
HCS 1 - Lawn mower TEAM - Free user manual and instructions
Find the device manual for free HCS 1 TEAM in PDF.
| Product type | Hair clipper and nose/ear trimmer |
| Brand | Team |
| Model | HCS 1 |
| Power supply (main clipper) | Mains (power cord) |
| Power supply (nose/ear trimmer) | 1 LR6 (AA) battery |
| Number of interchangeable combs | 4 (3 mm, 6 mm, 9 mm, 12 mm) |
| Progressive height adjustment | Yes, via adjustment lever (position "short hair" → shortest cut, rear position → increased height) |
| Main functions | Hair cutting with combs, contour shaping, nose and ear trimming |
| Blade type | Steel blades (upper and lower) |
| Blade maintenance | Cleaning with brush, lubrication with oil, alignment (1.2 mm gap between teeth) |
| Blade replacement | Possible, unscrew and replace if dull |
| Maximum continuous use time | Indicated by "KB xx min" on the rating plate (check on the device) |
| Operating pause | At least 10 minutes after continuous use |
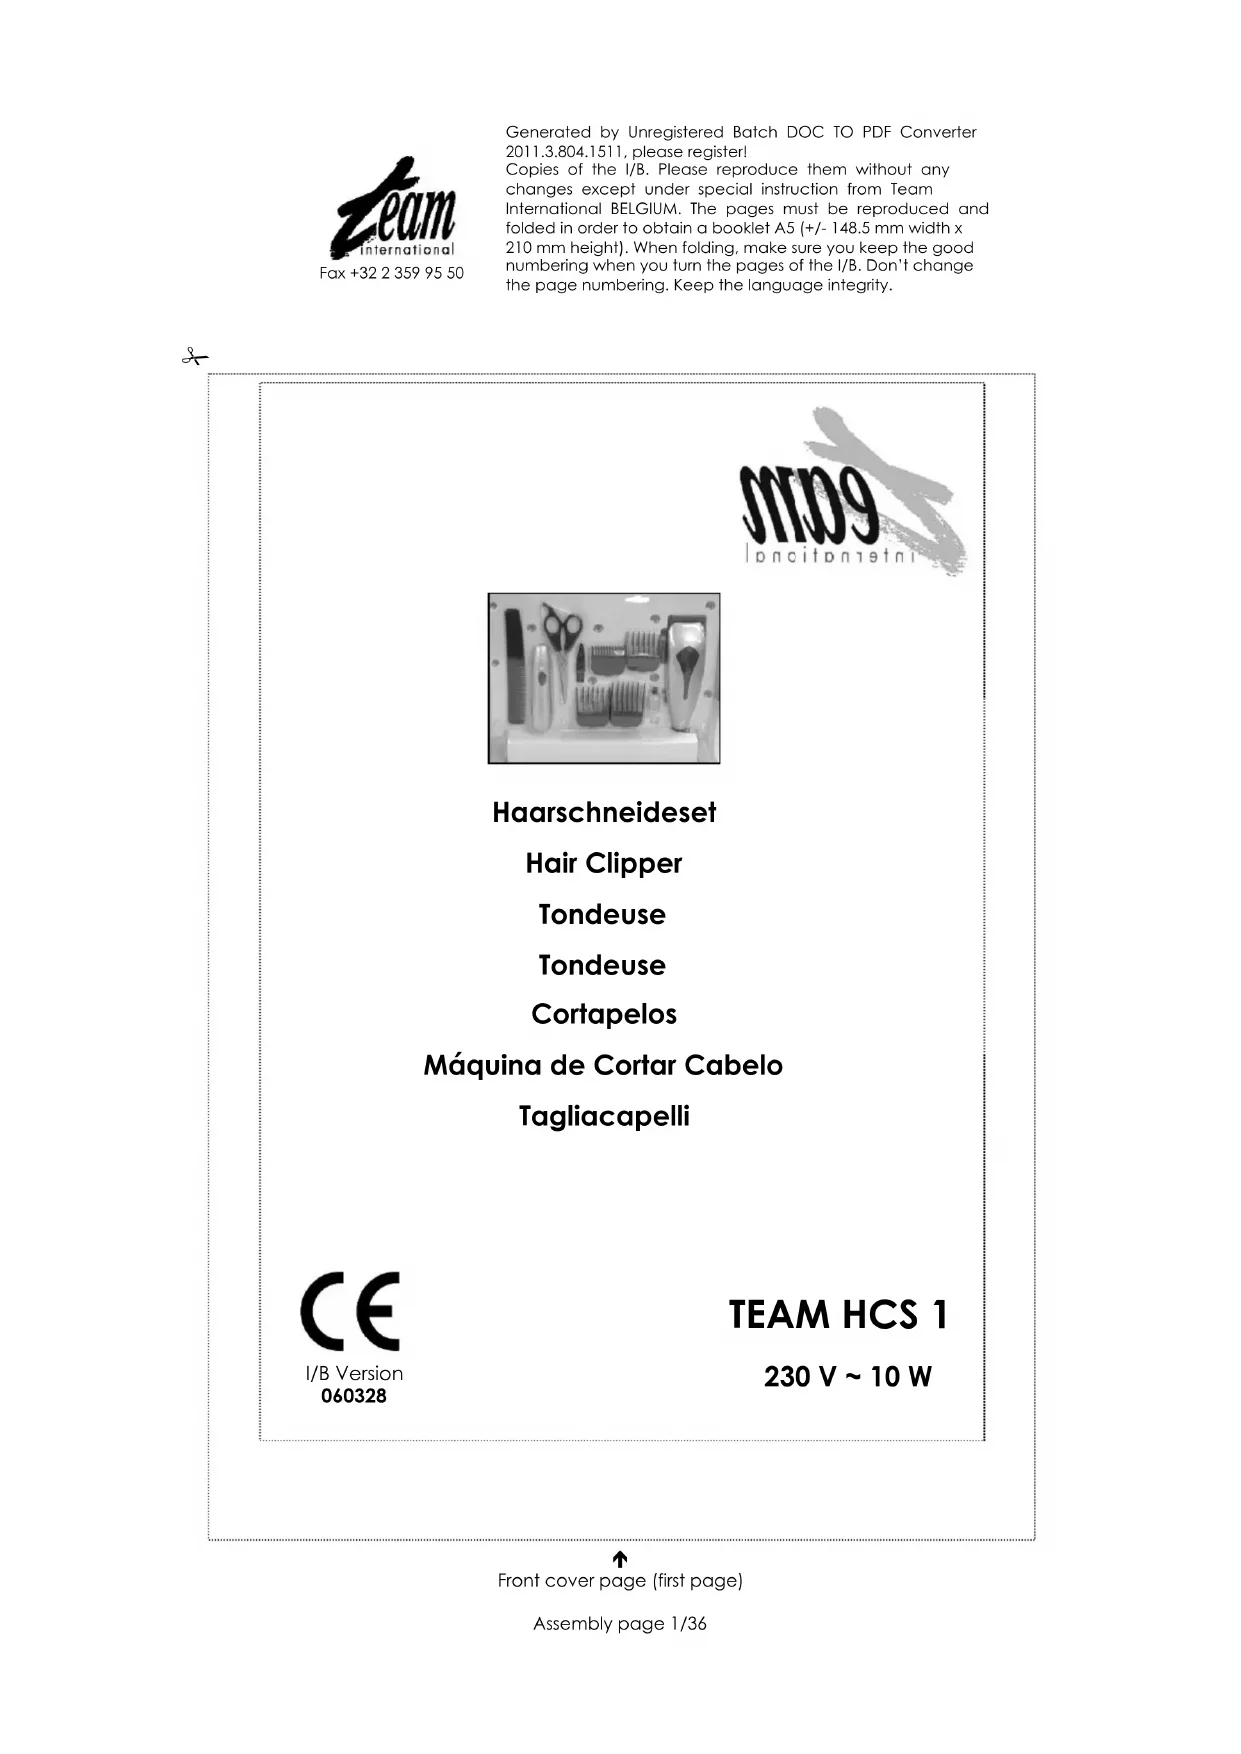
| Included accessories | 4 interchangeable combs, 1 pair of scissors, 1 hair comb, 1 oil bottle, 1 cleaning brush, integrated nose/ear trimmer |
| Important safety instructions | Do not use in water, unplug before cleaning, do not leave unattended, check condition regularly |
| Repairability | Have it checked by a qualified competent service (manufacturer or importer after-sales service) |
| Environment | Do not dispose of with household waste; separate collection according to directive 2002/96/EC |
Frequently Asked Questions - HCS 1 TEAM
User questions about HCS 1 TEAM
0 question about this device. Answer the ones you know or ask your own.
Ask a new question about this device
Download the instructions for your Lawn mower in PDF format for free! Find your manual HCS 1 - TEAM and take your electronic device back in hand. On this page are published all the documents necessary for the use of your device. HCS 1 by TEAM.
USER MANUAL HCS 1 TEAM
natural_image
Assorted hair styling tools including comb, scissors, and brush (no visible text or labels)Haarschneideset
Hair Clipper
Tondeuse
Tondeuse
Cortapelos
natural_image
Close-up of a mechanical device with a cylindrical body and a pointed tip, showing a directional arrow (no text or symbols)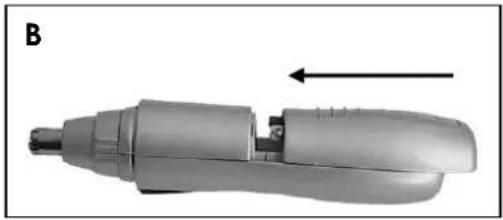
natural_image
Close-up of a handheld electric shaver with a metallic handle and black arrow indicator (no text or symbols)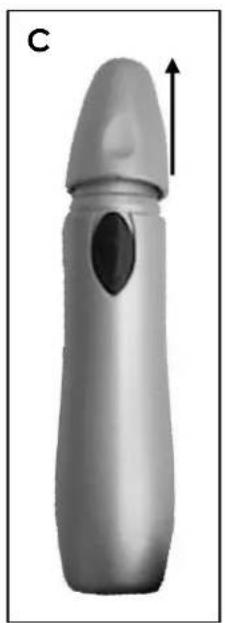
natural_image
3D rendered image of a cylindrical object with a pointed top and a black oval cutout, labeled 'C' in the top-left corner (no text or symbols on the object itself)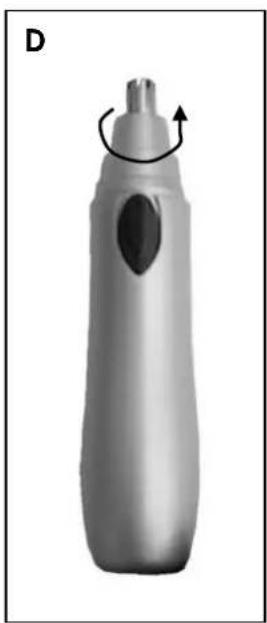
natural_image
3D rendered image of a cylindrical object with a pointed tip and curved arrow indicating rotation (no text or symbols)☐ Please read these instructions carefully before using the appliance.
☐ Check that your mains voltage corresponds to that stated on the appliance.
☐ Never leave the appliance unsupervised when in use. Keep out of reach of children or incompetent persons.
From time to time check the appliance for damages. Never use the appliance if it shows any signs of damage. All repairs should be made by a competent qualified electrician ^1 . Should the cord be damaged, it must be replaced by a competent qualified electrician ^2 .
☐ Only use the appliance for domestic purposes and in the way indicated in these instructions.
□ Never immerse the appliance in water or any other liquid for any reason whatsoever.
□ Never use the appliance near hot surfaces.
Before cleaning, always unplug the appliance from the power supply.
☐ Never use the appliance outside and always place it in a dry environment.
☐ Never use accessories that are not recommended by the producer. They could constitute a danger to the user and risk to damage the appliance.
☐ Never move the appliance by pulling the cord and never hang it by the cord, use its hanging loop. Make sure the cord cannot get caught in any way. Do not wind the cord around the appliance and do not bend it.
☐ Never use the appliance in bath, shower with feet in water or above a sink filled with water! However, should the appliance happen to fall into the water:
- immediately unplug it
- do not put your hands into the water
- make sure your appliance is verified by a competent qualified electrician before using it again.
☐ When using the appliance in the bathroom, always unplug it when not in use as the proximity of water could constitute a danger even when the appliance is switched off.
□ Always make sure your appliance is not wet (water splashes, ...) and never handle it with wet hands.
☐ Unplug the appliance when not in use or even if you put it down only for a moment
☐ Do not insert any object or piece of paper near the blade
☐ Do not use the appliance if one of the blades shows any kind of defect, make sure it is verified by a qualified competent electrician (*).
□ Always use the clippers with one of the (supplied) combs. Never use a comb which misses a tooth or which is damaged in any way.
☐ Do not use the clippers on wet hair. It can be lightly wet but you will get better results if you work on dry hair.
This kind of appliance cannot function continuously; it is not a professional type of appliance. It is necessary to make temporary stops. Check the section « Important information » in the instruction manual.
IMPORTANT INFORMATION
This appliance is not for professional use. You should follow the requested breaks. Failure to follow this instruction carefully may result in damage to the appliance. Please refer to the rating label for the maximum continuous usage time (KB xx min where xx is the maximum usage time). The breaks should last at least 10 minutes.
BEFORE YOU START
• Make sure that your clipper is clean, properly oiled and in perfect working condition. Attention, if the blades are not properly oiled, your appliance will not work correctly.
- Place a towel around the neck of the person whose hair is to be cut to prevent hair from falling inside the collar.
Have the person sit on a chair so that his/her head is at your eye's level.
- Comb the hair thoroughly and hold the clipper in a relaxed, comfortable grip. This will help you maintain an accurate cutting control.
CUTTING HAIR WITH THE ATTACHMENT COMBS
To attach the comb, hold it with teeth up and snap comb attachment firmly to the bottom of the clipper blade (see picture 1):
Attachment comb #1...leaves hair approx. 1/8" in length Attachment comb #2...leaves hair approx. 1/4" in length Attachment comb #3...leaves hair approx. 3/8" in length Attachment comb #4...leaves hair approx. 1/2" in length
- In order to become accustomed to the length of each attachment comb we recommend for the first use to place the attachment comb #4 and then to reduce the length steadily until you obtain the desired length. Afterwards, you can place directly the comb you want.
- For uniform cutting, never push or force the clipper through the hair at a fast pace. The clipper works most efficiently when it works at its own speed.
- Once you placed the attachment comb on the hair clipper, cut the hair by placing the comb teeth flat against the scalp (2). We recommend to proceed by small lengths in order to avoid stuffing. Therefore you only have to remove the comb regularly by bending it lightly outward. Then make the same movement but start lower than the point you remove the clipper in order to obtain a homogeneous length.
- The cutting always happens by moving towards in the opposite side of the natural direction of the hair. For the backside, start from the nape of the neck and go to the top of the head (3), for the sides, from the ears to the top of the head (4) and for the top of the head, from the forehead to the backside of the head (5).
- We recommend to do the hair regularly in order to check the homogeneity of the cutting and to replace the hair. For the same reason, once the hair is cut and done, work the hair clipper again but quicker in order to cut the hair that would have escaped from the first cutting. You can eventually insist on the places with defaults.
OUTLINING
- Outlining requires no attachment combs. Take the clipper and push the lever (see next paragraph) up to the close-cut position.
- Comb hair into the required style. Start from the outline of the ear by placing the side of the hair clipper on the skin and following the roundness of the ear (6). To draw the sideburns and the nape of the neck, place the hair clipper in the wrong side (with the
cover facing the head), the top of the blades perpendicular to the skin and cut to the desired length (7). If necessary, insist on the reluctant hair.
- When you get used to your hair clipper, you will be able to make layers simply by changing the length of the combs in function of the cutting zone. These handling asks for a special dexterity in order to obtain a correct result.
SHORT CUTS
- Always cut from the back of the neck to the crown, using the longest attachment comb. Holding it flat against the head, slowly move the clipper up through the hair. Use the same technique for the sides, cutting from the bottom to the upper side of the head (8).
- For the front of the crown, cut the hair against the direction in which it grows. Then even it up with the sides.
- For a flat top, use a flat comb, not the attachment comb. Just cut hair on top of the head over it. To taper hair down to the neckline, use closer cutting attachment combs. Comb hair, check for uneven spots and outline sideburns and neckline.
• The four basic areas illustrated are your "road map" to easy do-it-yourself hair cutting (8).
LEVER
This lever has two main functions:
- Regulation of the cutting length because in the position short hair (lever pushed to the front side) you can cut the length of the used combs or make outlining by pulling it to the backside, you can make the cutting length longer (this allows middle cutting lengths above the 4 delivered combs).
- Partial cleaning of the blades when in use by to and fro motions in order to remove the hair blocked in the blades.
ADJUSTABLE LEVER
- Your clipper was carefully examined before leaving our factory to ensure that the blades were oiled and aligned.
- Blades must be realigned if they have been removed for cleaning or replacement. Therefore, as the lever is pushed to the front side in short hair position, the end of the top blade teeth is
- Approximately 1.2 mm away from bottom blade. Compare your clipper blades with the sketch (9).
- If the blade alignment is incorrect, add a few drops of oil to the blades, turn clipper on for a few moments, turn off and unplug. Loosen screws slightly and turn the upper blade until a correct alignment. Then tighten screws once the blades are aligned (10).
- Change the blades as soon as they become blunt.
- To clean the blades, use the small brush delivered with your appliance and if necessary, remove them completely.
OIL
To maintain your clipper in peak condition, the blades should be oiled every few haircuts (12). Do not use hair oil, grease or oil mixed with kerosene or any solvent, as the solvent will evaporate and leave the thick oil which may slow down the blades' motion.
POWER SCREW
The power screw allows you to adjust the power. It has been adjusted before leaving the factory; however, if the voltage in your home is low, you may need to re-adjust it. To adjust, use
a screwdriver or a thin coin to turn power screw clockwise until it stops (13). Then slowly turn power screw out (counter-clockwise) until noise reduces. This is the maximum power setting.
ACCESSORIES
Your appliance is delivered with a complete set of hair accessories, which allows you to make the desired hair cuttings: 1 pair of scissors, 1 comb and 4 interchangeable combs to place on your appliance. In this set there are also two other accessories in order to clean the appliance: an oil burette for the blades lubrication and a small brush to remove the hair on the blades.
USE OF THE NOSE AND EAR TRIMMER
Before use:
This appliance runs on a LR6 battery.
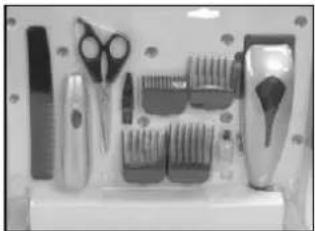
Open the lid of the battery housing by sliding it towards the outside of the appliance. (Fig. A) Insert the battery with its "+" side towards the inside of the appliance.
To close the lid, slide it towards the inside of the appliance till you hear a click. (Fig. B)
The nose and ear trimmer is now ready for use.
Use
Remove the protective cap that covers the trimmer's shaving head (Fig. C)
Insert the shaving head a couple of millimeters into the nose or ear.
Switch on the appliance by activating the switch.
After a couple of seconds, your nose and ear hairs are cut and you can switch off the appliance.
Maintenance
To clean the trimmer's blade, it is possible to remove the upper part of the shaving head. To do so, hold the body of the appliance with one hand, and unscrew the plastic part of the shaving head to the right with the other hand. (Fig. D)
You now have access to the blade. Caution, this blade is very sharp so pay attention not to get hurt, and keep the blade out of the reach of children or irresponsible persons.
Clean the shaving head with a cleaning brush and put the upper part of the shaving head back on the lower part. To attach it, screw it to the left.
Battery
If your appliance does not work properly, it is probably because the battery is discharged. In that case, replace it by a new one of the same type. Please eliminate the old battery in an environmentally friendly way.
PROTECTION OF THE ENVIRONMENT- DIRECTIVE 2002/96/EC
In order to preserve our environment and protect human health, the waste electrical and electronic equipment should be disposed of in accordance with specific rules with the
implication of both suppliers and users. For this reason, as indicated by the symbol — the rating label or on the packaging, your appliance should not be disposed of as unsorted municipal waste. The user has the right to bring it to a municipal collection point performing waste recovery by means of reuse, recycling or use for other applications in accordance with the directive.
FR MODE D'EMPLOI
POUR VOTRE SECURITE


- Haarschneideset
- IMPORTANT INFORMATION
- BEFORE YOU START
- CUTTING HAIR WITH THE ATTACHMENT COMBS
- OUTLINING
- SHORT CUTS
- LEVER
- ADJUSTABLE LEVER
- OIL
- POWER SCREW
- ACCESSORIES
- USE OF THE NOSE AND EAR TRIMMER
- Before use:
- Use
- Maintenance
- Battery
- PROTECTION OF THE ENVIRONMENT- DIRECTIVE 2002/96/EC
- FR MODE D'EMPLOI
- POUR VOTRE SECURITE
Brand : TEAM
Model : HCS 1
Category : Lawn mower