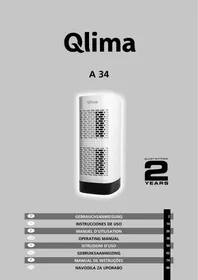
A25 - Air purifier QLIMA - Free user manual and instructions
Find the device manual for free A25 QLIMA in PDF.

User questions about A25 QLIMA
0 question about this device. Answer the ones you know or ask your own.
Ask a new question about this device
Download the instructions for your Air purifier in PDF format for free! Find your manual A25 - QLIMA and take your electronic device back in hand. On this page are published all the documents necessary for the use of your device. A25 by QLIMA.
USER MANUAL A25 QLIMA
natural_image
Front view of a Qlima air conditioner unit with vertical cooling fins (no visible text or symbols on the unit body)guarantee

YEARS
| DK | BRUGSANVISNING | 2 |
| E | INSTRUCCIONES DE USO | 14 |
| F | MANUEL D’UTILISATION | 26 |
| GB | OPERATING MANUAL | 38 |
| I | ISTRUZIONI D’USO | 50 |
| N | BRUKSANVISNING | 62 |
| NL | GEBRUIKSAANWIJZING | 74 |
| P | MANUAL DE INSTRUÇÕES | 86 |
| PL | INSTRUKCJA OBSŁUGI | 98 |
| S | BRUKSANVISNING | 110 |
| SLO | NAVODILA ZA UPORABO | 122 |
Kære.
Billede 2
VIGTIGE DELE
natural_image
Square textured surface with a label '1' at the bottom left (no other text or symbols)
natural_image
Square textured surface with black border, labeled '2' below (no other text or symbols)
natural_image
Solid black square with textured surface and number 3 below (no text or symbols on the pattern)Billede 8
- Udskifteligt forfilter
- HEPA-filter
- Aktivt kulfilter

Fig 2
COMPONENTES PRINCIPALES
natural_image
Simple line drawing of a device with a downward arrow and labeled Fig 5 (no text or symbols on the diagram itself)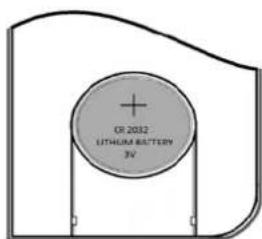
Fig 6
natural_image
Square textured surface with a small number '1' labeled at the bottom left (no other text or symbols)Fig 8
natural_image
Square mesh filter or cover with uniform texture, no visible text or symbols2
natural_image
Solid black square with a textured, speckled pattern at the bottom (no text or symbols)3
Illustration 2
PIÈCES PRINCIPALES
natural_image
Simple line drawing of a tunnel with an arrow pointing downward (no text or symbols)Illustration 5
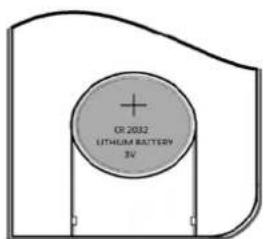
Illustration 6
natural_image
Square textured surface with a numbered label '1' at the bottom (no other text or symbols)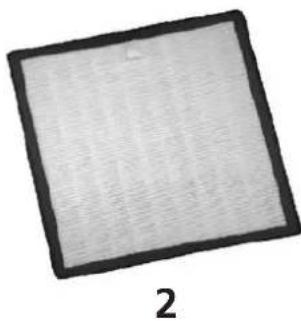
natural_image
Square textured surface with black border, labeled '2' below (no other text or symbols)
natural_image
Solid black square with textured surface and number 3 below (no text or symbols on the pattern)Illustration 8
natural_image
Pure electrical circuit lines without any symbolsCongratulations on the purchase of your air purifier. You have acquired a high quality product that will give you years of pleasure if you use it sensibly. Read this manual first in order to optimise the life span of your air purifier.
On behalf of the manufacturer, we provide a two-year guarantee on possible material or manufacturing defects.
Enjoy your air purifier.
Yours sincerely,
PVG Holding B.V.
1 FIRST READ THE MANUAL.
2 IF IN DOUBT, CONSULT YOUR DEALER.
GB
Picture 2
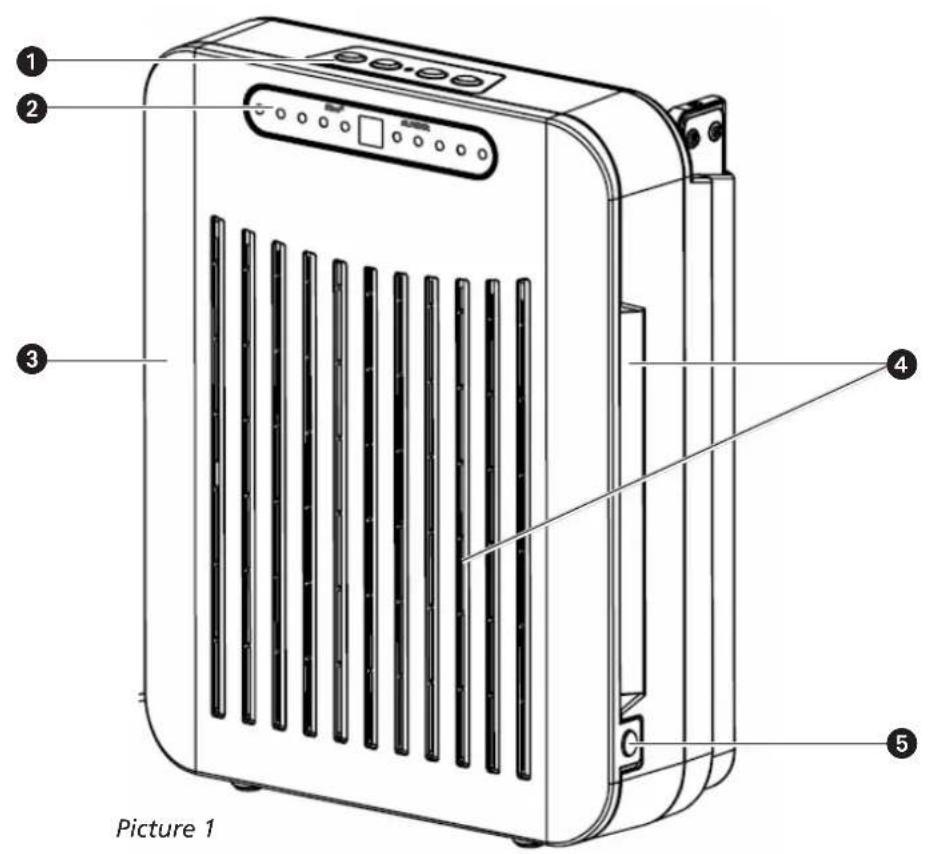
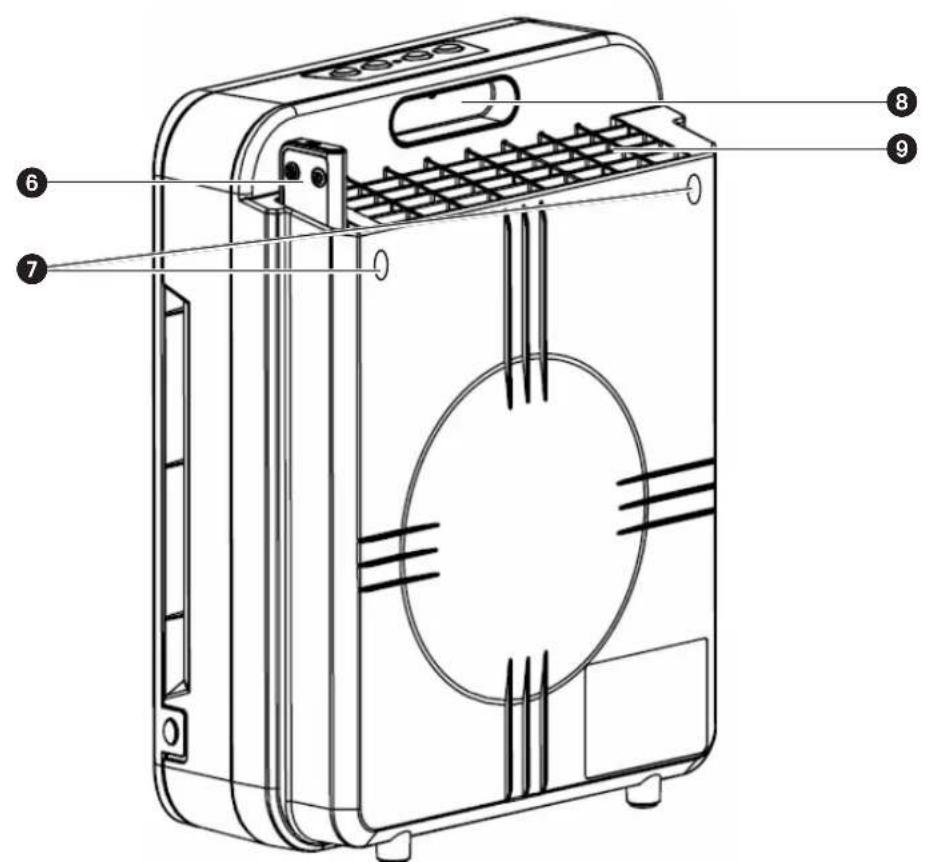
IMPORTANT COMPONENTS
① Operating Panel
② Display
③ Front Panel
④ Polluted Air Intake
⑤ Front Panel
6 Storage for Remote Control
⑦ Mounting Points
8 Handle
9 Clean Air Outlet
GENERAL
Take the following actions to obtain an optimum result.
- Place the air purifier in an elevated location (e.g. on a table or cupboard) in order to allow it to filter small particles such as smoke. Place the air purifier near or on the ground to enable it to filter large dust particles such as pollen.
- Always maintain a free space of 30 cm around the device.
- Read these instructions carefully and follow the directions.
SAFETY REGULATIONS
Read this user manual carefully before using the appliance and keep it for future reference. Install this device only when it complies with local/national legislation, ordinances and standards. This product is intended to be used as an air purifier in residential houses and is only suitable for use in normal household conditions, indoors in living room, kitchen and garage. Check the mains voltage. This device is suitable exclusively for earthed sockets – connection voltage 220-240 Volt/ 50 Hz.
- Keep plastic bags and other packaging materials out of reach of children.
- The device was developed to purify air and not for any other application.
- Always contact your supplier if repair or maintenance is required.
- Do not place the device in the vicinity of heat sources, materials, installations, or near curtains,
that may cause a fire hazard or in environments where explosions may occur.
• Always switch the device off and remove the plug from the socket before cleaning it.
• The surface must be stable and level.
- The installation must be completely in accordance with local regulations, ordinances and standards.
- The device is suitable exclusively for use in dry places, indoors.
- Check the mains voltage. This device is suitable exclusively for earthed sockets – connection voltage 220-240 Volt/ 50 Hz.
Before connecting the unit, check the following:
- The voltage supply must correspond with the mains voltage stated on the rating label.
- The socket and power supply must be suitable for the current stated on the rating label.
- The plug on the cable of the device must fit into the wall socket.
- The device must be placed on a flat and stable surface.
The electricity supply to the device must be checked by a recognised professional if you have any doubts regarding the compatibility.
- This appliance is not intended for use by persons (including children) with reduced physical, sensory or mental capabilities, or lack of experience and knowledge, unless they have been given supervision or instruction concerning use of the appliance by a person responsible for their safety.
- This device is manufactured according to CE safety standards. Nevertheless, you must take
care, as with any other electrical device.
- Do not cover the air inlet and/or outlet.
- Never allow the device to come into contact with chemicals.
- Never submerge the unit in water.
- Do not insert objects into the openings of the unit.
- Always remove the plug from the electric power supply before cleaning or replacing the unit or components of the unit.
- Never use an extension cable to connect the device to the electric power supply.
- Children should be supervised to ensure that they do not play with the appliance.
- Have any repairs only carried out by a recognised service engineer or your supplier.
- Always remove the plug of the unit from the wall socket when it is not in use.
- If the power cable is damaged it must be replaced by the manufacturer, its customer service department or persons with comparable qualifications in order to prevent danger.

ATTENTION!
Never use the device with a damaged power cord, plug, cabinet or control panel. Never trap the power cord or allow it to come into contact with sharp edges.
ATTENTION!
Failing to follow the instructions may lead to nullification of the guarantee on this device.
INSTALLATION
- Release the front panel by pressing the clamps, ⑤, on the left and right hand side of the air cleaner, and remove the front panel.
-
Remove the filter from the unit and remove the plastic packaging material.
-
Place the filter back in the unit with the white front filter facing to the front.
- Put the front panel back by first hanging the top edge of the front panel on the two hooks at the top of the air cleaner and then clipping the two recesses at the bottom over the clamps, ⑤, on the bottom of the air cleaner by pushing.
- The device is now ready for use.
- To ensure that it functions properly the filter package must be inserted correctly and such that the front filter (white side) is positioned on the front side and the active carbon filter (black side) is positioned at the back.
- For the device to work correctly the air flow must first go through the front filter, then through the HEPA filter and then through the active carbon.
OPERATION
Picture 3
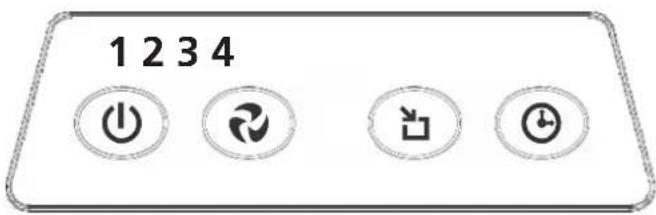
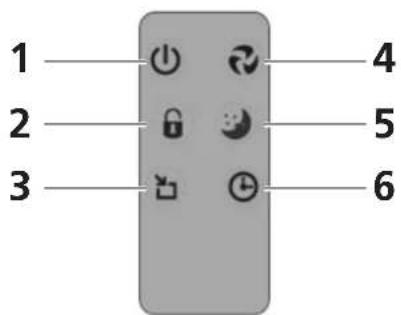
DESCRIPTION OF THE OPERATING BUTTONS
- On / Off Button
- Press to set ventilator capacity / Reset button filter replacement alarm.
- Button for setting AUTO MODE.
- Button for setting the timer function.
DESCRIPTION OF THE REMOTE CONTROL
Picture 4

Picture 6
- On / Off Button
- Button for activating and de-activating the child lock
- Button for setting AUTO MODE.
- Press to set ventilator capacity / Reset button filter replacement alarm.
- Button for setting SLEEP MODE.
- Button for setting the timer function.
BATTERY REPLACEMENT OF THE REMOTE CONTROL
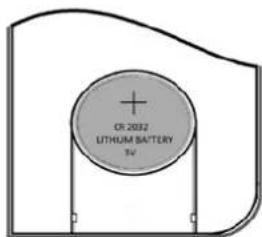
If the batteries of the remote control need to be replaced, remove the cover of the backside of the remote control, as shown in picture 5. Replace the old batteries by the new ones. Respect the + and - poles. Don't use any other batteries than CR2032 lithium 3V.
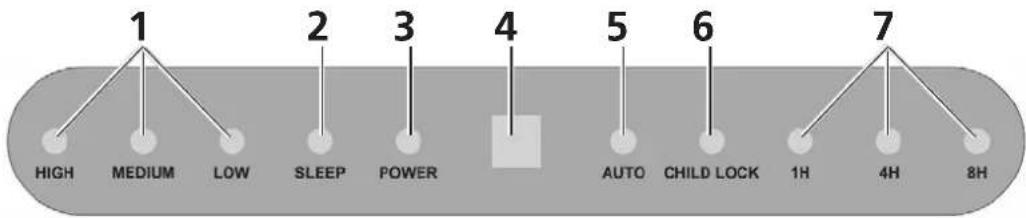
DESCRIPTION OF THE DISPLAY
flowchart
graph TD
    A["1"] --> B["2"]
    B --> C["3"]
    C --> D["4"]
    D --> E["5"]
    E --> F["6"]
    F --> G["7"]
    style D fill:#f9f,stroke:#333
    style E fill:#ccf,stroke:#333
    style F fill:#cfc,stroke:#333
    note1["HIGH"] --> A
    note2["MEDIUM"] --> A
    note3["LOW"] --> A
    note4["SLEEP"] --> A
    note5["POWER"] --> A
    note6["AUTO"] --> E
    note7["CHILD LOCK"] --> F
    note8["1H"] --> G
    note9["4H"] --> G
    note10["8H"] --> G
Picture 7
- Shows the set ventilator capacity. The ventilator capacity can be set by pressing Button 2 (Figure 3) or Button 4 on the remote control (Figure 4). By pressing this button repeatedly the capacity of the ventilator will cycle from LOW to MEDIUM to HIGH and back to LOW again.
- SLEEP MODE; can only be set using the remote control by pressing Button 5. The ventilator will switch to a low capacity so that the air cleaner becomes whisper quiet.
-
Indicates that the air cleaner is switched on. The air cleaner can be switched on and off by pressing button 1 on the display or the remote control.
-
Remote control receiver
-
AUTO: indicates that the air cleaner is in AUTO MODE. The air cleaner can be switched on and off by pressing button 3 either on the display or on the remote control. The air cleaner will operate in a loop-cycle and start at HIGH fan speed for 2 hours, followed 2 hours at MEDIUM fan speed and 2 hours at LOW speed. After this cycle the unit will start at HIGH speed for two hours again.
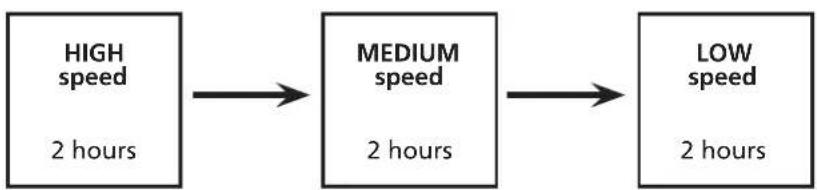
flowchart
graph LR
    A["HIGH speed\n2 hours"] --> B["MEDIUM speed\n2 hours"]
    B --> C["LOW speed\n2 hours"]

REMARK:
To operate the unit in auto mode, the air cleaner must be switched on by pressing button 1 (On/Off button).
- Indicates that the air cleaner is in child lock mode. When the air cleaner is in child lock mode the settings cannot be changed. The child lock can only be turned on or off by pressing Button 2 on the remote control.
- Indicates that the timer function is switched on. The air cleaner will automatically be switched off when the time set has elapsed. The timer function can be set by pressing button4 on the display or Button 6 on the remote control. By repeatedly pressing Button 4 the time to be set will cycle from 1 hour to 4 hours and then to 8 hours. By pressing Button 4 again the timer function will be switched off again.

If the device is switched off then all settings will be lost.
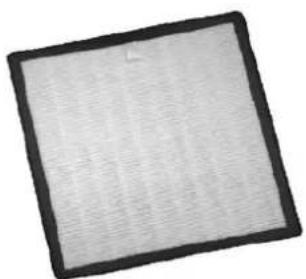
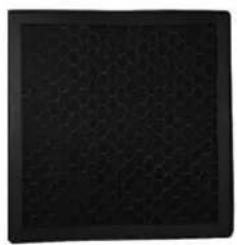
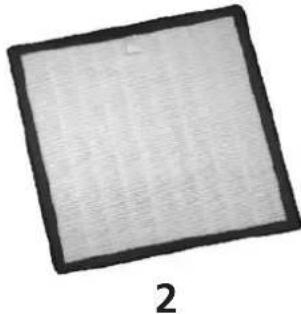
AIR FILTER
The A25 air cleaner is equipped with a 3 layer filter package to clean the air.
• Pre-Filter for removing larger dust particles
- A HEPA filter (High Efficiency Particulate Air Filter), removes unhealthy particles from the air like bacteria, dust and pollen.
• The active carbon filter removes smells from the air.
natural_image
Square textured surface with a numbered label '1' at the bottom (no other text or symbols)
natural_image
Square textured surface with black border, labeled '2' below (no other text or symbols)
natural_image
Solid black square with textured surface and number 3 below (no text or symbols on the pattern)Picture 8
- Removable pre-filter
- HEPA filter
- Active Carbon Filter

When the air cleaner is switched on the ioniser is also automatically switched on. This ensures that the air cleaner will always function optimally.
REPLACING THE FILTER PACKAGE
The frequency with which the air cleaner is used and the circumstances determine how often the filter must be replaced. The air cleaner is equipped with a warning signal, Light 3, which will flash if the filter needs to be replaced.
- Unplug the device from the wall socket.
- Remove the front panel (See chapter on Installation)
- Remove the filter package.
- Remove the packing material from the new filter package and place it in the air cleaner. See the chapter on Installation for the correct way to insert the filter package.
- Replace the front panel.
-
Plug the air cleaner into the wall socket again and turn it on.
-
Reset the filter alarm by pressing Button 3 and holding it depressed for 3 seconds until Light 3 stops flashing.
- The air cleaner is now ready for use again.
- Used filters can be disposed of in the regular house hold garbage with a problem.
If Light 3 is flashing then the filter package must be replaced. The filter alarm can be reset by pressing Button 2 for about 3 seconds.
ATTENTION!
- Always replace dirty filters with new filters. Never re-use a dirty filter, even after it has been cleaned.
- Depending on the circumstances it might be comfortable to replace the filters more frequent.
CLEANING THE PRE-FILTER
The pre-filter must be checked weekly for dirt and if necessary be cleaned.
- Unplug the device from the wall socket.
- Remove the front panel (See chapter on Installation)
- Remove the pre-filter. It can be easily separated from the filter package.
- Clean the pre-filter with a vacuum cleaner, brush or a soft, damp cloth.
- If it is badly fouled then the filter can be rinsed in lukewarm water.
- Replace the pre-filter on the filter package and replace the front panel.
- The air cleaner is now ready for use again.
CLEANING
Switch off the air purifier and remove the plug from the socket before cleaning.
THE EXTERIOR
Clean the exterior with a soft, dry cloth.
If the device is extremely dirty, use a mild cleaning agent.
Wipe the device with a slightly damp cloth.
Never spray the device with water.
STORAGE
If the machine will not be used for a long period of time, take the following steps:
- Switch off the device.
- Remove the plug from the socket.
- Clean the machine.
- Remove the filter package. Remove the batteries from the remote control.
- Store the device in a dust free room, preferably covered.
TROUBLESHOOTING
Check the following before contacting technical support:
| Problem Cause Solution | ||
| Light 3 on the display is blinking | Dirty filter | Replace the filter package and reset the filter alarm by pressing Button 2 on the remote control for 3 seconds |
| The device does not work | The front panel has not been replaced correctly. | Remove the front panel and put it back again. Make sure that the top of the panel is placed correctly. |
| The power cord is not connected. | Insert the plug into the socket. | |
| The power cord is not connected properly. | Insert the plug into the socket correctly. | |
| The fuse of the unit is defective. | Have the fuse replaced by a recognised Qlima dealer. | |
| The remote control is not working. | The batteries in the remote control are dead. | Replace the batteries. |
| The device does not remove odours and/or dust. | The filter package has not been inserted correctly. | Insert the filter package correctly. |
| The filter package is dirty. Replace | the filter package. | |
| The Auto mode doesn't work. | The sensor is dirty. | Run the air cleaner ventilator at its highest setting. |
| No / insufficient air circulation. | The air flow is blocked. | Remove the blockage. |
| Replace the filters. |
GUARANTEE CONDITION
We provide a two-year guarantee on your air purifier from the date of purchase. All material or manufacturing defects will be repaired free of charge. The following applies:
- All claims for compensation, including consequential damage, will not be entertained.
- Any repairs or replacement of components during the warranty period will not result in an extension of the warranty period.
- The warranty will expire if any alterations have been made, not genuine components have been fitted or if the air purifier has been repaired by a third party.
- Components subject to normal wear and tear, such as the air filter, are not covered by the warranty.
- The warranty is only valid on presentation of the original, unaltered, and date-stamped purchase receipt.
- The warranty does not cover damage caused by actions that deviate from those as described in the user's manual or by neglect.
- Shipment costs and the risks associated with the shipment of the air purifier or parts of the air purifier are always borne by the purchaser.
To prevent unnecessary expenses, we recommend that you always carefully read the user's manual first. If this does not provide a solution, take the air purifier to your dealer for repair.
TECHNICAL SPECIFICATIONS
| Type A 25 | ||
| Mains power V / Hz / F 220-240 / 50 / 1 | ||
| Power consumption (min./max.) W | 35 | |
| Amperage (max.) A 0,15 | ||
| Noise level (min./max.) dB 28 - 40 | ||
| Air debit (min./max.) m | ^3 /hour 105 | |
| Net weight kg 3.5 | ||
| Dimensions (wxhxd) mm 394 x 310 | x 139 | |
| Suitable for rooms to m | 3 | 35 |

natural_image
Pure electrical circuit lines without any symbolsContact your local government for information regarding the collection systems available. If electrical appliances are disposed of in landfills or dumps, hazardous substances can leak into the groundwater and get into the food chain, damaging your health and well-being. When replacing old appliances with new once, the retailer is legally obligated to take back your old appliance for disposal at least for free of charge. Do not throw batteries into the fire, where they can explode or release dangerous liquids. If you replace or destroy the remote control, remove the batteries and throw them away in accordance with the applicable regulations because they are harmful to the environment.
Gentile signora, egregio signore,
Figura 2
COMPONENTI PRINCIPALI
natural_image
Simple line drawing of a device with an arrow pointing downward, no text or symbols present.Figura 5
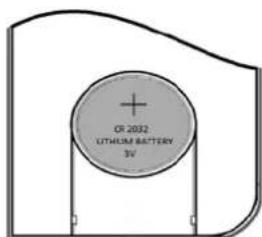
Figura 6
natural_image
Square textured surface with a label '1' at the bottom left (no other text or symbols)Figura 8

natural_image
Square fabric sample with textured surface and black border, labeled '2' below (no text or symbols on the sample itself)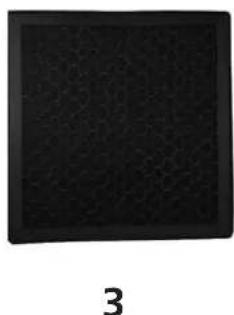
natural_image
Black square textured surface with the number '3' below it (no other text or symbols)natural_image
Pure electrical circuit lines without any symbolsBilde 2
VIKTIGE DELER
natural_image
Square textured surface with a numbered label '1' at the bottom (no other text or symbols)Bilde 8

natural_image
Square textured surface with black border, labeled '2' below (no other text or symbols)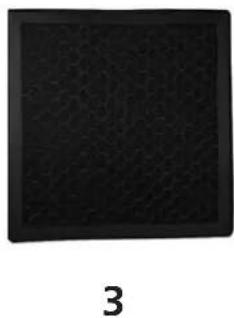
natural_image
Black textured square with a small number '3' below it (no other text or symbols)- Utskiftbart filter for
- HEPA filter
- Aktivert kullfilter
natural_image
Pure electrical circuit lines without any symbolsAfbeelding 2
BELANGRIJKE ONDERDELEN
natural_image
Square textured surface with a numbered label '1' at the bottom (no other text or symbols)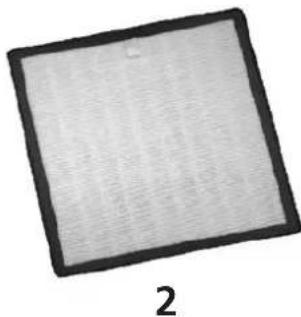
natural_image
Square textured surface with black border, labeled '2' below (no other text or symbols)
natural_image
Solid black square with textured surface and number 3 below (no text or symbols on the pattern)Afbeelding 8
Figura 2
natural_image
Simple line drawing of a tunnel with an arrow pointing downward (no text or symbols)Figura 5
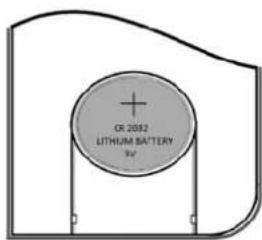
Figura 6
SUBSTITUIÇÃO DAS PILHAS DO COMANDO À DISTÂNCIA
natural_image
Square textured surface with a small number '1' labeled below (no other text or symbols)
natural_image
Square textured surface with black border, labeled '2' below (no other text or symbols)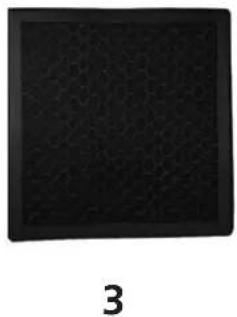
natural_image
Solid black square with textured surface and number 3 below (no text or symbols on the pattern)Figura 8
natural_image
Pure electrical circuit lines without any symbolsRys 2
IDENTYFIKACJA CZEŚCI
natural_image
Square textured surface with a small number '1' labeled below (no other text or symbols)
natural_image
Square mesh filter or grid pattern with black border, labeled '2' below (no text or symbols within the pattern)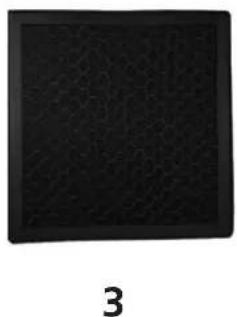
natural_image
Black textured square with a small number '3' below it (no other text or symbols)Rys 7
natural_image
Pure electrical circuit lines without any symbolsBESKRIVNING AV KNAPPARNA
natural_image
Square textured surface with a black number '1' below it, no visible text or symbols.Bild 8

natural_image
Square textured surface with black border, labeled '2' below (no other text or symbols)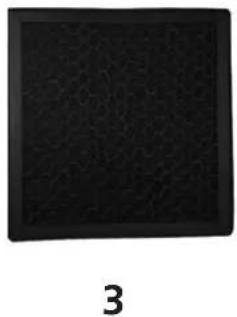
natural_image
Solid black square with textured surface and number 3 below (no text or symbols on the pattern)natural_image
Pure electrical circuit lines without any symbolsSliko 2
POMEMBNI DELI
natural_image
Square textured surface with a label '1' at the bottom left (no other text or symbols)Sliko 8
natural_image
Square textured surface with black border, labeled '2' below (no other text or symbols)
natural_image
Solid black square with a textured surface and the number '3' below it (no text or symbols on the pattern itself)- Odstranljivi filter za
- Filter HEPA
- Filter z aktiviranim ogljikom

natural_image
Pure electrical circuit lines without any symbolsHEPA Filter (High Efficiency Particulate Airfilter)
D Anti-allergene Wirkung durch Filterung von Staub und Mikro-Organismen (Pollen, Bakterien, Hautschuppen)
DK Anti-allergene ved fi ltrering af støv og mikroorganismer (pollen, bakterier, blomsterstøv)
Anti-alergénico al fi ltrar polvo y micro organismos (pollen, bacterias, pelusa)
F Anti-allergène grâce à la fi Itration des poussières et micro-organismes (pollen, bactéries, squames)
FIN Suodattaa ilmasta pölyä, siitepölyä sekä mikro-organismeja
GB Anti-allergenic by filtering dust and micro-organisms (pollen, bacteria, dander)
① Azione anti-allergica, fi Itra polvere e microrganismi (pollini, batteri, peli)
N Antialergi for filtrering av støv og mikroorganisk støv (pollen - bakterier - blomsterstøv)
NI Anti-allergene werking door het filteren van stof en micro-organismen (pollen, bacteriën, huid-schilfers)
P Anti-alergênico a filtrar pó e micro organismos (pólen, bactérias, penugem)
PL Anty-alergenowy dzięki filtrowaniu kurzu i mikroorganizmów (pyłki, bakterie, naskórek)
S Anti allergiskt genom att filtrera damm och micropartiklar (pollen, bakterier mm)
SIO Protialergijski - filtrira prah in mikroorganizme (cvetni prah, bakterije, prhljaj)
TR Anti-alerjiktir; tozu ve mikro organizmaları filitreler (polen, bakteri, evcil hayvan tüyü)
Active Carbon Filter
D Filtert unangenehme Gerüche aus der Luft
DK Reducerer dårlige lugte
E Disminuye olores desagradables en el ambiente
F Désodorise l'air
FIN Vähentää epämiellyttäviä hajuja.
GB Reduces unpleasant odours
1 Riduce gli odori fastidiosi nell'aria
N Reduser ubehagelige lukter
NL Vermindert vervelende geurtjes
P Reduz a presença de odores desagradáveis
PL Redukuje nieprzyjemny zapach
S Minskar otrrevliga lukter
SLO Zmanjša neprijetne vonjave
TR Hoş olmayan kokuları azaltıyor

Distributed in Europe by PVG Holding B.V.
Benötigen Sie weitere Informationen oder treten Probleme auf, besuchen Sie bitte unsere Website www.qlima.com, oder setzen Sie sich mit unserem Kundendienst in Verbindung (Telefonnummer auf www.qlima.com).
For alle yderligere oplysninger eller ved eventuelle problemer med apparatet henvises til www.qlima.com eller det lokale Kundecenter (telefon-numre findes i www.qlima.com).
(8) Si necesita información o si tiene algún problema, visite nuestra página Web www.qlima.com, o póngase en contacto con el servicio cliente (hallará el número de teléfono en www.qlima.com).
F Si vous souhaitez obtenir des informations supplémentaires ou si vous rencontrez un problème, rendez-vous sur notre site Web (www.qlima.com) ou contactez notre service client (vous trouverez l'adresse et numéro de téléphone sur www.qlima.com).
FHN Jos haluat huoltoapua, lisätietoja tai laitteen kanssa tulee ongelmia, tutustu verkkosivustoon osoitteessa www.qlima.com tai kysy neuvoa PVG kuluttajapalvelukeskuksesta (www.qlima.com).
(8) If you need information or if you have a problem, please visit the our website (www.qlima.com) or contact our sales support (you find its phone number on www.qlima.com)
① Per informazioni e in caso di problemi, visitate il sito Web www.qlima.com oppure contattate il Centro Assistenza Clienti (per conoscere il numero di telefono, consultate www.qlima.com).
Hvis du trenger informasjon, eller hvis du har et problem med produktet, kan du gå til nettsidene www.qlima.com. Alternativt kan du kontakte med PVG' forbrukertjeneste (telefonnummeret i www.qlima.com).
NL Als u informatie nodig hebt of als u een probleem hebt, bezoek dan de onze website (www.qlima.com) of neem contact op met de afdeling sales support (adres en telefoon op www.qlima.com).
Se necessitar de informações ou se tiver problemas, visite o Web site www.qlima.com ou contacte o Centro de Assistência (número de telefone o www.qlima.com)
PL W przypadku problemów i w celu uzyskania szczegółowych informacji odwiedź stronę internetową Qlima dostępną pod adresem www.qlima.com lub skontaktuj się z Centrum kontaktów Qlima (www.qlima.com)
⑤ Om du behöver service eller information eller har problem med apparaten kan du besöka www.qlima.com eller kontakta Qlima kundtjänst (du hittar telefonnumret på www.qlima.com).
SUD Če želite dodatne informacije, obiščite spletno mesto podjetja na naslovu www.qlima.com ali pokličite na telefonsko (www.qlima.com).
TR Daha fazla bilgiye ihtiyaç duyarsanız veya bir sorunla karşılaşırsanız, www.qlima.com adresindeki Qlima Internet sitesini ziyaret edin veya ülkenizde bulunan Qlima müşteri merkeziyle iletişim kurun (telefon numarasını: www.qlima.com).