
A34 - Air purifier QLIMA - Free user manual and instructions
Find the device manual for free A34 QLIMA in PDF.
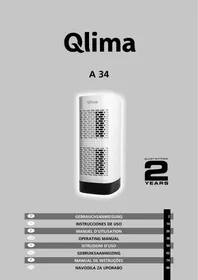


| Product type | Air purifier |
| Model | A34 |
| Brand | QLIMA |
| Dimensions (L x H x D) | 215 x 432 x 176 mm |
| Net weight | 3 kg |
| Power supply | 220-240 V ~ 50 Hz |
| Power consumption | 35 W (max) |
| Rated current | 0.22 A |
| Noise level | 57 dB |
| Airflow (min/med/max) | 41 / 71 / 86 m³/h |
| Recommended area | Up to 34 m² |
| Filtration | Pre-filter + HEPA filter |
| Fan speeds | 3 (Low, Medium, High) |
| Timer | 2, 4, 6, 8 hours |
| Sleep mode | Yes (reduced speed, dimmed lights) |
| Child lock | Yes (key lock) |
| Filter replacement indicator | Yes (pre-filter and HEPA) |
| Spare parts available | Pre-filter, HEPA filter |
| Warranty | 2 years |
| Cleaning | Inlet grille: vacuum cleaner or damp cloth; do not clean filters with water |
| Storage | Unplugged, cleaned, in a dry and dust-free place |
Frequently Asked Questions - A34 QLIMA
User questions about A34 QLIMA
0 question about this device. Answer the ones you know or ask your own.
Ask a new question about this device
Download the instructions for your Air purifier in PDF format for free! Find your manual A34 - QLIMA and take your electronic device back in hand. On this page are published all the documents necessary for the use of your device. A34 by QLIMA.
USER MANUAL A34 QLIMA
Congratulations on the purchase of your air purifier. You have acquired a high quality product that will give you years of pleasure if you use it sensibly. Read this manual first in order to optimise the life span of your air purifier.
On behalf of the manufacturer, we provide a two-year guarantee on possible material or manufacturing defects.
Enjoy your air purifier.
Yours sincerely,
PVG Holding B.V.
1 FIRST READ THE MANUAL.
2 IF IN DOUBT, CONSULT YOUR DEALER.
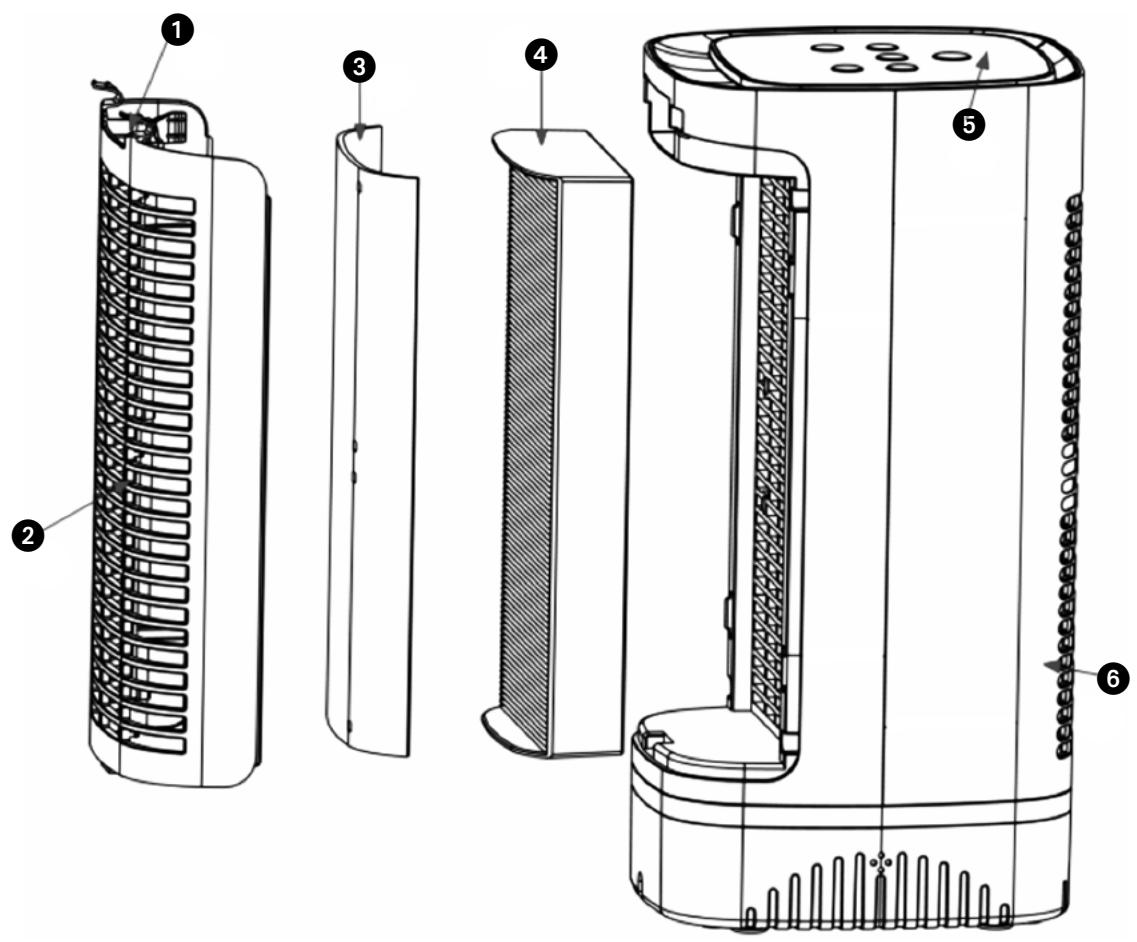
IMPORTANT COMPONENTS
Locking Latch, Air Inlet Grill, Pre-filter, HEPA Filter, Control Panel: Timer, On/Off, Fan Speed, Sleep Mode, Pre-filter changing indicator, HEPA filter changing indicator, Child Lock, Air Outlet Grill
GENERAL
Take the following actions to obtain an optimum result.
- Place the air purifier in an elevated location (e.g. on a table or cupboard) in order to allow it to filter small particles such as smoke. Place the air purifier near or on the ground to enable it to filter large dust particles such as pollen.
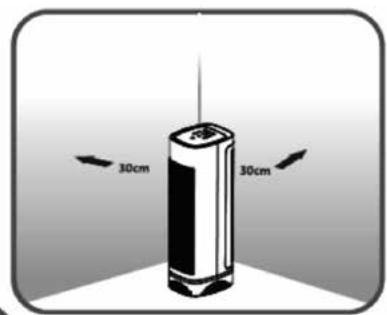
- Always maintain a free space of 30 cm around the device.
- Read these instructions carefully and follow the directions.
SAFETY REGULATIONS
Read this user manual carefully before using the appliance and keep it for future reference. Install this device only when it complies with local/national legislation, ordinances and standards. This product is intended to be used as an air purifier in residential houses and is only suitable for use in normal household conditions, indoors in living room, kitchen and garage. Check the mains voltage. This device is suitable exclusively for earthed sockets - connection voltage 220-240 Volt/ 50 Hz.
- Keep plastic bags and other packaging materials out of reach of children.
- The device was developed to purify air and not for any other application.
- Always contact your supplier if repair or maintenance is required.
- Do not place the device in the vicinity of heat sources, materials, installations, or near curtains,
that may cause a fire hazard or in environments where explosions may occur.
- Always switch the device off and remove the plug from the socket before cleaning it.
- The surface must be stable and level.
- The installation must be completely in accordance with local regulations, ordinances and standards.
- The device is suitable exclusively for use in dry places, indoors.
- Check the mains voltage. This device is suitable exclusively for earthed sockets – connection voltage 220-240 Volt/ 50 Hz.
Before connecting the unit, check the following:
- The voltage supply must correspond with the mains voltage stated on the rating label.
- The socket and power supply must be suitable for the current stated on the rating label.
- The plug on the cable of the device must fit into the wall socket.
- The device must be placed on a flat and stable surface.
If you have any doubts regarding the compatibility of the electricity supply, have it checked by a recognized professional.
- This appliance is not intended for use by persons (including children) with reduced physical, sensory, or mental capabilities, or lack of experience and knowledge, unless they have been given supervision or instruction concerning use of the appliance by a person responsible for their safety.
- This device is manufactured according to CE safety standards. Nevertheless, you must take
care, as with any other electrical device.
- Do not cover the air inlet and/or outlet.
- Never allow the device to come into contact with chemicals.
- Never submerge the unit in water.
- Do not insert objects into the openings of the unit.
- Always remove the plug from the electric power supply before cleaning or replacing the unit or components of the unit.
- Never use an extension cable to connect the device to the electric power supply.
- Children should be supervised to ensure that they do not play with the appliance.
- Have any repairs only carried out by a recognized service engineer or your supplier.
- Always remove the plug of the unit from the wall socket when it is not in use.
- If the power cable is damaged, it must be replaced by the manufacturer, its customer service department, or persons with comparable qualifications in order to prevent danger.
- If the supply cord is damaged, it must be replaced by the manufacturer, its service agent or similarly qualified persons in order to avoid a hazard.
- This appliance can be used by children aged from 8 years and above and persons with reduced physical, sensory or mental capabilities or lack of experience and knowledge if they have been given supervision or instruction concerning use of the appliance in a safe way and understand the hazards involved.
- Children shall not play with the appliance.
- Cleaning and user maintenance shall not be made by children without supervision.

ATTENTION!
Never use the device with a damaged power cord, plug, cabinet or control panel. Never trap the power cord or allow it to come into contact with sharp edges.

ATTENTION!
Failing to follow the instructions may lead to nullification of the guarantee on this device.
INSTALLATION
Before using the air purifier, please read the following important information.
ELECTRICAL RATINGS:
Voltage: 220-240V, 50Hz Power consumption: 35 watts at high fan speed
REPLACEMENT PARTS:
Pre-filter HEPA Filter
Locate a level surface on which to place the air purifier near a 220-240V outlet (follow warnings in the "SAFETY INSTRUCTIONS" and "IMPORTANT WARNINGS" sections of this manual). Position your air purifier at least 30 cm from the wall. Plug in the unit.
Before using the air purifier, please read the following important information.
SAFETY
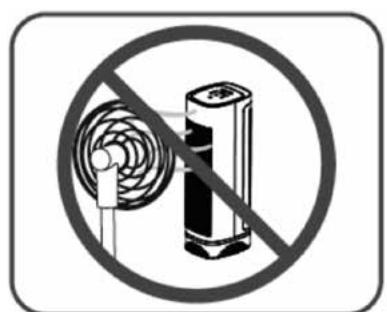
- Do not place near fans.
- Keep both sides of the unit at least 30CM away from a wall. Do not place the unit near curtains.
- Placing the unit close to the source of air pollution is an effective way to improve indoor air quality.
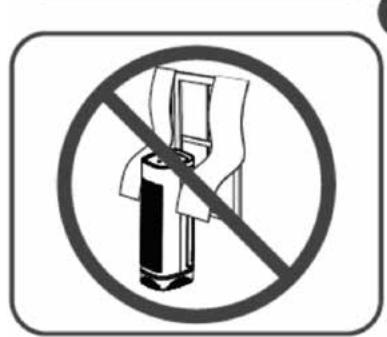
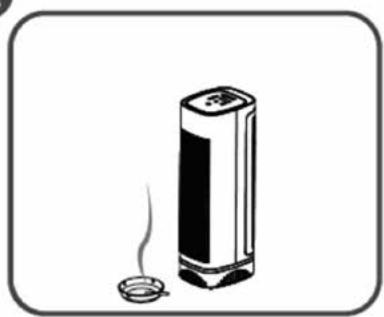

DO NOT run the air purifier with a broken filter. Replace the filter if the filter has a tear or a hole in it. If the filter is damaged or needs replacement, please contact the retailer to order a replacement filter.
OPERATION
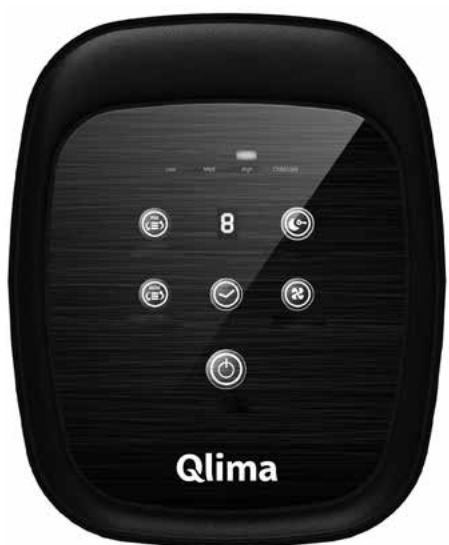
CONTROLS/ SETTINGS: Power Control
Timer Control
Fan Speed Control
To operate the air purifier, press the Power button to turn on the air purifier.
The air purifier can be programmed to turn off after a preset amount of time. Press the "TIMER" button to program the timer to 2, 4, 6, or 8 hours as you desire.
The air purifier has three different speeds of cleaning: LOW, MED, and HIGH. Press the "SPEED" button to cycle through the settings and select the fan speed you desire. The speed state will be shown on the LED display.

Pre-filter Changing Indicator
display.
The Pre-filter Changing Indicator will turn on each time the Pre-filter needs to be changed. To reset the pre-filter indicator, press the PRE-FILTER button for 3 seconds, then the Pre-filter Changing Indicator will turn off completely, indicating the unit has been reset.

HEPA Filter Changing Indicator
The HEPA Filter Changing Indicator will turn on each time the HEPA Filter needs to be changed. To reset the HEPA Filter indicator, press the HEPA FILTER button for 3 seconds, then the HEPA Filter Changing Indicator will turn off completely, indicating the unit has been reset.

Sleep Mode
If you want to sleep with silent and dim condition, please press Sleep Mode button to activate it. Then the speed would turn to low and the lights would be dim. Press again Sleep Mode button would exit Sleep mode.

Child Lock
Press the Sleep Mode button for 3 seconds to activate the Child lock, and press again for 3 seconds to exit Child lock.
CLEANING
Keep the air purifier functioning properly by changing the Pre-filter and HEPA Filter when the filter changing indicator turn on. More frequent replacement will be necessary if the unit is located in an area with a high level of airborne contaminants (excessive amounts of smoke, pet dander, etc.).
Exposing the air purifier to candle/oil/fireplace soot and smoke is not recommended and will require more frequent cleaning.

Always make sure the air purifier is turned off and unplugged before changing filter.
- Do not use water or any household cleaners or detergents to clean the Prefilter and HEPA Filter.
- The inlet grill may be cleaned (after unit is turned off and unplugged) with a vacuum or a slightly damp cloth.
CHANGING THE HEPA FILTER
- Release the inlet grill by pressing on the locking latch (see diagram of Main Parts).
- Remove the inlet grill from the unit as shown below.
- Grasp the left and right frames of the HEPA Filter through the indentations on the sides of the filter enclosure and remove the filter.
- Insert new HEPA Filter into the unit. Make sure it is the correct installation direction.
- Reattach the Rear Cover of the unit and securely latch into place.
- Push and hold HEPA FILTER Button for 3 seconds to reset HEPA Filter Change Indicator.
7.
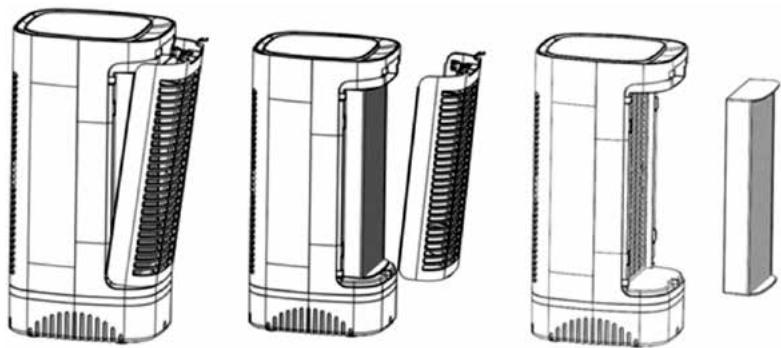
CHANGING THE PRE-FILTER
- Release the inlet grill by pressing on the locking latch (see diagram of Main Parts).
- Remove the inlet grill from the unit as shown below.
- Grasp the pre-filter on the backside of inlet grill and remove the pre-filter.
- Insert new Pre-filter into the inlet grill.
- Reattach the Rear Cover of the unit and securely latch into place.
- Push and hold PRE-FILTER Control Button for 3 seconds to reset PRE-Filter Change Indicator.
CLEANING EXTERNAL SURFACES
- Turn off and unplug unit.
- Use a washcloth slightly dampened with a little water and dishwashing soap to wipe the outer case surfaces.
- Do not allow water to slip into the internal parts as this could damage your unit and result in electrical shock and injury to you.
- Allow the unit to thoroughly dry before use.
STORAGE
If the machine will not be used for a long period of time, take the following steps:
- Switch off the device.
- Remove the plug from the socket.
- Clean the machine.
- Remove the filter package.
- Store the device in a dust free room, preferably covered.
TROUBLESHOOTING
Check the following before contacting technical support:
| Unit will not operate | Power button has not been turned on. | Press the Power button |
| Unit is unplugged. | Check to ensure unit is plugged in. | |
| The inlet grill has not been installed & locked into place. | Check to make sure filter is properly installed & locked into place. | |
| Reduced airflow or poor filtering | The inlet or outlet grill may be blocked. | Check to ensure nothing is blocking air inlet & air outlet. |
| HEPA filter may be clogged. | Check & change filter, if necessary. |
GUARANTEE CONDITION
We provide a two-year guarantee on your air purifier from the date of purchase. All material or manufacturing defects will be repaired free of charge. The following applies:
All claims for compensation, including consequential damage, will not be entertained. - Any repairs or replacement of components during the warranty period will not result in an extension of the warranty period. - The warranty will expire if any alterations have been made, not genuine components have been fitted or if the air purifier has been repaired by a third party. - Components subject to normal wear and tear, such as the air filter, are not covered by the warranty. - The warranty is only valid on presentation of the original, unaltered, and datestamped purchase receipt. - The warranty does not cover damage caused by actions that deviate from those as described in the user's manual or by neglect. - Shipment costs and the risks associated with the shipment of the air purifier or parts of the air purifier are always borne by the purchaser.
To prevent unnecessary expenses, we recommend that you always carefully read the user's manual first. If this does not provide a solution, take the air purifier to your dealer for repair.
| Type | A 34 | |
| Mains power | V / Hz / F | 220-240 ~ / 50 / 1 |
| Power consumption (min./max.) | W | 31 |
| Amperage (max.) | A | 0.22 |
| Noise level (min./max.) | dB | 57 |
| Air debit (min./max.) | m3/hour | 41/71/86 |
| Net weight | kg | 3 |
| Dimensions (wхhxd) | mm | 215 x 432 x 176 |
| Suitable for rooms to | m3 | 34 |
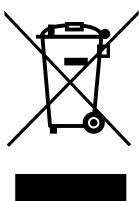
Contact your local government for information regarding the collection systems available. If electrical appliances are disposed of in landfills or dumps, hazardous substances can leak into the groundwater and get into the food chain, damaging your health and well-being. When replacing old appliances with new ones, the retailer is legally obligated to take back your old appliance for disposal at least for free of charge. Do not throw batteries into the fire, where they can explode or release dangerous liquids. If you replace or destroy the remote control, remove the batteries and throw them away in accordance with the applicable regulations because they are harmful to the environment.
Dear Madam, dear Sir,
- Release the inlet grill by pressing on the locking latch (see diagram of Main Parts).
- Remove the inlet grill from the unit as shown below.
- Grasp the pre-filter on the backside of the inlet grill and remove the pre-filter.
- Insert a new pre-filter into the inlet grill.
- Reattach the rear cover of the unit and securely latch it into place.
- Push and hold the PRE-FILTER control button for 3 seconds to reset the PRE-FILTER change indicator.
CLEANING OF EXTERNAL SURFACES
Distributed in Europe by PVG Holding B.V.
If you need more information or encounter any problems, please visit our website at www.qlima.com or contact our customer service (phone number available on www.qlima.com). For further information or if you have any problems with the device, please refer to www.qlima.com or your local customer center (phone numbers can be found on www.qlima.com). If you need information or if you have a problem, please visit our website www.qlima.com or contact our customer service (phone number available on www.qlima.com). If you would like to obtain additional information or if you encounter a problem, please visit our website (www.qlima.com) or contact our customer service (you will find the address and phone number on www.qlima.com). If you need service, more information, or if you have problems with the device, please visit our website at www.qlima.com or ask for advice from the PVG consumer service center (www.qlima.com). If you need information or if you have a problem, please visit our website (www.qlima.com) or contact our sales support (you will find its phone number on www.qlima.com). For information and in case of problems, please visit the website www.qlima.com or contact the Customer Service Center (to find out the phone number, please consult www.qlima.com). If you need information or if you have a problem with the product, you can visit the website www.qlima.com. Alternatively, you can contact PVG's consumer service (phone number on www.qlima.com). If you need information or if you have a problem, please visit our website (www.qlima.com) or contact the sales support department (address and phone number on www.qlima.com). If you need information or if you have problems, please visit the website www.qlima.com or contact the Assistance Center (phone number on www.qlima.com). In case of problems and for detailed information, please visit the Qlima website at www.qlima.com or contact the Qlima contact center (www.qlima.com). If you need service or information or if you have problems with the device, you can visit www.qlima.com or contact Qlima customer service (you will find the phone number on www.qlima.com). If you need additional information, please visit the company's website at www.qlima.com or call the phone number (www.qlima.com). If you need more information or if you encounter a problem, please visit the Qlima website at www.qlima.com or contact the Qlima customer center in your country (phone number: www.qlima.com).

- IMPORTANT COMPONENTS
- GENERAL
- SAFETY REGULATIONS
- ATTENTION
- INSTALLATION
- ELECTRICAL RATINGS
- REPLACEMENT PARTS
- SAFETY
- OPERATION
- PRE-FILTER CHANGING INDICATOR
- HEPA FILTER CHANGING INDICATOR
- SLEEP MODE
- CHILD LOCK
- CLEANING
- CHANGING THE HEPA FILTER
- CHANGING THE PRE-FILTER
- CLEANING EXTERNAL SURFACES
- STORAGE
- TROUBLESHOOTING
- GUARANTEE CONDITION
- CLEANING OF EXTERNAL SURFACES
- DISTRIBUTED IN EUROPE BY PVG HOLDING B.V
Brand : QLIMA
Model : A34
Category : Air purifier