
MP840 - Mp3 player Difrnce - Free user manual and instructions
Find the device manual for free MP840 Difrnce in PDF.
| Product type | Digital MP3 player |
| Brand | Difrnce |
| Model | MP840 |
| Power supply | Batteries (AAA type not included) |
| Display | LCD screen with backlight (7 adjustable colors) |
| Supported audio formats | MP3, WAV, ACT (recording) |
| Playback functions | Normal playback, repeat (1, folder, all), shuffle, intro, A-B, tempo adjustment |
| Equalizer | Natural, Rock, Pop, Classical, Soft, Jazz, DBB |
| Lyrics display | Synchronization with .LRC files |
| Voice recording | Fine quality (WAV) or Long (ACT), with voice control (VOR) |
| Storage capacity | Internal memory (capacity unspecified, up to 99 folders and 99 files per folder) |
| Connectivity | USB 2.0 (supports Windows 98SE/2000/XP, Mac OS 10.3+, Linux Red Hat 8.0+) |
| Security and encryption | Possibility of encrypted partition with username and password |
| System functions | Date setting, backlight, language (12 languages including French), auto power off, sleep, contrast |
| Maintenance and cleaning | Use a soft dry cloth; do not expose to moisture |
| Recycling | Recyclable packaging; batteries to be disposed of at recycling center |
Frequently Asked Questions - MP840 Difrnce
User questions about MP840 Difrnce
0 question about this device. Answer the ones you know or ask your own.
Ask a new question about this device
Download the instructions for your Mp3 player in PDF format for free! Find your manual MP840 - Difrnce and take your electronic device back in hand. On this page are published all the documents necessary for the use of your device. MP840 by Difrnce.
USER MANUAL MP840 Difrnce
natural_image
Blue digital MP3 player device with a screen displaying the same body (no visible text or symbols on the device body)text_image
Removable Disk Decoding Tool User name: 123 Password :** confirm cancelnatural_image
Blue digital MP3 player device with a screen displaying the same body (no visible text or symbols on the device body)User Manual
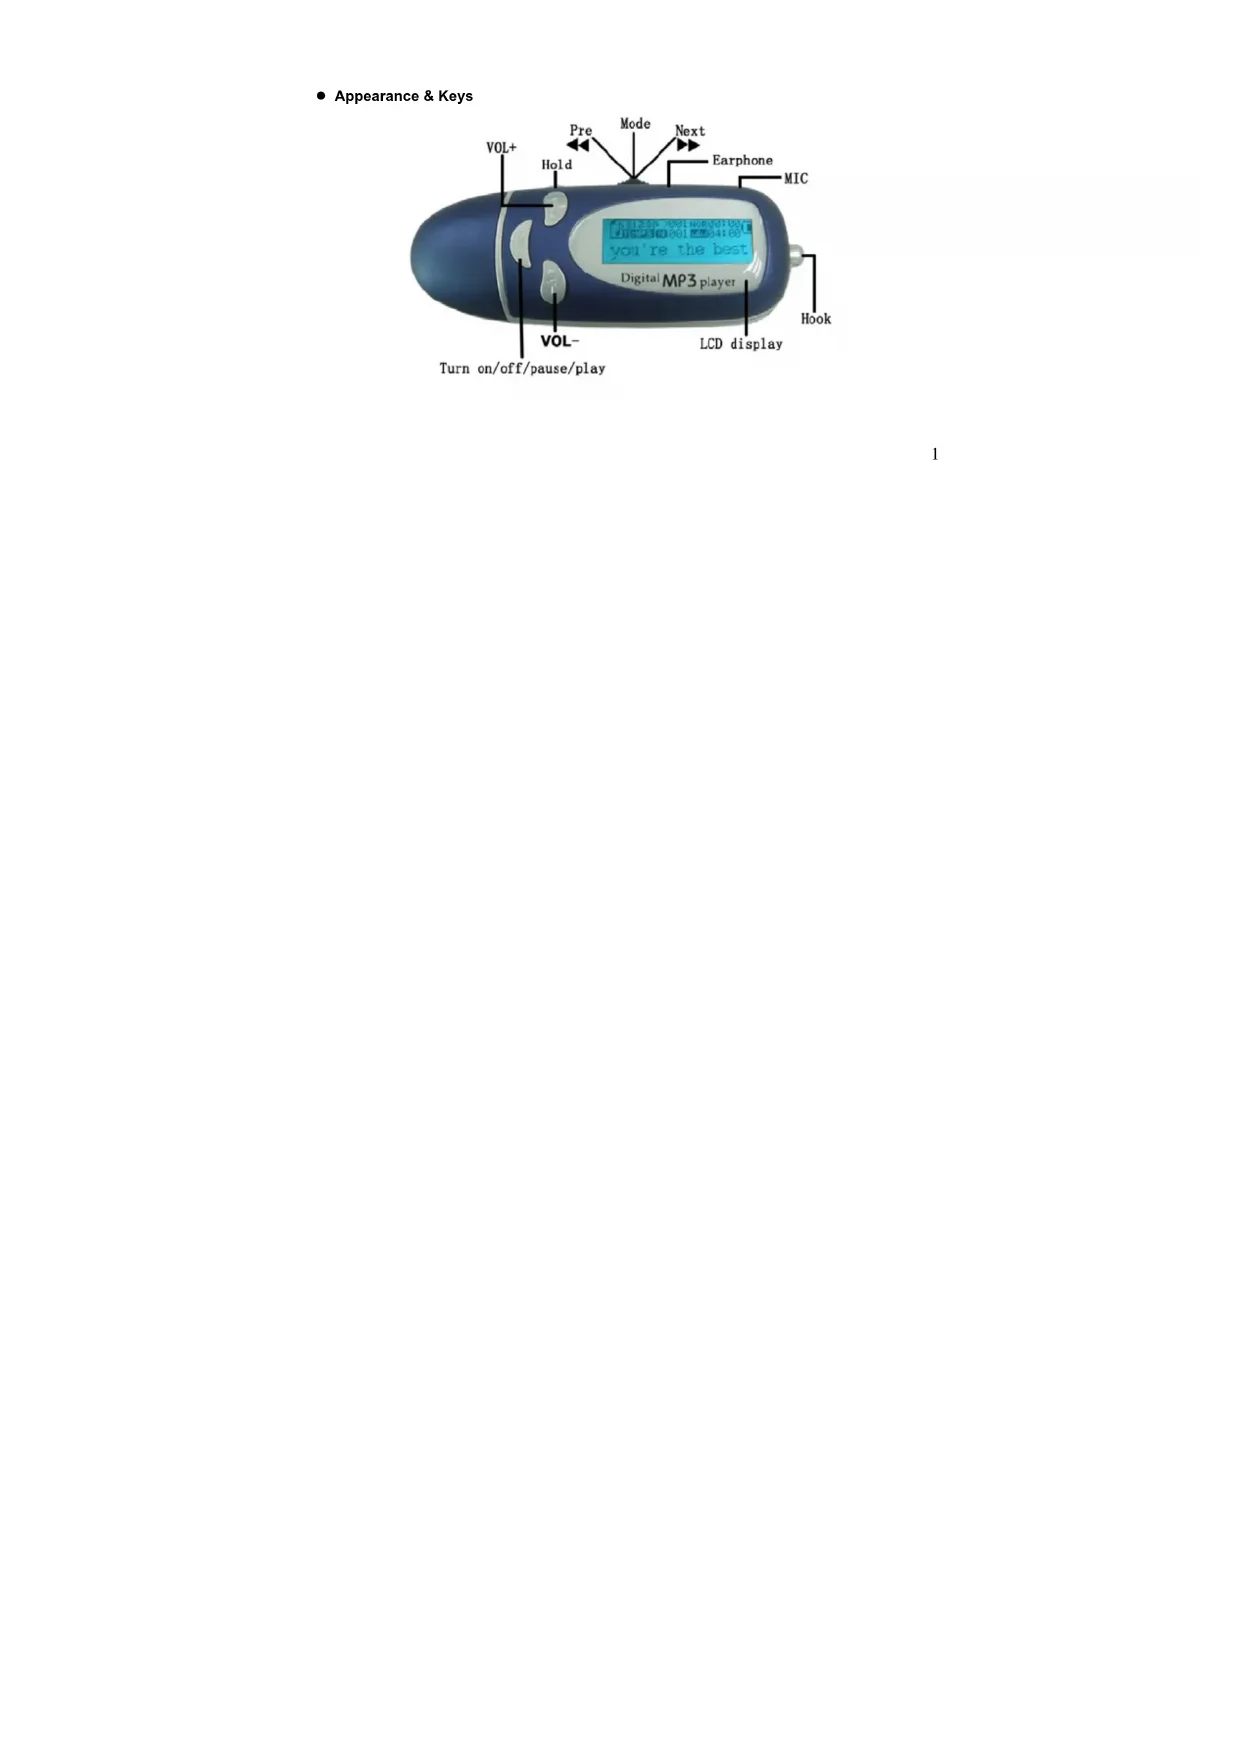
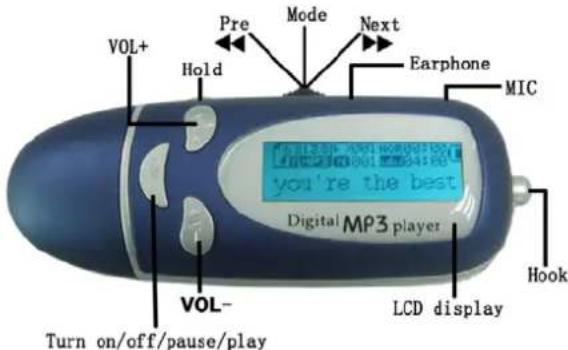
- Appearance & Keys
text_image
VOL+ Hold Pre Mode Next Earphone MIC Digital MP3 player Turn on/off/pause/play VOL- LCD display Hook- LCD Window
text_image
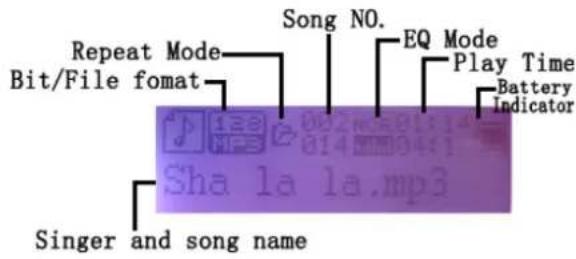
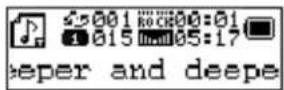
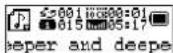
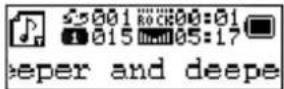
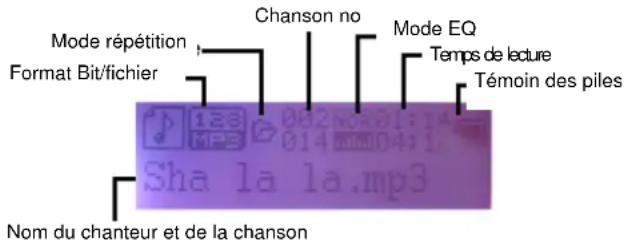
Repeat Mode Bit/File format Song NO. EQ Mode Play Time Battery Indicator Singer and song name Sha la la.mp3Operation
- Entering Menu System (Main Menu)
When the mp3 player is in stop/playing state, keep pressing Mode button for 3 seconds to enter into the main menu. (Music Mode is selected)
- Entering Submenu
In the main menu, select the menu by ▶ & ◀ and press Mode Button once to confirm & enter
into sub-Menus. In submenu, you can click >> & << button to select "exit" or press Mode button for 3 seconds to return main menu directly.
Turn On/ Off the player
Keep pressing “▼” button for 2 seconds to turn on the player. Keep pressing “▼” button for 4 seconds to turn off the player.
PLAY/PAUSE/STOP
In Music mode, press button shortly to play the music. In Music playback, press button shortly to pause. In Record state, press button shortly to pause recording.
- Music playback
- Insert earphone into earphone jack
- Press button to turn on the player
- In the main menu, enter into Music Mode by pressing MODE button
-
Press ▼ button to play track ,pause and stop
-
You can select Music by
&
Push the Next/Prev key to play next or previous music.
- Forward/Backward
Push ▶button continually to play forward
Push ◀ button continually to play backward
- VOL+/VOL-: increase / decrease volume
Note: when Mp3 player is in Play and Record state, it can automatically power off to save power.
As to this function, you can enter into "SYS" menu and select "Power Off" menu.
- Music Submenu:
When the music is playing, Press "Mode" shortly to enter into the following Music Sub Menu:
| Repeat | Repeat | folder |
| Repeat | all | |
| Intro | ||
| Random | ||
| Normal | ||
| Repeat | one |
| Folder | |
| equalizer | Natural |
| Rock | |
| Pop | |
| Classic | |
| Soft | |
| Jazz | |
| DBB | |
| Tempo rate | |
| Replay(A-B) replay | |
| Replay Times | |
| Replay Gap | |
| Exit |
Repeat
| Normal Play files in current folder in normal sequence |
| Repeat one Play a single music file repeatedly |
| Folder Play all music files in current folder in |
| sequence | |
| Repeat Folder | Play all music files in current folder repeatedly |
| Repeat All Play all music files repeatedly | |
| Random Play music files in current folder randomly | |
| Intro Play the first seconds of each music file in | |
EQ
Enter into "Equalizer" menu; you can select different EQ modes that you like
Tempo Rate
When playing music (Only for MP3 formats) or recorded files,
Different tempo rate can be adjusted
Press Mode to enter Tempo Rate
Push ▶ & ◀button, change tempo rate and press' Mode' button to confirm it
A-B Replay
At Music playback, Press Mode once to enter into Music Submenu and select Replay by pressing Mode once
1) "A" flickers in Replay Mode icon Push to set "A" as starting point
2) "B" flickers, Push ▶ to set "B" as endpoint
3) The player will start to repeat A-B segment.
4) You can stop the replay by pressing Mode button again.
Replay Times :
Set A-B repeat times
➢ Replay Gap:
The break period between different playing times (unit: second).
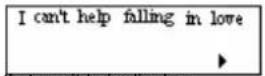
➢ Synchronized lyric display
This player supports"*.LRC" lyric files (you can download the lyric editor software from website and store the lyric files with MP3 files into the player).
For example :
Name of song: LOVE.MP3
Name of lyric file: LOVE.LRC
If there is lyric available for current song, then the icon 📄 will change into “” in the audio
mode.
- Matching lyric
While playing state, press MODE button for 2 seconds and the lyric will be displayed synchronously.
- Press MODE key shortly to exit lyric display.
- Record Voice
Make sure that the battery is not in the status of "low battery". The player may save 99 recording files under each directory.
➢ Start recording in Record Mode
-
Enter main menu and select record mode
-
Press MODE button shortly to enter into record mode
-
press ▼ button shortly to record and pause
-
Press button for 3 seconds to stop recording.
NOTE:
• The recorded file is saved in the current folder set in "Local Folder".
- If "Overflow" is displayed on the LCD, the player's memory is full. Please delete some files.
- If "over record" is displayed on the LCD, the current directory has already had 99 recording files. Please switch to another directory.
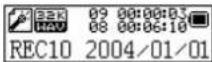
- Select Recording Type
- In recording state
-
Press Mode to enter Record Submenu.
-
Push ▶ to select REC Type option
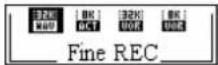
- Push ▶ to select recording type
• SEM : Fine record---wav format with excellent tone quality
• : Low record---act format with common tone quality
32K:
Eir#OR, way format and voice control record;
- Fill OR---wav format and voice control record,
Long/OR---act format and voice control record;
Note: Voice control record means that the Player can automatically pause if without effective sound.
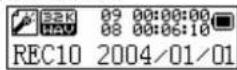
- Play Recorded Files
-
Enter into main menu
-
Press MODE button to enter Voice
-
Enter into main menu
-
Press MODE button to enter Voice
-
Press ▼y shortly to play voice file
- Select recorded file by ▶& ◀
- Volume control by VOL+/VOL-
- Convert ACT Files to WAV Format Files
Files of ACT format recorded by this player can be converted to those of WAV format through the tool program attached in the driver CD
- Run "Sound Converter" program, click "open" button.
- Choose the ACT files.
- Click "converter" button and begin the converting.
- In a System Setting
Enter into main menu, click ➤ to select SYS, and then press Mode button to enter System Setting submenu interface.
- Parameters Introduction
| Record time Set the time and date when recorded files are saved | |
| Backlight set backlight time | |
| Backlight mode Set black light colors | |
| Language set different languages displayed | |
| Power off set time period that the player powers off automatically | |
| Replay mode set Replay Mode | |
| Contrast set contrast of LCD | |
| Online Mode Linking PC mode: for “Disk Enctrotion” option | |
| Memory info. | Display memory capacity and percentage that has been used |
| Firmware version show firmware version | |
| Firmware upgrade | Firmware upgrading |
| Exit exit from current interface | |
- Instruction
- "Record Time"
- System Setting Interface
-
Press Mode to enter Record Time:
-
select VOL+/VOL- to select "YY-MM-DD" sequence.
- Push ▶ & ◀ button to adjust the time.
- Press Mode to confirm and exit.
- "Back light" setting
- Select "Back light" icon
- Press Mode button to enter "Back light" setting interface:
- Push ▶ & ◀ button to adjust time
- Press Mode to confirm and exit.
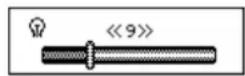
Backlight Mode
You can set the colors of backlight from random color, 1, 2, 3, 4, 5, 6, to 7 colors.
Language
In SYS Mode, Press Mode button to enter "Language". Select language by ▶ & ◀
| NO. | language | Remark |
| 1 | English | |
| 2 | Trad | Chinese |
| 3 | Japanese | |
| 4 | Korean | |
| 5 | French | |
| 6 | German | |
| 7 | Italian | |
| 8 | Dutch | |
| 9 | Portuguese | |
| 10 | Spanish | |
| 11 | Thai | |
| 12 | Simple | Chinese |
Power Off
Off Time mode: Click ▶ & ◀ to adjust time for automatic power off, from 0 to 60 seconds. 0 implies disable of Power off Press "Mode" to confirm. Player will "Auto Off" when player is in stop state for power saving.
Sleep Time mode: Set sleep time by \& to turn off automatically. This function is specially for listening to music before sleep. Note: Setting of Sleep Timer is valid only once and the set time
will be cleared after power off. The time needs to be set again next time.
- Replay Mode
Manual Replay means that at A-B Replay Mode, the end point B must be set manually Auto Replay means that at A-B Replay Mode can be set automatically.
○ Contrast
Click ▶ & ◀ to adjust contrast from brightest(0) to darkest(16) and press mode to confirm it and exit.
○ Online Mode
Select the status of PC connection: Encrypted only, Normal Only, Multi Drive
- Memory Info.
It displays total memory capacity and the percentage of the capacity used.
- Firmware Version
Indicating the firmware version..
- Firmware Upgrade
This function is only available for professional engineers in service center, not available for end
users.
Tip: you can press ▼ key once to fast exit after finishing setting.
USB disk
- Connect your Mp3 player to PC's USB Port by the supplied USB cable. Once the player is connected to the computer, USB stick will be detected by your computer system automatically. The player supports Windows 98/SE(need install drives program), Windows 2000 and above operation System (no need install driver), MAC OS 10.3 and above, Linux Red Hat 8.0 and above.
- Note: If the operation system of your computer is Windows 98SE, a hardware driver for USB disk will be required. To install the driver, place the supplied install CD in your CD drive, then follow the instruction to complete the installation.
- The player can identify the maximum 99 folders .Each folder maximum 99 files (songs)
■ Firmware Updated
Note: The Firmware update is an advanced operation, this function is only open for the engineers of service center.
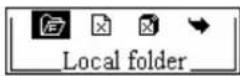
■ Select Folders
Select Folders (At Stop Submenu)
Users can save files in different folders to manage and play files according to different types. The player supports identification of 99 sub directories.
At Music Stop state:
Press Mode to enter into Local Folder, press Mode to Root menu, press >> & << to select folders, press Mode to confirm it
Delete File (At Stop Submenu)
Under the modes of music, you can delete the related files and stored stations. On Stop Interface.
At Stop Interface.
Press Mode to enter Stop Submenu.
Push ▶ & ◀ to select "Delete file" or "Delete All".
Press Mode to enter Delete Interface.
Push ▶ & ◀ to switch between "NO" and "YES".
Press Mode to confirm and deletion starts.
"Delete all" will delete all corresponding files of current mode in the current directory (for example, "delete all" in music mode will delete music files and recorded files will not be deleted).
Press key in this state to return to Music Mode
When you delete a file from a PC, please make sure that the player should be ejected in a safe way, the USB cord unplugged. Otherwise, the file deleted seems to be undeleted.
MP3 Player Disk Tool
After install the utility from the CD, you can run MP3 Player Disk Tool to format the player and for the encryption function
-
Format: You can format the player either by this program or by Windows
-
Partition and Encrypt
You can divide USB disk into two parts by this tool, one is encrypted and the other is non-encrypted. Note: Windows 2K should be installed SP4 to support this function
- Connect the player with PC
- Run MP3 Player Disk Tool
- Select "partition and encryption"
- Select a suitable space for encrypted disk and setup user name and password
- Click "start" and finish the partition
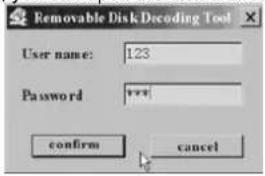
- You will see two disks. Click encrypted disk "RdiskDecrypt" and input user name and password in the dialogue; if they are correct, you can open the disk and copy files in it.
text_image
Removable Disk Decoding Tool User name: 123 Password :**** confirm cancel- Every time you connect the disk with your PC, you need input user name and password to open
the encrypted disk.
Attention: dividing one disk into two will clear away the data; please backup your data before partition; combining two disks in one will also clear away the data.
Alarm: please do not lose your user name or password, or the encrypted disk will not be used; and you can only cancel encryption by combining the disks, which will lose the files in the encrypted disk.
A note about Recycling
This product's packaging materials are recyclable and can be reused. Please dispose of any materials in accordance with your local recycling regulations.
This product consists of materials which can be recycled and reused if disassembled by a specialised company.
Batteries should never be thrown away or incinerated but disposed of in accordance with your local regulations concerning chemical wastes.
natural_image
Blue digital MP3 player device with a screen displaying the same logo (no visible text or symbols on the device body)text_image
VOL+ Hold Préc. Suiv. Mode Ecouteurs MIC you're the best Digital MP3 player Crochet VOL- Affichage LCD Eteindre/allumer/pause/lecture- Fenêtre LCD
text_image
Removable Disk Decoding Tool User name: 123 Password *** confirm cancelnatural_image
Blue digital MP3 device with three buttons and a screen displaying the same black rectangle (no visible text or symbols on device body)Benutzerhandbuch