
MP1860 - Mp3 player Difrnce - Free user manual and instructions
Find the device manual for free MP1860 Difrnce in PDF.


| Product Type | MP3 Player |
| Model | MP1860 |
| Display | 1.8 inch True Color TFT Screen |
| Memory Capacity | 1GB / 2GB / 4GB / 8GB (optional) |
| Supported Audio Formats | MP1, MP2, MP3, WMA, WAV |
| Supported Video Format | AMV (via conversion from RM, MOV, VOB, WMV, ASF, MPEG, AVI, DAT) |
| FM Radio Frequency | 87.5 MHz - 108 MHz (Normal Band), 76.5 MHz - 90 MHz (Japan Band) |
| Recording | SP/LP digital recording (WAV/ACT), VOR function |
| Battery Type | Built-in high-capacity rechargeable Li-polymer battery |
| Battery Life (Approx.) | Up to 10 hours (depending on volume, file format, usage) |
| Charging | Via USB cable or charger (USB bus-powered) |
| USB Version | USB 2.0 |
| Signal-to-Noise Ratio | 85 dB |
| Max Output Power | 10mW (L) + 10mW (R) into 32Ω |
| Equalizer Modes | NATURAL, ROCK, POP, CLASSIC, SOFT, JAZZ, DBB |
| Playback Modes | Normal, Repeat One, Repeat All, Repeat Folder, Random, Intro, A-B Repeat |
| Features | Lyrics display, Electronic photo album, Text reader, Game (Move Box), Encryption disk, ID3 support |
| Operating Temperature | -5°C to 40°C |
| System Requirements | Win98/SE/ME/2K/XP, Mac OS 10, Linux 2.4.2 (Win98 requires driver) |
| Accessories | User Manual, Earphones, USB Cable, Installation CD |
| Dimensions (Approx.) | 90 x 40 x 12 mm (estimated) |
| Weight (Approx.) | 50 g (estimated) |
Frequently Asked Questions - MP1860 Difrnce
User questions about MP1860 Difrnce
0 question about this device. Answer the ones you know or ask your own.
Ask a new question about this device
Download the instructions for your Mp3 player in PDF format for free! Find your manual MP1860 - Difrnce and take your electronic device back in hand. On this page are published all the documents necessary for the use of your device. MP1860 by Difrnce.
USER MANUAL MP1860 Difrnce
1. The Safety Instructions
The manual contains important safety instructions and information of the device's proper usage. Make sure to read carefully and understand all the instructions to avoid accident.
Do not expose the device to extreme temperature (above 40° C), especially in cars with shutting windows in summer.
Do not store in humid or dirty areas.
Avoid the device falling and bumping strongly. Do not make TFT screen suffer from violent shake; otherwise, TFT screen could be damaged or displayed abnormally.
Choose the suitable volume. Do not turn up the volume of the earphones too high while using it. If you feel ringing in your ears, stop using the device or turn the volume down.
Do not disassemble the device by yourself and do not wipe the surface of device with alcohol and benzene and thinners.
Do not use the device in areas where electronic devices is prohibited, such as in plane.
Do not use the device while driving an automobile or walking in the street, otherwise an accident may happen.
Our company reserves the right to improve the product so product's specification and design are subject to change without further notice.
2. Function Overview
● 1.8 inch true color screen
● Mass memory: 1GB/2GB /4GB /8GB optional
● Movie player, support AMV format
- Support various video formats convert to AMV format :RM /MOV /VOB /WMV /ASF /MPEG /AVI /DAT etc
- USB 2.0, fast download speed
- ID3 support, Lyrics display
- SP/LP digital recording function
● Electronic photo album
● FM Radio function
● Play mode: Repeat A-B, repeat one, repeat all, repeat catalog, follow read etc
- EQ modes: JAZZ, CLASSIC, ROCK, POP, NORMAL, SOFT, DBB
- No driver is needed above Win98, plug & play to the computer
● Built-in hi-capacity rechargeable Li-polymer battery
- Managing disk function: set two partitions by accessorial tool. One is normal disk, the other is security disk in which files could not be accessed freely.
- Save 40 radio channels and record them to recording file
3. About Battery
The player adopts a built-in Li-polymer battery with large capacity which is very safe in usage.
If battery power is low, the screen will display "low power" then will automatically power off.
Recharge your battery by connection to PC via USB cable or by charger.
The screen displays battery icon and impulse when recharging battery. The icon will indicate full when completing recharging.
The running time of battery depends on volume setting, playing files format, button operation, etc.
The user can set time of [power off] in Setting to save power.
When you don't use the device for a period of time, please push [ON] to [OFF] side
4. Button function:
[ON/OFF]: power switch
[MENU]: enter menu and exit from sub-menu, confirm selection (under any status, hold [MENU] will enter main menu)
[>II]: play/stop, power on/off the player
[PRE] / [NEXT] : last/next, backward /forward
[VOL+] / [VOL-]: adjust volume, increase /decrease the volume
5. Basic operation
1) Power on: hold >II button for 3 seconds, the player will go to working condition.
2) Power off: hold [>II] (play/stop) button for three seconds, the player will be turned off.
Note: When battery power is low, it will automatically power off.
3) Adjusting volume:
With MP3 mode, AMV mode, Voice mode and FM mode, press [VOL-] or [VOL+] to decrease/increase the volume one step, while hold [VOL-] or [VOL+] button will decrease/increase continuously.
6. Main menu
Hold [MENU] to enter main menu, there are seven modes which can switch into each other by pressing [PRE] or [NEXT].
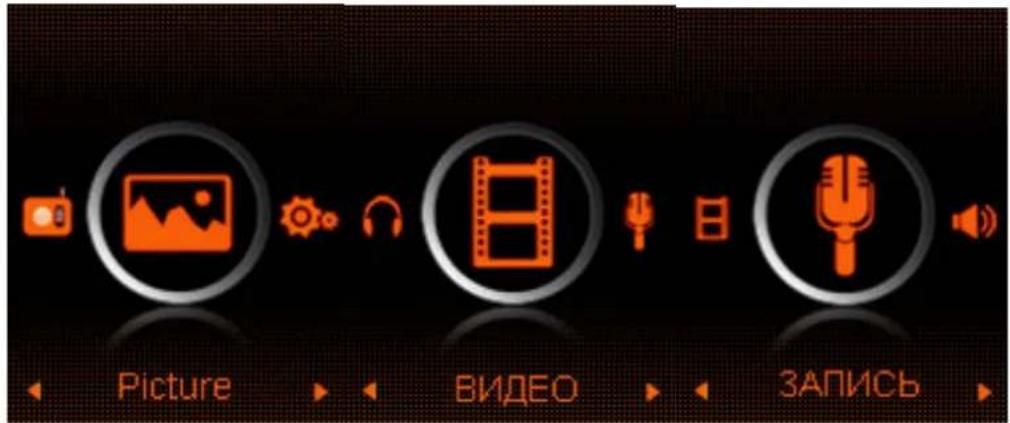

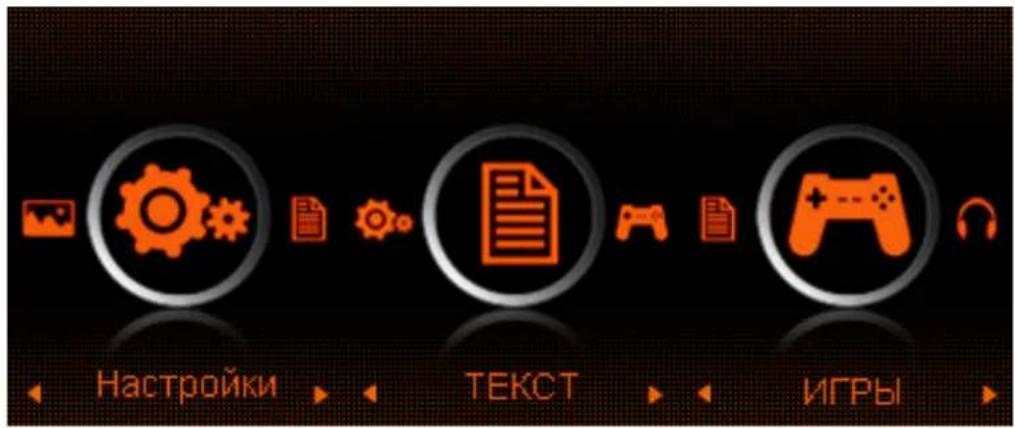
Sub-menu description:
A. sub-menu under playing status (there's no sub-menu while playing AMV file) Select MUSIC mode in main menu, press [MENU] to confirm selection and then press PLAY/STOP [>II] button to play the song. While music playing, press [MENU] button to enter sub-menu:

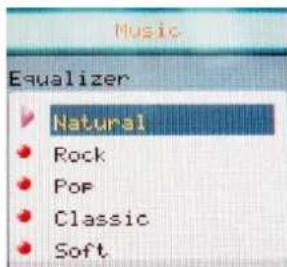
| Repeat Normal, Repeat one; Folder; | RepeatFolder; Repeat All; Random; Intro. |
| Equalizer NATURAL,ROCK,POP,CLASSIC,SOFT,JAZZ, DBB | |
| SRS WOW mode SRS WOW, User Setting, Disable SRS | |
| Tempo Rate Moving to positive direction will fast temporate and moving to negative direction will slow tempo rate. The digit “0” means normal tempo rate. | |
| Replay A-B repeat, when “A” in the icon blinks, swing [NEXT] to confirm start point, swing | |
| [NEXT] as “B” point. The player will replay from A to B according to the setting in the replay times. (Return to A-B replay mode by swing [PRE] button in such status). | |
| Replay times Set how many times the | A-B point replayMaximum is 10 times (1-10) |
| Replay gap set replay time gap between | every replay |
| Exit Exit from sub-menu | |
The device displays lyrics whose name is the same as MP3 file. For example, music format's name is "song.mp3" and LRC file's name must be "song.lrc", and they should be also in the same folder.
If there is lyrics file along together with playing song, the round ball beside the "lyric" icon is green. Otherwise it is red.
B. sub-menu under stop status: (Under playing status with MP3 mode, AMV mode mode, press [>II] to stop playing, then press Mode button)
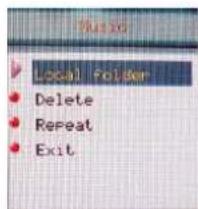
| Local folder Indicate the folder of present playing file |
| Delete file Delete the present playing song |
| Delete All Delete All songs |
| exit Exit from the sub-menu |
Delete file:

Sub-menu interface, select "Delete file", choose the file you want to delete, confirm "Delete", then the screen shows below:

8. Install (AMV) convert tool:
Make sure you have installed Windows media player 9.exe and DirectX9.0 before you install the software
- Put CD drive into computer and open the driver.
- Run Setup.exe to install the software, then restart the computer.
- choose menu: start----program----mp3 player utilities --- AMV convert tool
- There's a window appears, choose the file you want to convert, then choose the folder you want to put the new converted file, click "start converting"
9. Record mode:
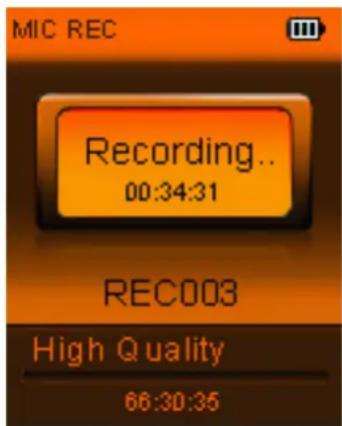
Press [MENU] button to select Record mode in main menu, then press [MENU] again enter into recording sub-menu.
| Local folder Indicate the folder of presentrecording file | |
| REC type: Fine REC: WAV format, good voicequality;Long REC: ACT format, fair qualityand longer recording time;Fine VOR: WAV format, good voicequality, will stop recordingautomatically when there is no sounddetected;Long VOR: ACT format, fair quality,will stop recording automatically whenthere is no sound detected; | |
| Exit Exit form sub-menu | |
After setting, press [>II] to start recording. In the meantime please note:
- During recording, only [>II] (play/stop) and [MENU] can be effective.
- press [>II] (play/stop) button shortly will save present recording file and start a new recording file
-
Ensure sufficient battery capacity during recording。
-
The player support 99 voice recording files storage in each directory. If the screen displays “out of space”, which indicates the current directory has already
saved 99 voice recording files, the user need to change to a new directory.
10. Voice mode

Main menu status, swing [PRE] or [NEXT] to select the Voice mode, then press [MENU] to confirm the selection, press [>II] to play the recording file. Press [>II] button to pause playback, swing [PRE] or [NEXT] button to select recording files.
Sub-menu while playing status:
| Repeat Refers to “repeat” in music mode | |
| Tempo rate Refers to “tempo rate” in music mode | |
| Replay Refers to “replay” in music mode | |
| Exit Exit from sub-menu |
| Sub-menu while stop status: | |
| Local folder Indicate the folder of present recording file | |
| Delete Delete recording song | |
| Delete All Delete all recording files | |
| exit Exit from the sub-menu | |
11. FM mode
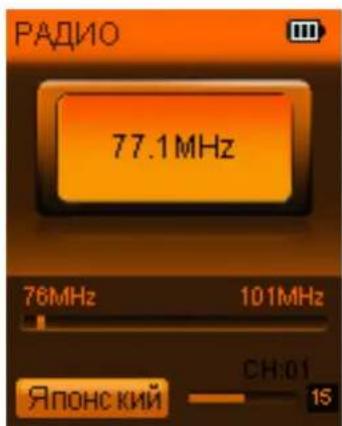
Under main menu, swing [PRE] or [NEXT] button to choose FM mode and press [MENU] to confirm. Press [>II] (play/stop) to save channel. If no channel is saved, you can look for channels by auto or manual searching. Press [MENU] again to get sub-menu as below:
| Save Save currently | tuned frequency; |
| Record Record current preset channel; | |
| Delete delete current preset channel; | |
| Delete All delete all saved channels; | |
| Auto Search Auto search FM channel | |
| Normal Band Frequencies from 87.5MHz---108MHz; | |
| Japan Band frequencies from76.5MHz---90MHz; | |
| Exit exit from FM sub-menu | |
Auto search: Holding [PRE] button or [NEXT] button for two seconds will tune frequency upward or downward until a radio station is located then it stop automatically.
Manual search: swing [PRE] or [NEXT] button to search channel upward or downward one-step
Notice: Normal band and Japan band can store 20 preset channels respectively.
12.Picture
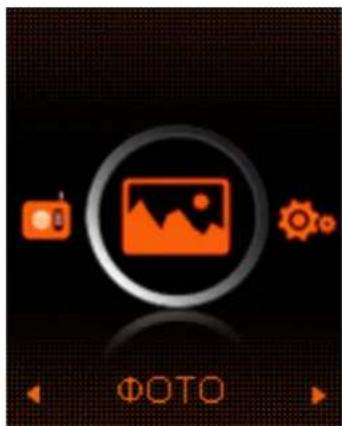
Under main menu, swing [PRE] or [NEXT] button to select Photo mode, then press [MENU] to confirm, screen shows as below:
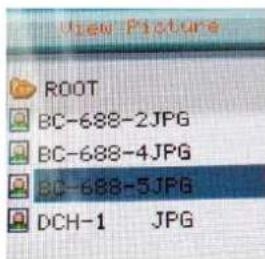
Press [MENU] button again to enter sub-menu:
| local folder choose the folder where picture is saved; | |
| play set manual play or auto play (there is a time gap for auto play from 1-10 seconds) | |
| delete, Delete picture; | |
| Delete All Delete all pictures | |
| exit Exit from sub-menu | |
Press [>II] (play/stop) button to display the picture automatically or manually according to previous playing setting.
13. SYS Setup
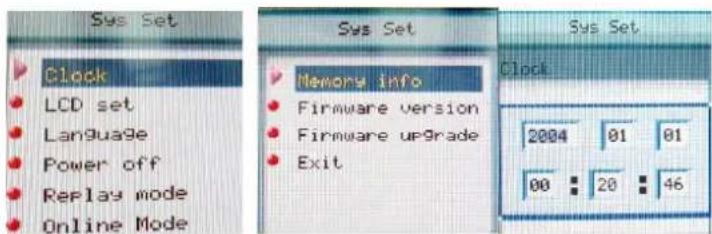
| System Time | Press [MENU] to edit recording time. Swing [NEXT] button and the digit of year will increase; swing [VOL+] button to edit next digit, push [PRE] or [NEXT] button to adjust the digit. Press [MENU] to confirm the setting |
| LCD set | Always light10 Sec20 Sec30 Sec |
| Language | Simple Chinese, English, Trad Chinese, Japanese, French, German, Italian, Dutch, Portuguese, Spanish, Swedish, Czech, Denmark, Polish etc. |
| Power off | Off time: set self-power off time when the player is stopped and no button is pressed. The time unit is seconds. 0 means set off the function.Sleep time: set self-power off time after last key pressed, regardless of whether the player is active or stopped. The time unit is minutes. |
| Replay mode | Manual replay; auto replay |
| Online mode | Multi Drive; Normal only; Encrypted only |
| Memory info. | Check the memory size and the remaining memory |
| Firmware version | Display the player's firmware version |
| Firmware upgrade | Firmware can be upgraded via connection to PC |
| Exit Exit from the sub-menu | |
14. TEXT
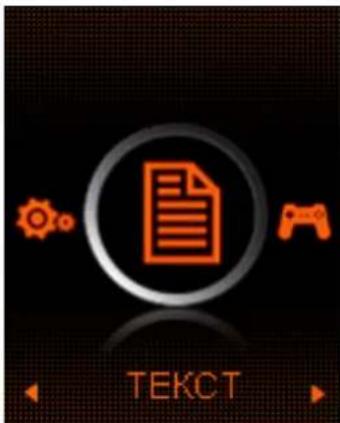
Enter TEXT mode by pressing Mode button, then you can read and edit the article in the device. The device only can recognize the article in "txt." Format.
Press [MENU] button again to enter sub-menu:
| local folder choose the folder where picture is saved; | |
| play set manual play or auto play (there is a time gap for auto play from 1-10 seconds) | |
| delete, Delete picture; | |
| Delete All Delete all pictures | |
| exit Exit from sub-menu | |
15. Game

Enter Game function by pressing Mode button, then there's a game named MOVE BOX. Pressing [PRE], [NEXT], [VOL-], [VOL+] to move the pictures.
16. USB disk function
1) The player can be a large mobile storage device, supports 1GB/2GB/4GB memory
2) Above windows 98 no driver is required, plug and play to the computer
3) The player supports USB bus-powered and begins to charge when connecting to PC.
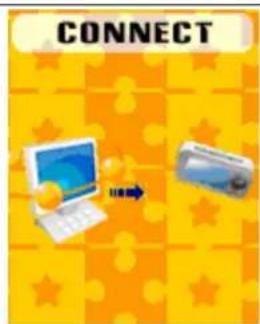
4) When connected to a computer, the screen will indicate three different modes while operating:
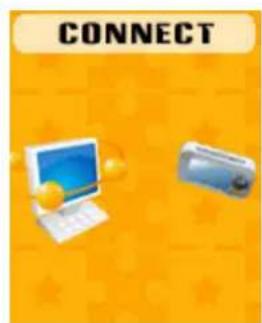
2.upload
- download 1. suspending

17. Encrypt disk function
User can use the software to set partitions for USB disk. One is normal disk, the other is encrypted disk. (User can see two disk icons in computer. WINDOWS 2K need install SP4, otherwise, user only see one disk icon and selecting [normal only] or [encrypt only] from [online mode] of [system setting]. Encrypted disk would hide all private data, others cannot access data without password.
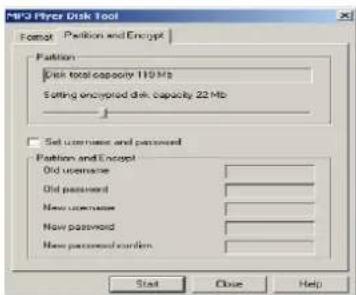

Notice:
*Data in encrypted disk cannot be readable in the player.
*It is necessary for encrypted disk to input user name and password when connecting to computer.
*Setting partitions will erase data, please backup data in advance. Combining disks would also erase data.
*Please do not lose username and password. Otherwise, you cannot access encrypted disk. You can combine disks to cancel encrypted disk at risk of damaging data in encrypted one.
18. Upgrading
Use update tool installed in your computer to update and repair the damaged driver.
1) Connect player to the computer
2) Run the software: Start----program----MP3 Player Utilities ---- MP3 Player Upgrade Tool, click [choose new version firmware] button.
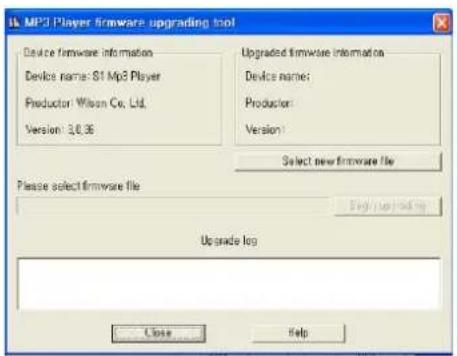
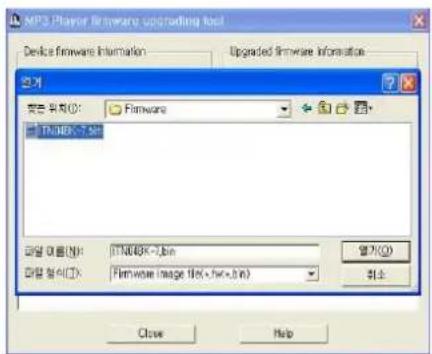
3) Select the new firmware driver (from the drive CD or from the website of the supplier). Click [start] button to begin upgrading.
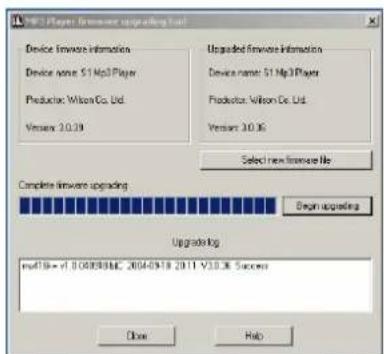
4) When upgrading is successful, the display will indicate successfully upgraded.

- Find the icon of removable disk in [my computer]. Click the right button of mouse to select [format]. In formatting interface, select FAT system in [file system], then click [start] button to format disk. Notice: formatting disk would erase all the data and please backup data before formatting.
19. Troubleshooting
If the player couldn't play properly, please use trouble-shooting guide to help you.
| Symptom Solution | |
| The player cannot work | Please check the voltage of batteryMake sure the power button is onPlease check if volume is set to “0” or not and make sure that earphones are connected properly.Damaged music data will make noise in some extent; make sure there are files in the player.choose right FAT file system in dialogue when formatting disk. |
| The player cannot upload /download files; no disk icon in computer | Please check USB cable is correctly connected.Please properly re-install CD driver if under Win 98 |
| The player cannot record | Please check if memory is sufficient.Please check the battery voltage. |
| Strange characters are displayed | Please check if the correct language is selected. |
| FM radio signal is not clear | Readjust the position between player and earphone; earphone can be used as antenna to receive the signal |
If you had other difficulties in warranty period, please feel free contact our company to help you solve the problem.
20. Specification
| Item Specification | |
| Transferring data rate USB2.0 | |
| File formats supported | Music: MP1、MP2、MP3、WMA、 WAVRecord: WAVVideo support: AMV |
| FM frequency 87.5MHz—108MHz | |
| S/N rate 85dB | |
| The max output power (L) 10mW+(R) 10mW (320hm) | |
| Built-in memory 1GB-8GB | |
| Operating temperature | -5°C ~ 40°C |
| Operating System | WINSE/ME/2K/XP,MacOS10.Linux2.4.2(Only WIN98 needs the CD driver) |
| Accessories | User Manual, Earphone, USB cable, Installation CD |
Specification and appearance
are subject to change without further notice.


- THE SAFETY INSTRUCTIONS
- FUNCTION OVERVIEW
- ABOUT BATTERY
- BUTTON FUNCTION
- BASIC OPERATION
- MAIN MENU
- SUB-MENU DESCRIPTION
- DELETE FILE
- INSTALL (AMV) CONVERT TOOL
- RECORD MODE
- VOICE MODE
- FM MODE
- 12.PICTURE
- SYS SETUP
- TEXT
- GAME
- USB DISK FUNCTION
- ENCRYPT DISK FUNCTION
- NOTICE
- UPGRADING
- TROUBLESHOOTING
- SPECIFICATION
Brand : Difrnce
Model : MP1860
Category : Mp3 player