VL1212 - Battery charger VELLEMAN - Free user manual and instructions
Find the device manual for free VL1212 VELLEMAN in PDF.
| Product type | Battery charger |
| Brand | Velleman |
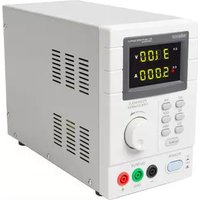
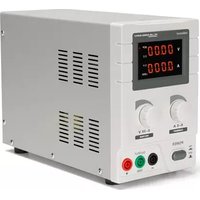
| Model | VL1212 |
| Output voltage | 12V |
| Charge current | 1.25A |
| Compatible battery type | 12V lead-acid batteries |
| Dimensions (L x W x H) | 93 x 82 x 105 mm |
| Weight | 1 kg |
| Output cable length | 190 cm |
| Power supply | 230 V AC, 50 Hz |
| Main functions | Automatic charging, float charging, anti-spark protection, 72h safety timer |
| Indicator lights | Red and green lights for charging status |
| Usage | Indoor use only |
| Safety | Do not expose to rain or snow; use in a ventilated area; disconnect before maintenance |
| Maintenance and cleaning | Clean battery terminals; check electrolyte level regularly; disconnect before cleaning |
| Spare parts and repairability | Contact the dealer; no user-repairable parts; power cord not replaceable |
| Warranty | 24 months for consumer products (conditions in manual) |
Frequently Asked Questions - VL1212 VELLEMAN
User questions about VL1212 VELLEMAN
0 question about this device. Answer the ones you know or ask your own.
Ask a new question about this device
Download the instructions for your Battery charger in PDF format for free! Find your manual VL1212 - VELLEMAN and take your electronic device back in hand. On this page are published all the documents necessary for the use of your device. VL1212 by VELLEMAN.
USER MANUAL VL1212 VELLEMAN
To all residents of the European Union
Important environmental information about this product
This symbol on the device or the package indicates that disposal of the device after its lifecycle could harm the environment.
Do not dispose of the unit (or batteries) as unsorted municipal waste; it should be taken to a specialised
company for recycling.
This device should be returned to your distributor or to a local recycling service.
Respect the local environmental rules.
If in doubt, contact your local waste disposal authorities.
Thank you for buying the VL0612 / VL1212! Please read the manual thoroughly before bringing this device into service. If the device was damaged in transit, don't install or use it and contact your dealer. This manual contains important safety and operating instructions, please keep it for future reference.
2. Safety Instructions
WARNING: RISK OF EXPLOSIVE GASES. Working in the vicinity of a lead-acid battery is dangerous. Batteries generate explosive gases during normal battery operation. For this reason, you should carefully read and follow these instructions.
- Keep away from children and unqualified persons.
- To reduce the risk of battery explosion, follow these instructions and those marked on the battery carefully.
- Never smoke or allow an open spark or flame in the vicinity of the battery or engine.
- Do not expose the charger to rain or snow. For indoor use only.
- The use of attachments not recommended or sold by the battery charger manufacturer may result in a risk of fire, electric shock or personal injury.
- To reduce the risk of damage to the electric plug and cord, pull the plug and not the cord when disconnecting the charger.
- Make sure the cord cannot be stepped on, tripped over or is not otherwise subjected to damage or stress.
- Study all the battery manufacturer's specific precautions such as removing or not removing cell caps while charging and recommended rates of charge.
- Do not use the battery charger unless the battery voltage matches the output voltage rating of the charger.
- Do not operate the charger in a closed-in area or in an area with restricted ventilation.
- An extension cord should not be used unless absolutely necessary. The use of an improper extension cord could result in a risk of fire and electric shock. If an extension cord must be used, make sure that:
a. the pins on the plug of the extension cord are the same number, size and shape as those of the charger plug.
b. the extension cord is properly wired and in good electrical condition.
c. the wire size is as specified in table 1 below. Do not operate the charger with damaged power core or plug.
d. The supply cord cannot be replaced. If the cord is damaged, the appliance should be discarded.
| Cord length feet / metre 25ft / 7.60m 50ft / 15.25m 100ft / 30.50m 150ft / 45.75m | |||||
| AWG cord size, table 1 18 18 18 | 18 | ||||
- To reduce the risk of electric shock, unplug the charger from the outlet before you start any maintenance or cleaning activities.
- Damage caused by disregard of certain guidelines in this manual is not covered by the warranty and the dealer will not accept responsibility for any ensuing defects or problems.
- All modifications of the device are forbidden for safety reasons. Damage caused by such modifications is not covered by the warranty.
3. Personal Precautions
- Someone should be within range of your voice or close enough to come to your aid when you work near a lead-acid battery.
- Have plenty of fresh water and soap nearby in case acid contacts your skin, clothes or eyes.
- Wear complete eye protection and protective clothing. Avoid touching your eyes when working with batteries.
- If battery acid comes into contact with your skin or clothing, immediately wash with soap and water. Should it come into contact with your eyes, immediately rinse with running cold water for at least 10 minutes and seek immediate medical attention.
- NEVER smoke or allow a spark or flame in the vicinity of a battery or engine.
- Avoid the risk of metal objects falling onto the battery. This might spark or short-circuit the battery or other electrical parts which may cause an explosion.
- Remove all personal items such as rings, bracelets, necklaces and watches when working with a lead-acid battery. A lead-acid battery can produce a short-circuited current high enough to weld a ring or the like to metal causing a severe burn.
- Use the charger for charging a rechargeable lead-acid battery ONLY. It is not intended to supply power to a low-voltage system or to charge rechargeable batteries other than lead-acid batteries. Charging dry-cell batteries may cause them to burst and cause injury to persons and damage to property.
- NEVER charge a frozen battery.
4. Preparation
- If it is necessary to remove the battery from the vehicle to charge it, always remove the grounded terminal from the battery first. Make sure all accessories in the vehicle are turned off in order to prevent an arc.
- Be sure the area around the battery is well-ventilated while the battery is being charged. Using a piece of cardboard or other non-metallic material can be used to dissipate gas.
- Clean the battery terminals. Avoid corrosion from coming into contact with your eyes.
- Add distilled water to each cell until the battery acid reaches the level specified by the manufacturer. This helps purge excessive gas from the cells. Do not overfill. For a battery without cell caps, carefully follow the manufacturer's instructions.
- Study all the manufacturer's specific precautions such as removing or not removing cell caps while charging and recommended charging rates.
- Determine the battery voltage by referring to the car's manual and make sure it matches the battery charger's output rating.
5. Positioning the charger
- Position the charger as far away from the battery as the DC cables permit.
- Never place the charger directly above or below the battery being charged. Gases or fluid from the battery will corrode and damage the charger.
- Never allow battery acid to drip on the charger when filling the battery.
- Do not operate the charger in a closed-in area or in an area with restricted ventilation.
- Do not put the battery on top of the charger.
6. Connecting the charger
Only connect or disconnect the DC-output clips after setting the charger switches to "off" and removing the AC cord from the electric outlet. Never allow the clips to touch each other.
a. Follow these steps when the battery is installed in a vehicle:
A spark near the battery may cause battery explosion. To reduce the risk of a spark near the battery:
- position the AC and DC cords so they cannot be damaged by the hood, a door or a moving engine part.
- stay clear of fan blades, belts, pulleys, and other parts that can cause personal injuries.
- check the polarity of the battery posts. A positive (pos, p+) battery post usually has a larger diameter than the negative (neg., n-) post.
-
determine which battery post is connected to the chassis (in other words, which battery post is grounded). If the negative post is grounded (as in most vehicles), see item 5. If the positive post is grounded, see item 6.
-
for a negative-grounded vehicle, connect the positive (red) clip from the battery charger to the positive ungrounded post of the battery first. Then connect the negative (black) clip to the vehicle chassis of the engine block but stay clear of the battery and fuel line. Do not connect the clip to the carburettor, fuel lines or any sheet metal parts. Connect it to a heavy gauge metal part of the frame or engine block.
-
for a positive-grounded vehicle, connect the negative (black) clip from the battery charger to the negative (neg, n.-) ungrounded post of the battery first. Connect the positive (red) clip to the vehicle chassis or engine block but stay clear of the battery and fuel line. Do not connect the clip to the carburettor, fuel lines or any sheet metal parts. Connect it to a heavy gauge metal part of the frame or engine block.
-
connect the charger to an electric outlet with the supplied power cord.
-
when disconnecting the charger, disconnect the AC cord, remove the clip from the vehicle chassis and then remove the clip from the battery terminal.
b. Follow these steps when the battery is outside the vehicle:
A spark near the battery may cause battery explosion. To reduce the risk of a spark near the battery:
- check the polarity of the battery posts. A positive (pos, p+) battery post usually has a larger diameter than the negative (neg., n-) post.
- connect an insulated battery output cable of at least 1.8m and 0.75mm ^3 from the charger to the negative (neg n.-) battery post.
- connect the positive (red) charger clip to the positive (pos, p.+) post of the battery.
- hold the free end of the cable as far away from battery as possible, then connect the negative (black) charger clip to the free end of the cable.
- do not face the battery when making the final connection.
- connect the charger to an electric outlet with the supplied power cord.
- when disconnecting the charger, always proceed in reverse order of connection and sever the first connection while standing as far away from the battery as possible.
7. User instructions
a. Automatic monitoring
Your new battery charging system is completely automatic and can be left on whenever there is input power available. The charger output depends on the condition of the battery it is charging. When the battery is fully charged, the indicating light will turn green and the charger will automatically switch to storage charge mode and monitor and maintain the battery at full charge.
b. Cable connections
The battery charging system is equipped with two output leads, a red positive lead and a black negative lead. Only connect or disconnect the output leads before plugging into an AC power outlet.
For all battery types: connect the red positive (+) lead to the positive terminal of the battery. Connect the black negative lead (-) to the negative terminal of the battery.
If the charger is connected to a battery for long periods of time, check the water levels as directed by the battery manufacturer as to ensure they remain at the proper level.
ATTENTION: Your battery charging system has spark-free circuitry! The clips will not spark when making contact with each other. It will also not produce any voltage (when turned on) until it senses at least 3V from the battery. It must be connected to battery in order to start working.
The clip terminals must be connected to the battery with correct polarity to initiate output voltage. In other words, when you plug an AC power cord into a 230V power source, the output clips will not spark when making contact with each other.
The output clips must be connected to a battery to produce an output voltage.
If the charger is hooked up backwards, the red light will continue to flash which indicates that no charging has been initiated. The clips must be properly connected (polarity!) to start the charger (red to positive (+ to +) and black to negative (- to -)).
Never turn the device on and off within a few seconds. If this should happen, unplug the battery charger, wait a few minutes and then reconnect it to restart the charging cycle.
c. Charging time
$$ \begin{array}{c} \text {(BATTERY CAPACITY) / (CHARGING CURRENT) = HOURS} \ \text {or} \ \text {(AMP HOURS) / AMPS = HOURS} \end{array} $$
Suppose you have a 15 Amp/Hour battery, which is a fairly typical size for an automotive engine start type battery. Let's say you have a 1.25 Amp charger. A good charger will deliver close to 1.25 Amp for as long as it takes to completely recharge the battery to its full capacity. It is possible to calculate the charging time by dividing the two values:
e.g. 15 AMP HOURS divided by 1.25 AMPS = 12 HOURS
Some large capacity batteries may take up to 24 hours or even days to fully charge.
d. Dead battery
If your battery is completely dead (under 3V), the battery charger's circuitry will not start due to its internal safety circuit. The charger's internal safety circuit must detect more than 3V for the charger to be turned on. Otherwise, the charger is inoperable. In this case, both the red and the green indicator light are flashing at the same time, which means that the charge cycle has not been initiated. In order to be able to charge a completely dead battery, just fool the charger's circuitry by momentarily connecting the battery to a known good battery. This will trick the charger and start the charge cycle.
Note: Most 12V lead-acid batteries are likely to be defective if their voltage is below 9V.
e. 72-hour safety timer
A 72-hour safety timer will start working once the battery charger is turned on to protect the battery from overcharging. If the battery voltage does not reach the absorption level within 72 hours, the charger will automatically switch to float mode. In this case, both the green and red lights will burn steadily.
However, with marginal or defective batteries, the battery charging system will stop the charging process to prevent the marginal battery from overcharging.
If this happens, the green light will burn steadily whereas the red light will be flashing. Please have the battery checked.
f. Status indicator lights
If neither light is on or flashing, the battery charging system is not properly connected to the AC power source.
- The red light is flashing: the battery charging system is verifying the battery status prior to charging while it has AC power available and the battery charger's microprocessor is functioning properly.
- The red light is burning steadily: when the battery is properly connected, the red light will stop flashing and will burn steadily. The red light will remain on until the charging process is completed. When the red light is steadily burning, the charger is charging the battery. In order to properly charge the charger may remain in this mode for several hours or even days.
- The red light is burning steadily and the green light is flashing: the charging system detects that the battery has been charged to 80% of its total capacity. At this stage, the battery could be returned to service if absolutely necessary. However, it is recommended to complete the charging process.
- The green light is burning steadily: the charging process is complete and the battery can be returned to service.
8. Troubleshooting
| Indicator lights are not lit 1. no AC power available2. battery charger is defective | 1. ensure that AC power is available2. contact your local dealer for service | |
| Green indicator burns steadily at the beginning of the charging cycle | 1. battery is charged2. battery is defective3. battery charger is defective4. AC power was temporarily interrupted5. electrical connections between the charger and the battery may not be completely secured | 1. do nothing2. have battery checked3. contact your local dealer4. unplug the battery charger. Wait 1 minute and reconnect the charger.5. unplug the battery charger. Wait 1 minute and reconnect the charger. |
| Charger is charging but the green light is not lit | 1. battery is not fully charged yet2. battery is defective3. excessive load on battery during charge cycle4. battery charger is defective | 1. allow sufficient charging time2. have battery checked3. remove load from battery4. contact your local dealer |
| Both indicator lights are on at the same time | 1. battery capacity is not within the charger's range2. battery is defective or marginal | 1. a) use an appropriate chargerb) unplug the battery charger, wait 1 minute and then reconnect it.2. have the battery checked |
| Both indicator lights flash at the same time | 1. battery voltage is less than 3V and the battery charger will not start working | have the battery checked |
| The red light comes on when charging battery in float mode | 1. battery has an excessive current draw.2. battery may be defective | 1. remove battery from equipment2. have the battery checked |
| The green light burns steadily and the red light is flashing | 1. the 72-hour safety timer has expired. The battery is marginal. | 1. have the battery checked |
| The red light is on and the green light is flashing at the beginning of the charging cycle. | AC power has been interrupted or the battery charger has been turned on and off within a few seconds. | Unplug the battery charger. Wait 1 minute and reconnect it. |
9. Technical Data
Output VL0612 6V / 1.25A
VL1212 12V / 1.25A
Weight
1kg
Dimensions 93 x 82 x 105mm
Output cord length 190cm
The information in this manual is subject to change without prior notice.
VL0612 / VL1212 – VOLAUTOMATISCHE BATTERIJLADER VOOR LOODZUUR ACCU'S (6V / 12V)
1. Inleiding
$$ (C A P A C I D A D D E L A B A T E R I A) / (C O R R I E N T E D E C A R G A) = P E R I O D O $$
$$ (\text { HORAS AMP }) / \overset {\circ} {\text { AMP }} = \text { PERÍODO } $$
$$ (B A T T E R I E K A P A Z I T \ddot {A} T) / (L A D E S T R O M) = S T U N D E N $$
Velleman® Service and Quality Warranty
Velleman® has over 35 years of experience in the electronics world and distributes its products in more than 85 countries.
All our products fulfil strict quality requirements and legal stipulations in the EU. In order to ensure the quality, our products regularly go through an extra quality check, both by an internal quality department and by specialized external organisations. If, all precautionary measures notwithstanding, problems should occur, please make appeal to our warranty (see guarantee conditions).
General Warranty Conditions Concerning Consumer Products (for EU):
- All consumer products are subject to a 24-month warranty on production flaws and defective material as from the original date of purchase.
- Velleman® can decide to replace an article with an equivalent article, or to refund the retail value totally or partially when the complaint is valid and a free repair or replacement of the article is impossible, or if the expenses are out of proportion.
You will be delivered a replacing article or a refund at the value of 100% of the purchase price in case of a flaw occurred in the first year after the date of purchase and delivery, or a replacing article at 50% of the purchase price or a refund at the value of 50% of the retail value in case of a flaw occurred in the second year after the date of purchase and delivery.
• Not covered by warranty:
- all direct or indirect damage caused after delivery to the article (e.g. by oxidation, shocks, falls, dust, dirt, humidity...), and by the article, as well as its contents (e.g. data loss), compensation for loss of profits;
- frequently replaced consumable goods, parts or accessories such as batteries, lamps, rubber parts, drive belts... (unlimited list);
- flaws resulting from fire, water damage, lightning, accident, natural disaster, etc. ...;
- flaws caused deliberately, negligently or resulting from improper handling, negligent maintenance, abusive use or use contrary to the manufacturer's instructions; - damage caused by a commercial, professional or collective use of the article (the warranty validity will be reduced to six (6) months when the article is used professionally);
- damage resulting from an inappropriate packing and shipping of the article;
- all damage caused by modification, repair or alteration performed by a third party without written permission by Velleman®.
- Articles to be repaired must be delivered to your Velleman® dealer, solidly packed (preferably in the original packaging), and be completed with the original receipt of purchase and a clear flaw description.
- Hint: In order to save on cost and time, please reread the manual and check if the flaw is caused by obvious causes prior to presenting the article for repair. Note that returning a non-defective article can also involve handling costs.
• Repairs occurring after warranty expiration are subject to shipping costs.
• The above conditions are without prejudice to all commercial warranties.