
PCPSM 1031 - Food Processor PROFICOOK - Free user manual and instructions
Find the device manual for free PCPSM 1031 PROFICOOK in PDF.
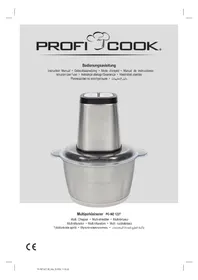
| Brand | ProfiCook |
| Model | PCPSM 1031 |
| Category | Food processor (pepper/salt mill) |
| Product type | Electric pepper and salt mill |
| Number of mills | 2 (pair) |
| Power supply | 4 AA / R6 batteries (1.5 V each, not included) |
| Net weight | 0.39 kg |
| Material | Not specified (likely plastic and stainless steel) |
| Grinding adjustment | Bottom wheel: turn for fine or coarse grind |
| Operation | Top switch, integrated LED lamp |
| Storage chamber capacity | Not specified (approx. 50 g) |
| Care and cleaning | Clean with a slightly damp cloth, do not immerse |
| Safety | Do not expose to heat, do not immerse, handle batteries with care |
| Batteries and environment | Remove batteries before disposal, take to collection point |
| Warranty | Not specified (typically 2 years) |
| Troubleshooting | Check housing assembly, replace batteries, unblock mechanism |
| Intended use | Private household use |
Frequently Asked Questions - PCPSM 1031 PROFICOOK
User questions about PCPSM 1031 PROFICOOK
0 question about this device. Answer the ones you know or ask your own.
Ask a new question about this device
Download the instructions for your Food Processor in PDF format for free! Find your manual PCPSM 1031 - PROFICOOK and take your electronic device back in hand. On this page are published all the documents necessary for the use of your device. PCPSM 1031 by PROFICOOK.
USER MANUAL PCPSM 1031 PROFICOOK
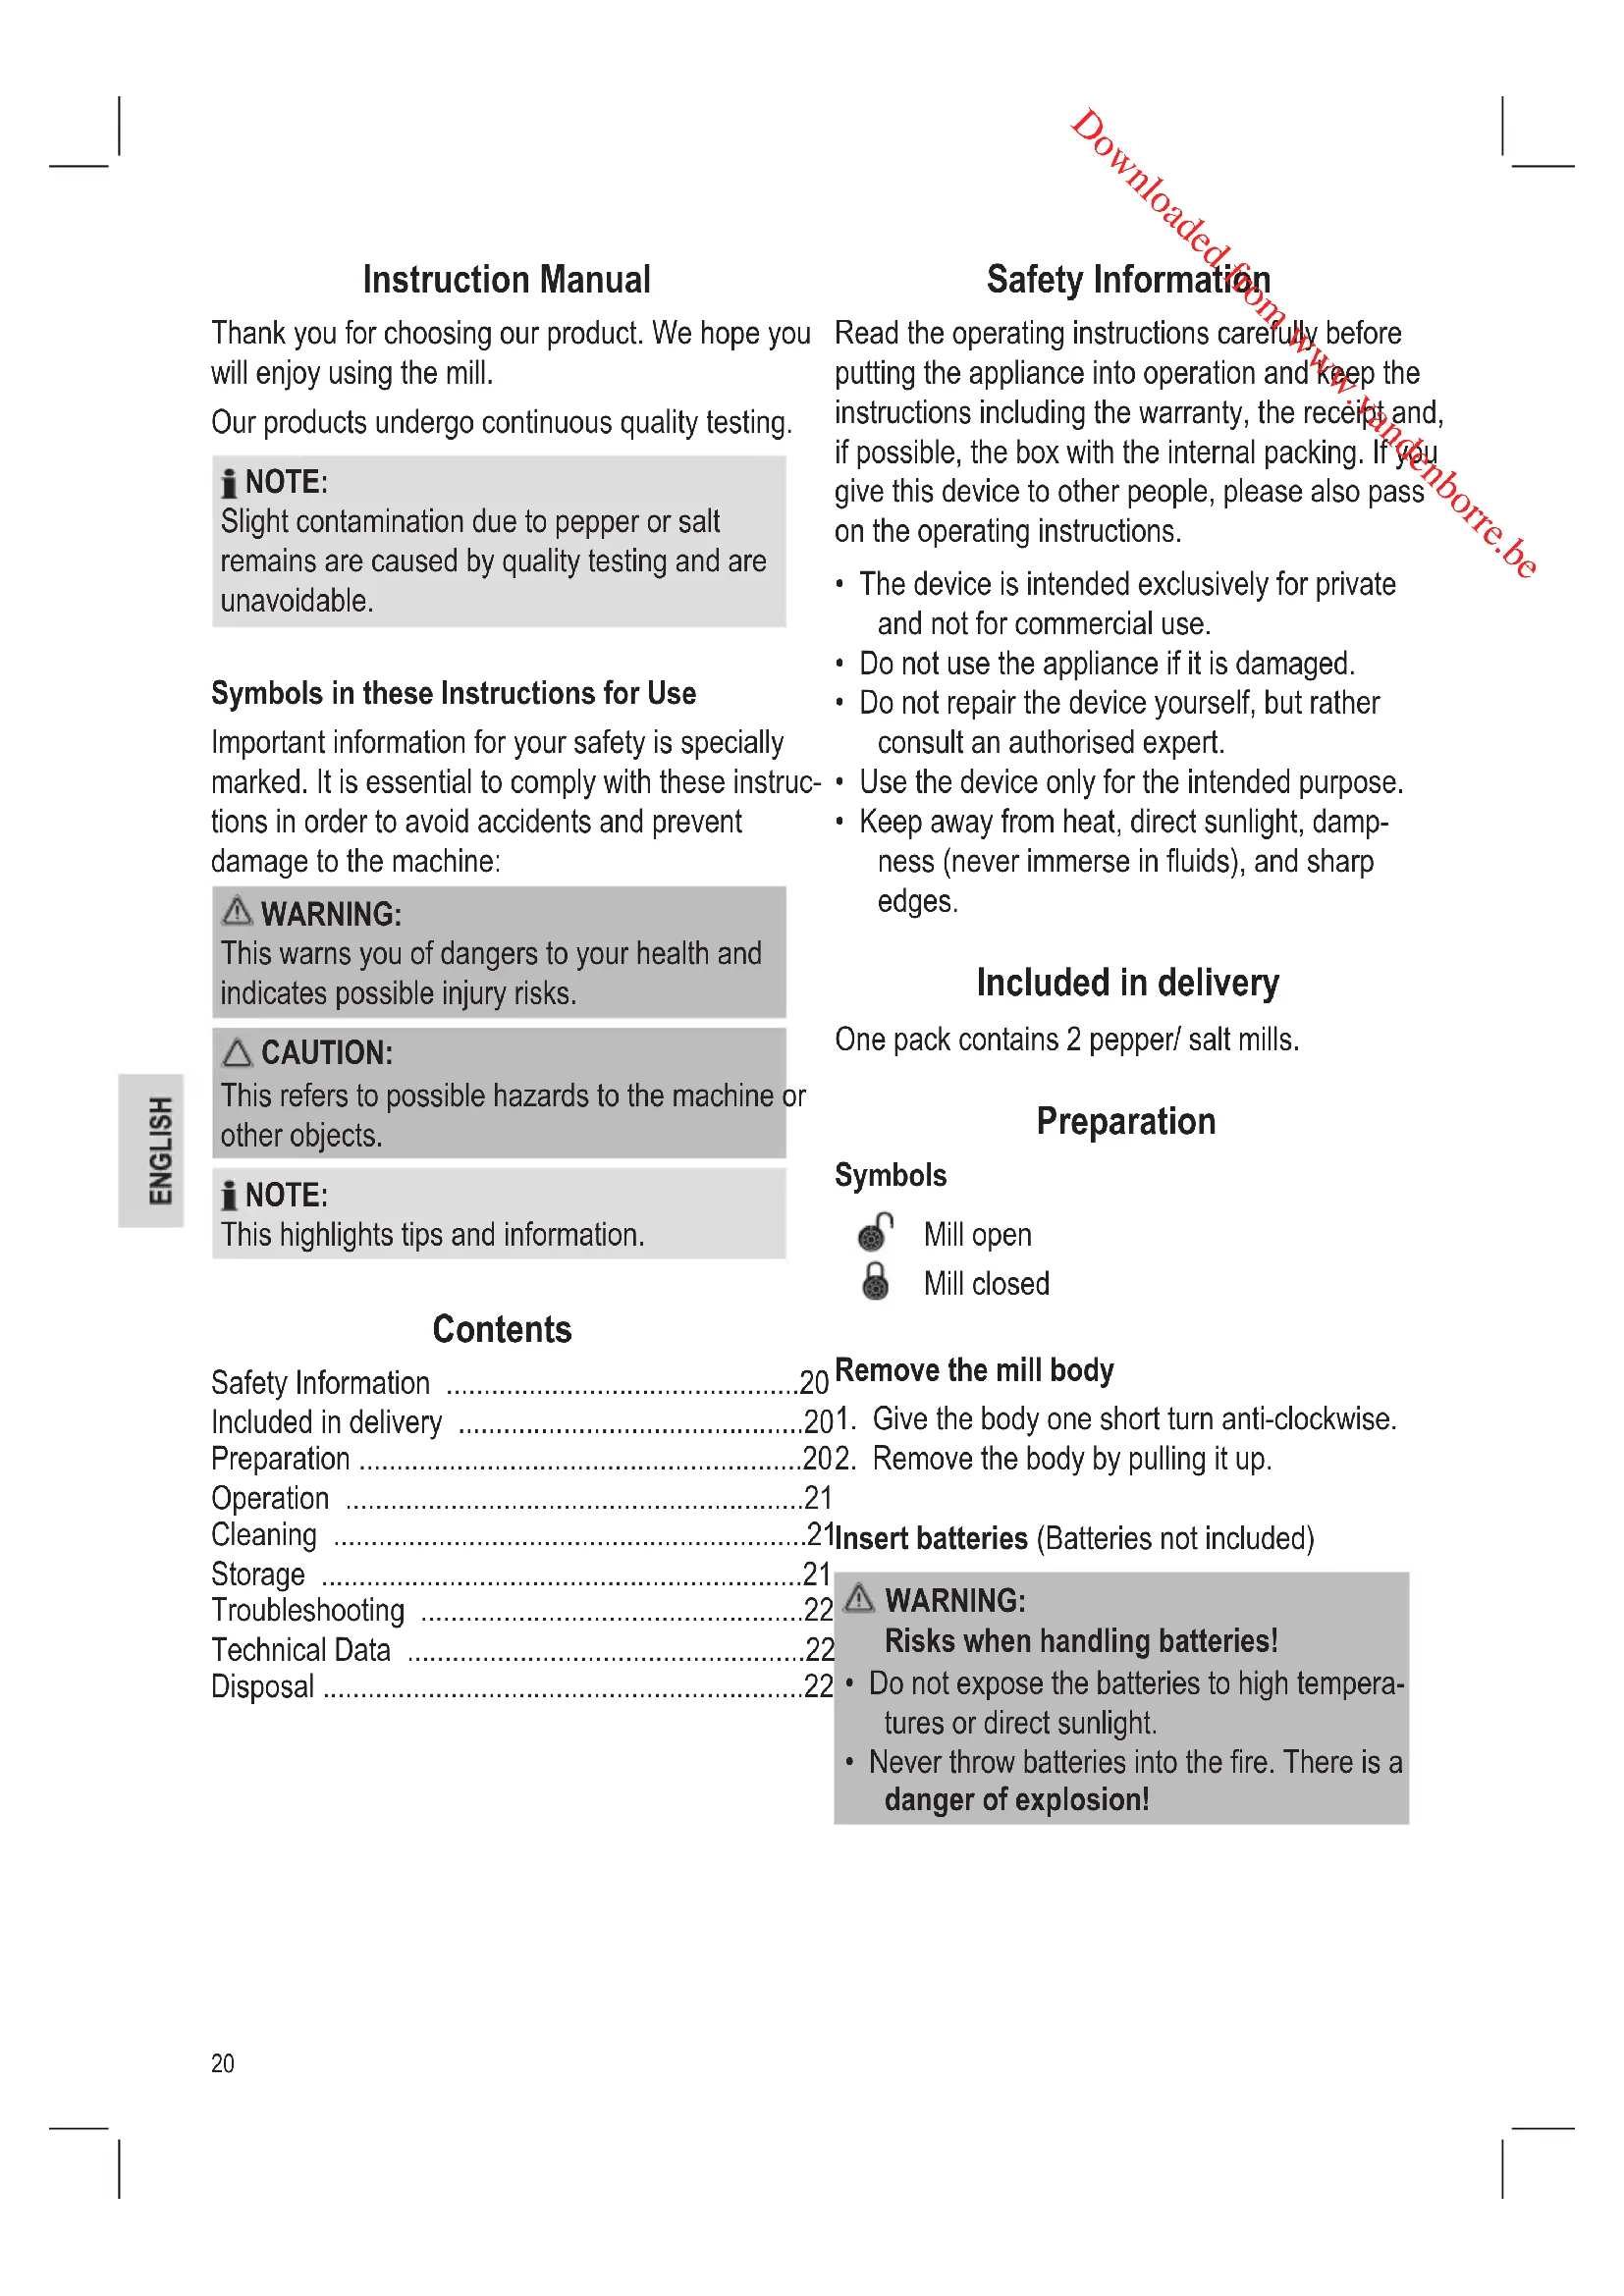
Thank you for choosing our product. We hope you will enjoy using the mill.
Our products undergo continuous quality testing.
NOTE:
Slight contamination due to pepper or salt remains are caused by quality testing and are unavoidable.
Symbols in these Instructions for Use
Important information for your safety is specially marked. It is essential to comply with these instructions in order to avoid accidents and prevent damage to the machine:
WARNING:
This warns you of dangers to your health and indicates possible injury risks.
CAUTION:
This refers to possible hazards to the machine or other objects.
NOTE:
This highlights tips and information.
Safety Information
Read the operating instructions carefully before putting the appliance into operation and keep the instructions including the warranty, the receipt and, if possible, the box with the internal packing. If you give this device to other people, please also pass on the operating instructions.
- The device is intended exclusively for private and not for commercial use.
- Do not use the appliance if it is damaged.
- Do not repair the device yourself, but rather consult an authorised expert.
- Use the device only for the intended purpose.
- Keep away from heat, direct sunlight, dampness (never immerse in fluids), and sharp edges.
Included in delivery
One pack contains 2 pepper/ salt mills.
Preparation
Symbols

Mill open
Mill closed
Contents
Safety Information 20
Included in delivery 20
Preparation 20
Operation 21
Cleaning 21
Storage 21
Troubleshooting 22
Technical Data 22
Disposal 22
Remove the mill body
- Give the body one short turn anti-clockwise.
- Remove the body by pulling it up.
Insert batteries (Batteries not included)
WARNING:
Risks when handling batteries!
- Do not expose the batteries to high temperatures or direct sunlight.
- Never throw batteries into the fire. There is a danger of explosion!

CAUTION:
- Different types or new and used batteries may not be used together.
-
Do not dispose of batteries with household waste. Take spent batteries to a dedicated collection point or to a dealer.
-
Pull the plastic sleeve from the battery compartment.
- Insert 4 identical type batteries of MIGNON/ AA/R6 type into the battery compartment. Observe the correct polarity of the batteries when inserting.
- Reattach the plastic sleeve to secure the batteries.
Fill with corns/grains

IOTE:
-
The grains can be poured in more easily using a funnel.
-
Separate the motor part from the storage chamber. Pull it out upwards.
- You can fill the storage chamber with pepper corns or salt grains.
- Put the motor part back onto the storage chamber.
8.1. Place the drive of the motor part onto the shaft in the storage chamber.
8.2. The contact pins need to sit precisely on the contact screws of the storage chamber so that the current can be transmitted to the lamp.
Close the housing
- On the body and the storage chamber you will find symbols.
9.1. Position the housing body so that the arrow points to the symbol on the storage container.
9.2. Give the housing body one short turn in a clockwise direction.
The housing is correctly locked when the arrow points to the symbol.
Adjust the grinding grade
-
Turn the wingnut on the bottom of the mill
-
clockwise, to grind the grain/corns finer.
- anti-clockwise to grind the grains/corns coarsely.
Operation
To grind the grains, press the switch on the top side of the mill. The lamp will light up.
Whilst not in use
If the unit is not used for long periods of time, remove the batteries to avoid "leakage" of battery acid.
Cleaning

CAUTION:
- Do not immerse the balance appliance in water: the electronic components can be damaged.
- Do not use a wire brush or any abrasive items.
-
Do not use any acidic or abrasive detergents.
-
Clean the device with a slightly moist cloth.
Make sure that no humidity or waters seeps into the device! - Dry the device well after cleaning with a dry and soft cloth.
Storage
- Clean the device as described and allow to dry completely.
We recommend that you keep the appliance in the original packaging if the appliance will be not used for long periods.
Always keep the appliance out of the reach of children in a dry, well ventilated place.
Troubleshooting
Unit does not work
Possible cause:
The body of the mill is assembled incorrectly.
Action:
Check that the body is assembled correctly:
- The drive of the motor part needs to sit precisely on the shaft in the storage chamber.
- The contact pins need to be placed precisely on the contact screws on the storage chamber.
- The arrow on the housing body must point to the symbol.
Possible cause:
The batteries are spent.
Action:
Change the batteries. Use 4 new MIGNON/AA/R6 type batteries.
Blocked grinding mechanism
- Turn the mill with the wingnut facing upwards.
- Unscrew the wingnut slightly by turning it anticlockwise.
- Push the switch until the grinder disengages.
- Adjust the desired grinding grade.
Technical Data
Model: PC-PSM 1031
Power supply: ....4 batteries 1.5 V Type "AA" / "R6"
Net weight: 0.39 kg
The right to make technical and design modifications in the course of continuous product development remains reserved.
This device has been tested according to all relevant current CE guidelines, such as electromagnetic compatibility and low voltage directives, and has been constructed in accordance with the latest safety regulations.
Disposal
Meaning of the "Wheelie Bin" Symbol
Remove the batteries before disposing of the appliance.
Take care of our environment, do not dispose of electrical appliances via the household waste.
Dispose of obsolete or defective electrical appliances via municipal collection points.
Please help to avoid potential environmental and health impacts through improper waste disposal.
You contribute to recycling and other forms of utilization of old electric and electronic appliances.
Your municipality provides you with information about collecting points.
Instrukcje obslugi
CTC Clatronic Sp. z o.o
He iDaaBae 6aTapeKn BnNBy BnCOKoI TemepaTyPi a6o npAMM COHcHIM IpOMHHM.
Hikonn He BnndaTe 6aTapeKy B orOhb. IcHye He6e3neKa Bn6yxy!
△YBAGA.
-БатAPEйкп pi3HOrO TUny a6o HOBI i Bxke 3aCTOCOBaHIбатAPEйкн He MoXHa BnKOpncTOByBaTn pa3OM.
- BaTapeiKn He MoXHa BkNdaTn B No6yTOBe cmITr. Ipocmo BiIaTn BkOpncTaHi 6batapeKn Ha cneiaJIbHi nyHKTu 36opy He6e3neuHx BiXoDIB a60 nobepHyTN B mara3H, de Bn Kynnn npnaJ.
- BntaHITb nIacTKOBy o6oMy 3 6aTapeHoro BiDiny.
- BCTaBTe 4 oHaKoBi 6aTapeeKn Tnny MIGNON/AA/R6 y BiDilok dJa 6aTapeeK. 3BepHItb yBarHy ha npabInbHy nonpHiCt b 6aTapeeK.
- BctaHOBITb 06Omy Ha Micse, 06 3akpInnTbatapeuKn.
3acntte 3epHa nepuo a6o cilb
IINPIMITKA.
-
3ephaIerue 3acnnatnYepe3 NiKy.
-
Biiinitb 6nok npnbody Bi kamepn BiHaKoNHyBaIbHOi kamepn. BntarHITb II Doropn.
- HakoNHyBaIbHy Kamepy MoXHa 3aNoBHTn nepuem-ropoWkOM qn ciJIIO.
- BctaHOBiB 6IOK npuBOy Ha3aHa Ha HAKONn- yBaJIbHy KaMepy.
8.1. BcTaHOBITb npuBiHy deTaNb 6nOky npuBODy Ha BaN y HAKONNUyBaNbHi Kamepi.
8.2.CtpnXHeBi KOHTaKTMaHOb CTaTH TOUHO Ha KOHTaKTHi TBHNTn HAKONHyBaJIbHOI KamepN, 06 Ha NaMny MOrna NoCTynATn Hanpyra.
3akpnTe Kopnyc
- Ha kopnyci ta Ha BiiDinky 36epirHnE no3Ha-
9.1. Iepemictitb Kopnyc TaKIM YHOM; 6 cTpiKa Bka3yBaJa Ha 3HaOHa Ha KaNHyBaJIbHi KaMePI.
9.2. Tpoxn noBepHitb Kopnyc 3a roDHHNKOBIO CTPIIKOIO.
Kopnyc npabnblho 3akpinneHn, konn cTpiKa Bka3ye Ha 3HaO
HanaTuTe cTyinb po3MeIIOBaHHa
YcyHeHH HeCnpaBHOCTe
YcyHeHH HeCnpaBHOcte
Moxnuei npuyuHu:
Kopnyc MInHa He BCTaHOBNeHO HaJeXHM YHOM.
i:
IpebeipTe npabunbHicTh BCTaHOBJIeHHaKOpnyca:
-Привідна Deетаь 6лOKу пивody Mae 6уТи TOчно BCTAHOBJIeHa Ha BaJy B HAKONИЧУВаьHii Kamepi.
- CtpnKHeBI KOHTaKTN MaOTb nonactu ToUHO Ha KOHTaKTHi TBnHTN B HAKONuYBaJIbHi Kamepi.
- Ctrpinka Ha Kopnyci MaE Bka3yBaTN Ha 3HaQOK
Moxnuei npuyuHu:
Pozpndnncs6atapeyn.
i:
3amihb 6batapeuKn. BnKOpncTaIte 4 HOBx 6batapeok Tny MIGNON/AA/R6.
3a6JIOKOBaHm MExaH3M po3MeJIIOBaHHA
- Пееверніт b минок raико-баршkom догор.
2.ПослбTe raиу-барok,оберТIoUчп II npOTn roINHHIOBOI cTpiKN. - Hatachitb Bmikau, 06 MInHok po36nokyBabcra.
- HanaTuYTe CTyniHb po3MeJIIOBaHHa
Texhihi xapaKTepeNCTnK
Mодь: PC-PSM 1031
YcTaPHeHHe HncnpaBHOCTeI 35
TexHHueckne daHHbIe 35
He noBepraTe 6aTapeKn BO3deIcTBnHO BbICOKnx TempeaTpN INN pRmBX COJIHeuHbIX Lyuei.
HkoIa He 6pocaiTe 6atapeKn B OOrHb. Onacnoctb B3pbiBa!
BHIMAHNE:
Pa3nHbIe Tnbl6aTapeek, a TaKKe HOBbie n CTapbIe 6aTapeKn HeJIb3r NcNoJb3OBaTb BMeCTe.
He BbIbpaBbAaTe 6bTaapeKn BmecTe C pyrIMN 6bITOBbIMN OTXdAMN. CdaTne INX B CpeuaJbHbI NyHKT yTNIN3aUN INN CBOEmy npOaBcy.
- Notaryte Ппаковую Крышky Батуреного OTceka.
- BCTaBbTe 4 OdnHaKOBbIe 6aTapeKn Tnna MIGNON/AA/R6 B 6aTapeHbI OtceK. Ppn BCTaBKe 6aTapeek co6liOdaIte NOJpHocTb.
- YctaHOBtTe o6paTHo pINaCTIKOByIO KpbIiKy IINr OIKCaun 6aTaapeek.
HanoHnTe kamepy KpncTannm/ropoHHaM
ПОНМЕЧАЙ:
KpnctaJIbI cOnn Ierue 3acblnTaB C nCNObl- 3OBaHHeM BOpOHKn.
- OTdJInte MOTOpHyO uactb npnbopa ot KamepbI dIa IINuEBOrO npoDyKta.AKKypaTHo NOTAHTE DvIXKeHnEM BBePx.
- Bbl moxete hanoHnHTb OTcEK IJI npOyKTOB rooHNHAMn nepca nI KpNCTaIIAMn COJI.
- YctaHOBHTe Ha3aM MOTOp Ha KaMepy dIpy NIIuEBOrO npOdykTa.
8.1. YcTaHOBInTe npINBOd MOtOpHoi qactn Ha BaI B Kamepe IJRA NIIeBOrO pOdyKTA.
8.2.KoHTaKTHbIe WbIpbkN DOnJXHbI paC
NOnaTbCToUHOHaKoHTaKTbIX6OJTAX NIIeBOI KAMEpbI, YTObI ToK MoN OCTynatb Ha JAmny.
3akpoTe koxyx
- Ha kopnyce n kamepe yctpoiCTBa ectb cIMBONbl
9.1. PacnoJoxnTe Kopnyc TaK, YTo6bI CTpeJIka yKa3bIBaJa Ha CmBOJHa KaMepe InpOdykTa.
9.2. HEmHoro noBepHnTe Kopnyc no yacoboi CTpeJIke.
Kopnyc HaneJxHo 3a6nokpoBaH, KOrJa cTpeIka yKa3bIBaet Ha CNMBOJI.
OtperynpyuTe ctenenb nomona
-
NobepeHnte 6apaKOByo raKy cH3y MeIbHNuI
-
IocboCpeKe, TObI nepMaBbBaTb Kpynuc6oJee Meiko.
- PpOtnB YacOBoN CTpeJKN, YTO6bI rpy6o nepemalbIBaTb KpynUcbl.
Pa6ota
IIN3MeIbYeHnRApoWka/COJI,HaXMMTe Ha KHONky CBepxMyeIbHNuI.JaMNoUka 3aROpNTcra.
Ecn yctpoIcTBo He nCnOJIb3yeTc
Ecni yctpoiCTBO He nCNOJb3yeTcA DnIteJIbHoe BpeM, n3BLeKITE n3 Hero 6aTaapeKn, TAK KAK n3 6aTaapeeK MoKeT BblTeKaTb KNCIoTA.
UncTka
BHIMAHNE:
He norpykaTe yctpoNCTBO B BOy: 3TO MoKxET NOBpeNTb 3JKeKTPOHHbIe KOMNoHEHTbl.
He nCnoJb3yIte npoBOIoHnyU TeKu nn pyrue abpa3nBhble ppeMeTbl.
He nCnoJb3yIte kaKne-Ni6o KnCNoTHbIe nn a6pa3nBHbIe MOIOUne cpeIcTba.
- YnCTHTe yCTPOIcTBO C NOMOuIcJIeKb BnaJxHOI TKAH.N.Y6eINTEcB, YTO BNaRa IIN BOda He nonaNA BHYTpB yCTPOIcTBA!
- Bbtpnte yctpoiCTBO nocIe uNCTKN C NOMO- ⅢbIO cyXoMraKoTkaHn.
XpaHeHne
-ПочиТе yCTpoIcTBO B COOTBETCTBUN C OINcaHHeM,ИДaITe eMy NOJIHOCTbIO BBICOXHyTb.
- PekomeHnyETcXpaHHTb yCTpOietBO B erO opnHaIbHOYnaKOBKe,ecnO OHO He NCIOJIb3yETc DINTeJIbHOE BPEM.
Bcerda xpaHnTe yCTPOIcTBO B cyXOM, XopoIoBBeHTUNpyEMOM MeCTe, HeIOCTUINOMДЯTei.
YcTpaHHe HEnCnPaBHOCTeI
YcTpaHHe HEnCnpaBHOCTe
Bo3MOXnHa npuUHa:
Kopnyc MeIbHnIbI co6paH HenpaBnJIbHO.
Deucmeue:
Y6eIITecb, YTO KOpNyc cO6paH npaBnJIbHo:
- Пивов моторнoi части hyхно установпь точно на вал отсека дая порукta.
KoHTaKTbIe WbIPbKN DoJXHbI paCNoJIaratbCra ToHO Ha KOHTaKTbIX 6OITax NnueBOKamepbl - CtrpeIka Ha Kopnyce MeIbHnUcbI DOJIxHa yKa3bIBaTb Ha CUMBOJ
Bo3MoXnHa npuUna:
Pa3paDnInscb 6aTapeiKu.
Deucmeue:
3aMeHnTe 6aTapeKn. NcNoJIb3yIte 4 HOBbIX 6aTapeek Tuna MIGNON/AA/R6.
3a6nokpoBaHHbI nepemaJIbBaIOUm MexaHN3M
1.ПовернITE Meльну баразкову ratko, CMOTpueB VBepx.
2. Otnyctnte HemHoro 6apaKoByo raKy, no BepHyB ee npOTnB YacBOB cTpeJKN.
3. KMITEHa KhoNky, noka n3MeIbYnteJIb He OTCOeDHHITcR.
4. YctahOBInTe JKeJaEmyIO CTeNeHb NOMOJa.
TexHnueckne daHHbIe
Modenb: .PC-PSM 1031
3JIeKtpoNTaHHe: 46aTapeiKn1,5B,TnA"/R6" Bec HETTO: .0,39Kr
CoxpaheNo npaBo Ha TexHnueckne I KOHCTpyKUoHHbIe N3MeHeHnB paMkax pOdoJkaHOuSeiCpa3pa60TKn npOdykTa.
3TO n3deneHne npoIIO BCE Heo6xOIMbIe N aKtyaJIbHbIe npOBepKn, npEaIncAHbIe DnpeKTHBOI CE, K npiM. Ha 3NeKtpomarHTHyIO COBMECTUMOCTB I COOTBeTCTBNE Tpe6oBaHnM K Hn3KOBoJbTHOI TEXHKe, OHO 6blIO TaKKe CkOHCTpyuPobAoHO I NOcTpoEHO C yueTeOM NocJeDHX Tpe6oBaHn IO TEXHKe 6e3OnacHOCTN.
Jaiil
A
21 × 2 + 2 + 1 = 7
4 4
.MIGNON/AA/R6
aagaae aac
1
Jc alil 1500
ac w_1
aiinboll 1aii gai liaiol lbiwai .3
a ball a ball a ball 4
aai 1
PC-PSM 1031
S BCD = S COD + S BDO - S BOC
4“AA”/“R6"1.5
0.39 1
a a a a a a a a a a a a a a a
iill
CE aaiiaaiei jgi jgll 1
gill gill
iiall llllal 128 laaai ai Laiciaiaill
#
jglal jiljll jbiol jnbl
.
p1i 1
jajalgsa jol jai slalw
y
#
y = - ( x - 2) ^2 + 9 = - x^2 + 4x + 5
alai as jil g sio las jie
1 11111111111111111111111
a#
JSo JIbJIgIoo JcIaI Jglal
a1 = 23,an + 1 = an - an - 1
LgXgIgIbSlaIa
Jae 2 o
Jai
a aae
c = x/1
a a a a a a a a a a a a a a a a a a a a
.
21 ≤ y_1
j
a aie aie ball

aolizaoia ball

aiaeaai j!
elull 1
a. a. 2
()
1 = 2
y
y
Julll Juaill gia
Jy
L
aaiy jaii y
Ji 1
:
aal lalall lal y bll
Aii jSoy jol gog oall jaiia aaii
1
aaii iaii iaii iaii
1 = 2
a. iLxU xu jiuill iaiuo jbiuo 2g s g
4
i 1
(3) x = 1 y = 2 .
:
cuiall jaiill
#
38
38 1
38 120
37
37
37
37
36
Downloaded from www.vandenbore.be
GARANTIE-KARTE
Garantiebewijs · Carte de garantie


- NOTE:
- Symbols in these Instructions for Use
- WARNING:
- CAUTION:
- Safety Information
- Included in delivery
- Preparation
- Symbols
- Contents
- Remove the mill body
- Fill with corns/grains
- IOTE:
- Close the housing
- Adjust the grinding grade
- Operation
- Whilst not in use
- Cleaning
- Storage
- Troubleshooting
- Unit does not work
- Blocked grinding mechanism
- Technical Data
- Meaning of the "Wheelie Bin" Symbol
- Instrukcje obslugi
- △YBAGA.
- 3acntte 3epHa nepuo a6o cilb
- IINPIMITKA.
- 3akpnTe Kopnyc
- HanaTuTe cTyinb po3MeIIOBaHHa
- YcyHeHH HeCnpaBHOCTe
- 3a6JIOKOBaHm MExaH3M po3MeJIIOBaHHA
- Texhihi xapaKTepeNCTnK
- BHIMAHNE:
- HanoHnTe kamepy KpncTannm/ropoHHaM
- ПОНМЕЧАЙ:
- 3akpoTe koxyx
- OtperynpyuTe ctenenb nomona
- Pa6ota
- Ecn yctpoIcTBo He nCnOJIb3yeTc
- UncTka
- XpaHeHne
- YcTpaHHe HEnCnPaBHOCTeI
- YcTpaHHe HEnCnpaBHOCTe
- 3a6nokpoBaHHbI nepemaJIbBaIOUm MexaHN3M
- TexHnueckne daHHbIe
- #
- y = - ( x - 2) 2 + 9 = - x2 + 4x + 5
- LgXgIgIbSlaIa
- aiaeaai j!
- L
- 1
- GARANTIE-KARTE
Brand : PROFICOOK
Model : PCPSM 1031
Category : Food Processor