
PixDoc - Scanner EASYPIX - Free user manual and instructions
Find the device manual for free PixDoc EASYPIX in PDF.
| Product type | Portable document scanner |
| Resolution | 300 x 300 dpi (low) / 600 x 600 dpi (high) |
| Max scan width | 210 mm (A4 size) |
| Max scan length | 300 dpi: 1270 mm (50 in); 600 dpi: 635 mm (25 in) |
| Scan speed | 6 seconds per page (all modes) |
| File format | JPEG |
| External memory | MicroSD card (up to 32 GB, not included) |
| Power supply | 4 AA alkaline batteries or USB power adapter (included) |
| Display | Scanning status LCD |
| Interface | USB 2.0 high speed |
| Auto power off | 3 minutes of inactivity |
| System compatibility | Windows 7/Vista/XP and Mac OS 10.4 or later (no driver required) |
| Scan functions | Color / Monochrome, 300 / 600 dpi |
| Settings | Time and date, card formatting, effect, DPI |
| Sensor cleaning | Cleaning sheet and card included |
| Sensor type | A4 color contact image sensor |
| Number of sensors | 5136 pixels (1st ~ 5104 pixels available) |
| Estimated battery life | Variable, depending on usage (use new AA alkaline batteries) |
Frequently Asked Questions - PixDoc EASYPIX
User questions about PixDoc EASYPIX
0 question about this device. Answer the ones you know or ask your own.
Ask a new question about this device
Download the instructions for your Scanner in PDF format for free! Find your manual PixDoc - EASYPIX and take your electronic device back in hand. On this page are published all the documents necessary for the use of your device. PixDoc by EASYPIX.
USER MANUAL PixDoc EASYPIX
Max scanning size---LTR / A4
Color / Monochrome (Mono) scan selection
600/300 dpi scan selection
Direct save.JPG file to MicroSD card
Support MicroSD card up to 32GB
Driver free to download for Windows 7 / Vista / XP and
Mac OS10.4 or above (direct plug-in, driver installation not required)
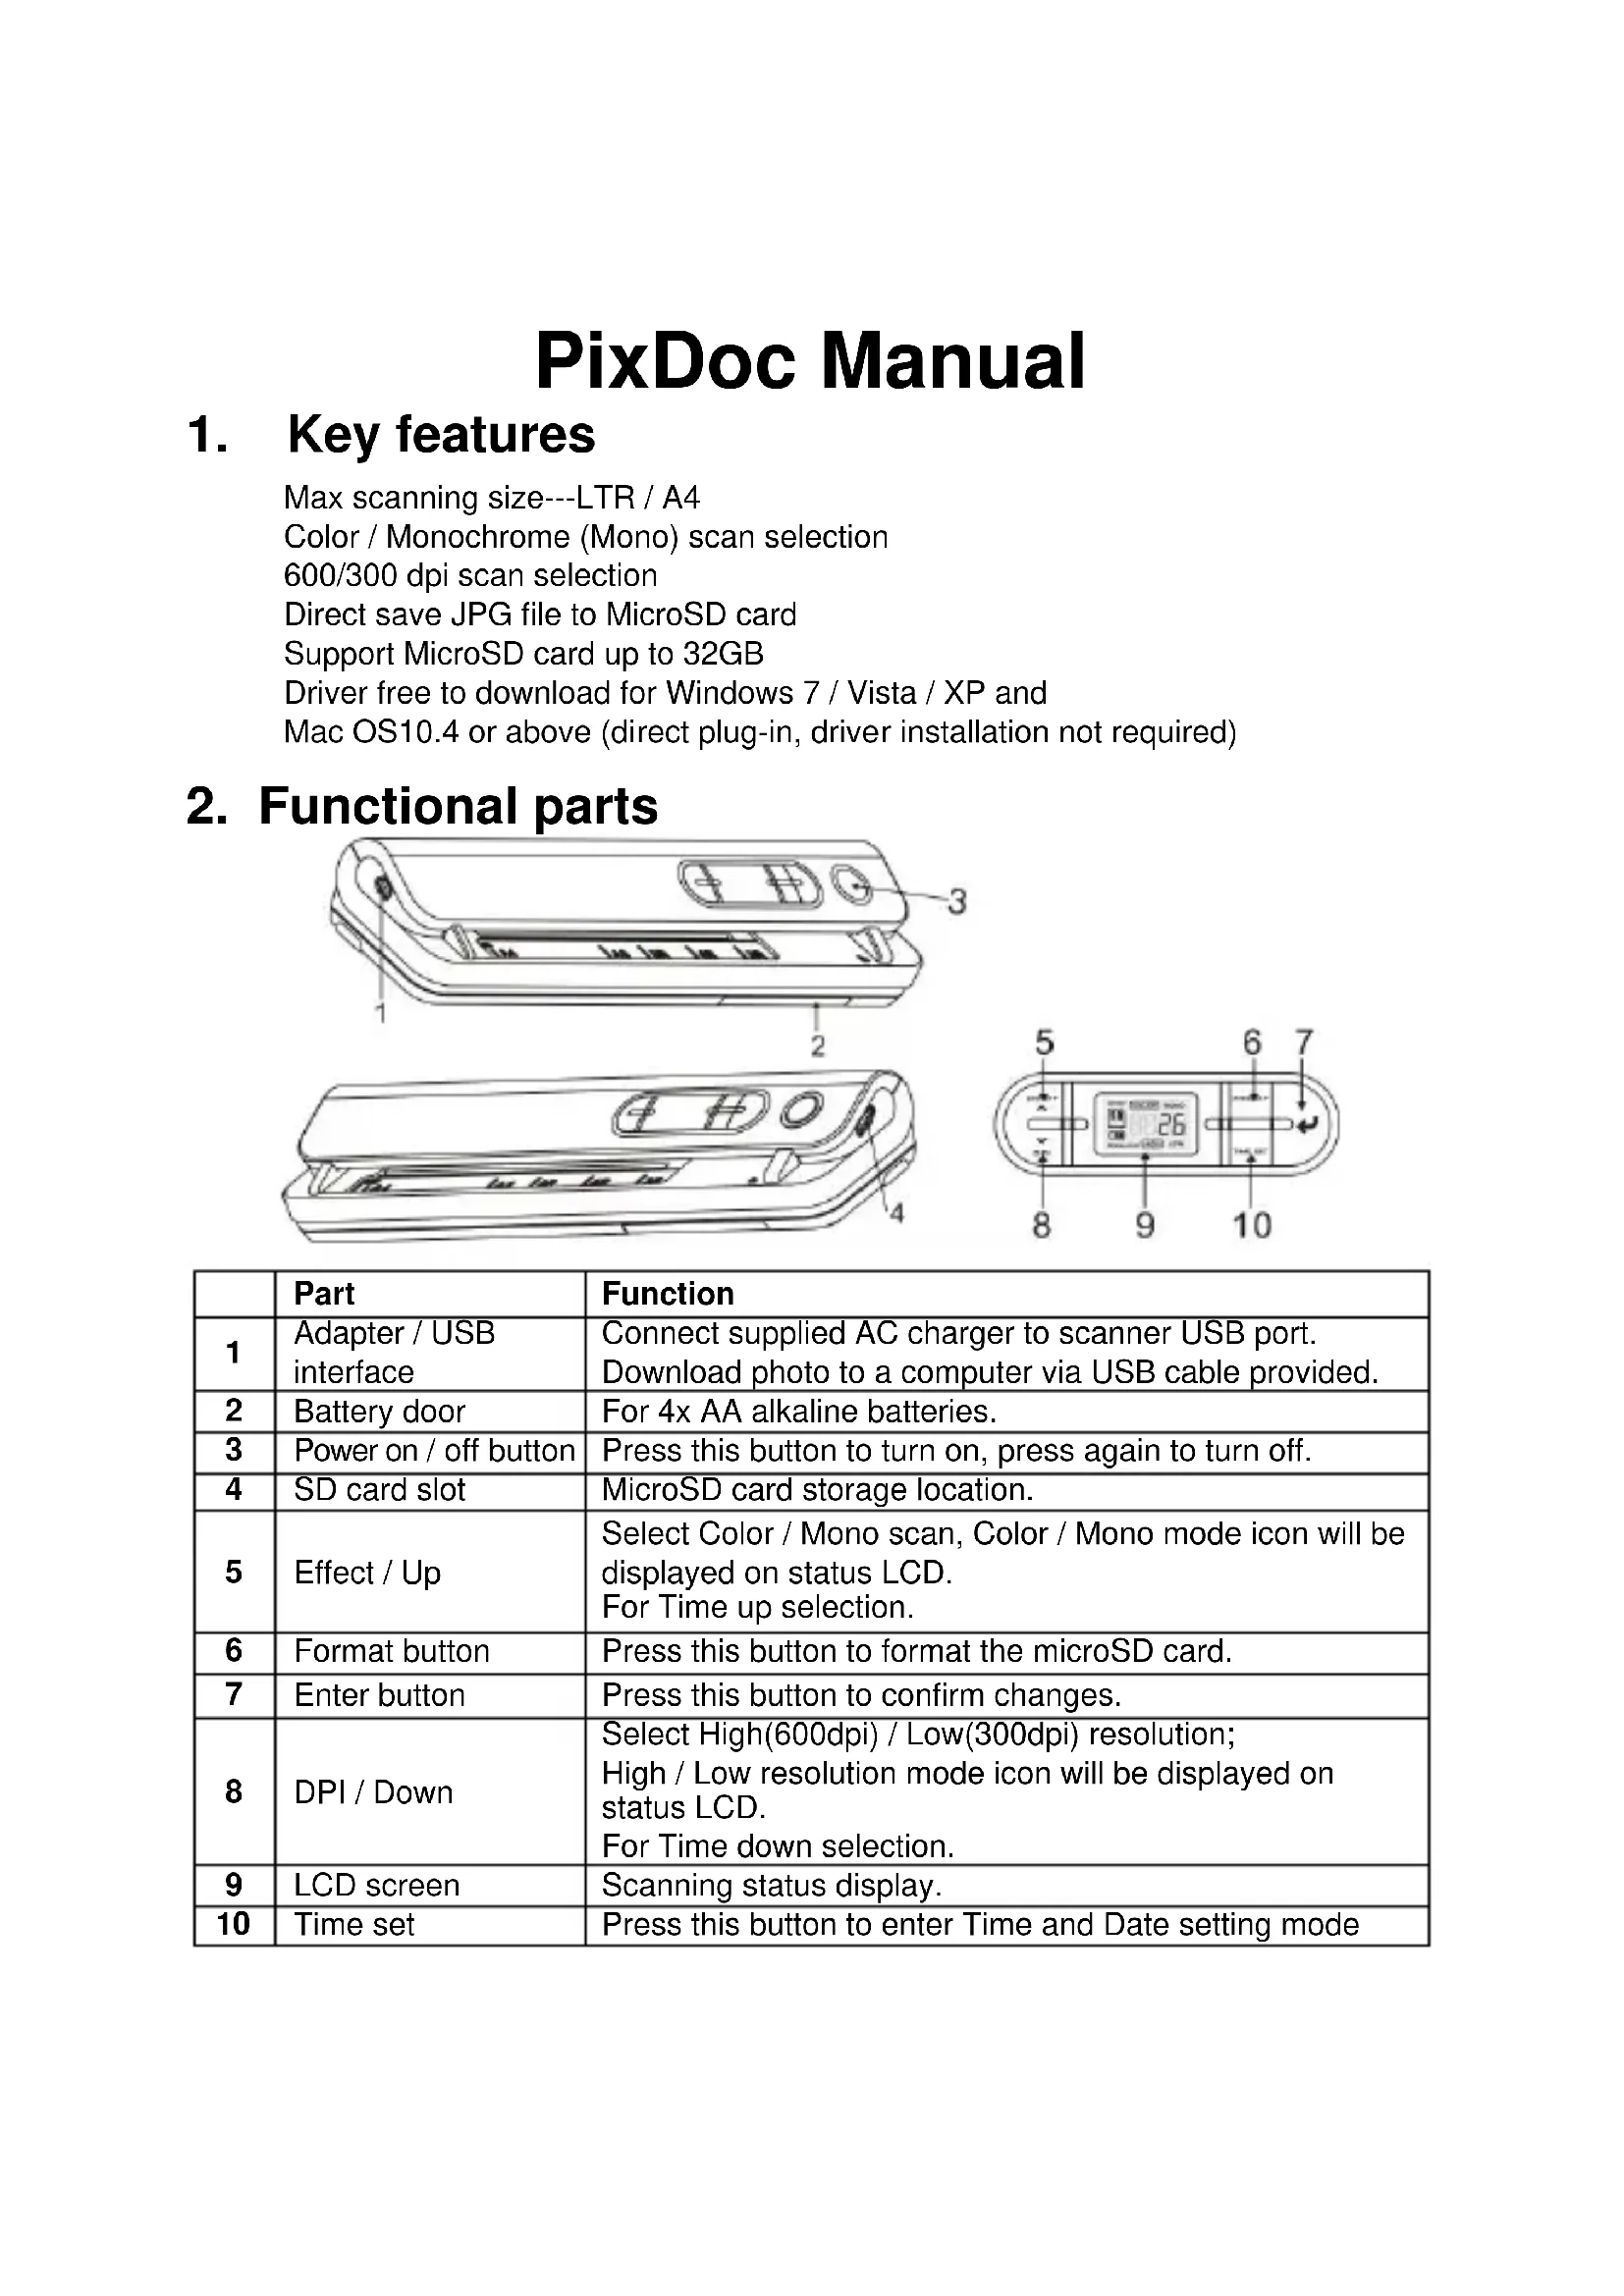
2. Functional parts
| Part | Function | |
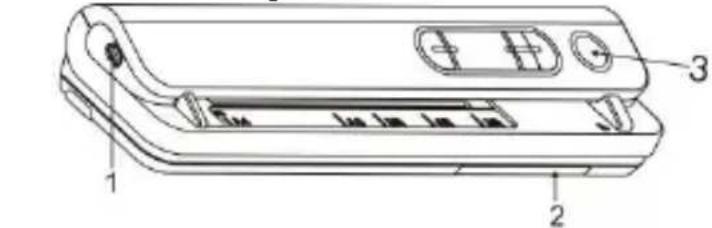
| 1 | Adapter / USB interface | Connect supplied AC charger to scanner USB port. Download photo to a computer via USB cable provided. |
| 2 | Battery door | For 4x AA alkaline batteries. |
| 3 | Power on / off button | Press this button to turn on, press again to turn off. |
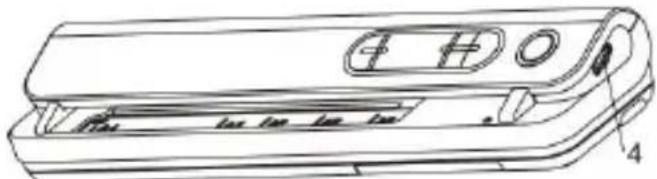
| 4 | SD card slot | MicroSD card storage location. |
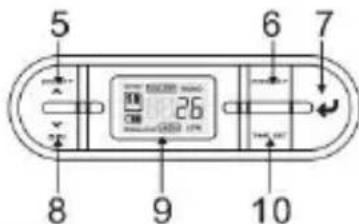
| 5 | Effect / Up | Select Color / Mono scan, Color / Mono mode icon will be displayed on status LCD. For Time up selection. |
| 6 | Format button | Press this button to format the microSD card. |
| 7 | Enter button | Press this button to confirm changes. |
| 8 | DPI / Down | Select High(600dpi) / Low(300dpi) resolution; High / Low resolution mode icon will be displayed on status LCD. For Time down selection. |
| 9 | LCD screen | Scanning status display. |
| 10 | Time set | Press this button to enter Time and Date setting mode |
3. Explanation of the status icons
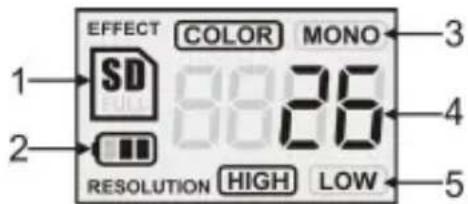
| Item | Function | Description |
| 1 | SD card indicator | SD Photos will be stored in microSD card |
| 2 | Battery indicator | Battery is full Empty battery |
| 3 | Effect indicator | Color or Mono |
| 4 | Counting indicator | Show scanned files in microSD card |
| 5 | Selected resolution | High:600 dpi / Low:300 dpi |
4. Using the scanner
4.1 Installing the battery
- Open the battery door.
- Insert 4x AA alkaline batteries into the battery compartment.
- Turn on the scanner by pressing the [POWER] button.

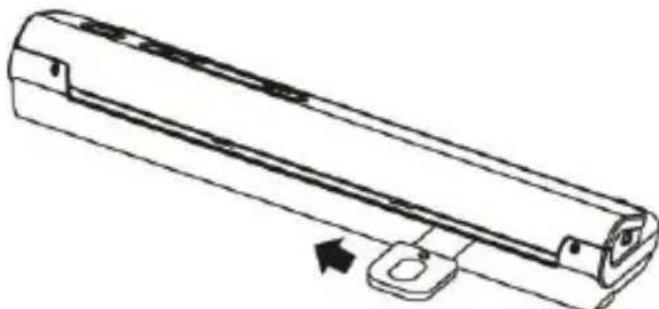
4.2 Inserting a microSD memory card (not included)
You must insert a microSD Card (not supplied) to record and store your pictures.Inserting the microSD memory card:
- Turn OFF the scanner.
- Insert the microSD card into the microSD card slot, gently press in until card is latched.
Note: Do not force the card into the slot; forcing may damage scanner and the microSD memory card. Align microSD card position (as marked) and try again.
Note: The microSD memory card must be formatted before scanning. See the following instruction.
4.3 Time setting
- Press the [TIME SET] button to enter time setting mode.
- In the LCD, it shows 1 XX, and press the [EFFECT & DPI] buttons for up & down number selection
- Press the enter button[ ] to confirm setting
- In the LCD, it jumps to next setting mode as below sequence
1 XX year setting
2 XX month setting
3 XX date setting
4 XX hour setting
5 XX minute setting
5 After all the information has been set, press the [TIME SET] button again to exit
4.4 Formatting the microSD memory card
- Insert a new microSD card into the scanner, then turn on the scanner.
- Press the[FORMAT] button into format mode. "F" shows on the LCD.
- Press the enter button[ ] to start formatting the microSD card.
- SD card indicator will blink until format is complete.
4.5 Setting the resolution
Press the [DPI] button to select High/Low resolution.
High/Low resolution icon will be displayed on status LCD.
4.6 Setting the scan mode
Press the [EFFECT] button to select Color/Mono mode.
Color/Mono icon will be displayed on status LCD.
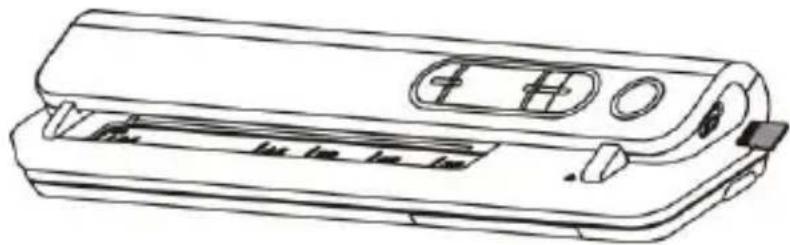
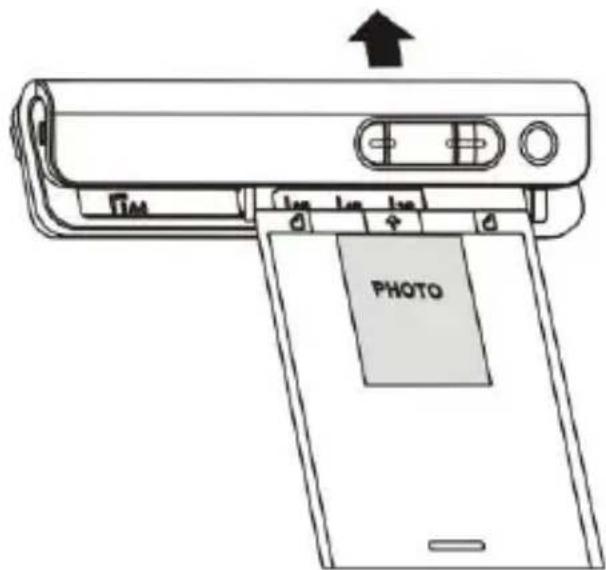
4.7 How to scan
- Press the power button to turn on the scanner.
- The scanner now will be in preset standby mode, select color / mono or DPI if needed.
- Insert the scan document into the scanner with scanning page face down .
- Once the scanner detected the document, it start scanning with green LED on on the "Power" button.
- It stop scanning until finish the page and retain in standby mode, waiting for next page.
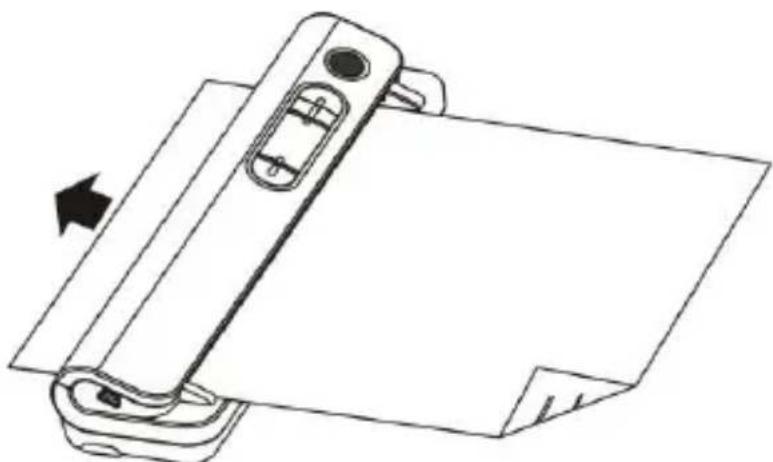
5. Maintenance & cleaning the sensor
For keeping best image quality, scanner needs to be cleaned after used. Enclosed with the scanner, A cleaning paper and a handheld cleaning card. CLEANING PAPER
Insert the cleaning paper as normal paper, let the scanner runs for 6 Sec., then stop it.
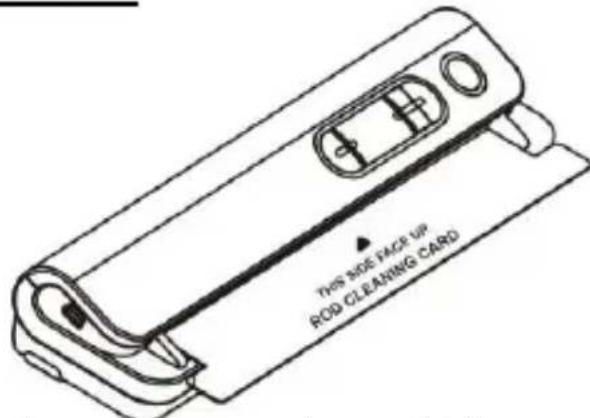
HANDHELD CLEANING CARD
Insert the cleaning card as above, slide the card from one to the other end for two times.
Note:
A PVC jacket is provided for scanning photo which can protect the surface of the photo from being scratched. The photo must be face down.
6. Connect to computer
You may also connect your scanner to your computer and view pictures on the computer monitor, then press the ENTER button into mass storage mode.

7. Specifications
| Image sensor | A4 Color Contact Image Sensor |
| Number of sensor | 5136 dots(1st~5104 dots available) |
| Resolution | Low resolution: 300x300 dpi(default) High resolution: 600x600 dpi |
| Maximum scanning speed for A4 size document | Color High resolution: 6 Seconds Mono High resolution: 6 Seconds Color Low resolution: 6 Seconds Mono Low resolution: 6 Seconds |
| Capacity (Based on 1GB microSD card.Scan A4 size file, the quantity of scans varies depending on the content complexity) | 600dpi color: 220 Photos(Min.) |
| 600dpi mono: 290 Photos(Min.) | |
| 300dpi color: 780 Photos(Min.) | |
| 300dpi mono: 1280 Photos(Min.) | |
| Scan width | 8.27" |
| Scan length | 300DPI: 50"(Max), 600DPI: 25"(Max) |
| File format | JPEG |
| LCD | Scanning status display |
| Auto Power Off | 3 Minutes |
| USB Port | USB 2.0 high speed |
| External memory | MicroSD Card |
| Standard Battery | 4XAA alkaline batteries |
8. Computer system minimum requirement
| Operating System | Windows 7 / Vista / XP and Mac OS 10.4 or above (direct plug-in, driver installation not required) |
| CPU | Pentium II or above |
| RAM | 64MB |
| Interface | USB port |
9. Troubleshooting
| Problem | Cause | Solution |
| Cannot turn on the scanner | 1. Low battery power. 2. Battery not inserted properly | Replace or install the battery correctly |
| Pictures cannot be saved when you are scanning them | 1. MicroSD card has not been installed 2. Memory is full 3. The microSD card has not been formatted properly | 1. Install microSD card 2. Download the pictures from the scanner to the computer to create storage space 3. Please refer to section 4.4 |
| Computer does not recognize your scanner when connected. (You cannot find removable disk) | Connection failure. | 1. Make sure all cable connections are secured. Restart the computer if Necessary 2. Connect the USB cable, pess the ENTER button. |
| The battery life is very short | Use wrong type of battery | Replace with new 4x AA alkaline batteries |
| Blurry images | 1. The lens of scanner is dirty 2. Contact Image sensor aged. | 1. Clean the lens with soft dry cloth 2. The scanner should be re-do calibration. |
| Red LED is on on the “Power” button after power on. | The calibration data is destroyed. | The scanner should be re-do calibration. |
5 Apou puOuToov oAe oI pnpoopoe, Tnote [TIME SET] kai nai yia va eEeAeT
4.4 i micro SD card
- TOnToEtnoTe μia vεa kαρτa micro SD μεσα σην utnoδoxn kai ση Σuvexεia evpyotioinote to αρωπη.
- PatnoTe to nnKtpo [FOMAT]. To "F" avicetai otyn obovn LCD.
- PntnoTe To Koumu Enter [ ] ia va xekivnoei n diaoppwon nms micro SD kaptac
- H Evδειξη [SD card] θα αναβοσβήνει μέχριν αλοκληρωθείη διαμόρφωση.
4.5 Puθμiζovtac nν αvαλuσn σαρωσ
PntnoTe to [DPI] yia va eTIIeEeYyln/Xaunn avauon.
To eikovidio Yynnnc/Xaunnnc avauonc 0e npaviotei otny obov LCD.
4.6 Puzion ts etoupyias opawons
PntnoTe To [EFFECT] yia va eTIIAEETE EYxpoo / movoxpwo
To eikoviio Eeyxpwmo / movoxpwmo 0a eupaviotei otyn ofov LCD.
4.7 NwS va aapwoeTe
- Patnote to Koupi Ieitoupyia yia va eevpyoioeTe to apwn.
- O aapwntg th eivai nleov oE katadtaon avaovns, ETIAETe to xpwa / moxpwo no

- Functional parts
- Explanation of the status icons
- Using the scanner
- Installing the battery
- Inserting a microSD memory card (not included)
- Time setting
- Formatting the microSD memory card
- Setting the resolution
- Setting the scan mode
- How to scan
- Maintenance & cleaning the sensor
- HANDHELD CLEANING CARD
- Note:
- Connect to computer
- Specifications
- Computer system minimum requirement
- Troubleshooting
- i micro SD card
- Puθμiζovtac nν αvαλuσn σαρωσ
- Puzion ts etoupyias opawons
- NwS va aapwoeTe
Brand : EASYPIX
Model : PixDoc
Category : Scanner