PixPocket - To scan EASYPIX - Free user manual and instructions
Find the device manual for free PixPocket EASYPIX in PDF.


User questions about PixPocket EASYPIX
0 question about this device. Answer the ones you know or ask your own.
Ask a new question about this device
Download the instructions for your To scan in PDF format for free! Find your manual PixPocket - EASYPIX and take your electronic device back in hand. On this page are published all the documents necessary for the use of your device. PixPocket by EASYPIX.
USER MANUAL PixPocket EASYPIX
Photo / Name Card Scanner
natural_image
Line drawing of a portable air conditioner unit with control panel and handle (no text or symbols)USER MANUAL
Contents
- Introduction ...... 2
- Preparation 3
● Package Contents .... 3
- Scanner Overview ...... 4
- Installation & Operation 5
● 3.1 Initial Setup .... 5
● 3.2 Power on the Scanner ...... 6
3.3 Scan an Original 8
● 3.4 Power off the Scanner ...... 9
- Connecting to a Computer 11
● 4.1 How to connect the scanner to a computer ....11
● 4.2 Disconnecting the scanner from a computer .... 13
- Maintenance 14
● 5.1 Cleaning the Roller of the scanner.....14
● 5.2 Calibrating the scanner .....15
● 5.3 Cleaning the Image Sensor .... 16
- Troubleshooting 17
● 6.1 Frequently Asked Questions ...... 17
- Arcsoft BizScanner 19
● 7.1 Install BizScanner.....19
● 7.2 Run BizScanner.....21
- 7.3 Start to use BizScanner.... 22
● 7.4 System requirements.... 31
- Specifications 32
1. Introduction
Congratulations on your purchase of the scanner. Now you can scan and store your printed photos directly to your memory card or flash disk without connecting to any computer. If you want to store your photos directly into your computer, just connect the scanner with SD card to the computer.
Before you install and operate the product, please take a few minutes to read through this manual. It provides proper instructions for you to install, operate and maintain the product.
Precautions
- Keep the product out of direct sunlight. Direct exposure to the sun or excessive heat may cause damage to the unit.
- Do not install the product in a humid or dusty place.
- Be sure to use the proper AC power source.
- Place the product securely on an even, flat surface. Tilted or uneven surfaces may cause mechanical or paper-feeding problems.
- Retain the product box and packing materials for shipping purposes.
System Requirements
● Free USB 2.0 port
- Windows ^ XP
- Windows ^ Vista ^TM
● Windows ^® 7 (32 / 64 bit or later version)
2. Preparation
Package Contents
natural_image
Line drawing of a cylindrical electronic device with a handle and top panel (no text or symbols)Scanner

natural_image
Simple concentric circle diagram with no text or symbolsCD
text_image
Scanned document page with multiple bullet points and icons, likely a technical or informational slide.QSG

Roller Cleaning Tool

Sensor Cleaning Swab
natural_image
Simple line drawing of a connected electrical component with a cable (no text or symbols)AC Power Adapter
natural_image
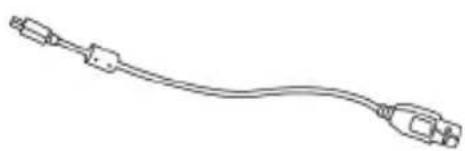
Line drawing of a USB cable with three connectors (no text or symbols)USB cable
Scanner Overview
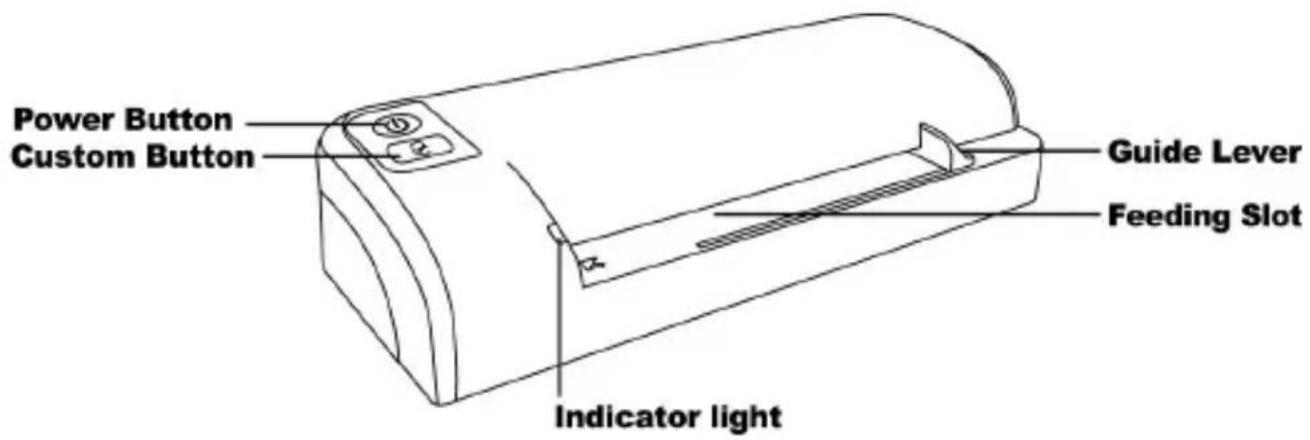
text_image
Power Button Custom Button Guide Lever Feeding Slot Indicator light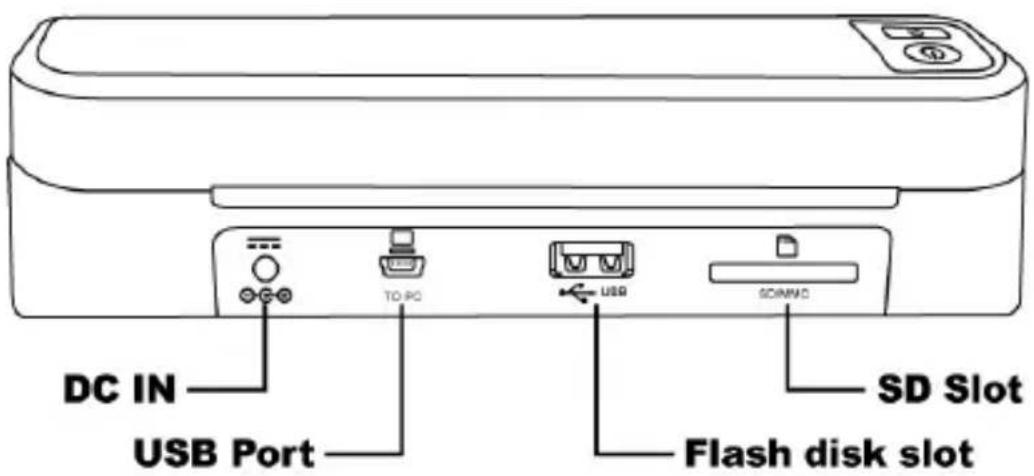
text_image
DC IN USB Port TO PC USB SD/MD SD Slot Flash disk slot3. Installation & Operation
3.1 Initial Setup
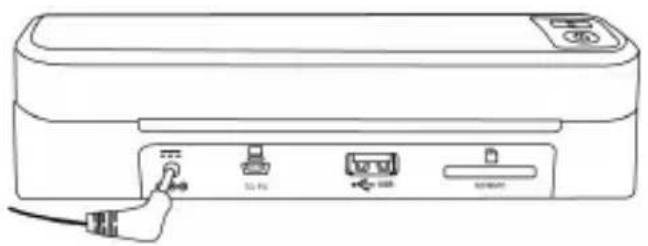
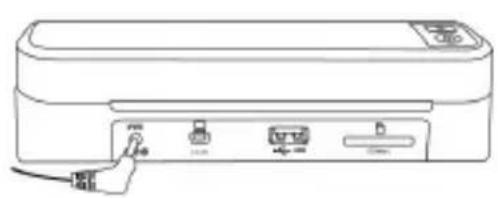
- Connect the plug on the power adapter cable to the power connector on the scanner.
natural_image
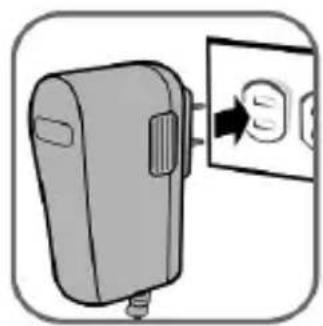
Line drawing of a printer front panel with buttons and a hand pointing to the left button (no text or symbols)- Plug the power adapter into a power outlet.
natural_image
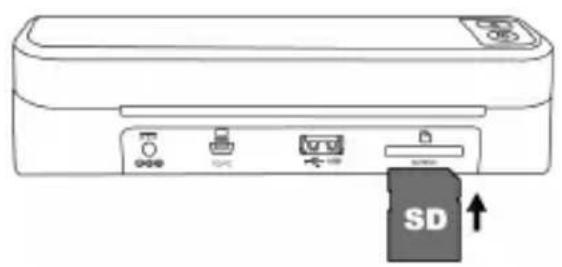
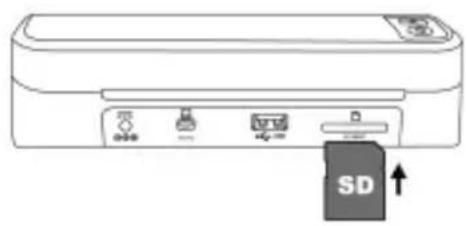
Illustration of a handheld device with an arrow pointing to a screen showing a stylized number 9 (no text or symbols present)- Insert a memory card into the memory card slot or a flash disk into the flash disk slot.
text_image
SD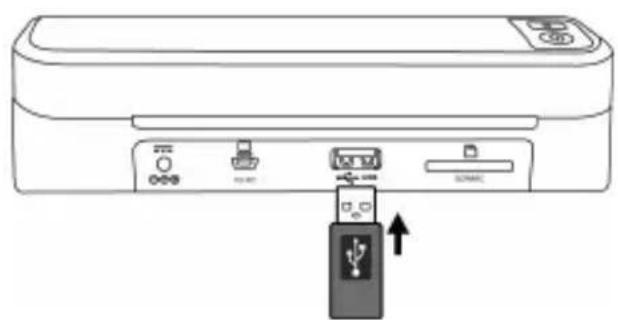
natural_image
Line drawing of a printer front panel with ports and an inserted USB symbol (no text or labels)Note : The SD card is the high priority when you insert the SD card and flash disk together.
3.2 Power on the Scanner
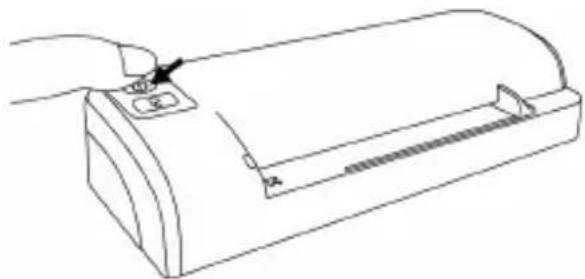
- Press and hold the Power button for about 0.5 seconds. The power indicator green light blinks.
natural_image
Line drawing of a mechanical device with a hand holding a button (no text or symbols)- Wait until the power indicator stops blinking then change to orange and stays on to indicate the scanner is ready.
The indicator light patterns represent function status as follows:
| Light Function Status | |
| 1. Green Blinks | The scanner is power on and initiating. |
| 2. Orange Steadily on | The scanner is ready for use. |
| 3. Orange Blinks Continuously | · Initializing system and memory card. Please wait until the initialization process is complete before using the scanner. · Busy scanning and storing image files. Please wait until the process is complete before scanning another original. · Sensor cleaning in progress. Please wait until the process is complete before performing any operations. |
| 4. Red Blinks | · Paper jam. Press the Custom button for about 0.5 seconds; the scanner will back out the original so you can remove it from the input slot. · Memory card error. Remove the memory card to clear this error status. · Calibration failed. Error indication only. |
| 5. No light The scanner is powered off. | |
3.3 Scan an Original
-
Insert your photo or name card with the side to be scanned facing upward and in correct orientation, place the left edge of the original against the left edge of the feed slot, and then adjust the guide lever so that it is against the right side of the original. Do not apply any force to the original.
-
Gently push the original into the feeding slot and let go when it begins to feed into the slot.
- When the scan is completed, the scanner will automatically create a folder titled “Photo1” on your memory card or flash disk, which will hold the first 9999 scans. Then “Photo2” folder will be created for the next 9999 scans, and so on.
(Each scanned image is given a file name with the prefix scan followed by a 4-digit sequential number in the order the images are stored. For example, IMG 0001.jpg, IMG 0002.jpg, etc.)
Note:
- Do not remove the memory card or disconnect the power supply while the indicators are blinking.
- This scanner only supports output images in JPEG (.jpg) format, and the date/ time attribute will not be added.
- If the memory card is near full (lower than 1MB), the power indicator light blinks. Use another card or delete some files on it if necessary.
- Insert only one original at a time, and insert the next original only when the previous one is done and the blinking has stopped, otherwise the scanner may malfunction.
3.4 Power off the Scanner
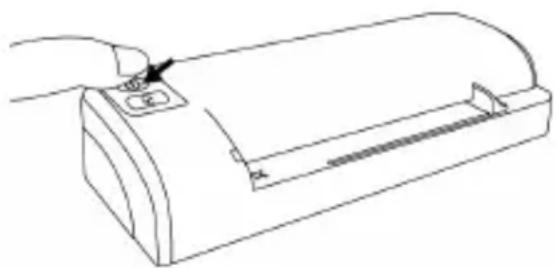
After all originals were scanned, press and hold the power button until the indicator blank. Now you can safely disconnect the power and remove the memory card or flash card from the scanner.
natural_image
Line drawing of a cylindrical device with a hand pressing a button (no text or symbols)Important:
- Insert only one photo at a time, and insert the next one only when the previous one is done, and the indicator light stops blinking. Otherwise, the scanner may malfunction.
- The acceptable paper size is 2"x 2" \~ 4"x 6".
- Do not use the following types of originals for scanning; otherwise the scanner may malfunction or cause the original to jam in the slot.
● Originals thicker than 0.5mm
- Originals with either side shorter than 50mm(below 2")
● Originals with lots of black or dark colors
● Originals with dark colors surrounding the edges
● Transparencies(filmstrips, celluloid, etc.)
● Printed images (pictures on newspapers, magazines, etc.)
- Soft and thin materials (thin paper, cloth, etc.)
● Originals that exceed or below the acceptable size
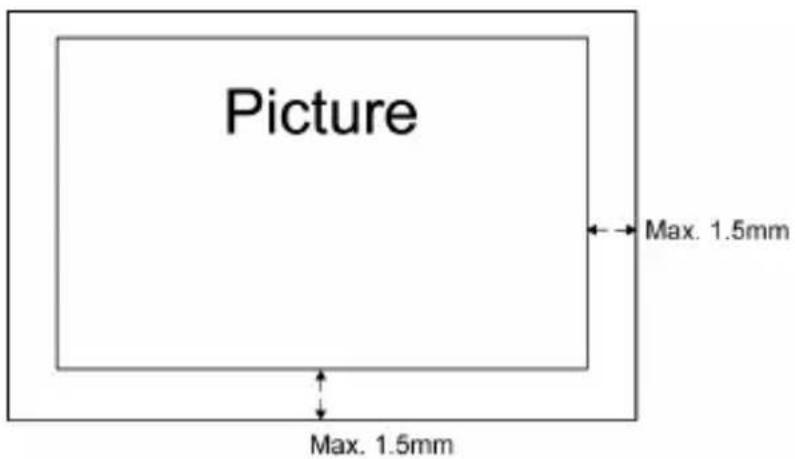
- The scanner has a built-in cropping function that is capable to detect and crop the edges of an original.
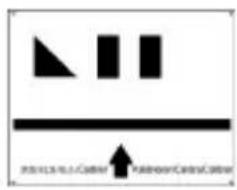
The max cropping size is 1.5mm per edge, as illustrated below:
text_image
Picture Max. 1.5mm Max. 1.5mm- If the photo is incautiously skew in the feeding slot, the four edges of the scanned image will become dark as illustrated.

natural_image
Black-and-white family portrait of a woman and a child (no text or symbols visible)4. Connecting to a Computer
You may use the scanner as a memory card reader by connecting it to the computer through the USB cable, so that you can freely copy, paste or delete files to and from the memory card. The images in the card can also be downloaded to the computer by other computer devices.
4.1 How to connect the scanner to a computer
- Connect the plug on the power adaptor cable to the power connector on the scanner.
natural_image
Line drawing of a portable air conditioner unit with three buttons and a cable (no text or symbols)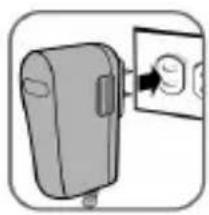
natural_image
Illustration of a device with an arrow pointing to a screen (no text or symbols)- Insert a memory card or flash disk that contain your scanned images into the memory card slot.
natural_image
Diagram of a printer with three ports and a SD card icon, no text or symbols present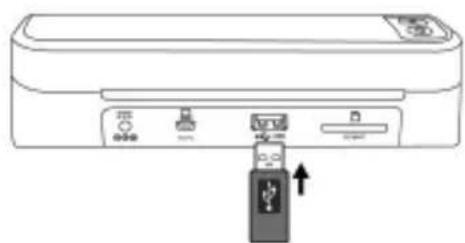
natural_image
Line drawing of a device with ports and a USB jack (no text or symbols)- Connect the mini end of the USB cable (included with scanner) to the Mini USB connector on the scanner.
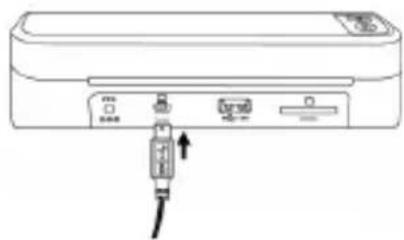
natural_image
Line drawing of a server rack with ports and an attached cable (no text or symbols)- Power on your PC, and then connect the large end of the USB cable to a USB port on your PC.
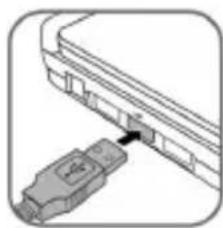
natural_image
Diagram of a USB port with an inserted connector (no text or symbols visible)- Press and hold the Power button for 0.5 seconds.
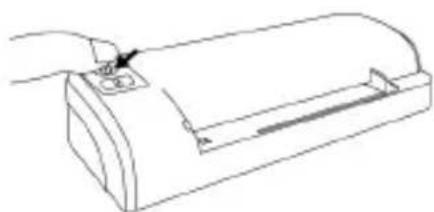
natural_image
Line drawing of a cylindrical device with a hand holding a small object, no text or symbols present-
When the scanner connects successfully with a computer, a Removable Disk (F) (F represents the removable drive letter) will be shown in Windows Explorer. If a memory card or flash disk is inserted to the scanner, the Removable Disk will be replaced with the name of the memory card or flash disk.
-
After your scan, a folder titled PHOTO1 is added to the memory card or flash disk and the scanned image will be saved in JPEG file format. Each scanned image is given a file name with the prefix scan followed by a 4-digit sequential number in the order the images are stored. For example, IMG0001.jpg, IMG0002.jpg. If the file name reaches IMG9999.jpg in the Photo1 folder, a new folder titled Photo2 will automatically be created to store subsequent new files, and so on.
-
You can now view or edit the files on the memory card or flash disk using your own graphic editing software.
4.2 Disconnecting the scanner from a computer
- On the Windows System Tray, click the hardware removal icon.
- Click the ‘Safely remove USB mass Storage device’ message with the corresponding Drive.
- When the ‘Safe to Remove Hardware’ message appears, you can safely remove the scan engine’s USB cable.
5. Maintenance
5.1 Cleaning the Roller of the scanner
If the scanned image has lines or photo has dust, clean the roller by supplied roller cleaning tool. Using only the recommended and supplied tools.
Follow the instructions of Cleaning the Roller on the preceding section to clean the roller.
- Connect the power supply to the scanner.
- Insert the SD card or flash disk.
- Press and hold the power button for about 0.5 seconds to power the scanner on.
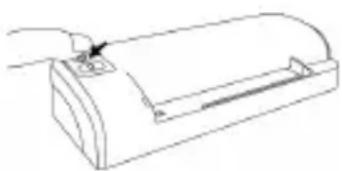
natural_image
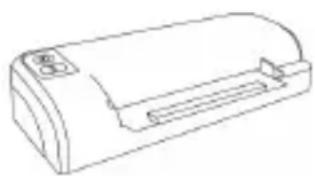
Line drawing of a cylindrical device with a handle and a small inset component, no text or symbols present-
Press the Custom button and release immediately.
-
Place the supplied roller cleaning tool on the feeding slot.
natural_image
Line drawing of a cylindrical electronic device with a base and top ports (no text or symbols)-
The cleaning tool will be brought into the feeding slot automatically, and the cleaning process will begin.
-
When the cleaning process is completed, the cleaning tool will be ejected from the feeding slot.
5.2 Calibrating the scanner
If the scanned image color looks unnatural, the scan engine may need calibrating in order for the sensor to resume its original precision. To calibrate the scan engine:
- Connect the power supply to the scanner.
- Insert the SD card or flash disk and move the guide lever to the end of right side.
- Press and hold the power button for about 0.5 second to power the scanner on.
- Press and hold the Custom button until the indicator LED blinks.
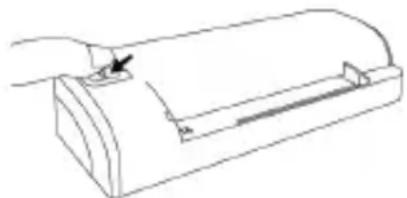
natural_image
Line drawing of a mechanical component with a hand holding a small object (no text or symbols)- Insert the calibration card to the feed slot in 5 seconds.
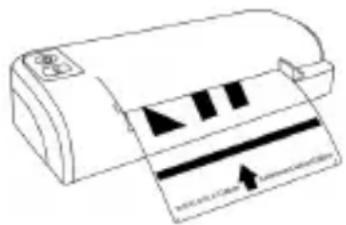
natural_image
Line drawing of a printer with paper and buttons, no text or symbols present- The scanner starts calibrating.
- The calibration chart will move and stop some time then reject when calibrate done.
Notice : Always keep the calibration card clean and avoid dirty, scrape or wrinkle that will affect the calibrating result.
5.3 Cleaning the Image Sensor
If the scanned image looks fuzzy or there are strange stripes on it, the image sensor may need cleaning in order for the sensor to resume its original clean. To clean the image sensor:
- With the scanner powered off and disconnected from the power supply, insert the sensor cleaning swab into one end of the input slot.
- Gently slide the sensor cleaning swab back and forth from one end of the input slot to the other five or six times consecutively.
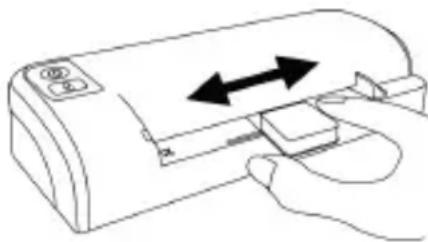
natural_image
Line drawing of a hand inserting a device into a printer (no text or symbols)- Remove the sensor cleaning swab, store it in a safe place and protect it from dust.
6. Troubleshooting
If you have problems with the operation of the product, please check the following troubleshooting hints.
6.1 Frequently Asked Questions
Question: There are strange lines on the scanned image, or the image is not clear.
Answer: Check the following:
Are there scratches on the original, or is the original clean? Remove any stains or dust from the original before scanning.
☐ Has the scanner been used for a long period of time without cleaning and calibration? Follow the instructions for "Cleaning the Scanner" and "Calibrating the Scanner", and then try again.
Question: The original gets stuck halfway in the feeding slot.
Answer: Press the Custom button. The scanner will back out the original so you can remove the jammed original from the output slot.
Question: The status indicator blinks rapidly and no scan is possible.
Answer: Check the following:
☐ Is the memory card inserted properly into the memory card slot? Re-insert the card and try again.
☐ Is the SD card locked (set to write-protect)?
Unlock the card.
☐ Is the memory card full? The indicator blinks when the free space on the memory card is below 1MB. Use another card if necessary.
Make sure the memory cards are in FAT or
FAT32 file formats only, not NTFS or any other file format.
Did you insert the next original before the
scanning process of the previous one was completed? Power the scanner off and back on and try again. Make sure that you scan the next original only after the scanning process of the previous one has completed.
Does the length of the original exceed the maximum acceptable size?
Question: The scanner feels warm to the touch.
Answer: It is normal for the scanner to emit a small amount of heat (around 30-45 degrees Celsius) after prolonged use. However, if there are strange odors coming from the scanner or the scanner feels hot to the touch, disconnect the scanner immediately from the power supply or the computer.
Question: Photo with dark edge cropping problem
Answer: For a very darkedge(edges) photo, the scanner will not read the dark portion and will be cropped away. This kind of photo is not suitable for scanning.
7. Arcsoft BizScanner
This simple application uses advanced OCR technology and scans the images of your business cards. It quickly and easily captures contact information from business cards and adds it to the application's database, saving you a great deal of time and effort by eliminating the need to manually type in names, phones, and other key information.
BizScanner also provides convenient tools for you to manage all business cards. With just a few clicks, you can synchronize the application's database with other programs, such as Microsoft Office Outlook and so on.
7.1 Install BizScanner
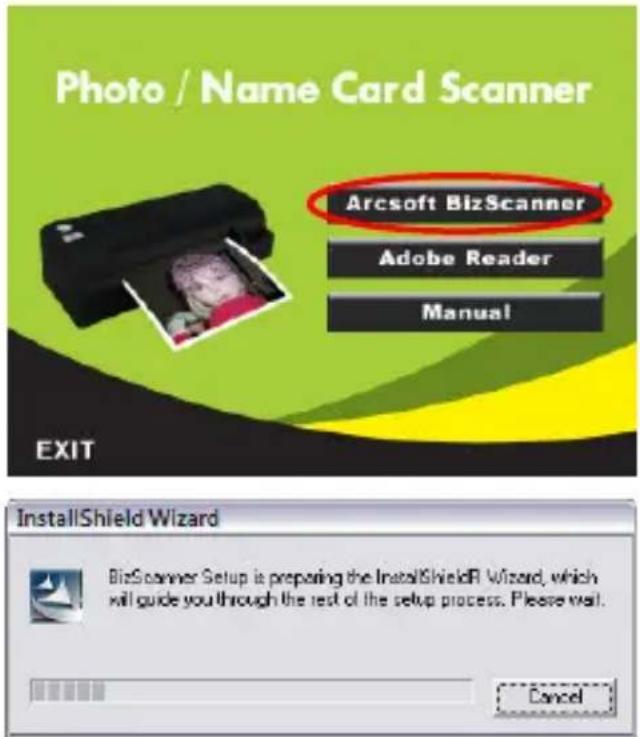
- Insert the installation CD into the CD-ROM drive and click 'BizScanner' and start to install BizScanner.
text_image
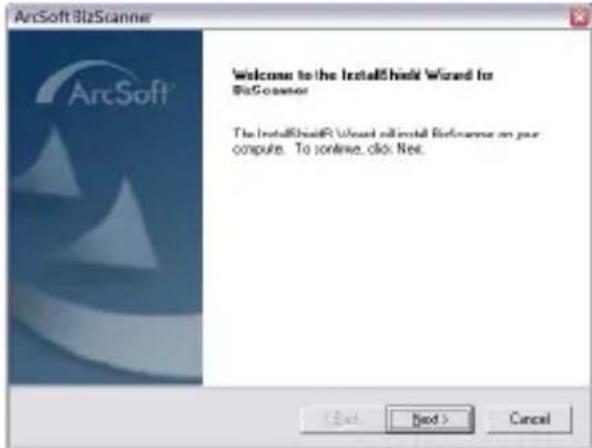
Photo / Name Card Scanner Arcsoft BizScanner Adobe Reader Manual EXIT InstallShield Wizard BizScanner Setup is preparing the InstallShield® Wizard, which will guide you through the rest of the setup process. Please wait. Cancel2. Follow the installation wizard step by step.
text_image
ArcSoft BizScanner Welcome to the InstallShield Wizard for BizScanner The InstallShield Wizard will install Reference on your compute. To continue click Next. < Back Next > Cancel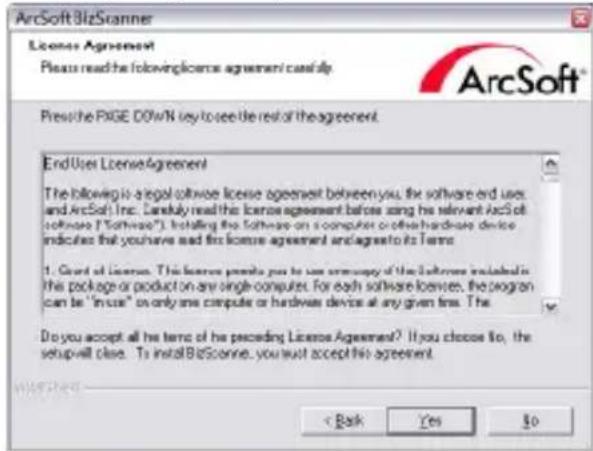
text_image
ArcSoft BIZScanner License Agreement Please read the following license agreement case/sip: Presuche PAGE 00w/N key to see the rest of the agreement. End User License Agreement The following is a legal software license agreement between you, the software and user, and ArcSoft Inc. Darefully read this license agreement before using his relevant ArcSoft software ("Software"). Installing the software on a computer or hardware device indicates that you have and the license agreement and agree to its Terms. 1. Grant of license. This license permits you to use microscopy of the Software included in this package or product on any single-computer. For each software license, the program can be "in case" on only one computer or hardcover devices at any given time. The Do you accept all the terms of the preceding License Agreement? If you choose to, the setup will close. To install BIZScanne, you must accept this agreement.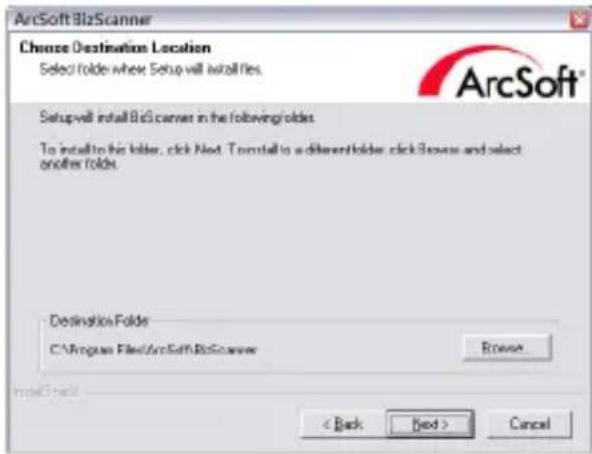
text_image
ArcSoft BlzScanner Choose Destination Location Select folds where Setup vall install files. Setupvall install BlzScanner in the following fields To install to this folder, click Next. To install to a different folder, click Browse and select another folds. Destination Folds C:\Program Files\ArcSoft\BlzScanner Browse Install Clear < Back Next > Cancel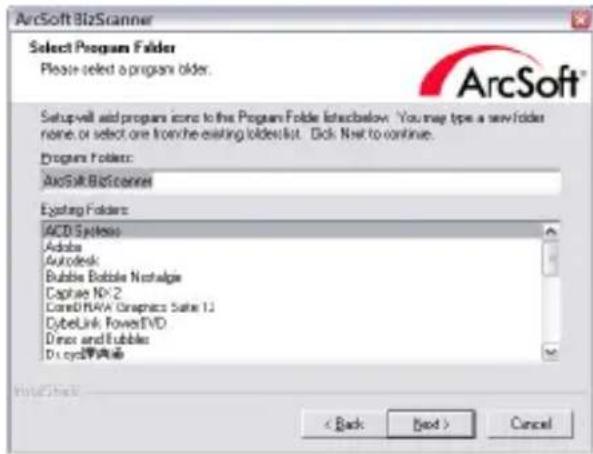
text_image
ArcSoft BizScanner Select Program Folder Please select a program older. Setupwell add programs icon to the Program Folder list below. You may type a new folder none or select one from the existing folder list. Click Next to continue. Program Folders: ArcSoft BizScanner Existing Folders: ACD System Adobe Autodesk Bubble Bubble Nostalgie Capture NX-2 CoreDRAW Graphics Suite 12 CyberLink PowerEVID Dimes and Bubbles D:\cmd\弹窗体 < Back Next > Cancel3. Install completely.
text_image
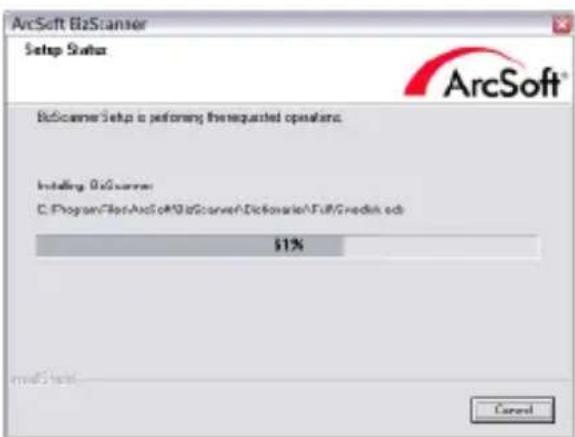
ArcSoft BizScanner Setup Status: ArcSoft® BizScanner Setup is performing the sequenced operations. Installing BizScanner C:\Program\Files\ArcSoft\BizScanner\Dictionary\FulGmedian.edu $1% <|im_start|> Guy's text Cancel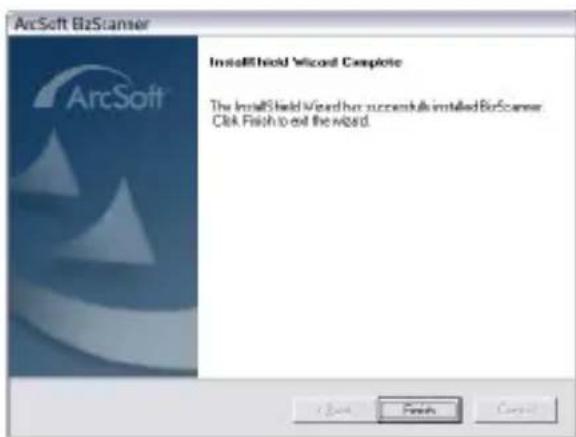
text_image
ArcSoft B2Scanner InstallShield Wizard Complete The InstallShield Wizard has successfully installed B2Scanner. Click Finish to exit the Wizard.7.2 Run BizScanner
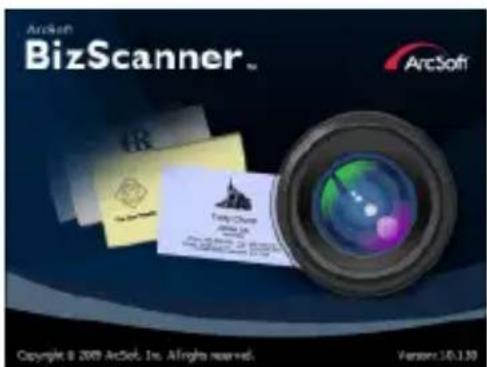
There are several ways that you can launch BizScanner:
- Double click 'BizScanner' icon on the desktop or right-click the icon and select "open".

- Click Start-> All Programs-> ArcSoft BizScanner-> BizScanner.
text_image
ArcSoft BizScanner™ ArcSoft Tally Churn 2016.12 Copyright © 2009 ArcSoft, Inc. All rights reserved. Version: 10.1.107.3 Start to Use BizScanner
1. Input Business Cards
Input - Switch to "Input Business Cards" to quickly and easily capture contact information from business cards.
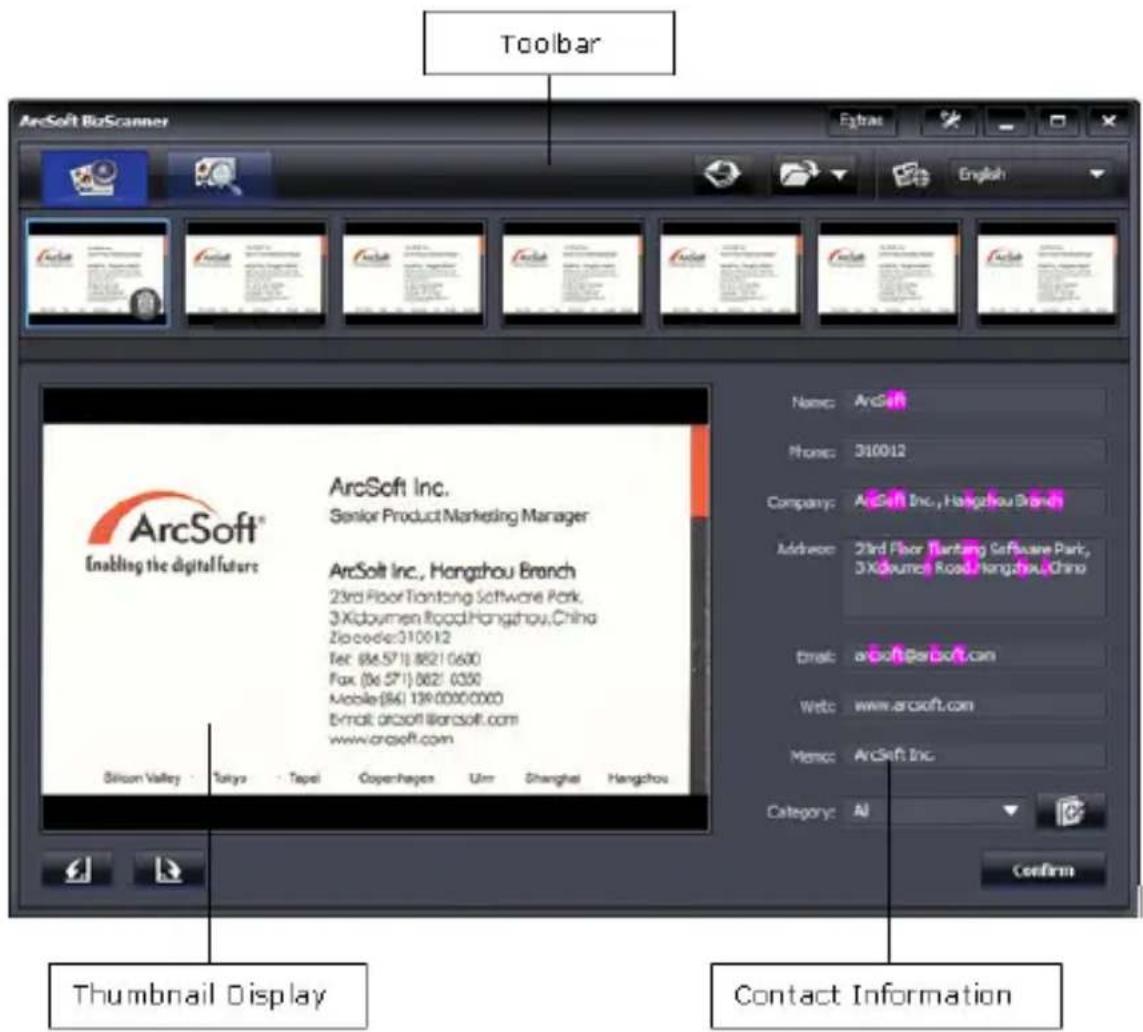
1.1 Input business cards main screen:
text_image
Toolbar ArcSoft BioScanner ArcSoft Inc. Senior Product Marketing Manager ArcSoft Inc., Hongzhou Branch 23rd Floor Painting Software Park, 3 Kidoumen Road Hongzhou, China Zisocede:310012 Tel: (86.57) 8821 0600 Fax: (86.57) 8821 0300 Mobile: (86) 1990000000 Email: arcsoft.borsoft.com www.arcsoft.com Silicon Valley Taiga Taipei Copenhagen Umi Shanghai Hangzhou Name: ArcSoft Name: 310012 Company: ArcSoft Inc., Hongzhou Branch Address: 23rd Floor Painting Software Park, 3 Kidoumen Road Hongzhou, China Email: arscsoft@arcsoft.com Wet: www.arcsoft.com Message: ArcSoft Inc. Category: AI Confirm Thumbnail Display Contact Information1.2 Toolbar
The Toolbar provides the following functions for you to input business card images:

Import from BizCard Scanner - Import
images of business cards from a professional BizCard scanner. Before using this function, make sure that a BizCard scanner is properly connected to your computer.

Import - Import existing images of
business cards from your local disk. Choose "Import from Folder" or "Import from Files" from the drop-down list.

Language - Select the language of the
business card from the drop-down list. BizScanner recognizes multilingual business cards.
Thumbnail Display
Displays thumbnails of all imported business cards. Select a thumbnail and detailed contact information of that card is displayed. To remove a specific business card before importing it to the database, click the Delete icon located on the bottom right corner of the selected thumbnail.
Contact Information
Displays detailed information of the selected business card. Any characters that do not appear correct are highlighted. Modify any information and select a category for that card from the drop-down list. If the card does not fit into any of the existing categories, use the "New Category" button to create one.
The thumbnail of the active business card is also displayed in this area. Use the "Rotate Left" or "Rotate Right" button if the image is not properly placed.
When all information of the business card is correct, click "Confirm" to add it to the database.
2. Manage Business cards
Manage - Switch to "Manage Business Cards" to manage the application's database and preview all imported business cards.
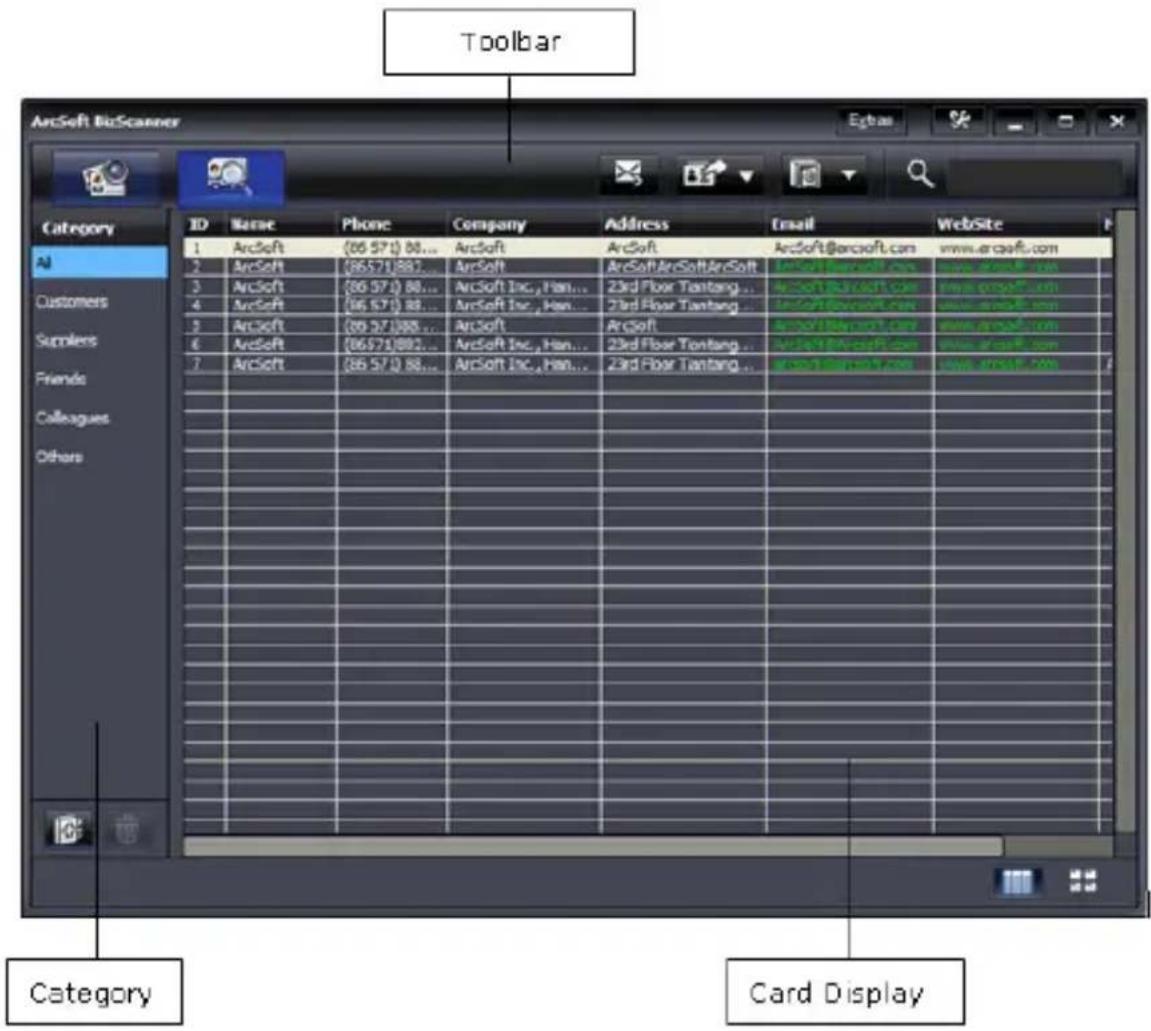
2.1 Manage business cards main screen:
text_image
Toolbar ArcSoft BioScanner Category AI Customers Suppliers Friends Colleagues Others ID Name Phone Company Address Email Website 1 ArcSoft (86.97) 88... ArcSoft ArcSoft ArcSoft @arccsoft.com www.arccsoft.com 2 ArcSoft (86.97) 88... ArcSoft ArcSoft ArcSoft @arccsoft.com www.arccsoft.com 3 ArcSoft (86.97) 88... ArcSoft Inc., Han... 2nd Floor Tantang... ArcSoft Inc., Han... 2nd Floor Tantang 4 ArcSoft (86.97) 88... ArcSoft Inc., Han... 2nd Floor Tantang... ArcSoft Inc., Han... 2nd Floor Tantang 5 ArcSoft (86.97) 88... ArcSoft 6 ArcSoft (86.97) 88... ArcSoft Inc., Han... 2nd Floor Tantang... ArcSoft Inc., Han... 2nd Floor Tantang 7 ArcSoft (86.97) 88... ArcSoft Inc., Han... 2nd Floor Tantang... Category Card Display2.2 Toolbar
The toolbar provides several functions for you to manage the database.

Email - Send selected business cards as email attachments. For each card, the original image and a vCard file are attached.

Export - Export the selected business cards as a specified format as listed in the drop-down list.
vCard - Export the selected business cards as vCard files, a file format standard for electronic business cards. They can be exchanged in various ways.
Outlook Address Book - Add contact information of the selected business cards into the address book of Microsoft Office Outlook.
JPEG - Export the original images of the selected business cards as JPEG files.
Excel - Export the contact information of the selected business cards and save it to a CSV file, a file format used for the digital storage of data structured in a table of lists.

Backup & Restore - Select "Backup" from the drop-down list to save the selected business cards as a backup. If you delete any card by mistake, use "Restore" from the drop-down list and import all backup cards to the database.

Search - Sort business cards by keywords. BizScanner searches all business cards and displays the results in the Card Display area.
Category
Categorizes all business cards into different groups when importing. Select each category to see all cards under that group in the Card Display area. Use the following buttons to manage these categories:

New Category - Click to create a new category. Enter the name of the new category and press "Enter" to confirm. Newly-added categories are placed before the category named "Others."

Delete Category - Click to remove the selected category. BizScanner's default categories cannot be deleted.
Card Display
Provides two modes for you to preview all business cards.
More than one card can be selected at the same time.
List View - Displays detailed information in a table format. E-mail and website addresses are displayed in hyperlink format. Click to send an e-mail or visit the website.
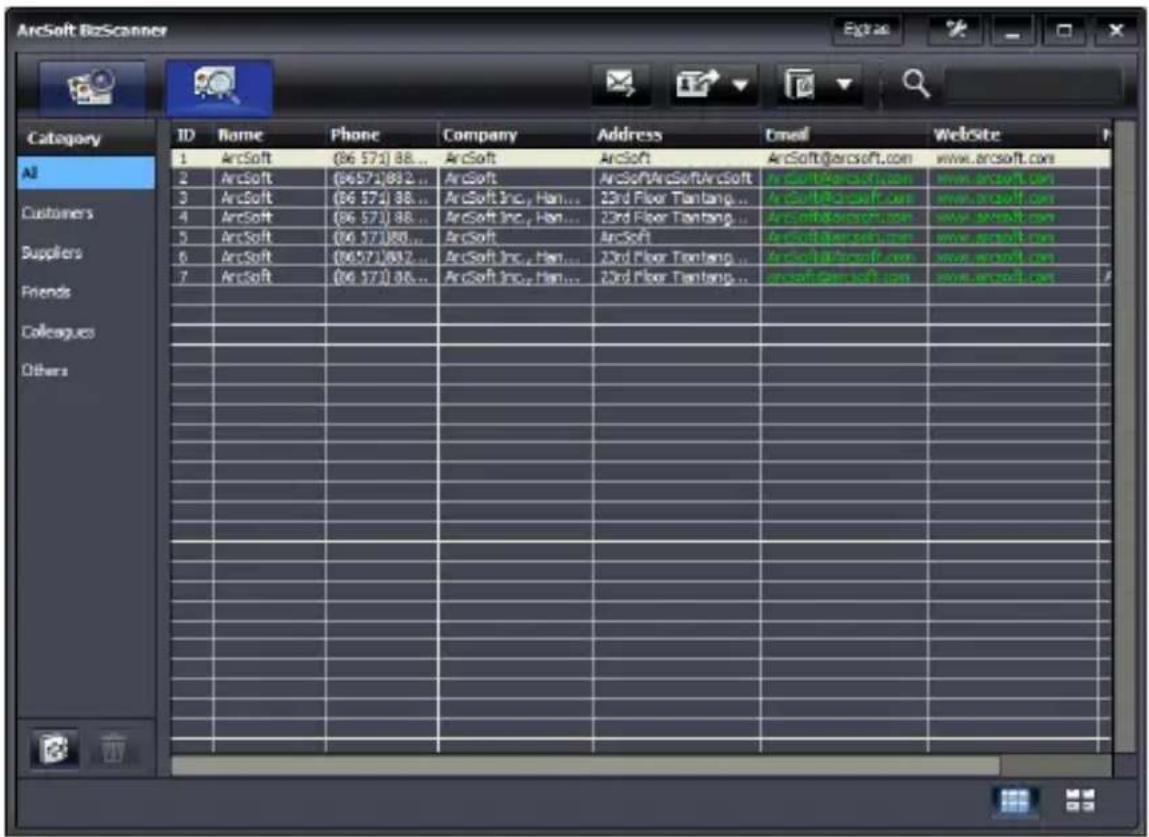
text_image
ArcSoft BzScanner Category All Customers Suppliers Friends Colleagues Others ID Name Phone Company Address Email Website 1 ArcSoft (86 571) 88... ArcSoft ArcSoft ArcSoft@arcsoft.com www.arcsoft.com 2 ArcSoft (86571)892... ArcSoft ArcSoftArcSoft@arcsoft.com www.arcsoft.com 3 ArcSoft (86 574) 88... ArcSoft Inc., Han... 23rd Floor Tanfang... ArcSoft@arcsoft.com www.arcsoft.com 4 ArcSoft (86 571) 88... ArcSoft Inc., Han... 23rd Floor Tanfang... ArcSoft@arcsoft.com www.arcsoft.com 5 ArcSoft (86 571)80... ArcSoft ArcSoft ArcSoft@arcsoft.com www.arcsoft.com 6 ArcSoft (86571)892... ArcSoft Inc., Han... 23rd Floor Tanfang... ArcSoft@arcsoft.com www.arcsoft.com 7 ArcSoft (86 571) 86... ArcSoft Inc., Han... 23rd Floor Tanfang... ArcSoft@arcsoft.com www.arcsoft.com
Thumbnail View - Displays business
cards as thumbnails to provide a direct way of viewing contact information.

text_image
ArcSoft BizScanner Category AI Customers Suppliers Friends Colleagues Others ArcSoft Indivite Solutions ArcSoft Inc. Direct Product Management Manager ArcSoft Inc., Hargines Branch Direct Product Management Manager ArcSoft Inc. (Hargines Branch) Direct Product Management Manager ArcSoft Inc. (Hargines Branch) Direct Product Management Manager ArcSoft Inc. (Hargines Branch) Direct Product Management Manager ArcSoft Inc. (Hargines Branch) Direct Product Management Manager ArcSoft Inc. (Hargines Branch) Direct Product Management Manager ArcSoft Inc. (Hargines Branch) Direct Product Management Manager ArcSoft Inc. (Hargines Branch) Direct Product Management Manager ArcSoft Inc. Direct Product Management Manager ArcSoft Inc. Direct Product Management Manager ArcSoft Inc. Direct Product Management Manager ArcSoft Inc. Direct Product Management Manager ArcSoft Inc. Direct Product Management Manager ArcSoft Inc. Direct Product Management Manager ArcSoft Inc. Direct Product Management Manager ArcSoft Inc. Direct Product Management Manager ArcSoft Inc. Direct Product Management Manager ArcSoft Inc. Direct Product Management Manager ArcSoft Inc. Direct Product Management Manager ArcSoft Inc. DirectProduct Management Manager ArcSoft Inc. DirectProduct Management Manager ArcSoft Inc. DirectProduct Management Manager ArcSoft Inc. DirectProduct Management Manager ArcSoft Inc. DirectProduct Management Manager ArcSoft Inc. DirectProduct Management Manager ArcSoft Inc. DirectProduct Management Manager ArcSoft Inc. DirectProduct Management Manager ArcSoft Inc. DirectProduct Management Manager ArcSoft Inc. DirectProduct Management Manager ArcSoft Inc. DirectProduct Management Manager ArcSoft Inc. DirectProduct Professional Manager ArcSoft Inc. DirectProduct Professional Manager ArcSoft Inc. DirectProduct Professional Manager ArcSoft Inc. DirectProduct Professional Manager ArcSoft Inc. DirectProduct Professional Manager ArcSoft Inc. DirectProduct Professional Manager ArcSoft Inc. DirectProduct Professional Manager ArcSoft Inc. DirectProduct Professional Manager ArcSoft Inc. DirectProduct Professional Manager ArcSoft Inc. DirectProduct Professional Manager ArcSoft Inc. DirectProduct Professional Manager ArcSoft Inc. DirectProduct Professional Director ArcSoft Inc. DirectProduct Professional Director ArcSoft Inc. DirectProduct Professional Director ArcSoft Inc. DirectProduct Professional Director ArcSoft Inc. DirectProduct Professional Director ArcSoft Inc. DirectProduct Professional Director ArcSoft Inc. DirectProduct Professional Director ArcSoft Inc. DirectProduct Professional Director ArcSoft Inc. DirectProduct Professional Director ArcSoft Inc. DirectProduct Professional Director ArcSoft Inc. DirectProduct Professional Director ArcSoft Inc. DirectProduct Professional DirectorIn each view, you can also right-click the business card to display an additional menu:
Move to Category - Move the selected business card to another category.
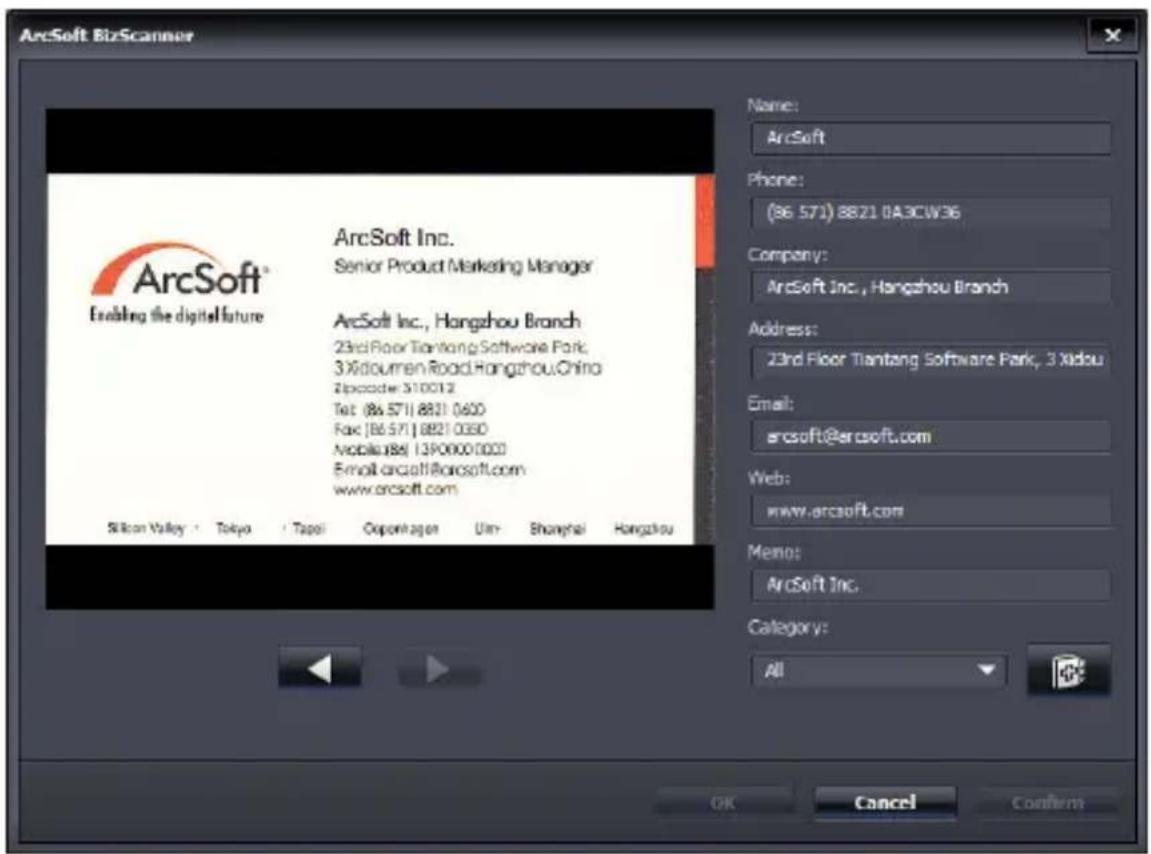
Edit - Modify the details of the business card in the pop-up window. You can also double-click the business card to go to the Edit screen. The main screen is as follows:
text_image
ArcSoft BizScanner ArcSoft Inc. Senior Product Marketing Manager ArcSoft Inc., Hangzhou Branch 23rd Floor Tiantang Software Park, 3 Xidoumen Road Hangzhou China Episode 310012 Tel (86 571) 8821 0600 Fax (86 571) 8821 0360 Mobile(86) 13900001000 Email: arcsoft@arcsoft.com www.arcsoft.com Silicon Valley · Tokyo · Taipei · Copenhagen · Uly · Shanghai · Hangzhou Name: ArcSoft Phone: (86 571) 8821 0A3CW36 Company: ArcSoft Inc., Hangzhou Branch Address: 23rd Floor Tiantang Software Park, 3 Xidou Email: arcsoft@arcsoft.com Web: www.arcsoft.com Memo: ArcSoft Inc. Category: All OK Cancel ConfirmAfter editing the card, click "Confirm" to save your modifications. Use the "Previous" and "Next" buttons to navigate to any card you want to modify. Repeat the editing process. When done, click "OK" to save your modifications and close the Edit window; or you can click "Cancel" to quit without saving the modifications that have not been confirmed.
Delete - Remove the selected business card from the BizScanner's database.
7.4 System requirements
- Windows XP/ Vista/ Windows 7
- Pentium IV 2.4 GHz or equivalent AMD Athlon®
- 300 MB free hard drive space required for program installation
- 512 MB DDR RAM or above
- 32-bit color display at 800x600 with DirectX 3D support
- DirectX 9.0c or above
8. Specifications
| Scanner type | Sheet-fed scanner module/single page |
| Carriage | Color CIS (4 inch) |
| Boot on time | Less then 7 seconds |
| Memory card slot | SD / SDHC / Flash Disk |
| Button | 2 (Power / Custom) |
| Acceptable paper | |
| Size | 2" x 2" ~ 4" x 6" |
| PC connectivity | Acts like removable storage device |
| Scan resolution | 300 dpi |
| Scan color depth | Color – 48bit |
| Output format | Color – 24bit (JPEG) |
| Auto crop | Yes |
| Color match | Yes |
| Calibration | Yes |
| Input | USB 2.0 |
| Power consumption | 5V / 2A |
| Dimension | L175 x H42 x W74 mm |
Specifications are subject to change without prior notice.
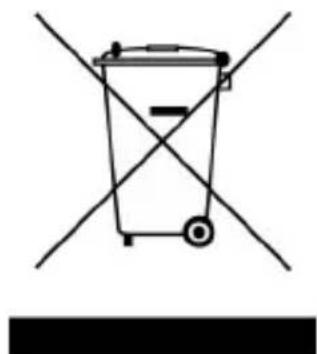
This symbol on the product or in the instructions means that your electrical and electronic equipment should be disposed at the end of its life separately from your household waste. There are separate collection systems for recycling in the EU. For more information, please contact the local authority or your retailer where you purchased the product.