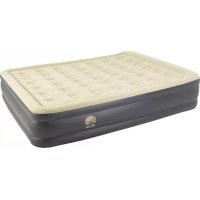
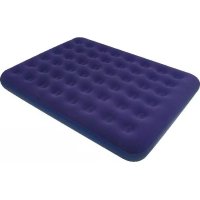
JL027266NG - Air bed JILONG - Free user manual and instructions
Find the device manual for free JL027266NG JILONG in PDF.



| Product Type | Air Bed (air mattress) with built-in electric pump |
| Brand | JILONG |
| Model | JL027266NG |
| Power Supply | 220-240 V ~ 50 Hz, 130 W |
| Built-in Pump | Yes, built-in electric motor for inflation and deflation |
| Maximum Continuous Operation Time | 5 minutes maximum, then 20 minutes pause |
| Inflation Capacity | Full inflation in about 5 minutes |
| Material | PVC or durable composite material (not specified exactly) |
| Color | Not specified (gray/blue typical) |
| Dimensions (approx.) | Not provided in the manual (estimate: 190 x 75 cm for a single bed) |
| Weight | Not provided |
| Manual Inflation Valve | Yes, optional valve for manual/foot pump |
| Adjustable Firmness | Yes, via control dial to adjust air |
| Safety | GFCI breaker recommended; automatic shutoff in case of overheating; do not use near water or flames |
| Cleaning and Maintenance | Clean with clear water, no acidic or alkaline detergents; dry in shade |
| Repairability | Repair patch provided for small punctures; silicone or rubber glue for damage > 2.5 cm |
| Included Accessories | Storage bag, repair patch |
| Usage | Indoor only, flat and smooth surface, not on water |
| Warranty | Not specified (typically 1 to 2 years) |
Frequently Asked Questions - JL027266NG JILONG
Note: Do not overinflate to avoid damaging the seams.
User questions about JL027266NG JILONG
0 question about this device. Answer the ones you know or ask your own.
Ask a new question about this device
Download the instructions for your Air bed in PDF format for free! Find your manual JL027266NG - JILONG and take your electronic device back in hand. On this page are published all the documents necessary for the use of your device. JL027266NG by JILONG.
USER MANUAL JL027266NG JILONG
Built-in Electric Pump
220 - 240V \~ 50 Hz 130W
Important Safety Guideline
Please read, understand and follow all instructions prior to using.
To enhance the enjoyment of your Air Bed and protect the safety of the operator using the product, ALWAYS STRICTLY OBSERVE the following important safety points. The following important points should be read and understand before using this product:
-
WARNING: To prevent possible electric shock, do not attempt to plug in power cord with wet hands.
-
WARNING: To prevent possible electric shock, connect power cord into a grounded receptacle protected by a ground-fault circuit interrupter (GFCI).
-
WARNING: To prevent possible electric shock, never use a damaged or frayed power cord. If the supply cord is damaged, it must be replaced by the manufactured or its service agent or a similarly qualified person in order to avoid a hazard.
-
WARNING: Do not extension power cords with this product.
-
WARNING: Only for indoor household use. Keep away from fire.
-
WARNING: In order to reduce the risk of electric shock, do not expose to rain. And store indoors.
-
RISK OF COMBUSTION: Do not place the airbed against or near any open flames, heaters, furnaces or other hot objects.
-
IMPORTANT: Do not operate electric pump for more than 5 minutes at one time (Generally, 5 minutes for each inflation or deflation is enough), take 20 minutes break between uses, as overheating may occur and pump will automatically shut off. It will be ready to use after it has cooled down. This automatic shut off is for your safety. Unplug electrical power cord when not in use.
-
WARNING: Do not obstruct the air passage opening or insert any objects into the opening at any time.
-
WARNING: Do not stand, jump or use the airbed as a trampoline. Always supervise children near the airbed.
-
WARNING: This product is not a raft or floatation device. Do not use near or on water.
-
WARNING: Children must not be left unattended when using the airbed. Use only under adult competent supervision.
-
WARNING: The storage bag is not a toy. To avoid danger of suffocation, keep the airbed storage bag or any other bags away from babies and children. Fold up the bag and store away from children when not in use.
-
WARNING: Keep pets away from the airbed. Pets may tear or puncture the airbed.
-
IMPORTANT: Make sure the area is flat, smooth, even and free of sharp
objects that can puncture the airbed. Do not set up the airbed nearby stairs, doors, drops, sharp edges or breakables.
- IMPORTANT: To minimize any chance of rolling, tipping or swaying, avoid sleeping on the edge of the airbed. Edges provide less support than the middle of the airbed.
- IMPORTANT: This appliance is not intended for use by persons (including children) with reduced physical, sensory or mental capabilities, or lack of experience and knowledge, unless they have been given supervision or instruction concerning use of the appliance by a person responsible for their safety.
- IMPORTANT: Children should be supervised to ensure that they do not play with the appliance.
Inflation instructions
- Open the cord cover of pump first and make sure the optional inflation air valve is securely closed.
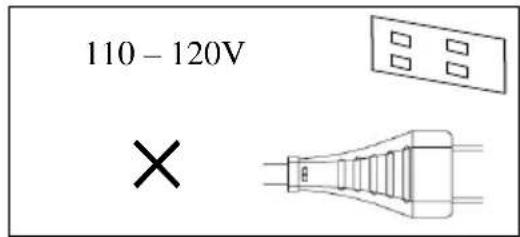
- Plug the AC electrical line cord into an AC electrical outlet (ground fault circuit interrupter outlet). Please check the correct voltage! See Fig. (1)
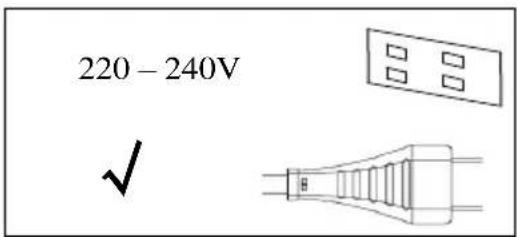
Fig.(1)
- Turn the control dial clockwise until arrow points to the inflation mark ( ). See Fig. (2)
Fig.(2)
![graph TD A["INFLATE AUFBLASEN"] --> B["DEFLATE LUFTABLASSEN"] B --> C["OFF AUS"] C --> D["Return to Inflating"] style A fill:#f9f,stroke:#333 style B fill:#ccf,stroke:#333 style C fill:#cfc,stroke:#333 style D fill:#fcc,stroke:#333](/content/2026/02/391795/images/43bd201241a44b262440cc273e252a190dd66f9ff7ae21eb552f7d56c019269a.jpg)
- When the airbed is fully inflated to the desired firmness, turn the control dial counter-clockwise until arrow points to the “OFF”. See Fig. (3)
![graph TD A["INFLATE AUFBLASEN"] --> B["OFF AUS"] B --> C["DEFLATE LUFTABLASSEN"] style A fill:#f9f,stroke:#333 style C fill:#ccf,stroke:#333](/content/2026/02/391795/images/5b989f5569cfb7db69e024f46f5777a932b15f99ede93746762e63cd7a1d461e.jpg)
-
Lie down on the airbed to test the firmness.
-
If the sleeping surface is too hard, adjust the firmness by continuously turning the control dial counter-clockwise gradually until air start to exit through the air passage. Then turn the control dial clockwise until arrow points to the “OFF” when the desired firmness is achieved. If the airbed becomes too soft, please repeat step 3 thru 5 as necessary.
-
Disconnect the AC line cord from the wall socket and place it inside the cord compartment.
Deflation instructions
-
Open the cord cover of pump first and make sure the optional inflation air valve is securely closed.
-
Plug the AC electrical line cord into an AC electrical outlet (ground fault circuit interrupter outlet). Please check the correct voltage! See Fig. (1)
-
Turn the control dial counter-clockwise until arrow points to the deflation mark ( ). See below Fig. (4)
-
When all air is removed from the airbed, turn the control dial clockwise until arrow points to the "OFF". See below Fig. (3)
-
When the airbed is completely deflated, begin rolling the airbed from the foot of the airbed towards the head of the airbed where the pump is located. To ensure the airbed is fully deflated, repeat steps 3 thru 4.
-
Disconnect the AC line cord from the wall socket and place it inside the cord compartment.
Fig.(4)
![graph TD A["INFLATE AUFBLASEN"] --> B["OFF AUS"] B --> C["DEFLATE LUFTABLASSEN"] style A fill:#f9f,stroke:#333 style C fill:#ccf,stroke:#333](/content/2026/02/391795/images/842690deef4f06479f76d5a4ac5a58f26059c273910f46b513b059c50d3040db.jpg)
Inflation option
If the electric pump is not available then a conventional foot or manually operated air pump can be connected to the optional inflation valve for inflation. See below fig (6).
-
Remove the valve totally from out of the valve insertion, and then pull the stopper out of the valve extension. Inflate the product by air pumps. Blow in sufficient air in order to fill up the chamber to the full extent. Do not use air compressor or high pressure pumps. Do not over inflate: excessive inflation of the air chambers can cause the chamber to burst or cause damage to the welding seams.
-
Close the valve by firmly inserting the stopper and press the valve into the chamber until the valve sits flush with the chamber.
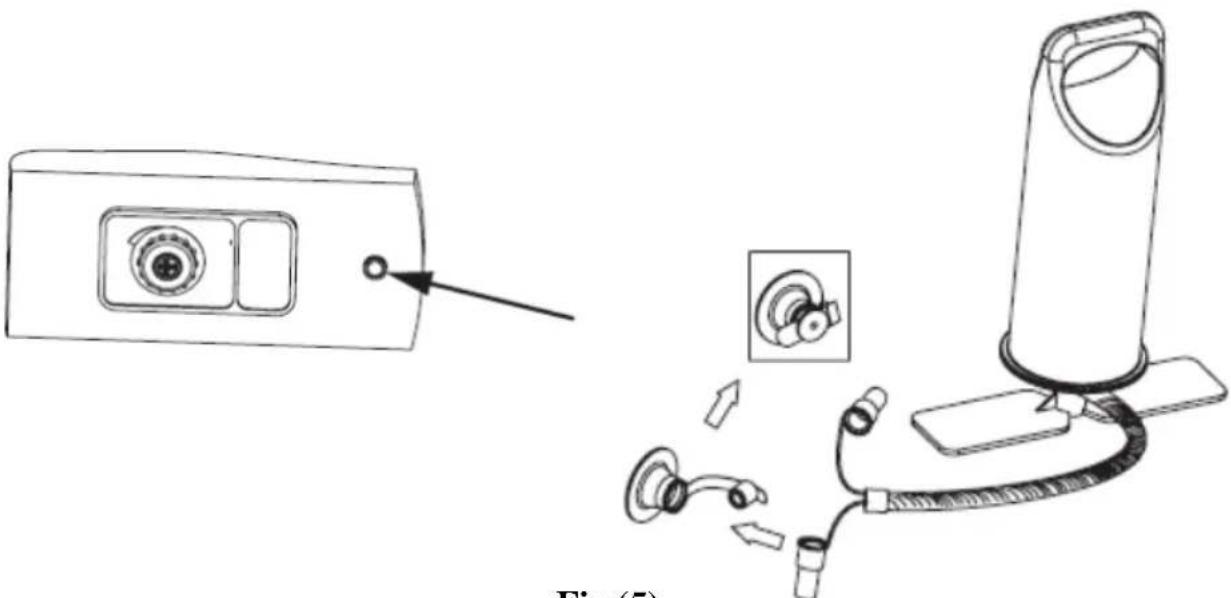
Fig.(5)
Storage and Maintain
1) Clean the product with clear water, then leave it in shady and cool place for airing, fold it into original package and place it indoor for next use. Caution: Do not use the alkali or acid detergent to clean product! Do not leave product exposed under sunlight directly because it will shorten the using-life of product.
2)Fold the airbed loosely and avoid sharp bends, corners and creases which can damage the airbed.
3) No specific maintenance is required for the built-in electric pump.
4) Place the airbed inside the storage bag and store in a dry and room temperature location indoors. Do not store in an area where it is likely to be exposed to extreme temperature.
Repair Patch Instructions
(Small pinhole and small puncture leaks can be repaired with the included repair patch)
a) Locate the leak place.
b) Deflate and drain the water.
c) Clean the area surrounding the leakage and wipe up all water from the surface.
d) Take out the repair patch, cut it into required shape and size, which should be litter larger than the leaking area, put the patch on leaking area and press firmly.
e) You can use it again after 24 hours drying of the repaired position.
If the damage is bigger than 1" (2.5cm), we recommend using a Silicone or rubber based glue for repair. Please read warning statement on glue prior to use.
Shanghai Jilong Plastic Products Co. Ltd.
No. 460 Lanxue Road, Huanglou, Pudong Area, Shanghai, 201205, P.R. China Tel: +86-21-58942200 E-mail: info@jilong.com Web: www.jilong.com
Voir la fig. (5)
STOCKAGE ET ENTRETIEN
Shanghai Jilong Plastic Products Co. Ltd.
No. 460 Lanxue Road, Huanglou, Pudong Area, Shanghai, 201205, P.R. China Tel: +86-21-58942200 E-mail: info@jilong.com Web: www.jilong.com
Shanghai Jilong Plastic Products Co. Ltd.
No. 460 Lanxue Road, Huanglou, Pudong Area, Shanghai, 201205, P.R. China Tel: +86-21-58942200 E-mail: info@jilong.com Web: www.jilong.com
Bedienungsanleitung
Shanghai Jilong Plastic Products Co. Ltd.
No. 460 Lanxue Road, Huanglou, Pudong Area, Shanghai, 201205, P.R. China
Tel: +86-21-58942200 E-mail: info@jilong.com Web: www.jilong.com
Fig.(5)
Shanghai Jilong Plastic Products Co. Ltd.
No. 460 Lanxue Road, Huanglou, Pudong Area, Shanghai, 201205, P.R. China
Tel: +86-21-58942200 E-mail: info@jilong.com Web: www.jilong.com
Fig.(6)
Opslag en onderhoud
Shanghai Jilong Plastic Products Co. Ltd.
No. 460 Lanxue Road, Huanglou, Pudong Area, Shanghai, 201205, P.R. China Tel: +86-21-58942200 E-mail: info@jilong.com Web: www.jilong.com
说明手册
内置式电动泵
220 - 240V \~ 50 Hz 130W
重要安全指南
请在使用前阅读,理解并遵守所有说明。
- BUILT-IN ELECTRIC PUMP
- 240V \~ 50 HZ 130W
- IMPORTANT SAFETY GUIDELINE
- PLEASE READ, UNDERSTAND AND FOLLOW ALL INSTRUCTIONS PRIOR TO USING
- INFLATION INSTRUCTIONS
- DEFLATION INSTRUCTIONS
- INFLATION OPTION
- STORAGE AND MAINTAIN
- REPAIR PATCH INSTRUCTIONS
- SHANGHAI JILONG PLASTIC PRODUCTS CO. LTD
- STOCKAGE ET ENTRETIEN
- BEDIENUNGSANLEITUNG
- OPSLAG EN ONDERHOUD
- 说明手册
- 内置式电动泵
- 重要安全指南
- 请在使用前阅读,理解并遵守所有说明。
Brand : JILONG
Model : JL027266NG
Category : Air bed