
KM 367 CB - Food Processor BOMANN - Free user manual and instructions
Find the device manual for free KM 367 CB BOMANN in PDF.
| Product Type | Food Processor |
| Brand | Bomann |
| Model | KM 367 CB |
| Power Supply | 220-240 V ~ 50/60 Hz |
| Rated Power Consumption | 600 W |
| Maximum Power Consumption | 1000 W |
| Net Weight | 7.91 kg |
| Protection Class | II |
| Mixing Bowl Capacity | 2 kg (max) |
| Blender Jug Volume | 1.5 L (max) |
| Main Functions | Knead, mix, beat, mince meat, make sausages, biscuits, fresh pasta |
| Included Accessories | Mixing bowl, dough hook, whisk, beater, meat grinder (3 plates), sausage stuffer, kebbe accessory, pasta machine (5 shapes), blender jug, etc. |
| Speeds | 6 speeds + progressive pulse |
| Pulse Function | Yes (PULSE) |
| Continuous Operation Time | 10 minutes maximum (for thick dough and grinder) |
| Care and Cleaning | Hand wash with soapy water; motor housing with damp cloth; do not immerse; not dishwasher safe |
| Safety | Safety switch (symbol alignment), splash-proof lid, pusher for feeding, overload protection |
| Blade Material | Metal (worm screw and metal knife) |
| Warranty | Manufacturer warranty (according to conditions) |
Frequently Asked Questions - KM 367 CB BOMANN
User questions about KM 367 CB BOMANN
0 question about this device. Answer the ones you know or ask your own.
Ask a new question about this device
Download the instructions for your Food Processor in PDF format for free! Find your manual KM 367 CB - BOMANN and take your electronic device back in hand. On this page are published all the documents necessary for the use of your device. KM 367 CB by BOMANN.
USER MANUAL KM 367 CB BOMANN
natural_image
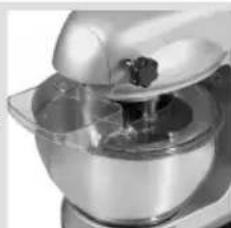
Modern kitchen stand mixer with a blender and metal grater (no visible text or symbols)Zubehör Rührschüssel • Onderdelen Mengkom
Accessoires du bol à mélanger • Accesorios de la batidora
natural_image
Close-up of a kitchen mixer with a metal bowl and handle (no visible text or symbols)

natural_image
Line drawing of a manual shaver with two wheels and a handle (no text or symbols)
natural_image
Close-up of a mechanical component with a metallic cylindrical shaft and circular base (no visible text or symbols)natural_image
Close-up of a kitchen mixer blending liquid into a plastic bowl (no text or symbols visible)
Achtung:
natural_image
Close-up of a mechanical component with a metallic shaft and circular base (no visible text or symbols)NEDERLANDS

natural_image
Close-up of a kitchen mixer blending liquid into a bowl (no text or symbols visible)△ Let op:
natural_image
Close-up of a mechanical component with a cylindrical shaft and flange, no visible text or symbolsnatural_image
Close-up of a kitchen mixer blending liquid into a bowl (no text or symbols visible)Attention:
natural_image
Close-up of a mechanical component with a cylindrical shaft and circular base (no visible text or symbols)Atención:
natural_image
Close-up of a kitchen mixer with a handle and control panel (no visible text or symbols)
Atención
natural_image
Close-up of a mechanical component with a metallic shaft and circular base (no visible text or symbols)△ Atenção:
natural_image
Close-up of a kitchen mixer blending liquid into a bowl (no text or symbols visible)△ Atenção:
natural_image
Close-up of a mechanical component with a metallic shaft and circular base (no visible text or symbols)Attenzione:
natural_image
Close-up of a kitchen mixer blending into a bowl (no visible text or symbols)General Safety Guidelines
Before using this device, carefully read this user manual and keep it together with the Warranty Certificate, cashier receipt and if possible, the original package inclusive its interior packing. If you hand on the device to any third person, include the user manual as well.
- Use the device for private and its intended purpose only. The device is not intended for commercial use.
- Do not use the device outdoors. Protect it from heat, direct sunlight, humidity (do not immerse into liquids under any circumstances) and sharp edges. Do not use the device with wet hands. If the device gets wet, unplug it immediately.
- Always switch off and unplug the device (pull the plug, not the cable) when you do not use the device, or when you attach accessories, during cleaning or malfunctioning.
- Do not leave the device unattended during operation. Always switch off the device when leaving the room. Unplug the device.
- Regularly check appliance and mains cable for damages. Do not use a damaged appliance.
- Do not repair the appliance yourself; contact an authorized technician. A defective mains cable must be replaced by the manufacturer, the authorized service center or a similar qualified person to avoid hazards.
- Do only use original parts.
- Please observe the following "Special Safety Precautions".
Children and disabled persons
- For the safety of your children, keep any packing parts (plastic bags, cartilage, Styrofoam etc.) out of their reach.
Warning! Don't let small children play with foils for danger of suffocation!
- This device is not intended for use by persons (including children) with reduced physical, sensory or mental capabilities, or lack of experience and/or knowledge unless they have been given supervision or instructions concerning the use of the device by a person responsible for their safety.
- Supervise children to ensure they do not play with the device.
Symbols in this user manual
Important notes for your safety are marked distinctively. Pay absolute attention to them to avoid accidents and damage to the device:
Warning:
Warns of dangers for your health and indicates potential risks of injury.
Caution:
Indicates potential dangers for the device or other objects.
i Note:
Highlights tips and information for you.
Special Safety Precautions for this Device
- Do not leave the appliance unattended during operation.
- Do not manipulate any of the safety mechanisms.
- Do not reach into the rotating hooks during operation.
- Place the appliance on a flat, smooth and sturdy surface.
- Do not connect to mains power supply before all necessary accessories are attached.
- Only use the pusher for refilling the meat grinder.
- Risk of overload! Use this appliance either as a meat grinder or a kneader but never with both functions at the same time.
Location Of Controls
Components base unit with meat grinder (Figures A-C):
1 Drive shaft
2 Cover screw conveyor drive
3 Mixing bowl
4 Arm
5 Lever to lower/lift arm
6 Casing
7 Pulse and step switch
8 Splash guard mixing bowl
9a Kneading hook
9b Egg beater
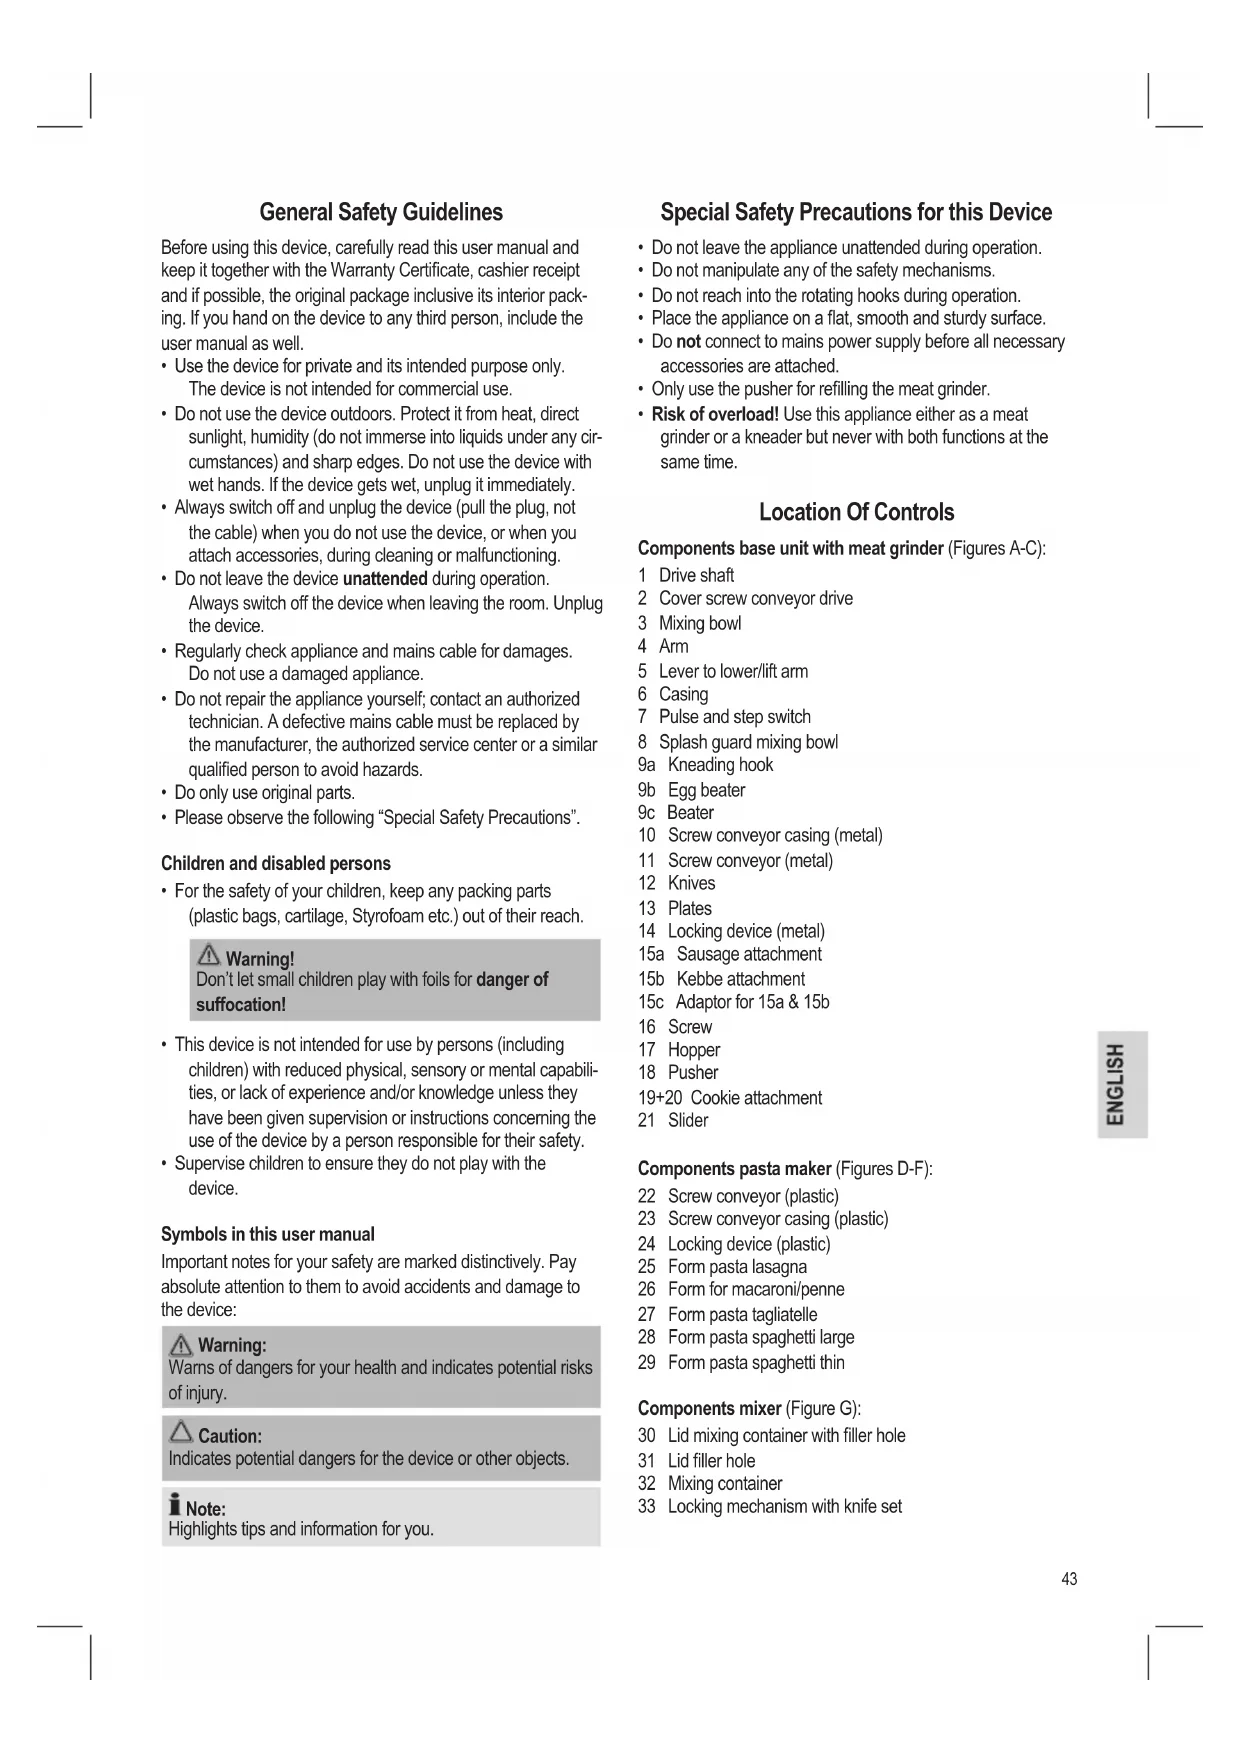
9c Beater
10 Screw conveyor casing (metal)
11 Screw conveyor (metal)
12 Knives
13 Plates
14 Locking device (metal)
15a Sausage attachment
15b Kebbe attachment
15c Adaptor for 15a & 15b
16 Screw
17 Hopper
18 Pusher
19+20 Cookie attachment
21 Slider
Components pasta maker (Figures D-F):
22 Screw conveyor (plastic)
23 Screw conveyor casing (plastic)
24 Locking device (plastic)
25 Form pasta lasagna
26 Form for macaroni/penne
27 Form pasta tagliatelle
28 Form pasta spaghetti large
29 Form pasta spaghetti thin
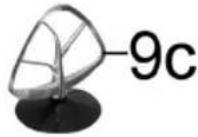
Components mixer (Figure G):
30 Lid mixing container with filler hole
31 Lid filler hole
32 Mixing container
33 Locking mechanism with knife set
Scope Of Delivery
1 X Kneader/mixer base unit
1 X Mixing bowl
1 X Splash guard with hopper
1 X Kneading hook
1 X Egg beater
1 X Beater
1 X Screw conveyor casing
1 X Screw conveyor
1 X Knife
3 X Plates
1 X Locking device
1 X Sausage attachment
1 X Kebbe attachment
1 X Adaptor for sausage/ kebbe attachment
1 X Screw
1 X Hopper
1 X Pusher
1 X Cookie attachment 3-piece
1 X Screw conveyor (plastic)
1 X Screw conveyor casing (plastic)
1 X Locking device (plastic)
1 X Form pasta lasagna
1 X Form for macaroni/penne
1 X Form pasta tagliatelle
1 X Form pasta spaghetti large
1 X Form pasta spaghetti thin
1 X Lid filler hole
1 X Lid mixing container with filler hole
1 X Mixing container
No illustration
1 X Storage box
1 X Tool for locking mechanism pasta maker
Use Instruction Mixing Bowl
-
Press the lever (5) in the direction of the arrow. The arm lifts.
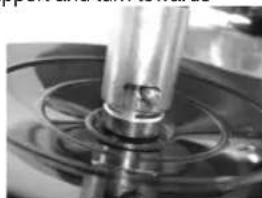
-
Place the mixing bowl on the support and turn towards LOCK to the stop.
-
Attach the desired tool by inserting the upper end in the drive shaft. Turn it slightly to lock on the drive shaft.
-
Now fill in your ingredients.
natural_image
Close-up of a mechanical component with a metallic cylindrical shaft and circular base (no visible text or symbols)Caution:
Do not overfill the appliance, the max. amount for ingredients is 2 kg.
- Press the lever (5) in the direction of the arrow to lower the arm. Press the arm down to lock in the lowest position.
- Connect the device to a properly installed 230V / 50Hz wall outlet.
- Turn the appliance on; set the step switch to one of the speed settings 1 to 6 (depending on the dough).
Table Dough Types And Tools
| Dough Type Tool Setting Amount | |||
| Heavy dough (e.g. bread or shortcrust) | Kneading hook | 1-2 max. 2kg | |
| Medium dough (e.g. crepes or cake batter) | Beater 3-4 max. 2kg | ||
| Light dough (e.g. cream, egg whites, pudding) | Egg beater | 5-6 max. 2kg | |
| Interval (e.g. folding in biscuit, egg whites) | Egg beater | Pulse max. 2kg | |
| Liquids, cream | Egg beater or mixing container | 5-6 or Pulse | max. 1.5 l |
i Note:
▶ Short time operation: With heavy dough do not operate the appliance longer than 10 minutes and leave for 10 minutes to cool down.
▶ Pulse operation: For pulse operation (kneading in short intervals) turn the switch to "PULSE" position. Hold the switch during the desired interval in this position. The switch returns to "0" position when released.
▶ Splashguard: Use the splashguard for liquid dough. It consists of the splashguard and a hopper.
o First attach mixing bowl and tool and then lower the arm.
o Now place the splashguard around the tool on top of the mixing bowl.
o Hook the hopper into the splash-guard.
natural_image
Close-up of a kitchen mixer blending liquid into a bowl (no text or symbols visible)Caution:
Remove the splashguard before lifting the arm again.
End Operation And Remove Bowl
- After kneading / mixing turn the switch (7) back to "0" position. Disconnect from mains power supply.
- Press the lever (5) down for the arm to lift.
- Remove the tool.
- Turn the mixing bowl slightly counter-clockwise to remove.
- Loosen the dough with a spatula and remove it from the mixing bowl.
- Clean all used components as described in chapter "Cleaning".
Meat Grinder
General Start-Up
- Remove the cover (2) for the screw conveyor to the front.
- Remove the cover at the screw (16).
- Tighten the screw (16) with 4 turns.
-
Attach the screw conveyor casing (10) with the hopper up in the screw conveyor drive and tighten the screw (16) clockwise.
-
Place the filler table on the hopper with the table's intake above the arm.
- Slide the screw conveyor into the horizontal part of the screw conveyor casing until the shaft locks in place.
See further in chapters "Operation Meat Grinder", "Operation Sausage Attachment", and "Operation With Cookie Attachment".
Operation Meat Grinder (see Fig. A)
i Note:
▶ Cut the meat in approx. 2.5cm pieces. Ensure that all bones and filaments are removed.
▶ Select the hole plate according to the desired fineness of the minced meat.
- Place the knife on the screw conveyor shaft with the sharp side out.
- Select a hole plate. Observe the plate and the notches at the screw conveyor casing.
- Tighten the locking mechanism (14) "hand-tight".
- Place the pieces of meat on the hopper (17) and in the funnel.
- Place a container under the outlet.
- Ensure that the function switch (7) is set to "Off" position.
- Connect the appliance to a properly installed 230V / 50Hz wall outlet.
- Turn the switch (7) to turn the meat grinder on.
- Push in the meat with the pusher (18), if necessary.

Warning:
Do not reach with your fingers into the funnel.
Operation Sausage Attachment (see Fig. B)
Follow points 1 - 6 as described in chapter "General Start-Up".
- Attach the adaptor (15c) to the screw conveyor shaft.
- Attach the sausage or kebbe attachment (15a or b) in the locking mechanism.
i Note:
The "kebbe" attachment serves to form tubes of meat or dough paste.
- Tighten the locking mechanism "hand-tight" on the screw conveyor casing.
- Slide the sausage casing (you can use natural or artificial casing) over the sausage attachment and knot the end.
- Fill the sausage paste on the hopper and in the funnel.
- Ensure that the function switch (7) is set to "Off" position.
- Connect the appliance to a properly installed 230V / 50Hz wall outlet.
- Turn the switch (7) to turn the meat grinder on.
- Push in the meat with the pusher (18), if necessary. Do not reach with your fingers into the funnel.
-
The sausage material is pressed through the sausage attachment and fills the sausage casing.
-
Pinch the sausage at the end of the sausage attachment after the first sausage has reached the desired length. Turn the sausage once or twice around its axis.
i Note:
▶ Speed settings 1 to 4 are suitable for meat grinder operation.
▶ Do not operate the appliance longer than 10 minutes and leave for 10 minutes to cool down.
▶ Turn the appliance off after each sausage until you get into the routine.
▶ Follow step 8 as described and turn the meat grinder on again.
▶ If using natural sausage casing soak it in water before use.
▶ Ensure that the natural casing is filled “loosely”, since the sausage will expand during cooking or frying and the casing may break.
Operation With Cookie Attachment (see Fig. C)
Follow points 1 - 6 as described in chapter "General Start-Up".
- Attach the cookie attachments (19 and 20) to the screw conveyor shaft.
- Tighten the locking mechanism (14) "hand-tight".
- Set the desired cookie shape with the slider (21).
- Place the dough on the hopper and in the funnel.
- Ensure that the function switch (7) is set to "Off" position.
- Connect the appliance to a properly installed 230V / 50Hz wall outlet.
- Turn the switch (7) to turn the meat grinder on.
- Push in the dough with the pusher (18), if necessary. Do not reach with your fingers into the funnel.
- Hold the strands of dough at the outlet and cut them to the desired size.
Pasta Maker
Installation (see Fig. D - F)
- Remove the cover (2) for the screw conveyor to the front.
- Remove the cover at the screw (16).
- Tighten the screw (16) with 4 turns.
- Attach the screw conveyor casing (23) with the hopper up in the screw conveyor drive and tighten the screw (16) clockwise.
- Slide the screw conveyor (22) into the horizontal part of the screw conveyor casing until it locks in place.
- Select a form plate for your pasta.
i Note:
The form plates only fit in one position on the screw conveyor casing. Observe the form plate and the notches on the screw conveyor casing.
- Tighten the locking mechanism (24) "hand-tight".
- Place the pasta dough on the hopper and in the funnel.
- Prepare a surface to spread out the pasta afterwards.
Operation Pasta Maker
- Ensure that the function switch (7) is set to "Off" position.
- Connect the appliance to a properly installed 230V / 50Hz wall outlet.
- Turn the switch (7) to turn the pasta maker with speed setting 1 to 3 on.
- Push in the dough with the pusher (18), if necessary.
Installation Mixing Container And Lid (see Fig. G)
- Remove the cover for the mixing drive upward.
- Hold the mixing container (32) with the handle on the right.
- Place the mixing container on the base unit with the ▼ marking at the bottom of the container on the base unit's icon.
- Turn the mixing container in the direction of the arrow until it locks in place. ▼ and the ☐con must be exactly lined up.
- Attach the lid (30) so that the ear closes the outlet.
- Closing the inlet simultaneously arrests the lid. Place the locking mechanism on the lid and turn towards "LOCK" until it locks in place. Turn the locking mechanism counterclockwise to remove the lid.
Mixer Operation

Caution:
For your own safety attach the mixing bowl (3) without tools and attach the cover for the screw conveyor drive (2).
▶ Do not use the lever (5) for lifting/lowering the arm during mixer operation.
▶ Do not exceed the MAX quantities marked on the mixing container!
▶ Never fill hot or hard ingredients, such as potatoes, ice, coffee beans, nuts, etc. into the mixing container.

aution: Safety switch!
The appliance only operates if the ▼ and 📋cons are perfectly aligned.
- Cut the ingredients into smaller pieces.
- Fill the mixing container (32) with your ingredients (min. 0.2 l - max. 1.5 l). Do not overfill!
- Attach the lid (30).
- Lock the lid with the locking mechanism (31).

Note:
Open the lid and/or the locking device to refill more ingredients.
▶ First turn the appliance off.
▶ Remove the lid (30) of the mixing container and fill in the desired ingredients.
▶ Replace the lid on the mixing container.

Caution:
▶ Do not reach into the mixing container to avoid injuring on the blade set.
▶ Do not operate the mixing container empty or without lid.
- Ensure that the function switch is set to "0" position.
- Connect the appliance to a properly installed 230V / 50Hz wall outlet.
- Turn the appliance on (speed setting 1 or 2 etc.) or use the "PULSE" setting. Hold the mixing container during mixing.
For uniform mixing (continuous operation):
In speed settings 1 to 6 the switch engages in the respective position.
Speed setting 1 = low speed
Speed setting 6 = high speed
Turn the switch to "0" position to turn the appliance off.
For pulse operation (mixing in short intervals) set the switch to "0" position. The appliance is turned off.
- Turn the switch to "PULSE" according to the desired interval.
- The switch automatically returns to "0" position when released.
- Turn the mixing container counter-clockwise to remove.
- Clean all used components as described in chapter "Cleaning".
Cleaning

Warning:
▶ Always disconnect from mains power supply before cleaning.

Caution:
▶ Never submerge the appliance or the motor unit in water!
▶ Do not use aggressive or abrasive detergents.
Motor Casing
- Clean the casing only with a damp cloth and a squirt of washing-up liquid.
Mixing Bowl, Mixing Tools And Meat Grinder, Pasta Maker And Mixing Container Components

Caution:
The components are not dishwasher-safe. Heat and aggressive detergents will cause deformation and discoloration.
- Clean components that come into contact with foodstuffs in sudsy water.

Warning:
The meat grinder knives are very sharp! Risk of injuries!
- Dry all components well before re-attaching to the appliance.
- Grease the plate after drying with a squirt of vegetable oil.
Recipes
Speed Setting 3-4 Cake Batter (Basic Recipe)
Ingredients: 250g soft butter or margarine, 250g sugar, 1 sachet Vanilla sugar or 1 sachet Citro-Back, 1 pinch of salt, 4 eggs, 500g wheat flour, 1 sachet baking powder, approx. 1/8 l milk.
Preparation:
Fill wheat flour with other ingredients in the mixing bowl and mix with the beater for 30 seconds on speed setting 1, then for 3 minutes on speed setting 3. Grease the baking form or line with baking paper, fill in dough and bake. Check for doneness before taking out of the oven: pierce with a pointed wooden stick in the center. If no dough sticks to it, it's done. Place cake on a baking grid to cool.
Traditional Oven:
Baking tray slot: 2
Heating: Electric oven top and bottom
heat 175-200°C,
gas oven: setting 2-3
Baking time: 50-60 minutes
You can modify this recipe according to your taste with for instance 100g raisins or 100g nuts or 100g grated chocolate. Let your imagination run wild.
Speed Setting 1-2 Linseed Bread Rolls
Ingredients: 500-550g wheat flour, 50g linseed, 3/8 l water, 1 cube yeast (40g), 100g low fat curd cheese, well drained, 1 tsp salt.
For coating: 2 tbs water.
Preparation:
Soak linseed in 1/8 l of lukewarm water. Fill the remaining lukewarm water (1/4 l) into the mixing bowl, crumble the yeast into it, add the curd cheese and mix well with the kneading hook on speed setting 2. The yeast must completely disintegrate. Add the flour with the soaked linseeds and salt into the mixing bowl. Kneed first at speed setting 1, then switch to setting 2 and knead further 3-5 minutes. Cover the dough and leave to rise for 45-60 minutes in a warm place. Knead again, take out of the bowl and shape into 16 bread rolls. Line the baking tray with wet baking paper. Place the bread rolls on the baking paper, leave 15 minutes to rise, coat with lukewarm water and bake.
Traditional Oven:
Baking tray slot: 2
Heating: Electric oven: top and bottom
heat 200-220°C
(5 minutes preheating),
gas oven: setting 2-3
Baking time: 30-40 minutes
Speed Setting 5-6 Chocolate Crème
Ingredients: 200ml cream, 150g semi-sweet chocolate coating, 3 eggs, 50-60g sugar, 1 pinch of salt, 1 sachet vanilla sugar, 1 tbs brandy or rum, chocolate chips.
Preparation:
In the mixing bowl whisk the cream stiff with the eggbeater, remove from the bowl and place in a cold place.
Melt the chocolate coating according to the instructions on the packet or 3 minute in the microwave at 600W. In the meantime, in the mixing bowl with the eggbeater, whisk eggs, sugar, vanilla sugar, brandy or rum and salt to a foam. Add the molten chocolate coating and evenly fold in at speed setting 5-6. Keep some of the whipped cream for garnishing. Add the remaining cream to the creamy matter and fold in with the pulse function. Garnish chocolate crème and serve well chilled.
Speed Setting 1-3 Basic Recipe Pasta Dough
Ingredients: 600g Flour, 400g Semolina, 6 Eggs, 10g Salt, 2cl Oil (olive oil).
Preparation: Properly mix flour and semolina. Crack the eggs and add with the olive oil and salt in the mixing bowl. Let the appliance start with the kneading hook at low speed and add the flour/semolina mix. Knead the dough for approximately 10 minutes on speed setting 3 until it appears smooth and shiny. In the beginning it looks as if the semolina would not disintegrate. Later the dough becomes smoother; reduce the speed to setting 1. Ensure that the dough is not too dry in the beginning. If it appears too solid add oil or water drop by drop. If the dough is too soft knead in some more semolina. Shape the dough into a ball and leave for at least 20 minutes covered with a kitchen towel. Use this time to assemble the pasta maker. Divide the dough in 2 - 3 portions. Use one part for preparation and cover the remaining dough again to stop it from drying out. Fill the dough, slightly sprinkled with flour, in the pasta maker. Select a speed setting between 1 and 3 according to the dough and your skills. Use the pasta fresh, if possible, that is cook them al dente in plenty of salt water. Please note that fresh pasta needs a significantly shorter cooking time, approximately 1 - 3 minutes, depending on size and thickness. Touch-dry pasta needs 1 minute longer, dry pasta needs 5 minutes longer.
Noise Emission
The sound pressure level was measured at the operator's ear (LpA) according to DIN EN ISO 3744.
Determined sound pressure level: 86.2 dB (A) (no limit)
Technical Specifications
Model: KM 367 CB
Power supply: 220-240V\~50/60Hz
Power consumption: Pnom. 600 W Pmax. 1000 W
Protection class: II
Short time operation: 10 minutes
Net weight: 7.91kg
This device complies with all current CE directives, such as electromagnetic compatibility and low voltage directive and is manufactured according to the latest safety regulations.
Subject to change without prior notice!
Meaning of the "Wheelie Bin" Symbol
Take care of our environment, do not dispose of electrical appliances via the household waste.
Dispose of obsolete or defective electrical appliances via municipal collection points.
Please help to avoid potential environmental and health impacts through improper waste disposal.
You contribute to recycling and other forms of utilization of old electric and electronic appliances.
Your municipality provides you with information about collecting points.
natural_image
Close-up of a mechanical component with a cylindrical shaft and circular base (no visible text or symbols)△Uwaga:
natural_image
Close-up of a kitchen mixer blending liquid into a glass bowl (no text or symbols visible)△Uwaga:
natural_image
Close-up of a mechanical component with a metallic shaft and circular base (no visible text or symbols)Vigyázat:
natural_image
Close-up of a kitchen mixer blending liquid into a bowl (no text or symbols visible)Vigyázat:
natural_image
Close-up of a mechanical component with a cylindrical shaft and circular base (no visible text or symbols)△ YBara.
natural_image
Close-up of a kitchen mixer blending liquid into a bowl (no text or symbols visible)△ Увага.


- Achtung:
- △ Let op:
- Attention:
- Atención:
- Atención
- △ Atenção:
- Attenzione:
- General Safety Guidelines
- Children and disabled persons
- Warning! Don't let small children play with foils for danger of suffocation!
- Symbols in this user manual
- Warning:
- Caution:
- i Note:
- Special Safety Precautions for this Device
- Location Of Controls
- Components base unit with meat grinder (Figures A-C):
- Components pasta maker (Figures D-F):
- Components mixer (Figure G):
- Scope Of Delivery
- No illustration
- Use Instruction Mixing Bowl
- End Operation And Remove Bowl
- Meat Grinder
- General Start-Up
- Operation Meat Grinder (see Fig. A)
- Operation Sausage Attachment (see Fig. B)
- Operation With Cookie Attachment (see Fig. C)
- Pasta Maker
- Installation (see Fig. D - F)
- Operation Pasta Maker
- Installation Mixing Container And Lid (see Fig. G)
- Mixer Operation
- aution: Safety switch!
- Note:
- For uniform mixing (continuous operation):
- For pulse operation (mixing in short intervals) set the switch to "0" position. The appliance is turned off.
- Cleaning
- Motor Casing
- Mixing Bowl, Mixing Tools And Meat Grinder, Pasta Maker And Mixing Container Components
- Recipes
- Speed Setting 3-4 Cake Batter (Basic Recipe)
- Preparation:
- Traditional Oven:
- Speed Setting 1-2 Linseed Bread Rolls
- Speed Setting 5-6 Chocolate Crème
- Speed Setting 1-3 Basic Recipe Pasta Dough
- Noise Emission
- Technical Specifications
- Meaning of the "Wheelie Bin" Symbol
- △Uwaga:
- Vigyázat:
- △ YBara.
- △ Увага.
Brand : BOMANN
Model : KM 367 CB
Category : Food Processor