XF 300 POP - Docking station Trevi - Free user manual and instructions
Find the device manual for free XF 300 POP Trevi in PDF.
| Product Type | Docking station with amplified speaker, karaoke function and Bluetooth |
| Brand | Trevi |
| Model | XF 300 POP |
| Power Supply | 5V DC mains adapter (not included) or internal rechargeable battery 3.7V 1800mAh |
| Bluetooth Version | 2.1 + A2DP |
| Frequency Response | 100 Hz - 20 kHz |
| Subwoofer Speaker | 6 inches (15.2 cm) |
| Speaker Driver | 3 inches (7.6 cm) |
| Supported Audio Formats | MP3 |
| Max USB/SD Capacity | 32 GB |
| Max Audio Power | 15 W |
| Inputs | USB, SD, AUX (3.5 mm jack), 2 microphone inputs (6.35 mm jack) |
| Functions | Bluetooth, FM Radio, USB/SD Playback, AUX, Microphone with echo control, Karaoke |
| Charging Time | Approximately 4 to 6 hours (first charge), do not charge more than 8 hours |
| Accessories Included | USB/DC charging cable, 3.5 mm stereo jack cable, wired microphone, user manual, warranty |
| Usage Precautions | Do not expose to heat, humidity, dust, vibrations; leave 5 cm clearance for ventilation; unplug if liquid penetrates; do not place objects filled with liquid; do not block ventilation slots. |
| Cleaning | Soft cloth slightly damp, avoid abrasive solvents. |
| Repairability | The device contains no user-serviceable parts. For any intervention, contact a Trevi authorized service center. |
| General Information | Non-professional domestic use. The manufacturer reserves the right to change specifications. |
Frequently Asked Questions - XF 300 POP Trevi
User questions about XF 300 POP Trevi
0 question about this device. Answer the ones you know or ask your own.
Ask a new question about this device
Download the instructions for your Docking station in PDF format for free! Find your manual XF 300 POP - Trevi and take your electronic device back in hand. On this page are published all the documents necessary for the use of your device. XF 300 POP by Trevi.
USER MANUAL XF 300 POP Trevi
ALTOPARLANTE AMPLIFICATO CON KARAOKE, BLUETOOTH
Manuale d'uso e collegamento
PORTABLE SPEAKER WITH KARAOKE, BLUETOOTH FUNCTION
Connection and Operation Manual
HAUT-PARLEUR AVEC KARAOKE, BLUETOOTH FONCTION
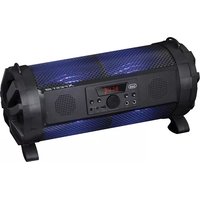
natural_image
Illustration of a portable electronic device with colorful guitar panels and a speaker, no visible text or symbols on the device itself.
ATTENZIONE
RISCHIO DI SCOSSE ELET-
TRICHE!
NON ESPORRE A PIOGGIA E
UMIDITÀ

ATTENZIONE: NON APRITE L'APPARECCHIO. ALL'INTERNO NON VI SONO COMANDI MANIPOLABILI DALL'UTENTE NE PARTI DI RICAMBIO. PER TUTTE LE OPERAZIONI DI SERVIZIO RIVOLGERSI AD UN CENTRO DI ASSISTENZA AUTORIZZATO TREVI

ATTENTION
RISQUE DE DECHARGES ELEC-
TRIQUES
NE PAS EXPOSER A LA PLUIE ET A
L'HUMIDITE

ATTENTION: NE PAS OUVRIR L'APPAREIL, A L'INTERIEUR IL N'Y A PAS DE COMMANDES A MANIPULER PAR L'UTILISATEUR OU DE PIECES DE RECHANGE. POUR TOUTES LES OPERATIONS DE SERVICE IL FAUT S'ADRESSER A UN SERVICE D'ASSISTANCE AUTORISE TREVI.

ATENCION
PELIGRO DE CHOQUES ELECTRICOS
NO EXPONER A LLUVIA Y HUMEDAD

WARNING: DO NOT OPEN THE SET. NEITHER CONTROLS OR SPARE PARTS TO BE USED BY THE USER ARE TO BE FOUND INSIDE IT. APPLY TO AUTHORISED TREVI CENTERS FOR SERVICE OPERATIONS.

ACHTUNG
WIRES CONNECTIONS TO A UK THREE-PIN PLUG
The wires in this mains lead are coloured in accordance with the following wiring codes:
Blue: Neutral
Brown: Live
The wires in this mains lead must be connected to the terminals in the plug as follows:
Blue wire: N or Black
Brown wire: L or Red
Neither wire is to be connected to the earth (E or W) terminal of three-pin plug.
Should the fuse fail in the plug remove the plug form the wall socket and replace the fuse with a 3 Amp. ASTA approved BS 1362 fuse.

text_image
BLUE E N L FUSE BROWN CORD GRIPNOTE D'USO
This is a precision electronic appliance; avoid using it in the following cases:
- Listening to high volume for a long time could damage your hearing.
- Do not close the ear to the loudspeaker during step setting and volume adjustments, and in particular keep the volume down at the ignition
- Near strong heat sources, such as central heating plants or stoves.
- In very humid places such as bathrooms, swimming pools, etc.
• In very dusty places.
• In places subject to strong vibrations. - Position the appliance in such a way that there is always enough room for free air circulation (at least 5 cm).
- Do not block the air inlets.
- If any liquid enters the appliance, unplug it immediately from the socket and take it to the nearest TREVI authorised service centre.
- Before switching on the appliance, always check that the power cable and the connection cable are properly installed.
- The apparatus shall not be exposed to dripping or splashing water. No objects filled with liquid, such as vases, should be placed on the unit.
- No naked flame sources, such as lighted candles, should be placed on.
- Keep this manual.
CARE AND MAINTENANCE
Use a slightly damp soft cloth for cleaning. Do not use solvents and abrasive substances.
IMPORTANT
This device is designed for home use (not professional use). This appliance has been carefully built to ensure long-lasting perfect performance. However, should any inconvenience occur, please contact your local authorised TREVI Service Centre.
TREVI follows a policy of ongoing research and development. Therefore products may have different features from those described.
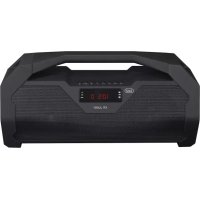
CONTROL PANEL
text_image
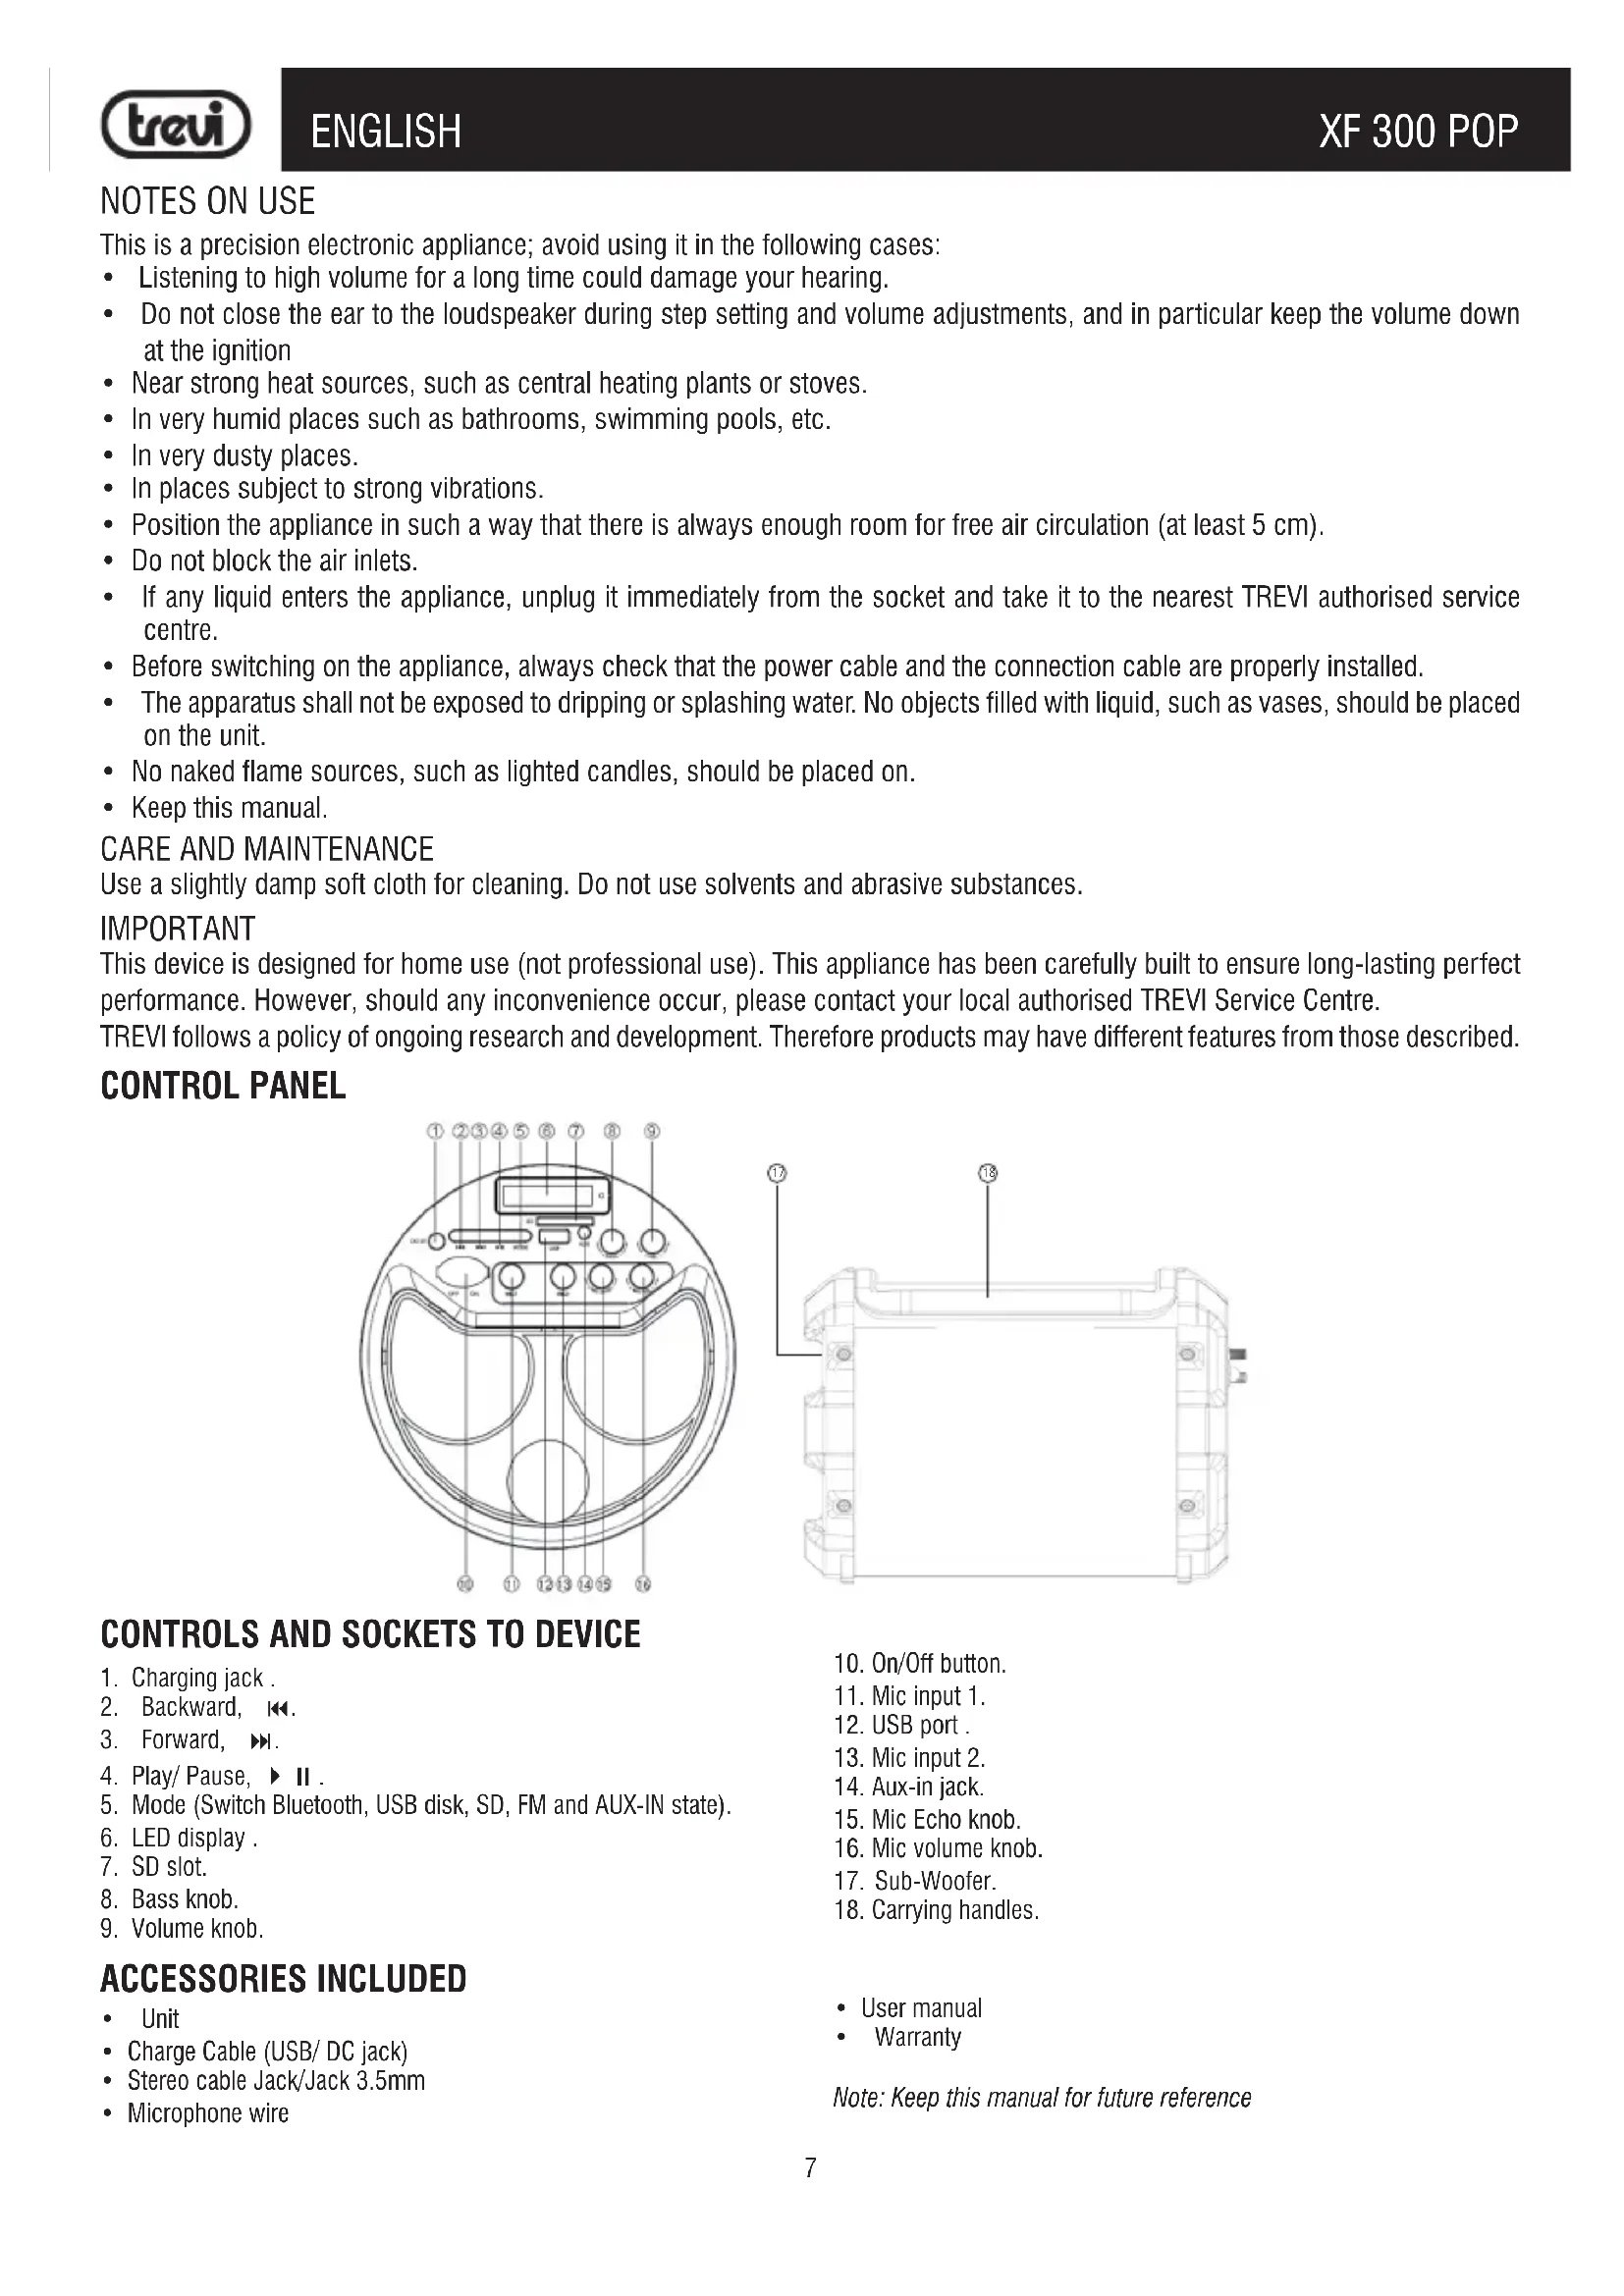
Technical diagram of a device front panel with numbered components and labeled parts in ChineseCONTROLS AND SOCKETS TO DEVICE
- Charging jack.
- Backward, ◀◀.
- Forward, ▶▶.
- Play/ Pause, ▶ II .
- Mode (Switch Bluetooth, USB disk, SD, FM and AUX-IN state).
- LED display.
- SD slot.
- Bass knob.
- Volume knob.
ACCESSORIES INCLUDED
- Unit
• Charge Cable (USB/ DC jack)
• Stereo cable Jack/Jack 3.5mm -
Microphone wire
-
On/Off button.
- Mic input 1.
- USB port .
- Mic input 2.
- Aux-in jack.
- Mic Echo knob.
- Mic volume knob.
- Sub-Woofer.
- Carrying handles.
- User manual
- Warranty
Note: Keep this manual for future reference
TRANSPORTATION
To carry the device can use the handles (18) by pulling them from the cabinet.
POWER
This unit works with rechargeable Lithium battery.
-
The charger is not included in the accessories. Please use the universal 5V/1A charger to charge this devices. Put the provided charge cable into the charging jack, connect the other end to the charger, the charging indicator beside the LED screen will keep lighting. (When playing music during charging, please put the volume to middle, because for some music with heavy bass, the charger may can not afford the high current temporarily under the maximum volume)
-
Charge time should be 4-6 hours. When charging full, the indicator light will switch off.
-
To prolong the life of battery, DO NOT CHARGE CONTINUOUSLY FOR LONGER THAN 8 HOURS.
Lamp status LED charging:
- RED LED light fixed: with the device switched off or in use indicates that the battery and 'being charged.
- RED LED indicator off: with the device switched off or in use indicates that the charging process is complete, the battery is charged.
Caution:
- Do not connect the appliance to sockets with a voltage other than that indicated.
- Do not use cables other than the supplied one.
BASIC FUNCTIONS
POWER ON/OFF
Press the main switch ON/OFF (10) to position ON to turn the power. Press the main switch ON/OFF (10) to position OFF to switch off.
MODE SETTING FUNCTION
To change the mode function, press more 'times the MODE key (5) to select RADIO (display show the frequency), BLUETOOTH (the display "Bt"), USB (only if the USB socket (12) is connected to a memory, the display shows "Lod" for a few seconds), SD (SD only if the slot (7) is connected to a memory, the display shows "Lod" for a few seconds), AUX (only if input Aux-in (14) cable is connected stereo Jack/Jack 3.5mm supplied the display shows "Aux").
ADJUSTING THE VOLUME
-
Turn the volume VOL. (9) to increase or decrease the overall volume of playback.
-
Turn the MIC VOL (16) to adjust the volume level signal inputs MICROPHONE (11) (13). The adjustment acts on the two inputs simultaneously
SETTING BASS TONE
Turn the knob BASS (8) to adjust the bass.
ECHO EFFECT
Turn the knob ECHO (15) to increase or decrease the echo effect on the inputs MICROPHONE (11) (13).
Note: the echo only works on microphone inputs.
FUNCTION RADIO FM
Under FM radio state, the audio cable provided treat as antennal. Please insert the audio cable to get best FM signal before using.
AUTO MEMORY
-
Turn on the unit and press repeatedly the MODE key(5) on unit and select RADIO function (the display will show the frequency).
-
Press ▶ II (4) button on the unit to activate the auto memory (the radio starts an automatic search radio stations and saves them automatically). The station's number stored depends on the radio signal in your area. During the search, press ▶ II (4) button to stop recording.
-
Use the ▶(3) and ◀(2) buttons to listen to the various radio stations saved in memory.
BLUETOOTH OPERATION
-
Turn on the unit and press the MODE(5) button to select the Bluetooth function, the display shows "Bt".
-
In Bluetooth mode, the "Bt" on the display (9) will light up, you will hear two beeps, the system automatically enters search mode.
-
Activate the Bluetooth feature on the external device to be coupled.
-
Initiate a search for devices. After select the "XF 300 POP".
-
Enter the password "0000" if required.
-
Press ▶ II (4) button to start playing and ▶(3) and ◀(2) buttons for change the songs.
PLAY ON INPUT USB/SD
-
Turn on the unit.
-
Insert a USB memory or an SD card into the USB(12), SD(7) slot. Playback starts automatically.
-
To pause playback, press the key ▶ II (4), the display will show the icon II.
-
To resume playback, press key ▶ II (4).
-
Press ▶(3) button to switch to the next track. Press ◀(2) button to switch to the previous tracks.
-
Press and hold the buttons ▶(3) or ◀(2) to quickly search for a particular piece of music. Release the button to resume normal playback.
Note:
- The player may not support some USB devices, this is due to the incompatibility of some processors.
- To avoid harmful interference, always connect USB devices directly to the unit, do not use extension cords.
- From the computer to format the USB memory/SD FAT (16 or 32).
AUX-IN
- Turn on the unit.
- Connect any unit equipped with audio output, through a cable 3.5mm jack (included) to the AUX IN(14).
- The device will automatically go to the function "AUX IN", the display will show "AUX".
- Use the external device from their commands.
- Connect the supplied microphone into the jack MIC(11).
- Turn on the microphone using the switch on the handle of the microphone to the ON position.
- Adjust the volume of the microphone input(16) and the echo effect(15) as desired using the appropriate commands.
- Press ▶ II (4) to activate the MUTE function, press it again to turn off the mute function.
Note:
- You can use two microphones simultaneously (second microphone not included).
- With microphone connected, the radio does not work. Remove the microphone jack for normal operation.
- The microphone is active on the Bluetooth function, USB / SD and AUX-IN.
INFORMATION NOTE ON THE REMOVAL AND DISPOSAL OF BATTERIES
Warning: Only high-qualified personnel should perform this operation!
BATTERY REMOVAL
The appliance should not be plugged to the mains socket when performing this operation!
- Remove the screws that secure the structure of the trolley and take it apart.
- Remove the screws that secure the rear panel speaker amplified and remove the panel;
- Locate the battery;
- Remove the screws that secure the supports of the battery, remove the supports, disconnect the battery and remove it.
Used batteries should not be disposed of with household waste or thrown into fire or water. Used batteries should be recycled or disposed of in separate waste collection centres.
SPECIFICATIONS
Rechargeable battery capacity: .....Lithium battery 3.7V, 1800mAh
Voltage: 5V
Bluetooth version: 2.1 + A2DP
Bluetooth transmission power: 2,5mW
Bluetooth transmission: 2,4GHz
Radio FM: 87.5 - 108.0 MHz
Frequency Response: 100Hz - 20KHz
Subwoofer size: 6 inch
Speaker size: 3 inch
Format supporting: MP3
USB/SD supporting: 32GB
Power soun max: Max 15W
Sound Bar Dimensions: 310x215x225mm
Weight: 2,9 Kg
NOTES D'EMPLOI
text_image
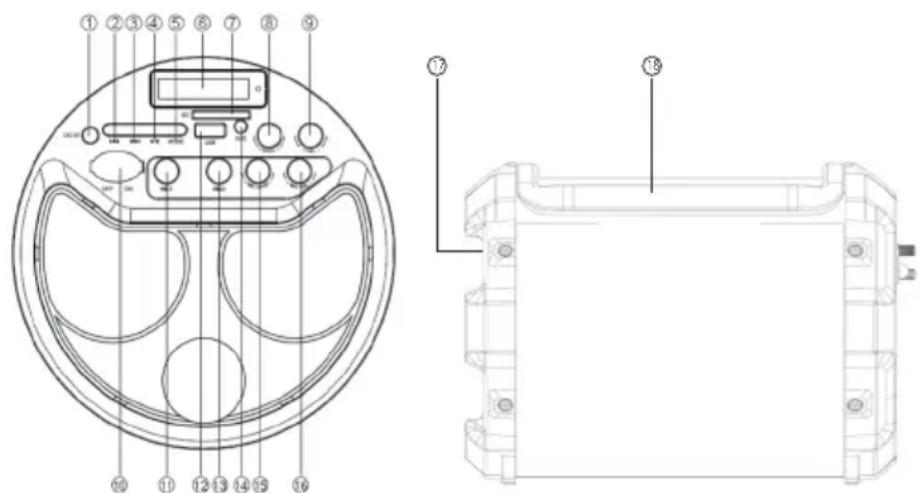
Technical diagram of a device's internal components with numbered labels for identification.COMMANDES ET PRISES POUR LE DISPOSITIF
Radio FM: 87.5 - 108.0 MHz
Dimensions: 310x215x225mm
Poids: 2,9 kg
GEBRAUCHSHINWEISE
text_image
Technical diagram of a device casing with numbered components and labeled parts in ChineseKONTROLLEN UND ERGRIFFEN, UM DIE DEVICE
Radio FM: 87.5 - 108.0 MHz
text_image
Technical diagram of a device casing with numbered components and labeled parts in ChineseUSERS INFORMATION pursuant to Legislative Decree No. 49 of March 14, 2014
"Implementation of Directive 2012/19 / EU on Waste Electrical and Electronic Equipment (WEEE)"
This wheeled bin symbol on the product indicates that at the end of its life must be collected separately from other waste. The user must, therefore, take the remote control integrates the essential components that got to its life to the appropriate differentiated collection centers for electronic and electro-technical waste, or return it to the dealer when purchasing a new appliance of equivalent type, in terms of one to one, or one to zero for equipment having longer side of less than 25 cm. Appropriate separate collection for the decommissioned equipment for recycling, processing and environmentally compatible disposal helps prevent negative impact on the environment and human health and promotes recycling of the materials making up the product. Illegal dumping of the product by the user entails the application of administrative sanctions stated in Legislative Decree n. Legislative Decree No. 49 of March 14, 2014.
SIMPLIFIED EU DECLARATION OF CONFORMITY
Hereby TREVI Spa declares that the radio equipment type XF 300 POP is in compliance with directive 2014 / 53 / EU.
The full text of the EU declaration of conformity is available at the following internet address www.trevi.it