USER MANUAL N112 THETFORD
175Gnd 1802002-1942Rnain
www.thetiod-europe.com
THETF RD REFRIGERATOR
UK-ALD-P-FES-P-F-I-S-N-DX-SF-SLO
图10-30
M
0 -
B
5
B
1
1475.2014 10512893-1344P#y

| Model | Emissions
and
Use of the
Vehicle | Actual value for
NED
(€) | Pre-Expenditure
of E&O | NED value
(€) | Fuel
Type | Fuel
Price/100km | Fuel
Value
(€) | Fuel
Weight
(€) | Operation |
| BEC - F-257 | S 460/450 | 5 | 15 | 8 | 2.5 | 25 | 22 | Unmanned | |
| BEC - F-257 | S 460/450 | 13 | 5 | 13 | 2.5 | 25 | 22 | Unmanned | |
| BEC - F-257 | S 460/450 | 9 | 42 | 10 | 2.5 | 25 | 22 | Unmanned | |
| BEC - F-257 | S 460/450 | 11 | 64 | 11 | 2.5 | 25 | 22 | Dred | |
| BEC - F-257 | S 460/450 | 16 | 38 | 11 | 2.5 | 25 | 22 | Dred | |
| VTC - F-257 | S 460/450 | 32 | 32 | 11 | 2.5 | 25 | 22 | Dred | Twin or multiuser |
| YBC - F-257 | S 460/450 | 47 | 47 | 11 | 2.5 | 25 | 22 | Dred | HJT and DED |
| YBC - F-257 | S 460/450 | 57 | 11 | 11 | 2.5 | 25 | 22 | Dred | Motor |
| YBC - F-257 | S 460/450 | 67 | 25 | 11 | 2.5 | 25 | 22 | Dred | FCA and DED |
| YBC - F-257 | S 460/450 | 77 | 47 | 11 | 2.5 | 25 | 22 | Dred | Motor |
| YBC - F-257 | S 460/450 | 100 | 47 | 11 | 2.5 | 25 | 22 | Dred | Motor |
| YBC - F-257 | S 460/450 | 100 | 47 | 11 | 2.5 | 25 | 22 | Dred | Motor |
| YBC - F-257 | S 460/450 | 100 | 47 | 11 | 3.5 | 25 | 22 | Dred | Motor |
| YBC - F-257 | S 460/450 | 100 | 47 | 11 | 3.5 | 25 | 22 | Dred | Motor |
| YBC - F-257 | S 460/450 | 100 | 47 | 11 | 3.5 | 25 | 20 | Motor | Motor |
| YBC - F-257 | S 460/450 | 100 | 47 | 11 | 3.5 | 25 | 20 | Motor | Motor |
| YBC - F-257 | S 460/450 | 100 | 47 | 11 | 3.5 | 25 | 20 | Motor | Motor |
| YBC - F400 | S 460/450 | 115 | 47 | 11 | 3.5 | 25 | 20 | Motor | Motor |
| YBC - F400 | S 460/450 | 115 | 47 | 11 | 3.5 | 25 | 20 | Motor | Motor |
| YBC - F400 | S 460/450 | 115 | 47 | 11 | 3.5 | 30 | 20 | Motor | Motor |
| YBC - F400 | S 460/450 | 115 | 47 | 11 | 3.5 | 30 | 20 | Motor | Motor |
| YBC - F400 | S 460/450 | 115 | 47 | 11 | 3.5 | 30 | 20 | Motor | Motor |
| YDC - F400 | S 460/450 | 115 | 47 | 11 | 3.5 | 30 | 20 | Motor | Motor |
| YDC - F400 | S 460/450 | 115 | 47 | 11 | 3.5 | 30 | 20 | Motor | Motor |
| YDC - F400 | S 460 /450 | 115 | 47 | 11 | 3.5 | 30 | 20 | Motor | Motor |
| YDC - F400 | S 460/450 | 115 | 47 | 11 | 3.5 | 30 | 20 | Motor | Motor |
| YDC - F400 | S 460/450 | 115 | 47 | 9 | 3.5 | 30 | 20 | Motor | Motor |
| YDC - F400 | S 460/450 | 115 | 47 | 9 | 3.5 | 30 | 20 | Motor | Motor |
Welcome!
Congratulations on purchasing your Thetford refrigerator! You have made an excellent choice. The refrigerator is user-friendly, has the very latest features, uses little power and works silently. It gives you all the convenience of home during your holiday or short break. Enjoy using your new refrigerator!
If you have any questions, our Customer Service department will be happy to assist you during office hours. For the address of your local Theford office, please see the back of this manual.
THETFORD
COPYRIGHT © 2005 Thetford B.V. All rights reserved. Changes, printing, setting and translation mistakes excepted. Date: April 2005
-5-
UK Instructions for use
1 INTRODUCTION
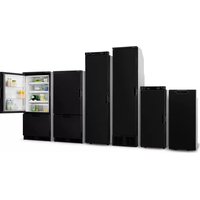
This user's manual is for all N80, N90, N87, N100, N104, N109, N110, N112, N145 and N150 models of Thetford absorption refrigerators. It explains how to use your refrigerator correctly and safely. Read the manual carefully before using the refrigerator for the first time to obtain a quick overview of how to operate and use the refrigerator.
The method for absorption refrigerators are specially designed to store fresh and frozen food and make ice cubes in caravans and campers. The control panel allows you to select the preferred energy source and cooling level. Different energy sources allow you to use your refrigerator under different conditions.
There are numbers in the text that refer to illustrations. These illustrations are printed in a fold-out at the beginning of this manual.
Theftold absorption refrigerators belong to category C11: gas appliances that must be installed so that the combustion area is isolated from the living space.
To find out more about how your absorption refrigerator works, visit our website at www.thetford-europe.com.
2 PRECAUTIONS AND SAFETY INSTRUCTIONS
2.1 Alerts
The following alerts are used in this user's manual:
Warning! Warning alerts the user to the danger of damage to the product or to the user if the user fails to carry out the described procedures carefully. Non-observance of the procedures may result in serious injury to the user or damage to the product.
Caution! "Caution" alerts the user to the possibility of damage to the product if the user fails to carry out the described procedures carefully.
Important "Important" denotes supplementary information for the user and alerts the user to potential problems.
2.2 Warnings
-
This refrigerator must be installed according to the manufacturer's instructions and in compliance with local and national regulations.
-
Read this manual carefully before you start to use your refrigerator.
-
Always consult the warnings before you perform any maintenance or gas checks.
2.2.1 Repairs / mainlenance
- Never open or damage the cooling system. The cooling system is pressurized and contains substances harmful to health.
- Never attempt to repair gas, extractor or electrical parts yourself. They must be repaired by a qualified service engineer. Contact the Customer Service department of Theftford for a list of qualified parties.
- Always switch off the refrigerator before you perform any kind of maintenance or cleaning.
2.2.2 Use
- Never cover the ventilation grills in the walls of a caravan. Good ventilation is essential for the corrected working of the absorber system.
Water in the ventilation grating can result in damage to the refrigerator. Therefore, we advise that you put the winter cover over the ventilation gratings prior to washing your vehicle.
- Never expose the refrigerator to rain.
- Never operate the refrigerator by gas while driving. If a road accident results in fire, there is a risk of explosion.
2.2.3 What to do If...
You smell gas:
close the valve of the gas bottle
extinguish any naked flames;
- do not switch on any electrical devices or lighting;
- open the windows and leave the room.
- contact the Customer Service department of Thetford. You suspect a leak in the cooling system:
- switch off the refrigerator;
extinguish any naked flames;
- provide sufficient ventilation
- contact the Customer Service department of Theford.
3 ABOUT YOUR REFRIGERATOR
Your refrigerator has a cold space and a freezer compartment. After startling up the refrigerator, allow it to cool for at least eight hours before placing any food in it.
3.1 Cold space
The cooling fins are located on the inside of your refrigerator. The absorption system uses the cooling fins to withdraw heat from the refrigerator. Therefore, never place plastic or paper over the cooling fins. Air must be able to circulate freely through the refrigerator so that heat can be extracted.
Important Do not cover the cooling fice at the back of the refrigerator with plastic or paper. The refrigerator cools optimally when air is allowed to move freely through the refrigerator.
To limit frosting on the cooling fins:
always cover liquid foods before placing them in the refrigerator;
always let hot food cool before placing it in the refrigerator;
- never keep the refrigerator open longer than necessary.
3.1.1 Fitting racks
Inside your refrigerator there are two or three storage racks. You can adjust the racks to a convenient height by means of a simple click system:
- click the plastic bracket to the right short side of the rack;
- turn the bracket into the horizontal position and insert the rack tipped in a sloping position into the refrigerator;
- place the short side without bracket into one of the grooves on the left wall of the refrigerator;
- place the short side with bracket in the corresponding groove on the right wall of the refrigerator;
- turn the bracket downwards to fix it into the groove.
To move a rack, turn the bracket upwards and remove the rack. Place the rack at the required height in the way described above.
3.1.2 Securing products for driving
The fitting racks in your refrigerator have a system for you to secure products while driving. The system consists of a simple click-and-slide plastic strip. To secure products on the rack while driving, push the plastic strip as tightly as you can against the products on the rack.
In the storage space on the inside of the refrigerator door, there are two unique Thetford bottle slides (see illustration 1 and 2). The slides prevent bottles from sliding around during driving. Push the slide against the products in the door (bottle slides 1 and 2) or place the products between the bottle slide (only bottle slide 1).
3.2 Freezer compartment
Important - The freezer compartment is unsuitable as a means of freezing food, the freezer will maintain the temperatures of already frozen food.
- Use only drinking water to make ice cubes.
- Do not place any other products in the freezer compartment when you are making ice cubes.
Water freezes fastest with the thermostat at the highest setting.
Tip! - Make ice cubes at night when your refrigerator has more spare capacity.
3.3 Automatic defrosting cycle
The Automatic (and LCD - Electric) refrigerators that work on the SES system (Smart Energy Selection) are equipped with an automatic defrosting cycle. At the end of each 49 hours of refrigerator operation, the system checks the temperature of the cooling fins at the rear of the refrigerator. If the temperature is too low, the system activates the defroasting cycle:
the system switches off the refrigeration, until the rear cooling element has reached the correct temperature again. After this, the timer is set at 49 hours once again and the system resumes normal operation. Each firth the refrigerator is switched on or off, the timer is automatically reset to 49 hours.
Note1 Regular manual defrosting is not necessary with refrigerators that work on the SES system. The automatic defrosting cycle ensures that there is minimal ice build-up on the cooling element at the rear of the refrigerator.
3.4 Door locking mechanism
The refrigerator door has an automatic locking mechanism. The door locks automatically when you press it shut firmly. This automatic locking mechanism also keeps the refrigerator door shut during driving. For some models an additional security device is fitted below the refrigerator. By pushing the locking bar over the pin when the door is closed, you can be sure that the door does not open during your journey.
If you are not going to use the refrigerator for a prolonged period of time, you can use the special storage latch of the door locking mechanism (see illustrations 3 and 4) to prevent odours. Rotate the hook through 90 degrees and lock it in place using the strike plate.
4 SWITCHING ON THE REFRIGERATOR (control panel according illustrations 5 and 6)
- It is recommended to clean the inside of the refrigerator before you switch it on.
- Let the refrigerator cool for at least eight hours before you place food in it for the first time.
4.1 Igniting and starting your refrigerator
Manual ignition:
ILLUSTRATION 5
A-Energy source selector switch
B=Thermosat
C=Flame matab
B. Annual income
D=Manual ignition (plzoelectric ignition)
Electric ignition:
ILLUSTRATION 6
A = Energy source selector switch
B=Thermostat
C-Flame meter
A. The refrigerator can be powered by the mains (230V), direct current (12V) or liquid gas. Select the energy source that you want by means of the energy source selector switch (A). The switch has four settings:
direct current (DC) (12V)
- mains supply (230y)
08
- switched off
B. The thermostal controls the refrigerator temperature when the refrigerator is powered from the mains (230 V) or gas. The refrigeration level is indicated by the dots (the bigger the dot, the colder the setting).
C. The flame meter shows whether the flame is alight. The flame is alight when the red needle of the meter moves into the green area.
D. Pressing the manual (piezoelectric) starter produces a spark that ignites the flame in the burner.
4.1.1 Electrical operation
The refrigerator can be powered by electricity in two ways:
- DC (12V): Set the energy source selector switch (A) to
Important! Always use the gas connection or mains voltage to start up the refrigerator for the first time and to cool it. Powering from the battery of your vehicle is suitable only for maintaining the temperature of the refrigerator and its contents once it has been refrigerated.
- When powered by a vehicle battery (12 V) the refrigerator works without temperature control (i.e. constant operation).
- Mains voltage (230 V): set the power selector switch (A) to
- Sat the temperature by means of a thermostat, rotary switch (8). (The bigger the dot, the colder the setting).
4.1.2 Powering with gas
Warning! - Flammable material must be kept away from the refrigerator.
For selection of gas type, see the information plate inside your refrigerator.
- For the pressure regulator model, see the information plate inside your refrigerator and the table at the end of this booklet.
- The type of gas container and its location must be in compliance with the most recent regulations. Ensure that the unit is installed in a location with good ventilation and make sure that the ventilation openings in the gas container storage location remain open.
- The changing of the gas container must be done outside in the open air and out of reach of any possible sources of ignition.
- You are strongly advised not to use gas to power the refrigerator while you are driving. If a road accident results in fire, there is a danger of explosion.
- You are strongly advised not to use gas to power the refrigerator in the vicinity of petrol stations.
1 Open the valve of the gas bottle and the gas taps.
2 Set the Thermostat (B) to the highest level (the biggest dot).
3 Set the energy source selector switch (A) to 4 Limit the on-flores
4. Ignite the gas name:
Manual ignition (N80P, N90P, N100P, N112P):
- Press the thermostat (B), and keep it depressed.
- Press the button for manual ignition several times at intervals of between 1 and
2 seconds.
Release the thermostat when the indicator of the flame meter enters the green area. If it does not enter the green area, repeat the previous step.
Warning! Never keep the thermostat depressed for longer than 30 seconds. If a flame does not appear, wait at least five minutes before trying again. If you fail to observe this rule, there may be an accumulation of gas creating the risk of fire or explosion.
Sat the desired refrigeration level by means of the thermostat (B). (The bigger the dot, the colder the setting)
Electrical ignition (N80E, N90E, N100E, N109, N110E, N145E):
- Press the thermostat (B) and keep it depressed.
- Ignition takes place automatically. You will hear a ticking noise. If ignition was successful, the noise will stop and the flame meter will turn green. Release the thermostat.
- If the flame goes out, ignition will be repeated automatically.
- Set the desired refrigeration level by means of the thermostat (5).
4.2 Switching off the refrigerator
Set the energy source selector switch (A) to C. The refrigerator is now completely switched off.
- Use the special storage latch on the door locking mechanism to stop the door from closing. This prevents unpleasant odours and mould in the refrigerator. Important! If you are not going to use the refrigerator for a prolonged period, close the valve of the gas bottle and the gas taps.
5 SWITCHING ON THE REFRIGERATOR (control panel according illustration 7)
- It is recommendable to clean the inside of the refrigerator before you switch on the refrigerator.
- Let the refrigerator run for at least eight hours before you place food in it for the first time.
5.1 Smart Energy Selection (SES)
When you start up a refrigerator equipped with Smart Energy Selection (SES) you should usually select the AUTO mode. The SES system will then automatically select the best of the three available energy sources.
The system will apply the following priority:
- mains voltage (230 V) = C
direct current (12V)
liquid gas
If an energy source becomes available that has a higher priority than the source the refrigerator is currently using (e.g. if your vehicle engine is started), the system will stop using the current energy source and switch to the energy source with the higher priority.
If a fault occurs in one or more of the possible energy sources, the system will not generate an error message while an alternative energy source is still available. The SES system switches over automatically.
If none of the energy sources is available, the LED of the main switch will turn
from green to red and flash every second.
SES models additionally allow you to select the desired energy source manually.
5.2 Switching on the refrigerator
Important! The memory of the SES system saves every change made to the setting. Consequently, the SES system will start up on each subsequent occasion in the last-selected setting.
ILLUSTRATION 7
A = Main switch (on/off)
B=Mode selection switch
C-Cooling level switch
D = Display LED
- Open the valve of the gas bottle.
- Open the taps of the gas supply.
- Press main switch (A). The LED alongside the main switch will turn green.
- Use the mode selection switch to select the "Auto" function or one of the power supplies that you want. The LEDs will show the option you have selected.
- Set the desired cooling level by means of the cooling level selection switch (C). The LEDs will show the cooling level setting you have selected.
A. Use the main switch to switch the refrigerator on and off. The LED alongside the main switch will turn green. The display LEDs show the most recent settings. After 10 seconds the display LEDs will go out. The LED of the main switch remains green.
B. Press the mode selector switch and the display LEDs will show the setting for 10 seconds. Successively pressing the mode selector switch takes you through the menu in the following sequence: AUTO, manual DC (12 V), manual gas, manual mains voltage (230 V) and back to AUTO. Select either the AUTO option or one of the other power supplies that you want to use. The LEDs show the option you have selected. If you select the AUTO option, the system will choose the most suitable power supply and the AUTO LED and the LED of the power supply chosen by the system will both light up. Ten seconds after release of the mode selector switch, the system will switch off the LEDs. They will go out.
C. Use the cooling level selector switch to control the temperature of the refrigerator. When you press the cooling level selector switch, the LED showing the currently sat temperature will light up. Every time you press the cooling level selector switch you set the refrigerator one position cooler. On reaching the coldest temperature, the system will start again at the warmest temperature setting. Ten seconds after release of the cooling level selector switch, the system will switch off the LEDs. They will go out.
5.3 Powering with electricity
Powering with electricity can be selected both by the Auto mode and manually.
5.3.1 Auto mode
Mains voltage (230 V):
This energy source will be selected if the mains voltage is greater than 200 V. This power supply requires a continuous current of 12 V to operate the electronic control system.
Direct current (12V)
The SES system will select 12 V powering only if a mains voltage (230 V) is
unavailable, the vehicle engine is running and a voltage higher than 11V is available.
If a fault occurs during electrical powering (230 V or 12 V), an error message will not be shown on the display as long as another energy source is available. The system will automatically switch to the available energy source that has the highest priority.
5.3.2 Selecting electrical power manually Mains voltage (230 V):
The LED on the main switch warns you whenever insufficient voltage is available or if a fault occurs. If this happens, the LED will change from green to red and flash once per second.
When sufficient current is available again, or the fault has been resolved, the main switch LED will emit a steady green light again.
Direct current (12V):
The main switch LED warns you whenever your vehicle's engine is not running, or if a fault occurs, or if insufficient voltage is available. If this happens, the LE will change from green to red and flash once per second.
Once the engine is running, or the fault has been resolved, or sufficient voltage is available again, the main switch LED will again emit a steady green light.
NB: if the refrigerator has been manually set to operate at 12V , it will not automatically switch to another energy source when your vehicle's engine is not running. In this case, the refrigerator will stop cooling.
5.4 Powering with gas
Powering with gas can be selected both by the Auto mode and manually. Warning! Flammable material must be kept away from the refrigerator.
- For selection of gas type, see the information plate inside your refrigerator.
- For the pressure regulator model, see the information plate inside your refrigerator and the table at the back of this booklet.
- The type of gas container and its location must be in compliance with the most recent regulations. Ensure that the unit is installed in a location with good ventilation and make sure that the ventilation openings in the gas container storage location remain open.
- The changing of the gas container must be done outside in the open air and out of reach of any possible sources of ignition.
- It is prohibited to use gas to power the refrigerator while you are driving. If a road accident results in fire, there is a danger of explosion.
- It is prohibited to use gas to power the refrigerator in the vicinity of petrol stations.
5.4.1 Auto mode
The system will select gas operation if:
- mains voltage (230 V) is unavailable;
- the vehicle's engine is not running
Once mains voltage (230 V) is available again or the vehicle's engine is running, the system will switch to the available energy source that has the highest priority. If the refrigerator switches from 12 V DC to gas operation when it is in auto mode, the system will wait for about 15 minutes before igniting the gas. During this time, however, the gas indicator lamp will come on. The delay is built in to avoid it switching to gas operation whenever you stop to refuel your vehicle. You can cancel the delay by immediately switching the refrigerator off and then on again.
If the system selects gas operation, the ignition will be activated automatically. The
gas will flow to the burner and be lit by the electric ignition. If the flame goes out, the gas will immediately be lit again.
5.4.2 Selecting gas operation manually
If the flame cannot be lit within 30 seconds, the gas supply will stop and gas mode will be switched off. The LED of the main switch will turn from green to red and flash every second.
The gas mode can be reset only if the refrigerator is switched off. If you switch the refrigerator on again and the gas mode is still not working, the LED of the manual gas mode will flash to indicate that gas is unavailable.
Important! It is prohibited to use gas to power the refrigerator while you are driving. If a road accident results in a fire, there is a danger of explosion. It is prohibited to use gas to power the refrigerator in the vicinity of patrol stations. If it takes longer than 15 minutes to refuel your vehicle, you should switch the refrigerator off using the main switch (A).
5.5 Switching off the refrigerator
- Set the main switch (A) to
The refrigerator is now completely switched off.
- Use the special storage latch on the door locking mechanism to stop the door from closing. This prevents unpleasant odours and mould in the refrigerator.
6 SWITCHING ON THE REFRIGERATOR (control panel according illustration 8)
- It is recommendable to clean the inside of the refrigerator before you switch on the refrigerator.
- Let the refrigerator run for all at least eight hours before you place food in it for the first time.
6.1 Smarl Energy Selection (SES)
When you start up the refrigerator (equipped with Smart Energy Selection (SES)) you should usually select the AUTO mode. The SES system will then automatically select the best of the three available energy sources.
The system will apply the following priority:
- mains voltage (230 V) =
direct current (12 V)
liquid gas
If an energy source becomes available that has a higher priority than the source the refrigerator is currently using (e.g. if your vehicle engine is started), the system will stop using the current energy source and switch to the energy source with the higher priority.
If a fault occurs in one or more of the possible energy sources, the system will not generate an error message while an alternative energy source is still available. The SES system switches over automatically.
If none of the energy sources are available, the blue LED flashes every second and an error code is shown in the display.
Automatic models additionally allow you to select the desired energy source manually.
6.2 Switching on the refrigerator
Important! The memory of the SES system saves every change made to the setting. Consequently, the SES system will start up on each subsequent occasion in the last-selected setting.
ILLUSTRATION 8
A = Main switch (on/off)
B=Mode selection switch
C = cooling level selection switch
D - Function LED
E = LCD display
-
Open the valve of the gas bottle.
-
Open the taps of the gas supply.
- Press main switch (A). The function LED will turn blue and all symbols on the LCD display will light up.
- Use the mode selection switch to select the "Auto" function or one of the power supplies that you want. The LCD display will show the option you have selected.
- Set the desired refrigerating cooling level by means of the cooling level selection switch (C). The LCD display will show the cooling level setting you have selected
A. Use the main switch to switch the refrigerator on and off. The function LED will turn blue. The display LCD shows the most recent settings. After 10 seconds the LCD display's backlight will go out. The function LED remains blue.
B. Press the mode selector switch and the LCD display backlight will show the setting for 10 seconds. Pressing the mode selector switch successive times takes you through the menu in the following sequence: AUTO, manual DC (12 V), manual gas, manual mains voltage (230 V) and back to AUTO. Select either the AUTO option or one of the other power supplies that you want to use. The LCD display shows the option you have selected. If you select the AUTO option, the system will choose the most suitable power supply and the AUTO symbol and the symbol of the power supply chosen by the system will both be shown on the LCD display. Ten seconds after release of the mode selector switch, the system will switch off the LCD backlight.
C. Use the cooling level selector switch to control the temperature of the refrigerator. When you press the cooling level selector switch, the LCD backlight will light up and show the currently set temperature. Every time you press the cooling level selector switch again, you set the refrigerator one position cooler. On reaching the coldest temperature, the system will start again at the warmest temperature setting. Ten seconds after release of the cooling level selector switch, the system will switch off the LCD backlight.
6.3 Powering with electricity
Powering with electricity can be selected both by the Auto mode (only Automatic fridges) and manually.
6.3.1 Auto mode
Mains voltage (230 V):
This energy source will be selected if the mains voltage is greater than 200 V. This power supply requires a continuous current of 12 V to operate the electronic control system.
Direct current (12V)
The SES system will select 12 V powering only if a main voltage (230 V) is
unavailable, the vehicle engine is running and a voltage higher than 11V is available. If a fault occurs during electrical powering (230 V or 12 V), an error message will not be shown on the display as long as another energy source is available. The system will automatically switch to the available energy source that has the highest priority.
6.3.2 Selecting electrical power manually Mains voltage (230 V):
The LED warns you whenever insufficient voltage is available or if a fault occurs. If this happens, the LED will start flashing once per second and an error code is shown in the LCD display.
When sufficient current is available again, or the fault has been resolved, the LED will emit a steady blue light again.
Direct current (12V):
The LED warns you whenever your vehicle's engine is not running, or If a fault occurs, or If Insufficient voltage is available. If this happens, the LED will start flashing once per second and an error code is shown in the LCD display.
Once the engine is running, or the fault has been resolved, or sufficient voltage is available again, the LED will again emit a steady blue light.
NB: if the refrigerator has been manually set to operate at 12V , it will not automatically switch to another energy source when your vehicle's engine is not running. In this case, the refrigerator will stop cooling.
6.4 Powering with gas
Powering with gas can be selected both by the Auto mode (only Automatic fridges) and manually.
Warning! - Flammable material must be kept away from the rear of the refrigerator. For selection of gas type, see the information plates inside your refrigerator.
- For the pressure regulator model, see the information plate inside your refrigerator and the table at the back of this booklet.
- The type of gas container and its location must be in compliance with the most recent regulations. Ensure that the unit is installed in a location with good ventilation and make sure that the ventilation openings in the gas container storage location remain open.
- The changing of the gas container must be done outside in the open air and out of reach of any possible sources of ignition.
- It is prohibited to use gas to power the refrigerator while you are driving.
- It is prohibited to use gas to power the refrigerator in the vicinity of petro stations.
6.4.1 Auto mode
The system will select gas operation if:
- mains voltage (230 V) is unavailable;
- motor's engine is not running.
Once mains voltage (230 V) is available again or the vehicle's engine is running, the system will switch to the available energy source that has the highest priority if the fridge is in Auto mode.
If the refrigerator switches from 12 V DC to gas operation when it is in auto mode, the system will wait for about 15 minutes before igniting the gas. During this time, however, the gas indicator lamp will come on. The delay is built in to avoid it switching to gas operation whenever you stop to refuel your vehicle. You can cancel the delay by immediately switching the refrigerator off and then on again.
If the system selects gas operation, the ignition will be activated automatically. The gas will flow to the burner and be lit by the electric ignition. If the flame goes out, the gas will immediately be lit again.
6.4.2 Selecting gas operation manually
If the flame cannot be lit within 30 seconds, the gas supply will stop and gas mode will be switched off. The LED start flashing every second and an error code is shown in the LCD display.
The gas mode can be reset only if the refrigerator is switched off. If you switch the refrigerator on again and the gas mod is still not working, the LED of the manual gas mode will flash to indicate that gas is unavailable and an error code is shown in the LCD display.
Important! It is prohibited to use gas to power the refrigerator while you are driving. If a road accident results in a fire, there is a danger of explosion. It is prohibited to use gas to power the refrigerator in the vicinity of petrol stations. If it takes longer than 15 minutes to release your vehicle, you should switch the refrigerator off using the main switch (A).
6.5 Switching off the refrigerator
- Push the main switch (A).
- The blue LED will go out.
- The refrigerator is now completely switched off.
- Use the special storage latch on the door locking mechanism to fixate the open door. This prevents unpleasant odours and mould in the refrigerator.
7. MAINTENANCE
Regular maintenance is necessary to ensure the correct functioning of your refrigerator.
7.1 Cleaning
Tip! A good time to clean your refrigerator is straight after you have defrosted it.
Clean the refrigerator with a soft cloth and mild detergent.
- Dust the refrigerator with a soft, moistened cloth
- Use a brush or soft cloth to remove once a year any dust from the condenser at the inside of the refrigerator.
Important! Do not use soap or aggressive detergents that are abrasive or soda-based.
The removable interior components of the refrigerator are not dishwasher proof.
7.2 Defrosling
Frost will gradually build up on the condenser of the refrigerator. You should detrost the refrigerator as soon as the frost layer is about 3mm thick. Frost reduces the refrigerating capacity and life of your refrigerator.
- Remove the ice cube tray and all food.
- Switch off the refrigerator.
-Leave the refrigerator door open.
- Place dry towels in the refrigerator to absorb the water.
- Place trays containing hot water in the freezer compartment.
- After defrosting (when the freezer compartment and condenser are frost-free).
remove the towels and the water trays and use a cloth to dry off the refrigerator
- Switch the refrigerator on again in the way described in section 4.1 ("Igniting and starting your refrigerator");
Important! Do not use force or sharp objects to remove frost.
- Do not try to accelerate defrosting by using (for example) a hairdryer.
7.3 Door locking mechanism
Frost will form in the refrigerator if the door is not closed properly. To determine whether the door closes properly, close the door with a piece of paper between the door and the refrigerator. Pull at the piece of paper. If you feel resistance, the refrigerator door closes properly. If you feel no resistance, the door does not close properly. Perform this test regularly on all four sides of the refrigerator door.
If you find that the door does not close properly, check whether the door locking mechanism keeps the door properly shut.
7.4 Winter operation
If you use the refrigerator when the outdoor temperature is below 8^ , install the Theftond vent storage cover (see illustration 10) on the ventilation grills. The cover protects your refrigerator from excessively cold air. The winter cover is a refrigerator accessory obtainable from your caravan dealer.
Tip! It is advisable to use the winter/storage cover if you are not going to use the vehicle for a long period of time.
IMPORTANT: DO NOT USE THE WINTER/STORAGE COVER IN TEMPERATURES GREATER THAN 8^ AS THIS CAN DAMAGE THE COOLING UNIT AT THE REAR OF THE FRIDGE. Remove the covers & re-fit when placing the vehicle back into storage.
7.5 Maintenance of gas equipment
A qualified service engineer must maintain and inspect gas and electrical equipment. It is advisable to have this maintenance work performed by a customer service centre. Contact the Customer Service department of Tnefthord for a list of qualified parties.
Important! European laws covering gas appliances and extractors prescribe the following requirements for the operation of the plant:
- appliances that run on liquid gas must be inspected before being used for the first time and every year thereafter.
- the gas burner must be cleaned at least once a year or more frequently if necessary.
-
If a gas hose is used, it must be checked annually. This hose has a limited life and, thus, must be regularly replaced. Check the hose regularly for cracks, splits and ageing. If in doubt, replace the hose. Pay attention to the maximum life of the hose and replace it in time, as advised by the manufacturer or in conformance with local regulations.
-
For replacement, a gas hose approved in accordance with the local regulations must be used. Position the hose so that it can rotate, is not kinked, and will allow no bends to occur.
- Due to the limited life of the gas hose, it must be installed so that replacement is possible.
7.6 Maintenance checklist
This refrigerator will give you many years of trouble-free use if you simply run through the following checklist regularly:
-keep the refrigerator clean (see section 7.1, "Cleaning");
- defrost the refrigerator as often as is necessary (see section 7.2, "Defrosting");
- check the door closing mechanism regularly (see section 7.3, "Door locking mechanism");
make sure that the ventilation grills are not blocked; Regularly clean the ventilation grills.
7.7 Vent screen
The vent has a vent screen to prevent bugs from entering the combustion area of the refrigerators. These vents need to be cleaned regularly to insure a good airflow. When the refrigerator performs poor because of external circumstances such as extreme ambient temperatures, the vents can be removed to improve the airflow and improve the cooling performance of the refrigerators.
8 STORAGE
If you do not expect to use your refrigerator for a lengthy period, carry out the following actions:
- Remove all food
- Switch off the refrigerator
- Clean the refrigerator as described in Section 7.1 Cleaning
- Shut off the gas tap to the refrigerator
- Leave the door of the refrigerator ajar using the special door closure hook (storage position)
- Place the winter protection on the ventilation grill.
9 TROUBLESHOOTING
If your refrigerator does not refrigerate properly or will not start, run through the following checklist. If this fails to solve the problem, please contact the Customer Service Department in your country (see the addresses at the book of this manual). Check whether you have followed the instructions in chapters 4, 5 or 6
('Switching on the refrigerator').
Check whether the refrigerator is on a level surface.
Check whether the refrigerator can be used with an available energy source.
9.1 Problem: refrigerator will not work on gas
Possible cause Action you can take
a) Gas bottle is empty. a) Replace the gas bottle.
b) Valve of the gas bottle or one of the shut-off valves is closed. shut-off valve(s).
9.2 Problem: refrigerator will not work on 12V DC
Possible cause Action you can take
a) 12V fuse is defective.
b) Battery is empty.
9.3 Problem: refrigerator will not refrigerate sufficiently
Possible cause Action you can take
a) Insufficient ventilation for the
refrigerator
b) Thermostat set too low.
c) Too much ice on the condenser.
d) Too much hot food stored
simultaneously.
eGas burner is dirty.
Door does not shut properly.
a) Fit a new fuse (Camper fuse box of
camper.Car fuse box of car)
b) Test the battery and charge it.
a) Check whether the ventilation grills
are covered.
b) Increase the setting of the
thermostat.
c) Check whether the refrigerator door
shuts properly and defrost the
refrigerator
d) Let the food cool off first.
e) Have the gas burner cleaned.
1) Check the door closing mechanism.
m : x = 1 或 3x + 4y + 1 = 0
·Fa
A
11.6
1
[
11.1 Guarantee
Theftold B.V offers the end users of Theftold refrigerators a three-year guarantee. In the case of defects within the guarantee period, Theftold will repair or replace the product. In this instance, the costs of replacement, labour costs for the replacement of defective components and/or the costs of the parts themselves will be paid by Theftold.
- To make a claim under this guarantee, the user must take the product to a
Service Centre recognised by Theftford. The claim will be assessed here.
- If components are replaced during repair under guarantee, these become the property of Theford.
- This guarantee does not prejudice current consumer protection law.
- This guarantee is not valid in the case of products that are for, or are used for,
commercial purposes.
- No claim under the guarantee will be accepted in the following circumstances: - the product has been improperly used or the instructions in the manual have not been followed
the product has not been installed in accordance with the instructions
alterations have been made to the product
- the product has been repaired by a Service Centre not recognised by Theford
- the serial number or product codes have been changed
- the product has been damaged by circumstances outside the normal use of the product
11.2 Liability
Theftond is not liable for loss and/or damage caused directly or indirectly by use of the refrigerator.
12 ENVIRONMENT
Refrigerators manufactured by Thetford B.V. are PCB-free. Most of the refrigerator is recyclable.
If the refrigerator has reached the end of its service life, contact your local waste processing company to dispose of the refrigerator in an environment-friendly way. Energy-saving tips
Install the refrigerator and switch it on about 12 hours before you put anything in it.
- Do not expose the refrigerator to direct sunlight.
At an ambient temperature of approximately 25^ you can let the refrigerator operate at the middle position of the thermostat (both with gas operation and mains voltage).
-Store foods that have been pre-cooled.
- Open the door only briefly when you take things out of the refrigerator.
- Defrost the refrigerator regularly

Gebruksaanwijzing
1 INLEIDING
5.1 Smart Energy Selection (SES)
6.1 Smart Energy Selection (SES)
3 UBER IHREN KUHLSCHRANK
5.1 Smart Energy Selection (SES)
6.1 Smart Energy Selection (SES)
OwJowIs AUSGESCHALTETeH sioIe,
Allumageelectrique(N80E,N90E,N100E,N109,N110E,N145E):
Encendido eletrico (N80E, N90E, N100E, N109, N110E, N145E):
5.1 Smart Energy Selection (SES)
Al enender un frigorific op性强 con Smart Energy Selection (SES) beschärle selecctionen en部主任 AUTO.
m = 311 ;
6.1 Smart Energy Selection (SES)
Acendimento eletrico (N80E, N90E, N100E, N109, N110E, N145E):
5.1 Smart Energy Selection (SES)
6.1 Smart Energy Selection (SES)
Elektrsk tanding (N80E, N90E, N100E, N109, N110E, N145E)
5.1 Smart Energy Selection (SES)
Natspanning (230 V) into fims tillganglig;
Fordonets motor ar avstingd.
Nar dest er finns nittspanning (230 V) tilngligih, ell er onforden motes startes, koopar systemet om til den tilgligihge energikalln med hoga storiere.
6.1 Smart Energy Selection (SES)
Vid starten av et SES kylskop valjer du i princip fungtionslaget AUTO. SES-systemet valjer da automatisk den lampligaste av ole Ire energikallorna.Darvid hanlaras follando prioritatsfoldd
- natscanning (230 V)
-likstrom(12V)
-gasol


7.6 Pricklsta for underhal
Dette klysckp glig dig miga ans prolemfrnti bekvlihliget, du behover endast realebounden je toanem nepadstenende prilkista:
- Hall ditt kyliskap ordentligl rant. Se paragral 6.1 "Rengoring".
-Frostav kylskapet sa snart det behovs. Sa paragral 6.2"Avftrosinng".
- Kontrollera regelbundet att dörren stänger ordentigt. Se paragrap 6.3 a Dörns stängning'.
- Se till att ventilationsgalren inte tacks over.
Rangrventilationsgallrenregelbundet.
7.7 Ventilationsfilter
Ventilationszippengen har stett forfer for at fhrindra att instecker mittn in i kylskaptes gossolorinane. Ventilationszippengna behover rengras regelbundet for at sakerstellg god lucfirkulation. Cm kylskapt fungerer dligt p arund grav yttre onostidighe, t. ex. extrem onglvinstemperatur, kan ventilationsfitten tass bort for at orbiflta lucfirkulationen och dianigenom kylskaptes kylande formiga.
8 FÖRVARING
4 IGANGSETTING AV KJ0LESKAPET
(betjeningspanel, tegning 5 og 6)
Vi anbefaler at du renpoir kigleskacet for det tas i bruk.
-La det ga atte timer for du setter matvarar i kjoleskapet.
4.1 Tenny ng igangsetting av kjoleskapet
Manuel tenning: TEGNING 5
A = Enargikildavelgar
B=Termostat
C=Flammevakt
D-Manuel tenning (piezoelektrisk tenning)
Elektrisk lenning: TEGNING 6
A = Enargikilddevolver
B-Termostat
C=Flammevakt
A. Driftsv kijteskapket kan foragam med nettspening (230 V), likestrom (12 V) ellar flytende gass (propan). Oneket energikilde stiller du inn ved hajvel op energikidvegeleran (A). Energikidvegeleran har fire inimmilster:
- likesstrom (12 V)
- netspening (230 V)
a a s
B. Termostaten er an temperaturregulator for kjoleskapet ved drift via nettspenning (230V) elter gass. Markeringene angir kjoelsoftkanton (jo slorring markering, clostoro sloro kalalefki).
C. Flammevaxn angir om flammen er tent. När mäller befinner seg i det gröne feltet, er flammen tent.
D. Den manuelle (patezolektriske) tenningen forarsaker en gnisn dar den trykkes inn, som tem flamm n gasbrenneren.
4.1.1 Elektrisk drift
Elektrisk tending (N80E, N90E, N100E, N109, N110E, N145E)
5.1 Smart Energy Selection (SES)
6.1 Smart Energy Selection (SES)
Ved opstart af et kleskxb mad Smart Energy Solution (SES) veiger du i princiert Auto modus. SES-systemet volgar da automatisk den bedste af tre muligo kraktildker. Degt gar der fremt after falgende prioritierung:
-netspending(230V)
-jewinstream(12V)
- flydende gas
a) 12mm (in mm) of the surface.
b) Battariet tomt.
a) Sat en ny sibirik i (Camper sibirsksgkab camper. Auto sibirsksgkab auto)
b) Test ballariat og lid det op.
Elektrilcnvlklop (N80E, N90E, N100E, N109, N110E, N145E):
SLIKA6
A = sikalo za izbiro vira enerigije
B=termostat
C=merleecplamena
A. HadiLinke se Iskho napajiz elektrinzaga omejia (230V), z encememim tokom (12V) altoko pimlinm, Vrsto napajian izberete sstkolon za izbiro vina energije (A). Stikolo iml. Sfri nestavitev:
- enosmimi tok (DC) (12 V)
-e. omreEe(230V)
B. Ternostat uravnava temperaturu v hladlinku, ko sie siednji napaja iz ormezja (230V) al 2 uporab olina. Stoprja hiakrosil je prestavljena o pikamji (reca ko je kira, nia jia is naystajnoj temaralur).
C. Monlez plama ne kaze, alle plamen prizgan. Plamen je prizgan takrat, ko se monlez premakne na zeleno obmhc.
D. Schipkum na rodo (piezoeleithre) stikalo za vlok se pritge iskra, ki pritge plamen v goricu.
Elecriqi ylop N80E, N90E, N100E, N109, N110E, N145E;
- prisite in drzite wtyj termostat (B).
- viklop se zvade automatsko. Siilali boze tiktakjoc zoč. Ze se je viklop izvede iuspnesno, bo omenjen zoč prenemai in merilec plamna se bo preminskii na zeleno obrojdce. Socja termedcat spustile.
- ce planen ugasne, se vklop avtomatsko ponovi.
- s termostatom (B) nastavite zeeleno moh hlsjenja. (Veča kot je pika, nizjä je
nastavljena temperatura
4.2 Izkiop hadinilika
- Stukla zo zbrova viregia (A) Nastavita vla
- Sediä he hladnik coprochina uassleni.
- S poshebro rofico na mezherniz zu zaciriljne blokistiye prozira vostla Madlinka. Tako se u protoriesti biartikna, noe bado raskii, nepetrii vopni in piezohoe.
Pomembnot Cu hladitanka na basice uporabaii dalii ias. zapire vidri na pinskii jelankni in pjo z pein.
5 VKLOP HLADILNIKA ( nadzorna plošca prikazana na Sliki 7)
pred vklpom hladinlpa nporacmo. da oistile njagvo notanost.
- hladinlk naj obratujne najmanj osem ur, selnato varn pric wloze 2vila.
Pomembnot - Za delovanje na kateramkoli viru anargije potrebujte ta tip hladinika
neprekinjeno napajanja z 12 V. V karavanu je to ponavadi z akumulatorjem.
5.1 - Avtomatska izbira vrste energija (SES = angl. Smart Energy Selection)
Ko klobstie hadnilnik s systemem SES, je naboje izrali avtomatski (AUTC) racin System SES bo avtomatsko izrali nabojlic vosto energije od razpojli'iv'virov. bo izbirni p nosedjenim vrestnemu redu:
-el. onreje (230V)
- enosmemit tok (12 V)
Kakor hito bo na vojo prinemjna wista energiige od tenutnu uporabijene (nor. ko zaanele motor volazla), so sistern pranaehal uporabijatl be nufuic ocran vir energija in prekopiui na ustrzemneji vir energija.
Cpe pr enan al voz mozhin with energije pride do napako, systern ne bo oporzir na pomankarje energije, dokler je se voja orientativni vir energije. Prkapijanje mad razlioniir vir energije pe sistern SES avotnaticke.
Ce ne bo na volno nobega vira energihe, bo LED diola sperimenta loz zelene v rdeo in zelaea utripatv skundinh presledkh.
ModelisystemoSESdodtnomogocataudi rochoizbirozelenega vira enerigije.
5.2 Vklop hladilnika
Pomboim? Pri pvem klopa: ae bo SES system autostatics klopi v autostatem (AUT) naciin in s sedrino tempuro. Pomilniksysteme SES omogoda shanitve. vah svempron v rastavihat. Siesem SES bo bil pvaskam naleshdien klopu gnan z zadino ztrano nastavihjo.
SLIKA5
A = glavno stikalo [vklop[jeno/2klop]en]
B=zbirno stikalo
C = stikalo za nasativitev stopnie alajenia
D = LED prikazovalnik
- Odprite ventil posode za plin.
- Oipnite pipo za plic ra dovodu pins.
- Pritisnite giavno sikalo (A). Ob glavenn sikalu se prizge zelena LED dioda.
- Z Izmir semikolom ziberte automatsko (AUTO) nastavite all eno od vst erighe. Izbrana nastavite bo prikrzane na LED diodat.
S. S stikionae zanastavite hajaria (CI) nastavite stopjo hajaria. Izbrana temperature b oprzakana 2 LED diodarii.
A. Z glavum stikimoni lankpo grigete el uguasene hiadink. Poieg glavema atska se bo prigze zevaLED dioda, LED diode boe priakazoe zadjne marvatafe. Po 10. sedunah bodo priakazoeval LED diode gusilane. LED diode pri glavem stska pe bo se napre svittia zeino.
B. Prilisinta na stikalo in prikazovaleh LE diode bodo naskivat' prikazovale naskidin 12 sekund. Z zapravimit priktajenan ne zkrsto stiko dinskega omajra se boste premkali skozi ibrze vnilnadjukupiatr: automatsko (AUTO), romina naskavitov onosmernogta koka (DC 12 V), romina naskavitov tka no elektrito omrajce (Z30 V), naqajana in vinkar na avonatski nasir (AUTO), izbrenie avonatskno (AUTO) naskavitov alla energi od prostalin virov energije, gi zeile npo uporadji. Izbana naskavitve je prizavza z LED diodari. Ces bosta Izblavn avonatsko (AUTO) mochost, bo sistem san izbal nejprimarnsvi nargije, svellil paesta dve diodi. Diode za avonatsko izbro (AUTO) nadele LE diode vira energija, gi je izbal sistem. Deset sekund po sprozhtv izbrnegala stika bo sistem LE diodl Izkopl. Obesta ugasniln.
C. Temperatureo v hladniku nastavljte s staklon za nastavljt stopojne hajeje. Po pritsko na stiklo se bo prigajda LED diolo, ko b ocipkala trenura zbrano temperatumo. Z vaskim pritsko na stiko do hladnik stajnen jn haladneji polojz. Ko bo dosezina najhradneja temperatura, bo systeme zrovo zaje pro najcoplej nastavljti. Desel sukend zo prstivi temperatunega stika bo sstem LED diodo izkopil. Frenelle dobro sievit.
5.3 Delovanje preko elektricnega omrejla