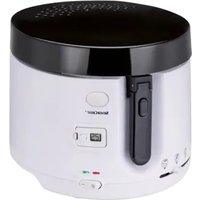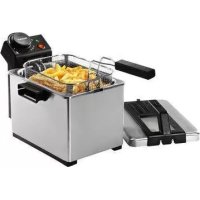
SKF 2300 B2 - Deep fryer SILVERCREST - Free user manual and instructions
Find the device manual for free SKF 2300 B2 SILVERCREST in PDF.


| Brand | SilverCrest |
| Model | SKF 2300 B2 |
| Category | Deep fryer |
| Product type | Electric deep fryer with cold zone |
| Power supply | 230 V ~, 50 Hz |
| Rated power | 2300 W |
| Oil capacity | Approx. 3 litres |
| Solid fat capacity | Approx. 2.5 kg |
| Timer | Up to 60 minutes, with AG13 LR44 button cell (1.5 V) |
| Temperature regulator | Adjustable thermostat with positions from 130°C to 190°C |
| Control light | Green, indicates when temperature is reached |
| Main functions | Frying, timer, cold zone, overheat protection with Reset button |
| Tub material | Stainless steel |
| Basket | With handle and drain hook, internal MAX mark |
| Lid | With viewing window and removable metal filter |
| Dimensions (approx.) | Approx. 35 cm x 25 cm x 30 cm (estimate) |
| Weight (approx.) | Approx. 3.5 kg (estimate) |
| Maintenance and cleaning | Tub and basket dishwasher safe; body and heating element wiped with a damp cloth |
| Safety | Overheat protection, automatic shut-off, Reset button, splash protection |
| Spare parts and repairability | Parts available via after-sales service; heating element and timer removable |
| Warranty | 3 years from purchase date |
| General information | Importer: Kompernass GmbH, Germany; CE certification |
Frequently Asked Questions - SKF 2300 B2 SILVERCREST
User questions about SKF 2300 B2 SILVERCREST
0 question about this device. Answer the ones you know or ask your own.
Ask a new question about this device
Download the instructions for your Deep fryer in PDF format for free! Find your manual SKF 2300 B2 - SILVERCREST and take your electronic device back in hand. On this page are published all the documents necessary for the use of your device. SKF 2300 B2 by SILVERCREST.
USER MANUAL SKF 2300 B2 SILVERCREST
Operating instructions
IAN 75818

FR BE
Before reading, unfold the page containing the illustrations and familiarise yourself with all functions of the device.
Comment eliminer I'arriere-gout desagreable 15
Alimentation saine 15
Fonction anti-surchauffe 16
Fonctionanti-surchauff e
VAARSCHUWING! LETSELGEVAARI!
WAARSCHUWING! BRANDGEVAARI!
WAARSCHUWING-LETSELGEVAARI!
WAARSCHUWING - LETSELGEVAAR!
WAARSCHUWING - GEVAAR VOOR VERBRANDING!
Zelf patates frites make
WAARSCHUWING - LETSELGEVAAR!
WAARSCHUWING - LETSELGEVAAR!
WARNING! BRANDGEFAHRI!
Disposal of the packaging. 63
Description of appliance / attachments 64
Technical data 64
Safety instructions 65
Before the First Use 67
Low-Acrylamide Cooking 67
Frying 67
Preparation 67
Frying foodstuffs. 69
Solid Cooking Fats. 70
Timer 71
After Frying 71
Changing the frying oil or fat 72
Cleaning and Care 72
Storage 74
Tips 74
Home-made chips 74
Frozen Foods 74
How to remove undesirable after-tastes 75
Healthy Nutrition 75
Overheat Protection 76
Table - Frying Times. 77
Troubleshooting 78
Appendix 78
Disposal of the appliance 78
Battery disposal 79
Notes on the Declaration of Conformity 79
Importer 79
Warranty 79
Service. 80
Introduction
Congratulations on the purchase of your new appliance!
You have clearly decided in favour of a modern, high quality product. These operating instructions are a component of this product. They contain important information in regard to safety, use and disposal. Before using the product, familiarise yourself with all of these operating and safety instructions. Use this appliance only as described and only for the purposes indicated. In addition, pass these documents on, together with the product, to any future owner.
GB
Intended use
This appliance is intended exclusively for frying foods in domestic households. This appliance is intended exclusively for use in domestic households. Do not use it for commercial purposes.
Use the appliance only in dry spaces, and never use it outdoors.
WARNING
Risks from unintended use!
Risks can be engendered by the appliance if it is used for unintended purposes and/or other types of use.
Use the appliance exclusively for its intended purposes.
Observe the procedures described in these operating instructions.
NOTICE
Risks can be engendered by the appliance if it is used for unintended purposes and/or other types of use. Use the appliance exclusively for its intended purposes. Observe the procedures described in these operating instructions. Claims of any kind for damage resulting from unintended use, incompetent repairs, unauthorised modification or the use of unauthorised spare parts will not be accepted. The operator alone bears liability.
Items supplied
The appliance is supplied with the following components as standard:
Cool-Zone Deep Fat Fryer
- Operating instructions
1) Remove all parts of the appliance and the operating instructions from the carton.
2) Remove all packing material.
NOTICE
- Check the contents to ensure everything is available and for signs of visible damage.
If the delivery is not complete or has been damaged, due to defective packaging or transportation, contact the Service Hotline (see chapter Service).
Disposal of the packaging
The packaging protects the appliance from transport damage. The packaging materials are selected from the point of view of their environmental friendliness and disposal technology and are therefore recyclable.
The recirculation of packaging into the material circuit saves on raw material and reduces the amount of waste generated. Dispos of packaging material that is no longer needed as per the regionally established regulations.
NOTICE
If possible preserve the appliance's original packaging during the warranty period so that in the case of a warranty claim you can package the appliance properly for return.
Description of appliance / attachments
Illustration A:
1 Covering of the permanent metal filter
Hinge supports
Frying basket
4 Stainless steel container
Removable control and heating element
6 Lid release button
7 Rolled-up cable
8 Temperature regulator
9 Control lamp
On/Off switch
1 Timer
12 Handle locking button
13 Permanent metal filter
Viewing window
Illustration B:
15 Reset button
Technical data
| Mains voltage 230 V | ~, 50 Hz |
| Rated power 2300 W | |
| Capacity for cooking oil approx. 3 litre | |
| Capacity for solid fats 2.5 kg approx. | |
| Power supply for Timer | Button cell battery AG13 LR44 |
| ——1.5 V | |

Safety instructions

RISK OF ELECTRIC SHOCK
- Ensure that the power cable never gets wet or moist when the appliance is in use. Lay the cable so that it cannot be clamped or damaged in any way.
Connect the appliance to a mains power socket delivering a voltage of 230V ,50Hz
To avoid risks, arrange for defective power plugs and/or cables to be replaced at once by qualified technicians or our Customer Service Department.

Never submerge the operating/heating element and the housing with the power cable in water, and do not clean these components under running water.

WARNING! RISK OF INJURY!
This appliance is not intended for use by individuals (including children) with restricted physical, physiological or intellectual abilities or defi ciences in experience and/or knowledge unless they are supervised by a person responsible for their safety or receive from this person instruction in how the appliance is to be used.
Children should be supervised to ensure that they do not play with the appliance.
- Provide a stable location for the appliance.
- Do not operate the appliance if it has sustained a fall or is damaged. Arrange for the appliance to be checked and, if necessary, repaired by qualified technicians.
Hot steam is generated during the frying process, especially when the lid is open. Keep a safe distance away from the steam.
- Ensure that all parts are completely dry before pouring oil or liquid fat into the deep fryer. Otherwise, hot oil or fat could splatter out.
Carefully pat all foodstuff s dry before placing them in the deep fryer. Otherwise, hot oil or fat could splatter out.
Be especially careful with frozen foodstuff s. Remove all ice particles. The more ice there is on the foodstuff, the more the hot oil or fat will splatter.
- Some parts of the appliance become very hot during operation. Touching these may cause serious burns.

WARNING! RISK OF FIRE!
Do not use the appliance near hot surfaces.
- Never leave the appliance unattended while it is being used.
- Do not use an external timing switch or a separate remote control system to operate the appliance.
- NEVER melt solid fat (fat in blocks) in the deep fryer. The heating element may be damaged by the high temperature or there is a risk of fire! Melt the fat beforehand in a saucepan or similar.

Attention! Hot surfaces!
NEVER use water to extinguish a fire in the deep fryer!
- Old or dirty fats and oils can spontaneously ignite themselves if overheated. Change the oils or fats in good time. In the case of a fire, remove the plug from the mains power socket and smother the burning fat or oil with a damp towel or fire blanket.
CAUTION - APPLIANCE DAMAGE!
- When charging the stainless steel container with fat, NEVER fi ll it to above the MAX marking or to below the MIN marking. First ensure that there is sufficient oil or fat in the deep fryer every time you intend to switch the appliance on.
NEVER switch the appliance on if there is no oil or liquid fat in it.
This deep fryer is suitable only for frying foodstuff s. It is not designed for cooking liquids.
INFORMATION REGARDING THE HANDLING OF BATTERIES
This appliance utilises a battery. When interacting with batteries, please observe the following:
- Do not throw batteries into a fire. Do not recharge batteries. Never open batteries, never solder or weld batteries. The risk of explosions and injuries exists!
Regularly check the condition of the battery. Leaking batteries can cause damage to the appliance.
If you do not intend to use the appliance for an extended period, remove the battery.
In the event of the batteries leaking acids, first put on a pair of protective gloves. Then clean the battery compartment and the battery contacts with a dry cloth. - Keep batteries well away from children. Children can put batteries into their mouths and swallow them. If a battery is swallowed, medical assistance must be sought immediately.
Before the First Use
1) Before you use the deep fryer for the first time please clean all individual components thoroughly and carefully dry them (see chapter "Cleaning and Care").
2) Pull the timer 0 out from the deep fryer.
3) Open the battery compartment, take out the battery and remove the insulation strips from the battery compartment.
4) Insert the battery so that the side with "+" is facing upwards. Slide the battery compartment cover back on so that it engages.
5) Slide the timer ① back into its recess in the deep fryer.
Low-AcrylamideCooking
Acrylamide is a possibly carcinogenic substance formed from a reaction with amino acids when frying foodstuff s with a high starch content (at temperatures of more than 175^ ).
Therefore, if avoidable, do not fry foodstuff s that have a high starch content, for example chips, at temperatures in excess of 170^ . The items to be cooked should be fried until they are golden yellow, instead of dark brown. Only in this way can you achieve a low acrylamide level.
In the temperature controller ⑧ a pause position is built-in at 170^ C. This reminds you that you are progressing into the temperature range at which acrylamide may be formed.
Frying
We recommend frying oil or liquid frying fat for use in this deep fryer. You can also use solid cooking fats. For this, first read the chapter "Solid Cooking Fats".
Preparation
1) Place the appliance on a horizontal, level, stable and heat resistant surface.
NOTICE
If you wish to place the deep fryer below the extraction fan of the cooker, ensure that the cooker is switched off.
2) Unwind all of the power cable from the power cable retainer 7.
3) Open the appliance lid by pressing on the lid release button 6. The appliance lid flips open.
4) Pull the handle upwards until it audibly engages. Remove the frying basket ③.
NOTICE
- Only use oils or fats which are expressly marked as "non-foaming" and are suitable for deep frying. This information is to be found on the packaging or the labelling.
NEVER mix diff erent types of oil or fat! The deep fryer could froth.
5) Fill the dry and empty stainless steel container (Heating element fitted) with cooking oil, liquid or molten fat (about 3 liters of oil or about 2.5kg of solid fat).
NOTICE
- When charging the stainless steel container 4 with oil or fat, NEVER fill it to above the MAX marking or to below the MIN marking.
6) Insert the plug into the mains power socket.

RISK OF ELECTRIC SHOCK
The power cable may not make contact with the hot areas of the deep fryer. Risk of electric shock!
7) Replace the frying basket 3.

WARNING! RISK OF INJURY!
- When closing the lid always ensure that you do not touch the viewing window 14. The viewing window 14 becomes very hot! Risk of Burns!
8) Close the appliance lid.
9) Push the handle locking button back and lower the handle.
Frying foodstuff s
1) Switch the deep fryer on with the On/Off switch ⑩. The control lamp integrated into the On/Off switch ⑩ starts to glow.
2) Turn the temperature controller to the required temperature. The cooking oil or the fat is now heated up to the required temperature. When the required temperature has been reached the green control lamp 9 starts to glow.
NOTICE
The correct frying temperature is to be found either on the food packaging or from the table in these operating instructions. A rough guide as to which foods should be fried at what temperature is given by the pictures on the front of the deep fryer:
| Symbol Foodstuff | Temperature |
| = °C | Scampi 130°C |
| Chicken 150°C | |
| Chips (fresh) 170°C | |
| Fish 190°C |
The values given are only for guidance. The temperature can vary depending on consistency and personal taste!
3) Pull the handle upwards until it audibly engages.
4) Open the appliance lid by pressing on the lid release button.
5) Remove the frying basket ③ and place into it the food to be fried. The frying basket ③ may, at the most, only be fi lled up to the max marking on the inside of the frying basket ③ with foods to be fried. Always take note, however, of the frying volume indicated on the packaging!
6) Carefully replace the frying basket 3 into the deep fryer.
7) Close the appliance lid. This must click in audibly.
8) Push the handle locking button ② downwards. The handle now allows itself to be lowered. The frying basket ③ is at the same time lowered into the hot oil or fat.
NOTICE
The frying process can be overseen through the viewing window 14 in the appliance lid.
GB
Solid Cooking Fats
To avoid a spraying of the fat and that the appliance becomes too hot, please take the following precautions when using solid frying fat:
When replacing old fat with fresh, first melt the fresh blocks of fat slowly, under low heat, in a separate pan. Then carefully pour the molten fat into the deep fryer. When this has been done, insert the plug into a mains power socket and switch the deep fryer on.
After use, store the deep fryer with the solidified fat at room temperatures.
Should the fat become too cold, it could cause splattering on remelting! To avoid this, poke a few holes into the solidified fat with a wooden or plastic spatula. Ensure that no damage is caused to the heating element.
To melt the fat, switch the appliance on with the On/Off switch 10 and then adjust the temperature regulator 8 to 130^ . The control lamp integrated into the On/Off switch 10 starts to glow.
Wait until all of the fat has melted. Thereby, the green indicator light can intermittently light up and go out. First set the desired frying temperature when all of the fat has melted.
Timer
You can programme in a countdown of up to 60 minutes with the timer 10:
1) Press the button "B" on the Timer ① to switch it on.
2) Press the buttons ^ + ^ and - to set the desired time in minutes.
3) Press on the button "D" to start the countdown of the time. The programmed time will blink twice to indicate that the countdown of the time has begun.
Signal tones sound on completion of the countdown.
4) The signal tones will stop when you once again press the button 0 .
NOTICE
On expiry of the countdown the heating element 5 is NOT switched off! Therefore pay heed to the signal tone from the Timer 1, so as to avoid spoiling the food being fried.
- When the battery is depleted, exchange it. Always use a replacement battery of the same type. Pay heed to the correct polarity when inserting it.
AfterFrying
1) When the food is ready, pull the handle upwards until the handle locking button ⑫ engages.
2) Leave the frying basket 3 in this position to drip off.
3) Press the On/Off switch. The deep fryer is now switched off. Remove the plug from the mains power socket.
4) When the food has dripped off, open the appliance lid by pressing the lid release button 6.
WARNING! RISK OF INJURY!
- Never take hold of the frying basket ③ directly after frying. It will be very hot! Lift the frying basket ③ out of the fryer ONLY by the handle!
5) Carefully lift the frying basket ③ out of the deep fryer. If necessary, shake off any excess oil or fat over the deep fryer.
6) Tip the fried food into a bowl or a sieve ( lined with absorbent kitchen paper!).
If you do not use the deep fryer regularly it is recommended that, after cooling, the oil or liquifi ed fat is poured into a well sealed container and stored in the refrigerator or a cool storeroom. Fill the container through a sieve, in order to remove any food particles from the oil or fat. Solid fats must still be in a liquid state so that they can be poured.
Changing the frying oil or fat
Change the oil first when it has completely cooled down. Solid fats must still be in a liquid state so that they can be poured.
1) Open the appliance lid by pressing on the lid release button 6.
2) Remove the frying basket 3.
3) Remove the control/heating element 5.
4) Place the operating/heating element 5 at a clean and dry location.
5) Carefully remove the stainless steel container with the oil or fat from the deep fryer.
6) Pour the oil or fat into suitable containers, for example bottles. For this, use the pouring funnel at the corner of the stainless steel container 4.
NOTICE
The disposal of cooking oils and fats is regulated differently in every community or town. Frequently, it is not permitted to dispose of such oils or fats with normal household refuse. Make enquiries at your local community administration office about suitable disposal sites.
7) Thoroughly clean all parts of the deep fryer as described in the chapter "Cleaning and Care".
8) Refi II the deep fryer with fresh oil or fat as described in the chapter "Frying".
Cleaning and Care
WARNING - RISK OF ELECTRIC SHOCK!
Always remove the plug from the mains power socket before you clean the appliance.
UNDER NO CIRCUMSTANCES may the appliance or parts of it be submersed in liquids! This could result in you receiving a fatal electric shock and the appliance could be damaged.
Never open the appliance housing.
WARNING - RISK OF BURNS!
- Allow the appliance to cool down completely before cleaning it.
CAUTION - PROPERTY DAMAGE!
- When cleaning the components do not use aggressive or abrasive cleaning agents or materials such as scouring milk or steel wool. These could damage the upper surfaces of the appliance!
To simplify cleaning, completely dismantle the deep fryer:
1) Open the appliance lid as far as possible and then pull it upwards and out of the hinge supports 2.
2) Remove the covering of the permanent metal fi lte 1 and lift the permanent metal fi lter 13 out.
3) Pull the handle upwards until it audibly engages. Remove the frying basket ③.
4) Pull the operating/heating element ⑤ upwards from the guiding rails. Place the operating/heating element ⑤ at a clean and dry location.
5) Take out the stainless steel container and remove the fat or oil.
The frying basket 3 and the stainless steel container 4 can be cleaned in the dishwasher. They are suitable for dishwashers.
Clean the housing with a moist cloth. If required, use a mild detergent on the cloth.
Clean the operating/heating element 5 with a damp cloth and then dry it well.
Clean the permanent metal filter 13 in warm water containing a mild detergent.
Clean the appliance lid in warm water containing a mild detergent. Rinse the appliance lid off with clear water.
Dry the appliance lid and then place it upright on its side so that any excess water still inside of the lid can drain away.
Be aware that the lid MUST be completely dry before re-use!
6) Dry all parts well before reassembly.
7) Reassemble the deep fryer in the reverse order.
Storage
1) Lift or carry the appliance using the lateral carrying recesses.
2) Wrap the power cable around the power cable retainer 7.
3) Store the appliance with the appliance lid closed. This will keep the inside of the deep fryer clean and free of dust.
Tips
Home-made chips
Potatoes intended for frying should be faultless and not germinating.
Use potato varieties suitable for frying, such as "King Edward", "Morris Piper", "Cara" etc.
After peeling, cut the potatoes according to the intended preparation (chips or slices).
Soak the potatoes for ca. one hour before frying. This will help remove a portion of the sugar content, which is one of the constituent products for the formation of acrylamides.
Carefully dry the potatoes.
Always fry home-made potatoes twice:
- first for 10-12 minutes at 160^ then for 3-4 minutes at 170^ , depending on the desired degree of browning.
Deep frozen chips are pre-cooked and thus only need to be fried once. Comply with the instructions on the packaging.
Frozen Foods
Deep frozen foodstuff s (-16 to -18 °C) cool the oil or fat to a considerable extent, because of this they do not cook fast enough and possibly also soak up too much oil of fat. To avoid these occurrences, proceed as follows:
■ Do not attempt to fry large volumes all at once. The food to be fried must be completely covered with cooking oil/fat after lowering the frying basket 3.
Heat the oil for at least 15 minutes before inserting the frozen foodstuff s.
- Adjust the temperature controller ③ to the temperature specified in these operating instructions or on the packaging of the foodstuff.
Preferably, allow the deep frozen food to thaw at room temperature. Remove as much ice and water as possible before inserting the food into the deep fryer.
WARNING! RISK OF INJURY!
Always close the appliance lid before lowering the frying basket ③ into the hot oil or fat. There is a risk of fire caused by splashing fat!
Always insert the foodstuff as slowly and carefully as possible into the deep fryer, as deep frozen foods can cause the oil or fat to bubble heftily and abruptly.
How to remove undesirable after-tastes
Some foodstuff s, especially fi sh, release fl uids when being fried. These fl uids collect in the oil or fat and can influ vence the smell and taste of fried foods that are later cooked in the same oil or fat.
Proceed as follows to again obtain a neutral tasting oil or fat:
Heat the fat or oil to 160^ and place two thin slices of bread or a couple of small sprigs of parsley into the frying basket 3.
WARNING!RISK OF INJURY!
Absolutely close the appliance lid before lowering the frying basket with the parsley or the bread into hot oil or fat. Splattering fats can cause serious burns.
Close the appliance lid and then lower the frying basket 3 into the fat.
Wait until the oil or fat is no longer bubbling and remove the bread or parsley with a skimmer. The oil or fat now has a neutral taste once again.
Healthy Nutrition
Nutritional experts recommend the use of vegetable oils and fats containing unsaturated fatty acids (e.g. Linol acid). However, these oils and fats lose their positive characteristics faster than other oils and must therefore be exchanged more frequently.
Orientate yourself on the following guidelines:
Exchange the oil or fat regularly. If you use the deep fryer mainly to prepare chips and strain the oil or fat after every use, it can be used 10 to 12 times.
However, do not use an oil or fat for longer than six months. Always follow the instruction given on the packaging.
As a general rule, oils and fats can be used for a lesser time if you mainly fry foods with lots of proteins, such as meat or fish.
Do not mix fresh oil with old oil.
- Change the oil or fat if it foams on being heated, it develops a strong taste or odour, it becomes dark and/or it develops a syrupy consistency.
Overheat Protection
In a case of overheating, the heat protection function switches the appliance off.
This can happen if there is no, or not sufficient, oil or fat in the deep fryer or when solid cooking fats are being molten in the appliance.
With solid cooking fats the heating element cannot disburse the heat created fast enough.
If the heat protection function has switched the appliance off, please proceed as follows:
1) Allow the appliance to cool down.
2) Leave the oil or fat to cool (the fat should just be liquid).
3) Open the appliance lid by pressing on the lid release button 6.
4) Remove the frying basket 3.
5) Remove the control/heating element 5.
6) Place the operating/heating element 5 at a clean and dry location.
7) Carefully press the reset button on the rear side of the operating/heating element with a small pointed object.
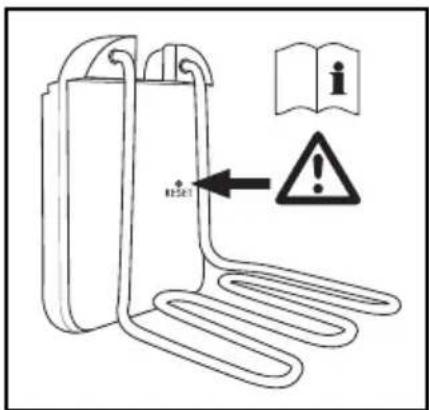
The appliance can now be used again.
Table - Frying Times
This table provides details of the temperatures at which specific foods must be fried and how much frying time is required for them. Should these details differ from those shown on the food packaging, please observe the instructions given on the packaging.
| Foodstuff | Temperature (approx.) | Time in minutes |
| Beefburger (frozen) 150°C 3 - 5 Minutes | ||
| Pork chops (breaded) 150°C 15 - 25 Minutes | ||
| Chicken pieces (large pieces) | 150°C 10 - 18 Minutes | |
| Chicken pieces (small pieces) | 150°C 8 - 18 Minutes | |
| Chips (fresh) 160 - 170°C 10 - 15 Minutes | ||
| Chips(deep-frozen) | see manufacturers details | see manufacturers details |
| Scampi (fresh) 170°C 3 - 5 Minutes | ||
| Mushrooms 180°C 5 Minutes |
NOTICE
In the degree details it can happen that there will be minor temperature variations. The values given in the table are intended as aids for guidance. They refer to a volume of approx. 300 Gramm. Subject to the consistency of the foodstuff, the times can vary.
- When frying larger amounts, always bear in mind that the foods to be fried must be completely covered with cooking oil/fat after the frying basket 3 has been lowered.
The frying basket 3 may, at the most, only be filled up to the max marking on the inside of the frying basket 3 with foods to be fried.
Troubleshooting
| PROBLEM POSSIBLE CAUSE | POSSIBLE SOLUTIONS | |
| The appliance does not function. | The appliance is not connected with a mains power socket. | Connect the appliance to a mains power socket. |
| The appliance is damaged. | In this case, contact Customer Services. | |
| oder | The On/Off switch10 has not been activated. | Press the On/Off switch 10. |
| The control lamp integrated into the On/Off switch10 does not glow. | The heat protection function has been activated. | 1. Remove the plug and allow the appliance to cool down. 2. Press the reset button 15 on the rear of the control/heating element 5. |
| The appliance has switched itself off during use and does not allow itself to be switched back on. | The heat protection function has been activated. | 1. Remove the plug and allow the appliance to cool down. 2. Press the reset button 15 on the rear of the control/heating element 5. |
| The green control lamp9 does not glow. | The programmed temperature for the cooking oil/fat has not been reached. | Wait a few minutes until the required temperature has been reached. |
If the malfunction cannot be corrected with the above suggestions, or if you have determined that the malfunction may have other causes, please make contact with our Customer Service.
Appendix
Disposal of the appliance
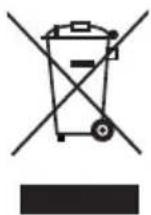
Do not dispose of the appliance in your normal domestic waste. This product is subject to the provisions of European Directive 2002/96/EC.
Dispose of the appliance through an approved disposal centre or at your community waste facility. Observe the currently applicable regulations. In case of doubt, please contact your waste disposal centre.
Batterydisposal!
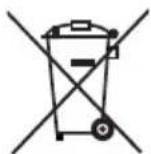
Batteries may not be disposed of with normal domestic waste. All consumers are statutorily obliged to dispose of batteries at the collection point in their community/district or with the original supplier.
The purpose of this obligation is to ensure that batteries can be disposed of in an environmentally friendly manner. Only dispose of batteries when they are fully discharged.
Notes on the Declaration of Conformity
With regard to conformity with essential requirements and other relevant provisions, this appliance complies with the guidelines of the Electromagnetic Compatibility Directive 2004/108/EC, the Directive for Low Voltage Appliances 2006/95/EC and the ERP Directive 2009/125/EC.
The complete original declaration of conformity can be obtained from the importer.

Importer
KOMPERNASS GMBH
BURGSTRASSE 21
44867 BOCHUM, GERMANY
www.kompernass.com
Warranty
The warranty for this appliance is 3 years from the date of purchase. This appliance has been manufactured with care and meticulously examined before delivery.
Please retain your receipt as proof of purchase. In the case of a warranty claim, please make contact by telephone with our service department. Only in this way can a post-free despatch for your goods be assured.
NOTICE
- This warranty is valid only for material or manufacturing faults, not for transport damage, parts subject to wear and tear or for damage to fragile parts, e.g. switches.
This product is for domestic use only and is not intended for commercial applications. In the event of misuse and improper handling, use of force and modifi cations not carried out by our authorised service branch, the warranty will become void.
Your statutory rights are not restricted in any way by this warranty. The warranty period is not extended by repairs effected under warranty. This applies also to replaced and repaired parts.
Damages or defects discovered after purchase are to be reported directly after unpacking, at the latest two days after the purchase date.
Repairs carried out after lapse of the warranty period are subject to charge.
Service
GB Service Great Britain
Tel.: 0871 5000 720 (£ 0.10/Min.)
E-Mail: kompernass@lidl.co.uk
IAN75818
GB
KOMPERNASS GMBH
BurgsraBe 21
D-44867 Bochum
www.kompernass.com
Version des informations · Stand van de informatie