
Thermo Bueno Digitaal - Coffee machine WMF - Free user manual and instructions
Find the device manual for free Thermo Bueno Digitaal WMF in PDF.
| Product | Filter coffee machine |
| Brand | WMF |
| Model | Thermo Bueno Digitaal |
| Rated voltage | 220-240 V ~ 50/60 Hz |
| Power consumption | 1000 W |
| Protection class | I |
| Tank capacity | 7 cups (max. 875 ml) |
| Coffee type | Ground coffee, size 1x4 paper filter |
| Display | Digital screen with clock |
| Timer programming | Yes, up to 24 hours in advance |
| Auto shut-off | Yes |
| Keep warm | Yes, via the stainless steel thermal carafe |
| Anti-drip system | Yes |
| Carafe material | Double-wall stainless steel |
| Cleaning | Exterior: damp cloth; filter and carafe: running water |
| Descaling | Recommended with durgol® universal; intervals according to water hardness |
| Safety | Do not immerse in water; auto shut-off after brewing |
| Usage | Domestic (kitchen, office, etc.) |
| Compliance | European directives 2006/95/EC, 2004/108/EC, 2009/125/EC |
| Disposal | Do not dispose with household waste; recycle at collection point |
Frequently Asked Questions - Thermo Bueno Digitaal WMF
User questions about Thermo Bueno Digitaal WMF
0 question about this device. Answer the ones you know or ask your own.
Ask a new question about this device
Download the instructions for your Coffee machine in PDF format for free! Find your manual Thermo Bueno Digitaal - WMF and take your electronic device back in hand. On this page are published all the documents necessary for the use of your device. Thermo Bueno Digitaal by WMF.
USER MANUAL Thermo Bueno Digitaal WMF
We would like to congratulate you on purchasing the automatic coffee maker.
The automatic coffee maker may only be used for its intended purpose in compliance with this operating manual. Please read the operating manual carefully prior to first use. It provides instructions for the use, cleaning and care of the appliance. We will not accept any liability for damages resulting from non-compliance. Keep the manual in a safe place and pass it on to any future user. Please also observe the warranty information at the end of the operating manual.
This appliance is intended for domestic use and similar applications, such as:
- in staff kitchens in shops, offices and other commercial establishments;
- in agricultural establishments;
- by guests in hotels, motels and other accommodation facilities;
- in bed-and-breakfast facilities.
The appliance is not intended for purely commercial use.
Be sure to follow the safety information when using the appliance.
Technical data
Rated voltage: 220-240 V~ 50/60 Hz
Power consumption: 1000 W
Protection class: I
Safety information
- Connect the appliance only to a shockproof socket that has been installed according to regulations. The power cable and power plug must be dry.
- Do not pull the power cable over sharp edges or jam, do not let it hang down and protect from heat and oil.
- Use an extension cable only if it is in good condition.
- Do not pull out the plug by the cable or touch it with wet hands.
- Do not carry the appliance by the power cable.
- Do not place the automatic coffee maker on hot surfaces such as stove tops or near an open gas flame, as this may cause the housing to melt.
- Do not place the appliance on water-sensitive surfaces. Water spray may damage the appliance.
- Do not switch on the appliance without water. Do not fill the fresh water reservoir with more cold water than for the maximum number of cups.
- Do not fill water into the automatic coffee maker while the appliance is switched on or still hot. Switch off the automatic coffee maker first and let it cool down for five minutes.
- Caution. The appliance becomes very hot. Risk of scalding due to emerging steam. Never swing out the filter or open the cover while brewing is in progress.

- This appliance is not intended to be used by persons (including children) with limited physical, sensory or intellectual faculties or who lack experience and/or knowledge, unless they are supervised by a person responsible for their safety or have received instructions on how to use the appliance.
- Please make sure that children do not have an opportunity to play with the appliance.
If you do not intend using the appliance for an extended period, pull the power plug. -
If the following happens, do not use the appliance and unplug it immediately:
-
the appliance or power cable are damaged
-
a defect is suspected after a fall or similar occurrence
In these cases, have the appliance repaired.
- Do not leave the appliance to run unattended.
The appliance must be decalcified regularly. - The thermo pot is not suitable for use in microwave ovens.
- Never immerse the appliance in water.
- We will not accept any liability for damages resulting from misuse, non-compliance with the decalcification instructions, or unqualified repairs. Also, guarantee services are excluded in such cases.
- If the power cable of the appliance is damaged, it must be replaced by the manufacturer's authorised service agent or a qualified technician. Incorrect repairs may result in considerable hazards for the user.
Information about the thermos pot
The pot is designed as a serving pot which keeps the contents hot and it works best when filled to the limit. The heat retention action is greatly reduced when small amounts are left in the pot or when the pot is only partly filled. It works best if the pot is rinsed out with hot water before use.
The lid is not fully sealed due to the brew-through design so that it can also be opened easily when the coffee has cooled down. Do not apply too much force when screwing on the lid. Keep the pot upright whenever in use.
Turn the lid anticlockwise to open until the arrow on the lid is lined up over the spout.
The double-thickness stainless steel container is unbreakable. Nevertheless, it should be treated with care.
Rinse the pot out regularly. Iron particles from the water may cause localised corrosion on the stainless steel surface. Remove these deposits immediately with a cleaning agent for stainless steel.
Start-up
Prior to first use and after the unit has not been used for longer periods, perform a boiling process with fresh water without coffee grounds. Fill the tank with fresh water only to the mark for 7 cups.
Then rinse the filter and pitcher with hot water.
Set current time
After plugging the plug into an outlet, the display shows "12:00". Press the Prog key. The display shows "CLOCK" and the colon of "12:00" is blinking. You can now set the current time by pressing the h and min keys. When "CLOCK" disappears from the display, the clock is running. Confirmation is not required. Note: The time must be reset after a power failure or after the plug was disconnected.
Programming the activation time
The automatic activation of the unit independently starts the brewing process at the desired time. The activation time can be programmed up to 24 hours in advance.
Press the Prog key twice. The display shows "TIMER" and the colon of "00:00" is blinking. You can now change the activation time by pressing the h and min keys. When "TIMER" disappears from the display, the new activation time is programmed.
You can check the activation time at any time by pressing the Prog key twice.
Note: The activation time must be reprogrammed after a power failure or after the plug was disconnected.
Making coffee
Fill only cold water into the water tank. The water level display applies to the amount of fresh water which is needed to brew the desired number of cups, each containing 125ml .
Open the lid to add coffee grounds. Put a 1 × 4 paper filter into the filter, first slightly folding the embossed edge over. The paper filter must not protrude beyond the edge of the filter and should therefore be slightly pressed down by hand.
Add the required amount of coffee grounds. Depending on personal taste, use approx. 5 - 7g of moderately finely ground coffee per cup. The filter may overflow if it is too finely ground.
Automatic activation
To start brewing automatically at the programmed activation time, press the Prog key three times. The right indicator light lights up blue. Brewing starts automatically at the programmed activation time. The right indicator light goes out; the left indicator light lights up blue.
Immediate start
To start brewing coffee immediately, press the Start/Stop key The left indicator light lights up blue, and brewing starts. You can stop brewing at any time by pressing the blue lit Start/Stop key again.
Wait until the coffee has completely run into the pitcher. After the pitcher is removed, a drip stop valve prevents remaining coffee from dripping onto the heating plate.
Automatic shut-off
After the brewing process, an automatic shut-off function stops the unit from overheating. The unit only shuts off when the water has completely run through.
The unit can be shut off early by pressing the ON/OFF key. This may be necessary if you have accidentally turned it on without adding water. It is vital to let the coffeemaker cool for a few minutes before adding water to the hot unit.
Cleaning
Disconnect the power plug and leave the appliance to cool down.
Never immerse the appliance in water; simply wipe the exterior using a damp cloth with a drop of washing-up.
Do not use harsh or abrasive cleaning agents.
Clean the filter and thermo pot under running water.
Decalcifying
Limescale and calcium deposits result in a loss of energy and impair the service life of the appliance. The appliance will switch off prematurely if the deposit is too excessive. It is then very difficult to remove the deposit. We therefore recommend you to decalcify the appliance regularly, but at the latest when the brewing time increases significantly or there is more noise during the brewing process.
The following values are offered for guidance and are based on daily use in a household.
| Hardness range Hardness Decalcification | ||
| 1 soft 0 - 7° dH every | 6 months | |
| 2 medium >7- 14° dH | every 3 months | |
| 3 hard | >14 - 21° dH | every 6 weeks |
| 4 very hard | >21° dH | every 4 weeks |
1^ corresponds to approximately 0.18 mmol/l Ca and Mg ions
You can ask the responsible waterworks or community administration about how hard the water is in the region where you live. We recommend using durgol universal. It is highly effective and gentle on material with no additional acting time.
You can find it where you purchased the unit, in select specialist trade, or order it directly from wmf consumer electric.
To remove lime, place a paper filter in the unit and set the pitcher into the unit. Pour 1-2 cups of durgol universal into the water tank and fill up with tap water to the 7-cup mark. Press the Start/Stop key to remove lime.
Then rinse by running through a full tank of tap water.
Absolutely do not use vinegar or vinegar essence, since this may damage materials in the unit.
When using citric acid based lime removers, lime removal may lead to the formation of deposits which seal the lime coating or plug the lines in the unit. Lime removal with citric acid is also too slow - complete lime removal can therefore not be guaranteed.
Attention, there are no guarantee claims for damage caused by noncompliance with the lime removal instructions.
For UK use only
- This product is supplied with a 13 A plug conforming to BS 1363 fitted to the mains lead. If the plug is unsuitable for your socket outlets or needs to be replaced, please note the following. If the plug is a non-rewireable one, cut it from the mains lead and immediately dispose of it. Never insert it into a socket outlet as there is a very great risk of an electric shock.
- The replacement of the plug at the mains lead has to be done according to the following instructions:
Warning - This appliance must be earthed
Important: The wires in this mains lead are coloured in accordance with the following code:
green/yellow Earth
blue Neutral
brown Live
As the colours of the wires in the mains lead of this appliance may not correspond with the coloured markings identifying the terminals in your plug, proceed as follows:
- the wire which is coloured green and yellow must be connected to the terminal which is marked with the letter E or by the earth symbol, or coloured green or green and yellow,
- the wire which is coloured blue must be connected to the terminal which is marked the letter N or coloured black,
-
the wire which is coloured brown must be connected to the terminal which is marked with the letter L or coloured red.
-
If a 13 A (BS 1363) plug is used it must be fitted with a 13 A fuse conforming to BS 1362 and be ASTA approved. If any other type of plug is used, the appliance must be protected by a 15 A fuse either in the plug or adapter or at the distribution board.
If in doubt - consult a qualified electrician. - Never use the plug without closing the fuse cover.
The appliance is compliant with European Directives 2006/95/EC, 2004/108/EC and 2009/125/EC.
This product may not be disposed of in normal household waste at the end of its service life, but must be delivered to a collecting point for recycling electrical and electronic appliances.
The materials are reusable in accordance with their identification. You will make an important contribution to the protection of our environment by recycling used appliances.
Please ask about the responsible disposal point at your community offices.
Subject to change
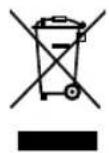
Universal Express Decalcifier durgol® universal
durgol® universal quickly and simply removes limescale and calcium deposits from all household items. Its formula stands for efficient decalcifying which is at the same gentle on materials, food-compatible and environmentally friendly.
durgol® universal can be purchased at select dealers or directly from wmf consumer electric in a 500 litre bottle.
Avant l'utilisation
- Technical data
- Safety information
- Information about the thermos pot
- Start-up
- Set current time
- Programming the activation time
- Making coffee
- Automatic activation
- Immediate start
- Automatic shut-off
- Cleaning
- Decalcifying
- For UK use only
- Warning - This appliance must be earthed
- Universal Express Decalcifier durgol® universal
- Avant l'utilisation
Brand : WMF
Model : Thermo Bueno Digitaal
Category : Coffee machine