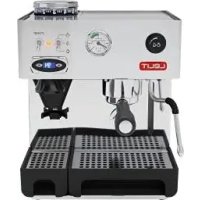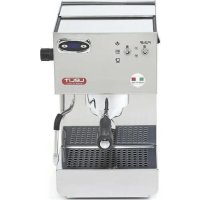
Gilda PL41 Plus - Coffee machine Lelit - Free user manual and instructions
Find the device manual for free Gilda PL41 Plus Lelit in PDF.


User questions about Gilda PL41 Plus Lelit
0 question about this device. Answer the ones you know or ask your own.
Ask a new question about this device
Download the instructions for your Coffee machine in PDF format for free! Find your manual Gilda PL41 Plus - Lelit and take your electronic device back in hand. On this page are published all the documents necessary for the use of your device. Gilda PL41 Plus by Lelit.
USER MANUAL Gilda PL41 Plus Lelit
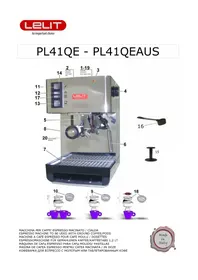
- Cold water tank
- Cup warmer
- Indicator light: steam ready
- Steam/hot water knob (on the right side)
- Filter holder retaining ring
- Steam/hot water arm
- Removable water drainage tray
- Filter holder
- Single cup filter
- Two cup filter
-
On/off switch (on the left side)
-
\
- Coffee/hot water/steam lever switch
- Indicator light: coffee ready
- Coffee press/tamper
- Measuring spoon
- Thermometer
- \
- Removable water tank cover
- Water level indicator
- \
- Pump lever switch

GENERALWARNINGS
This manual is an integral and essential part of the product. Please read all these warnings carefully as they provide important information on safe installation, use and maintenance. These instructions should be carefully retained for future reference.
- This appliance can be used by children aged from 8 years and above and persons with reduced physical, sensory or mental capabilities or lack of experience and knowledge if they have been given supervision or instruction concerning use of the appliance in a safe way and understand the hazards involved. Children shall not play with the appliance. Cleaning and user maintenance shall not be made by children without supervision.
- This appliance can be used by children aged from 8 years and above if they have been given supervision or instruction concerning use of the appliance in a safe way and if they understand the hazards involved. Cleaning and user maintenance shall not be made by children unless they are older than 8 and supervised. Keep the appliance and its cord out of reach of children aged less than 8 years.
- Appliances can be used by persons with reduced physical, sensory or mental capabilities or lack of experience and knowledge if they have been given supervision or instruction concerning use of the appliance in a safe way and understand the hazards involved. Children shall not play with the appliance.
- This appliance is intended to be used in household and similar applications such as: staff kitchen areas in shops, offices and other working environments; farm houses; by clients in hotels, motels and other residential type environments; bed and breakfast type environments.
- The appliance is only designed for making espresso coffee or hot drinks using the hot water or steam tubes and for preheating cups.
- Store the packaging material (plastic bags, polystyrene, etc.) out of the reach of children.
- The appliance is only designed for making espresso coffee or hot drinks using the hot water or steam wands and for preheating cups.
- Any use other than that described above is improper and could be ha-zardous; the manufacturer accepts no liability whatsoever for any damage arising from improper use of the appliance.
- This appliance is not intended for use by persons (including children) with reduced physical, sensory or mental capabilities, or lack of experience and knowledge, unless they have been given supervision or instruction concerning use of the appliance by a person responsible for their safety.
- Children must not be allowed to play with the appliance.
- The appliance must not be left unattended or used outdoors.
- The appliance should not be immersed in water or cleaned by spraying
- The appliance must not be exposed to atmospheric agents (rain, sun, ice).
- If the appliance is stored in rooms where the temperature can go below freezing, the tank and the water pipes must be emptied.
- All the packing material (plastic bags, polystyrene, etc.) should be keep out of the reach of children.
- No liability is accepted for the use of unauthorized spares and/or accessories.
- No liability is accepted for repairs not carried out by authorized service centres.
- The manufacturer accepts no liability for tampering with any of the appliance components.
In all the above cases the warranty will be void.

ESSENTIAL SAFETY WARNINGS
As with all electrical appliances, the risk of electric shock cannot be excluded, therefore, the following safety warnings should be carefully observed.
To avoid spilling the connector, never pull the power cord.
- Always attach plug to appliance first, then plug cord into the wall outlet.
- To disconnect the appliance, turn any control to "off", then remove plug from wall outlet.
- In the event of any fault or malfunction, do not attempt to carry out repairs. Switch the appliance off, remove the plug and contact the Service Centre.
- In the event of damage to the plug or the power cord, do not operate the appliance, these should be replaced only and exclusively by the Service Centre.
- Unplug from outlet when not in use.
- Before cleaning the exterior surfaces of the appliance, putting on or taking off parts, switch it off, remove the plug from the outlet and allow to cool.
- To reduce the risk of injury do not drape cord over the counter top or table top where it can be pulled on by children or tripped over unintentionally.
- Do not let cord touch hot surfaces.
- Do not let cord hang over edge of table or counter.
- The use of accessory attachments not recommended by the appliance manufacturer may result in fire, electric shock or injury to persons.
- Do not place on or near a hot gas or electric burner, or in a heated oven.
- Before switching on, ensure that the power supply voltage corresponds to that indicated on the plate on the base of the appliance and that the power supply is properly earthed.
- Do not tamper with the appliance. Contact an authorized technician or the nearest service centre for any problem.
- Do not touch the appliance if your hands or feet are wet.
- Do not touch the plug with wet hands.
- Ensure that the electrical outlet is always freely accessible so that the plug can be easily removed when necessary.
- When removing the plug, always hold it directly. It should never be removed by pulling on the power cord, as this can cause damage.
- To protect against fire, electric shock and injury to persons do not immerse cord, plugs in water or other liquid.
- Do not use adapters, multiple so-ckets or extension cords. If their use is unavoidable, use simple adapters or multiple sockets and extension cords that conform to current safety standards, taking care not to exceed the current limit marked on the simple adapter or extension cord, or the ma-ximum capacity of the multiple socket.

WARNING ABOUT BURN/SCALD RISKS
This appliance produces hot water and steam; therefore, the following safety warnings should be strictly observed
- Warning: hot surfaces remain hot for a certain time also after use.
- Take care to avoid contact with water spray or jets of steam.
- When the appliance is switched on, do not touch the cup warming plate as it is hot.
- Never direct the steam or water spray towards your body.
- Be careful when touching the steam/ hot water dispensing wand (6).
- Never remove the filter holder (8) during operation.
- The parts labelled "CAUTION HOT" are very hot, so approach and operate them with maximum caution.
- Only place cups and glasses for use with the coffee machine on the cup warmer (2). Other objects should not be placed there.
- Dry the cups thoroughly before placing them on the cup warmer (2).
USER INSTRUCTIONS:
Starting of the machine:
- Remove the machine from its packing and make sure all packing parts have been taken off (including the protection bags).
- Lay the machine on a flat and steady surface far away from hot places and from the water taps.
- Remove the water tank cover (19) on the top of the machine and take out the water tank (1) paying attention not to damage the water tubes inside the tank.
- Fill the tank (1) with cold water.
- Replace the water tank back in the machine and check that the water tubes are not bent and that the filter is well set on one of them; reposition the tank cover (19).
- Plug in the machine in the mains. Make sure that the wall socket has the right voltage.
- Place the filter holder (8) under the brewing group (5) and turn it from the left to the right. Leave it there so that it can get warm and it gets ready for use.
- Turn the machine on by pushing the on/off switch (11). The indicator light of the switch (11) comes on to confirm the power supply.
- Open the steam/hot water knob (4).
- Position the lever switch (13) on hot water mode and lift the pump switch up (22).
- Once water comes out of the steam nozzle (6), push the pump switch (22) down and close the steam/hot water knob (4).
- After completing all these operations, leave the machine on.
NB: The machine is provided with a thermometer that indicates the boiler temperature for coffee and steam function.
- Check that the water tank (1) has been filled in with water by looking at the water level indicator (20).
- Press the on/off switch (11): the indicator light of the switch (11) will come on. Do this operation only if the machine is off. If it's on pass to the following point.
- As soon as the indicator light (14) goes off, the machine is ready for use.
- Fit the single cup filter (9) or the two cup filter (10) into the filter holder (8) that has been warmed up by leaving it attached to the brewing group as described in point 7.
- Fill the filter with ground coffee by means of the supplied measure spoon (16): 1 measuring spoonful (16) = 1 coffee cup - 2 measuring spoonful (16) = 2 coffee cups. Every time you fill the filter with a spoonful of coffee, press the coffee with the coffee press/tamper (15) before proceeding to fill it with the next spoonful and make sure that there are no coffee rests on the filter border.
- Insert the filter holder (8) in the brewing group ring (5), turn it from left to right with force, and then put the cup on the removable water drainage tray (7).
- Position the lever switch (13) on coffee mode and lift the pump switch (22) up.
- Once you get the desired quantity of coffee, push the pump switch (22) down.
- Remove the filter holder (8) and throw away the coffee grounds. Make sure that the filter holder is clean and reposition it in the brewing group to warm up again.
Steam:
- Check that the water tank (1) has been filled in with water by looking at the water level indicator (20).
- Press the on/off switch (11): the indicator light of the switch (11) will come on. Do this operation only if the machine is off. If it's on pass to the following point.
- Position the lever switch (13) on steam mode.
- The lights (14) and (3) will go on and once the indicator light (3) goes off the machine is ready for a good and constant steam distribution. ATTENTION: if you'll wait to much and both lights will go off, the steam quantity will be less constant.
- Open the steam/hot water knob (4). First some water will flow out and then the steam.
- Put the cup with the desired infusion under the steam tube (6) and turn the knob (4).
- Once the drink has been suitably frothed, close the steam/hot water knob (4).
- IMPORTANT: after you have frothed your milk, reopen the steam/hot water knob (4), position the steam switch (13) on hot water, and lift the pump switch (22) up. When the water flows out of the steam tube (6), close the steam/hot water knob (4), at the same time push the switch (22) down and re-position the switch (13) on coffee mode. Clean carefully the steam/hot water tube (6). This operation is needed in order to restore the water circuit inside the machine's tubes.
Hot water:
- Check that the water tank (1) contains enough water by looking at the water level indicator (20).
- Press the on/off switch (11): the indicator light of the switch (11) will come on. Do this operation only if the machine is off. If it's on pass to the following point.
- Position the lever switch (13) on hot water.
- As soon as the indicator light (14) goes off, the machine is ready for use.
- Open the steam/hot water knob (4) and lift the pump switch (22) up.
- Hot water will flow out from the steam arm (6) immediately.
- Once you have got the desired quantity of water, repress the switch (22) down and close the steam/water knob (4).
- After obtaining hot water from the arm (6), make sure that there is still water in the tank (1).
USEFUL TIPS:
The single cup filter basket (9) and the two-cup filter basket (10) do not need to be washed after each use but please check that the holes are not obstructed.
- For best results, we suggest warming the cups up on the cup warmer (2) which works only when the machine is on.
CLEANING AND MAINTENANCE
Cleaning and maintenance of the machine are essential for the quality of the coffee and the durability of the appliance.
Cleaning
The machine must be cleaned at least once a week.
Before starting, remove the plug from the electrical outlet and allow the machine to cool.
Use a soft cloth, preferably microfiber, like the Lelit cloth (code MC972 - not included), and moisten
it with plain water. Do not use abrasive detergents and do not immerse the machine in water.
For thorough maintenance, we suggest you use the Lelit brush (code PL106 - not included), which will help you clean the nozzles and the spaces between the gaskets more effectively, removing stains and coffee residues from even the smallest cracks.
Warm running water can be used to clean the removable parts of the machine. The filters and filterholders should never be washed in a dishwasher.
There is no need to clean the filters after each use, but just to ensure they are not clogged.
However, to ensure the best performance from your machine, it is essential to thoroughly clean the steam wand and filterholder after each use.
The filterholder should be cleaned to remove the greasy coffee residues that can negatively affect the taste of your espresso.
Wash the exterior part of the steam wand with a damp cloth and release a little steam to remove any milk residues from inside the tube, as these could obstruct the steam output, making it more difficult to froth milk properly.
BACKFLUSHING:
It is recommended to perform this cleaning at least once a week and / or at least every 100 brewed coffees. The following instructions apply to all types of groups fitted to our espresso machines.
Material needed:
- Blind filter
code MC754/C for portafilters with 58mm diameter)
Brush (code PL106)
- Detergent powder for espresso machine (code PL103)
Group cleaning. Follow these steps:
- Place the blind filter in the portafilter
- Add 1 tea spoon of detergent powder (3-5 grams) in the blind filter
- Insert the portafilter into the brewing group
- Switch the espresso switch on for about 10 seconds
- Stop the espresso brewing and wait for 10 seconds
-
Without removing the portafilter, repeat this operation 5 times
-
Remove the portafilter, switch the espresso switch on again and rinse the portafilter under the hot water that comes out of the group. Turn the switch off
- Clean the brew group and the brew gasket first with the brush and then with a damp cloth in order to remove all coffee powder rests
- Insert the portafilter into the brew group again and repeat points 4-5-6 without detergent powder
- Throw away the first espresso you'll brew
Cleaning of the accessories through immersion. Follow these steps:
- Place the filters and portafilter in a jug with the portafilter handle upwards
- Pour 3 tea spoons of detergent powder in the jug (10 grams)
- Pour 1 liter of hot water in the jug until the metallic part of the portafilter is completely immersed
- Wait at least 15 minutes
- Remove the immersed parts and rinse them with plenty of warm tap water
- Throw away the first espresso you'll brew
DESCALING THE MACHINE
Use of the machine creates a natural formation of lime scale, over a time period depending on how frequently the machine is used and on the hardness of the water. Lime scale deposits can obstruct the tubes and decrease the brewing temperature, altering the quality of the coffee and reducing the lifetime of your machine.
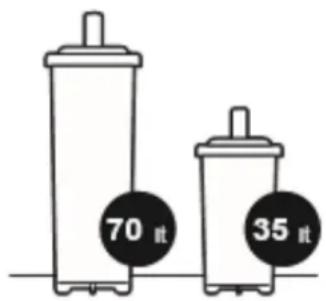
To avoid the formation of limescale, which can also deposit in the internal circuits, we recommend the use of our Lelit resin filter (code MC747 - MC747PLUS - not included) to soften the water. Please insert the filter in the tank following the instructions on the packaging. The filter purifies the water from the calcium and magnesium salts which are deposited to form lime scale and affect the taste of your coffee. Remember that the filter loses its effectiveness after a certain number of gallons treated, so replace it periodically. Instructions for the use and replacement of the filter are given on the box.
To avoid any possibility of damaging the machine's components, ADD ONLY NATURAL DESCALING PRODUCTS INTO THE WATER TANK.
TECNCIAL DATA:
Voltage: 230V - 50Hz/220V - 60Hz
Power: 1250 W
Heating time: ca. 10 min.
Pump pressure: 15 bar
Water tank: 2,7 litres
Dimensions (HxLxD): 23× 27× 34 cm
Weight: 9 kg
To be operated with ground coffee
PL41PLUS/110 - 120V 60 Hz
TROUBLESHOOTING:
We thank you for buying one of our products, projected and assembled in accordance with the most up-to date technological innovations.
Following carefully the simple operations described in this manual, which respect all essential safety regulations, you will get the best performances and will appreciate the remarkable reliability of this product in the years to come.
Please find below the description of the most frequent problems and of their solution:
| PROBLEM | CAUSE | SOLUTION |
| Coffee is not creamy | 1. Coffee blend not suitable for machine 2. Improper grinding 3. Insufficient coffee in filter basket 4. The filter holder has not be tightened under the brewing group ring | 1. Use a different coffee blend 2. Adjust coffee grinding 3. Put more coffee in the filter basket and press it properly 4. Tighten better the filter holder |
| The coffee is too cold | 1. The machine had not reached the proper temperature 2. Filter-holder has not been preheated 3. Cups have not been preheated 4. Thermostat malfunction. | 1. See section "Starting the Machine" and "Making an Espresso Coffee" 2. Filter-holder must be heated together with the water - see section "Starting the Machine" 3. Properly heat the cups on the cup-warmer (2) 4. Contact the nearest SERVICE CENTER |
| The coffee comes out too quickly | 1. Coffee too coarsely ground 2. Insufficient coffee in the filter basket 3. Coffee has not been pressed enough 4. Old or unsuitable coffee | 1. Use a finer grinding step 2. Put more coffee in the filter basket 3. Press the coffee more firmly 4. Use a different coffee blend |
| Coffee comes out between the coffee group and the filter-holder | 1. Filter-holder not properly inserted 2. Too much coffee in the filter 3. Edge of the filter-holder not clean 4. The douche seal is worn or damaged | 1. Insert the filter-holder correctly 2. Put less coffee in the filter 3. Clean the edge of the filter-holder and the brewing group seal 4. Contact the nearest SERVICE CENTER |
| Coffee comes out in drops | 1. Coffee too finely ground 2. Too much coffee in the filter 3. Coffee too firmly pressed | 1. Use a coarser grinding 2. Put less coffee in the filter 3. Press the coffee more gently |
| The machine does not produce steam | 1. The water tube hole may be obstructed 2. Lack of water in the tank 3. The steam nozzle has been improperly positioned | 1. Clean the hole with a needle 2. See section "Starting the Machine" 3. Reposition the steam nozzle |
| No coffee produced during the coffee cycle | 1. Lack of water in the tank 2. Steam switch on 3. Coffee too finely ground 4. Too much coffee in the filter 5. Coffee too firmly pressed 6. The brewing group douche is dirty | 1. Fill the tank 2. Turn off the steam switch 3. Use a coarser grinding 4. Put less coffee in the filter basket 5. Press the coffee more gently 6. Contact the nearest SERVICE CENTER |
| The machine does not work and the ON light on the main switch does not come on | 1. No electricity 2. The power cable is not properly plugged in 3. The power cable is damaged | 1. Restore electrical power 2. Plug in the power cable correctly 3. Contact the nearest SERVICE CENTER for a replacement cable |
| The ON light on the main switch is on but the ready steam indicator does not go off within 10 minutes | 1. Thermostat malfunction 2. Heating element malfunction | 1. Contact the nearest SERVICE CENTER 2. Contact the nearest SERVICE CENTER |
The inserted data and pictures can be subject to changes without previous notice for the improvement of the machine's performances.
WARRANTY TERMS: LEGAL WARRANTY
This product is covered by the warranty laws valid in the country where the product has been sold; specific information about the warranty terms can be given by the seller or by the importer in the country where the product has been purchased. The seller or importer is completely responsible for the product. The importer is completely responsible also for the fulfilment of the laws in force in the country where the importer distributes the product, including the correct disposal of the product at the end of its working life.
Inside the European countries the laws in force are the national laws implementing the EC Directive 44/99/CE.
DESCRIPTION:
CneIyoume INHCTpykun OTHOCATcK BOCEm TINam rpynn, yCTaHOBJIeHHbIX Ha HauXx 3cnpecco-MaunH.
Heo6xOaMbIe:
TnyxohΦnIbTp
山etka (KoJPL106)
UHCTaIIN NopOoK dIg 3cnpcecco
(KoM C754 / C dI npTaФиNbTpoB c 58 nIaMeTpOm)
(KoDPL103)
Yucmka apynnb. BbInonHume cndyououe deucmeur:
1.YctahOBHTe CnienoФmNbTpB noptaФmNbTp.
2.Добавыт e 1аину loxky uctzaero nopoika (3-5 r)В ctenoфпгьтр.
3.BcTaBbTe npTaΦmNbTp B KoΦeHnyIpynnbl.
4.BkNoHHTe npolnB npynbHa 10 cekyhd.
5.OctaHOBInTe npOINb rpynnbI nnoJOnJnTe 10 cekyHn.
6. He cHIMaI nopTaOpINbTp noBToPte 3ty onepauio 5 pa3.
7. CHIMITE npotapnIbTp, BkIOUHTe npoINB IN cytb TpOraa BObl, KOTOPA BbIXOHT IN 3rpynnIb IpMOeT rpynnIy IN npotapmIbTp. BbIKIOHTe npoINB.
8. Ouchte KopeHny rpynny n npoknady npn nooyn 1eTKN, a 3aTe m npn nooyn BnaXhoT KaHN, YTObI ydaNTb BCE OCTaTKN KoPeHbIX MaceN I KINPOB
9.BCTabBte noptaФnIbTp B KopeHnyI npOBtnpIe nyHKtbI 4-5-6be3uCTraJero nopoUka.
10.Пригоровы.TиВылейТeпервьзсресco.
Yucmka akceccaypoe uepe3 noepykenue 8 ucmuaui pacmeop. BbinoHume cedyouue deucmeua:
- NomeCTnTE pInbTpbl nopTaOpInbTp b KOhteHep (nopTabInbTp pyKamn BBepx).
- 3aIeTe 3 aHbIe IIOxKn YIcTJeero nopoSoKa B KOnTeHepe (10 rpaMm).
- 3aIITb DOCTaTOHoe KOINcTBO rOpyeB BObl B KOHTeHep Do KOHca MetaIInuecko qactn nopTaPnIbTp a (npTaPnIbTp He noJIHOCTbIO norpykaTb).
4.ПодoxДиTe MнИМуM 15 МнHT.
5.BbIbTe npryxheIe cactn n npomOteB x6BoJIbIM KOnIueCTBOM TENIO BOODPBOBDHOBOID.
6.Пиготовп Вьлелп Ррьзспесco.
YdaenHe HaKnnC KoFeBapKn
NcnoB3OBAHHe KoebeapKn npBODnK eCTeCTBeHHOMy OTIOXeHnHO HAKIN, CKOPoCTb KOtOpRo 3aBnCnT OT cAcTObl NcNOlb3OBAHn yctpoiCTBa n XeCTKoCTn BObl.
N3BcTkoBbIe OTIOXeHn 3a6nBaIOT Tpy6Km n CHnKaIOT TempeAtpy Ha BbIXOe, BnnaHa KaueCTBO BbIXoJzero KoPe n COKpaIaer cPOK cnjx6bl yCTPOIcTBa.
Bo n36ekahne 0bpa3oBAHn HauHH, KOtopa OTKnAdbBaetc BHTpN 6oJIepa, Mbl peKOMeHyEM BCERda NcONb3OBAbT pIbTp-ymrHTeJIb BObl Ha OCHOBe Ho0oMeHHbIX CMOn Lelit (KOJ MC747 - MC747PLUS He BXoJNT B KOMJIeKT), KOtOpBbl, BydyuN BCTabNeHHbIM B pe3epByap, OUYUaET BOy OT CONe KaJIbUHm MarHn, KOtOpBle 0bpa3yOT HauNb bN BnIaHOT Ha BKyc KoPe.
He 3a6yIbTe UTO fNJIbTp TepraT CBOIO 3fpeKtNBHOCTb Nocne OnpedeJeHHORO KOJIueCTBa fNJIbTpBOAHHO BODJI.
IopdOK mONb3OBaHm 3aMeHb yka3aHa yaNkOBKe camo fNtbpTa.
TTO, TTO6bI ppeoTbPAHTB BO3MOXHoe NOpeKDeHne KOMnoHETOB MaunHbI, IOABJIaTE TOJIbKO HATyPAJIbHbIE CPEJCTBA IINYDAJIENHRA HAKINB PeepByap dra BoDbl

TEXHNUECKNE DAHHBIE:
HapjxHe: 230 B -- MouHocTb: 1250 BT. -- PL41PLUS/110 - 120V 60 Hz
BpemrrotOBHcTn pa6ote:OKOIO 10 MNHT
DablenHe hacoca:156ap
06bem 6oUka dIa BOdbI:2,7IITpa
Pa3Mepbl(BxUxD):23x27x34cm--Bec:9kr.
TAPAHINHbIEOB3ATEJIbCTBA
3Ta npodykunraaunha rapaHTnHbIM 3akOHOM, deiCTBtuOUM B cTpaHe, rde OHa 6bIa npodaHa; KOHKpETHa INΦOpMaunr O rapaHTnHbIX cPOKAX MOKeT 6bITb DaHa npodAubom/Umnpotepom B cTpaHe, rde npodykunra 6bIa KynneHa. PpOdaBeu/Umnpotep NOHocTbIO OTBETCTBeHHb 3a 3Ty npodykunio. MMnpTeP OTBETCTBeHH 3a BblONHeHne DeiCTBtuOUnx 3akOHOB B cTpaHe, rde pacnpoctpahre TPOyKT, BKIOUcA npabINbHy IO tYNIN3auuio npodykTA NO OKOHAnH erO cPoka CnyKbI.
B ebponecknx ctpaHax DeIcTByHOT HauNoHaIbHbIe 3aKoHbI, KOtOpbIe OcyuecTBnIOT DeTeIbHoCTb DupeKTnBBi 44/99/CE
PA3PEUHEHNE BCTPEAUOUXXCRIPOBJEM:
Ybaxaembi NOKynteIb!
Blaoradapm Bac 3a noky Hauwien npdykun, KOtopa cKOHCTpynpoBaHa NO NocleHm TexHONOTeckn MHOweCTbAM. TzateIbHo Cney npocTbIM npabnIam No KOPpeKTHom yNoIb3ObaHIO, Yka3aHHbIM B Hactoae HNCTpykUn, Bbl noIyUHTe MaKcmaJIbHyIO OTaCy O Tpa6tbi KoFeBapKn yBepeHHOCtb B HaDeXHOCTn 3ToI npdykun Ha npotJxHeHm MHOrnx JET. Hxke npednaeraTc npakTueckar Ta6nua, B KOtopo ITO6paxHeBbCTpeaiouneHenoJaKn nix 6bICTpoe ycTaPHeHne.
IMPORTANT INFORMATION FOR CORRECT DISPOSAL OF THE PRODUCT IN ACCORDANCE WITH EC DIRECTIVE 2002/96/EC
At the end of its working life, the product must not be disposed of as urban waste. It must be taken to a special local authority differential waste collection centre or to a dealer providing this service. Disposing of a household appliance separately avoids possible negative consequences for the environment and health deriving from inappropriate disposal of enables the constituent materials to be recovered to obtain significant savings in energy and resources. As a reminder of the need to dispose of household appliances separately, the products is marked with a crossed-out wheeled dustbin.
EC DECLARATION OF CONFORMITY
Gemme Italian Producers srl declares under its own responsibility that the product: Coffee machine type: PL41PLUS to which this declaration relates conforms to the following standards: EN 60335/1 - EN 60335/2/15 - EN 61000/3/2 - EN 55014 pursuant to directives: Low Voltage Directive EC 2006/95 - Directive EMC EC 2004/108
NB: This declaration is null and void should the machine be modified without our specific authorisation.
FRANCAIS
AVERTISSEMENT POUR L'ELIMINATION CORRECTE DU PRODUIT AUX TRMES DE LA DIRECTI EUROPEENE 200/96/EC
Et conforme aux directives : Low Voltage Directive EC 2006/95 - Directive EMC EC 2004/108
Low Voltage Directive EC 2006/95 - Directive EMC EC 2004/108
YKA3AHNIOKOPPEKTHOMY N3BABJENHOOT N3DEJNA B COOTBETCTBNC EBPONECKOJ DEPEKTHBOI 2002/96/EC
No okohuaann cpoka cnyy6bl, 3neKtpnpnbop He cneyet nomeaaB B o6unn KOhtenep C Myc0hpb OTxodamn. Ero moxno cdaTb CneuaaHbIe ceHTpbl NO c60py dNphipehuaNbHbIX OTXoOB, PnpEOCTaJIeHHbIX aDMNHCTpaTHBbIMMyHcIIaIINTaM, INB CNEuaaHbIOBaHHbIE pnpMbI, KOTOpBie 3aHmApOTc TaKIM O6clyKbAHnEM. Pa3JeBHa Npepa6Ota Ka NEKtpnp6Opob No3BOJrE T36ekaTb BO3MOXbHe HcTaNBHe IocNeCTBn, Bo3HkaIOuJe N3-3a He COOTBeCTByIOUe Npepa6OKn OTXoOB, Dn OkpyKaIOoue Cpebl NdoPObBb OBseCTBa. Daet BO3MOXHOCTb DOCTNRHyTB 3NaHTeNbHO 3KOHOM 3Heprnn n pecypcoB, 6Iano4apnOBTOTOPHom MCNOb3OBAHIO MATEpnaIOB N3ROTOBENHn 3NEKTPnp6Opa. 4TO6bl NDOpeKHyTb 683aTeNbCTBO Cdaun 3neKtpnp6Opa Ha pa3dEhyo nepepa6Oky, Ha nDennie HaHeceHa MapKnupOBKa B BVide 3auepKHyTORo NepeDbHXHO Myc0pHO KOhtenHepa.
DEKJIAPAUHCAOTBETCTBNA TPEBOAHNMAEC

KomnaHnGemme Italian Producers srl 3aBnT noCBOIO OTBeTCTBeHHOCTb, UTO n3dJIHe:
Koepbapka Tuna: PL41PLUS K KOtopoO OTHOCITc DaHHa JeKnapa, COOTBETCTBYOT CNeDyIOH M HOPMAM:
EN 60335/1 - EN 60335/2/15 - EN 61000/3/2 - EN 55014 corlacho noLoxehnma DnpeKTHB:
HnpeKtNbA no Hn3kOMy HanpXeHHo 2006/95 EC - HnpeKtNbA 3MC EC 2004/108
PnmeuHHe: Hactoiaa Daeknapaunr Tepaet cnly, cInn B yctpoiCTBO 6bnn Bhecehbl n3Mehenra 6e3 Haewero NcBmehno pa3peweHn.
Castegnato, 01/10/2014
Genre Italian Producers srl
ITALIANO