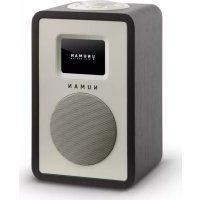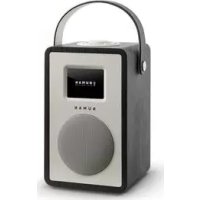
Mini Two - Radio Numan - Free user manual and instructions
Find the device manual for free Mini Two Numan in PDF.


User questions about Mini Two Numan
0 question about this device. Answer the ones you know or ask your own.
Ask a new question about this device
Download the instructions for your Radio in PDF format for free! Find your manual Mini Two - Numan and take your electronic device back in hand. On this page are published all the documents necessary for the use of your device. Mini Two by Numan.
USER MANUAL Mini Two Numan
Library > Add to Library.
AUX, BT, ALARM UNDSLEEPTIMER
AUX-MODUS
We are very pleased you've chosen to purchase a NUMAN product. A spectrum of pure sound, fun and satisfaction!
Before using your product, please take some time to read through the user manual to become familiar with all the great features this product has to offer. Be sure to retain the manual in a safe location for future reference.
If you have any questions or suggestions, please don't hesitate to contact us via our website www.hifi-tower.co.uk.
We will gladly help you as quickly as possible.
Best Regard from Berlin
Your NUMAN Team
CONTENTS
Technical Data and Packing Content 42
Safety Instructions 43
Product Description 45
47
Use and Operation 49
Radio Portal Registration 53
Setting up a Music Server 54
Internet Radio Mode 56
Music Streaming over the Network 60
Music Streaming in Windows 7 63
DAB Radio Mode 65
FM Radio Mode 68
BT, AUX, Alarms and Sleep Timer 70
Software Update and Factory Reset 73
Error Messages and Troubleshooting 74
Disposal and Declaration of Conformity 77

TECHNICAL DATA AND PACKING CONTENT
TECHNICAL DATA
Item number: 10030809, 10030810, 10030811, 10030812, 10030817
Power supply: Power adapter DC 13.5 V or Lithium battery (3x) 11.1 V | 2200 mAh
Display:
TFT
Display
Functions and connections: WiFi | DLNA | Internet Radio | DAB | DAB+ | FM | AUX | BT
PACKING CONTENT
1x NUMAN Mini Two
1x Power adapter DC 13.5 V
1x User Manual
IMPORTANT HINT ON CHANGING THE BATTERIES
To charge the battery you may need to put On the switch located inside the battery compartment. Put the switch to OFF if not used the battery for a long time). The battery can be recharged when the radio is supplied with the power supply and the switch is ON.

SAFETYINSTRUCTIONS
Read all the safety and operating instructions carefully and retain them for future reference.
- To reduce the risk of fire or electric shock, do not expose this apparatus to rain or moisture. The apparatus shall not be exposed to dripping or splashing and that objects filled with liquids, such as vases, shall not be placed on apparatus.
- The direct plug-in adapter is used as disconnect device, the disconnect device shall remain readily operable.
- To reduce the risk of electric shock, do not remove cover (or back) as there are no user-serviceable parts inside. Refer servicing to qualified personnel.
- The exclamation point within an equilateral triangle is intended to alert the user to the presence of important operating and maintenance instructions in the literature accompanying the appliance.
- No naked flame sources, such as lighted candles, should be placed on the apparatus.
- CAUTION: Danger of explosion if battery is incorrectly replaced. Replace only with the same or equivalent type.
- WARNING: The battery (battery or batteries or battery pack) shall not be exposed to excessive heat such as sunshine, fire or the like.
- Do not use this product near water or moisture.
Clean only with a dry cloth. - Unplug this product from the wall outlet before cleaning.
- Place the unit on a solid surface.
- Do not put it in a closed bookcase or a cabinet that may keep air from flowing through its ventilation openings.

- Do not install near any heat sources, such as radiators, heat registers, stoves or other appliances that produce heat.
- Protect the power cord from being walked on or pinched, particularly at plugs and the point where they exit from the product.
- Servicing is required when the product has been damaged. Do not attempt to service this product yourself. Opening or removing covers may expose you to dangerous voltages or other hazards. Please contact the manufacturer to be referred to an authorized service center near you.
- To prevent risk of fire or electric shock, avoid over loading wall outlets, extension cords, or integral convenience receptacles.
- Do not let objects or liquids enter the product.
- Use proper power sources. Plug the product into a proper power source, as described in the operating instructions or as marked on the product.
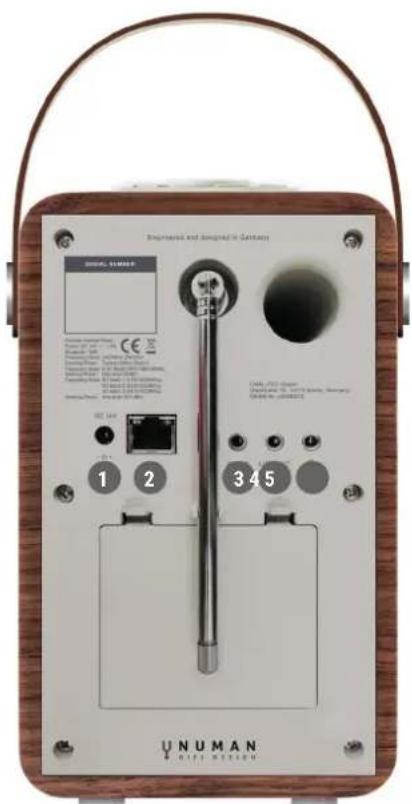

DC power in (13.5 V)
LAN for Ethernet connect
3 Aux in (to connect external media like iPod)
Line out (to connect to an external amplifier)
5 Headphones out
HOW TO USE THE SCROLL (TOP)
Turn to scroll through a menu or station list. The chosen option is highlighted in reverse text (dark characters on a white background). Press to the button to select. Turn to the button to adjust the volume up or down when playback. Press to the button to mute the music when playing. Press the button to snooze a set time when alarm sounding. Long press this button to power off the unit.
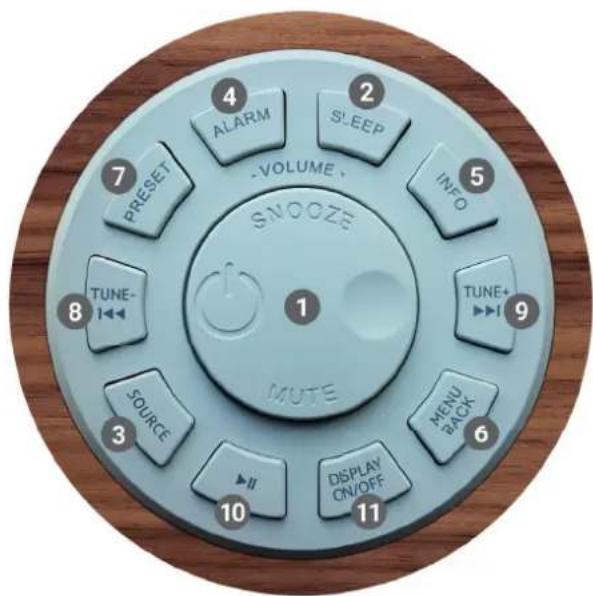
Controls on the cover (top)
1 Select | Volume | Mute | Snooze | Power
2 Sleeptimer
3 Changing the source
Alarm 1 or 2
5 View more information
Menu | Menu back
Save the favorite station
8 Tune- | Previous
9 Tune+ | Next
10 Select Play | Pause (in different mode)
11 Display on/off

SCREENS
The screen shows various menus, dialogues and displays as described below. There are basically six types of screen. When text is too long to fit on the screen, it is first shown truncated, then after a few seconds, slowly scrolls so that you can read it all.
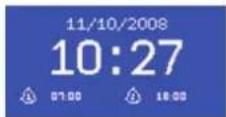
STANDBY SCREEN
The Standby screen shows the time, date and any active alarm times.
SPLASH SCREENS (MODE)
As you cycle through the play modes using SOURCE, the radio shows a splash screen for each mode. After one second, the radio enters the selected mode and tries to start playing the last station or track that was playing in that mode. If this is not possible, the radio tries to connect to the selected source by scanning for stations, networks, or prompting for user input as appropriate.
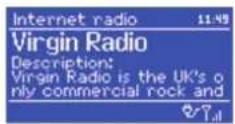
NOW PLAYING SCREENS
Now playing screens show information about the audio source and track now playing, where available.

DIALOGUE SCREENS
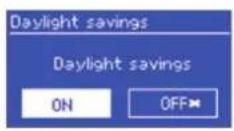
Dialogue screens are shown to allow the user to change settings. They vary in complexity from simple Yes/No options up to the scrollable network password input screen. As with menus, the selected item is shown with a yellow background. Dialogue screens mark the current setting with an asterisk (*)
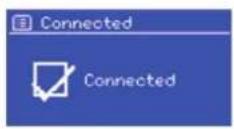
ERROR AND INFORMATION SCREENS
Error/Information screens give specific messages for a few seconds, then change automatically to another screen.
MENUS
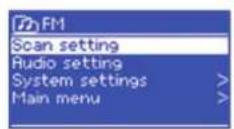
The radio has basically three types of menu. Use the Select control to step through and select options. A scroll bar on the right of the screen shows if there are further options above or below those visible. Each mode has a Mode menu, with options specific to that mode. In addition, each mode menu has two final options: System settings and Main menu. The >^ indicates options leading to further menus.
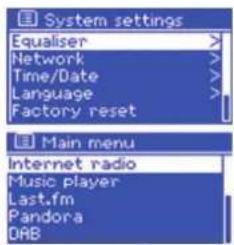
SYSTEM SETTINGS AND MAIN MENU
The System settings menu allows access to system settings and information such as network, time, language and software update. Menus with more options than will fit on one screen have a scroll bar to the right. The Main menu allows access to all modes plus sleep and timer functions. Some menus have several submenus.

USE AND OPERATION
GETTING STARTED AND SETUP
The radio is easy to use. To play DAB or FM radio, all you need is a power source (a 100-240 V mains supply); For Music Player mode, you need a wired/wireless Ethernet network and a UPnP music server (e.g. a PC). For Internet-connected modes such as Internet radio, you also need a broadband Internet connection.
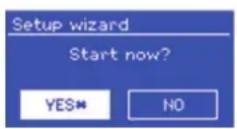
When the radio is started for the first time, it runs through a setup wizard to configure settings for date/time and network. Once this has finished, the system is ready to use in most modes. Note: To change these settings later, select MENU > System settings > To run the setup wizard again, select MENU > System settings > Setup wizard. Select Yes to start the setup wizard. If you choose No, the next screen asks if you would like to run the wizard next time the radio is started. The system then starts without configuring time/date and network settings and enters the Main Menu.
NOTE: If power is removed while the wizard is in progress, the wizard will run again next time the radio is started.
SETTING TIME AND DATE
To change between 12 and 24 hour display, select Set 12/24 hour and then select your preference.

The time and date can be updated manually or automatically. Withauto-update, the time and date are automatically synchronised with external clocks. Auto-update is generally more accurate.
AUTO-UPDATE
Auto-update works with data sent over DAB, FM or the Internet. The clock is only updated when in a corresponding mode, so it is best to select a mode you use regularly. DAB and FM use time signals broadcast with radio transmissions. Network uses a time signal sent from the Frontier Silicon Internet radio portal when in network-connected mode.
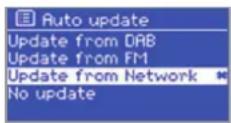
- Select Update from DAB, Update from FM, Update from Network or No update.
- If you are updating from the network, set your time zone.
- If your country uses daylight saving, the automatically updated time from the network may be wrong by one hour. When daylight savings are in effect (during the winter), turn on the Daylight savings option to rectify this. Note that if you are updating the time from DAB or FM, the Daylight savings option has no effect on the clock's time. The radio will auto-update from the selected source when time information is available.
MANUAL SET
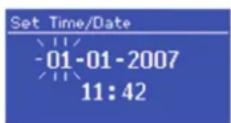
If you set No update, the wizard now prompts you to set the time and date manually. The date and time are displayed as dd-mm-yyyy and hh:mm AM/PM with the first value, dd, active (flashing). Adjust each value with the Select control. As each value is set, the next value becomes active and flashes.

NETWORK
The radio is compatible with all common network protocols and encryption methods.
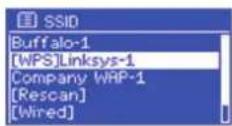
To connect the radio to your network, you need a Wi-Fi wireless router, together with password key if set. Select WLAN region/country > Wi-Fi network (SSID), and then select a network from the list. If the network is open (non-encrypted), the radio connects without any further ado.
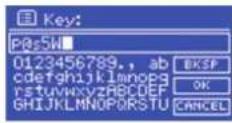
If your network is standard encrypted enter the network's key (password), use the Select control to move the cursor through the characters and select. As each character is selected, the key is built up near the top of the display. There are three options accessible by turning Select back before the first characters (0123...) - Backspace, OK and Cancel.
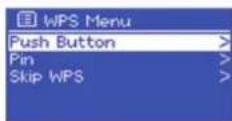
WPS encrypted networks are identified by '[WPS]' at the start of the network name, and have three methods of connection. Select one and follow the prompts:

- Push Button: The radio prompts you to press the connect button on the router. It then scans for a ready Push Button Connect network and connects.
- Pin: The radio generates an 8-digit code number which you enter into the wireless router, Access point, or an external registrar (e.g. advanced versions of Windows Vista).
- Skip WPS: Enter key as for a standard encrypted network, above. For more information on setting up a WPS encrypted network, see your WPS router's instructions.

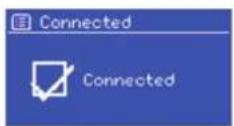
The radio tries to connect to the selected network. If connecting fails, the radio returns to a previous screen to try again. If the network connection is lost, the radio automatically tries to reconnect.
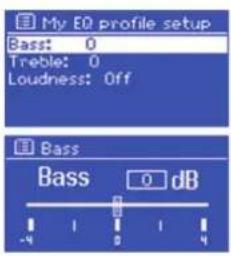
EQUALIZER
Several preset EQ modes are available; also a user-defined setting. To adjust the EQ, select MENU > System settings > Equalizer. You can then choose from a variety of preset modes or create your own, with custom bass, treble and loudness settings. Choose: My EQ profile setup, choose the setting and Use the SCROLL/SOURCE to adjust the chosen setting.
NETWORK AND LANGUAGE
The radio remembers the last four wireless networks it has connected to, and automatically tries to connect to whichever one of them it can find. You can see the list of registered networks through MENU > System settings > Network > Network profile > From here you can delete unwanted networks by turning pressing Select then confirming delete Yes. There are also other options for viewing and manually altering network settings from MENU > System settings > Network > (for example setting up a wired network). Users experienced with networking may find these options useful for diagnosing and find network problems.
The default language is English. To change, select MENU > System settings > Language > then select your favourite language.

RADIO PORTAL REGISTRATION
The radio uses the Frontier Silicon Internet radio portal website that allows you to organize your favourite's lists and also listen to Internet radio on a computer.

To register your radio with the portal, switch to internet radio mode as described in Section "Internet Radio Mode", and then obtain your radio's unique portal access code by selecting MENU > Station list > Help > Get access code . Write down the access code.
Visit the portal website at www.wifiradio-frontier.com.
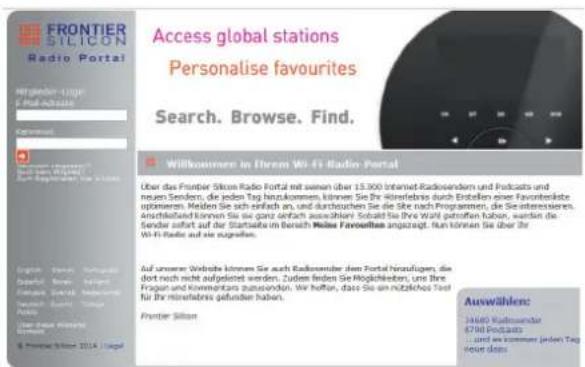
If this is your first visit to the portal, register for a new account, entering the following information: access code, your e-mail address, password, radio model.
If you already have an account and wish to add an additional radio, log into your account and select My preferences > Add another Wi-Fi radio. Once your radio is registered with the portal, you can immediately use the Internet radio favourites and added stations features.

SETTING UP A MUSIC SERVER
In order for the radio to play music files from a computer, the computer must be set up to share files or media. UPnP media sharing allows devices like the radio to play music from a shared media library, navigating through tag menus such as Artist, Album or Genre.
If you are running a suitable server system such as a PC with Windows Media Player 10 or later (WMP), and your music library is well-tagged, then it is recommended to use media sharing. Only the UPnP server needs to be set up.
NOTE: iTunes does not currently work as a UPnP media server, but there are add-ons available to work with an iTunes library.
SHARING MEDIA WITH WINDOWS MEDIA PLAYER
The most common UPnP server is Windows Media Player (10 or later). Alternatively, other UPnP platforms and servers may be used. To set up WMP for media sharing, perform the following steps:
- Ensure that the PC is connected to the network.
- Ensure that the radio is powered on and connected to the same network.
- In WMP, add to the media library the audio files and folders you want to share with the radio:
Library > Add to Library.
- In WMP, enable media sharing: Library > Media sharing.
- Setup can differ depending on which version of WMP you have.

WINDOWS 7 STREAMING MEDIA FEATURE
To set-up the radio to be controlled and to stream music via Windows Media Player 12 (Windows 7 only), perform the following steps:
- Ensure that the PC is connected to the network.
- Ensure that the radio is powered on and connected to the same network. Note: The radio must be in an Internet radio mode to be detected.
From the Windows 7 main screen, select Start > Devices and Printers. - Select the Add a device tab in the top left of the Devices and Printers window and follow the instruction prompts given by the wizard.
- In the Devices and Printers window a icon will appear and you are now ready to stream your Windows media music files to the radio.

INTERNET RADIO MODE
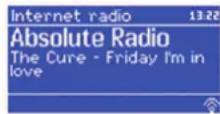
The radio can play thousands of radio stations and podcasts from around the world though a broadband Internet connection. When you select Internet radio mode, the radio contacts the Frontier Silicon Internet radio portal to get a list of stations, organized into different categories like Country, Most popular and Genre. Once you select a station, the radio connects directly to that station.
The portal also enables multiple lists of favourite stations that you can personalise, for example Andy's stations, Jo's favourites, Talkshows. To use the favourites feature, register your radio with the portal website as described on page 53. If you have several Frontier Silicon radios, you can register them all on the same account so that each radio has access to your favourite's lists. It is possible to add favourites either directly through the radio or through any computer with a web browser.
To enter Internet Radio mode, either press Mode until the display shows Internet Radio or select:
MENU > Main menu > Internet Radio.
NOTE: The station list menu is provided from the Internet radio portal, so it is only accessible when the radio is connected to the Internet. Station lists and submenus may change from time to time.
There are several ways of selecting stations.
- Directly from the radio: shows last listened and preset stations.
- From the portal through the Menu > Station list > Menu: shows stations sorted by favourite lists, county, genre, most popular, newest. You may also search for keywords or added stations.

- If you are already listening to an Internet radio station, you can press Back rather than MENU to quickly return to the last visited branch of the menu tree.
LAST LISTENED AND PRESETS
When Internet radio mode restarts, the last-listed station is selected. To select another recently used station, select MEN > Last listened then one of the stations listed. Most recent stations appear at the top of the list. Presets are stored in the radio and cannot be accessed from other radios.
To store an Internet radio preset, press and hold Preset until the display shows the Save preset screen. Select one of the presets to save the currently playing station. To select a preset, press Preset briefly, then select one of the listed preset stations. When a preset station is playing, it shows Pn (P1, P2 etc) in the bottom of the screen.
NOTE: Operation of presets is identical for Internet radio, DAB and FM.
SAVING FAVOURITE STATIONS
Favourites are stored on the Internet radio portal. Before you set up an account on the portal from its Web interface (www.wifiradio-frontier.com), the favourites are associated solely with the radio on which you set them. After you set up a portal account, all the favourites from your different radios are merged into a combined favourites list. This combined list is available to all the radios on your account.
To store a playing station as a favourite, press and hold Select until the display shows 'Favourite added'. The station appears in the default favourites list Stations. To select a favourite, select:
[ \text{MENU} > \text{Station list} > \text{My favourites} > [\text{Favourites list}] > [\text{Station}] ]

BROWSE INTERNET BROADCASTS
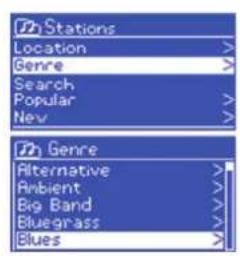
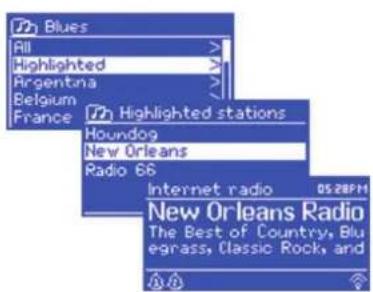
To browse Internet broadcasts, select MENU > Station list > then either Stations > or Podcasts > Browse through the menus to find broadcasts.
NOTE: BBC radio 'Listen Again' programmes are accessible through the Podcast menu, for example:
MENU > Podcasts > Location > Europe > United Kingdom > All shows > BBC Radio 4 > You and Yours > 20/10/2008- October 2010.
SEARCHING BROADCASTS
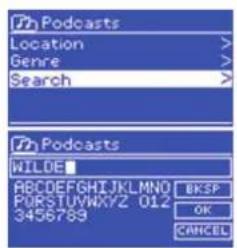
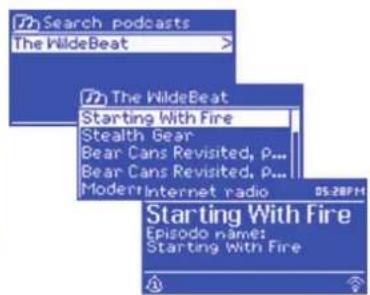
You can also search through Internet broadcasts for stations or podcasts with particular keywords in their title.
To search, select MENU > Station list > then either Stations > or Podcasts > Enter a keyword by selecting characters then OK. The search entry screens are similar in operation to the Wi-Fi password entry screen. Select a broadcast from the list. For podcasts, you may be able to select a particular episode.

SAVE AND SELECT PRESETS
- To store a preset, press and hold Preset until the display shows the Save preset screen.
- Select one of the 10 preset to save the currently playing station.
- To select a preset, press Preset briefly, then select one of the listed preset stations.
- When a preset station is playing, it shows Pn (P1, P2 etc) in the bottom right of the screen.
MY ADDED STATIONS
Even though the Internet radio portal contains thousands of stations, you may want to listen to stations not listed. You can add your own stations via the portal. These added stations are accessible from the radio by selecting MENU > Station list > My added stations > [Station] .
NOW PLAYING INFORMATION
While the stream is playing, the screen shows its name and description. If artist and track information is available, this is also shown. To view further information, press Info. Each time you press Info, another set of information is displayed, cycling through the following details: Artist and track name (default; where available), Description, Genre and show country, Reliability, Bit rate and Codec and Sampling, Playback buffer, Today's Date.

Music player mode plays audio files such as MP3s, AACs, WMA's or FLACs from a computer on the local network. To enter Music player mode, either press Mode until the display shows Music player, or select: MENU > Main menu > Music Player.
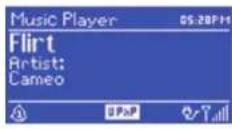
- Once in music player mode, press MENU, then select Shared media. Note: The radio does not support USB playback as shown in the picture below
- If you are already playing a music file, you can press Back to quickly return to the last visited branch of the menu tree.
- You can use and button, to move through tracks. Press and hold the on button to quickly to select previous or next track.
SHARED MEDIA (FROM UPNP MEDIA SERVER)
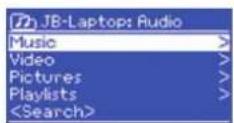
Select MENU > Shared media. If you have set up shared media, you should see an entry consisting of

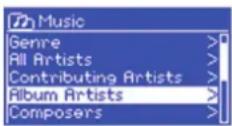
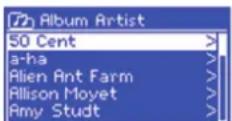
From Music, there are numerous ways of selecting tracks, including: Genre, Artist, Album,Composer and Rating.
Once you have found a track you want to play, press Select . A short press plays the track immediately and a long press adds the track to the playlist. You can also add entire albums to the playlist. The radio plays either the selected track or the playlist.
WAKE-ON-LAN
If shared media is selected a list of available music servers will be displayed. If a question mark appears before the server name, this indicates that the server has been seen before and supports Wake-on-LAN functionality, but cannot currently be found on the network. If a server with a question mark is selected by the user, the device will try to wake the server up and connect to it. In some instances this may not be possible as the server may not be connected to the network any more or may be switched off.
From time to time it may be necessary to remove servers displaying question marks in front of the server name from the server list. For example, if the device is moved to a new network or if a Wake-on-LAN server is removed from your current network. To perform this function go to: MENU > Prune servers > YES.

PLAYLISTS
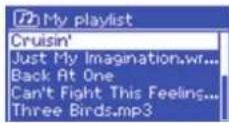
The radio holds a queue of up to 500 tracks in the playlist. Playlist tracks can be mixed from multiple UPnP servers. To manage the playlist, select:
MENU > My playlists.
- To view the playlist, scroll through it by turning Select. UPnP tracks show their track name.
To play the playlist from a certain track, quick Select.
To erase a track from the playlist, long Select, then confirm YES. - If you select a track/album/folder for instant playback (without using the playlist), the playlist is preserved.
The playlist is also preserved during standby.
REPEAT AND SHUFFLE
To repeat tracks select: MENU > Repeat play.
- To play tracks in random order select: MENU > Shuffle play.
NOW PLAYING INFORMATION
While a track is playing, the screen shows its track and artist (UPnP). There is also a progress bar with figures for elapsed and total track time. At the bottom of the screen, an icon indicates UPnP.
To view further information, press INFO. Each time you press Info, another set of information is displayed, cycling through: playback progress bar (default), album, codec/sampling rate, playback, buffer bar, today's date.

MUSIC STREAMING IN WINDOWS 7
One of the new Windows 7 features includes a feature called "Play To" and this lets your PC running Windows 7 control the radio to push media and use as a universal remote control for your media collection. The radio supports the industry standard DLNA (Digital Living Network Alliance) 1.5 digital media renderer. This allows you to "Play To" other devices around your home. Before you can use the "Play To" feature you need the set-up the radio for Windows 7 streaming media.
USE "PLAY TO" IN WINDOWS MEDIA PLAYER
Windows Media Player makes it easy to manage your media, find items that you want to play, and open Play To. To select items that you want to play, follow these steps:
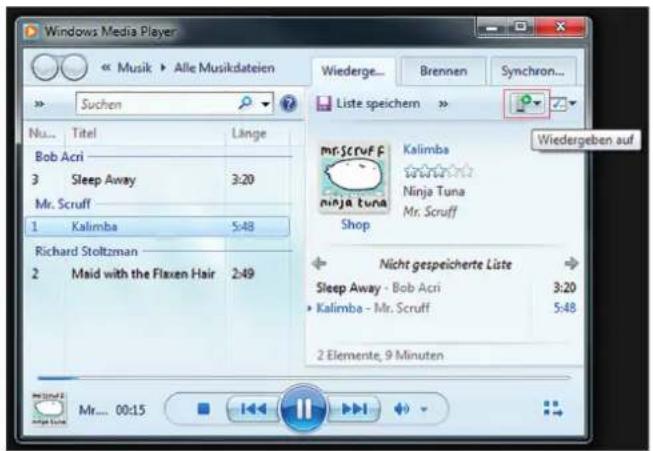
- Open Windows Media Player. If the Player is open and you're in Now Playing mode, click the Switch to Library button in the upper-right corner.
- If the list pane is closed or if the Burn or Sync tabs are exposed, click the Play tab.
Find the items that you want to play in the Player Library, and then drag those items From the details pane into the list pane. - Click the Play to button at the top of the list pane, click the device on your network that receives the media.
- In the Play To dialog box, use playback controls to play, pause, stop the stream or change to the next or previous item in the list.

USE "PLAY TO" ELSEWHERE IN WINDOWS 7
Outside of Windows Media Player, you can stream media to the radio with "Play To" by right-clicking music files. To select music files and stream them to the radio, follow these steps:
- Click the files you want to stream to the radio.
- Right-click the selected files, point to "Play to", and then click the device on the network that will receive the media.
- In the Play To dialog box, use the playback controls to play, pause, or stop the media stream, and to change to the next or previous item in the list..
NOW PLAYING INFORMATION
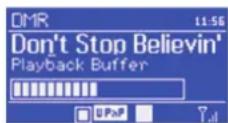
While a track is playing, the screen shows its track name (UPnP). There is also a progress bar with figures for elapsed and total track time. At the bottom of the screen, an icon indicates UPnP.
To view further information, press INFO. Each time you press Info, another set of information is displayed, cycling through the following: artist, album, codec/sampling rate, playback buffer.

DAB RADIO MODE
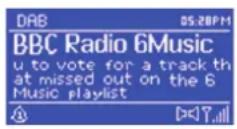
DAB radio mode receives DAB/DAB+ digital radio and displays information about the station, stream and track playing. To enter DAB mode, either press Mode until the display shows DAB Radio or select: MENU > Main menu > DAB.
SCANNING FOR STATIONS
The first time you select DAB radio mode, or if the station list is empty, the radio automatically performs a full scan to see what stations are available.
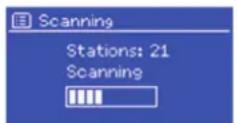
You may also need to start a scan manually to update the list of stations for one of the following reasons: Available stations change from time to time. If reception was not good for the original scan (for example the antenna was not up), this may result in an empty or incomplete list of available stations. If you have poor reception of some stations (burbling), you may wish to list only stations with good signal strength. To start a scan manually, select: MEN > Scan . Once the scan is complete, the radio shows a list of available stations. To remove stations that are listed but unavailable, select: MEN > Prune invalid > YES .
SELECTING STATIONS
To listen to a station or to change it, press the MENU/BACK key, then press SELECT (knob) to select a station. Once selected, the station plays and the screen shows information about the station, track or show as broadcast.

SAVE AND SELECT PRESETS
- To store a DAB preset, press and hold Preset until the display shows the Save preset screen.
- Select one of the 10 presets to save the currently playing station.
- To select a preset, press Preset briefly, then select one of the listed preset stations.
- When a preset station is playing, it shows Pn (P1, P2 etc) in the bottom right of the screen.
NOW PLAYING INFORMATION
While the stream is playing, the screen shows its name and DLS (Dynamic Label Segment) information broadcast by the station giving real-time information such as programme name, track title and contact details. Stereo broadcasts are indicated with an icon at the top of the screen.
To view further information, press Info. Each time you press Info , another set of information is displayed, cycling through DLS text, programme type, ensemble name/frequency, signal strength/errror rate, bit rate/codec/ channels and today's date.

DYNAMIC RANGE COMPRESSION
Some DAB broadcasts offer dynamic range compression (DRC). This feature allows radios to compress the dynamic range of the output audio stream, so that the volume of quiet sounds is increased, and the volume of loud sounds is reduced. This can be useful if you are listening to music with a high dynamic range in a noisy environment (for example, classical music while cooking).
To change the DRC of the radio, select MENU > DRC, and then DRC high, DRC low or DRC off. NOTE: The radio's DRC setting does not have any effect if DRC data is not included in the broadcast.
STATION ORDER
You can choose the order of the DAB station list to be either Alphanumeric, Ensemble or Valid. Ensemble lists groups of stations that are broadcast together on the same ensemble, for example BBC or South Wales local. Valid lists valid stations first, alphabetically, then off-air stations.
To change station order, select MENU > Station order > then Alphanumeric, Ensemble or Valid.

FM RADIO MODE
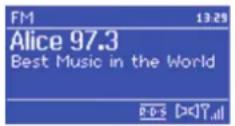
FM radio mode receives analogue radio from the FM band and displays RDS (Radio Data System) information about the station and show (where broadcast). To enter FM mode, either press Mode until the display shows FM Radio or select: MENU > Main menu > FM.
SELECTING STATIONS
Automatic
To find a station, press Select . The frequency display starts to run up as the radio scans the FM band.
Manually:
Alternatively, you can scan up or down by pressing and holding the or buttons or tune manually with quick presses, or by turning the Select control.
STORING FM PRESETS
- To store a FM preset, press and hold Preset until the display shows the Save preset screen.
- Select one of the 10 presets to save the currently playing station.
- To select a preset, press Preset briefly, then select one of the listed preset stations.
- When a preset station is playing, it shows Pn (P1, P2 etc) in the bottom right of the screen.

NOW PLAYING INFORMATION
While an FM station is playing, the screen shows one of the two following sets data:
- If RDS information is available, by default the service name (i.e. station name) is displayed. You can cycle through further RDS information by pressing INFO. Each time you press the button, another set of information is displayed, cycling through RDS radio text, RDS programme type, frequency and today's date.
- If no RDS information is available, the currently tuned frequency is shown.
SCAN SETTINGS
By default, FM scans stop at any available station. This may result in a poor signal-to-noise ratio (hiss) from weak stations. To change the scan settings to stop only at stations with good signal strength, select:
MENU > Scan settings > Strong stations only? > YES.
AUDIO SETTINGS
By default, all stereo stations are reproduced in stereo. For weak stations, this may result in a poor signal-to-noise ratio (hiss). To play weak stations in mono, select: MENU > Audio Settings > FM weak reception: Listen in mono only > YES.

AUX MODE, ALARMS AND SLEEP TIMER
AUX MODE
Aux in mode plays audio from an external source such as an MP3 player. To play audio with Aux in mode:
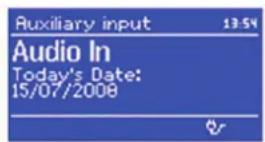
- Connect the external audio source to the AuxIn 3.5 mm stereo socket.
- Either press Mode until the display shows AUX in or select
MENU > Main menu > AUX in.
- Adjust the volume of the radio (and, if necessary, the audio source device) as required.
BT MODE
Prior to pairing, verify your device supports BT 4.0+EDR A2DP and your device is not connected to any other BT product. Devices may pair differently. Below is a general guide.
- Press to source to BT mode. This will power on the BT. Turn the volume up about 14 to start. Also turn up the volume on the source device (the device you are streaming from).
- Turn on the BT on your enabled device.
- Select BT device name "NUMAN Mini Two" when it appears on your device's screen to Initiate searching.
- You can start to play your music files wirelessly. Adjust the volume level on your device.
You should not have to pair your device again.

Depending on your device, you may need to make multiple attempts at Pairing and/or Connecting to the NUMAN Mini Two, but please give your device adequate time to Pair or Connect before repeating the process.
Pairing A BT Wireless Technology Enabled iPhone /iPod touch/iPad:
- Press source to select BT mode. This will power on the BT. Turn the volume up about 14 to start. Also turn up the volume on the source device (the device you are streaming from).
- Select "Settings". (Depending on software version).
- Select "General".
- Select "BT".
- Switch BT "On" to initiate searching.
- Select "NUMAN Mini Two" when it appears on the display.
- You will hear a ring tone from the NUMAN Mini Two and you can begin playing your music files wirelessly. Adjust the volume level on your device. You should not have to pair your iPhone/iPod/iPad again. The volume output level of music files varies.
If you prefer an even higher output level, check the settings in your iPhone/iPod touch/iPad: Set the EQ Off, the SoundCheck Off, and the Volume limit Off. If you encounter a problem Pairing, press the small arrow to the right of "NUMAN Mini Two BT" on your iPhone /iPod touch/iPad display and select "Forget this Device", then repeat the Pairing process.
Depending on your device you may need to make multiple attempts at Pairing and / or Connecting to the NUMAN Mini Two, but please give your device adequate time to Pair or Connect before repeating the process.

ALARMS
To set or change an alarm, either press Alarm or select: MENU > Main menu > Alarms. Select the alarm number (1 or 2) then configure the following parameters:

- Enable: on/off,
Frequency: Daily, Once, Weekends or Weekdays
Time,
Mode: Buzzer, Internet radio, DAB, FM - Preset: Last listened or 1-10,
Volume: 0 - max.
To activate the new settings, scroll down and select Save. The screen shows active alarms with an icon at the bottom left. At the set time, the alarm will sound.
SNOOZE FUNCTION
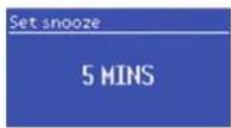
To temporarily silence it, press Snooze. You can change the snooze period with the Select control if you like. The radio returns to standby for the set period, with the silenced alarm icon flashing.
SLEEP TIMER
To set the sleep timer, select MENU > Main menu > Sleep then choose from Sleep OFF, 15, 30, 45, 60 minutes. Once you select a sleep period, the system returns to the main menu. Press Menu to return to the Now playing screen.

SOFTWARE UPDATE AND FACTORY RESET
SOFTWARE UPDATE
From time to time, the radio may make software upgrades available with bug Fixes and/or additional features. You can either check manually, or set the radio to check periodically automatically (this is the default). If the radio detects that newer software is available, it asks if you want to go ahead with an update. If you agree, the new software is then downloaded and installed. After a software upgrade, all user settings are maintained. To turn automatic checking on or off, select: MENU > System settings > Software update > Auto check settings.
CAUTION:
Before starting a software upgrade, ensure that the radio is plugged into a stable mains power connection. Disconnecting power during a software update may permanently damage the unit..
FACTORY RESET
A factory reset resets all user settings to default values, so time/date, network configuration and presets are lost. However, the radio's current software version is maintained, as is registration with the Internet radio portal. Internet radio favourites therefore remain unless you re-register your radio with another account on the portal website. To perform a factory reset, select: MENU > System settings > Factory reset > Proceed > YES.

ERROR MESSAGES AND TROUBLESHOOTING
| Message Description | Possible cause | |
| Failed to connect Correct key entered, But router rejects request. | MAC filtering enabled on router. | |
| Format error Cannot recognise file format - independent of network. | Received .wma, but found that the stream wasn't WMA when trying to decode. | |
| Network error Problem past router -incorrect data being received from network. | Data obtained from server is unreadable. | |
| Network not ready Problem with connection to router. Router switched off. | ||
| Network timeout Problem past router - no response being received from network. | Streaming IR station and suddenly station becomes unavailable. | |
| No UPnP media found | No UPnP servers found. Install an UPnP server. | |
| Service not available (DAB) | No DAB reception. The antenna is not aligned correctly. | |
| Unauthorized Access not granted by UPnP server. Allow access for the radio in UPnP server settings. | ||
| Update failed Software upgrade failed. Try it again. | ||

TROUBLESHOOTING
| Problem Cause Solution | ||
| FM: Hiss DAB: burbling, intermittent or cut-out | Low signal strength | Check/move antenna. |
| Move radio. | ||
| Rescan local (high-strength) stations only | ||
| DAB: ‘No stations available’ message | Low signal strength | As above, then rescan stations. |
| Cannot connect to Internet | Internet con- nection down | Check, if Internet is working for a computer connected to the same network |
| Firewall preventing access | Check the following ports are open: UDP and TCP ports 80 and 123; DNS port 53. Some Internet radio stations may require additional ports to be opened. | |
| Cannot connect to network | Network down | Check that network is working between a computer and the router |
| Firewall preven- ting access | Check the following ports are open on the router: UDP and TCP ports 80 and 123; DNS port 53. Windows shares: ports 135 - 139 and 445. Windows Media Player: varies - non-Microsoft firewalls may require configuration for UPnP. | |

| Problem Cause Solution | ||
| Cannot connect to network | Router restricts access to listed MAC addresses | Obtain the radio MAC address from MENU > System settings > Network > View settings and add to router list. Note: The radio has separate MAC addresses for wired and wireless networks; only the current network adaptor method address is displayed, but the other address can be obtained by changing the first pair of digits between '00' (wireless) and '02' (wired). |
| Insufficient Wi-Fi signal strength | Check distance to router; see if a computer can connect to the network in this location. | |
| Unknown encryption method | Change encryption method on router. The radio supports WEP, WPA and WPA2 | |
| Unusual network configuration | Setup network manually through MENU > System settings > Net-work > Manual settings. | |
| Cannot play particular Internet radio station | Station not broadcasting, overloaded or insufficient bandwidth. | Try other stations; try listening on computer via Internet radio portal website; try later. |
| Station broadcasting using unknown codec. | ||
| Link out of date. | ||

DISPOSAL AND DECLARATION OF CONFORMITY

HINTS ON DISPOSAL
According to the European waste regulation 2002/96/EC this symbol on the product or on its packaging indicates that this product may not be treated as household waste. Instead it should be taken to the appropriate collection point for the recycling of electrical and electronic equipment. By ensuring this product is disposed of correctly, you will help prevent potential negative consequences for the environment and human health, which could otherwise be caused by inappropriate waste handling of this product. For more detailed information about recycling of this product, please contact your local council or your household waste disposal service.
Your product contains batteries covered by the European Directive. 2006/66/EC, which cannot be disposed of with normal household waste. Please check local rules on separate collection of batteries. The correct disposal of batteries helps prevent potentially negative consequences on the environment and human health.
DECLARATION OF CONFORMITY
Producer: Chal-Tec, Wallstraße 16, 10179 Berlin.

This product is conform to the following European Directives:
2014|30|EU (EMV)
2014|35|EU (LVD)
2011|65|EU (RoHS)
1999|5|EC (R&TTE)

STREAMING AVEC LA FONCTION STREAMING DE WINDOWS 7
MESSAGESD'ERREURETRESOLUTIONDESPROBLEMES
SCHERMATA INIZIALE (MODALITA)
10179 Berlin, Germany