Mini One - Alarm clock radio Numan - Free user manual and instructions
Find the device manual for free Mini One Numan in PDF.
User questions about Mini One Numan
0 question about this device. Answer the ones you know or ask your own.
Ask a new question about this device
Download the instructions for your Alarm clock radio in PDF format for free! Find your manual Mini One - Numan and take your electronic device back in hand. On this page are published all the documents necessary for the use of your device. Mini One by Numan.
USER MANUAL Mini One Numan
text_image
N U M A N Bluetooth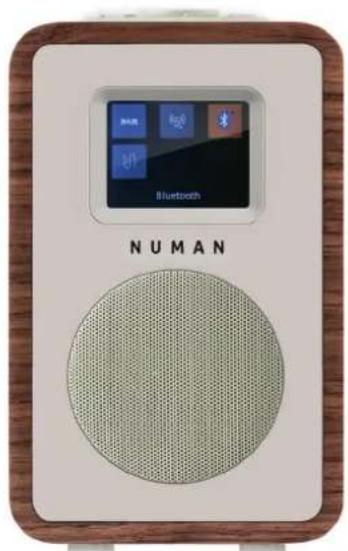
text_image
NUMAN Bluetooth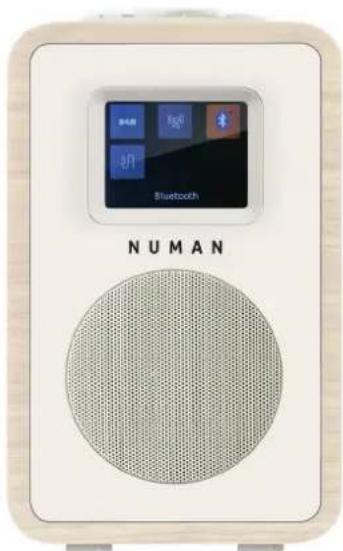
text_image
NUMANNUMAN Mini One
Benutzerhandbuch
www.numanaudio.com

NUMAN
HIFI DESIGN
text_image
UNUMAN RIFI DESIGN Serial NUMBER 12345 Technique: 1000000000000000000000000000000000000000000000000000000000000000000000000000000000 VEGETDA SA ALUX IN LINE OUT Engineered and ordered in Germany
text_image
VOLUME Svooze PRESET ALARM SLEEP INFO TUNE- I TUNE+ MENU RACK SOURCE 10 DISPLAY ON/OFF 11text_image
Recall from Pres 18:32 1: 34 RTHK BBC(WS) 2: 02DBC 2 3: (Empty) 4: (Empty) 5: (Empty) 6: (Empty) 7: (Empty)
text_image
Save to Preset 18:28 1: 34 RTHK BBC(WS) 2: (Empty) 3: (Empty) 4: (Empty) 5: (Empty) 6: (Empty) 7: (Empty)
text_image
Slide not available DABNormale Ansicht:

text_image
Digital Radio 10:30 NRK mP3 10:00; Adiele.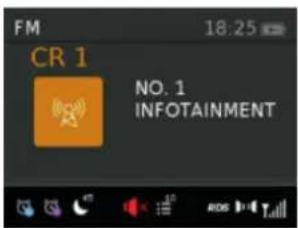
text_image
FM 18:25 CR 1 NO. 1 INFOTAINMENT
text_image
Bluetooth 17:56 Disconnectedtext_image
Auxiliary Input 17:57 Mains Power| Alarm 1 Details | 17:52 |
| Alarm | On |
| Frequency | Daily> |
| Wake Up time | 11:51> |
| Source | Buzzer> |
| Duration | 60> |
| Volume | 7> |

text_image
Alarm 1 Duration 18:58 15 30 45 60 90 120
text_image
Alarm 1 Volume 18:25 7natural_image
Symbol of a trash bin crossed with a diagonal line, no text or numbers presentWe are very pleased you've chosen to purchase a NUMAN product. A spectrum of pure sound, fun and satisfaction!
Before using your product, please take some time to read through the user manual to become familiar with all the great features this product has to offer. Be sure to retain the manual in a safe location for future reference.
If you have any questions or suggestions, please don't hesitate to contact us via our website www.hifi-tower.co.uk.
We will gladly help you as quickly as possible.
Best Regard from Berlin
Your NUMAN Team
CONTENTS
Technical Data and Packing Content 36
Safety Instructions 37
Product Description 39
Screens 41
Use and Operation 44
DAB Radio Mode 46
FM Radio Mode 52
AUX und BT Mode 54
Alarms, Snooze and Sleeptimer 55
System Settings 59
Error Messages and Troubleshooting 63
Disposal and Declaration of Conformity 65

TECHNICHAL DATA AND PACKING CONTENT
TECHNICAL DATA
Item number: 10030814, 10030815, 10030816. 10030818
Power supply: Power adapter DC 9 V or Lithium batteries (2 pic) 7.4 V | 2200 mAh
Display: TFT Display
Functions and connections: FM with RDS, Bluetooth, DAB | DAB+, AUX
PACKING CONTENT
1x NUMAN Mini One
1x Power adapter DC 9 V 1.5 A
1x Use manual
IMPORTANT HINT ON CHANGING THE BATTERIES
To charge the battery you may need to put On the switch located inside the battery compartment. Put the switch to OFF if not used the battery for a long time). The battery can be recharged when the radio is supplied with the power supply and the switch is ON.

SAFETY INSTRUCTIONS
Read all the safety and operating instructions carefully and retain them for future reference.
- To reduce the risk of fire or electric shock, do not expose this apparatus to rain or moisture. The apparatus shall not be exposed to dripping or splashing and that objects filled with liquids, such as vases, shall not be placed on apparatus.
- The direct plug-in adapter is used as disconnect device, the disconnect device shall remain readily operable.
- To reduce the risk of electric shock, do not remove cover (or back) as there are no user-serviceable parts inside. Refer servicing to qualified personnel.
- The exclamation point within an equilateral triangle is intended to alert the user to the presence of important operating and maintenance instructions in the literature accompanying the appliance.
- No naked flame sources, such as lighted candles, should be placed on the apparatus.
- CAUTION: Danger of explosion if battery is incorrectly replaced. Replace only with the same or equivalent type.
- WARNING: The battery (battery or batteries or battery pack) shall not be exposed to excessive heat such as sunshine, fire or the like.
- Do not use this product near water or moisture.
- Clean only with a dry cloth.
- Unplug this product from the wall outlet before cleaning.
- Place the unit on a solid surface.
- Do not put it in a closed bookcase or a cabinet that may keep air from flowing through its ventilation openings.

- Do not install near any heat sources, such as radiators, heat registers, stoves or other appliances that produce heat.
- Protect the power cord from being walked on or pinched, particularly at plugs and the point where they exit from the product.
- Servicing is required when the product has been damaged. Do not attempt to service this product yourself. Opening or removing covers may expose you to dangerous voltages or other hazards. Please contact the manufacturer to be referred to an authorized service center near you.
- To prevent risk of fire or electric shock, avoid over loading wall outlets, extension cords, or integral convenience receptacles.
- Do not let objects or liquids enter the product.
- Use proper power sources. Plug the product into a proper power source, as described in the operating instructions or as marked on the product.
text_image
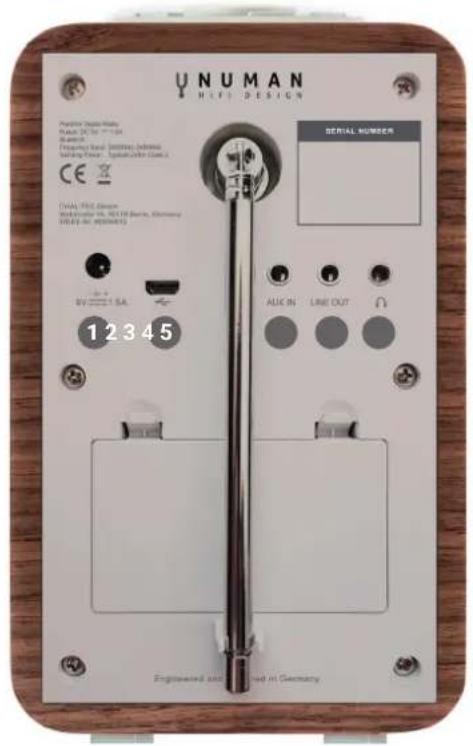
UNUMAN HIFi DESIGN Performance Control Module Maximum 100% (197-24) Number: 3 Frequency Band: (Technical) (Technical) Operating Power: (Technical) (Technical) CE 12345 SERIAL NUMBER UNITED BY: USA ALIK IN LINE OUT Engineered and Rated in Germany
1 DC power in (9 V)
2 Mini USB socket for software update (only for service)
3 Aux in (to connect external media like iPod)
4 Line out (to connect to an external amplifier)
5 Headphones out
HOW TO USE THE SCROLL (TOP)
Turn to scroll through a menu or station list. The chosen option is highlighted in reverse text (dark characters on a white background). Press to the button to select. Turn to the button to adjust the volume up or down when playback. Press to the button to mute the music when playing. Press the button to snooze a set time when alarm sounding. Long press this button to power off the unit.
text_image
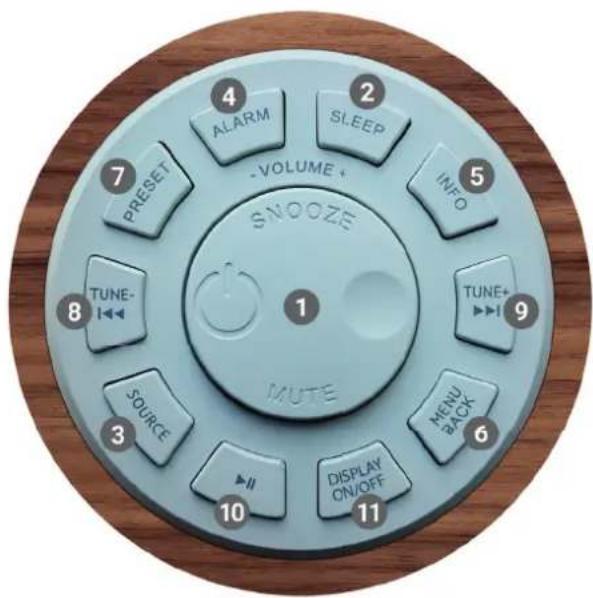
VOLUME + SNOOZE MUTE 1 2 3 4 5 6 7 PRESET ALARM SLEEP INFO TUNE- TUNE+ MENU BACK SOURCE DISPLAY ON/OFF 10 11Controls on the cover (top)

1 Select | Volume | Mute | Snooze | Power
② Sleeptimer
③ Changing the source
4 Alarm 1 or 2
⑤ View more information
6 Menu | Menu back
7 Save the favorite station
8 Tune- | Previous
9 Tune+ | Next ▶▶▶
10 Select Play | Pause (in different mode)
11 Display on/off

SCREEN
The screen shows various menus, dialogues and displays as described below. There are basically six types of screen. When text is too long to fit on the screen, it is first shown truncated, then after a few seconds, slowly scrolls so that you can read it all. There are basically six types of screen:
- Standby (clock)
- Splash (mode)
- Now playing
- Dialogue
- Error/Information
- Menu
Standby: The Standby screen shows the time, date and any active alarm times.
Mode: As you cycle through the play modes using SOURCE, NUMAN Mini One shows a splash screen for each mode. After one second, NUMAN Mini One enters the selected mode and tries to start playing the last station or track that was playing in that mode. If this is not possible, NUMAN Mini One tries to connect to the selected source by scanning for stations, or prompting for user input as appropriate.

Now playing screens: show information about the audio source and track now playing, where available.
Dialogue screens: are shown to allow the user to change settings
Error/Information screens: give specific messages for a few seconds, then change automatically to another Screen.
MENUS
NUMAN Mini One has basically three types of menu. Use the Select control to step through and select options. A scroll bar on the right of the screen shows if there are further options above or below those visible.
Each mode has a Mode menu, with options specific to that mode. For example, the FM mode menu has just two options: Scan Setting and Audio Setting.

text_image
Digital Radio 16:34 Station list > Full scan Manual tune > Prune DRC > System settings >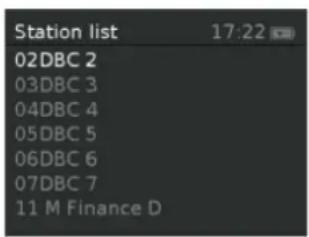
text_image
Station list 02DBC 2 03DBC 3 04DBC 4 05DBC 5 06DBC 6 07DBC 7 11 M Finance D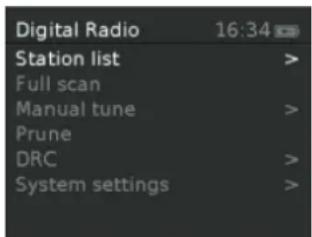
text_image
Digital Radio 16:34 Station list > Full scan Manual tune > Prune DRC > System settings >
In addition, each mode menu has two final options:
System settings > and Main menu >
The [>] indicates options leading to further menus.
The System settings menu allows access to system settings and information such as time, language and software update.
Menus with more options than will fit on one screen have a scroll bar to the right.
The Main menu allows access to all modes plus sleep and timer functions. Some menus, for example the System settings menu, have several submenus.

USE AND OPERATION
QUICKSTART GUIDE
NUMAN Mini One is easy to use. To play DAB or FM radio, all you need is a power source (a 220-240 V mains supply).
- Place NUMAN Mini One on a suitable shelf or table.
- Extend the telescopic antenna.
- Connect the power adaptor between NUMAN Mini One and the mains supply.
12/24 HOUR DISPLAY
To change between 12 and 24 hour display, select Set 12/24 hour and then select your preference.
The time and date can be updated manually or automatically.

AUTO-UPDATE
Auto-update works with data sent over DAB, FM. The clock is only updated when in a corresponding mode, so it is best to select a mode you use regularly.
MANUAL SET
If you set No update, the wizard now prompts you to set the time and date manually. The date and time are displayed as dd-mm-yyyy and hh:mm.

DAB RADIO MODE
DAB radio mode receives DAB/DAB+ digital radio and displays information about the station and programme / track as broadcast. To enter DAB mode, either press Mode until the display shows DAB Radio or select Menu > Main menu > DAB.
SCANNING FO STATIONS
The first time you use NUMAN Mini One, or if the station list is empty, the radio automatically performs a full scan to see what stations are available. You may also need to start a scan manually to update the list of stations for one of the following reasons:
- New stations may become available from time to time.
- If reception was not good for the original scan (for example the antenna was not up), this may result in an empty or incomplete list of available stations.
- If you have poor reception of some stations causing the audio to break up, you may wish to list only stations with good signal strength.
To do a full scan Select Menu > Full scan.
Once a scan is complete, the radio returns to playing the previously-selected station or first station on the station list.

To remove stations that are listed but unavailable select Menu > Prune invalid.
PRESETS
NUMAN Mini One has 10 preset stores for DAB stations.
To store a station in a preset store: Press and hold preset until the display shows a list of the Preset stores numbered 1 to 10 these are displayed as either Empty or with the currently stored station name. Use the Select control button to choose a preset memory then press Select to store the currently-playing station. After confirming the preset station is stored the display reverts to the Now playing screen.
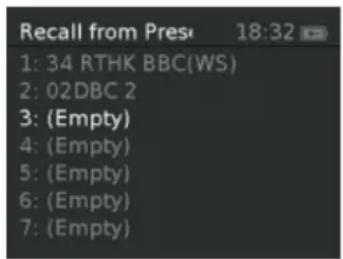
To recall a preset station: Press Preset briefly. Select one of the listed preset stations using the select control button and press Select to choose the highlighted preset station.
text_image
Recall from Pres 18:32 1: 34 RTHK BBC(WS) 2: 02DBC 2 3: (Empty) 4: (Empty) 5: (Empty) 6: (Empty) 7: (Empty)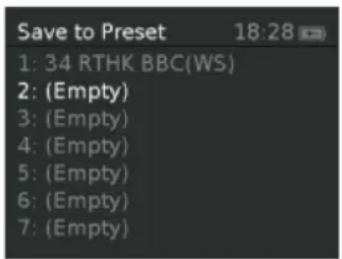
text_image
Save to Preset 18:28 1: 34 RTHK BBC(WS) 2: (Empty) 3: (Empty) 4: (Empty) 5: (Empty) 6: (Empty) 7: (Empty)
MANUAL TUNE
As well as the normal method of scanning, you can also manually tune to a particular channel / frequency. This can be useful for adjusting your antenna to achieve the best possible reception and scanning a particular channel to update the station list.
To manually tune Press Menu > Manual tune then use select control button to display a particular channel/frequency, press Select to tune to that channel/frequency. The display shows a live indication of the received signal strength on the selected frequency.

text_image
Manual tune 17:38 5A 174.928MHz 5B 176.640MHz 5C 178.352MHz 5D 180.064MHz 6A 181.936MHz 6B 183.648MHz 6C 185.360MHz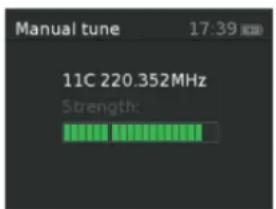
text_image
Manual tune 17:39 11C 220.352MHz Strength:Adjustments to your antenna will be manifested in the received signal strength displayed.
Note: The division in the signal strength bar indicates the audio quality threshold – if the signal strength, as indicated by the solid rectangles, falls below this threshold the audio quality will deteriorate.

When a channel/frequency is selected NUMAN Mini One also scans for any DAB stations on the selected frequency and updates the station list with any new stations found. To listen to any stations found, return to the Now playing screen and select the required station from the station list as normal.
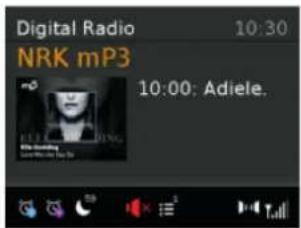
NOW PLAYING INFORMATION
While a station is playing, the screen shows its name and DLS (Dynamic Label Segment) information broadcast by the station such as programme name, track title and contact details.
SLIDESHOW
The normal now playing screen shows a thumbnail of the currently available slideshow image. (If no slideshow image is available a default DAB thumbnail image is displayed). The Select button cycles through the following slideshow displays.
Slideshow image and DLS text being broadcast by the current station:

text_image
m3 ELLE Goulding ELLIE Goulding Ellie Goulding Love Me Like You Do 10:00: Adiele.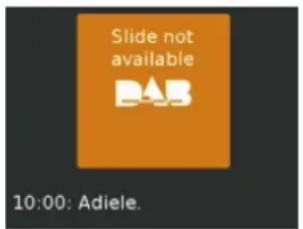
text_image
Slide not available DAB 10:00: Adiele.
Full screen version of the slideshow image:

text_image
m3 ELLIE Goulding ELELLIE Goulding Ellie Goulding Love Me Like You Do
text_image
Slide not available DABNormal now playing screen:

text_image
Digital Radio 10:30 NRK mP3 10:00; Adiele.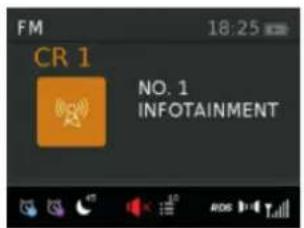
text_image
FM 18:25 CR 1 NO. 1 INFOTAINMENT
To view further information Press Info.
Each time you press Info, the next set of information is displayed, cycling through: DLS text, DL Plus information (this is only displayed if broadcast by the station), programme type, ensemble name, channel number/frequency, signal strength, power status (Mains/Battery), and date.
Note: DL Plus presents additional information that can be broadcast by stations and stored temporarily on your radio.
To return to the default Now playing screen at any time, press and hold Info.
DYNAMIC RANGE COMPRESSION (DRC)
This function reduces the difference between the loudest and quietest audio being broadcast. Effectively, this makes quiet sounds comparatively louder, and loud sounds comparatively quieter.
Note: DRC only works if it is enabled by the broadcaster for a specific station.
To change the DRC setting select Menu > DRC > The options available are: DRC high | low | off.

FM RADIO MODE
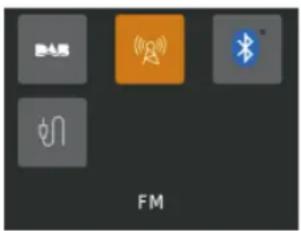
FM radio mode receives analogue radio from the FM band and displays RDS (Radio Data System) information about the station and show (where broadcast). To enter FM mode: Press Mode until the display shows FM Mode.
SELECTING STATIONS
The first time you select FM radio, NUMAN Mini One is set to the lowest frequency in the FM band. On subsequent selections the last used frequency/station is displayed.
TO SCAN FOR A STATION IN FM MODE
Press Select .NUMAN Mini One scans up through the FM band frequencies, showing the current frequency on the screen display. A scan stops when a signal is found. NUMAN Mini One can be set to stop at each station or only at stations with a strong signal. Alternatively, you can tune, using the select control button on the top in 50 kHz steps.
PRESETS
NUMAN Mini One has 10 preset memories for FM, which work in the same way as DAB mode presets, as described earlier.

NOW PLAYING INFORMATION
While FM radio is playing, the screen shows its frequency, or if RDS information is available, station name and any further 'RadioText' information. If no information is available, just the frequency and a No RadioText message is shown.
To view further information about the broadcast press Info. Each time you press Info, the next set of information is displayed, cycling through: RDS Radio text, programme type, frequency, name, mono/stereo, power status, and date. To return to the default Now playing screen: Press and hold Info.
SCAN SETTINGS
By default, FM scans stop at any available station (All stations). This may include poor quality audio from weak stations. Options: Strong stations only | All stations. To change the scan settings, to stop only at stations with good signal strength select Menu > Scan setting then Strong stations only.
AUDIO SETTINGS
By default, all stereo stations are reproduced in stereo. For weak stations, this may result in poor quality audio. The audio quality can be improved using mono. Options: Stereo allowed | Forced mono.
To play weak stations in mono select Menu > Audio setting > Forced mono.

AUX AND BT MODE
BT MODE
text_image
自电屏 FM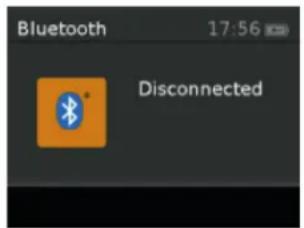
text_image
Bluetooth 17:56 DisconnectedBluetooth mode allows the unit to act as a wireless speaker playing audio content from a connected Bluetooth capable device. To enter Bluetooth mode: Press source to choose Bluetooth mode. Use your Bluetooth capable smart device to pair and connect with the unit. The screen displays either a connected or disconnected message depending on the connection state.
AUX MODE
text_image
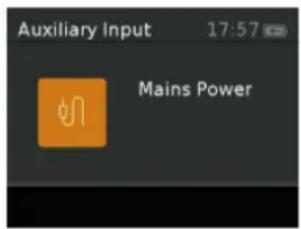
Auxiliary Input 17:57 Mains PowerAux In mode plays audio from an external source such as an MP3 player. To play audio with Aux In mode:
- Turn the volume low on both NUMAN Mini One and the audio source device.
- Connect the external audio source to the Aux In 3.5 mm stereo socket.
- Press source until the display shows Auxiliary Input.
- Adjust the volume of NUMAN Mini One (and, if necessary, the audio source device).
When in Aux In mode, the screen shows Auxiliary Input and the date.

ALARMS, SNOOZE AND SLEEPTIMER
As well as a clock/calendar, there are two versatile wake-up alarms with snooze facility, and a sleep function to turn the system off after a set period of time. The alarm sound for each alarm can use a buzzer or a selection from the audio sources.
The settings for the internal clock and setting Alarm, Snooze and Sleep function are all accessible via the Systems Setting menu.
ALARMS
Note: Alarms will only function when the NUMAN Mini One unit is On (mains or battery power) or in Standby mode (Mains power only). Attempting to enter Standby mode when powered only by battery will turn the NU-MAN Mini One unit Off.
An active alarm is indicated by its icon in the bottom line of the display.
Note: Alarms can be switched on or off in standby mode (see below), however, the alarm parameters can only be set when the NUMAN Mini One is on.

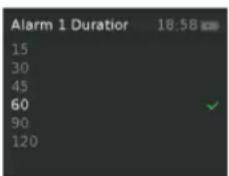
TO SET ALARMS
Press Alarm and use the Select control button to select the required Alarm 1 or 2 and press Select To accept the displayed alarm settings press Alarm.
To exit alarm setting mode, press Menu or Back (alternatively, the Alarm display will timeout and automatically return to the Now Playing screen after a short time). The alarm setup prompts you for the following parameters. Select a value for each parameter in turn turning the select control button and press Select to confirm and move on to the next parameter.
| Alarm 1 Details | 17:52 |
| Alarm | On |
| Frequency | Daily> |
| Wake Up time | 11:51> |
| Source | Buzzer> |
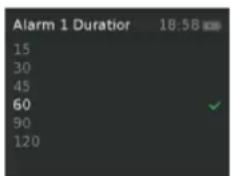
| Duration | 60> |
| Volume | 7> |
text_image
Alarm 1 Duration 18:58 15 30 45 60 90 120
text_image
Alarm 1 Volume 18:25 7PARAMETERS
- Alarm - Off | On
- Frequency - Daily | Once | Weekends | Weekdays. Choose the days on which the alarm is active. Note: if you choose 'Once', you are prompted to enter the required date.
- On time – hours and minutes

- Source – Buzzer | DAB | FM. If DAB or FM is chosen as the audio source you will also be prompted to select the Last played station or one of the preset stations (if set).
- Duration – 15 | 30 | 45 | 60 | 90 | 120 minutes. If the alarm is not cancelled NUMAN Mini One returns to standby after this time period.
- Volume – (use the TUNE-/TUNE+ button to set the required alarm volume 4-16). This is the volume the alarm will build up to. (Initially the alarm sounds at a low volume and gradually gets louder to the set volume).
In all listening modes active alarms are indicated by displaying the relevant Alarm 1 and/or Alarm 2 icons. At the set time, the alarm will sound, quietly at first, then gradually building up to the set volume. When an alarm sounds, the icon in the display flashes.
To cancel a sounding alarm and switch the radio to standby: Press Standby or Alarm.
SNOOZE
To temporarily silence a sounding alarm, press Sleep. You can change the snooze period by repeatedly pressing Sleep. Snooze periods are 5, 10, 15 and 30 minutes. The radio returns to standby for the set time period with a snooze countdown displayed. When the countdown reaches 0 (zero) the alarm is triggered again.
Press Standby or Alarm to fully cancel a sounding alarm and switch the radio to standby

SLEEPTIMER
To set the sleep timer while the radio is playing Press Sleep. You can choose the sleep delay time in minutes from: Sleep Off | 15 | 30 | 45 | 60 | 90 | 120. Use select control button to cycle through the options (or press Sleep repeatedly) then press Select to choose the displayed option.
Once you select a sleep delay period, the display returns to the Now playing screen displaying a Crescent moon icon and the remaining time, in minutes, before the sleep time expires. After the sleep delay period the radio switches to standby mode.

SYSTEM SETTINGS
The System Settings allow you to tailor the NUMAN Mini One with a variety of options to suit you. To access system settings from any mode Select Menu > System Settings >, then choose from the various options as described in the menu as below. The System Setting Menu options are:
- Sleep
- Alarm
- Equalizer
- Time | Date
- Backlight
- Language
- Software upgrade
- Software version
TO NAVIGATE THROUGH THE MENUS
The following controls are used to move about the menu tree to choose and select the required settings:
Pressing Select: This selects the currently displayed option, if the option has a further sub-menu the first option of the sub-menu is displayed. If the option is a setting value, the displayed value is selected and either the next setting is highlighted or, if there are no further settings, the display returns to the parent menu for that setting.

Select control button: cycles forwards and backwards through the current menu or setting options.
Pressing Back: jumps back to the parent menu of the currently displayed menu or setting.
Pressing Menu: to return to the Now Playing screen
AUDIO OUTPUT
Presents the option to direct audio output to the built in speakers (Speakers) or the SPDIF port on the back of the unit (SPDIF).
EQUALIZER
This presents a number of preset settings plus a My Equaliser option to allow you to create your own equaliser settings. My EQ... | Normal | Classic | Jazz | Pop | Rock | Speech
MY EQ...
This option allows you to set a bias in the treble and bass audio frequencies and turn 'Loudness' On or Off. Values can be set between -7 (Minus 7) and +7 (plus 7).

Treble - (Use the select control button to choose a bias value between -7 and +7)
Bass - (Use the select control button to choose a bias value between -7 and +7)
Loudness – On or Off. (When On, low-level high and low frequency sounds are boosted to give a 'fuller' sound.)
TIME AND DATE
The time and date can be updated manually or automatically. With auto-update, the time and date are automatically synchronised with national time signals broadcast over DAB and FM (when available). You can also select the display format for the time and date. The Time menu contains the following options:
- Set Time/Date
• Auto update - Update from Any | Update from DAB | Update from FM | No Update - Set 12/24 hour - 12 | 24
- Set date format - dd-mm-yyyy | mm-dd-yyyy.
SET TIME/DATE
This option is for manually setting the time and date displayed. The time displays as hh:mm, with the first value, hh, active (flashing). Adjust each value using the select control button and press Select to confirm. The next value then becomes active and flashes. The date values follow and are set in the same way.

BACKLIGHT
The NUMAN Mini One has a backlight with three brightness settings, and adjustable timeout (this is the time delay, in seconds, after which the display switches to the Dim level). There are three settings:
- Timeout - Light On | 10 | 20 | 30 | 45 | 60 | 90 | 120 | 180
- On level - Low | Mid | High
- Dim level - Low | Mid | High
INACTIVE STANDBY
If the NUMAN Mini One is not interacted with for a time it can automatically enter Standby mode.
LANGUAGE
The language used for display messages can be selected from: English | Français | Deutsch | Italiano
FACTORY RESET
A factory reset clears all user defined settings, replacing them with the original default values, so time/date, preferences/settings, DAB station list and preset stations are all lost.
If you select Factory reset, you are asked to confirm by selecting "Yes".

EROOR MESSAGES AND TROUBLESHOOTING
IN DAB MODE:
| Message Description | |
| Service not available (DAB) | No DAB reception |
| Signal Error The DAB | signal has been interrupted. |
| No DAB Station The listed station cannot be found. | |
| (No Name) The current station does not broadcast an identity name. | |
| No stations found No DAB stations are available – check aerial. | |
IN FM MODE:
| Message Description |
| No Radio Text No RDS text information is available on this station. |
| No PTY No RDS programme type information is available. |
| No Name No RDS station name is being broadcast |

GENERAL MESSAGES:
| Message Description | |
| Update failed Software upgrade failed | |
| Time is not set No time value is currently set on this platform. | |
| Time is not saved Any changes made to the time settings will be lost. | |
| Alarm not saved Any changes made to the Alarm settings will be lost. | |
| Invalid date The entered value does not match a valid date. | |
TROUBLESHOOTING
| Problem Cause Solutions | ||
| FM: HissDAB: burbling, intermittent or cut-out | Low signal strength | Check/move antenna. |
| Move radio. | ||
| Rescan local (high-strength) stations only | ||
| DAB: 'No stations available' message | Low signal strength | As above, then rescan stations. |

DISPOSAL AND DECLARATION OF CONFORMITY

natural_image
Symbol of a trash bin crossed with a diagonal line, no text or numbers presentHINTS ON DISPOSAL
According to the European waste regulation 2002/96/EC this symbol on the product or on its packaging indicates that this product may not be treated as household waste. Instead it should be taken to the appropriate collection point for the recycling of electrical and electronic equipment. By ensuring this product is disposed of correctly, you will help prevent potential negative consequences for the environment and human health, which could otherwise be caused by inappropriate waste handling of this product. For more detailed information about recycling of this product, please contact your local council or your household waste disposal service.
Your product contains batteries covered by the European Directive. 2006/66/EC, which cannot be disposed of with normal household waste. Please check local rules on separate collection of batteries. The correct disposal of batteries helps prevent potentially negative consequences on the environment and human health.
DECLARATION OF CONFORMITY
Producer: Chal-Tec, Wallstraße 16, 10179 Berlin.

This product is conform to the following European Directives:
2011/65/EU (RoHS)
2014/30/EU (EMC)
2014/35/EU (LVD)

NUMAN
HIFI DESIGN
text_image
UNUMAN HIFI DESIGN Serial NUMBER 12345 SERIAL INPUT AUX IN LINE OUT Engineering not rated in Germany
text_image
Recall from Pres 18:32 1: 34 RTHK BBC(WS) 2: 02DBC 2 3: (Empty) 4: (Empty) 5: (Empty) 6: (Empty) 7: (Empty)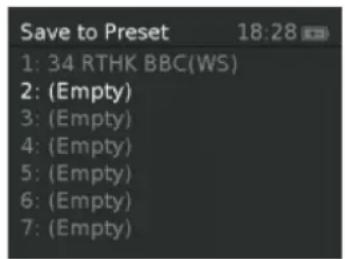
text_image
Save to Preset 18:28 1: 34 RTHK BBC(WS) 2: (Empty) 3: (Empty) 4: (Empty) 5: (Empty) 6: (Empty) 7: (Empty)
AJUSTAR MANUALMENTE LAS EMISORAS
text_image
Slide not available DABVista normal:

text_image
Digital Radio 10:30 NRK mP3 10:00; Adiele.
text_image
FM 18:25 CR 1 NO. 1 INFOTAINMENT
text_image
Bluetooth 17:56 Disconnectedtext_image
Auxiliary Input 17:57 Mains Powertext_image
Alarm 1 Details 17:52 Alarm On Frequency Daily> Wake Up time 11:51> Source Buzzer> Duration 60> Volume 7>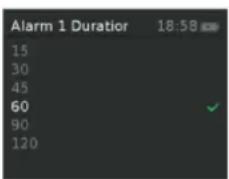
text_image
Alarm 1 Duration 18:58 15 30 45 60 90 120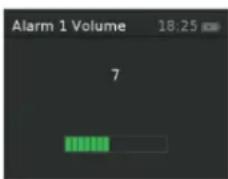
text_image
Alarm 1 Volume 18:25 7OPCIONES DE AJUSTE
natural_image
Symbol of a trash bin crossed with a diagonal line, no text or numbers presentINDICACIONES PARA LA RETIRADA DEL APARATO
text_image
UNUMAN RIFI DESIGN Serial NUMBER 12345 Technique: 1000000000000000000000000000000000000000000000000000000000000000000000000000000000 VEGETDA SA ALUX IN LINE OUT Engineered and designed in Germany
text_image
VOLUME Svooze PRESET ALARM SLEEP INFO TUNE- I TUNE+ MENU RACK SOURCE 10 DISPLAY ON/OFF 11text_image
Recall from Pres 18:32 1: 34 RTHK BBC(WS) 2: 02DBC 2 3: (Empty) 4: (Empty) 5: (Empty) 6: (Empty) 7: (Empty)
text_image
Save to Preset 18:28 1: 34 RTHK BBC(WS) 2: (Empty) 3: (Empty) 4: (Empty) 5: (Empty) 6: (Empty) 7: (Empty)
RÉGLAGE MANUEL D'UNE STATION
text_image
Slide not available DABAperçu normal :
text_image
Digital Radio 10:30 NRK mP3 10:00; Adiele.
text_image
FM 18:25 CR 1 NO. 1 INFOTAINMENT
text_image
Bluetooth 17:56 Disconnectedtext_image
Auxiliary Input 17:57 Mains Power| Alarm 1 Details | 17:52 |
| Alarm | On |
| Frequency | Daily> |
| Wake Up time | 11:51> |
| Source | Buzzer> |
| Duration | 60> |
| Volume | 7> |
text_image
Alarm 1 Duration 18:58 15 30 45 60 90 120
text_image
Alarm 1 Volume 18:25 7POSSIBILITÉS DE RÉGLAGE
natural_image
Symbol of a trash bin crossed with a diagonal line, no text or numbers presentINFORMATION SUR LE RECYCLAGE
DÉCLARATION DE CONFORMITÉ
Fabricant : Chal-Tec GmbH, Wallstraße 16, 10179 Berlin, Allemagne.

text_image
UNUMAN HIFI DESIGN Serial NUMBER 12345 SERIAL INPUT AUX IN LINE OUT Engineering not used in Germany
text_image
VOLUME Svooze PRESET ALARM SLEEP INFO TUNE- I TUNE+ MENU RACK SOURCE 10 DISPLAY ON/OFF 11text_image
Recall from Pres 18:32 1: 34 RTHK BBC(WS) 2: 02DBC 2 3: (Empty) 4: (Empty) 5: (Empty) 6: (Empty) 7: (Empty)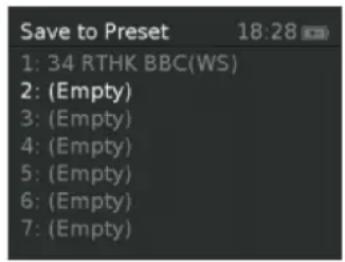
text_image
Save to Preset 18:28 1: 34 RTHK BBC(WS) 2: (Empty) 3: (Empty) 4: (Empty) 5: (Empty) 6: (Empty) 7: (Empty)
IMPOSTARE I CANALI MANUALMENTE
text_image
Slide not available DABtext_image
Bluetooth 17:56 Disconnectedtext_image
Auxiliary Input 17:57 Mains Powertext_image
Alarm 1 Details 17:52 Alarm On Frequency Daily> Wake Up time 11:51> Source Buzzer> Duration 60> Volume 7>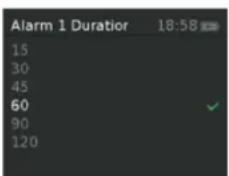
text_image
Alarm 1 Duration 18:58 15 30 45 60 90 120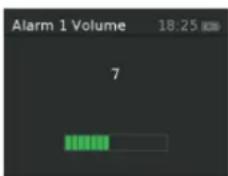
text_image
Alarm 1 Volume 18:25 7- Impostare l'ora e la data
- Auto Update – Update from Any | Update from DAB | Update from FM | No Update
• 12|24ore - Impostare la data – gg – mm – aaaa oppure mm-gg-aaaa
IMPOSTARE L'ORA E LA DATA
RICERCA E RISOLZIONE DEI PROBLEMI
natural_image
Symbol of a trash bin crossed with a diagonal line, no text or numbers presentSMALTIMENTO
10179 Berlin, Germany