Pixma TS8150 - Printer CANON - Free user manual and instructions
Find the device manual for free Pixma TS8150 CANON in PDF.
User questions about Pixma TS8150 CANON
0 question about this device. Answer the ones you know or ask your own.
Ask a new question about this device
Download the instructions for your Printer in PDF format for free! Find your manual Pixma TS8150 - CANON and take your electronic device back in hand. On this page are published all the documents necessary for the use of your device. Pixma TS8150 by CANON.
USER MANUAL Pixma TS8150 CANON
Read Safety and Important Information (addendum) first.
Installation of printeren side 1
Connecting with Computer and Smartphone/Tablet.. page 4
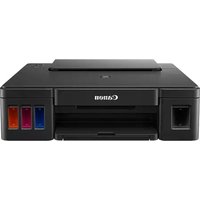
1. Checking Included Items

Power cord
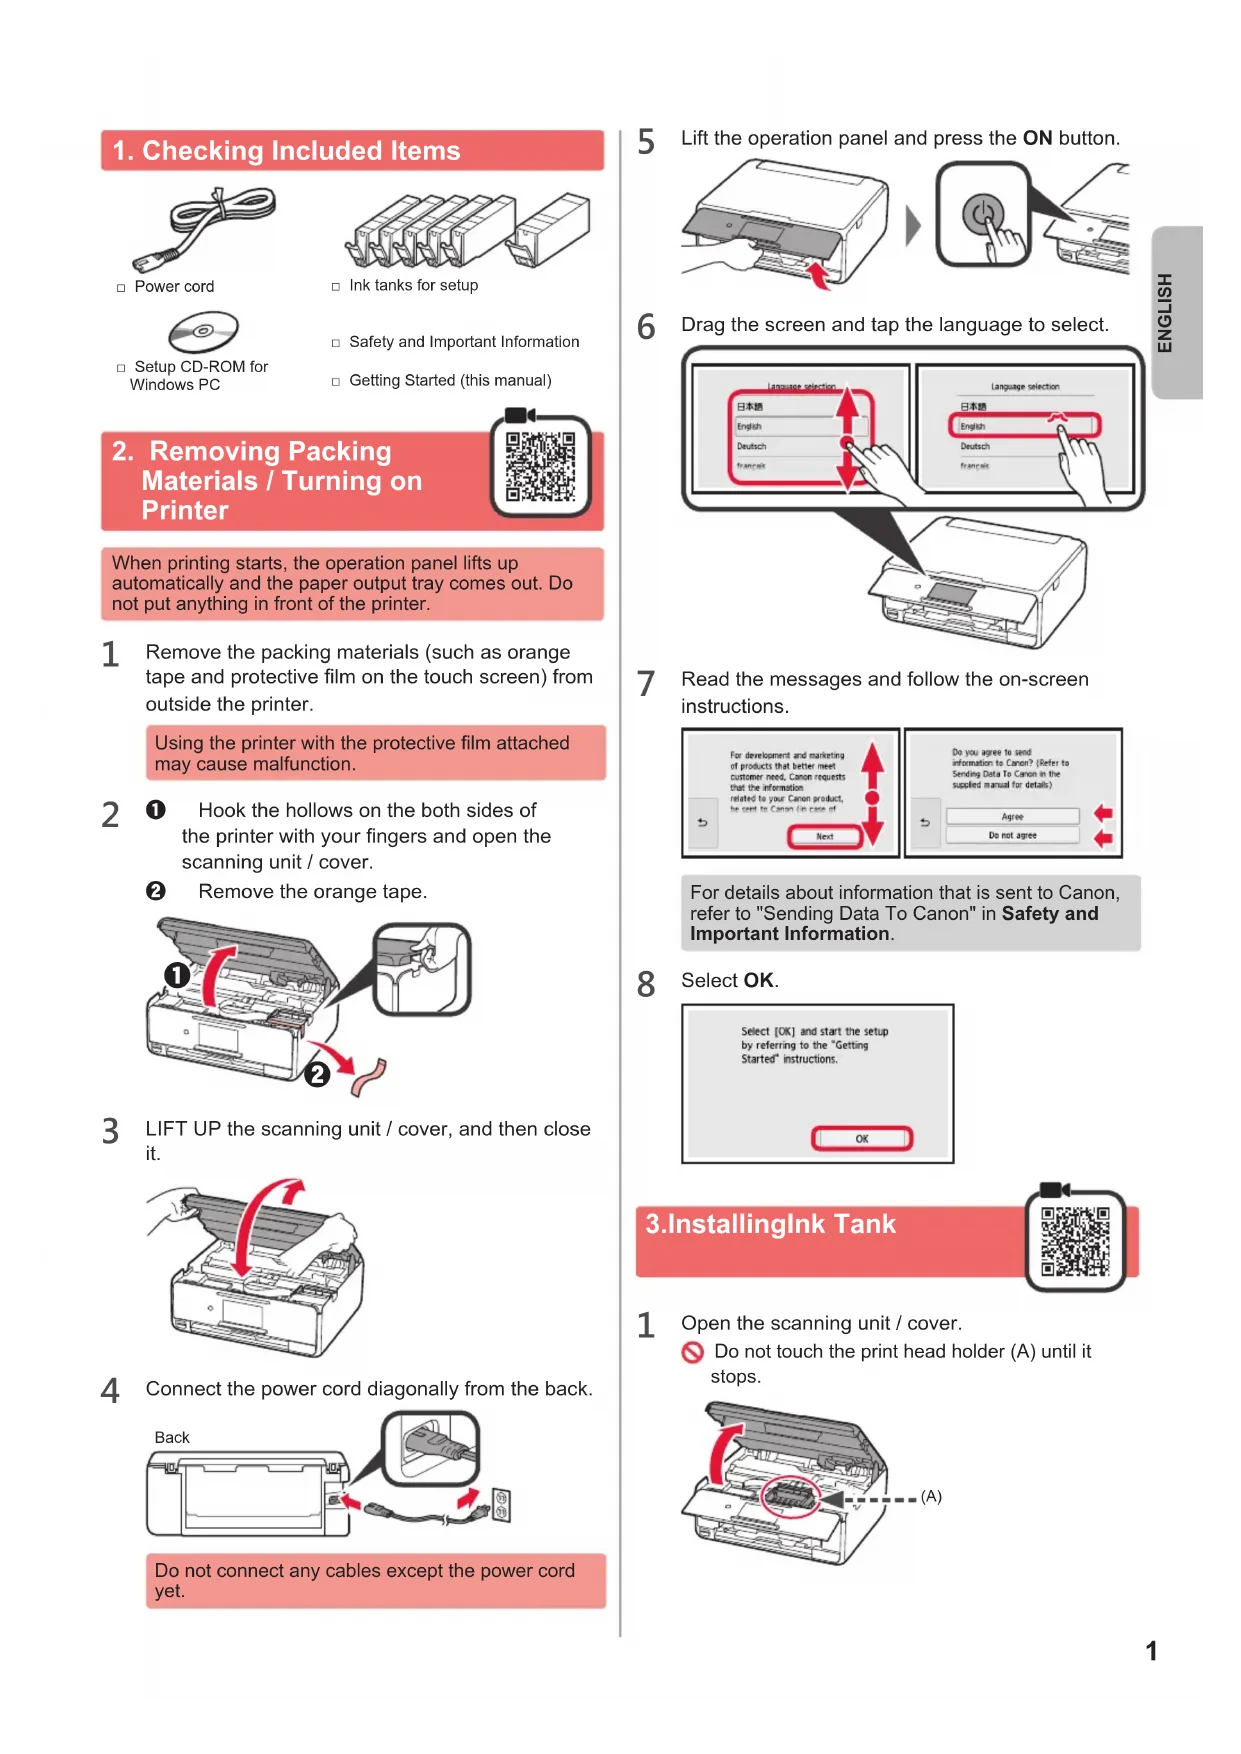
Ink tanks for setup

Setup CD-ROM for Windows PC
Safety and Important Information
Getting Started (this manual)

2. Removing Packing Materials / Turning on Printer
When printing starts, the operation panel lifts up automatically and the paper output tray comes out. Do not put anything in front of the printer.
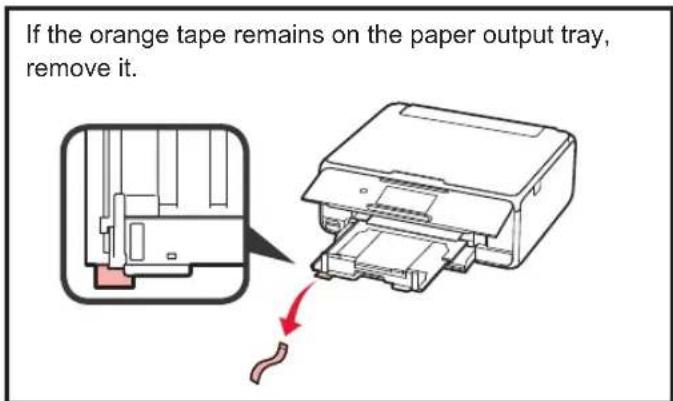
1 Remove the packing materials (such as orange tape and protective film on the touch screen) from outside the printer.
Using the printer with the protective film attached may cause malfunction.
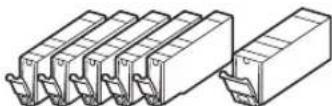
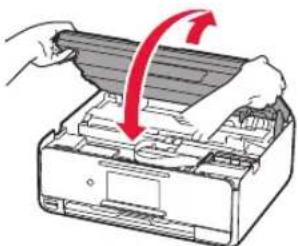
2 Hook the hollows on the both sides of the printer with your fingers and open the scanning unit / cover.
Remove the orange tape.
3 LIFT UP the scanning unit / cover, and then close it.
4 Connect the power cord diagonally from the back.
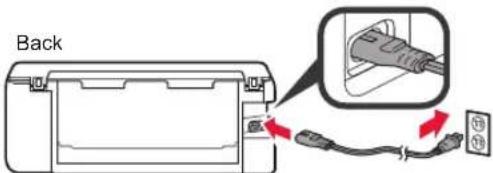
Do not connect any cables except the power cord yet.
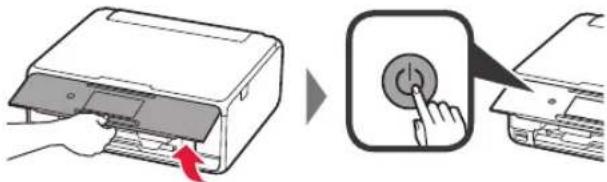
5 Lift the operation panel and press the ON button.
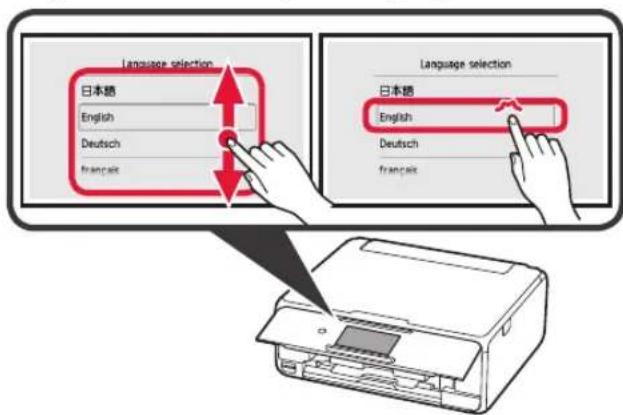
6 Drag the screen and tap the language to select.
7 Read the messages and follow the on-screen instructions.
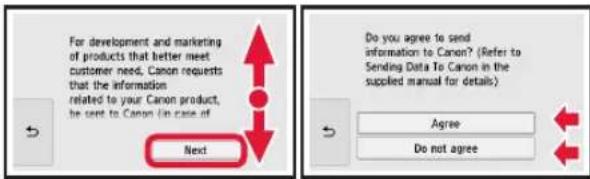
For details about information that is sent to Canon, refer to "Sending Data To Canon" in Safety and Important Information.
8 Select OK.

3.Installinglnk Tank

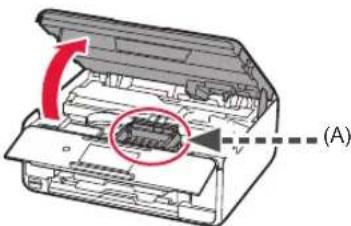
1 Open the scanning unit / cover.
Do not touch the print head holder (A) until it stops.
2 1 COMPLETELY remove the orange tape.
2 Remove the protective wrap.
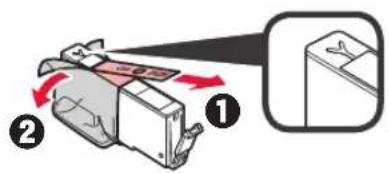
3 Hook the orange cap with your finger to remove it GENTLY.
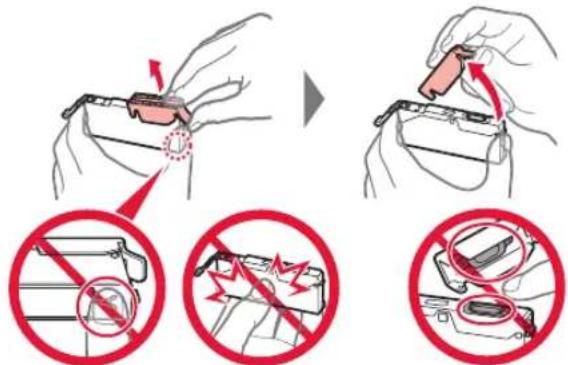
Do not push the both sides of the ink tank with the Y-shape air hole blocked.
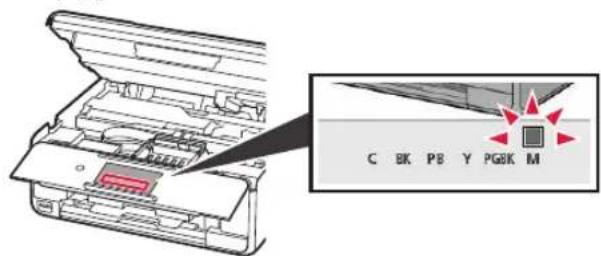
4 Insert the ink tank into the print head and push it down firmly until it snaps into place.
The color of the ink tank that you set appears on screen.
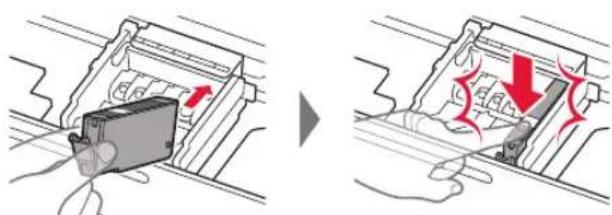
If the color is not displayed on the screen even though you have installed the ink tank, the color of the ink tank may be wrong or you may have installed an ink tank, such as one with a different model number, that is not supported by this printer. Either install an ink tank for the correct color or use the provided ink tank for setup.
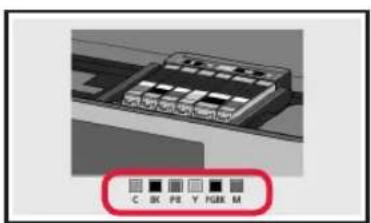
5 Install all the ink tanks the same way as in step 4, and then confirm that all the colors appear on screen.
6 LIFT UP the scanning unit / cover, and then close it.
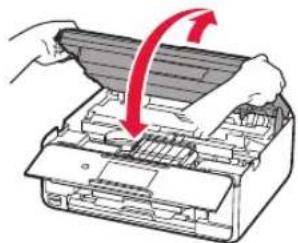
If an error message appears on the screen, make sure the ink tanks are installed correctly.
4. Loading Paper / Aligning Print Head

To obtain a better print result, print a pattern for Print Head Alignment and scan it.
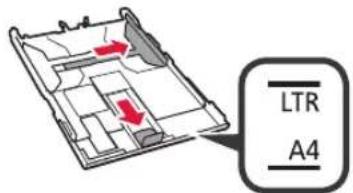
1 ① Pull out the cassette.
Remove the cassette cover.

2 Open the paper guides, and then align the guide in front with the mark of LTR or A4.
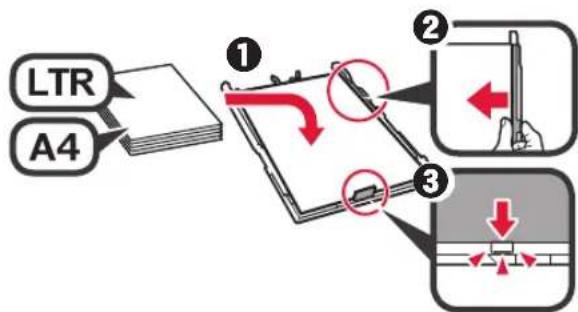
3 1 Load plain LTR or A4 size paper with the print side facing down.
Slide the right paper guide to align it with the side of the paper stack.
Align the paper stack with the paper guide in front.
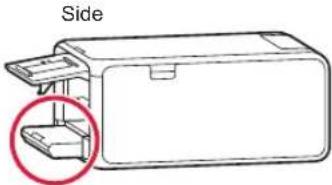
4 Attach the cassette cover and insert the cassette.
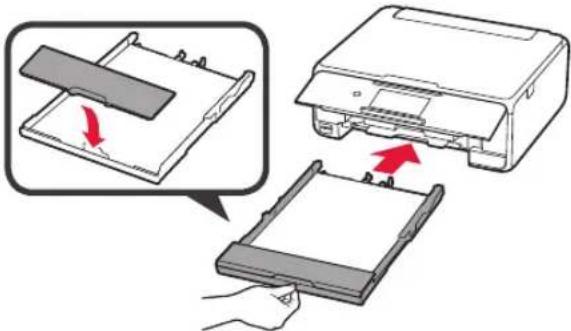
The following figure shows the state after the cassette is inserted.
5 If the following screen appears, select OK.
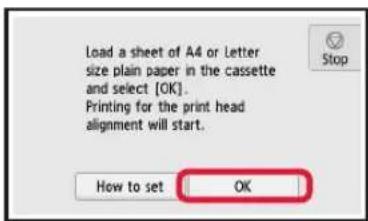
The paper output tray comes out automatically.
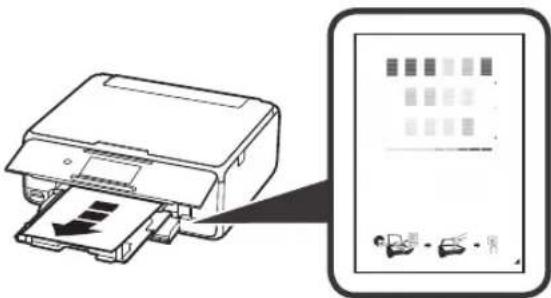
6 Make sure that a pattern is printed for Print Head Alignment.
It takes about 4 minutes to finish printing.
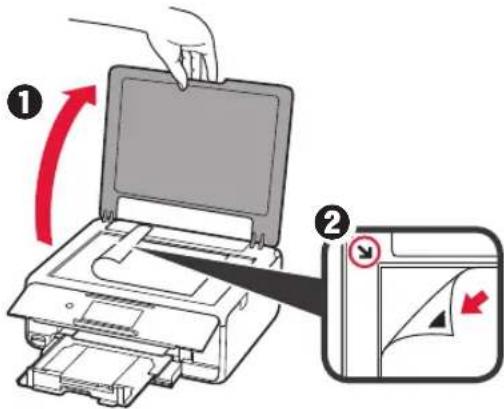
7 1 Open the document cover.
Load the printed pattern on the platen glass.
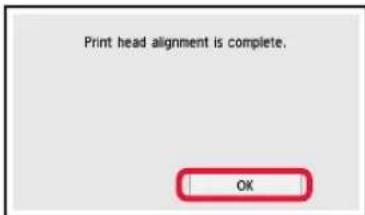
8 After closing the document cover, select OK.
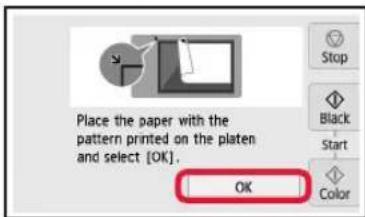
9 If the following screen appears, select OK.
5. Preparing for Connection
In the following description, smartphones and tablet devices are collectively described as smartphone.
1 Select Next.
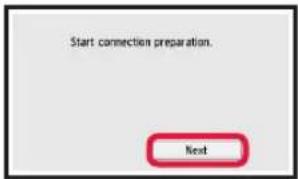
2 Make sure that the following screen appears.

From here on, proceed to a step according to how you use the printer.
- To use the printer by connecting only to a computer or both to a computer and smartphone
"6-A. Connecting to Computer" - To use the printer by connecting only to a smartphone
"6-B. Connecting to Smartphone" on page 6 - To use the printer without connecting to a computer or smartphone
"Use Only Printer"
6-A. Connecting to Computer

You need a connection setup for each computer. Proceed with the setup from step 1 for each computer.
1 Start the setup file for either method A method B

Downloading from the Internet
Open a web browser (etc.) on your computer.
Input the following URL and access the Canon website.

3 Select Set Up.

4 Input the model name of your printer and click OK.

You can select a model name from the list.
5 Click Setup.

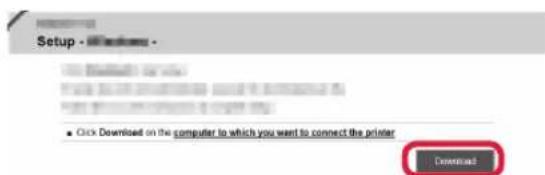
The procedures for Windows and Mac OS are shown below. If you are using a computer with an OS other than Windows or Mac OS, such as a Chrome OS, do the setup according to the on-screen instructions.
Click Download and download the setup file.
7 Execute the downloaded file.
Proceed to step 2 on the next page to continue.

Using Setup CD-ROM (Windows Only)
1 Load the Setup CD-ROM in your computer.

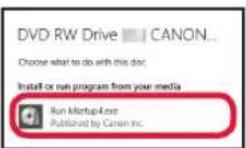
When using Windows 10 or Windows 8.1:
When the following message appears on the right side of your computer screen, click it.

If the following screen appears, click Run Msetup4.exe.
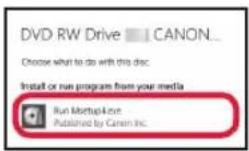
If the User Account Control dialog box appears, click Yes.
When This Message Does Not Appear (or Has Disappeared)
1.ClickFile Explorer on the taskbar.


2.ClickThis PC on the left side of the opened window.
-
Double-click the CD-ROM icon on the right side of the window. If the contents of the CD-ROM appear, double-click Msetup4.exe.
-
Proceed to step 4.
When using Windows 7:
When the AutoPlay screen appears, click Run Msetup4.exe.
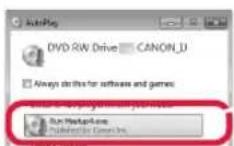
If the User Account Control dialog box appears, click Continue.
When Play Screen Does Not Appear
1.ClickComputer from the start menu.
- Double-click the CD-ROM icon on the right side of the opened window. If the contents of the CD-ROM appear, double-click Msetup4.exe.
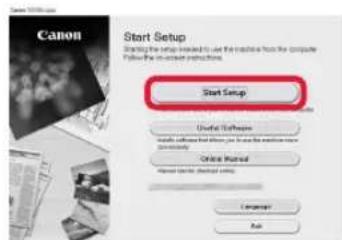
Proceed to step 2 to continue.
2 Click Start Setup.
If the following screen appears, click Exit.

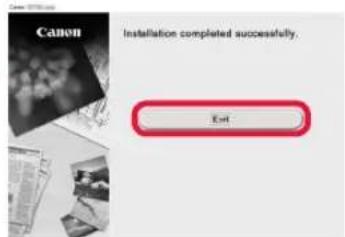
The connection with your computer is now complete. You can print from your computer.
6-B. Connecting to Smartphone

You need a connection setup for each smartphone. Proceed with the setup from step 1 for each smartphone.
Preparation
- Turn on Wi-Fi on your smartphone.
- If you have a wireless router, connect your smartphone to the wireless router you want to connect to the printer.
- For operations, refer to manuals of your smartphone and the wireless router or contact those manufacturers.
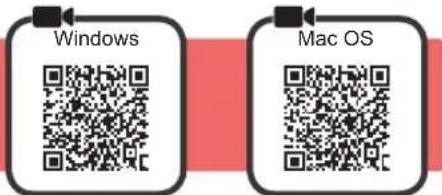
1 Install the application software Canon PRINT Inkjet/SELPHY in your smartphone.

iOS : Search "Canon PRINT" in App Store.
Android : Search "Canon PRINT" in Google Play.
Or access the Canon website by scanning the QR code.

- You may not connect your smartphone to the Internet wirelessly during connecting the printer to the smartphone directly. In that case, you may be charged depending on the contract with your service provider.
- Up to 5 devices can be connected to the printer via wireless LAN connection directly.
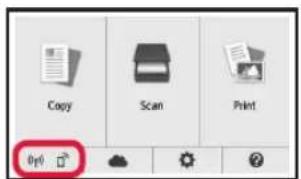
2 Check the display on the printer.
The screen turns off when no operation is made for about 10 minutes. Tap the touch screen to display the screen.
If the following screen appears: Check the icon on the lower left, and then proceed to A or B
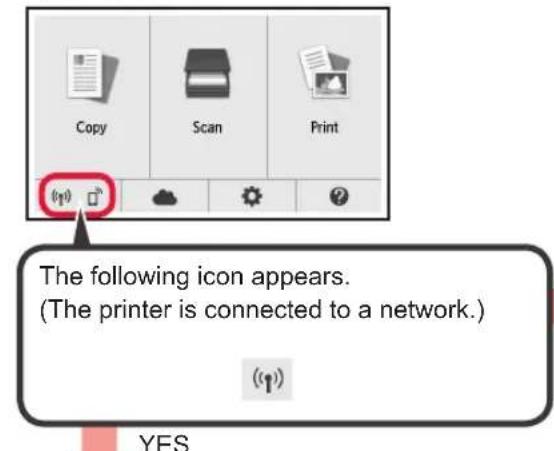
If the following screen appears: Proceed to B.

No (Proceed to B.)
If appears, the printer cannot communicate by wireless LAN connection. For details, access "http://ij.start.canon" to see Frequently Asked Questions.

iOS
Android
Tap the installed application software.
Follow the on-screen instructions to register the printer.
3 Make sure that the following screen appears.
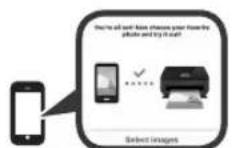
The connection with your smartphone is now complete. You can print from your smartphone.
To print photos, load photo paper. Proceed to "Loading Photo Paper" on page 8.

Procedures below vary depending on iOS or Android. Select your operating system and proceed to its procedure.
iOS
Tap Settings on your smartphone's home screen, and tap Canon_ij_XXXX in the Wi-Fi settings.


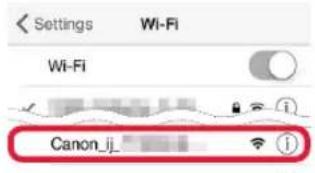
If Canon_ij_XXXX does not appear on the list, see "Preparation for Printer" below to operate the printer, and then repeat step 1.
Tap the installed application software.
Follow the on-screen instructions to register the printer.
Follow the on-screen instructions to proceed with the setup.
If you select Auto Select Conn. Method (recommended) on the connection method selecting screen, the appropriate connection method is selected automatically depending on your environment.
4 Make sure that the following screen appears.
Android
Tap the installed application software.
Follow the on-screen instructions to register the printer.
If a message saying "Printer is not registered. Perform printer setup?" does not appear, see "Preparation for Printer" below to operate the printer, and then wait for a while until the message appears.
Follow the on-screen instructions to proceed with the setup.
The appropriate connection method is selected depending on your environment.
If two printer names appear on the Register Printer screen as shown below, select A.
A) TS8100 series (xxx.xxx.xxx.xxx)
B) Direct-xxxx-TS8100series
3 Make sure that the following screen appears.
The connection with your smartphone is now complete. You can print from your smartphone.
To print photos, load photo paper. Proceed to "Loading Photo Paper" on page 8.
Preparation for Printer
1 Select on the touch screen of the printer.
2 Select the icon on the lower left of the HOME screen.
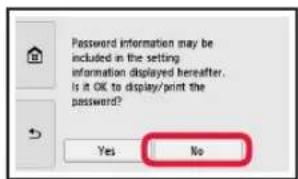
3 If the following screen appears, select No.
4 Select LAN settings > Wireless LAN > Wireless LAN setup > Easy wireless connect in this order.
Select Yes.
Return to the operation of your smartphone.
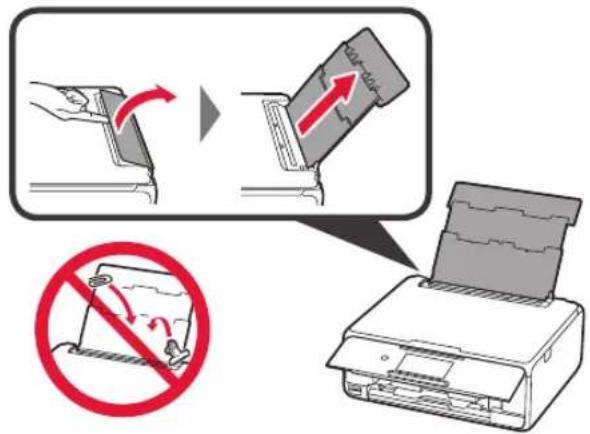
Loading Photo Paper
Load photo paper in the rear tray.
1 Open the rear tray cover and pull out the paper support.
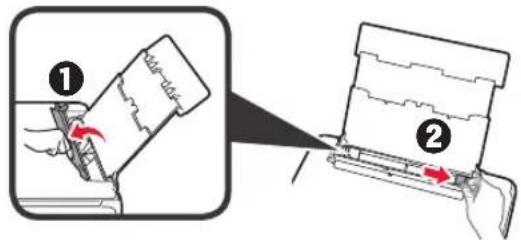
2 1 Open the feed slot cover.
Slide the right paper guide to the end.
3 Load several sheets of photo paper with the print side facing up.
Slide the right paper guide to align it with the side of the paper stack.
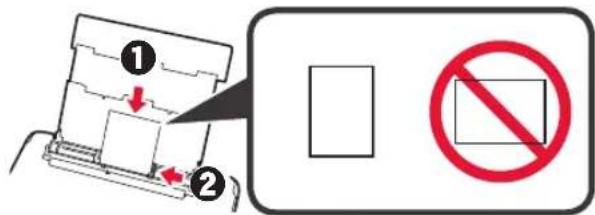
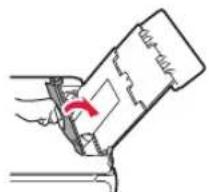
4 Close the feed slot cover.
Read the message on the printer's screen and register the information of the loaded paper.
Printing Photos Saved on Memory Card
You can print photos saved on a memory card with easy operations.
1 Make sure the printer is turned on.
2 Load several sheets of photo paper.
3 Insert the memory card into the card slot.
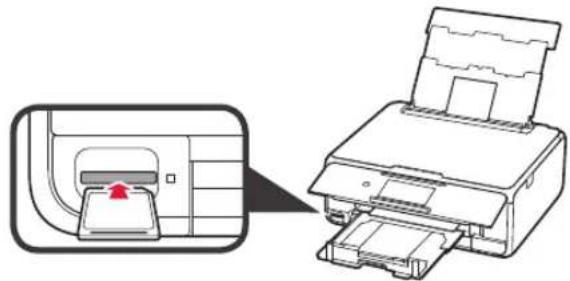
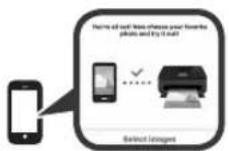
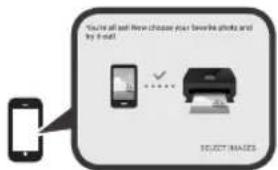
4 Select photos to be printed.
5 Tap the Color button
The printer starts printing.
De installment is nu voltooid.
6-A. Connessione a computer
Ao usability Windows 7:
Quando aanela Reproducao Automática (AutoPlay) for exibida, clique em Executor Msetup4.exe (Run Msetup4.exe).

Se a caixa de dialogo Controle de Conta de Usuario (User Account Control) for exigida, clique em Continuar (Continue).
Click Downloaded on the computer to which you want to connect the printer

EKTAEOToAHPeEv apxio.
Tia va ouvexioet, PPOXWPnOe OTo Bna 2, OTNv EIOEyn OeIa.

Xpno CD-ROM ykataoanc (movo yia Windows)
1 TOnoTeHnTo CD-ROM EYkataaTcns OTOV UToLoyoiTnOaC.
Kata n xpnan Windows 10 n Windows 8.1:
OTAV TO aKoAouO MuVua EaPavicetai OTN dEJa TlEupa Tns Oovnc Tou UTOAOyIOTn, KAVTE KAIK e auto.

Av eipavioTei n akolouOth oOvN, kAVTE KAIOTNV EITIAOYn EkTeAeON Msetup4.exe (Run Msetup4.exe).
Av eipavioTe to napaOp oiaIoyou EeYxoc loyapiaou xpnotn (User Account Control), kAVTE KAIK OTNV ETIIoyN Nai (Yes).
Otauo to mnuua dev eepavicietai (h exe i eapaviotei)
Installations-CD for Windows PC
iOS : Sök after "Canon PRINT" i App Store.
Android: Sök after "Canon PRINT" i Google Play.
2 1 Apne spordekselet for mating.
ios : Sg after "Canon PRINT" i App Store.
Android: Sog after "Canon PRINT" i Google Play.