PMS200BT - Hi-fi system PEAQ - Free user manual and instructions
Find the device manual for free PMS200BT PEAQ in PDF.
User questions about PMS200BT PEAQ
0 question about this device. Answer the ones you know or ask your own.
Ask a new question about this device
Download the instructions for your Hi-fi system in PDF format for free! Find your manual PMS200BT - PEAQ and take your electronic device back in hand. On this page are published all the documents necessary for the use of your device. PMS200BT by PEAQ.
USER MANUAL PMS200BT PEAQ
natural_image
White audio workstation with two speakers and a digital display unit (no visible text or symbols)
natural_image
White remote control device with black buttons and a globe icon (no visible text or symbols)
natural_image
Exterior view of a black REAO audio recording device with two speakers and a digital display (no visible text or symbols)
natural_image
Black remote control device with multiple buttons and a 'SATE' label (no readable text or symbols beyond branding)Micro Audio System PMS200BT-B/W
1 Symbol
natural_image
White electrical outlet plug with black cable inserted into a square socket (no text or symbols visible)natural_image
Close-up of a black electronic device with white mark symbols, showing top and side views (no readable text or labels)natural_image
Close-up of a mechanical component with a white arrow pointing to a curved surface (no text or symbols visible)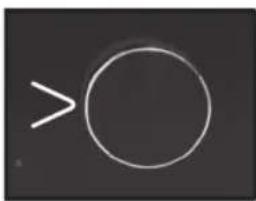
natural_image
Simple geometric shape: a white circle with a greater-than symbol inside, on a dark background (no text or symbols)▶II WIEDERGABE / PAUSE
natural_image
Close-up of three circular mechanical components with holes, one with a small circular mark on the left (no text or symbols visible)bar
| Category | Value | |---|---| | OFF | 1 | | MI | 2 | | HH | 3 | | HH | 4 | | MODE | 5 | | MEMORY | 6 | | Other | 7 | | FM | 107.00 | Volume = Volume1 Eikovídio
natural_image
White electrical outlet plug with black cable inserted into a square socket (no text or symbols visible)natural_image
Close-up of a black electronic panel with three circular buttons and a star symbol (no text or labels visible)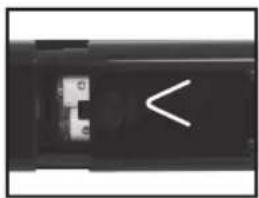
natural_image
Close-up of a black electronic device with a white abstract symbol on its side (no readable text or symbols)natural_image
Close-up of a mechanical component with a white arrow pointing to a feature, no visible text or symbols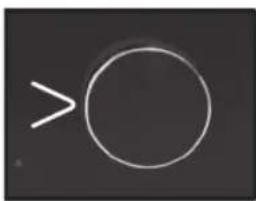
natural_image
Simple geometric shape: a white circle with a greater-than symbol extending right, on a dark background (no text or symbols)natural_image
Close-up of three circular mechanical components with holes, one with a small circular detail on the left (no text or symbols visible)Important Safety Instructions. Please read the instructions carefully and keep them for later use.
DANGER! Invisible laser radiation when open and safety interlock failed or defeated. Avoid direct exposure to the beam. Do not touch the lens.
RISK OF ELECTRICAL SHOCK
DO NOT OPEN
WARNING: SHOCK HAZARD - DO NOT OPEN
AVIS: RISQUE DE CHOC ÉLECTRIQUE - NE PAS OUVRIR
The lightning flash with arrow head within an equilateral triangle is intended to alert the user to the presence of uninsulated “dangerousvoltage” within the product’s enclosure that may be of sufficient magnitude to constitute a risk of electric shock to persons and animals.
The exclamation point within an equilateral triangle is intended to alert the user to the presence of important operating and maintenance instructions in the literature accompanying the device.
For safety reasons, this class II product is provided with double or reinforced insulation as indicated by this symbol.
- This product is only intended for audio entertainment. Do not use the product for any other purpose than described in this manual in order to avoid any hazardous situation. Improper use is dangerous and will void any warranty claim.
- For household use only. Do not use outdoors.
- Danger! Excessive sound pressure from earphones and headphones can cause hearing loss. If you listen to loud music for
a long time, your hearing may be impaired. Set to a moderate volume.
– Danger of suffocation! Keep all packaging material away from children.
- Only use under normal room temperature and humidity conditions.
– The product is only suitable for use at moderate degrees of latitude. Do not use in the tropics or in particularly humid climates.
- Do not move the product from cold into warm places and vice versa. Condensation can cause damage to the product and electrical parts.
- Do not use attachments or accessories other than recommended by the manufacturer or sold with this product. Install in accordance with this user manual.
- Do not install near any heat sources such as radiators, heat registers, stoves or other products (including amplifiers) that produce heat.
- Do not shift or move the product when powered on.
- Do not touch, push or rub the surface of the product with any sharp or hard objects.
- Danger! To reduce the risk of fire or electric shock, do not expose this product to rain or moisture.
– The product shall not be exposed to dripping or splashing and no objects filled with liquids, such as vases, shall be placed on the product.
- Care should be taken so that no objects or liquids enter the enclosure through openings.
- No naked flame sources, such as lighted candles, should be placed on the product.
- Refer all servicing to authorised service agent. Do not attempt to repair the product yourself. Servicing is required when the product has been damaged in any way, such as the supply cord or plug are damaged, liquid has been spilled, objects have fallen into the product, the enclosure is damaged, the product has been exposed to rain or moisture, does not oper-
ate normally, or has been dropped.
– Before connecting the product to a socket outlet, make sure the voltage indicated on the product corresponds to your local mains.
– If the supply cord is damaged, it must be replaced by the manufacturer or its service agent or similarly qualified person in order to avoid hazard.
- Regularly check if the supply cord, product or extension cable is defective. If found defective, do not put the product into operation. Immediately pull the plug.
- Place the supply cord and, if necessary, an appropriate extension cable in such away that pulling or tripping over it is impossible. Do not allow the supply cord to hang down within easy reach.
- Do not jam, bend or pull the supply cord over sharp edges.
- The power plug is used as the disconnect device; the disconnect device shall remain readily operable. To completely disconnect the power input, disconnect the mains plug.
- The product may not function properly or not react to the operation of any control due to electrostatic discharge. Switch off and disconnect the product; reconnect after a few seconds.
- Protect the supply cord from being walked on or pinched particularly at the plug, convenience receptacles and the point where it exits from the product.
- Never pull the plug by the supply cord or with wet hands.
- Disconnect the power plug in case of faults during use, during lightening storms, before cleaning and when not using the product for a longer period of time.
- Danger! Before cleaning, switch the product off and disconnect the power plug from the socket.
- When the product has reached the end of its service life, make it defective by disconnecting the plug from the socket and cutting the cord in two.
- Caution! There is danger of explosion
from improper replacement of the batteries. Replace batteries only with the same or equivalent type of battery.
– Always change the entire battery pack. Do not mix old and new batteries, or batteries with different charge state.
- Make sure the batteries are correctly inserted. Observe the polarity (+) plus / (-) negative on the battery and the housing. Improperly inserted batteries can lead to leakage or, in extreme cases, a fire or an explosion.
- Remove used batteries. Remove the batteries if you know that the product will not be used for a longer period of time. Otherwise, the batteries could leak and cause damage.
- If the batteries leak, remove them with a cloth and dispose of them accordingly. Prevent battery acid from coming into contact with skin and eyes. If you do get battery acid in your eyes, flush them thoroughly with lots of water and consult a physician immediately. If battery acid comes into contact with your skin, wash the affected area with lots of water and soap.
- When installing the device, leave sufficient space for ventilation. Do not install in bookcases, built-in cabinets or the like.
- Do not impede ventilation by covering the ventilation openings with items, such as newspapers, table-cloths, curtains, etc. Do not insert any objects.
Partlist
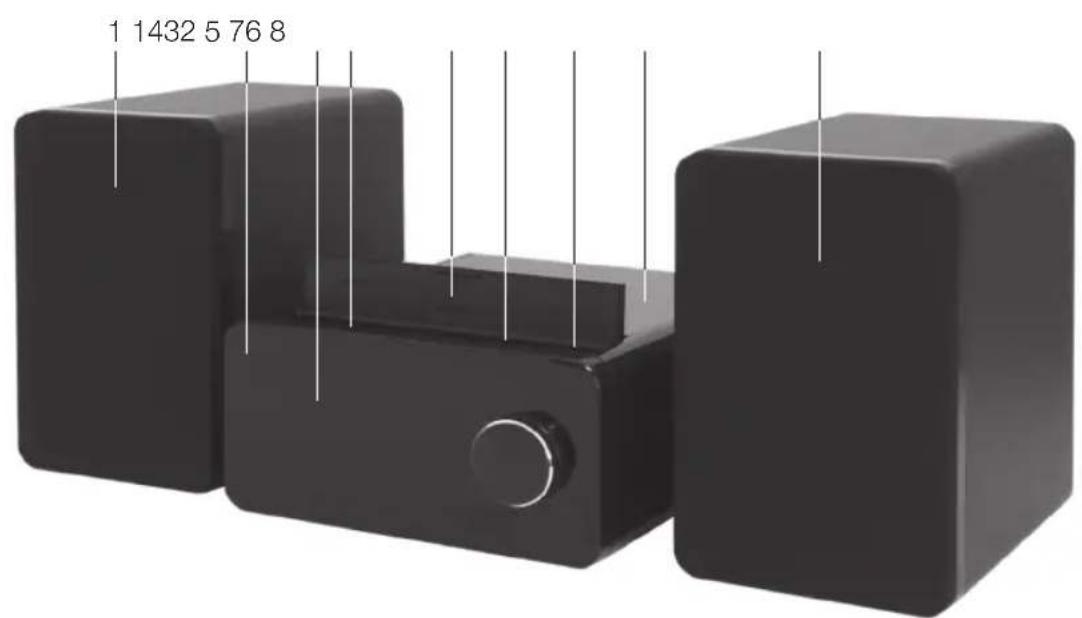
1 Speaker
2 Main unit
3 Touch panel
4 SD card slot
- USB SD cover
6 USB port
7 Earphone jack
8 CD tray
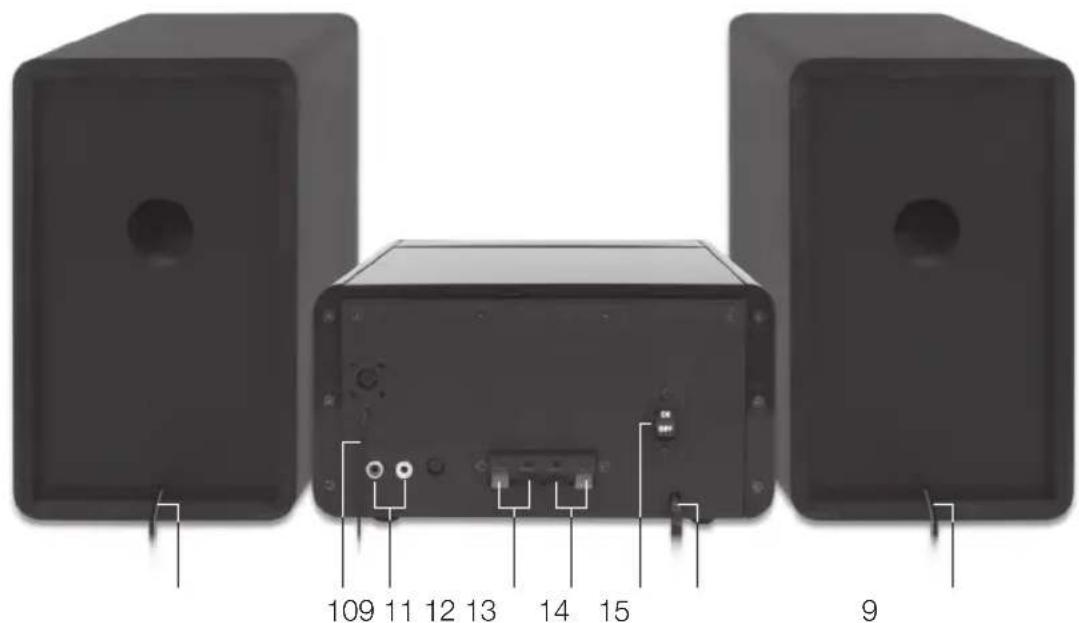
9 Speaker cable
10 Antenna
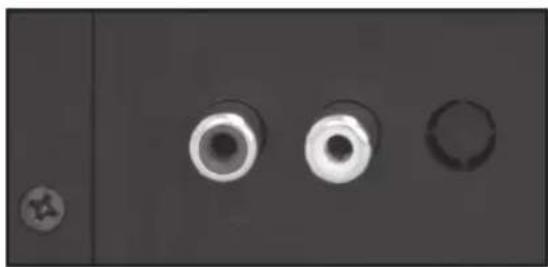
11 AUX INPUT
12 Audio OUTPUT (R)
13 Audio OUTPUT (L)
14 Power switch
15 Power cord with plug
Accessories
1 x User manual
1 x Main unit
2 x Speaker
2 x Detachable Speaker Cloth
1 x Remote control
1 x Quick start guide
1 x Warranty card
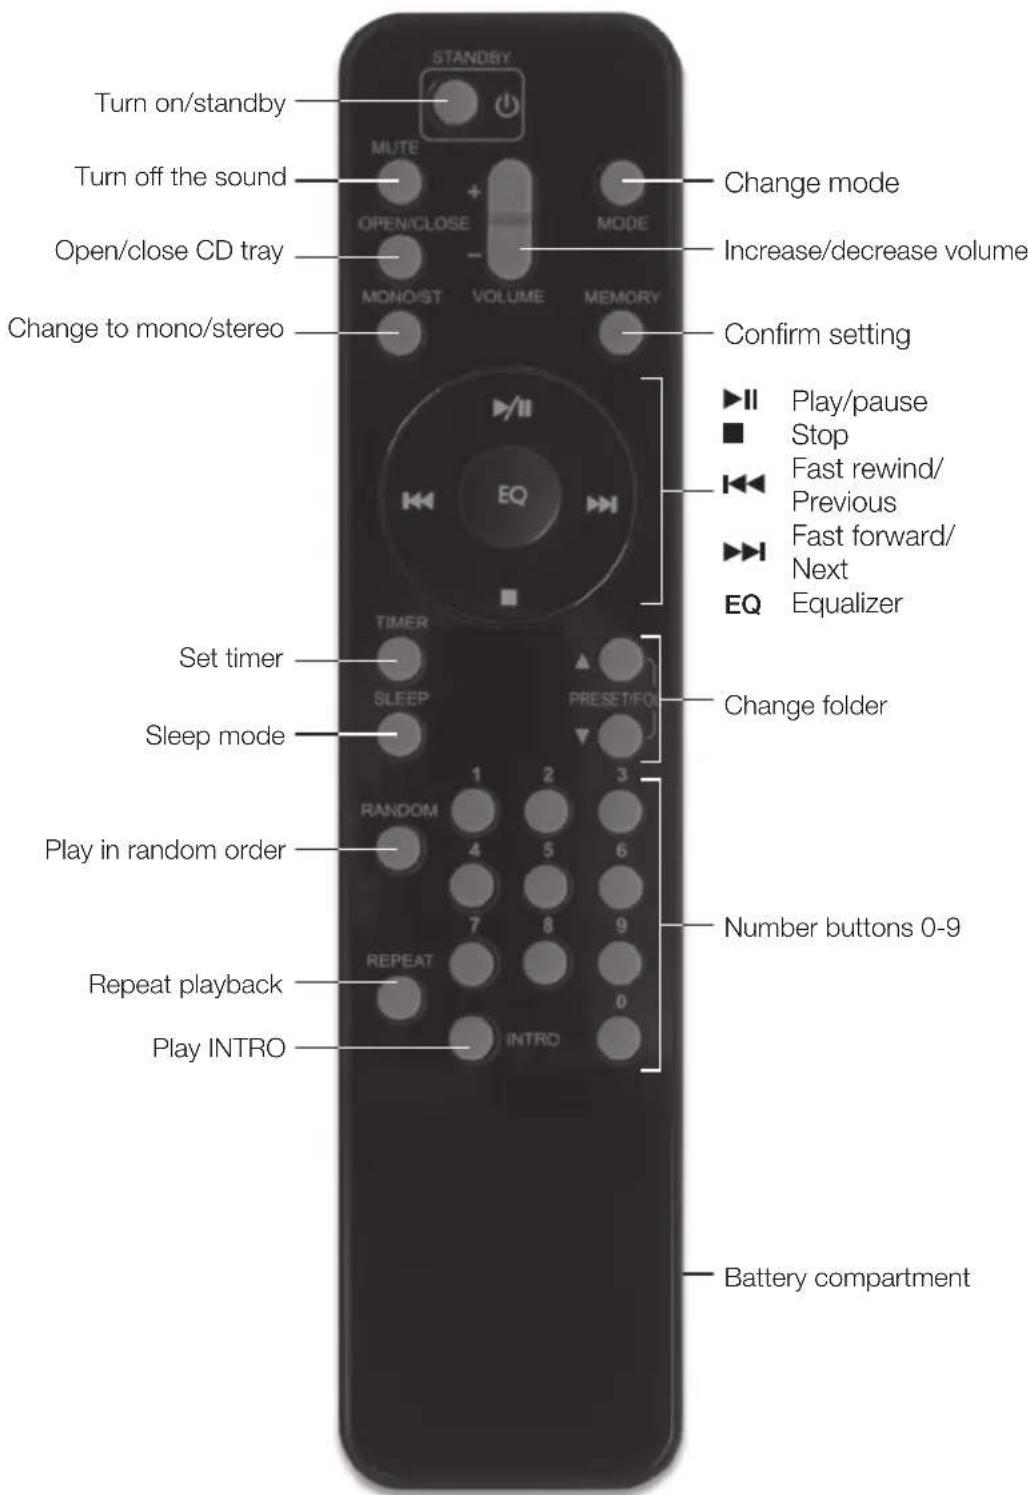
Touchpanel

bar
| Component | Value | |---|---| | OFF | 1 | | >/II | 2 | | HH | 3 | | HH | 4 | | MODE | 5 | | MEMORY | 6 | | Other | 7 | | Total | 8 | FM 107.00 (mm) |1 icon
Turn on or into standby
2 idn
Play or pause the playback
3 ibon
Fast rewind current track or skip to previous track
4 ion
Stop the playback
5 i▶▶h
Fast forward current track or skip to next track
6 Screen
7 MODE icon
Change mode
8 MEMORY icon
Confirm setting
9 ▲ icon
Open or close CD tray
10 Volume knob
Increase or decrease volume
Remote control
OperationSetup
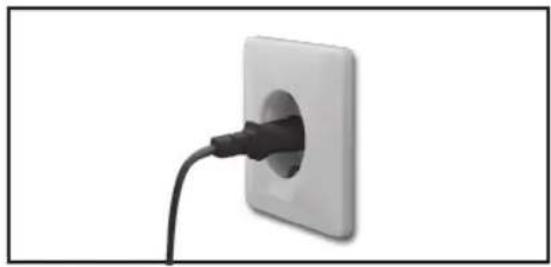
POWER SUPPLY
natural_image
White electrical outlet plug with black cable inserted into a square socket (no text or symbols visible)Connect the power plug to a suitable power outlet.
POWER ON/OFF

Press the power switch on the rear of the main unit to the ON position. Press ☐ on the remote control or on the touch panel to turn on the product.
INSERTING BATTERY
natural_image
Close-up of a black remote control panel with white directional arrows indicating left and right sides (no text or symbols)- Open the battery compartment cover.
- Insert the new batteries into the battery compartment while paying attention to the correct polarity.
- Close the battery compartment cover.
STANDBY

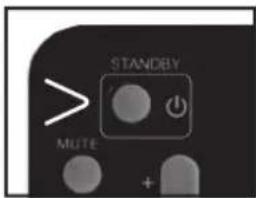
To turn the product back into standby mode, press ☑ on the remote control or on the touch panel.
NOTE: During standby mode, 📍Indicator will be displayed on the touch panel.
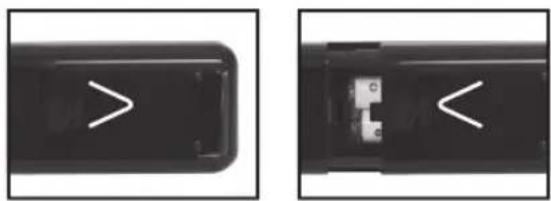
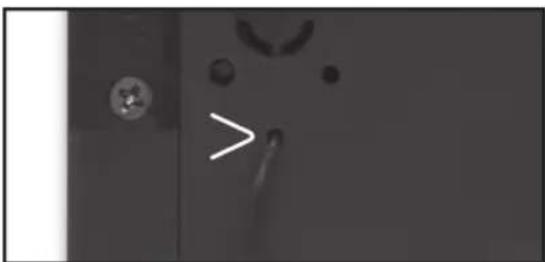
ANTENNA
natural_image
Close-up of a mechanical component with a white arrow pointing to a feature, no visible text or symbolsTry different positions of the antenna to figure out the best reception position.
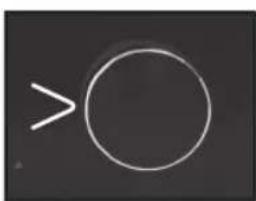
VOLUME
natural_image
Simple geometric shape: a white circle with a greater-than symbol extending right, on a dark background (no text or symbols)Adjust the volume with the volume knob or on the remote control.
MODE
Press MODE to select the following modes:
- CD - BT LINK
- USB - AUX
- CARD - TUNER
CLOCK SETUP
- During standby mode, press and hold MEMORY on the remote control.
- 24-HOUR (or 12-HOUR) starts flashing on the screen. Press◀◀ or ▶▶ adjust the 24/12 hour format and confirm by pressing MEMORY.
- The hour digits AM (or PM) start flashing. Press I◀◀ or ▶▶ to adjust the hour and confirm by pressing MEMORY.
- The minute digits start flashing. Press ◀◀◀ or ▶▶▶ adjust the minute and confirm by pressing MEMORY.
- Now the time is set.
NOTE: Time setup can also be adjusted on the touch panel.
TIMER
- After the time is set, press TIMER on the remote control for few seconds.
- ON indicator will be displayed on the screen and hour digits start flashing. Press ◀◀ or ▶to adjust the hour and confirm by pressing TIMER.
-
The minute digits start flashing. Press ◀◀ or ▶▶ adjust the minute and confirm by pressing TIMER.
-
OFF indicator appears on the screen and hour digits start flashing. Press I◄◄ or ►► adjust the hour and confirm by pressing TIMER.
- The minute digits start flashing. Press ◀◀ or ▶▶ adjust the minute and confirm by pressing TIMER.
- TUNER starts flashing. Press ◀◀ or ▶▶ I to select the mode TUNER / CD / USB or CARD and confirm by pressing TIMER.
- VOL starts flashing on the screen. Press ◀◀ or ▶▶d adjust the volume and confirm by pressing TIMER.
- The timer is set and the indicator will be displayed on the screen.
NOTE: If TIMER ON and TIMER OFF has the same time, ERROR will be displayed on the screen.
SLEEP
Press SLEEP on the remote control to activate sleep mode.
The indicator and SLEEP 90 will be displayed on the screen. Press SLEEP to decrease sleep intervals:
- SLEEP 90 90 minutes
- SLEEP 80 80 minutes
- SLEEP 70 70 minutes
- SLEEP 60 60 minutes
- SLEEP 50 50 minutes
- SLEEP 40 40 minutes
- SLEEP 30 30 minutes
- SLEEP 20 20 minutes
- SLEEP 10 10 minutes
- SLEEP OFF off
MUTE

Press MUTE on the remote control to turn off the volume temporarily. The volume indicator starts flashing.
Press MUTE again to deactivate.
▶ II PLAY / PAUSE
Press ▶II to start or pause the playback. If the playback is paused, the time elapsed indicator is flashing on the screen.
NOTE: Very high volumes can cause vibrations which could also make the tracks skip.
■ STOP PLAYBACK
Press ■ to stop the playback.
PREVIOUS / NEXT
With ◀◀ or ▶▶you can skip tracks to the next or previous track. By pressing ◀◀ once, the track being played will be played back again from the start. By pressing twice, the previous title will be played again. By pressing ▶▶, the next track will be played.
FAST REWIND / FAST FORWARD
By holding down the buttons ◀◀ or ▶, you can fast forward or rewind the current track. Once the desired place has been found, let go of the button in order to proceed with the playback.
TRACK SELECTION
Press the respective number button 0-9 on the remote control and wait approx. 3 seconds.
EQUALIZER
Press EQ to select FLAT / CLASSIC / ROCK / POP or JAZZ.
RANDOM
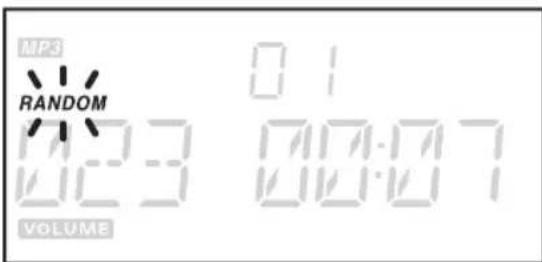
Press RANDOM on the remote control to play all tracks in random order. RANDOM will be displayed on the screen. Press RANDOM again to deactivate the function.
NOTE: RANDOM can only be used in USB/CARD and CD mode.
INTRO
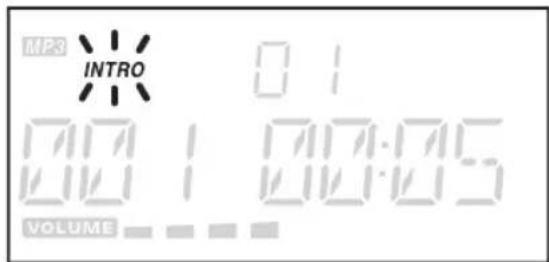
Press INTRO on the remote control to play the first 10 seconds of each track. INTRO will be displayed on the screen.
Press INTRO again to deactivate the function.
NOTE: INTRO can only be used in USB/CARD and CD mode.
TUNER playback

Press MODE and select TUNER.
MANUAL TUNING
Press ◀◀ or ▶▶b tune the desired wave band range of frequency.
AUTO TUNING
- Press and hold ◀◀◀ or ▶▶for few seconds and release the button.
- The tuner will automatically search the first station.
- Repeat the above procedure to select another station.
SAVING STATIONS
You can store up to 30 FM stations.
- Once a station is found, press MEMORY on the remote control.
- Press ▲ or ▼ on the remote control to select the desired station number.
- Press MEMORY to confirm the selection.
- To program more station or to change the stored preset stations, repeat the above steps.
NOTE: Storing a new station into a preset location will erase the previously stored station. Power off will not erase the memory of preset stations.
SELECT PRESET STATIONS
- Press ▲ or ▼ on the remote control to select the preset stations.
- The screen will display the number and the corresponding frequency.
MONO / STEREO
- Press MONO/ST. on the remote control to select MONO or STEREO.
- When you receive a FM stereo station the Ⓗst. Indicator will be displayed on the screen.
CD playback
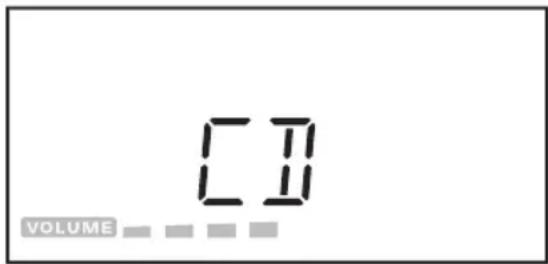
Press MODE and select CD.
▲EJECT / LOAD A DISC
- Open the CD tray by pressing OPEN/CLOSE or ▲ on the touch panel. The CD tray cover will open upwards. Remove the transport safeguard when opening the CD tray for the first time.
- Put one CD into the CD tray with the label side facing up. Press on a point in the middle of the CD until it clicks into place on the axis.
- Press OPEN/CLOSE to close the CD tray. The CD will now be read.
- The total number of tracks on the CD is displayed on the screen and will play the first track automatically.
NOTE: Before you open the CD tray again, always press ■ first to stop the CD from spinning. To remove the CD, place one finger in the middle of the CD (middle of the spindle) and the other finger on the edge of the CD. Carefully pull the CD out of the tray.
REPEAT FUNCTION
Press REPEAT to select the following repeat modes:
- REPEAT repeat current track
- REPEAT ALL repeat all tracks
- REPEAT ALBUM repeat album
NOTE: Repeat album will be displayed only for CD with MP3/WMA music files.
FOLDER SELECTION
For CD with MP3/WMA playback.
Press ▲ or ▼ on the remote control to change the folder.
ID3 OPERATION
For CD with MP3/WMA playback.
- During MP3/WMA playback, press MEMORY to turn on ID3 operation.
- TITLE NAME / ARTIST NAME / ALBUM NAME will be displayed on the screen.
- Press MEMORY again to turn off ID3 operation.
PLAYBACK LIST
The playback list can only be programmed in stop mode.
- While in stop mode, press MEMORY, track number 00 starts flashing.
- Press ◀◀ or ▶ on the remote control to select the track and confirm by pressing MEMORY.
- Up to 32 tracks can be programmed.
- Press ▶ play the first track of the program.
NOTE: For CD with MP3/WMA music files you can follow the steps in USB/CARD playback.
In stop mode, press ■ to cancel the program or open the CD tray by pressing OPEN/CLOSE or ▲ on the touch panel.
USB/CARD playback
USB
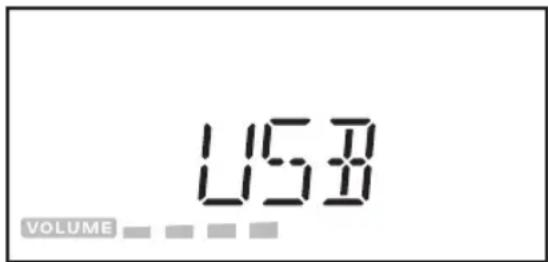
- Press MODE and select USB.
- Open the USB SD cover and insert a USB Stick with MP3/WMA music files.
- Playback starts automatically and the first track will be played. If there is no USB device connected, the message NO USB will be displayed on the screen.
NOTE: Connect the USB device directly to the USB port of the unit. Using an extension cable is not recommended and may cause interference and failure of data transfer. This product supports USB 1.1 and 2.0.
Charging external devices
External devices can be charged via USB with this speaker. Connect the device to the USB port (output: 5V/ 500mA).
NOTE: USB charging cable is not included (please use cable provided with your external device, if any)
SD CARD
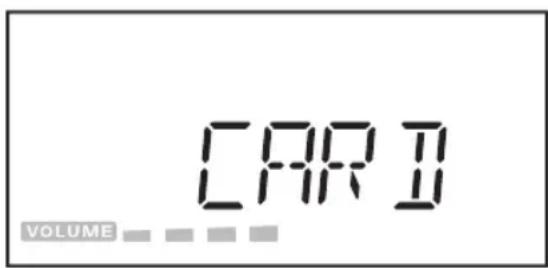
- Press MODE and select CARD.
-
Open the USB SD cover and insert an SD card with MP3/WMA music files.
-
Playback starts automatically and the first track will be played. If there is no SD card connected, the message NO CARD will be displayed on the screen.
REPEAT FUNCTION
Press REPEAT to select the following repeat modes:
- REPEAT repeat current track
- REPEAT ALL repeat all tracks
- REPEAT ALBUM repeat album
FOLDER SELECTION
Press ▲ or ▼ on the remote control to change the folder.
ID3 OPERATION
- During MP3/WMA playback, press MEMORY to turn on ID3 operation.
- TITLE NAME / ARTIST NAME / ALBUM NAME will be displayed on the screen.
- Press MEMORY again to turn off ID3 operation.
PLAYBACK LIST
The playback list can only be programmed in stop mode.
- Press MODE and select USB or CARD.
- While in stop mode, press MEMORY, album number 00 starts flashing.
- Press ▲ or ▼ on the remote control to select the folder and confirm by pressing MEMORY.
- Track number 000 starts flashing.
- Press 🔊 on the remote control to select the track and confirm by pressing MEMORY.
- Up to 64 tracks can be programmed.
- Press ▶ to play the first track of the program.
In stop mode, press ■ to cancel the program.
AUX Bluetooth
natural_image
Close-up of three circular mechanical components with holes, one with a small circular mark on the left (no text or symbols visible)Connect the playback music device to the AUX input with RCA cable (Red/White).
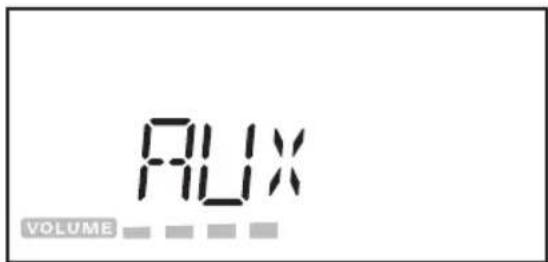
- Press MODE and select AUX.
- Now you can start playback on your music device.
NOTE: RCA cable is not included.

- Press MODE and select BT LINK. BT LINK starts flashing on the screen.
- Activate bluetooth on the bluetooth music device.
- Select and confirm BT speakerN for pairing.
- BT LINK stops flashing once the devices are connected.
- Now you can start playback on your bluetooth music device.
Disposal
Do not dispose of this appliance as unsorted municipal waste. Return it to a designated collection point for the recycling of WEEE. By doing so, you will help to conserve resources and protect the environment. Contact your retailer or local authorities for more information.
Specifications
POWER SUPPLY
| Input | 230-240 V~, 50 Hz |
| Operation power consumption | 33 W |
| Standby power consumption | < 1 W |
Radio
| Frequency range | Digital FM only, 88-108 MHz |
CD Playback
| Frequency response | 100-16 KHz at -3 dB |
| Compatibility | CD-DA/CD-R/CD-RW/MP3 |
Remote control
| Batteries | 2 x AAA (not included) |
Connectivity
| USB | YES |
| SD card | YES |
| Bluetooth | YES, iBT-03 |
| Bluetooth profiles | A2DP, AVRCP |
| Bluetooth range | 2.4-2.483 GHz |
| Bluetooth version | Class 2 |
| AUX | AUX IN |
Speaker
| Output power (RMS) | 2 x 10W RMS |
| Sound Enhancement | Flat/Classic/Rock/Pop/Jazz |
| Sound System | Flat/Classic/Rock/Pop/Jazz |
| Headphone output power | 250-280 mV at 32 OHM (1K 0dB) |
Dimension
| Main unit (W x H x D) | approx. 220 x 244 x 118 mm |
| Speaker box (W x H x D) | approx. 138 x 200 x 226 mm |
| Weight (Main unit and two speakers) | approx. 5.54 kg |
NOTE: WMA protected DRM FILE is not supported on this product.
ESPAÑOL
bar
| Category | Value | |---|---| | OFF | 1 | | MI | 2 | | HH | 3 | | HH | 4 | | MODE | 5 | | MEMORY | 6 | | Other | 7 | | FM | 107.00 (inferred from visual) |1 Icono
Encendido o espera
2 Icono ▶II
natural_image
Close-up of three circular mechanical components with no visible text or symbolsnatural_image
White electrical outlet plug with black cable inserted into a square socket (no text or symbols visible)
natural_image
Close-up of a black electronic device with a white abstract symbol on its side (no readable text or symbols)natural_image
Close-up of a mechanical component with a circular feature and a white arrow pointing to a curved edge (no text or symbols visible)
natural_image
Simple white line drawing of a circle with an arrow pointing right (no text or symbols)▶II REPRODUCIR / PAUSA
natural_image
Close-up of three circular mechanical components with holes, one with a small circular mark on the left (no text or symbols visible)bar
| Component | Value | |---|---| | OFF | 1 | | >/II | 2 | | HH | 3 | | HH | 4 | | MODE | 5 | | MEMORY | 6 | | Other | 7 | | Total | 8 | FM 107.00 (mm) |1 Icône
natural_image
Close-up of three circular mechanical components with a star symbol on the left (no text or labels visible)natural_image
White electrical outlet plug with black cable inserted into a socket (no text or symbols visible)natural_image
Close-up of a black remote control panel with white directional arrows indicating left and right sides (no text or symbols)natural_image
Close-up of a mechanical component with a white arrow pointing to a hole, no visible text or symbols
natural_image
Simple white line drawing of a circle with a greater-than symbol above it, on a dark background (no text or symbols)- SLEEP 90 90 minutes
- SLEEP 80 80 minutes
- SLEEP 70 70 minutes
- SLEEP 60 60 minutes
- SLEEP 50 50 minutes
- SLEEP 40 40 minutes
- SLEEP 30 30 minutes
- SLEEP 20 20 minutes
- SLEEP 10 10 minutes
- SLEEP OFF désactivé
SOURDINE

natural_image
Close-up of three circular mechanical components with holes, one with a small circular detail on the left (no text or symbols visible)| Piles | 2 x AAA (non fournies) |
Connectique
natural_image
White electrical outlet plug with black cable inserted into a socket (no text or symbols visible)natural_image
Close-up of a black electronic device with white directional arrows and a small internal component (no text or symbols visible)natural_image
Close-up of three circular mechanical components with holes, one small circular component on the left (no text or symbols visible)natural_image
Close-up of a mechanical component with a circular feature and a white arrow pointing to a hole (no text or symbols visible)
natural_image
Simple white line drawing of a circle with a greater-than symbol above it, on a dark background (no text or symbols)natural_image
Close-up of three circular mechanical components with holes, one with a small circular mark on the left (no text or symbols visible)natural_image
Close-up of three circular mechanical components with a star symbol on the left (no text or labels visible)natural_image
White electrical outlet plug with black cable inserted into a socket (no text or symbols visible)natural_image
Close-up of a black remote control with white directional arrows indicating left and right sides (no text or symbols)natural_image
Close-up of a mechanical component with a white arrow pointing to a feature, no visible text or symbols
natural_image
Simple white circle with a greater-than symbol inside, on a dark background (no text or labels)natural_image
Close-up of three circular mechanical components with a small circular component on the left (no visible text or symbols)is in conformity with the following directives:
Signature/ Unterschrift: Alexander Korthals