
Uno 2 - Hi-fi system REVO - Free user manual and instructions
Find the device manual for free Uno 2 REVO in PDF.
| Product Type | DAB/DAB+/FM clock radio with built-in speaker and auxiliary input (M-Port) |
| Brand | REVO |
| Model | Uno 2 |
| Frequency range | DAB: Band III (174 - 240 MHz); FM: 87.5 - 108 MHz |
| Tuner type | DAB, DAB+ and FM stereo |
| Speaker | 2 inch (5 cm) neodymium, 8 W power |
| Audio output power | 2 W RMS |
| Antenna | Integrated telescopic, adjustable |
| Display | High resolution LCD display with adjustable backlight (3 levels), time display, icons and 2 lines of information |
| Power supply | 230 V mains adapter, output 12 V / 1.2 A (supplied) |
| Input connectors | DC jack (adapter), 3.5 mm jack socket (M-Port for iPod/MP3) |
| Output connector | 3.5 mm headphone jack socket |
| Presets | 10 for DAB and 10 for FM |
| Alarm functions | 4 programmable alarms, mode selection (DAB, FM, buzzer), snooze up to 6 times (30 min), adjustable volume |
| Sleep timer | Minutes: 15, 30, 45, 60, 75 or 90 |
| Remote control | Infrared supplied |
| Warranty | 1 year (parts and labor) - registration required |
| Compliance | CE, RoHS |
| Dimensions | Approximately 180 x 120 x 100 mm (estimated) |
| Weight | Approximately 0.5 kg (estimated) |
| Cleaning | Soft dry cloth; avoid solvents and water inside |
| Included accessories | Mains adapter, M-Port audio cable, remote control, manual |
Frequently Asked Questions - Uno 2 REVO
User questions about Uno 2 REVO
0 question about this device. Answer the ones you know or ask your own.
Ask a new question about this device
Download the instructions for your Hi-fi system in PDF format for free! Find your manual Uno 2 - REVO and take your electronic device back in hand. On this page are published all the documents necessary for the use of your device. Uno 2 by REVO.
USER MANUAL Uno 2 REVO
Benefits of DAB radio 3
Uno overview and key features 3
Warranty 3
Warranty registration 3
■ Controls and Connections 3
Powering Uno 3
Getting Started 4
Uno's Control Method 4
Uno's Menus Explained 4
LCD Brightness Setting 4
■ DAB Operation 5
Choosing a station 5
Change display mode 5
■ Menu Options 6
To change station order 6
■ Manual Tuning 6
Set DRC 6
DRC - Dynamic Range Control 6
Local and Full Scan 6
Favourite Station Presets 6
■ Alarm 7
Setting an alarm 7
Sleep mode 8
■ FM Operation 9
■ M-Port™ 9
■ Trouble-Shooting 10
■ Technical Specification 10
Preface
Copyright and Acknowledgements
Copyright © 2009 Revo Technologies Ltd. All rights reserved.
Revo Technologies Ltd
The Inox Building
Caldwellside
Lanark
Scotland
United Kingdom
ML11 7SR
Tel. 01555 666 161
Fax. 01555 66 33 44
Email. enquiries@revo.co.uk
Website: www.revo.co.uk
The information in this guide is believed to be correct at the time of publication. However, our policy is one of continuous development and so the information is subject to change without notice.
Revo®, UNO 2™ and M-Port™ are trademarks or registered trademarks of Revo Technologies Limited.
iPod®is a registered trademark of Apple Computer, Inc.
Safety Warnings

Do not operate this radio near water. Avoid small objects and liquids from getting into this product.
Do not remove screws or casing parts.
Use only the power supply unit supplied.
EEC: This product has been designed and type-tested to comply with EU requirements and carries a CE mark.
RoHS
COMPLIANT


Technical Support
Should you encounter any difficulties with the operation of your radio, or should you suspect that it may be faulty in some way, please call our technical support department on the number below:
01555 666 161
Alternatively, email support@revo.co.uk or visit the troubleshooting section of our website at: www.revo.co.uk/support
Welcome to Revo DAB
Thank you for buying our Uno digital radio, we feel sure that it will provide you with years of enjoyment and reliable service.
This guide has been designed to quickly get you up-and-running and listening to DAB and DAB+ digital radio, offer guidance on the more complex features of this product and provide information on safety, warranty and registration.
Benefits of Digital Radio
■ Clear, interference free digital sound
■ Many more stations, much more choice
■ No frequencies, select by station name
No re-tuning
■ Text information via LCD screen
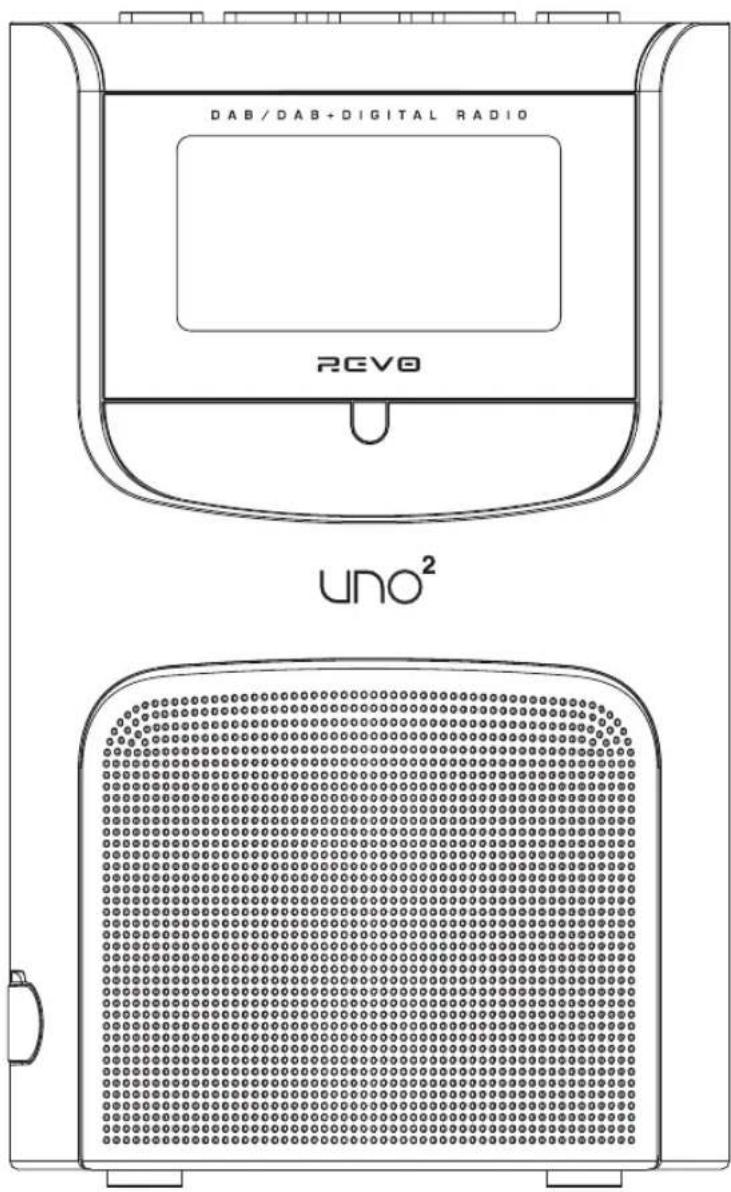
Uno Overview
Uno combines high quality DAB/DAB+ and FM radio reception with sophisticated alarm clock functionality including snooze and sleep features.
Uno can also be used as a high quality speaker system for your iPod™(or other MP3 player of external sound source).
Simply connect your device to Uno's MPort using the audio lead supplied.
Warranty
Revo Technologies Ltd warrants to the purchaser that this product will be free from parts and manufacturing defects in the course of normal use for a period of one year from the date of purchase.
This warranty does not apply in cases of accidental damage, where the case has been removed, wear and tear, negligence, modification or inappropriate use.
Should you encounter problems with this product, please contact your supplier or alternatively see page 2 of this guide for technical support contact details.
Warranty Registration
It is a warranty condition that you register your purchase by either completing the warranty card enclosed with your radio or alternatively registering online at www.revo.co.uk/register
Controls and Connectors
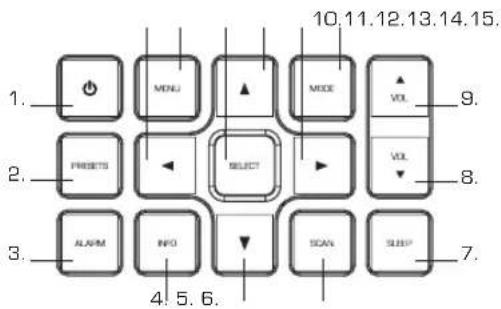
- Power
- Presets
- Alarm
- Info
- Down
- Scan
- Sleep
- Volume Down
- Volume Up
- Mode
- Forward
- Up
- Select
- Menu
- Back
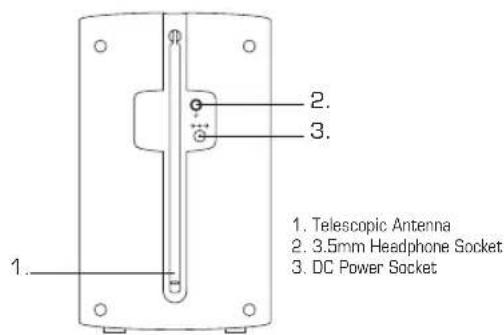
Powering Uno
Your Uno radio is powered from the mains using the power adaptor supplied.
Insert the power adaptor plug into the DC power socket on the rear of Uno. Pressing the ⏻ button will switch Uno on.
Only use the power adaptor supplied. Replacements are available, visit www.revo.co.uk for further details.

Getting Started
Uno is a sophisticated digital radio device, with several modes of operation and many advanced features.
In order for you to get the most out of Uno's functions, it is important that you learn how to use the cursor based control system, and also understand how Uno's menus work.
Uno's Control Method
Uno's control method is based around seven main keys as identified below.
Diagram of the four cursor keys and the select, menu and mode button
Label each of the keys as follows:
▲ Scroll Up:
Press to scroll through menu options
◀ Scroll Back:
Press to return to the previously selected menu entry. Repeatedly pressing will return you to the top level of the Mode menu [for the mode you are in].
▶ Scroll Forward:
When in text entry screens, this key can be used to navigate through the characters.
Uno's Menus Explained
Uno has three types of menu as follows:
Main Menu
This is Uno's principle (top level) menu, and allows you to enter different operating modes, setup the radio, and view information such as software version and your radio's ID number.
Mode Menus
The Mode menus are so called because they show the functions available within the context of each of the operating modes (internet radio mode, DAB mode, FM etc.).
It can also be used to move through to the next menu level.
▼ Scroll Down:
Press to scroll through menu options
SELECT – Press to select the current menu entry. In FM mode, pressing SELECT will initiate an FM scan.
Menu:
Press to enter (or return to) the Mode menu for the mode of operation you are currently in. Pressing for a second time will return you to the 'playing' screen.
Mode:
Sequentially cycles through each of the modes of operation.
Using these keys, you will be able to perform most functions and navigate through Uno's various menus
Pressing the MENU button at any time will take you to the Mode menu of the operating mode your radio is currently in. Each Mode menu includes a listing for Main Menu – selecting this option will return you to the top level Main Menu (as described above).
Main Menu
The Main menu provides access to the following modes and sub-menus:
DAB
System Setup
FM
Info
On powering-up Uno for the first time, you will be presented with this menu. To select
an option from the menu, simply use the ▲ or ▼ keys to move through the menu options, and press SELECT or ▶ to make a selection or move to the next menu level.
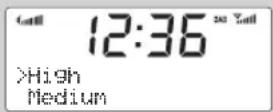
LCD Brightness Setting
■ Uno allows the user to individually define the LCD backlight brightness level for both its 'Standby' and 'Power-On' modes of operation.
■ There are three preset brightness levels to choose from, Low, Medium or High.
The 'Backlight' setting can be found in the 'System Setup' section of Uno's 'Main Menu'.
DAB Mode
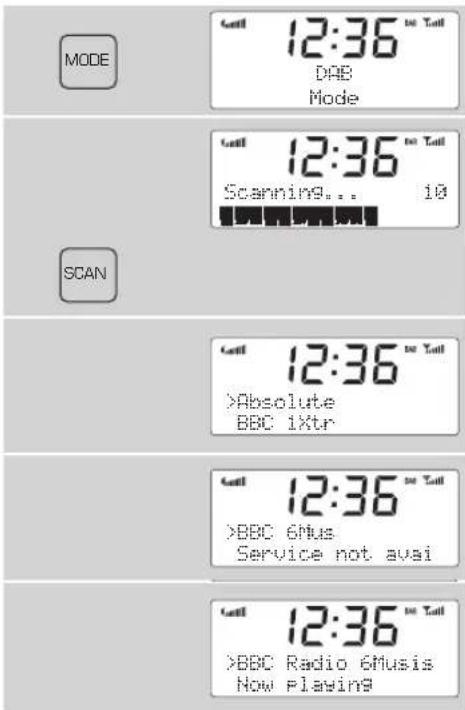
Choosing a Station
- Firstly ensure that you have extended Uno's telescopic antenna.
- Enter 'DAB Mode' from the Main Menu or by pressing the MODE key until 'DAB Mode' is displayed on Uno's display.
If this is the first time you have used Uno it will scan for DAB stations in your area and store them in memory. Uno will also set its clock and date at this point. - Pressing the SCAN button will manually instruct Uno to perform a station scan.
■ When the station scan has been completed, stations will be displayed in numeric then alphabetic order. The first station in the list will be selected.
If no DAB signal is found, try relocating your radio. Alternatively, it may be necessary to check that DAB coverage is available where you live.
■ Select your station choice by using the ▲ and ▼ cursor keys, scroll through the station list and press SELECT or ▶ the key to make your selection.
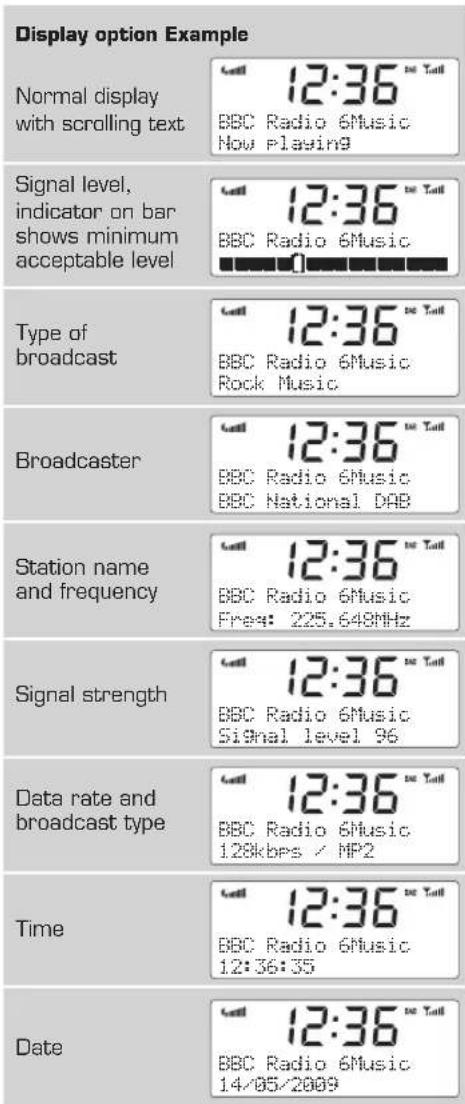
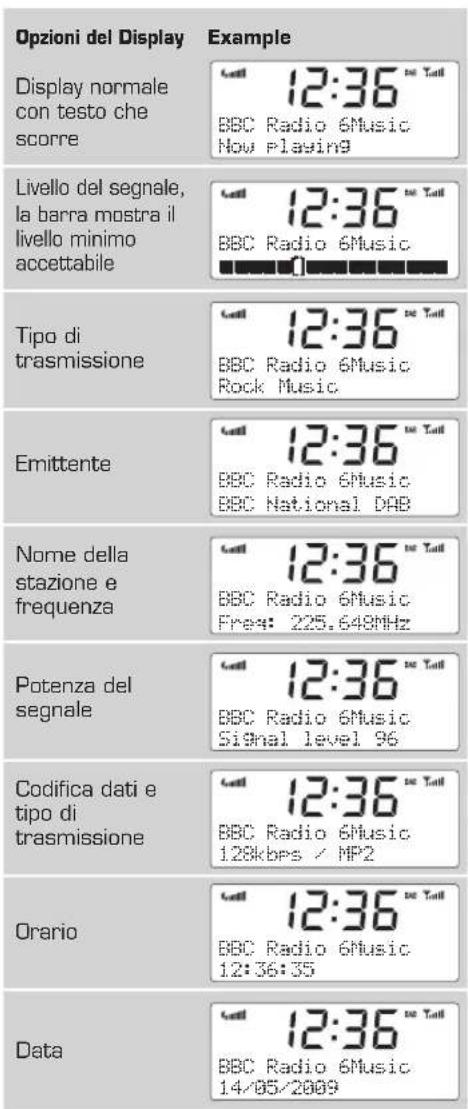
To Change the Display Mode
■ Uno has nine different display modes.
Simply press the INFO button to cycle through each mode. These display modes are explained in the table opposite:
DAB Mode Menu Options
Uno has a number of additional functions that are accessed through the DAB Mode menu, as follows:
Station Order
- Press the MENU key in DAB Mode then select 'Station order'.
To specify the order in which stations are displayed
■ Select the Station order option.
■ Use the ▲ and ▼cursor keys to scroll through the options, and press SELECT or the ▶key to make your selection.
The following table describes the options available under the 'Station Order' menu:
Station order Description
Alphanumeric Lists stations in alphabetical order.
Ensemble Lists stations by multiplex.
Valid Lists only active stations.
Manual Tune
- Choose the 'Manual tune' option from the DAB Mode menu.
The 'Manual tune' selection screen allows you to select a particular frequency to tune to. The list of frequencies displayed is dependant on the currently-set frequency band and contains all of the frequencies within that band. It starts with the short name of the frequency, for example 12B, and is followed by the actual frequency in MHz.
If there is a station corresponding to this station number and frequency, the display will show the name, frequency, and a tuning meter will show the signal strength.
DRC - Dynamic Range Control
■ Uno includes a dynamic range control that automatically boosts the volume of quieter sounds for listening in noisy environments.
The DRC control is found in the DAB Mode menu under 'DRC'. There are three pre-defined settings as follows:
DRC Description
DRC Low Dynamic Range Control is set to half
DRC High The recommended setting for noisy environments
DRC Off Dynamic Range Control is switched off
Local and Full Scan
As time passes, new stations will become available in your area. To find them and add them to your station list it is necessary to perform either a 'Local' or 'Full' scan. Both operations can be accessed via the DAB Mode menu.
A Local Scan performs a shorter scan of only the 'local' ensemble range.
■ A Full Scan will take longer, but will cover the complete DAB ensemble range.
Favourite Station Presets
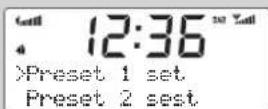
■ Uno allows you to store 10 favourite station presets, either via the 10 preset keys on Uno itself, or on the Uno remote control.
To save the station you are currently listening to as a preset, simply press the PRESET button and use ▲ and ▼ to find an unused location, then press SELECT to store.
To listen to a stored station press the PRESET button then use ▲ and ▼ to locate your desired preset.
Alarm Mode
Uno must have its clock and date set to use the alarm functionality.
To automatically set the time and date, tune to a DAB service and Uno will extract the correct time and date from the DAB broadcast stream. Alternatively, the time and date can be manually set via the 'Time Setup' option, this can be found under the 'System Setup' menu, which is located in the 'Main Menu."
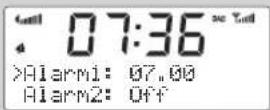
Setting An Alarm
■ Uno allows you to store up to four different alarm programmes in memory.
■ To set an alarm, press the ALARM button.
■ Uno will now ask you to choose which of the four alarm memories you'd like to use. Use the ▲ and ▼ keys too choose an alarm and press SELECT.
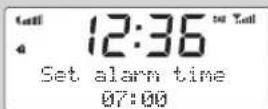
To set an alarm, use the ▲ and ▼ keys to choose one of the four available alarm memories, then press SELECT. To set the wake-up time use the ▲ and ▼ keys to scroll to 'Time', press SELECT, now use the ◀ and ▶ buttons, together with SELECT, to set the wake-up hour, before moving onto the minute setting. When your wake-up time has been set, press SELECT.
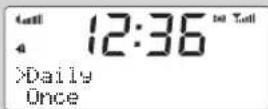
To set the alarm type, scroll to 'Days' and press SELECT. You will be given the option of Daily, Once, Weekdays or Weekends. Use the ▲ and ▼ to choose alarm type, the press SELECT to confirm.
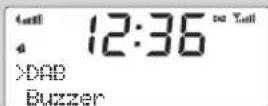
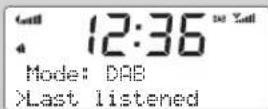
■ You can now decide whether you would like to be woken up by DAB, FM or Buzzer. To choose the wake-up mode press the ▼key to scroll through the options, then press SELECT.
If you have chosen to wake-up to DAB or FM, you can choose to wake-up to the last station you were listening to.
Alternatively you can decide to be woken up by a station held as one of your presets. You will be asked to choose the particular preset number. Use the ▲ and ▼ keys to navigate through the preset list, then press SELECT to set your choice.
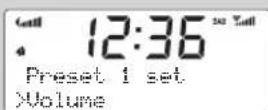
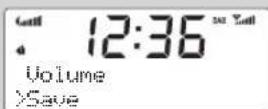
■ You will now have the option to set the wake-up volume for your alarm. Scroll to 'Volume', press SELECT then use the ▲ and ▼ keys to adjust the volume, then press SELECT to set.
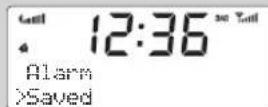
■ Finally, you should select 'Save' from the menu to complete your alarm programme.
- When Uno has an active alarm in its memory, the alarm icon will appear on the top line of Uno's display at all times.
ALARM
Halting An Alarm
To halt an alarm, press any button on Uno's keypad. Alternatively, tap the SNOOZE button to mute the alarm for a period of 5 minutes.
■ Uno will allow you to activate the Snooze feature up to 6 times (30 minutes).
■ When Uno is in Snooze mode, the Snooze icon will be displayed on-screen, together with the current time and remaining Snooze period.
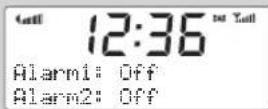
Editing An Alarm
■ To turn off a pre- saved alarm, press the ALARM button then use the ▲and ▼keys to locate the correct alarm, then press SELECT.
■ You can now choose to turn the active alarm OFF, or edit any of the other settings such as wake-up time, wake-up mode or alarm volume.
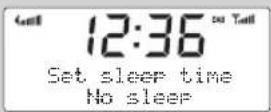
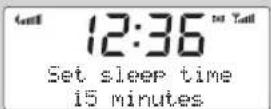
Sleep Mode
Setting A Sleep Period
It is possible to programme Uno to turn off after a pre-defined period of time. To do so, select the 'System Setup' option from the Main Menu.
Now select the 'Time setup' option. Within this menu select 'Sleep'.
■ Now, using the ▼ and ▲keys, you can select a sleep time period of 15, 30, 45, 60, 75 or 90 minutes.
■ Uno will now automatically put itself into standby mode after the time has elapsed.


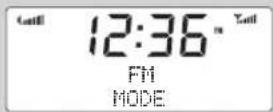
FM Mode
FM Operation
■ Extend the telescopic antenna found on the rear of Uno.
- Enter 'FM Mode' from the Main Menu or by pressing the MODE key until 'FM Mode' is displayed on Uno's LCD display.
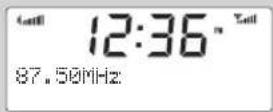
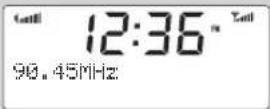
If this is the first time Uno has been in FM mode, it will start at the beginning of the FM frequency range. Otherwise, the last FM station you were listening to will be selected.
■ To scan through the FM frequency range press the ▲ and ▼buttons.
■ To 'SEEK' the next active station, press the SELECT button.
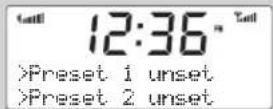
Favourite Station Presets
■ Uno allows you to store 10 favourite station presets, either via the 10 preset keys on Uno itself, or on the Uno remote control.
■ To save the station you are currently listening to as a preset, simply press the PRESET button and use ▲ and ▼ to find an unused location, then press SELECT to store.
■ To listen to a stored station press the PRESET button then use ▲ and ▼ to locate your desired preset, the press SELECT
MODE

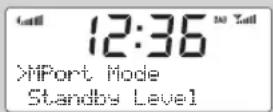
MPort Mode
Using MPort
■ Revo's MPort connector allows for quick and easy connection of an iPod®, similar MP3 player or sound source.
■ Using the connection lead supplied, Uno is transformed into a high quality digital audio speaker system.
■ Connect one end of the supplied audio lead to the headphone (or auxiliary out) socket of your source device, then connect the other end to the MPort on the side of Uno.
■ Uno's LCD screen will now display the word 'MPort' on its screen.
- You should adjust the output volume level on both the source device and on Uno itself to gain optimal volume levels and sound performance.
natural_image
Line drawing of a pipe joint with a small valve inserted, no text or symbols present
Trouble-Shooting
DAB Digital Radio
a. I hear a 'burbling' noise on some stations.
A. If the signal strength is too low, a break-up in reception can occur. This sound is the result. Make sure that Uno's antenna is fully extended and in an upright position. If the problem persists, move Uno to another location or check that you are in an area where reception of this station is possible.
Q. I get a 'No stations available' message?
A. Make sure that your antenna is fully extended and vertical. Check the signal strength and move Uno to another location if necessary.
Q. Uno's clock isn't set.
A. Uno needs to be able to pick-up a DAB signal or have its clock set manually. If Uno can find a DAB station, it can then set its clock.
Factory Reset
In the unlikely event that Uno performs erratically, it is possible to perform a software reset to restore the original factory settings. The factory reset option can be found under the System Setup heading, which itself can be found under the Main Menu.
Technical Specification
■ General: Mono DAB and FM radio with full Band III reception.
■ Speaker: 2" full-range neodymium, 8W power handling
■ Audio Power Output: 2W
■ Frequency Ranges: DAB Band III [174 - 240 MHz] DAB+ coverage FM (87.5 - 108 MHz)
■ Antenna: Integral telescopic aerial
■ Input Connectors: DC power adaptor socket (230V adapter supplied) 3.5mm line-in for auxiliary devices (M-Port)
■ Output Connector: 3.5mm headphone socket
■ LCD Display: Double height, high resolution negative display with digital clock, status icons and two information lines
■ Alarm Clock: Alarm clock with snooze and sleep functions
■ Presets: 10 x DAB and 10 x FM presets
■ Remote Control: Infra-red remote control
■ Mains Power Supply: 12V 1.2mA
■ Approvals: CE marked and RoHS compliant.
■ Dimensions: 167mm (H) x 105mm (W) x 105mm (D)
REVO®
uno²
■ Operating Guide
Revo Technologies Ltd
The Inox Building
Caldwellside
Lanark
Scotland
United Kingdom
ML11 7SR
Tel. 01555 666 161
Fax. 01555 66 33 44
Email. enquiries@revo.co.uk
Website: www.revo.co.uk
Assistance technique

commande de station Description
natural_image
Line drawing of a pipe joint securing a car trunk (no text or symbols)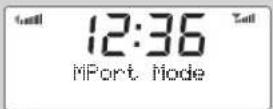
Dépannage
Radio digitale DAB
■ Dimensions: 167mm (H) x 105mm (L) x 105mm (P)
REVO®
uno²

■ Operating Guide
Revo Technologies Ltd
The Inox Building
Caldwellside
Lanark
Scotland
United Kingdom
ML11 7SR
Tel. 01555 666 161
Fax. 01555 66 33 44
Email. enquiries@revo.co.uk
Website: www.revo.co.uk
www.revo.co.uk/support
natural_image
Line drawing of a pipe joint securing a corner component (no text or symbols)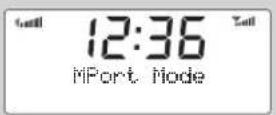
Problemlösungen
DAB Digitalradio
Revo Technologies Ltd
The Inox Building
Caldwellside
Lanark
Scotland
United Kingdom
ML11 7SR
Tel. 01555 666 161
Fax. 01555 66 33 44
Email. enquiries@revo.co.uk
Sito web: www.revo.co.uk
natural_image
Line drawing of a pipe joint with a small valve inserted, no text or symbols present
Radio is our Religion
natural_image
Technical line drawing of a mechanical component with mounting holes and a central vertical shaft (no text or symbols)Revo Technologies Ltd The Inox Building Caldwellside Lanark Scotland United Kingdom ML11 7SR
Telephone Support 01555 666 161
Online Support www.revo.co.uk/support support@revo.co.uk
- ■ Controls and Connections 3
- Getting Started 4
- ■ DAB Operation 5
- ■ Menu Options 6
- ■ Manual Tuning 6
- ■ Alarm 7
- ■ FM Operation 9
- ■ M-Port™ 9
- ■ Trouble-Shooting 10
- ■ Technical Specification 10
- Preface
- Copyright and Acknowledgements
- Safety Warnings
- Technical Support
- 666 161
- Welcome to Revo DAB
- Benefits of Digital Radio
- Uno Overview
- Warranty
- Warranty Registration
- Controls and Connectors
- Powering Uno
- Getting Started
- Uno's Control Method
- Uno's Menus Explained
- Main Menu
- Mode Menus
- Menu:
- Mode:
- LCD Brightness Setting
- DAB Mode
- Choosing a Station
- To Change the Display Mode
- DAB Mode Menu Options
- Station Order
- To specify the order in which stations are displayed
- Station order Description
- Manual Tune
- DRC - Dynamic Range Control
- DRC Description
- Local and Full Scan
- Favourite Station Presets
- Alarm Mode
- Setting An Alarm
- Halting An Alarm
- Editing An Alarm
- Sleep Mode
- Setting A Sleep Period
- FM Mode
- FM Operation
- MPort Mode
- Using MPort
- Trouble-Shooting
- DAB Digital Radio
- Factory Reset
- Technical Specification
- REVO®
- uno²
- Assistance technique
- Dépannage
- Radio digitale DAB
- Problemlösungen
- DAB Digitalradio
- Radio is our Religion
Brand : REVO
Model : Uno 2
Category : Hi-fi system