USER MANUAL AMBT67 AKAI
natural_image
Exterior view of a modern audio workstation with two black speakers and a central monitor (no visible text or symbols)
AMBT-67
Lire attentivement la notice avant d' utiliser l' appareil
Before operating this product, please read user manual completely
Lea atentamente el manual del usuario antes de utilizar el aparato
Lees de handleiding voordat u deze apparaat
Lesen Sie die Bedienungsanleitung bevor Sie das Gerät gebrauchen.
INTRODUCTION
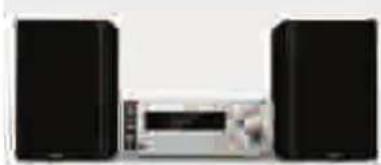
Merci d'avoir achetÈ notre AKAI AMBT-67 MICRO CHAINE BLUETOOTH AVEC FONCTION NFC, CD, PORT USB ET CARTE MEMOIRE.
...TI QUETTE DU PRODUIT LASER DE CLASSE 1 :
natural_image
Two black audio/video equipment units with a central screen and microphone (no visible text or symbols)
AMBT-67
TÉIÈcommande
díinstructions
C, ble audio
Manuel
natural_image
Pure electrical circuit lines without any symbols
flowchart
graph TD
    A["Before charging"] --> B["Charging Battery"]
    B --> C["Charging Device"]
    C --> D["After charging"]
    D --> E["Output: 120A battery with + and - polarity indicators"]
Notes:
POUR UNE R...CEPTION FM OPTI MALE
FONCTION NFC (Suite)
natural_image
Simple line drawing of a mechanical component or housing (no text or symbols)

ACCESSOI RES Multifunction Remote Control
(Pile: 2 x AAA ñnot included)
Poids Net 5.182 kg
Dimensions de liappareil 247x83x230mm
Dimensions de líenceinte 150x220x180mm
Thank you for purchasing the AKAI AMBT-67: MICRO SYSTEM BLUETOOTH with NFC function Digital FM tuner ñ CD MP3 ñUSB compatible.
This is your assurance of quality, performance and value. Our engineers have included many useful and convenient features in this product. Please be sure to read this instruction Manual completely to make sure you are getting the maximum benefit from each feature.
This product was manufactured using the highest quality components and standards of workmanship. It was tested by inspectors and found to be in perfect working order before it left our factory. For future reference, record the serial number in the space provided.
Model No: AKAI AMBT-67:
Serial Number:
WARNINGS
TO PREVENT FIRE OR SHOCK HAZARD DO NOT EXPOSE THIS APPLIANCE TO RAIN OR MOISTURE.


LIGHTNING FLASH WITH ARROWHEAD SYMBOL -
Within an equilateral triangle, is intended to alert the user to the presence of uninsulated dangerous voltage within the products enclosure that may be of sufficient magnitude to constitute a risk of electric shock to persons.
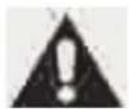
EXCLAMATION POINT - within an equilateral triangle is used to indicate that a specific component shall be replaced only by the component specified in that documentation for safety reason.
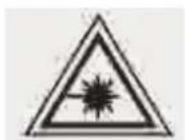
The following label has been affixed to the unit, listing the proper procedure for working with the laser beam:
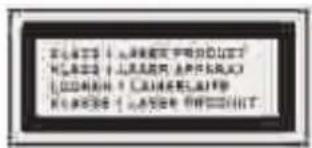
CLASS 1 LASER PRODUCT LABEL ñ
This label is attached to the place as illustrated to inform that the apparatus contains a laser component.

WARNING LABEL INFORMING OF RADIATION - This label is placed inside the unit. As shown in the illustration. To warn against further measures on the unit. The equipment contains a laser radiating laser rays according to the limit of laser product of class 1.

This equipment is a Class II or double insulated electrical appliance. It has been designed in such a way that it does not require a safety connection to electrical earth.
- READ INSTRUCTIONS --- All the safety and operating instructions should be read before the product is operated.
- RETAIN INSTRUCTIONS --- The safety and operating instructions should be retained for future reference.
- HEED WARNINGS --- All warnings on the product and in the operating instructions should be adhered to.
- FOLLOW INSTRUCTIONS --- All operating and use instructions should be followed.
- CLEANING --- Unplug this product from the wall outlet before cleaning. Do not use liquid cleaners or aerosol cleaners. Use a damp cloth for cleaning.
- WATER AND MOISTURE --- Do not use this product near water - for example, near a bath tub, wash bowl, kitchen sink, or laundry tub; in a wet basement; or near a swimming pool; and the like.
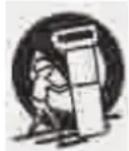
- ACCESSORIES --- Do not place this product on an unstable cart, stand, tripod, bracket, or table.
The product may fall, causing serious injury to a child or adult and serious damage to the product.
Use only with a cart, stand, tripod, bracket, or table recommended by the manufacturer, or sold with the product. Any mounting of the product should follow the manufacturer instructions, and should use a mounting accessory recommended by the manufacturer. A Product and Cart Combination should Be Moved with Care - Quick stops, excessive force and uneven surfaces may cause the product and cart combination to overturn.
- VENTILATION --- Slots and openings in the cabinet are provided for ventilation and to ensure reliable operation of the product and to protect it from overheating, and these openings must not be blocked or covered. The openings should never be blocked by placing the product on a bed, sofa, rug or other similar surface. This product should not be placed in a built-in installation, such as a bookcase or rack, unless proper ventilation is provided or the manufacturer* instructions have been adhered to.
- POWER SOURCES --- This product should be operated only from the type of power source indicated on the marking label. If you are not sure of the type of power supply to your home, consult your product dealer or local power company. For products intended to operate from battery power, or other sources, refer to the operating instructions.
- POWER-CORD PROTECTION --- Power-supply cords should be routed so that they are not likely to be walked on or pinched by items placed upon or against them, paying particular attention to cords at plugs, convenience receptacles, and the point where exit from the product.
- NON-USE PERIODS --- The power cord of the product should be unplugged from the outlet when left unused for long periods of time.
- LIGHTNING --- For added protection for this product during a lightning storm, or when it is left unattended and unused for long periods of time, unplug it from the wall outlet and disconnect the antenna or cable system. This will present damage to the product due to lightening and power-line surges.
- POWER LINES --- An outside antenna system should not be located in the vicinity of overhead power lines or other electric light or power circuits, or where it can fall into such power lines or other electric light or power circuits, or where it can fall into such power lines or circuits. When installing an outside antenna system, extreme care should be taken to keep from touching such power lines or circuits as contact with them might be fatal.
SAFETY INSTRUCTIONS
- OVERLOADING --- Do not overload wall outlets, extension cords, or integral convenience receptacles as this can result in a risk of fire or electric shock.
- OBJECT AND LI QUID ENTRY --- Never push objects of any kind into this product through openings as they may touch dangerous voltage points or short-out parts that could result in a fire or electric shock. Never spill liquid of any kind on the product.
- SERVI CING - Do not attempt to service this product yourself as opening or removing covers may expose you to dangerous voltage or other hazards. Refer to all servicing to qualified service personnel.
- DAMAGES REQUI RING SERVICE - Unplug this product from the wall outlet and refer servicing to qualified service personnel under the following conditions.
a) When the power-supply cord or plug is damaged.
c) If the product has been exposed to rain or water.
b) If liquid has been spilled, or objects have fallen into the product.
d) If the product does not operate normally by following the operating instructions. Adjust only those controls that are covered by the operating instructions as an improving adjustment of other controls may result in damage and will often require extensive work by a qualified technician to restore the product to its normal operation.
e) When the product exhibits a distinct change in performance - this indicates a need for service.
18. REPLACEMENT PARTS - When replacement parts are required, be sure the service technician has used replacement parts specified by the manufacturer or have the same characteristics as the original part, Unauthorized substitutions may result in fire electric shock and other hazards.
19- HEAT the product should be situated away from sources such as radiators, heat registers, stoves or other products that produce heat
PREPARATION FOR USE
Unpacking and set up
natural_image
Two black audio/video equipment units with a central display unit (no visible text or symbols)
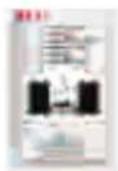
The Micro system
Remote Control
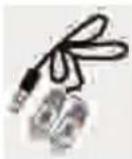
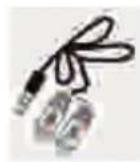
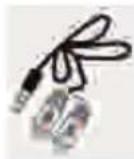
Audio cable
User manual
- Carefully remove all the components from the carton and remove all packing materials from the components. Make sure noting is accidentally discarded with the packing materials.
- Save the carton and the packing materials, if possible, in the unlikely event that the unit ever needs to be returned for service. Using the original carton and packing material is the only proper way to protect the unit from shipping damage.
- Unwind the AC power cord on the back of the main unit and extend it to its full length.
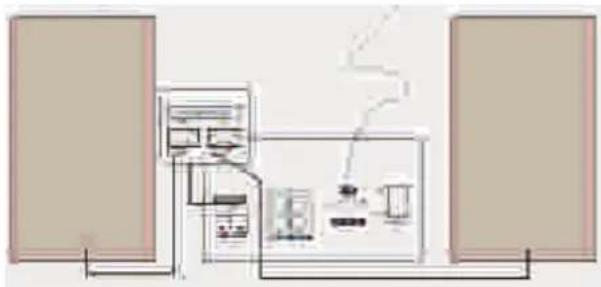
CONNECTIONS
- Check if the power voltage, as shown on the type plate located on the back of the set, corresponds to your local AC power supply. If it does not, consult your dealer or service centre.
- Connect the speakers to the unit
Connect the speaker cables to the front speaker terminals. Connect the black end of each wire to the marked-(minus) and the other end to the terminals \ marked + (plus) terminals.
- Connect the speakers to the unit
Connect the speaker cables to the front speaker terminals. Connect the black end of each wire to the marked-(minus) and the other end to the terminals \ marked + (plus) terminals.
flowchart
graph TD
    A["Speaker 1"] --> B["Central Unit"]
    C["Speaker 2"] --> B
    B --> D["Gas Collection"]
    D --> E["Reactor Unit"]
    E --> F["Output"]
    style A fill:#f9f,stroke:#333
    style C fill:#f9f,stroke:#333
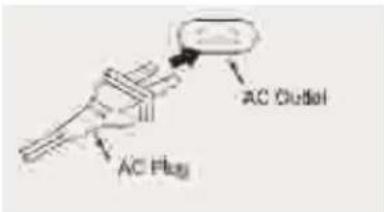
- Connect the power cord to the wall outlet. The power supply is now connected and ready for use.
-
To switch off completely, turn off the main power on/off button and unplug the power cord from the wall outlet.
-
Unplug the power cord from the wall outlet to protect your set during heavy thunderstorms.
- If electric cable is damaged, it must be replaced by manufacturer, or by the qualification persons, in order to avoid a danger.
• The mains plug is used as disconnect device, the disconnect device shall remain readily operable.
FM ANTENNA CONNECTION
Hints for Better FM Reception:
The FM lead wire antenna on the back panel should be extended to its full length. You may also have to vary the direction of this antenna until you find the position that provides the best reception.
STEREO HEADPHONE JACK
This system includes a stereo PHONES jack on the front panel of the main unit. You may connect a set of stereo headphones, not included, to this jack for private listening without disturbing others.
The main unit speakers are automatically shut off when headphones are connected to the PHONES jack. Make sure that the plug from your headphones is fully inserted into the headphone jack. If the plug is not fully inserted the sound may be intermittent, or you may only hear sound from one side of the headphones.
IMPORTANT: To prevent hearing damage always set the volume control to a low level before you connect the headphones. Then connect the headphones, put them on, and very gradually increase the volume to a comfortable listening level. Remember that CDs may contain both very soft and very loud passages. Adjust the volume to a comfortable level using a louder passage, so that you always know what the maximum level will be.
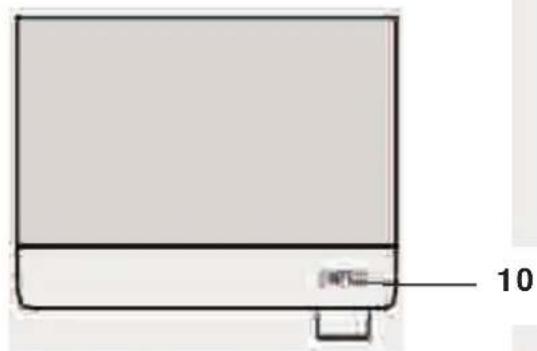
FRONT VIEW TOP VIEW
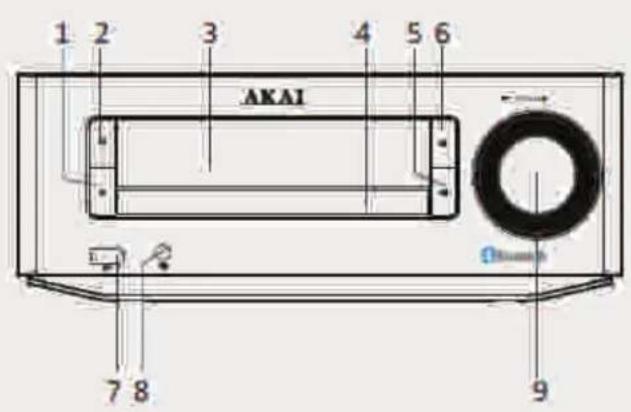
1.STOP
2.POWER
3.VFD DISPLAY
4.CD DOOR
5.PLAY/PAUSE
- OPEN/CLOSE
7.USB
8.EARPHONE
9.VOLUME
10.NFC SENSOR
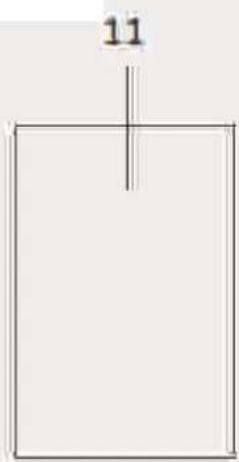
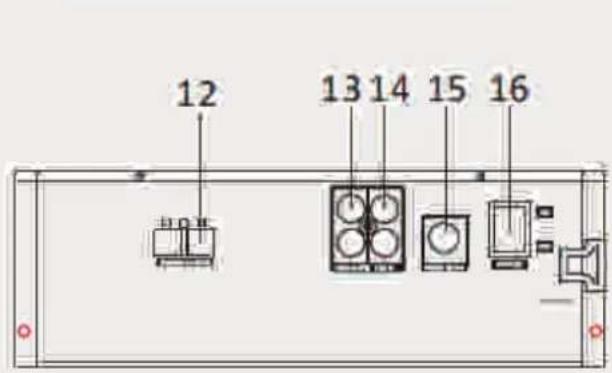
REAR VIEW
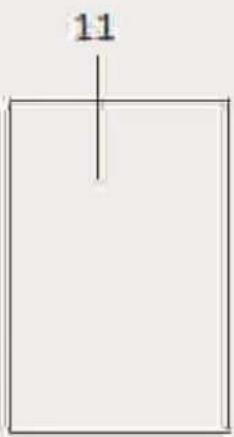
11.SPEAKER
12. SPEAKER OUTPUT
13. AUDIO OUTPUT
14.LINE IN
15.FMANT
16.POWER SWICH
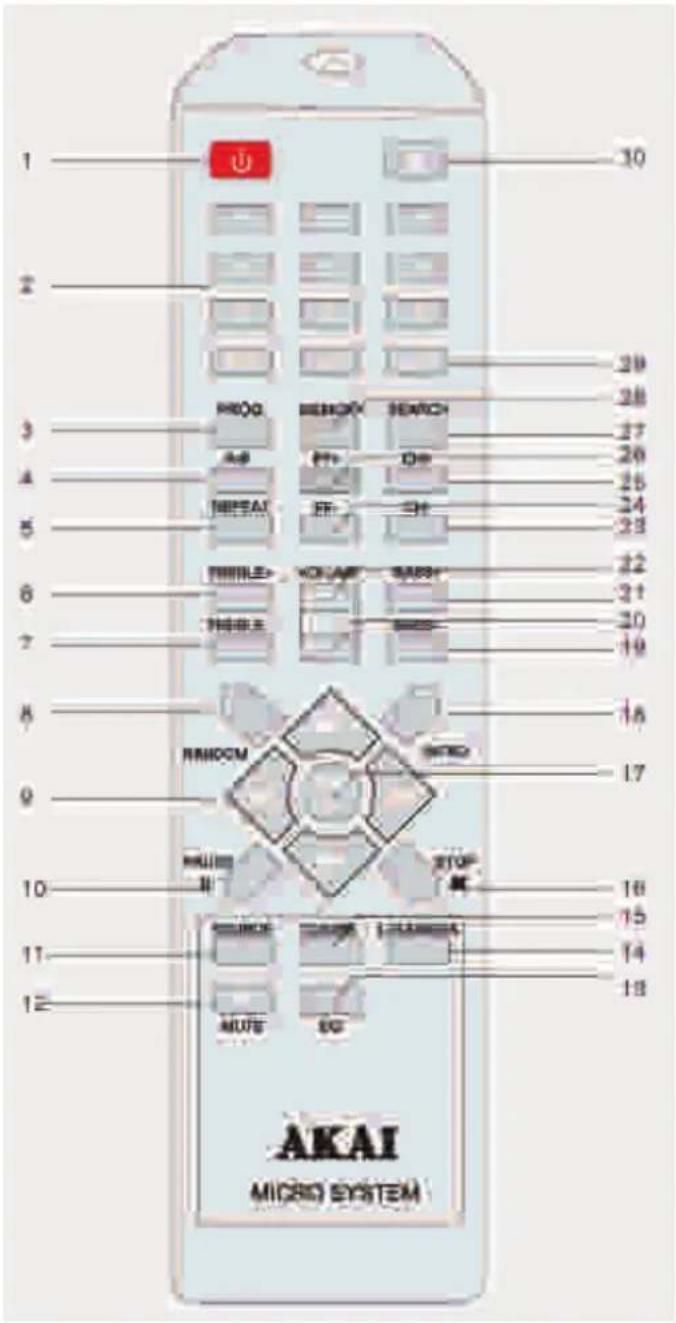
DESCRIPTION OF REMOTE CONTROL
- Even if the remote control is operated within the effective range, its operation may be impossible if there are any obstacles between the appliance and the remote control.
- If the remote control is operated near other appliances which generate infrared rays, or if other remote control devices using infrared rays are used near the appliance, it may operate incorrectly.
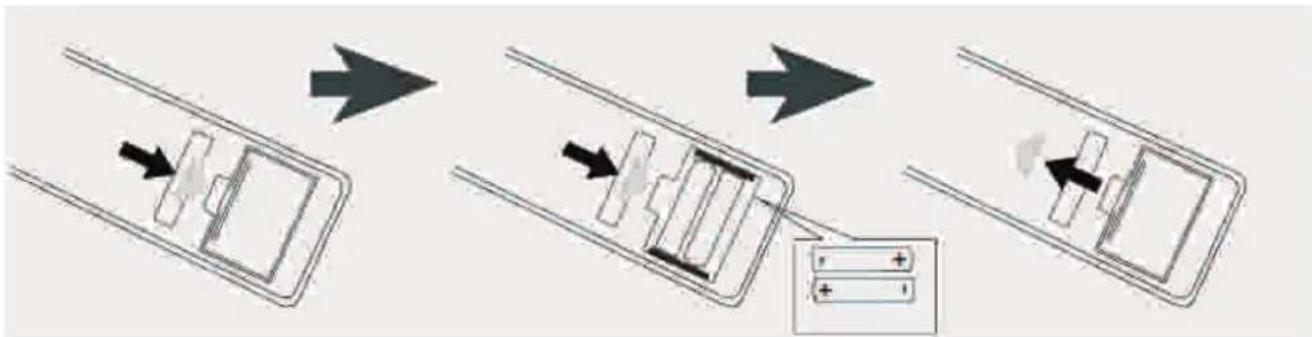
BATTERY INSTALLATION
Insert 2 AAA TYPE batteries (not included) into the battery compartment. Be sure that the battery is inserted correctly to avoid damage to the remote control. Always remove the battery when the remote control will not be used for a long period of time, as this will cause leakage to the battery and subsequently damage to your set.
BATTERY INSTALLATION
Slide out cover and install 2 AAA TYPE batteries (not included) with polarities as shown:
flowchart
graph TD
    A["Before charging"] --> B["Charging with battery"]
    B --> C["Charging with battery discharging"]
    C --> D["After charging"]
    D --> E["After discharging"]
Notes:
- If the distance required between the remote control and the appliance decreases, the batteries are exhausted. In this case replace the batteries with new one.
- Power button on main unit must be Oni in order for Remote Control to operate.
- To turn on the micro system, press the ⏻ button on front panel of the unit or on the remote control.
- To turn off the micro system, press the ⏻ button again.
- You can also press the MUTE button on the remote control to turn off the sound temporarily, for example, when answer the telephone.
Press the MUTE button again to cancel the mute function and restore the sound.
- The mute function will also be cancelled automatically by pressing the VOLUME + or ñ buttons.
Press the SOURCE button repeatedly to switch among CD/ TUNER/ LINE IN / BT modes. To select the USB mode please select the CD MODE and press CD/ USB button on remote control to switch into USB mode.
VOLUME LEVEL
Turn the VOLUME knob on front panel or press VOL + / VOL - buttons on remote control to adjust the volume level.
TREBLE ADJUSTMENT
Press TREBLE + or TREBLE - button on remote control to adjust the treble effect.
BASS ADJUSTMENT
Press BASS+ or BASS- button on the remote control to adjust the bass effect.
EQ
Press the EQ button on the remote control to cycle through the following equalizer settings: Rock-Pop-Jazz-Classic
LOUDNESS
Press LOUDNESS button to enhance the bass level immediately when bass is not enough.
GENERAL OPERATION
You can play in your Micro System your audio CD and MP3, CD-R. Please do not try to play CD-ROM, CD-I, VCD or DVD.
- Open the disc tray by pressing ▲ OPEN/ CLOSE button on the unit or on the remote control.
- Insert the CD with the printing side facing up and close gently the disc tray by pressing again ▲ OPEN/ CLOSE.
- Press SOURCE button to select the CD MODE.
- Press ▶ to start the CD playback; for AUDIO CD, playback starts automatically.
- Press ■ stop button on unit or on remote control to stop playback.
Searching for a section within a CD
During playback, press and hold 7 /8 on the remote control to find a specific passage within the track and release it at the point you want to listen to.
Select another track or file
Press ◀◀◀ or ▶▶button on the remote control to select a particular track.
Listening to your tracks (files) repeatedly
- Press REPEAT button repeatedly to activate the REPEAT function in following order: REPEAT 1 - REPEAT ALBUM (* MP3 MODE ONLY)- REPEAT ALL-OFF -
Listening to your tracks (files) randomly
- Press RANDOM button to play tracks in a random order.
A-B function
During CD/ MP3 DI SC playback, you can press AB button on remote to start from the point A (time point you pressed), and ended point B when you press AB button again and music will play repeatedly from A to B.
Intro function
This feature allows you to play the 10 first seconds of each track on the disk.
Load the disc and wait until the display shows the total playing time and number of tracks. Press
INTRO button on remote control to activate the function, press again to cancel the function.
PROGRAM
Creating your own playlist
You can play up to 20 tracks on a CD in order.
- Insert a CD and wait for to be read
- Press PROG button on the remote control in STOP status.
- Press ▶▶/ ▶ on the unit or on the remote control to select the track you want to program. Press PLAY button on remote or on front panel of the unit to confirm your selection.
- Press ▶ on the unit or ▶ on the remote control to play the programmed music files.
About MP3/ WMA
MP3/ WMA Disc compatibility with this unit is limited as follows:
Sampling Frequency: 32-48 (MP3/WMA)
Bit rate: 32-320kbps (MP3), 40-320kbps (WMA)
Do not use special letters such as / :* ?< > etc
Even if the total number of files on the disc has more than 1000, it will only be shown up to 999.
RADIO OPERATION
- Press SOURCE button on remote control to select TUNER MODE.
- Tune to the desired radio station by using ▶/|◀/◀/▶ or CH- / CH+ / FF- / FF+ for a manual tuning.
- For AUTO TUNING, press ▶ button on the unit or SEARCH (27) button on remote control to enter in automatic searching radio station mode.
For a best FM reception
i Make sure that you have fully extended the FM antenna wire.
[]
Preset Radio Stations:
You can store up to 40 of your favorite stations in the tuner memory for easy recall at any time.
1) Press SOURCE button on remote to select TUNER, and press GOTO button, the LCD will display i____: __^ digital input mode, please input FM frequency of the radio station that what you want to listen.
For example: 106.20, after input station frequency by using the number buttons, press PLAY button to confirm.
2) Once the desired radio station is tuned, press MEMORY button on remote control, LCD will display i CH_ _i; input the preset number you want to store the radio station.
How to recall presets radio stations
Press GOTO button on remote control, LCD will display i CH_ _i, and press the preset number of the radio station to recall it. For example, press 1 to play the radio station you preset in position 1.
If the preset number is above 10, press +10 button on remote control and number key to input second digit preset number.
The unit can be used to play the music from many types of external device
- Connect by using a 3.5mm Male-to-Male Stereo cable the external device to the LINE IN connector/jack of the unit.
If your TV has only one output for audio (MONO). Connect it to the left (white) audio jack on the unit.
- Press SOURCE repeatedly to select the LINE IN MODE.
- Start playback on the external audio device. Adjust the volume on the audio device (do not set the volume to a high level in order to avoid distortion). You may also adjust the volume on the appliance.
To control playback function, use the controls on the external audio device.
USB OPERATION
□
- Connect the USB device to the USB port of the unit.
- Select the USB MODE by pressing CD/USB on your remote control
- Select a file you want to play using ▶/◀◀/◀◀/▶ or directly thanks to number keys.
- Press ▶ on remote control or on the unit to start the playback.
- Turn the VOLUME knob or press VOL+ / VOL-to increase or decrease volume level.
- Press ■ stop button on unit or on remote control to stop USB playback.
- Before disconnecting the USB device, change the source by pressing SOURCE button.
Compatible USB Device:
Mp3 player: Flash type Mp3 player.
USB Flash Drive: Devices that support USB2.0 or USB 1.1.
The USB function may not be available depending on device.
Device which require additional program installation when you have connected it to a computer, are not supported.
For a large USB capacity, it may take longer than a few minutes to be searched.
To prevent data loss, back up all data.
If you use a USB extension cable or USB hub, the USB device is not recognized.
Using NTFS file system is not supported. (Only FAT (16/32) file system is supported)
This unit is not supported when the total number of files is 1000 or more.
External HDD, locked devices or hard type USB devices are not supported.
PROGRAM MODE
The operation of PROGRAM MODE are as the same as that of CD / MP3. Please refer to CD / MP3 OPERATION section paragraph PROGRAM.
BLUETOOTH OPERATION
Note: Prior to use Bluetooth function, your AKAI micro system should be paired firstly with your Bluetooth device. (i Pairing ^i means establish connection between Bluetooth devices such as MOBILE PHONE, TABLETS, PC, ETC.)
- Press the iSOURCEi button to switch into the BLUETOOTH MODE, iBTi displays on the LCD.
- In Bluetooth mode, the blue status indicator flashes three times, then 2 beep sounds, the status indicator goes RED & flashes, AKAI micro system enters automatically searches for Bluetooth device.
- Turn on Bluetooth functionality on your device and make it discoverable (see your device's instructions to add or setup a Bluetooth device).
- Search for Bluetooth equipment i AMBT-67i is your AKAI micro system identification. Red status indicator switches to blue lighting which means that devices are successfully paired. (During the paring, if the Bluetooth Version is below 3.0, you need to input code i0000i) Your Bluetooth device stores the AKAI micro system unique identification at the same time.
NOTE: The effective range of Bluetooth devices is 10 meters.
Once paired, your device should connect to the AMBT-67 whenever within the Bluetooth range (10 meters).
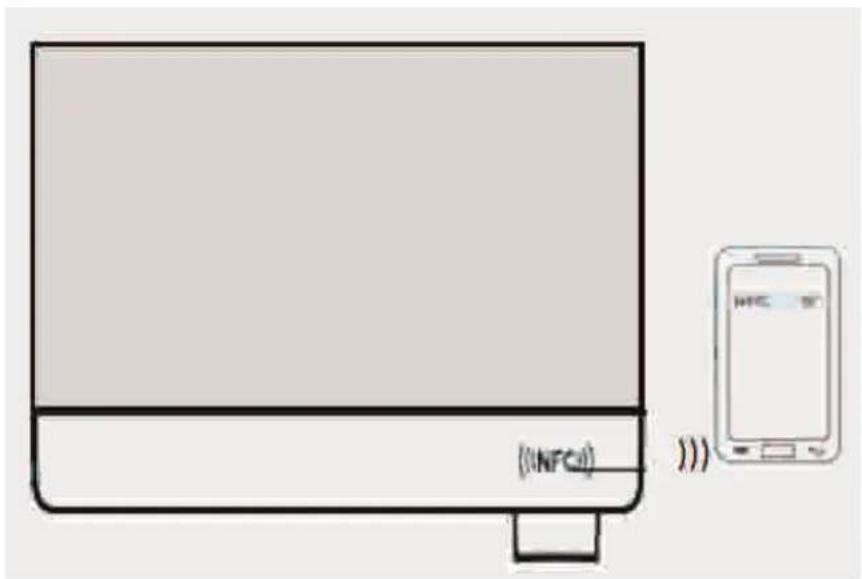
NFC FUNCTION
Using NFC (Near Field Communication), you can transfer your music from your phone to your Bluetooth device including NFC feature.
The maximum reading distance is about 1 cm, which prevents unauthorized communications.
Connection procedure
- Please press SOURCE button on remote to switch into Bluetooth mode
- Before connecting, make sure your connecting devices (e.g. phone or Tablet) with NFC technology.
- Set your connecting devices (e.g. phone or Tablet) into Bluetooth working mode.
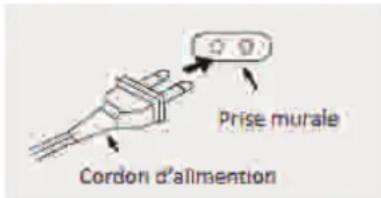
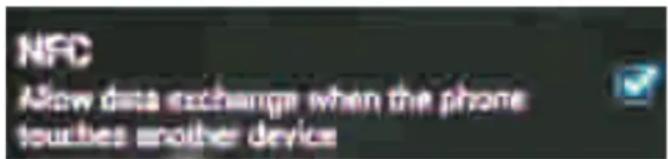
- Set your connecting devices (e.g. phone or Tablet) in to NFC working mode. For all the devices with NFC, you will find NFC setting on your device, confirm setting i Allow data exchange when it touches another deviceî. Please refer to below photo from the cell phone.
BLUETOOTH OPERATION
NFC FUNCTION (CONTINUATION)
-
When the NFC working mode of AMBT-67S and connecting devices (e.g. phone or Tablet) are activated, please put your connecting devices (e.g. phone or Tablet) on the top right side of the AMBT-67S unit (NFC sensor area). When you hear the sound i Di Daî from the AMBT-67S, that means AMBT-67S unit has been connected to your connecting devices (e.g. phone or Tablet) automatically. Then you can play the music through AMBT-67S unit from your phone or Tablet.
-
If want to disconnect NFC, please refer to step 5. Put your connecting devices (e.g. phone or Tablet) on the top right side of the AMBT-67S unit (NFC sensor area), when the sound i Di Daî is out again, that means NFC has been disconnected. Below photo for your reference.
| ACER | Acer E320, Liquid Express, Acer Liquid Glow |
| Alcatel | One Touch 922 |
| Black berry | BlackBerry Bold 9790, BlackBerry Bold , 9900 and 9930BlackBerry Curve9350, Curve 9360BlackBerry Curve 9380, BlackBerry PlayBookBlack berry Porsche Design P'9981 |
| C-mii 1 | C-mii 3 |
| Casio | Casio I T-800 |
| Fujitsu | Fujitsu Arrows F-07D |
| Google | SamsungGalaxy NexusGoogle Nexus 7Google Nexus S |
| HTC | HTC Desire C, Droid DNA, HTC J Butterfly, HTC Droid Incredible 4G LTEHTC Evo 4G LTE, HTC Incredible, HTC One X, HTC Ruby |
| HUAWEI | Ascend Y201, Huawei Sonic, Turkcell T20 |
| Kuoziro Frontier FT701W |
| Lenovo | Lenovo K800 |
| LG | Optimus 3D Max, LG Optimus 4X HD, LG Optimus Elite, LG Optimus L5LG Optimus L7,LG Optimus LTE, LG LU6200, LG Optimus LTE Tag, LG Optimus Net,LG OptimusVu, LG T530 LG Viper |
| Mobiwire Cosyphone |
| Motorola | Motorola Droid Razr, Motorola MC75A HF, Motorola Photon Q 4G LTE, Motorola Razr i |
| Nokia | Nokia 603 Nokia 700, Nokia 701 Nokia 801T, Nokia 808 Pureview, Nokia C7, Nokia Lumia 610Nokia Lumia 820, Nokia Lumia 920, Nokia N9 Nokia Oro |
| Orange San Diego |
| Panasonic | Panasonic BizPad, Panasonic Eluga |
| Pantech Discover |
| Sky Vega LTE |
| Prada phone |
| Samsung | Samsung Ace 2, Samsung Galaxy Mini 2, Samsung Galaxy Note, Samsung Galaxy Note II,SamsungGalaxy S Advance, Samsung Galaxy S Blaze 4G, Galaxy S II, Samsung Galaxy S3,Samsung Galaxy S III Mini, Samsung S5230 NFC, Samsung SHW-A170K, Samsung Wave 578,Samsung Wave M/ Y |
| Sharp | Aquos Phone series, RW-T107, RW-T110 |
| Sky Vega Racer |
| Sonim | XP1301 Core NFC, Sonim's XP and NFC |
| Sony | Sony Xperia Acro S, Sony Xperia Ion, Sony Xperia P, Sony Xperia S, Xperia Sola, Sony Xperia TV/ VL series |
| Toughshield R-500 |
| Turkcell T11 Maxiphone/ MaxiPRO5 |
| Xolo X900 |
| ZTE | ZTE Blade II, ZTE Kis, Turkcell MaxiPLUS5 |
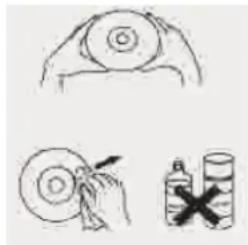
\* Carrying for Compact Discs
- Treat the disc carefully. Handle the disc only by its edges. Never allow your fingers
to come in contact with the shiny, unprinted side of the disc.
- Do not attach adhesive tape, stickers, etc. to the disc label.
- Clean the discs periodically with a soft, lint-free, dry cloth. Never use detergents or abrasive cleaners to clean the disc. If necessary, use a CD
cleaning kit. If a disc skips or gets stuck on a section of the disc, it is probably dirty or damaged
(scratched). When cleaning the disc, wipe in straight lines from the center of the
disc to the outer edge of the disc. Never wipe in circular motions.
- This unit is designed to play discs bearing the identification logo as shown here or MP3 format Disc. Other discs may not conform to the CD standard and may not play properly.
- Discs should be stored in their cases after each use to avoid damage.
- Do not expose discs to direct sunlight, high humidity, high temperatures, or dust, etc. Prolonged exposure or extreme temperatures can warp the disc.
- Do not stick or write anything on either side of the disc. Sharp writing instruments or the ink may damage the surface.
Care of the Cabinet
- To prevent fire or shock hazard, disconnect your unit from the AC power source when cleaning.
- The finish on your unit may be cleaned with a dust cloth and cared for as other furniture. Use caution when cleaning and wiping the plastic parts.
- Mild soap and a damp cloth may be used on the front panel.
To Clean the Lens
If the lens gets dirty, your player may skip or may not play a CD
- Open the CD door.
- Use a camera lens blower/brush to blow on the lens once or twice, brush the dust or particles off the lens then blow again.
- To remove fingerprints, use a dry cotton swab to wipe from the middle to outer edge of the lens.
natural_image
Illustration showing a hand holding a circular object, a magnified view of a ring, and a bottle with a cross (no text or symbols)
TROUBLE SHOOTING GUI DE
If a fault occurs, first check the points listed below before taking the set to repair.
Do not open the set as there is a risk of electric shock. If you are unable to remedy a problem by following these hints, consult your dealer or service center.
WARNING: under no circumstances should you try to repair the set yourself, as this will invalidate the warranty.
| Symptom | Circuit | Correction |
| General |
| No power. | The power cord is not plugged | Plug in the power cord. |
| Check whether electricity failed. | Check the condition by operating other electronic devices. |
| No sound. | Check whether you select right function. | Press SOURCE and check the selected function. |
| CD |
| The unit dose not start playback. | An unplayable disc is inserted | Insert a playable disc |
| The disc is dirty | Clean the disc |
| RADIO |
| Radio stations cannot be tuned in. | The antenna is positioned or connected poorly. | Connect the antenna securely. |
| Remote control |
| The remote control does not work properly. | The remote control is too far from the unit. | Operate the remote control within about 23ft(7M). |
| There is an obstacle in the path of the remote control and the unit. | Remote the obstacle. |
| The battery in the remote control is exhausted. | Replace the battery with new one. |
TECHNICAL SPECIFICATIONS
MODEL
AMBT-67
Power supply
AC 110 - 230 V, 50/60 Hz
Power consumption
60 W
Standby mode consumption
< 0.5 W
RADIO SECTION
Frequency ranges
FM 87.5 \~ 108.5 MHz
CD PLAYER
Frequency response
20Hz-20 KHz (+/-3dB)
Audio S/N
80dB
Audio output (analog audio)
Electric level output: 1.0-2.0v
Resistance: 10ks
Audio output (digital audio)
Electric level output: 0.5vp-p
Resistance: 75s
USB SECTION
USB compatible Port 2.0
AUXILIARY
3.5MM
AMPLIFIER
Output power
80W: 2x40W (2 x 20WRMS)
BASS
-14dB\~+14dB
TREBLE
-14dB\~ + 14dB
Frequency Response
20Hz\~20KHz+/-3dB
S/N
80dB
ACCESSORI ES
Multifunction Remote Control
(Battery: 2X AAA ñnot included)
Net weight
5.182 kg
Dimensions unit
247x83x230mm
Dimensions 1 speaker
150x220x180mm
IMPORTANT:
Due to continual revision and improvement on our products design, specifications are subject to change without further notice.
Warning! This logo set on the product means that the recycling of this apparatus comes within the framework of the Directive 2002/96/CE of January 27, 2003 concerning the Waste of Electrical and Electronic Equipment (WEEE).
This symbol means that used electrical and electronic products should not be mixed with general household waste. There is a separate collection system for these products.
If you want to dispose of this equipment, please do not use the ordinary dust bin!
- The presence of dangerous substances in the electrical and electronic equipments can have potential consequences on the environment and human health in the cycle of reprocessing this product.
- Therefore, at the end of its lifetime, this product shall not be disposed with other non-recycled waste. Used electrical and electronic equipment must be treated separately and in accordance with legislation that requires proper treatment, recovery and recycling of used electrical and electronic equipment.
- Local authorities and resellers have set special procedures for the purpose of collecting and recycling this product (please contact your local authority for further details). You have the obligation to use the selective waste collection systems put in place by your local authority.
- If your used electrical or electronic equipment has batteries or accumulators, please dispose of these separately beforehand according to local requirements.
- By disposing of this product correctly you will help ensure that the waste undergoes the necessary treatment, recovery and recycling and thus prevent potential negative effects on the environment and human health which could otherwise arise due to inappropriate waste handling.
This unit complies with European Council Directive 2006 / 95 CE (Electromagnetic Compatibility & Low Voltage Directives)
ANTES DE COMENZAR

SÓMBOLO DEL RAYO CON LA FLECHA HACI A ABAJO -
natural_image
Two black audio/video equipment units with a central display unit (no visible text or symbols)
El micro sistema
Mando a distancia
CABLE AUDIO
Manual de usuario
flowchart
graph TD
    A["Before charging"] --> B["Charging Battery"]
    B --> C["Charging Battery Discharge"]
    C --> D["After charging"]
    D --> E["Charging Battery with Battery Discharge"]
Notas:
Sampling Frequency: 32-48 (MP3/WMA)
Bit rate: 32-320kbps (MP3), 40-320kbps (WMA)
Mp3 player: Flash type Mp3 player.
USB Flash Drive: Devices that support USB2.0 or USB 1.1.
natural_image
Simple line drawing of two hands holding a circular object (no text or symbols)

natural_image
Pure electrical circuit lines without any symbols
GUÕA RESOLUCI "N DE PROBLEMAS
FM 87.5 \~ 108.5 MHz
REPRODUCTOS CD
ALGEMENE VEI LI GHEI DSVOORSCHRI FTEN
ALGEMENE VEI LI GHEI DSVOORSCHRI FTEN
natural_image
Two black audio/video equipment units with a central display unit (no visible text or symbols)
Het Micro systeem
Afstandbediening
audiokabel
Gebruiksaanwijzing
natural_image
Pure diagram of a laboratory setup with two large boxes and internal equipment, no text or symbols present.
flowchart
graph TD
    A["Before charging"] --> B["Charging Battery"]
    B --> C["Charging Battery Discharge"]
    C --> D["After charging"]
    D --> E["Charging Battery with DC power supply"]
Opmerkingen:
Bit rate: 32-320kbps (MP3), 40-320kbps (WMA)
Verbinding procedure
NFC:
natural_image
Illustration of three hand tools: a circular object, a circular disc with a hammer, and a bottle with a cross (no text or symbols)
natural_image
Two black audio/video equipment units with a central display unit (no visible text or symbols)
Das Mikrosystem
Fernbedienung

Audio-Kabel
Bedienungsanleitung
flowchart
graph TD
    A["Before charging"] --> B["Charging Battery"]
    B --> C["Charging Battery Discharge"]
    C --> D["After charging"]
    D --> E["Charging Battery Discharge"]
Anmerkungen:
Bitrate: 32-320kbps (MP3), 40-320kbps (WMA)
natural_image
Illustration showing a hand holding a circular object, a circular object with a pointed tip, and a bottle with a cross (no text or symbols)

80W: 2x40W (2 x 20WRMS)
RADIO
Frequenzbereich
FM 87,5 \~ 108,5 MHz
CD-PLAYER
Frequenzansprechen
20Hz-20 KHz (+/-3dB)
Audio S/G
80dB
natural_image
Exterior view of a modern audio workstation with two black speakers and a central CD (no visible text or labels)
AMBT-67