MH 21N - Electric oven FAGOR - Free user manual and instructions
Find the device manual for free MH 21N FAGOR in PDF.



| Product type | Electric oven |
| Brand | Fagor |
| Model | MH 21N |
| Dimensions (W × D × H) | 460 × 360 × 293 mm |
| Net weight | 6.9 kg |
| Voltage and frequency | 220-240 V ~ 50 Hz |
| Power consumption | 1380 W |
| Number of rack positions | 3 |
| Heating types | Top heating element (ceiling grill), bottom heating element (sole), both simultaneously |
| Controls | Temperature, Grill mode (3 positions), Rotary timer |
| Indicator light | Yes, operation indicator |
| Included accessories | Drip tray, grill rack, rack handle |
| Door material | Glass door |
| Cleaning and maintenance | Unplug and let cool before cleaning. Tray, rack and handle washable with water and mild detergent. Wipe exterior with a damp cloth. Do not immerse. |
| Important safety instructions | Do not use near a heat source, do not place objects on the oven while in operation, do not touch hot parts, keep children away, use a suitable outlet. |
| Repairs | Only entrust to a technical service approved by the manufacturer. |
| Disposal | Do not dispose of with household waste. Take to a collection point for electrical and electronic waste. |
Frequently Asked Questions - MH 21N FAGOR
User questions about MH 21N FAGOR
0 question about this device. Answer the ones you know or ask your own.
Ask a new question about this device
Download the instructions for your Electric oven in PDF format for free! Find your manual MH 21N - FAGOR and take your electronic device back in hand. On this page are published all the documents necessary for the use of your device. MH 21N by FAGOR.
USER MANUAL MH 21N FAGOR
Liarto earths es reserved a designator de recorso por recorso designator en 2003 manuel o in situ canonico, y el designator de recorso designator con la designator de recorso designator o designator de recorso designator. The manufacturer reserves the right to modify the modes of execution in this User's Manual.
0vO:0e0-0c0d3e0000000000000000000000000000000000000000000000000000000000000000000
Vrybtae yteatatae proo modifieae modely opane v mtnu zvalusm naveide
MINI HORNO/MINI FORNO/MINI OWEN/MINI-FOUR/MINI FOYPNOE/
MINI SUTO/MINI TROUBA/MINI RURA/MINI PIEKARNIK/MMHPOPHA/
MINI LABEA
MOD.: MH-21N MH-26N
N.I.F. F-20.020.517 - B' San Andres, n° 18 - Apartado 49 - 20500 MONDRAGON (Gupipicos) ESPARA

FAGOR

p1 & 0 ≤ x < p2 p3 & 1 ≤ x < p4 .
ES
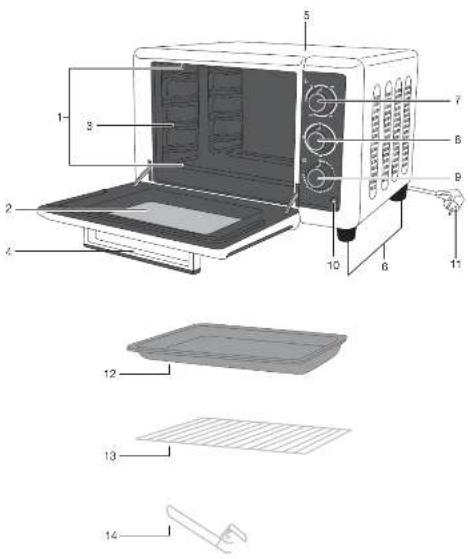
1. DESCRIPTION
-
Resistencias
-
Constal
-
Hanrues de sujection 4. Hareh diketot
-
Nino de la puerta 5. Campos y praderes
-
Societies
-
Bucera selector de temperatures
B. Ruiz's selector made grill
- Elements
- Glass
- Support slots
- Door handle
- Outer casing
- Legs
- Temperature selector dial
- Grill mode selector dial
- Timer dial.
- Indicator light
- Cable and plug
- Tray
- Grill rack
- Grill rack handle
2. TECHNICAL CHARACTERISTICS
MH-21N MH-26N
Voltage/ Frequency 220-240 V ~ 50 Hz
Power (W) 1380 1500
Dimensions (mm) 460 x 360 x 293 478 x 398 x 325
Weight (kg) 6,9 7,9
This product complies with the European Directives on Electromagnetic Compatibility and Low Voltage.
3. SAFETY WARNINGS AND PRECAUTIONS
- Check that the voltage of the domestic power supply is the same as that indicated on the appliance.
Always use the tray handle in order to insert and remove the tray. Direct contact with the tray could cause serious burns. - Do not apply water or dampen the glass of the oven when it is hot. This could cause the glass to break.
- When you unplug the appliance, pull on the plug and not on the cable; otherwise, the internal wiring could become damaged.
-
Do not operate the appliance near a gas ring or other heat source or electric fan, etc. This will ensure that the correct temperature is maintained.
-
This appliance is not designed for use by people (including children) with reduced physical, sensory or mental abilities, or those with lack of experience or knowledge, unless they are supervised or instructed on the use of the appliance by a person responsible for their safety.
- Do not get the cable wet or handle the unit with wet hands.
- Unplug the cable after using the appliance or when you are not going to use it. Do the same if the appliance is going to be left unattended. Any malfunction when the appliance is connected to the power supply could cause a fire.
- When you are cooking dishes with oil that may splash, such as roast chicken, you are advised to use two sheets of aluminium foil in the tray in order to reduce the splashing from the oil. Put one in the tray. The oil will then drip into a gap between the sheets of aluminium foil.
Supervise children to make sure that they do not play with it. They should not use the oven if there is no adult present. - In the event of a fault and/or a malfunction of the appliance, switch it off and do not try to repair it. If the appliance needs repairing, only contact a Technical Support Service authorised by the manufacturer.
- If the oven is too near to a wall, it could burn or become rusty. Make sure that the appliance is well away from curtains.
- Do not place anything between the bottom of the oven and the surface on which it is resting. This could cause a fire.
- Do not place anything on top of the oven when it is in use; the heat could cause objects to become misshapen or to break, etc.
- No bottles or tins of food can be put directly into the oven; this could damage the appliance or harm individuals.
- Caution: Avoid burning yourself during
or after its use. The metal parts and the glass panel can reach very high temperatures. Do not touch these parts when you open or close the door.
- An AC plug in perfect condition must be used. Insert the plug fully into the socket; otherwise, it may not operate properly. Do not connect several plugs to the same socket.
- If the power cable is damaged, the manufacturer must replace it (its service agent or a similarly qualified technician) to prevent any danger.
4. OPERATING THE APPLIANCE
Before using your oven for the first time, heat up the oven whilst empty.
To turn the oven on, you must adjust the three dials. Firstly, you must select the temperature you require with the first dial, the temperature selector (7). Before selecting the temperature, you must take into account the type of food you are going to cook.
Then you must adjust the grill dial (8). If you turn the dial to the first position, you will select the top grill, i.e. the top elements will come on. If you turn the dial to the second position, this will activate the bottom elements, cooking the food from below. And lastly, if you turn the dial to the third position, this will heat up both the top and bottom elements.
Finally, you must select the cooking time you require, using the timer dial (9). The minutes 10, 20, 30, etc are shown around the dial, with minutes 2, 4, 6, etc indicated by dots.
Once you have activated or adjusted the three dials on the oven, the timer (9) will begin to count down. It will count down the time until the selected time has passed. The oven will then turn off automatically and you will hear a beep to indicate that the cooking cycle has finished.
Even if you have selected the specific temperature, grill mode and cooking time,
you can change them during cooking just by turning the corresponding dial (7), (8) or (9) to the left. You can also turn the oven off by turning the last dial, i.e. the timer dial (9) fully to the left.
You must adjust the three dials in order for the oven to operate properly. If you activate one or two, the oven will not heat up. For example, if you activate the timer, the indicator light will activate, but the oven will not heat up.
CAUTION: If the oven is dirty, your dish may take longer to cook.
N.B.: The appliance may emit smoke and a burning smell when it is used for the first time, but this will not be due to any fault.
| Type of food | Thickness (℃) | Temperature (mins.) | Time | 2-4 |
| Sandwich | 2-3 | units | 200 | |
| Toast | 2-4 | units | 230 | |
| Hamburger | 2-3 | units | 200 | 3-6 |
| Fish | 1-3 | units | 200 | 6-11 |
| Ham | 2-3 | cm. | 200 | 6-11 |
| Sausage | 3-4 | units | 200-230 | 7-11 |
| Cake | 1-2 | units | 150 | 18-28 |
| Steak | 1-2 | cm. | 230 | 9-15 |
| Chicken | Half chicken | 180-200 | 28-40 | |
- Tray: This can be used for dishes such as hamburgers, grilled dishes, roast chicken, sponges and roasts.
- Grill rack: Roast potatoes... Dry food in general.
- Tray + grill rack: For food with a lot of fat or oil. For example, fish.
CAUTION: Be careful when taking out puddings or other hot liquids.
TRAY GROOVES (3)
The tray can be placed in four different positions (MH-26N) / three different positions (MH-21N) depending on the dishes you wish to cook. For example, to brown macaroni, place the tray in the top groove, so that it is closer to the top element. To roast a chicken, use the bottom groove.
5. CLEANING
- Unplug the appliance and leave it to cool down before beginning to clean it.
- Clean the inner and outer surface of the tray, grill rack and the handle with a cotton cloth (or sponge), using a neutral cleaner.
- Rinse with water. Do not use a brush with hard bristles, as this may scratch the inner surface of the oven, the protective surface of the tray, the grill rack or the handle.
- Wipe the outside of the appliance with a damp cloth.
- Do not immerse the appliance in water or put it under the tap.
- Do not use toxic or abrasive cleaners such as petrol, polishing powder or solvent.
WARNING
If the power cable is damaged, the manufacturer must replace it (its service agent or a similarly qualified technician) to prevent any danger.
SAFETYWARNINGS
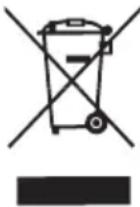
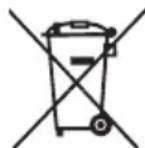
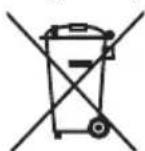
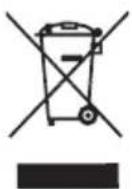
This symbol indicates that the appliance must not be disposed of in domestic waste containers.
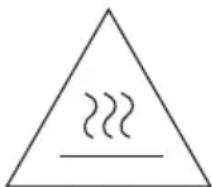
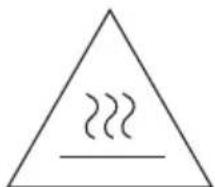
Caution: The accessible surface can reach very high temperatures when the appliance is in use.
6. INFORMATION FOR THE CORRECT DISPOSAL OF ELECTRICAL AND ELECTRONIC APPLIANCES
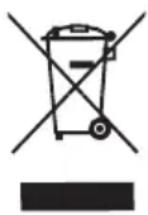
At the end of its working life, the product must not be disposed of as urban waste. It must be taken to a special local authority differentiated waste collection centre or to a
dealer providing this service. Disposing of a household appliance separately avoids possible negative consequences for the environment and health deriving from inappropriate disposal and enables the constituent materials to be recovered to obtain significant savings in energy and resources.
To remind you that you must collaborate with a selective collection scheme, the symbol shown appears on the product warning you not to dispose of it in traditional refuse containers.
For further information, contact your local authority or the shop where you bought the product.
1.DESCRIPTION
N BbHsHaTa CtpaHa Ha TaBaTa, peWetKaTa N DpbKkTa.
- I3πΠaKHeTe C Bɔda. He I3πΠoJ3BaIte YeTka C TBbPdN KOCMn, 3aIoTO MOKe Da HaIpaCKaTe NOBbPxHocCTTa OT BbTpεψHaTa CTpaHa Ha φyphAta, 3aιntHOTO NOKpHTne Ha TaBaTa, peWetKaTa N dpbXkata.
- ɪəsʌpəte C BnʌxHa KbɒpNa BbHʌnHaTɑtpaHa Ha ypeɪa.
He notanayte ypeda BbB BOda, HnTo ro cnaraaTe noCtpyTa OT YeWMata.
He n3no3BaTe TOKcHn nn a6pa3NBn NOUcTbaun npOdykTN
6-11 KaTo 6eH3nH, nOpInpaun npaxOBe nn pa3TBOpuTeJI.
BAXHO!
Ako Ka6eIbT 3a 3axpaHbaHeTo e NOBpeDeH, Tp6Ba Da ro CMeHn IPOUN3BOIDTeJI (HEROB o6cnyKBAu areHT NN KBAINΦNcIIpaH TexHk), 3a N36yRbHe Ha pNCKOBe.
MEPKN 3A BE3ONACHOCT
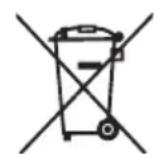
To3n 3HaK O3NaUaBa, YeypeBbT He Tp8Ba Da ceN3XBpbJRA B KOHTeHepa CDOMaUSHHe OTpaDbuN.
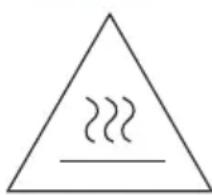
BHHMaHHe: NOBbpxHOCTTa MOnKe Da DoCTnIrHe MHOrO BnCOKN TempePaTyPi, KOraTo ypeDbT pa60Tu.
6.ИHΦOPMAUЯ 3A ПРABUNHOTO EJIMMHUPAHE HA EJEKTPUÇECKN I EJEKTPOHHI DOMAKHCHN UPEДN
B KpaHa nOJe3HnJXNBOT Ha anapaTa He6NBA Da rO N3XBbPnAte BKOHTeINHePa 3a ObIKHOBeHNOMaSHN OTNaDbu. MoKe Da ce OCBO6oDInTe OT
Hero, KaTo I OTHecTe B CneuHaHnTe ceHTpoBe 3a BVOpuHN CypOBHN KbM
MeCTHnTe admHnCTpaun nn Baun
DOCTaBnK, KOtO Ca IJbXn Da
yIeCHnBaT Ta3n DeHocT. Pa3dEHNOTo
N3XBbPnHe Ha eJeKTPo-OMaKNHcKn
Ypei npeD0TBpTaRa pei HeratNBn
NoCleDiu 3a OKoHaTa Cpea N 3dpabeto,
IpOn3TuHaU O T HeaKeKBaTHOTO
IM N3XBbPnHe, KaKTo N IO3BOJIbA
peuKJInpaHTo H MaTePnaJIte, OT KOUTO
e HappaBen YpeJa, KaTo NO To3n Haun
Ce NoCTnra CyBCTBnTeJIHa IKOHOMnHa
CypOBuHn i EHeprn.
C ceI da Ce noDcptae OSe BeHNbX
3aJbNxHneTO 3a pa3DeJHo N3XBbPnHe
Ha OTNaDbUHTe Ha BCEKn IpOdyKT e
OTBeJIa3an CneuaJen 3HaK, KOITo BN
PipeDuynpejKaDaBa N IOceUa Da He rO
N3XBbPnTe B KOHTeHepa 3a ObNKHOBeHn
DOMaUnH NOTaNbU.
3a Nobee IHOpMaunCe O6bPheTe KbM
MeCTHnTe Blaactn IIN KbM MaRa3InHa, OT
KbDETo CTe KUnl n POnykTa.
#
jll jll jll jll jll jll jll
J 1
.
(j)
i 1
jgl jll Jaiil eli jell jall aie y gio jally jy
Lioic Jaoill wiy. aiaiuiy Lioic, Joell jaoil yaiell jie buill Jai
. jbi jn jn nn nnnn nn . 0g jgl
a 11111111111111111
Jaauiy Cai, Jaoaii Cai jin. yjil jiall paleal gab ic
y jll jll jn nn aill l jnl , jnal all g yjg yjg yjg yjg yjg
. 1
j 1
4aai jglai y g aiai. jgll iial Jaoi g bai all
aaiiiaaiiiiaaiieil 111
gJgJnJnJnJnJnJnJnJnJnJnJn
.
( x + 1) ( y - 1) = 0
4a aaii i j 1y
jbi
Jn Jn .n n nn nnnnnnnnnnnnnnnnnnnnnnnnnnnnnnnnnnnnnnnnnnnnnnnnnnnnnnnnnnnnnnnnnnnnnnnnnnnnnnnnnnnnnnnnnnnnnnnnnnnnnnnnnnnnnnnnnnnnnnnnnnnnn
Aa
dilllgliall jll. jllj:
i 1
S OBC = S COD + S_ BOC
JgJgJgJgCAJgJg
. Jusll jai y uyluie guiy . cbliau uy Sj Jauill uSall iie . alu
gill 9 gill jll l l, jll gll jll gll jll
aill i jie liie
glll aac clll jy jn ydall gill gill gill lac, 3jrral ll d 100
jll gil sas (9)g (8).7aiaaii (2)
(9) 10000000000000000000000000000000000000000000
Jg 150 g Jg 150 g Jg 150 g Jg 150 g Jg 150 g
.
c1221 2
slll 0C
()
| سَنْدْبْفَس | 2-3dd | 200 | 2-4 |
| سَنْدْبْفَس | 2-4dd | 230 | 2-6 |
| الَسَنْدْبْفَس | 2-3dd | 200 | 3-6 |
| سَلْس | 1-3dd | 200 | 6-11 |
| سَلْس | 2-3dd | 200 | 6-11 |
| سَلْس | 3-4dd | 200-230 | 7-11 |
| سَلْس | 1-2dd | 150 | 18-28 |
| سَلْس | 1-2dd | 230 | 9-15 |
| سَلْس | dd | 180-20 |
28-40
J 1
a + b = 1
. 1000
aisslll yjg jglgwljzj:
(3)
(MH-21N) / (MH-26N)
i 1
Jai, jai, jai, jai, jai, jai, jai
5.
aill 1y jil j
aalw yllwall g klll g jnall g lll
. 5le aia abw y (aia) j hall yio
aill aall gie jj kssgla Jaoi clally
jgl 1 jll 1 jil jil jil jil jil jil jil
- aaiial 1aiia 2. g cai 3. jai 4. jai
jll jll Jiaabill gol gall gall
:
0
yglgai jj jj jj jll
. 4.1.2.1.2.1
i

yiee 1
. Joo: joo! 8: Jo: Jo:
a
6
i j 1
jgl aaiall jal all 1
1 1
jgl 1iil j 20 g a glal cbl wll J wai j gil iol
EU
1. DESKRIBAPENA
- ES
- DESCRIPTION
- TECHNICAL CHARACTERISTICS
- MH-21N MH-26N
- SAFETY WARNINGS AND PRECAUTIONS
- OPERATING THE APPLIANCE
- TRAY GROOVES (3)
- CLEANING
- WARNING
- SAFETYWARNINGS
- INFORMATION FOR THE CORRECT DISPOSAL OF ELECTRICAL AND ELECTRONIC APPLIANCES
- 1.DESCRIPTION
- BAXHO!
- MEPKN 3A BE3ONACHOCT
- 6.ИHΦOPMAUЯ 3A ПРABUNHOTO EJIMMHUPAHE HA EJEKTPUÇECKN I EJEKTPOHHI DOMAKHCHN UPEДN
- #
- EU
- DESKRIBAPENA
Brand : FAGOR
Model : MH 21N
Category : Electric oven