
4LD4136 IAN 273706 - Alarm Clock AURIOL - Free user manual and instructions
Find the device manual for free 4LD4136 IAN 273706 AURIOL in PDF.
| Product type | Radio alarm clock |
| Brand | Auriol |
| Model | 4LD4136 IAN 273706 |
| Power supply | 1 AA 1.5 V battery (R6/LR6) |
| Display | Analog (hands) + LCD screen (temperature, date, alarm) |
| Radio-controlled reception | DCF77 signal, automatic and manual search |
| Alarm function | Adjustable, activation/deactivation, progressive sound signal |
| Snooze | Press SNOOZE/LIGHT button, repeats after 5 minutes |
| Lighting | LCD screen backlit via SNOOZE/LIGHT button |
| Manual time setting | Hold SET for 4 seconds, then press to advance minutes |
| Reset | With a pointed tool on the RESET button |
| Dimensions (estimated) | Approximately 10 x 10 x 5 cm |
| Weight (estimated) | Approximately 150 g (without battery) |
| Care and cleaning | Dry lint-free cloth |
| Safety | Do not use in humid environment, avoid heat sources, water splashes |
| Warranty | 3 years (by digi-tech GmbH) |
| Package contents | Alarm clock, 1 AA 1.5 V battery, user manual |
Frequently Asked Questions - 4LD4136 IAN 273706 AURIOL
User questions about 4LD4136 IAN 273706 AURIOL
0 question about this device. Answer the ones you know or ask your own.
Ask a new question about this device
Download the instructions for your Alarm Clock in PDF format for free! Find your manual 4LD4136 IAN 273706 - AURIOL and take your electronic device back in hand. On this page are published all the documents necessary for the use of your device. 4LD4136 IAN 273706 by AURIOL.
USER MANUAL 4LD4136 IAN 273706 AURIOL
Usage and safety instructions
NL BE
RADIOWEKKER
Gebruksaanwijzing
IT
SVEGLIA
RADIOCONTROLLATA
GB Usage and safety instructions
Table of contents
Table of contents. 11
Preliminary note. 12
Intended use. 12
Scope of delivery 12
Technical specifications. 12
Important safety information Important safety information. - 12 -
Set up the alarm clock safely. -12-
User. 13
Batteries 13
Features. 14
Setup 14
Restart. 15
Manual time setting. 15
LC display. 15
Light 15
Alarm. 15
Snooze 16-
Reset 16-
Cleaning instructions 16
Declaration of Conformity 16
Disposal of the electronic appliance . 16
Disposal of the batteries. 16
digi-tech gmbh warranty - 17
Warranty conditions. 17
Warranty period and defects liability -17-
Scope of the warranty -17
Warranty claim procedure -18
Service. 18
Supplier 19
-11-


RADIO-CONTROLLED ALARM CLOCK
Preliminary note
Congratulations on the purchase of your new alarm clock. You have chosen a high quality appliance. The manual is part of the appliance. It contains important safety, usage and disposal information. Please read all usage and safety instructions before using the appliance. Please only use the appliance as described and for the described uses. If you sell or give this appliance to someone else it is very important to also include this manual.
Intended use
This electronic device is intended for time display and the described additional features. Any other use or modification of the electronic device does not comply with the intended uses. The manufacturer is not liable for damages caused by improper use or misuse. The device is not intended for commercial use.
Scope of delivery
Please note: Check the scope of delivery after purchase. Please ensure that all parts are included and undamaged.
Alarm clock
- 1x battery 1,5 V AA R6/LR6
- instruction manual
Technical specifications
Quartz movement
- Operates with 1,5 V AA R6/LR6 battery

Important safety information
Set up the alarm clock safely
The alarm clock is not intended for use in rooms with high humidity (example: bath room).
Make sure that:
- the device isn't placed on a thick carpet or bed during operation;
- no direct heat sources (i.e. radiators) influence the device;
- no direct sunlight reaches the device;
-12-


- contact with splashing or dripping water must be avoided (don't place any items filled with liquids, i.e. vases, onto or next to the device);
the device doesn't stand near magnetic fields (i.e. speakers); - candles and other open flames must be kept away from this product at all times to prevent the spread of fire
- no foreign objects penetrate the housing.
User
This device may be used by persons (including children over 8 years of age) with reduced physical, sensory or mental abilities or lack of experience and knowledge, if they are supervised or instructed regarding the safe use of the device and understand the dangers that may arise. Children may not play with the device. Cleaning and user maintenance of the device may not be performed by children without supervision. Keep packaging films out of the hands of children. There is a danger of suffocation.
Batteries
Keep batteries out of reach of small children. If a battery is swallowed, you must seek medical attention immediately. Batteries/rechargeable batteries must always be inserted in the correct polarity. If necessary, clean the battery and device contacts. Never attempt to recharge non-rechargeable batteries. Never short-circuit or attempt to open batteries. Never throw batteries into fire as they may explode.
If the device will not be used for an extended time period, remove the battery and store the device in a dry and dust-free area. Improper use of the battery can lead to explosion or leakage. If the battery leaks, avoid contact with skin, eyes and mucous membranes. Use gloves. If you are exposed to battery acid, rinse the affected areas with plenty of clean water and immediately seek medical attention. Remove discharged batteries from the device as they present an increased risk of leakage.
-13-

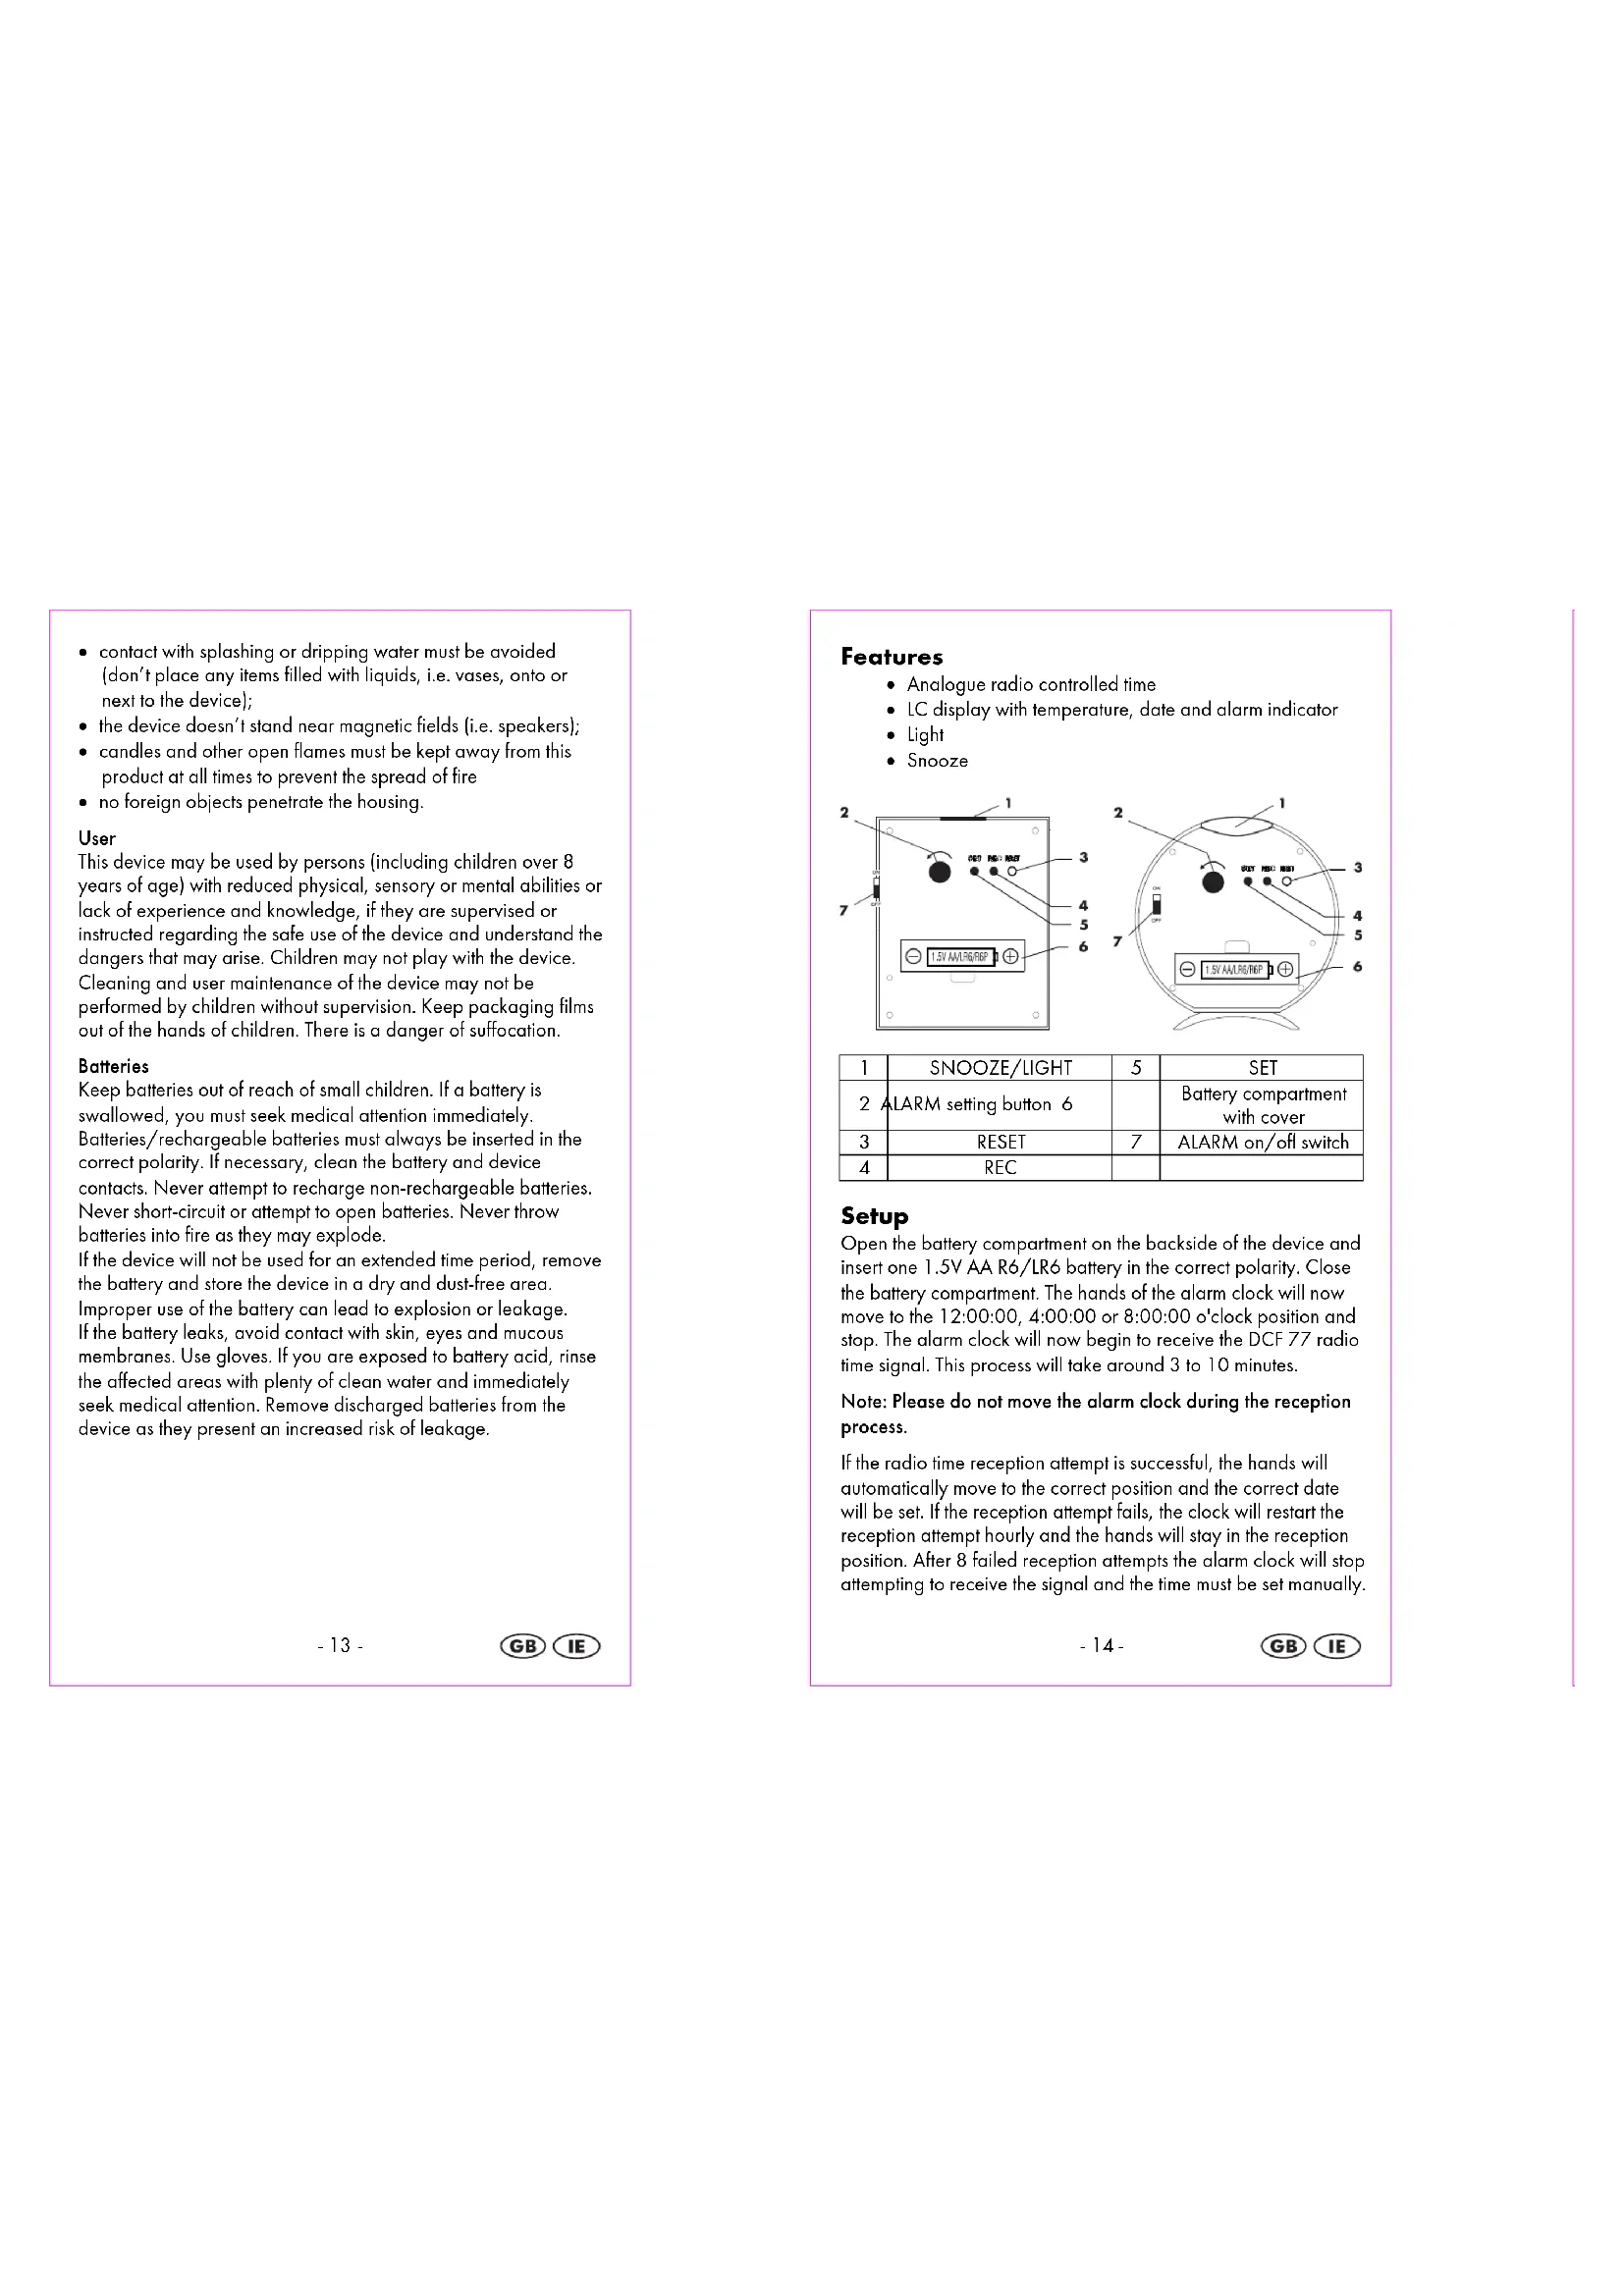
Features
- Analogue radio controlled time
- LC display with temperature, date and alarm indicator
Light
Snooze
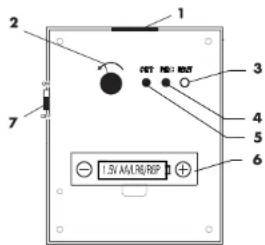
| 1 | SNOOZE/LIGHT | 5 | SET |
| 2 | ALARM setting button 6 | Battery compartment with cover | |
| 3 | RESET | 7 | ALARM on/off switch |
| 4 | REC |
Setup
Open the battery compartment on the backside of the device and insert one 1.5V AA R6/LR6 battery in the correct polarity. Close the battery compartment. The hands of the alarm clock will now move to the 12:00:00, 4:00:00 or 8:00:00 o'clock position and stop. The alarm clock will now begin to receive the DCF 77 radio time signal. This process will take around 3 to 10 minutes.
Note: Please do not move the alarm clock during the reception process.
If the radio time reception attempt is successful, the hands will automatically move to the correct position and the correct date will be set. If the reception attempt fails, the clock will restart the reception attempt hourly and the hands will stay in the reception position. After 8 failed reception attempts the alarm clock will stop attempting to receive the signal and the time must be set manually.
-14-

Note: Obstacles (strong walls) or sources of electromagnetic interference can impede radio time signal reception. Move the alarm clock to a different area at your location and reattempt radio time signal reception as described in the chapter "Restart".
Restart
Press the REC button on the backside of the alarm clock for 4 seconds to restart radio time signal reception. The hands of the alarm clock will now move to the 12:00:00, 4:00:00 or 8:00:00 o'clock position and stop. The alarm clock will now begin to receive the DCF 77 radio time signal. If radio time signal reception is not possible, the time must be set manually.
Manual time setting
If radio time signal reception is not possible, the time can be set manually:
- Press and hold SET for 4 seconds.
- Press SET briefly to move the hands forward by 1 minute.
- Press and hold SET to use speed setting.
If the SET button is not pressed for 8 or more seconds, the alarm clock will exit setting mode and the set time will be activated.
LC display
If radio time signal reception is successful, the LC display will
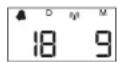
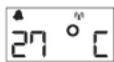
alternate between temperature and date every 20 seconds. If radio time signal reception failed, the temperature will appear continuously. If the alarm is activated, the bell symbol will appear.
Light
Press the SNOOZE/LIGHT button on top of the alarm clock to activate the light briefly.
Alarm
To set the alarm time, turn the alarm setting knob on the backside of the alarm clock in the direction of the arrow. Move the switch on the side of the alarm clock to the "ON" position.
-15-

If the alarm is activated, the bell symbol will appear on the LC display. The alarm will sound at the set time and the alarm frequency will increase 3 times in intervals of 10 seconds. Move the alarm switch to "OFF" to deactivate off the alarm. If the alarm is not turned off, it will sound again in 12 hours.
Snoopze
Press the SNOOZE/LIGHT button on the top of the alarm clock to activate the snooze feature. The light will be activated briefly and the alarm will stop. After 5 minutes, the alarm will restart.
Reset
If the alarm clock malfunctions, the electronics of the alarm clock can be reset by pressing the recessed RESET button with a pointed tool (a screw driver for example). The hands of the alarm clock will move to the 12:00:00 position and the date will be reset to 1.1.
Cleaning instructions
Clean the alarm clock with a soft, dry and lint-free cloth. A glasses cleaning cloth is ideal.
Declaration of Conformity
If used as intended this product conforms to the basic standards of 3 and the other relevant provisions of the FTEG (Section 3 of the R&TTE directive). The declaration of conformity may be requested here: conformity@digi-tech-gmbh.com
Disposal of the electronic appliance
This alarm clock may not be disposed of with normal household waste. Dispose of the alarm clock at an approved disposal facility or at your local recycling centre. Please observe the current rules and regulation disposing of the appliance. Contact the disposal system doubt.

Disposal of the batteries
Please dispose of your batteries properly in containers especially set up at retailers. Batteries do not belong in household waste. Dispose of the batteries at an
-16-


approved disposal facility or at your local recycling centre.
Contact the disposal system if in doubt.
digi-tech gmbh warranty
This alarm clock includes a 3 year warranty starting on the day of purchase. In case of defects of this alarm clock you have, by law, certain rights regarding the vendor of the alarm clock. These rights are not changed by the warranty which is described in the following paragraphs.
Warranty conditions
The warranty duration starts on the date of purchase. Please keep the original receipt in a safe place. The receipt is needed as a proof of purchase. If a defect occurs in the alarm clock within 3 years, the alarm clock will be repaired or replaced (according to our choice) free of charge. This warranty requires that, within the 3 year warranty period, the alarm clock and the receipt can be made available to us along with a short written description of the defect and when it occurred. If the defect is covered by the warranty, you will receive the repaired alarm clock or a new alarm clock. Repair or replacement does not cause the warranty period to restart.
Warranty period and defects liability
The warranty period is not increased by the defect liability. This also applies to repaired or replaced parts. If defects are noticed at the time of purchase they must be reported immediately upon unpacking the item. Paid repair may be available after the end of the warranty period.
Scope of the warranty
The alarm clock was manufactured according to strict quality guidelines and was carefully inspected before delivery. The warranty does not include parts that experience normal wear and tear and can thus be seen as wear parts or fragile parts that are damaged. Examples include Switches, Batteries or parts made of glass. This warranty becomes void if the alarm clock is damaged, is not used in the recommended way or is improperly repaired. For proper use of the alarm clock all instructions in this manual must be adhered to exactly. Use of the alarm clock in a way that
-17-

is discouraged in the manual must be avoided. The alarm clock not intended for commercial use. Abusive or improper use, excessive force and changes that are made by non-authorized repair centers will void the warranty.
Warranty claim procedure
To ensure that your call is processed in a fast and efficient manner please note the following directions:
- Have your receipt (as proof of purchase) and the article number (273706) handy.
- The article number can be found on the type label, an engraving, the front page of the manual (bottom left) or a sticker on the back side or bottom side of the case.
In case defects occur, please first contact the service center (see below) by phone or email.

Visit www.lidl-service.com to download this and many other manuals, product videos and software.
Service
Please note that the following address is not a service address.
Please first contact the service address (see above).
Name: digi-tech gmbh
Street: Valterweg 27A
Town:Eppstein 65817
Country: Germany
-19-

Reinicialization 44-
Aviso delimpieza 45-


- GB Usage and safety instructions
- Table of contents
- RADIO-CONTROLLED ALARM CLOCK
- Preliminary note
- Intended use
- Scope of delivery
- Technical specifications
- Important safety information
- User
- Batteries
- Features
- Setup
- Restart
- Manual time setting
- LC display
- Light
- Alarm
- Snoopze
- Reset
- Cleaning instructions
- Declaration of Conformity
- Disposal of the electronic appliance
- Disposal of the batteries
- digi-tech gmbh warranty
- Warranty conditions
- Warranty period and defects liability
- Scope of the warranty
- Warranty claim procedure
- Service
Brand : AURIOL
Model : 4LD4136 IAN 273706
Category : Alarm Clock