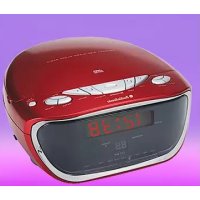
CDCL62 - Alarm Clock AudioSonic - Free user manual and instructions
Find the device manual for free CDCL62 AudioSonic in PDF.



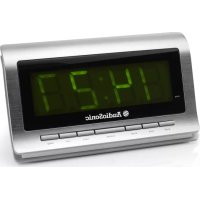
| Brand | AudioSonic |
| Model | CDCL62 |
| Product type | Clock radio |
| Mains power supply | 230-240 V ~ 50 Hz |
| Backup power supply | 9 V battery (type 006P, not included) |
| Compatible disc types | CD, CD-R, CD-RW |
| Radio functions | FM |
| Number of alarms | 2 (AL1 and AL2) |
| Alarm modes | Buzzer, Radio, CD |
| Snooze function | Yes, about 5 minutes |
| Sleep function | 15, 30, 60 or 90 minutes |
| CD playback modes | Normal, Pause, Repeat (1 track or all), Random, Programmed (20 tracks max) |
| Display | Time (12h/24h), current track |
| Speakers | Built-in |
| Headphone jack | Yes |
| Antenna | FM integrated, foldable |
| Cleaning | Soft dry cloth |
| Safety precautions | Do not expose to water, do not open, disconnect during storms |
Frequently Asked Questions - CDCL62 AudioSonic
User questions about CDCL62 AudioSonic
0 question about this device. Answer the ones you know or ask your own.
Ask a new question about this device
Download the instructions for your Alarm Clock in PDF format for free! Find your manual CDCL62 - AudioSonic and take your electronic device back in hand. On this page are published all the documents necessary for the use of your device. CDCL62 by AudioSonic.
USER MANUAL CDCL62 AudioSonic
This symbol indicates to the user that the voltage of the circuits is of sufficient magnitude to constitute a risk of electric shock.

ATTENTION
This symbol indicates to the user that the instruction manual contains important operating and maintenance instructions.
WARNING:
TO PREVENT FIRE OR SHOCK HAZARD,DO NOT EXPOSE THIS APPLIANCE TO RAIN OR MOISTURE.
- IT SHALL NOT BE EXPOSED TO DRIpping OR SPLASHING AND THAT NO OBJECTS Filled With LIQUIDS, SUCH AS UASES. SHALL BE PLACED ON THE APPARATUS.
CAUTION :
TO PREVENT ELECTRIC SHOCK, MATCH WIDE BLADE OF PLUG TO WIDE SLOT, FULLY INSERT.
- WHERE THE MAINS PLUG OR AN APPLIANCE COUPLER IS USED AS THE DISCONNECT DEVICE, THE DISCONNECT DEVICE SHALL REMAIN READILY OPERABLE.
- IN CASE OF MISFUNCTION DUE TO ELECTROSTATIC DISCHARGE OR ELECTRICAL FAST TRANSIENT (BURST), JUST RESET THE PRODUCT (RECONNECT OF POWER SOURCE MAY BE REQUIRED) TO RESUME NORMAL OPERATION.
IMPORTANT SAFETY PRECAUTIONS
- READ THESE INSTRUCTIONS.
- KEEP THESE INSTRUCTIONS.
- HEED ALL WARNING.
- FOLLOW ALL INSTRUCTIONS.
- DO NOT USE THIS APPARATUS NEAR WATER.
- CLEAN ONLY WITH DRY CLOTH.
- DO NOT BLOCK ANY VENTILATION OPENINGS. INSTALL IN ACCORDANCE WITH THE MANUFACTURER'S INSTRUCTIONS.
- DO NOT INSTALL NEAR ANY HEAT SOURCES SUCH AS RADIATORS, HEAT REGISTERS, STOVES, OR OTHER APPARATUS (INCLUDING AMPLIFIERS) THAT PRODUCE HEAT.
- THIS PRODUCTED CAN BE CONNECTED TO A WALL AC OUTLET OF 220-240VOLT/50HZ.
- PROTECT THE POWER CORD FROM BEING WALKED ON OR PINCHED PARTICULARLY AT PLUGS, CONVENIENCE RECEPTACLES, AND THE POINT WHERE THEY EXIT FROM THE APPARATUS.
- ONLY USE ATTACHMENTS / ACCESSORIES SPECIFIED BY THE MANUFACTURER.
- UNPLUG THIS APPARATUS DURING LIGHTNING STORMS OR WHEN UNUSED FOR LONG PERIODS OF TIME.
- REFER ALL SERVICING TO QUALIFIED SERVICE PERSONNEL. SERVICING IS REQUIRED WHEN THE APPARATUS HAS BEEN DAMAGED IN ANY WAY, SUCH AS POWER-SUPPLY CORD OR PLUG IS DAMAGED, LIQUID HAS BEEN SPILLED OR OBJECTS HAVE FALLEN INTO THE APPARATUS, THE APPARATUS HAS BEEN EXPOSED TO RAIN OR MOISTURE, DOES NOT OPERATE NORMALLY, OR HAS BEEN DROPPED.
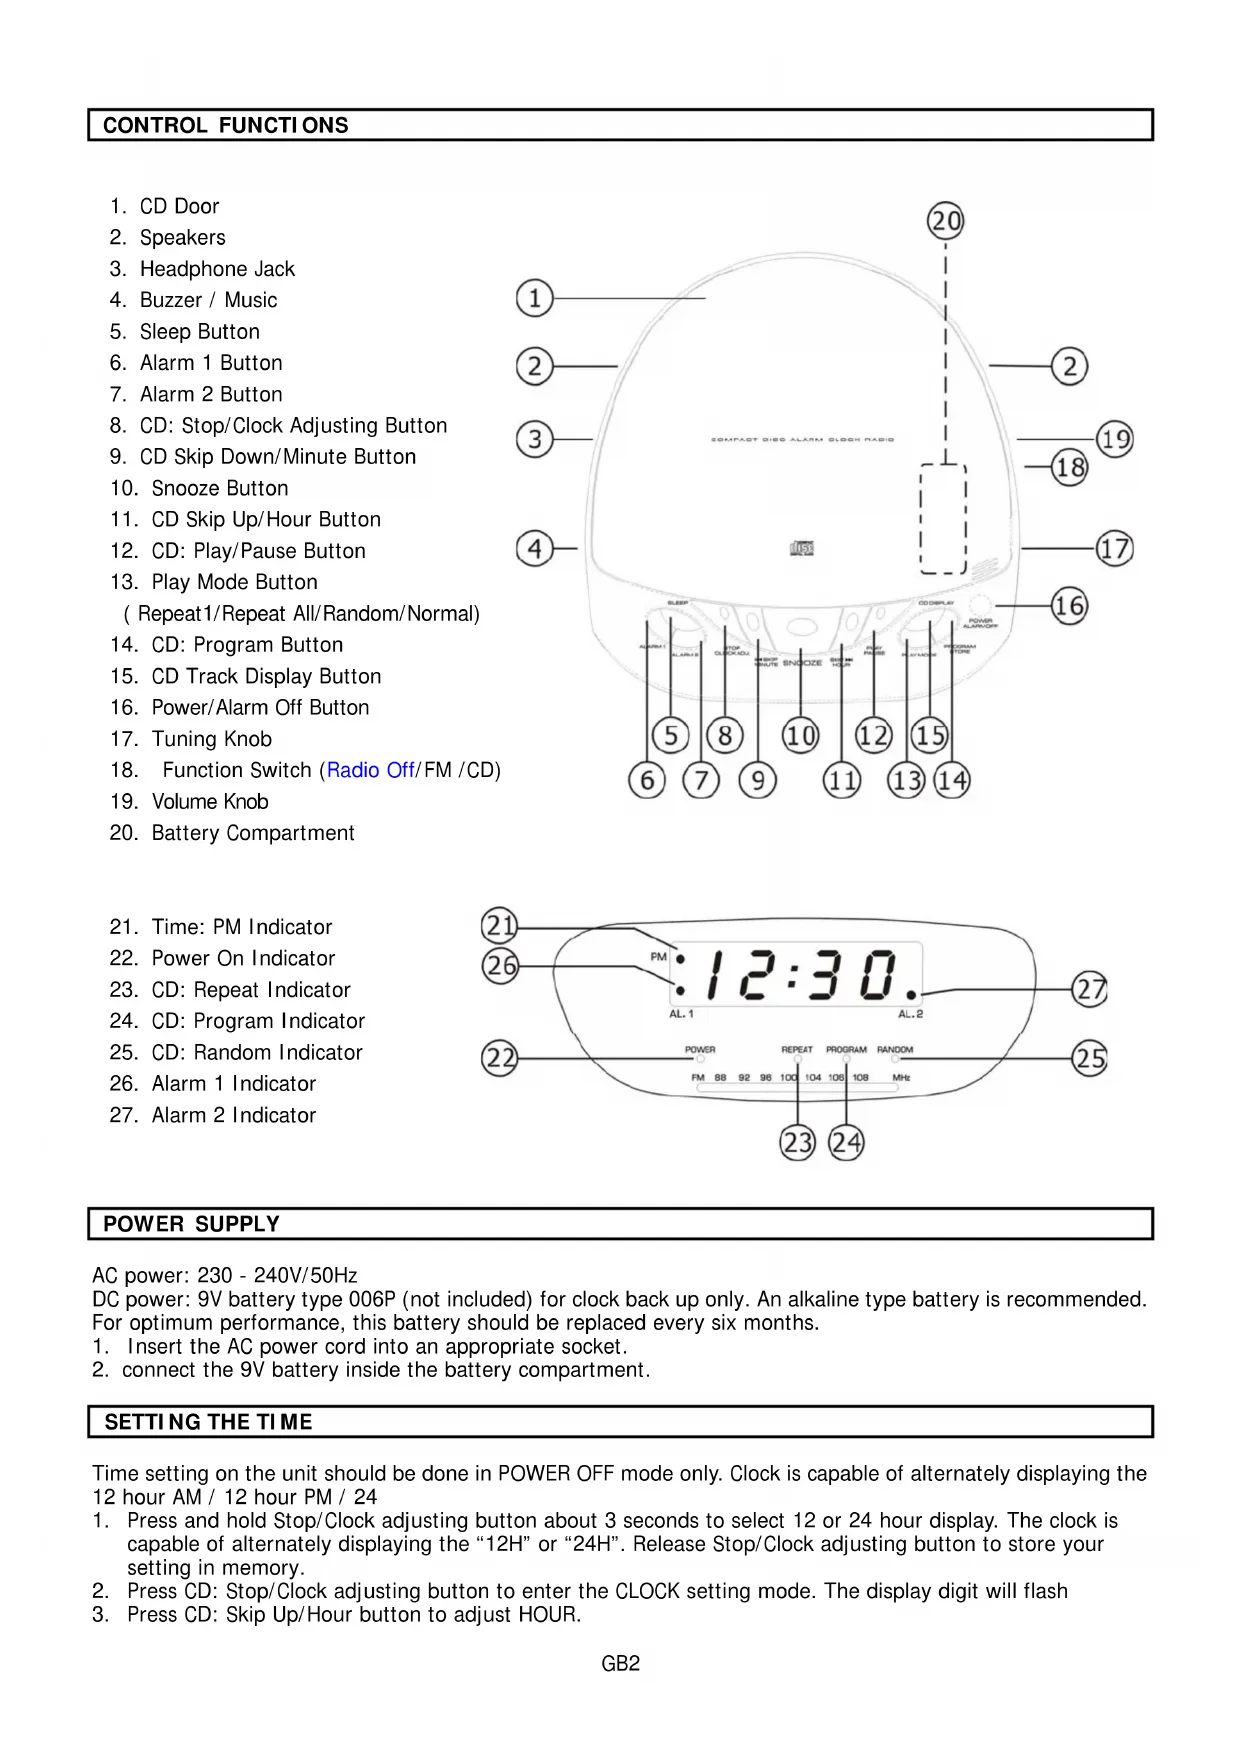
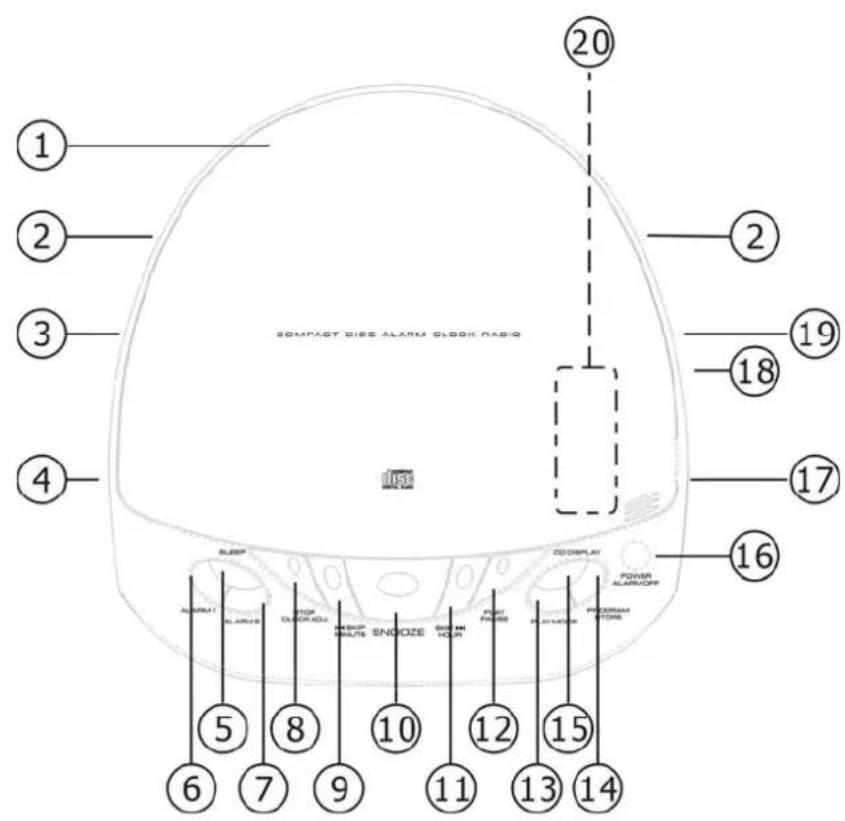
CONTROL FUNCTIONS
- CD Door
- Speakers
- Headphone Jack
- Buzzer / Music
- Sleep Button
- Alarm 1 Button
- Alarm 2 Button
- CD: Stop/Clock Adjusting Button
- CD Skip Down/Minute Button
- Snooze Button
- CD Skip Up/Hour Button
- CD: Play/Pause Button
- Play Mode Button (Repeat1/Repeat All/Random/Normal)
- CD: Program Button
- CD Track Display Button
- Power/Alarm Off Button
- Tuning Knob
- Function Switch (Radio Off/FM /CD)
- Volume Knob
- Battery Compartment
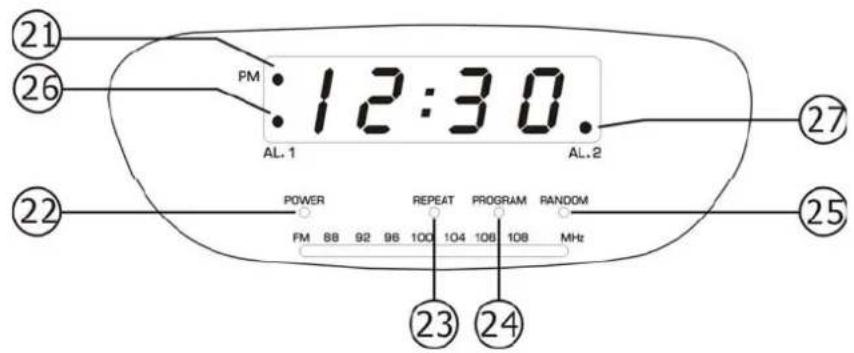
- Time: PM Indicator
- Power On Indicator
- CD: Repeat Indicator
- CD: Program Indicator
- CD: Random Indicator
- Alarm 1 Indicator
- Alarm 2 Indicator
POWER SUPPLY
AC power: 230 - 240V/50Hz
DC power: 9V battery type 006P (not included) for clock back up only. An alkaline type battery is recommended.
For optimum performance, this battery should be replaced every six months.
- Insert the AC power cord into an appropriate socket.
- connect the 9V battery inside the battery compartment.
SETTING THE TIME
Time setting on the unit should be done in POWER OFF mode only. Clock is capable of alternately displaying the 12 hour AM / 12 hour PM / 24
- Press and hold Stop/Clock adjusting button about 3 seconds to select 12 or 24 hour display. The clock is capable of alternately displaying the "12H" or "24H". Release Stop/Clock adjusting button to store your setting in memory.
- Press CD: Stop/Clock adjusting button to enter the CLOCK setting mode. The display digit will flash
-
Press CD: Skip Up/Hour button to adjust HOUR.
-
Press CD: Skip Down/Minute button to adjust MINUTE.
- Press CD: Stop/Clock adjusting button again to store your setting in memory.
PLAYING A CD
- Pull to open the CD door and load your disc then close the CD door. (CD printed side facing up)
- Press Power/Alarm Off button to turn on the unit.
- Slide Buzzer/Music switch to Music position, and Function switch to CD position.
- Press Play/Pause button to playing a CD, the LED display will indicate the current playing track number. Adjust the level of sound by tuning the Volume knob. Press Stop/Clock adjusting button to stop the playing.
NOTE: You can press the CD DISPLAY button to view the number of CD track, then it will return to the clock time after few seconds.
PAUSE & SKIP FEATURES
- Start playing your CD as the above mentioned procedures.
- Press Play/Pause button to pause the playing of the current track. Press the same button again to continue the playing.
- Press Up/Hour button to advance one track. Hold this button down to advance quickly through the tracks.
- Press Down/Minute button to return to previous track. Hold this button down to return quickly to the beginning track.
PROGRAMMED CD PLAY
This function allows you to preset the order in which a series of tracks will be played.
- Insert a CD as mentioned above. Press Program/Store button, the Track Memory (e.g. P 01) will appear and the Program Indicator will flash.
- Press Up/Hour button or Down/Minute button briefly to locate the particular track, then press the Program/Store button again to store the selected track(s) in the memory. Up to 20 tracks can be registered by repeating Step 2.
- If you want to review the tracks which you have programmed, press Program/Store button repeatedly.
- After completion of the programming, press Play/Pause button, the tracks will be played in stored order.
- If you want to clear all programmed tracks, press Program/Store button and then press Stop/Clock adjusting button.
REPEAT/ RANDOM CD PLAY
If you wish to listen to a track all tracks over and over again, the repeat function will allow you to do so.
- Start playing a CD.
- Press Play Mode button once to repeat the current track. the Repeat Indicator will flash.
- Press Play Mode button again to repeat all tracks. The Repeat Indicator will be on.
- Press PLAY MODE button one more time to enter the RANDOM mode, the RANDOM indicator will alight.
- If you want to cancel the previous repeat/random setting, press Play Mode button again till to Repeat and Random Indicator off.
RADIO OPERATION
- Press Power/Alarm Off button to switch on the unit.
- Slide Buzzer/Music switch to Music position, and Function Switch to FM position.
- Turn Radio Tuning Knob to select your desired radio station.
- Adjust Volume knob to your desired level.
- If you want to switch the Radio off, press Power/Alarm Off button again.
NOTE:
For FM reception, there is FM Antenna/Aerial on the rear of the unit. Extend the Antenna/ Aerial and move it around to obtain to the best reception.
SETTING THE ALARM
This unit allows you to set two different alarm time during the unit is off or the unit is on Radio or CD mode.
- Press AL1 button for setting the Alarm 1, the AL1 Indicator will be on and the alarm time will flash.
- Press Skip Up/Hour button to set the hour and press Skip Down/Minute button to set minute.
- Press AL1 button again to store your setting in the memory, the AL1 indicator will be still on.
- Press AL2 button for setting the Alarm 2, the AL2 Indicator will be on and the alarm time will flash. Other steps are same as above mentioned step 2-3.
WAKE TO RADIO
- Follow the procedures 1-4 in RADIO OPERATION section to select your desired Radio Station.
- Follow the procedures 1-3 in SETTING THE ALARM section to set the Alarm 1.
- Press Power/Alarm Off button to turn the unit off.
- If you need to set the Alarm 2, repeat the above mentioned Step 1-3.
WAKE TO CD
- Follow the procedures 1-4 in PLAYING A CD section.
- Follow the procedures 1-3 in SETTING THE ALARM section to set the Alarm 1.
- Press Power/Alarm Off button to turn the unit off.
- If you need to set the Alarm 2, repeat the above mentioned Step 1-3.
NOTE: This function automatically setting in repeat all mode to avoid your CD track too short in alarm. If you forget insert CD or disc error, It will automatically change to wake by buzzer.
WAKE TO BUZZER
- Follow the procedures 1-3 in SETTING THE ALARM section.
- Slide the Buzzer/Music switch to Buzzer position.
- Press Power/Alarm Off button to turn the unit off.
- If you need to set the Alarm 2, repeat the above mentioned Step 1-3.
SNOOZE CONTROL
The Snooze button allows the user an extra sleep time of about 5 minutes after the CD/Radio/Buzzer is switch on to the pre-set wake-up time.
SLEEP TO MUSIC
The CD or Radio can be set to play on and switch off automatically for a period of time from 15, 30, 60 or 90 minutes by following the procedures below:
- Start playing a CD or Radio.
- Press Sleep button to set the desired time until the clock shows the exact sleep time (90>60>30>15 minutes) you wish the CD or Radio to continue to play before switching the unit off.
- After 3 seconds, your setting will be stored in the memory.
- To turn off the music before the end of the registered sleep time period, simply press Power/ Alarm Off button.
- Press Sleep button again to set the sleep time in "00", so as to cancel the sleep function.
INSTRUCTIONSONENVIRINMENTPROTECTION
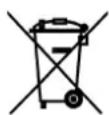
Do not dispose of this product in the usual household garbage at the end of its life cycle; hand it over at a collection point for the recycling of electrical and electronic appliances. The symbol on the product, the instructions for use or the packing will inform about the methods for disposal.
The materials are recyclable as mentioned in its marking. By recycling, material recycling or other forms of re-utilization of old appliances, you are making an important contribution to protect our
environment.
Please inquire at the community administration for the authorized disposal location.
IMPORTANT Note: Although this CD player can read CD-R and CD-RW discs, in addition to normal CDs, the playability of CD-R and CD-RW discs may be affected by the type of software that was used to create the discs, as well as the quality and condition of the blank media you are using. 100% playability cannot be guaranteed. This is not an indication of a problem with the player.
WICHTIG
- ATTENTION
- WARNING:
- CAUTION :
- IMPORTANT SAFETY PRECAUTIONS
- CONTROL FUNCTIONS
- POWER SUPPLY
- SETTING THE TIME
- PLAYING A CD
- PAUSE & SKIP FEATURES
- PROGRAMMED CD PLAY
- REPEAT/ RANDOM CD PLAY
- RADIO OPERATION
- SETTING THE ALARM
- WAKE TO RADIO
- WAKE TO CD
- WAKE TO BUZZER
- SNOOZE CONTROL
- SLEEP TO MUSIC
- INSTRUCTIONSONENVIRINMENTPROTECTION
- WICHTIG
Brand : AudioSonic
Model : CDCL62
Category : Alarm Clock