RT205 - Radio THOMSON - Free user manual and instructions
Find the device manual for free RT205 THOMSON in PDF.
| Brand | Thomson |
| Model | RT205 |
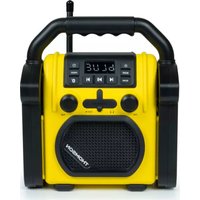
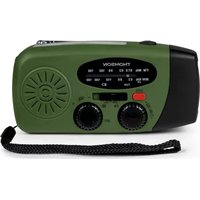
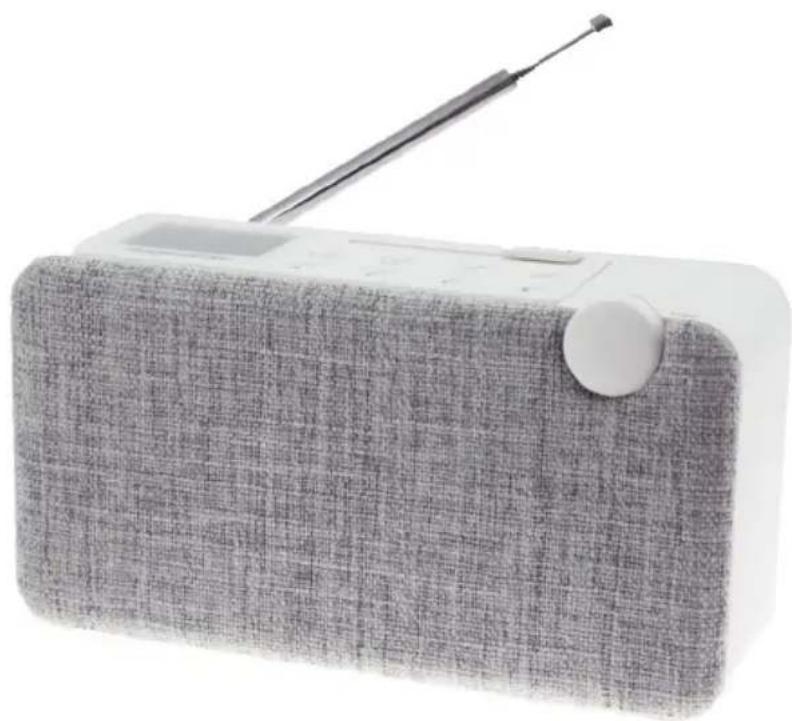
| Product Type | Portable DAB+/FM radio |
| Variants | DAB05 and WS05 (common manual) |
| Mains power supply (DAB05) | DC 9V 1A adapter (not supplied) |
| Mains power supply (WS05) | Micro USB 5V 800mAh cable (supplied) |
| Rechargeable battery | Built-in lithium, charges via adapter or micro USB |
| Wireless connectivity | Bluetooth (pairing names: DAB05 or WS05) |
| Audio inputs | AUX 3.5 mm |
| Headphone output | 3.5 mm jack (PHONE) |
| Display | Backlit LCD (8-character dot matrix) |
| DAB+ reception | Band III (174.928 – 239.200 MHz), channels 5A – 13F |
| FM reception | FM with RDS, 50 kHz step |
| Presets | DAB05: 32 DAB + 32 FM; WS05: 20 FM |
| Speakers | Left and right (DAB05); 1 speaker 1.75" (WS05) |
| Output power | WS05: 3 W at 4 ohms |
| Additional features | Info (DLS, signal strength), system menu, time setting, backlight, reset |
| Auto standby | 15 min without activity (unless audio is playing) |
| Safety | Do not expose to water, do not open, use only specified accessories |
| Maintenance | Unplug before cleaning, use a soft dry cloth |
| General information | Made in China by Bigben Interactive; support: 09 69 32 59 62 |
Frequently Asked Questions - RT205 THOMSON
User questions about RT205 THOMSON
0 question about this device. Answer the ones you know or ask your own.
Ask a new question about this device
Download the instructions for your Radio in PDF format for free! Find your manual RT205 - THOMSON and take your electronic device back in hand. On this page are published all the documents necessary for the use of your device. RT205 by THOMSON.
USER MANUAL RT205 THOMSON
(Applicable aux deux)
(Applicable aux deux)
customerservice@bigben-interactive.be
ESPANA, sat@bigbeninteractive.es
ITALIA, support@bigbeninteractive.it
www/bigben.eu
DAB05 / WS05
BLUETOOTH SPEAKER

OPERATING INSTRUCTIONS
PLEASE READ THIS USER MANUAL CAREFULLY BEFORE
OPERATING THIS UNIT AND RETAIN FOR
FUTURE REFERENCE
Contents
Warnings and precautions 1
Important safety instructions
Care for your product 2
Care of the environment
Safety and Notice 3
Setting Started
Contents
Product Description (Both Applicable)
Product Description (DAB 05 only) 4
Product Description (WS 05 only)
Turning on/off Description (DAB 05 only)
Turning on/off Description (WS 05 only) 5
DAB Function (DAB 05 only)
FM Function (DAB 05 only)
FM Function (WS 05 only) 6
BT Function (DAB 05 only)
BT Function (WS 05 only) 7
AUX Function (DAB 05 only)
AUX Function (WS 05 only)
INFO Function (DAB 05 only)
MENU Function (DAB 05 only) 8
SYSTEM (DAB 05 only)
Time Setting (WS 05 only) 9
PRESET Saved Radio Channels Function
(DAB 05 only)
PRESET Saved Radio Channels Function (WS 05 only)
Volume Tuning Function (Both Applicable) 10
Re-chargeable Function (DAB 05 only)
Re-chargeable Function (WS 05 only)
Battery Inspection Function (DAB 05 only)
External Earphone Function (Both Applicable)
Adjustment of Signal Receiving
(Both Applicable)
Manual RESET Function (DAB 05 only)
Cautions on Battery Consumption
(Both Applicable)
Remarks 11
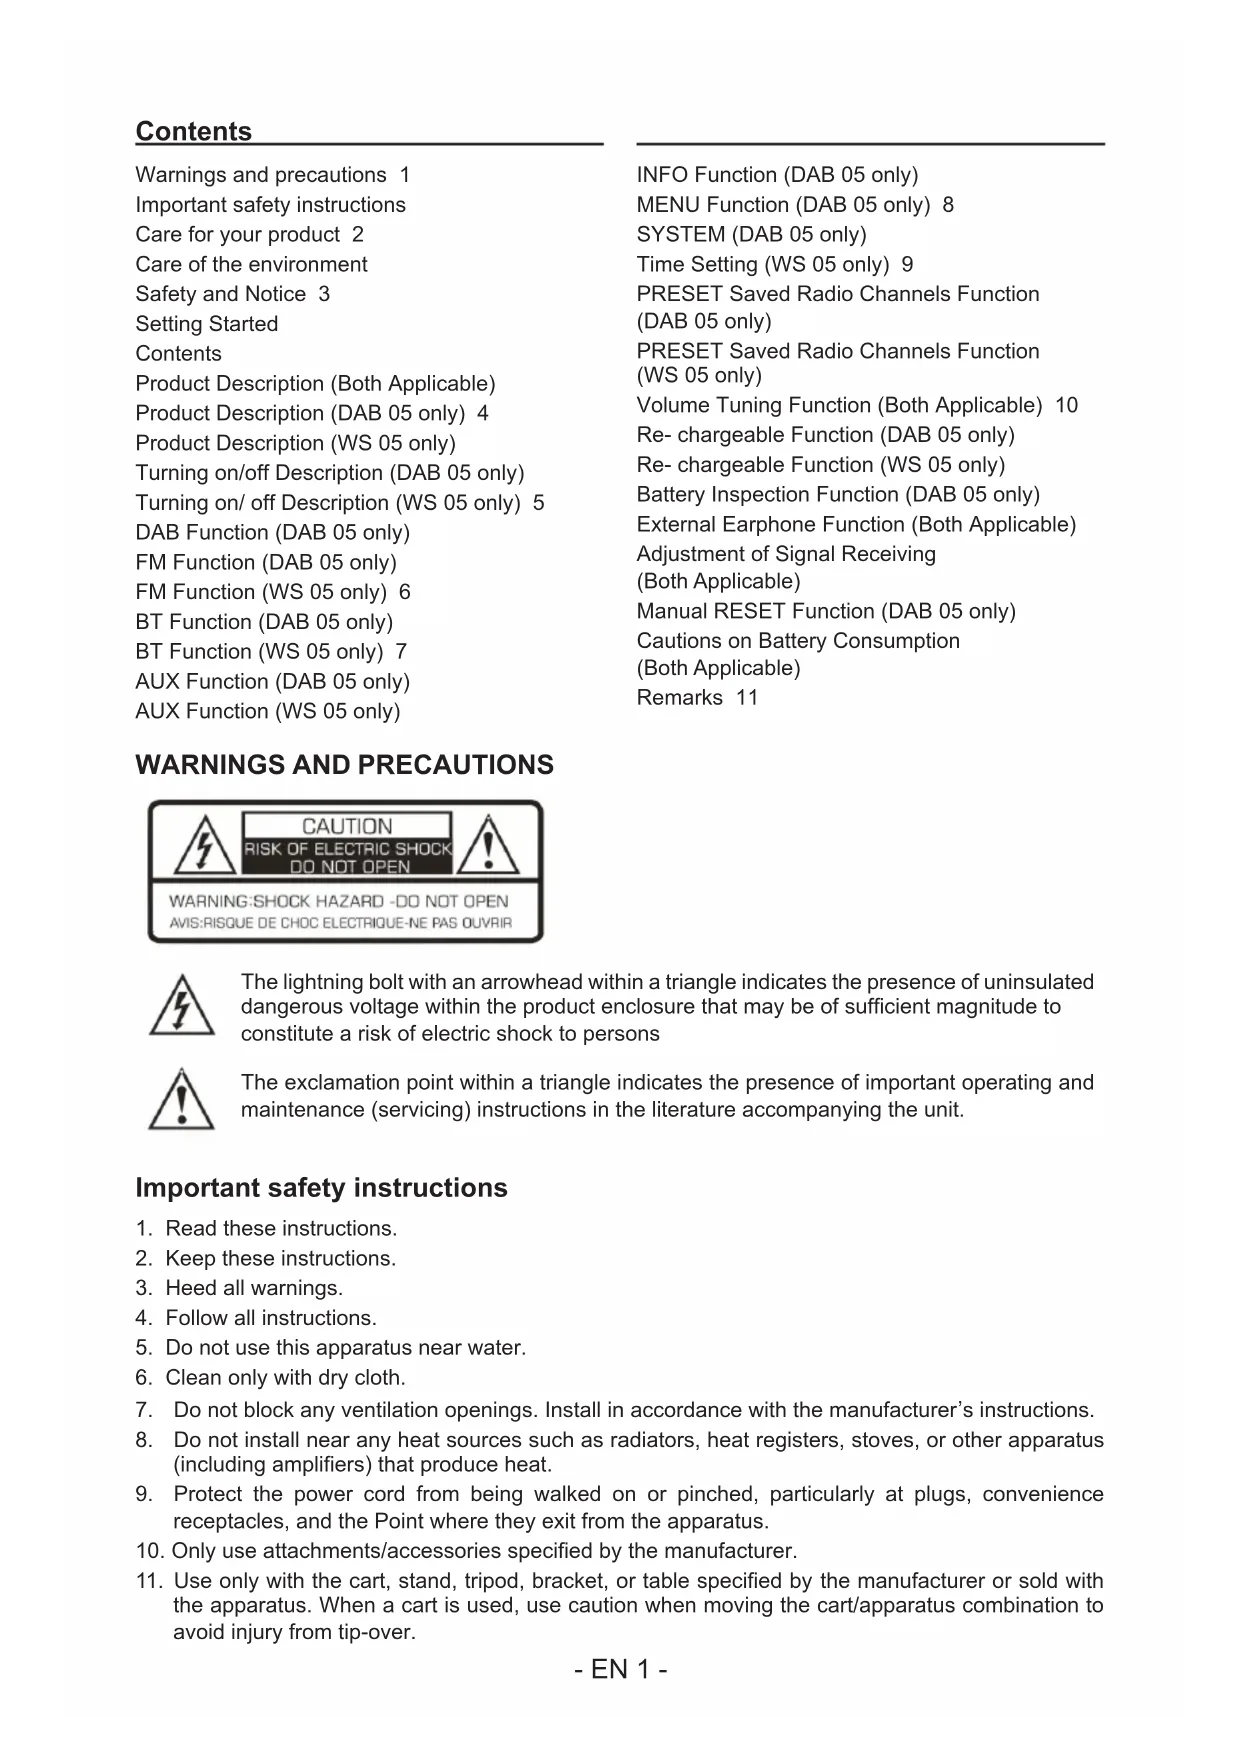
WARNING AND PRECAUTIONS

The lightning bolt with an arrowhead within a triangle indicates the presence of uninsulated dangerous voltage within the product enclosure that may be of sufficient magnitude to constitute a risk of electric shock to persons

The exclamation point within a triangle indicates the presence of important operating and maintenance (servicing) instructions in the literature accompanying the unit.
Important safety instructions
- Read these instructions.
- Keep these instructions.
- Heed all warnings.
- Follow all instructions.
- Do not use this apparatus near water.
- Clean only with dry cloth.
- Do not block any ventilation openings. Install in accordance with the manufacturer's instructions.
- Do not install near any heat sources such as radiators, heat registers, stoves, or other apparatus (including amplifiers) that produce heat.
- Protect the power cord from being walked on or pinched, particularly at plugs, convenience receptacles, and the Point where they exit from the apparatus.
- Only use attachments/accessories specified by the manufacturer.
-
Use only with the cart, stand, tripod, bracket, or table specified by the manufacturer or sold with the apparatus. When a cart is used, use caution when moving the cart/apparatus combination to avoid injury from tip-over.
-
Unplug this apparatus during lightning storms or when unused for long periods of time.
- Refer all servicing to qualified service personnel. Servicing is required when the apparatus has been damaged in anyway, such as power-supply cord or plug is damaged, liquid has been spilled or objects have fallen into the apparatus, apparatus has been exposed to rain or moisture, does not operate normally, or has been dropped.
- Apparatus shall not be exposed to dripping or splashing.
- Do not place any sources of danger on the apparatus (e.g. liquid filled objects, lighted candles).
- Where the MAINS plug or an appliance coupler is used as the disconnect device, the disconnect device shall remain readily operable.
- Make sure there is enough free space around the product for ventilation.
- Batteries (battery pack or batteries installed) shall not be exposed to excessive heat such as sunshine, fire or the like.
WARNING
Do not ingest the battery. Chemical burn hazard. This product contains a coin/button cell battery. If the coin/button cell battery is swallowed, it can cause severe internal burns in just 2 hours and can lead to death. Keep new and used batteries away from children. If the battery compartment does not close securely, stop using the product and keep it away from children. If you think batteries might have been swallowed or placed inside any part of the body, seek immediate medical attention.
Care for your product
- Always unplug the appliance when not in use and before cleaning.
- Do not play music at excessive volume levels as damage to hearing and or the equipment may occur.
- Do not use this unit in wet or damp conditions.
- Always disconnect the unit from the mains power supply before cleaning. Clean the appliance with a soft, damp, lint free cloth. Do not use abrasives or harsh cleaners.
Care of the environment

Your product is designed and manufactured with high quality materials and components, which can be recycled and reused.

Your product contains batteries covered by the European Directive 2006/66/EC, which cannot be disposed with normal household waste. Please inform yourself about the local rules on separate collection of batteries because correct disposal helps to prevent negative consequences for the environmental and human health.

When this crossed-out wheeled bin symbol is attached to a product it means that the product is covered by the European Directive 2002/96/EC. Please inform yourself about the local separate collection system for electrical and electronic products. Please act according to your local rules and do not dispose of your old products with your normal household waste. Correct disposal of your old product helps to prevent potential negative consequences for the environment and human health.
Safety and Notice
Read and understand all instructions before you use this product. If damage is caused by failure to follow the instructions, the warranty does not apply.

- Never remove the casing of this apparatus.
- Never lubricate any part of this apparatus.
- Never place this apparatus on other electrical equipment.
- Keep this apparatus away from direct sunlight, naked Fames or heat.
- Never look into the laser beam inside this apparatus.
- Ensure that you always have easy access to the power cord, plug or adaptor to disconnect this apparatus from the power.

CAUTION
- Risk of product damager! Make sure that the power voltage corresponds to the voltage printed on the back label.
- Risk of electric shock! When you unplug the AC/DC adaptor always pull the plug from the socket. Never pull the cord
- Before connecting the AC/DC adaptor, ensure you have completed all other connections
When AC power supply...
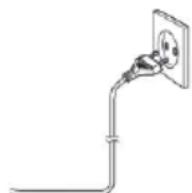
Place the unit in the desired position and unravel the mains cable. Insert the cable into the supply socket and switch on if applicable.
Auto standby
When no music play from a connected device, the product automatically switches to standby if:
- No button is pressed for 15 minutes,
- No audio from a connected device for 15 minutes.
Setting Started
- Remove the appliance from the box.
- Remove any packaging from the product.
- Place the packaging inside the box and either or dispose of safely.
Contents
- 1 x Bluetooth speaker
- 1 x DC Adapter (Optional)
- 1 x Micro- USB charging cable (Optional)
- 1 x User manual
- 1 x Aux in 3.5mm cable
Product Description (Both Applicable)
- Power button: press the power button at least 3 seconds to turn on or turn off.
- Previous Short press the button to go to previous track under BT mode.
- NEXT Short press it to go to next track under BT mode.
- BT button: press it to enter Bluetooth mode and short press again to disconnect existing Bluetooth connection.
- PLAY/PAUSE short press it to play and pause under BT mode.
Product Description (DAB 05 only)
- Tuneutto: press the 'mode' button to switch between DAB/FM mode. Spin the rotary button to search the suitable channel. Press Menu/ Enter button to adjust the system setting under DAB/FM/BT/AUX mode.
- DAB/FM button: switch between DAB, FM, and AUX mode.
- Play/Pairing: Long press the button to cut off the Bluetooth pairing.
- Info button: short press to check the radio information and status of DAB/FM.
- Menu/Enter button: short press the button to enter Menu screen under DAB/FM/BT/AUX mode. Spin the rotary button to choose available setting options. Long press Menu/Enter button to return to previous setting option. In FM mode, long press the Menu/Enter button to start the automatic search of radio channels.
- Preset button: Together with Menu button: press the preset button to enter DAB/FM preset option screen, long press the preset button to enter pre- save radio screen.
7.ANT:50 OHM extendable antenna. - DC IN: external DC 9V 1A power input hole.
- PHONE: external earphone input hole.
- RESET: return to the default setting.
- AUX IN: external AUX IN input hole.
- LCD DISPLAY: 8 letters and dot matrix character screen.
- SPEAKER: Left and right channel speakers.
- Volume-/+ button: to increase or decrease the volume of the speaker.
Product Description (WS 05 only)
- Rotary button: Long press it to turn on or off. Short press it to adjust the back-light to be 50% and 100% lightness. Spin the rotary button to search the available stations.
- MODE: Short press the "MODE" button to switch BT/FM/AUX function. Long press the "MODE" button to enter time setting.
- Previous: Short press to search the stations from lower frequency and play the 1st searched station automatically under FM mode.
- NEXT: Short press it to search the stations from higher frequency and play the 1st searched station automatically under FM mode.
- PLAY/PAUSE: Long press it to search and store the stations automatically under FM mode.
- PRESET: Press it for around 2 seconds to store the preferred station under FM mode.
- -VOLUME+: Slide the "-VOLUME+" button to adjust the volume.
- UP: Short press it to choose the stored station from P1-P20.
- DOWN: Short press it to choose the stored station from P20-P1.
Turning on/off Description (DAB 05 only)
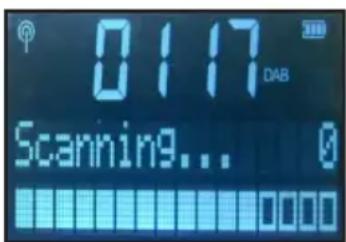
Long press the power button for 3 seconds to turn on if the speaker is charged directly with 9V 1A power adapter or the battery of speaker is fully charged. The message of "Welcome to Digital Radio" will be displayed by the backlight of LCD screen. The speaker is in function and will be in DAB searching mode, displaying "Scanning...and searching bar in progress".
The first radio channel and its information will be displayed in the screen until the DAB signal is reached automatically. Time zone will be updated automatically if the DAB signal is received.
Long press the power button for 3 seconds to switch it off.
Turning on/off Description (WS 05 only)
Unzip the antenna and fully extend it. Long press power button to turn on the unit, "BT" image will be displayed in LCD screen and enter standby mode. Long press the "MODE" button to choose the time setting, short press the "UP" and "DOWN" button to set the time. Long press the "MODE" button to confirm time setting and LCD display will show as below:

DAB Function (DAB 05 only)
Press DAB/FM button to switch to DAB mode. DAB information/ DAB signal bar/ current time zone will be displayed on the screen.
Automatic scanning function on radio channels:
When switching to DAB mode, the whole radio channels automatic scanning task will be started once. Message of "Scanning... 0" will be displayed. Then, whole part of DAB III channels (174.928-239.200MHZ) 5A - 13F will be scanned once, showing the total numbers of radio channels afterwards. The radio channels scanned will be saved automatically by the system. The first radio channel in the searching list will be played.
Radio manual Tune function:
Under DAB mode, short press the Menu/Enter button to enter the Menu screen, spin the tune button to "Manual Tune", press Menu/Enter button to confirm the action, DAB frequency will be displayed, spin the tune button to choose any single frequency from 5A to 13F range. Press the Menu/Enter button to confirm action. DAB signal bar will be detected and shown by the bottom of LCD screen.
When pressing the Menu/Enter button, the radio scanned will be saved to playlist automatically. Press the Menu/Enter button again to stop the manual radio searching mode. Radio channels saved in the playlist will be played afterwards. Please repeat the above steps if searching other radio channels is needed.
The message of "Service not available" will be displayed by the screen if there is no available radio signal.
FM Function (DAB 05 only)
Press the DAB/FM button to switch to FM mode, the screen will display the following information:

FM Auto Tuning function:
-
FM mode: Long press the Menu/Enter button, lowest radio channels will be scanned first, up to highest ones (50KHz Step). Automatic scanning will be terminated and until FM signal is detected. FM signal will be remained and played in that channel.
-
FM mode: after spinning the Tune button in clockwise direction, long press the Menu/Enter button for 2 seconds, lowest radio channels will be scanned first, up to highest ones (50KHz Step). Automatic scanning will be terminated and until FM signal is detected. FM signal will be remained and played in that channel.
- FM mode: after spinning the Tune button in anti-clockwise direction, long press the Menu/Enter button for 2 seconds, highest radio channels (50KHz Step) will be scanned first, up to lowest ones. Automatic scanning will be terminated and until FM signal is detected. FM signal will be remained and played in that channel.
FM Manual Tuning function:
- In FM mode, spin the Tune button one step, the radio frequency of low/high will change to 50 KHz. Manual spin the Tune button in clockwise direction continuously to high radio frequency; while manual spin the Tune button in anti-clockwise direction continuously to low radio frequency.
FM Function (WS 05 only)
Short press the "MODE" button to enter FM mode, LCD display will show the time and FM signal as below:

FM Auto tuning:
Long press the "UP" button to activate auto tuning upwards at 50KHz step, the unit will stop searching and play the 1st searched station. Long press the "DOWN" button to activate auto tuning downwards at 50KHz step, the unit will stop searching and play the 1st searched station. Long press the "▶button to search and store the stations automatically for auto tuning upwards at 50KHz step.
FM manual tuning:
Spin the "rotary button" clockwise to tuning upwards at 50KHz step. Spin the "rotary button" anticlockwise to tuning downwards at 50KHz step.
Play stored stations:
- Short press the "UP" and "DOWN" button to pick up stored stations from P1 to P20.
- The station will play automatically after choosing the picked-up station.
- Frequency will be displayed only if no station is stored.
BT Function (DAB 05 only)
Bluetooth pairing name: DAB 05
Press BT button to switch to Bluetooth mode, the screen will display the following information: Bluetooth mode and current time etc.:
Icon of and will be flashing mutually if the speaker is not matched with another compatible device. Turn on the Bluetooth mode of another device and search the name of this speaker in Bluetooth mode press "connect" on another device. Wait and check the for this icon on the LCD screen. The speaker can play the music from another device in Bluetooth mode.
Under Bluetooth mode, short press the PLAY/PAUSE button to pause the music playing on another device; long press the PLAY/PAUSE button to cut off the Bluetooth connection with another device.
Under Bluetooth mode, short press prev/next button to choose previous/ next song.
Under Bluetooth mode, the speaker will be off to save power if there is no successful Bluetooth connection for 15 minutes.
Under the situation of Bluetooth pairing, long press the PLAY/PAUSE button to activate the music playing. While long press the PLAY/PAUSE button again, music playing will be stopped.
BT Function (WS 05 only)
Bluetooth pairing name: WS 05
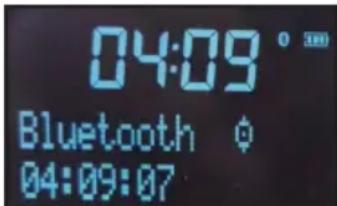
Short press the "MODE" button to switch to BT mode. LCD will display the BT mode and time as below:
The image on the display will blinks to search the BT device. The image on the display will be solid after paired. Press “ ” and “ ” button to go to previous or next track.
AUX Function (DAB 05 only)
Press DAB/FM/AUX button to switch to AUX status, the screen will display the following information: current time, Aux Input status etc.:
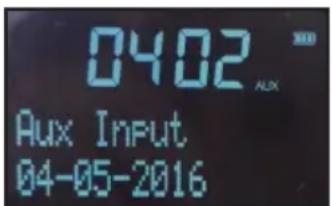
Plug in the Aux wire to play instantly.
Under the Aux mode, the speaker will be off to save power if there is no Aux wire plugging in for 15 minutes.
AUX Function (WS 05 only)
Short press the "MODE" button to switch to AUX mode. LCD will display the Aux in mode and time as below:

Connect AUX port to other audio devices via the AUX cable to play music. Adjust volume by either audio devices themselves or slide the “+VOLUME-” button. The Bluetooth function will not work when the unit connects to AUX IN mode.
INFO Function (DAB 05 only)
Under DAB mode, short press INFO button continuously to display relevant information of DAB:
DLS Signal Strength Signal Strength of radio Ensemble/Multiplex Frequency signalerror ## Transfer Rate Time Date...
Under FM mode, press INFO button tightly to check relevant radio information:
Radio Text Signal Strength Radio Program Type Name of radio Stereo/ Mon Time Date...
Under Bluetooth mode, press INFO button tightly to check relevant radio information:
Time Date...
MENU Function (DAB 05 only)
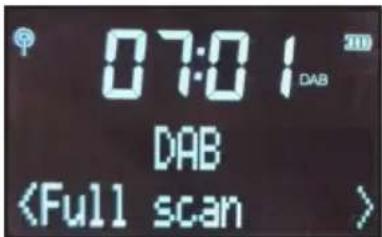
Under the DAB mode, short press Menu/Enter button to enter the Menu screen, spin the Tune button to choose the following options in ascending order:
Full scan Manual Tune DRC Prune System
When in Full scan, Short press Menu/Enter button to activate whole channel searching.
When in Manual Tune, short press Menu/Enter button, spin the Tune button to start manual searching on radio channels.
When in DRC, short press Menu/Enter button to enter DRC choices screen/DRC off/DRC high/ DRC low.
When in Prune, short press Menu/Enter button to enter options of "Prune NO / Yes".
Under FM mode, short press Menu/Enter button to enter Menu screen, spin the Tune button to choose the following options in ascending order:
Scan Setting Audio setting System
When in Scan Setting, short press Menu/Enter button, spin the Tune button choose options like: "All stations/Strong stations only".
When in Audio setting, short press Menu/Enter button, spin the Tune button to choose options such as, "Stereo Allowed / Forced mono".
SYSTEM (DAB 05 only)
When in System, short press Menu/Enter button to enter Menu, spin the Tune button to choose the following options in ascending order:
Time Back light Language Factory Reset SW version
Time setting:
There are two available options for the speaker, one is time update automatically; the other one is manual adjustment of time. Time will be updated automatically only when DAB or FM RDS signal is received. Otherwise, manual adjusting time is necessary.
When the speaker is on, short press the Menu/Enter button to enter Menu screen, spin the Tune button to choose System, short press Menu/Enter button to choose Time, and then short press Menu/Enter button.
1. Set Time/Date Manually:
Spin the Tune button to choose Time/Date, short press Menu/Enter button, then spin the Tune button, adjust the options one by one, like "Hour-Minutes-Day-Month. When the setting is finished, short press Menu/Enter button to confirm the action, the message of "Time/Date Saved" will be displayed. Long press the Menu/Enter button to exit the time setting and return to the main screen.
2. Auto update Timesetting:
Spin the Tune button to choose Auto update, short press Menu/Enter button and spin the Tune button, choose the following time update mode:
No Update: turn off the automatic time update.
Update form Any: can update DAB or FM RDS time.
Update form DAB: update DAB time only.
Update form FM: update FM RDS time only.
3. Set 12/24 hour setting:
Spin the Tune button to set 12/24 hour, short press Menu/Enter button, spin the Tune button to choose the following time displaying format:
Set 12 hour: 12 hour time format
Set 24 hour: 24 hour time format
4. Set data format setting:
Spin the Tune button to choose Set data format, short press Menu/Enter button, spin the Tune button to choose the following date displaying format:
DD-MM-YYYY: Date-Month-Year
MM-DD-YYYY: Month- Date- Year
Back Light setting:
Spin the Tune button to choose back light, short press Back Light, short press Menu/Enter button, spin the Tune button to choose the following backlight displaying seconds and brightness:
Timeout: 10 sec; 20 sec; 30 sec; 45 sec; 60 sec; 90 sec; 120 sec; 180 sec; ON
Dim level; High; Medium; Low
Language setting:
There are five languages available:
English
Frangais
Deutsch
Svenska
Espanol
Factory Reset:
Spin the Tune button to choose Factory Reset, short press Menu/Enter button, choose "YES" option, recover to default setting.
SW version setting:
Spin the Tune button to choose SW version, short press Menu/Enter button to check for the software information of this speaker.
For above setting procedures, every single long press Menu/Enter button will direct to previous Menu setting until returning to Menu button.
Time Setting (WS 05 only)
Manual time setting:
After turning on the unit, long press the "MODE" button to choose the time setting, short press the "UP" and "DOWN" button to set the time. Long press the "MODE" button to confirm time setting and long press it again to return.
Set 12/24 hours:
Long press the "MODE" button to select respective format of time display.
-
Set 12 hour: 12 hour mode
-
Set 24 hour: 24 hour mode
PRESET Saved Radio Channels Function (DAB 05 only)
Preset saved radio channels
Under DAB or FM mode, choose the designated single radio channel, press Preset button for at least 2 seconds to enter Preset Save Menu. Spin the Tune button to choose the numerical position of particular radio channel wanted (P1- P32).
After choosing the single numerical position (for example: P1), short press Menu/Enter button to confirm the action, the message of "Preset 1 Store" will be displayed means that position of Preset 1 is saved successfully.
Please repeat step 1 and 2 for saving other available radio channels wanted; there are 32 pre-saved DAB radio channels and 32 FM radio channels in this product.
For playing Pre- Saved Radio channels:
Press Preset button once to play pre-saved radio channels, enter Preset Store Menu, spin the Tune button to choose playing the pre-saved radio channel wanted
Press Menu/Enter button to confirm the action, the designated radio channel will be played promptly.
PRESET Saved Radio Channels Function (WS 05 only)
-
Under FM mode, choose the station which you want to store, hold the "PRESET" button for 2 seconds to preset, press the "UP" and "DOWN" button to choose the number from P1-P20 which you would like to store at.
-
If you want to store at P1, press "PRESET" button to confirm, then "Preset 1" will be stored.
- If you want to store at other presets, repeat the above steps.
- There are 20 FM stations can be stored in total.
Volume Tuning Function (Both Applicable)
While turning on the speaker, spin the "Volume-/+" OR "-VOLUME+" button to suit your needs, spin left to decrease the volume; spin right to increase the volume.
Re-chargeable Function (DAB 05 only)
The speaker is equipped with re-chargeable lithium battery. The speaker will be off automatically when the power indicator light is too low or reminder of low battery is displayed. Please re-charge the speaker with 9V 1A power adapter on time to avoid automatic shutdown.
Re-chargeable Function (WS 05 only)
This product uses 3.7V rechargeable built-in battery. The battery volume on the LCD display blinks as during charging. It stops blinking as solid after fully charged. The unit will be power off to protect itself after battery runs out. For DC IN details, it uses Micro-USB 5.0V-800mAh for charging. Its driver units are in 1.75" and the power output is 3W. Impedance is 4ohm.
Battery Inspection Function (DAB 05 only)
When the battery is in use, the actual volume of battery will be displayed as icon here. After the battery is exhausted, the message of "LOW BAT" will be displayed and the speaker will be off to ensure normal function next time.
External Earphone Function (Both Applicable)
Adjust the Volume-/+ button to the left to decrease the volume first, plug in the earphone to the corresponding hole for enjoying the music. The output of external speaker will be cut off when the microphone is plugged in.
Adjustment of Signal Receiving (Both Applicable)
Please ensure the exterior antenna are fully extended and adjusted to the right receiving angle to enjoy the best experience of listening FM or DAB radio. Please also make sure other technical devices (for instance computers, electric heater) are far away from the product while listening to the FM or DAB radio channels.
For FM status: If FM signal is too weak, please switch the stereo sound to Mono sound to improve the sound quality and signal of FM radio channels.
Manual RESET Function (DAB 05 only)
Using the product under disturbing environment, the buttons of the speaker may not respond properly. Please use a long, slim stick to plug in the Preset hole at the back of the product to restart the default recovery. Please restart the product to enjoy the functions of the speaker.
Cautions on Battery Consumption (Both Applicable)
This product uses DC 9V power adapter (for DAB 05) and Micro-USB 5.0V-800mAh (for WS 05) to recharge the lithium battery. To ensure the normal operation of the product, it is not recommended to use other power adapters to recharge the battery concerned.
Remarks:

Don't discard the electrical and electronic appliances in the regular waste disposal.
- Take them to a collection point.
-
Some components in these appliances may be hazardous to health and the environment.
-
In order to save energy when the unit has no sound output for a while, the unit will be switched to stand-by automatically. It can be switched ON by using the POWER selector again.
- If there is an incoming call while DAB05/WS05 is connected to your cell phone for music playback, it will pause at once when you answer the call and resume after the call ended. (Sometimes it will pause after end the call, it depend on your cell phone.)
- The Bluetooth® word, mark and logo are registered trademarks owned by Bluetooth SIG, Inc. and any use of such marks by Bigben Interactive is under license. Other trademarks and trade names are those of their respective owners.
- THOMSON is a trademark of TECHNICOLOR SA or its affiliates used under license to Bigben Interactive.
- Hereby, Bigben Interactive SA, declares that the DAB05/WS05 device complies with the essential requirements of the directive 1995/5/EC of the European Parliament and of the Council of 9 March 1999 on radio equipment and telecommunications terminal equipment and the mutual recognition of their conformity.
To download the full statement, please visit our website: http://www/bigben-interactive.co.uk/support and the section <>.
Manufactured by BIGBEN INTERACTIVE SA
396, Rue de la Voyette
CRT2-FRETIN
CS 90414
59814 LESQUIN Cedex - France
www/bigben.eu
Made in China


REACH


Fabricant:BigbenInteractiveFRANCE
396, Rue de la Voyette, C.R.T. 2 Fretin,
CS 90414-59814 LESQUIN Cedex
customerservice@bigben-interactive.be
ESPANA, sat@bigbeninteractive.es
ITALIA, support@bigbeninteractive.it
www/bigben.eu
DAB05 / WS05
ALTAVOZ BLUETOOTH

FunciOn AUX (solo DAB 05)
FunciOn AUX (solo WS 05) 8
customerservice@bigben-interactive.be
ESPANA, sat@bigbeninteractive.es
ITALIA, support@bigbeninteractive.it
www/bigben.eu
DAB05 / WS05
ALTOPARLANTE BLUETOOTH
ISTRUZIONI D'USO
PRIMA DI UTILIZZARE L'APPARECCHIO, LEGGERE PER INTERO IL PRESENTE MANUALE E CONSERVARLO PER CONSULTAZIONI FUTURE.
Index
customerservice@bigben-interactive.be
ESPANA, sat@bigbeninteractive.es
ITALIA, support@bigbeninteractive.it
www/bigben.eu
DAB05 / WS05
ALTIFALANTE BLUETOOTH

customerservice@bigben-interactive.be
ESPANAsat@bigbeninteractive.es
ITALIA, support@bigbeninteractive.it
www/bigben.eu
DAB05 / WS05
BLUETOOTH-LAUTSPRECHER

BEDIENUNGSANLEITUNG
customerservice@bigben-interactive.be
ESPANA, sat@bigbeninteractive.es
ITALIA, support@bigbeninteractive.it
www/bigben.eu
DAB05 / WS05
WAARSCHUWINGEN EN VOORZORGSGMAATREGELEN


Time-out: 10 sec; 20 sec; 30 sec; 45 sec; 60 sec; 90 sec; 120 sec; 180 sec; AAN
Dimniveau; Hoog; Medium; Laag
Taal instellen:
customerservice@bigben-interactive.be
ESPANA, sat@bigbeninteractive.es
ITALIA, support@bigbeninteractive.it
www/bigben.eu