
Lite 53D - Media player Dune - Free user manual and instructions
Find the device manual for free Lite 53D Dune in PDF.
User questions about Lite 53D Dune
0 question about this device. Answer the ones you know or ask your own.
Ask a new question about this device
Download the instructions for your Media player in PDF format for free! Find your manual Lite 53D - Dune and take your electronic device back in hand. On this page are published all the documents necessary for the use of your device. Lite 53D by Dune.
USER MANUAL Lite 53D Dune
Manufactured under license from Dolby Laboratories.
Dolby and the double-D symbol are trademarks of Dolby Laboratories.

dtts
2.0+Digital Out
Manufactured under license under U.S. Patent #s: 5,451,942; 5,956,674; 5,974,380; 5,978,762; 6,226,616; 6,487,535; 7,212,872; 7,333,929 & other U.S. and worldwide patents issued & pending. DTS and the Symbol are registered trademarks, & DTS-HD, DTS-HD High Resolution Audio and the DTS logos are trademarks of DTS, Inc. Product includes software. © DTS, Inc. All Rights Reserved.

Table of Contents
| 4 | English Quick Start Guide |
| 10 | Français Guide de démarriage rapide |
| 16 | Deutsch Schnellstartanleitung |
| 22 | Nederlands Snel Start Gids |
| 28 | Español Guía de instalación=rápida |
| 34 | Italiano Guida Rapida |
| 40 | Руccessкий Кратукке ручовODSTBO |
| 46 | Украïnhсьka Коротkinий посбник |
| 52 | Polski Skrócona instrukcja Szybki Start |
Introduction
Dune HD Lite 53D is an all-in-one solution for up to Full HD (1080p) video playback.
Key Features
- The newest Sigma Designs 8653 media processor: enjoy excellent playback and performance of interactive features.
- HDD player: connect an HDD to the player and play content directly from the HDD.
- Network player: connect the player to a local network and play content directly from PC or NAS (UPnP, SMB, NFS).
- MKV player: play HD and SD video in a popular MKV format and other modern video file formats, including top quality HD video with very high bitrate.
- 2 USB ports: conveniently connect HDDs, USB flash drives, USB card readers and other USB storage devices.
- SD card slot: easily play media files on SD memory cards from your camera or other devices, or use an SD memory card as a local or system storage.
- HDMI 1.3: ensure the best possible quality of HD video and HD audio.
- A rich set of standard A/V connectors: use S/PDIF optical audio, stereo audio, component video, composite video outputs to easily connect any A/V equipment.
Video output flexibility: output video in any resolution and format (from SD to 1080p, 24p/PAL/NTSC). - Upscaling: high quality upscaling of DVD and any other SD video content to Full HD (1080p) or other HD resolution.
- File browser: convenient file browser with powerful file management (copy, move, delete, rename, organize, sort).
Extra Functions
- High-quality music playback: play very high-quality (up to 192 Khz / 24-bit) music files in various formats (FLAC, Monkey's Audio APE, WAV/PCM, DTS, etc).
- Playlists: build playlists from your folders, use your own playlists, use repeat and shuffle functions.
- NAS function: access files on storage devices (HDD, optical drive, etc) attached to the player from the local network (using SMB or FTP).
- BitTorrent: use built-in BitTorrent client to download files from P2P networks.
- Customizable user interface: work with media collections using cover art and icon browsing (with Full HD graphics).
- Internet radio: playback and record various Internet radio stations (HTTP/MP3).
- IPTV: playback and record IPTV streams (multicast UDP/RTP) from your Internet provider*.
-
Digital TV option: playback and record Digital TV channels using an optional Digital TV USB dongle**.
-
Check availability of multicast UDP/RTP streams with your Internet provider.
** Digital TV USB dongle is not included; this option can be purchased separately.
Package Contents


6

7

8

9
- Dune HD Lite 53D media player
-
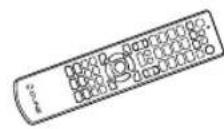
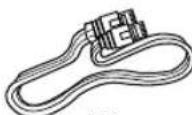
Remote control (batteries may not be included)
-
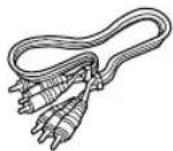
AV cable
- LAN cable
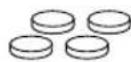
-
Feet
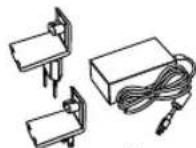
-
Screws
- External power supply
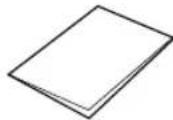
-
Quick start guide
-
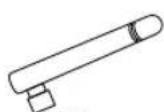
Wi-Fi Antenna (optional)
NOTE: Additional items (optional) may be included into the package, depending on player configuration, region, and distributor.
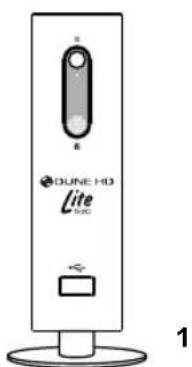
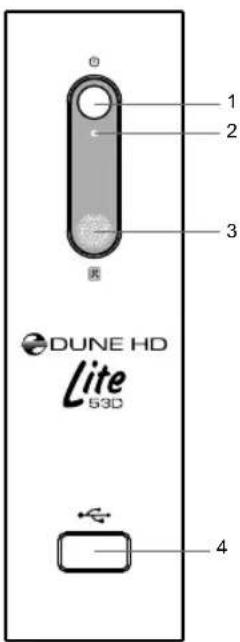
Exterior

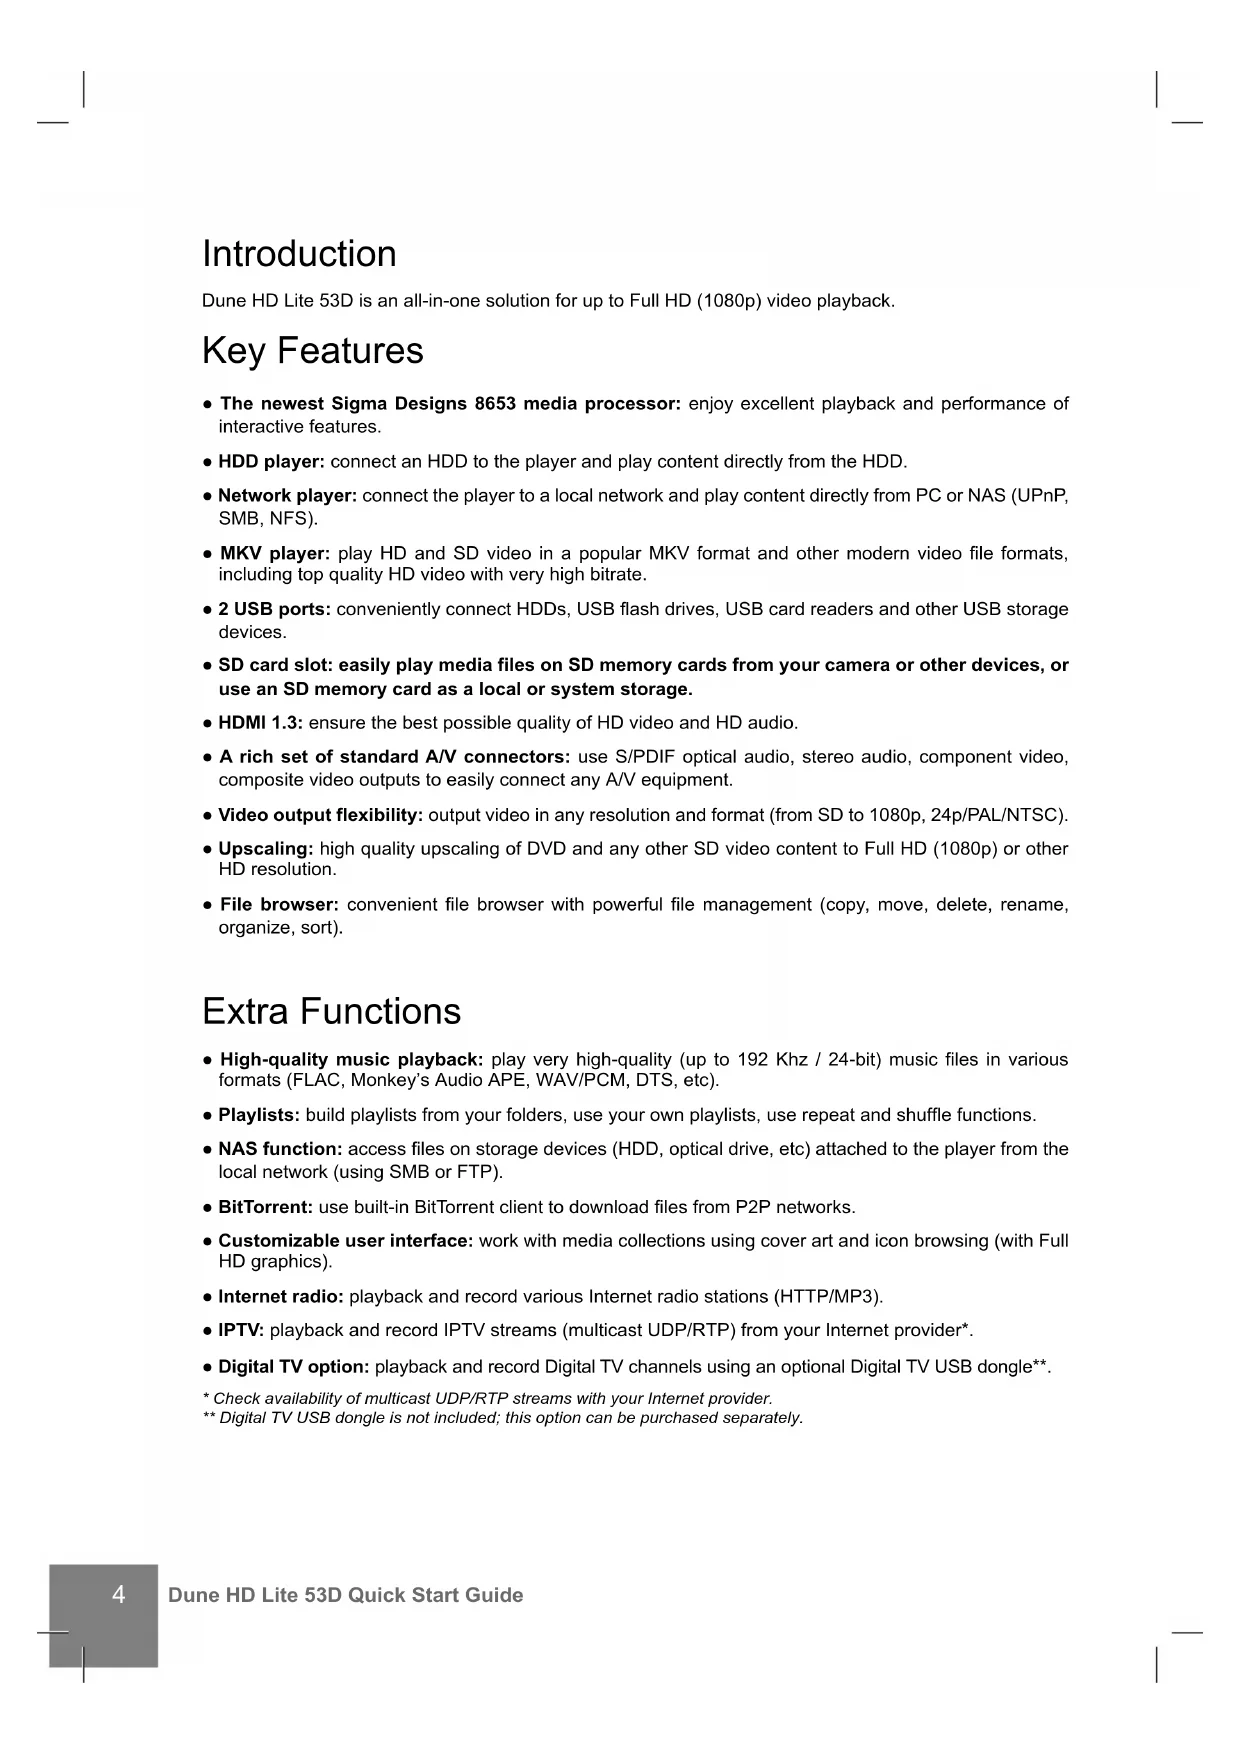
Front view
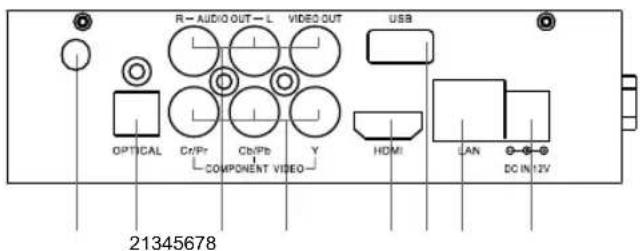
Rear view
- On/off button
- LED indicator
- IR eye
-
USB 2.0 host
-
Wi-Fi antenna (optional)
- Optical digital audio output
- Composite video and analog stereo audio output
- Component (Y/Pb/Pr) video output
5.HDMI 1.3 - USB 2.0 host
7.LAN - DC power 12V
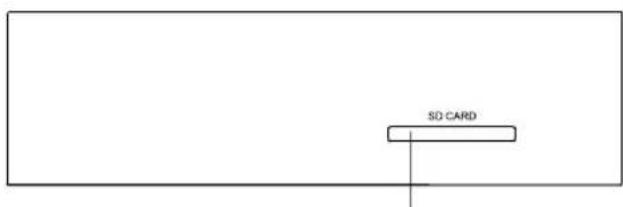
Top view
1. SD card slot
1
Horizontal Placement of Player
You can place the player either vertically or horizontally. If you want to use the horizontal placement, please do the following: detach the bottom stand from the player; use the special self-stick feet intended for horizontal placement of the player (included into the package) and stick them to the side of the player.
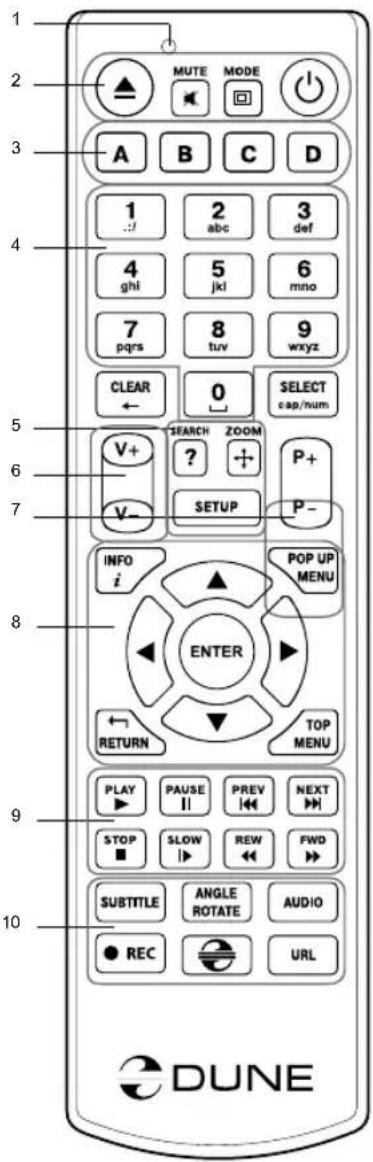
Remote Control
- Command indicator — flashes in response to RC button pressing.
- EJECT - open/close the optical drive tray. MUTE - turn the sound on/off. MODE - switch the video output mode; control some other player functions. POWER - toggle the standby mode.
- A (Red), B (Green), C (Yellow), D (Blue) — access Blu-ray disc features; control some other player functions.
- 0-9 — enter numbers and text; control some other player functions.
- SEARCH — jump to a specified playback position. ZOOM — change the zoom factor for the video content being played. SET-UP — enter/leave the setup menu; adjust playback settings during playback.
- V + V (volume up / volume down) - adjust the volume.
- P+/P- (page up / page down) — scroll up and down in various lists; control some other player functions.
- Arrows (LEFT, RIGHT, DOWN, UP), ENTER, RETURN, TOP MENU, POP UP MENU, INFO — main buttons for controlling the player (navigate across the items on the screen, open/use the currently selected item, go back to the previous screen, go to main menu, show popup menu with actions, show information, control some other player functions).
- PLAY, PAUSE, STOP, SLOW, REW, FWD, PREV, NEXT — control the playback.
- SUBTITLE, ANGLE/ROTATE, AUDIO, REC, DUNE, URL — control the playback and some other player functions.
NOTES:
- Use alkaline AAA batteries.
- Observe polarity when inserting batteries.
- Direct the remote control to the player. There must be no obstacles between the RC and the player.
- If RC functions only at short distances or stops functioning, make sure to replace the batteries.
- Some RC buttons may have several functions depending on the current player mode.
- Some RC buttons may be available only in certain player modes or only during playback of a certain content.
Getting Started
Ensure there is enough space around the player for proper cooling. The space at each side should be not less than 10cm
Ensure the RC has batteries installed.
Connect the player to your TV and to other A/V equipment in an appropriate way. Use HDMI connection to get the best possible quality of video and audio. Make sure to switch off the player and all relevant A/V equipment before connecting them. Ensure your TV and other A/V equipment are configured to use proper inputs.
Switch on the player. The player will perform its initial loading procedure, which may take up to about 1 minute. During the loading procedure, "DUNE" logo is shown on the TV.
- If you do not see "DUNE" logo on the TV when you switch on the player, it may mean some problem with the connection between the player and the TV or that a wrong video input is chosen in the TV or A/V receiver/switch. In such a case, recheck the cables and the settings of the TV or A/V receiver/switch, or try to use different cables or a different way of connecting the player to the TV.
- If you see "DUNE" logo on the TV when you switch on the player, but then the picture disappears and no other picture appears during at least 10 seconds, it may mean that a wrong video output mode is configured in the player. In such a case, press the "MODE" RC button, and then press one of the RC buttons "1", "2", "3", "4" or "5" to switch to a different video output mode (see "Quick Setting of Video Output Mode").
Finally, you should see the main screen of the player menu. The main screen shows items allowing to use different player functions and access all storage devices and network drives connected to the player.
Adjust the player settings as needed using "SETUP" item on the main screen of the player menu (or by pressing the "SETUP" RC button). In particular, you may want to adjust video settings, audio settings, and network settings.
To choose the language of the player menu, use "Setup / General / Interface language" setting.
Use the RC buttons "LEFT", "RIGHT", "UP", "DOWN", "ENTER", "RETURN" to navigate through the player menu. Use the "POP UP MENU" RC button to show the list of available commands. Use the "INFO" RC button to show the information about the selected item.
Quick Setting of Video Output Mode
The "MODE" RC button allows quick setting of video output mode without entering the player setup menu. This way of video output configuration may be required if you see no picture on the screen after connecting your player to a TV.
Press the "MODE" RC button and then one of the RC buttons "1", "2", "3", "4", or "5" to switch to one of the following video output modes respectively:
- Composite/Component, PAL
- Composite/Component, NTSC
3.HDMI,480i,60Hz
4.HDMI,720p,60Hz
5.HDMI,1080i,60Hz
After you see a picture on the TV, press the "ENTER" RC button, and then go to the player setup menu to perform a more precise configuration of the video output mode if needed.
NOTE: The procedure of quick setting of video output mode can not be used during playback. To ensure this procedure can be used, switch the player off, then switch the player on, and the wait about 1 minute to ensure the player loading is finished.
Connecting USB Drives
To connect a USB drive, ensure you are on the main screen of the player menu and connect the USB drive to an USB port of the player. The player will recognize the USB drive, and will show an item corresponding to the USB drive on the main screen.
When connecting a USB drive requiring significant power (such as USB HDD), use an external power supply for the USB drive. Power provided by the USB ports of the player may not be enough for correct functioning of the USB drive.
Do not disconnect or switch off the USB drive when some write operation is in progress.
Using SD Memory Cards
To insert an SD memory card, ensure you are on the main screen of the player menu and insert the memory card into the SD card slot of the player. The player will recognize the memory card, and will show an item corresponding to the memory card on the main screen. Some SD memory cards may not be recognized by the player or may work incorrectly; in such a case, use other models of SD memory cards.
Do not eject the SD memory card when some write operation is in progress.
Internal 2.5" SATA HDD
You can install the 2.5" SATA HDD inside the player case. To install the 2.5" SATA HDD, please do the following:
- Power off the player.
- Open the side cover of the case: remove two small screws at the side of the player which fasten the cover, then pry up the cover using the small gap between the cover and the side of the player.
- Attach the HDD to the metal plate mounted on the inner side of the player cover. Please use 4 screws of M3 type.
- Connect the SATA power and SATA data connectors to the HDD.
- Put the cover with the HDD back to its place and fasten the cover to the player case with the screws.
Accessing Network Drives
To connect a network drive using SMB or NFS protocol, ensure you are on the main screen of the player menu, press the "MENU" RC button, and choose "Create Network Folder", then fill the parameters of the network drive as needed. The player will show an item corresponding to the configured network drive on the main screen.
To browse the list of network resources accessible via SMB or UPnP protocols, use "Network Browser" item on the main screen of the player menu. NOTE: If some network resources are not shown by the player, you may need to wait some minutes and then retry (or press the "MENU" RC button and choose "Refresh" command).
Formatting HDD
To format a HDD attached to the player, select the drive item on the main screen of the player menu, press the "INFO" RC button and choose "Format Disk" (to format the entire disk) or "Format Partition" (or to format an already existing disk partition only). The player will format the disk using "EXT2" filesystem. NOTE: To use disks formatted by the player on a Windows PC, you may need to install additional software on the PC, such as "EXT2FSD" (http://www.ext2fsd.com/).
Switching the Player On and Off
To put the player into the standby mode, press the «POWER» RC button or the «on/off» button on the front panel. To exit the standby mode, press any of these buttons again.
Depending on the player settings (see the player setup menu), the «hardware standby» or «software standby» mode may be used. In the «hardware standby» mode, almost complete power-off takes place and the player consumes almost no power. In the «software standby» mode, the player produces no signal on the video output, but is still functioning. For example, if you have some storage devices connected to the player, you may still access them from network («NAS» function of the player). Exiting the «software standby» mode takes just a few seconds. When the player is in the «software standby» mode, it still consumes significant power. It is not recommended to keep the player in the «software standby» mode for a while if you do not need it.
NOTE: After switching off the player or putting the player into the «hardware standby» mode, it is recommended to wait about 1 minute before switching it on again.
NAS (Network Attached Storage)
You can access storage devices connected to the player from the local network using FTP and SMB protocols. On a Windows PC, just type "ftp://ip_address" or "\ip_address" in the Windows explorer, where "ip_address" is the IP address of the player.
WiFi
You can use a USB WiFi adapter to connect the player to the local network via WiFi.
Please see here for the information on supported USB WiFi adapters: http://dune-hd.com/support/hw_compat/
Limitations
Compatibility of the player with a particular hardware (A/V equipment, network equipment, disk drives, etc) may depend on various factors (particular hardware model, specifics of hardware installation and usage, configuration of the player and the hardware, etc). If the player does not correctly work with a particular hardware, try to adjust the configuration of the player or hardware, try to use the hardware in a different way, or try to use some other hardware.
Compatibility of the player with a particular media content (files, discs, etc) may depend on various factors (specifics of media content encoding, specifics of the configuration of the player, etc). If the player does not play correctly a particular media content, try to adjust the configuration of the player, or try to use media content encoded in a different way.
Updating Your Player and Getting More Information
Please check here for updated versions of player firmware (which may improve player functioning and extend player possibilities):
http://dune-hd.com/fi rmware/
(Note: You can also connect the player to Internet and use the online firmware upgrade function, see Setup / Misc / Firmware Upgrade.)
Please check here for more detailed and up-to-date documentation and information on player usage:
http://dune-hd.com/manuals/
http://dune-hd.com/support/
Introduction
http://dune-hd.com/fi rmware/.
- Composite/Component, PAL
- Composite/Component, NTSC
3.HDMI,480i,60Hz
4.HDMI,720p,60Hz
5.HDMI,1080i,60Hz
NAS (Network Attached Storage)
NAS (Network Attached Storage)
NAS (Network Attached Storage)
http://dune-hd.com/fi rmware/
NAS (Network Attached Storage)
- KomnoTHbIy/KomnoHeHTbIy, PAL
- Komno3HTbI/KomNoHeHTbI, NTSC
3.HDMI,480i,60T
4.HDMI,720p,60T
5.HDMI,1080i,60T
Iocne TOrO, KaK n3o6paXeHHe Ha 3kpaH No8BnIOcB, HaxMNTe «ENTER», a 3aTeM 3aIITe B MeHIO HAcTPOek npOnrpbBaTeTg dJa 60one DeTaIbHOH NaCTpoKN BuDeOpExmA, ecN 3TO Heo6xOIMO.
PIMMEAHNE: Ppoeypa 6bIcTporo n3MeHeHnBnDeOpexKMa HeOocTyNa BO BpeM BoCpOn3BeDeHn. Ira toro, yTo6bl rapaHTnpoBaHHo BblIOJNHtB 3Tu npoeDpy, BblKnIOHTe npoiRpbIbATEJB, 3aTeM BKIOHTe ero ChOBa n PoOxDnte OKoIo OdHO MnHytbl dIra toro, YTo6bl OH ycien npoBeCTn npoedpy HaayabHO 3arpy3kn.
NAS (Network Attached Storage)
Moxno nonyntb doctyn K haonntenam, noKnoueHHm K npourpbbaTeHIO, n3 lokaHoh cetn no npotokolam FTP n SMB. Ha komnbtopec Windows npocTo hapepiTe 飞 ftp://ip_address>nnn 飞 ip_address> B Ipobodnike (Windows Explorer), rde 飞 ip_address> IP-adpec npourpbbaTeHra.
WiFi
Moxno nCnObl30BaTb WiFi-aanTep, noKJIIOHaembI no USB, nIa noKJIIOHeHna npOnrpbBateJRA 6ecnpoBoHDn (WiFi) loKaJIbHOcTeN.
3a inhopmauee o noDepknaebmx USB-WiFi-aanTepax obaaatac b na ctpaHnuy: http://dune-hd.com/support/hw_compat/
OrpaHnueHn
COBMECTIMOCTB npOnrpbIbATEJI C KOHKpeTHbIM O6OpyOBaHHeM (ayDIO-BIDEOO6OpyOBaHne, cTeBOe O6OpyOBaHne, HAKONITeJI N T.I.) MOKeT 3aBNCETb OT pa3INuHbIX PaKTopOB (KOHKpeTHoM MoEJI N O6OpyOBaHn, Oc6eHHocTe annapathOH INCTaIIaIeN ee IcNOJb3OBaHn, HAcTpoE K npOnrpbIbATEJI N O6OpyOBaHn, N T.I.). EcNI npOnrpbIbATEJI He pa6otaet KoppeKTHO C HEKOTOpbIM O6OpyOBaHne, IONbTaIteCb N3MeHNb KOHfNpyaIIO npOnrpbIbATEJI INN O6OpyOBaHn, Nonp6yIte NcNoJb3OBaTb O6OpyOBaHne DpyHM O6pa3OM, N160 NcNoJIb3OBaTb DpyOE O6OpyOBaHne.
CoBmecTnMoCTb npOnrpbIbATEJI C KOHKpeTHbIM BIDOM MeDnAmatePepNAIOB (aaiNbI, DnCKN I T.I.) MOKET 3aBNCeTB OT pa3JINHbIX ΦakTopOB (OCo6eHNcTn KoDnPOBaHnmeDnAmatePepNAIOB, OCO6eHNcTn Ha- cTpoE K npOnrpbIbATEJI N.T.). EcII npOnrpbIbATEJI He BOCnpOu3BOdNT KoppeKTHO HeKOtOpBle MeDnAmatePepNAbl, nonpO6yTe n3MeHHTb HAcTpOoi K npOnrpbIbATEJI nII INCNoJIb3OBaTb MeDnAmatePepNAbl, 3aKoDnPOBaHHbI BOTJNUHOM φopMaTe.
OboBHeHne pIeepa n don.nHOpMaun
IoxaIyIcTa, npOBepaTe DoCTynHOCtB o6HOBJIeHn nporpaMMHOro o6ecneHn npOIRpbIBateJr (IpouINBKN)Ha cNeIyUIOe INHTepHET-CTpAHnE (3TO MOKeT yIyUHTb cyHKUHOJIbHOCTb npOIRpbIBATEJn paCUnPntb erO BO3MOXHOCTN):
http://dune-hd.com/fi rmware/
(3aMeuHHe: Bt KaKe MoKeTe NODKIOUHTb NIIeep K INTEpHET N BOCNOB3OBA TbCBc FyHKuee OHJaH06HOBHeHn IpoWNBKn, CM. HAcTPOJKn / Pa3Hoe / O6HOBHeHne IpoWNBKn.)
Ioxayncta, obaaataeB k cneyuonm INHTepHET-CTpaHnucam dIy noJyehn 6oJee noDpo6ho n aKtyaIbHOI DOKymeHTaunu HnΦopMaunu 6ncNoIb3OBAHN npOnrpBaTeTn:
http://dune-hd.com/manuals/
http://dune-hd.com/support/
BVeDeyHn
Dune HD Lite 53D - ue "Bce B o ndomy" npncptpi dIa BiTbOpenHra BiDeo do kocti Full HD (1080p).
OchOBhi xapaKTepeNCTnKN
- Hobithi Sigma Designs 8653 Medianpoecop: HacOIOJxIyTeCb BiIMHHM BiITBOpEHnMa Ta BnKoHaHHa IMHTepaKTbHnx MOXJIINBOCTeN.
- MepexeBn nporpaBaH: nikouitb nneep do nokabHOi MepeXi BiTbOpuTe KOHT 6e3nocepEHNbO 3 Nk a6o NAS (UPnP, SMB, NFS).
HDD-nporpaBau: niknouitb HDD do nporpaBaua i BiTbOpuTe KOHT 6e3nocepEhbo 3 Hboro. - MKV-nporpabau: BiTbOpHne HD-i SD-BiDeo B nonynrphomy fopMaTI MKV ta iHnx cyuacnX fopMaTAX BiDeo, BKIOUaOHn Haimkichiue HD-BiDeo 3 dyke BucOKM 6itpeiTOM.
RealD: BiTbOpIOHe HaCcyAChE 3D-BiDeo, IKe BnKOpNCToBcYbCBy cHaioCTaHHiHx CTpiKax y KInoteBaTpax. - 2 USB-nopTn: 3pyuHHe NiIKNHueHHaXOpCTKnx DnCKiB, fNeu-DnCKiB, USB fNeu-KapT Ta iHux USB-HaKoNHyBaiv.
Cnot dna SD-kapt: NERKO BiTbOpIte Media-4aunn 3 Kapr na'M'ti SD kamepn a6o IHoro npu-CTPOO, a TAKOK BnKOpNCToBnyTe SD-kapTy na'M'ti B JKOcTi JOKaNbHOro HAKONMByBaVa.
HDMI 1.3: 3a6e3neuTe hauKpauy kicTB HD-BiJeO Ta HD-ayio. - NobHn Ha6ip cTaNdapTHnx ayio-BiJeop03cMIB: uIcpOBn ONTuHn ayIOBxid, CTepeOBxid, KOMnoHEHTHni i KOMNo3HTHni BiDeOBHXoDn dIa 3pyHoro niKlnOeHHra npeepa do 6ydb-koRrA/V o6- naHaHH.
- Ihyukictb BiDeOBHXOy: BnBeHeHHa BiEo B 6yDb-akomy fopmati Ta pe30nouii (BID SD do 1080p, 24p/PAL/NTSC).
- 36iNbWeHnpe3oIouii: BvcoKa kicTb MacuTa6yBaHHa DVD Ta iHoro SD-Bideo do kocTi Full HD (1080p) Ta iHux HD-pe3oIouii.
- ΦαιLOBи 6pay3ep: 3pyHn φaIIOBи 6pay3ep 3 notyKHM ynpabInHHm φaINaMn (KoJIIOBaHH, nepemiuHHe, BuaJIeHH, nepeMeHyBaHH, oprahi3yBaHH, copTyBaHH).
IodatkoBi yHKci
- Bucokoikhe BiTbOpHnMy3Kn: BiTbOpHnTe My3NHy faiN dyKe BucKOi kocTi (do 192 K/24 6it) B pi3Hx fopMaTAX (FLAC, Monkey's Audio APE, WAV/PCM, DTS i T.D.).
- Pneiictn: CTbOpHTe nIeJIicTn 3 Baunx nanok, BkOpncTOByTe cBOI BlaChi nneNiciTn, BkOpncToBnyTe NOBtOpeHH i cyHKciio nepemiiybaHH.
-ФункцяNAS:doctyndoфainibHa npnctpoax 36epiraHHa (HDD,ontuHn npnbID i T.D.),piKlupeHXdo npepa 3 NOKaIbHoI Mepeki (3 BnKOpncTaHHm SMB i FTP). - BitTorrent: Викорисовий Буровань BitTorrent-Knicht Ддя заразхени Фашив 3 P2P-Mepex.
- MoxJIbIcIb HanaIaHTOByBaTn KOpNTcyBaUckn iHTeppeC: po60Ta 3 MediaKoneKciJMy 3 BnKopNCTAHm O6kJaDuHOK i 3HaUkB i neperny (3 Full HD rpaΦikoHO).
- INTepHET-paio: BiTbOpeHHia 3anC pi3nHex iHTepHET-paioctaHci (HTTP/MP3).
- IPTV: BiTbOpHnHa i 3annc IPTV-noToKIB (rpynoBi UDP/RTP) BiD BaWoRo IInTePHeT-npOBaIepy*.
Ouiu npoBorO TepeHn: BiTBoeHH i 3annc u npovix TeneKaHaJIIB 3a DonomoroIO doatKOBOru npoBorO TV USB-KIIOUa **.
* Npeepimhe HaeHicmb apynoeux UDP/RTP-nomokie y Bauozo Ihmephem-npoea@epy.
**LlucpoBtu TV USB-Knouk e komnnekm He exodumb; ou onui moxe bymu npudana Okpmo.
KoMnJIeKT nOCTaBKn
23
54
6

7
8
9
- Dune HD Lite 53D media player
-
NytbT DnctaHuiHoro KepyBaHHa (6aTaapei MoKyTB He 6yTu BKNIOHeHi B KOMNJIeKT)
-
AV-ka6eNb
-
LAN-ka6eIb
6.Hdkn -
KomnneKr rBnHTiB
8.3OBHIiHi6JIOKXuBHeHHA - Kopotkn noci6nK
3.Wi-Fi aHTeHa (oniohaJIbHO)
PIMITKA: OdaTkoBEnemEno (OnioHJIbHi) MoKyTB 6yTN BKnIOChHi B NaKeT, B 3aJExKHOCTi BiKOHphiirpaui nporpoBaHa, perioHy Ta noctaunbHnka.
3OBHIHINBUNJAD
Bvrgn cpepy
Bvrrn 33aay

1.KhONkaBMUKaHHBUMUKaHH
2.CBtNoioHm iHnKaTOp
3.14- npimau
4. USB 2.0 p03'EM
Bnrrnd 3ropn

1.CnotdansD-Kapr
1
Topn3oHTaJIbHe pO3TaUyBaHnI npOrpaBaay
Bn Moxete po3TaUyBaTn nporpaBau BepTKaIbHO a6o rOpN3OHTaIbHO. RaIO Bu XoYeTe BkOpncToBByBaTn rOpN3OHTaIbHe po3MIueHHra, BkOHaIte HAcTyHNI di: 3HiIMtB HIXHIO nIDCTABky 3 nporpaBaay; BkOpNCTOByTe cneiaJIbHI camokJeiOHiHXK, npni3HaueHi IINr rOpN3OHTaIbHO rO3MiueHHra IIeepa (BXOJrTB B KOMnNeKT) Ta npikJeTe ix Do 60koBoi CTopoHn nporpaBaHa.
He bID'EDHyTe SD-kapKy nam'ayi, niD yac onepaui 3anucy.
OHOBJIeHnI PpOrpaBaayi OTPMaHHa OdaTkoBoI InOpMaui
Будласа,певертуг.TOBHeBepi npOswBn nporpaBaHa (aki moKytb nokpaunTn cyHKioHyBaH-H i po3uPHTM MoKInBOCTI nporpaBaHa):
http://dune-hd.com/fi rmware/
(πpnmitka: Bn Takox Moke Te iKIOHHT nporpaBau Do Mepeki IHTepHET i BkOpncTObyBaTH OH-NAH ΦyHKUIO OHOBHeHH NPOWbKN, DnB. HanaWtBuHr /Pi3He / OHOBHeHH PpoWbKn.)
Bynb nacka, nepebipte tyT dIy OtpmaHH 6InbW deTaIbHOi IHopMaui ta cyuachoi Dokymentauii Ta iH- opmaui npo BnKOpNCtAHN nporpaBaay:
http://dune-hd.com/manuals/
http://dune-hd.com/support/