— Game — Mode d'emploi PDF")
NinetyNine Nights II (Xbox 360) - Game Konami - Free user manual and instructions
Find the device manual for free NinetyNine Nights II (Xbox 360) Konami in PDF.

| Product Type | Video Game |
| Platform | Xbox 360 |
| Publisher | Konami |
| Genre | Action / Beat 'em up |
| Number of Players | 1 to 2 (online co-op via Xbox LIVE) |
| ESRB Rating | Teen (estimated) |
| Game Modes | Single Player, Online Multiplayer |
| Key Features | Orb Attacks, Spark Orb, active/passive skills, combos, dodge, guard, flash, character-specific special actions |
| Playable Characters | Galen, Zazi, Levv, Sephia, Maggni |
| Required Storage | Minimum 595 KB (225 KB for save file) |
| Available Language (manual) | French (provided version) |
| Audio Options | Music, sound effects, voices (adjustable language) |
| Display Options | Brightness, interface type (A, B, C), subtitles, blood, enemy HP display |
| Controller Options | Vibration, camera inversion, camera tracking, customizable configuration |
| Difficulty Levels | Easy, Normal, Hard |
| Maintenance | Keep the disc free from scratches and dust |
| Warranty | 90 days against material defects (see manual) |
| General Information | Manual available in PDF at notice-facile.com |
Frequently Asked Questions - NinetyNine Nights II (Xbox 360) Konami
User questions about NinetyNine Nights II (Xbox 360) Konami
0 question about this device. Answer the ones you know or ask your own.
Ask a new question about this device
Download the instructions for your Game in PDF format for free! Find your manual NinetyNine Nights II (Xbox 360) - Konami and take your electronic device back in hand. On this page are published all the documents necessary for the use of your device. NinetyNine Nights II (Xbox 360) by Konami.
USER MANUAL NinetyNine Nights II (Xbox 360) Konami
WARNING Before playing this game, read the Xbox 360 ^® console and accessory manuals for important safety and health information. Keep all manuals for future reference. For replacement console and accessory manuals, go to www.xbox.com/support.
Important Health Warning About Playing Video Games
Photosensitive seizures
A very small percentage of people may experience a seizure when exposed to certain visual images, including flashing lights or patterns that may appear in video games. Even people who have no history of seizures or epilepsy may have an undiagnosed condition that can cause these "photosensitive epileptic seizures" while watching video games.
These seizures may have a variety of symptoms, including lightheadedness, altered vision, eye or face twitching, jerking or shaking of arms or legs, disorientation, confusion, or momentary loss of awareness. Seizures may also cause loss of consciousness or convulsions that can lead to injury from falling down or striking nearby objects.
Immediately stop playing and consult a doctor if you experience any of these symptoms. Parents should watch for or ask their children about the above symptoms—children and teenagers are more likely than adults to experience these seizures. The risk of photosensitive epileptic seizures may be reduced by taking the following precautions: Sit farther from the screen; use a smaller screen; play in a well-lit room; do not play when you are drowsy or fatigued.
If you or any of your relatives have a history of seizures or epilepsy, consult a doctor before playing.
ESRB Game Ratings
The Entertainment Software Rating Board (ESRB) ratings are designed to provide consumers, especially parents, with concise, impartial guidance about the age-appropriateness and content of computer and video games. This information can help consumers make informed purchase decisions about which games they deem suitable for their children and families.
ESRB ratings have two equal parts:
- Rating Symbols suggest age appropriateness for the game. These symbols appear on the front of virtually every game box available for retail sale or rental in the United States and Canada.
- Content Descriptors indicate elements in a game that may have triggered a particular rating and/or may be of interest or concern. The descriptors appear on the back of the box next to the rating symbol.

flowchart
graph LR
    A["ON FRONT"] --> B["VIDEO GAME"]
    B --> C["ON BACK"]
    style A fill:#f9f,stroke:#333
    style B fill:#ccf,stroke:#333
    style C fill:#cfc,stroke:#333
For more information, visit www.ESRB.org.
• TABLE OF CONTENTS •
STORY...2....
XBOX LIVE .. 3....
INTRODUCTION...3......
CHARACTERS ...4.
CONTROLS ...8.
GETTING STARTED...9....
HOW TO PLAY ...12......
GAME SCREEN...15....
STATUS AILMENTS...1.8....
ACTIONS...20....
ITEMS . . 27.
INTERACTIVE OBJECTS 30
CHARACTER MENU 31
MULTIPLAYER 37
HOW TO PLAY MULTIPLAYER GAMES ..... 40
WARRANTY & PRODUCT SUPPORT....43
FRANÇAIS 45
ESPAÑOL 89
• STORY •
• Xbox LIVE • • INTRODUCTION •
Favored by the gods since ancient times, this world is one of miracles and magic. It is a world teaming with life, not only human, but elven and all manner of beasts and monsters of legend.
Many a nation has ruled over the rich, fertile land of the central plains, only to fall to ruin and vanish from the world. It seemed the cycle of peace and chaos might never end.
Then one day, the Lord of the Night appeared.
The great nations fell one after the other to the mighty force led by Lord of the Night. His path of destruction was like a massive wave that swept across the land. In a mere three months, the entire central plains was reduced to smoldering ruins.
Only then did the Lord of the Night set his sights upon his final destination: the holy land to the north.
Ninety-two days had passed since the Lord of the Night first appeared. The Army of Night had nearly surrounded the holy land of Orphea, when suddenly, a great flash of light and a might roar tore a fraction of that great host asunder. From amid the great explosion emerged a mighty knight. This great hero is now single-handedly routing the Army of Night, as he makes his way to Orphea Castle across the desolate plains.
Xbox LIVE
Xbox LIVE® brings more of the entertainment you love right to your living room. Raise the curtain on your own instant movie night with thousands of HD movies, TV shows, and videos downloaded in a snap from Xbox LIVE and Netflix. Find the perfect game for any player with a free trial of hundreds of titles from the largest library available. With downloadable Game Add-Ons like maps, songs, weapons and levels, you'll get more out of every game by putting more into it. And don't forget to connect and play with friends wherever they happen to be. With Xbox LIVE, your fun never ends.
Connecting
Before you can use Xbox LIVE, connect your Xbox 360 console to a high-speed Internet connection and sign up to become an Xbox LIVE member. For more information about connecting, and to determine whether Xbox LIVE is available in your region, go to www.xbox.com/live/countries.
Family Settings
These easy and flexible tools enable parents and caregivers to decide which games young game players can access based on the content rating. Parents can restrict access to mature-rated content. Approve who and how your family interacts with others online with the Xbox LIVE service. And set time limits on how long they can play. For more information, go to www.xbox.com/familysettings.
Introduction
Thanking for purchasing Ninety-Nine Nights II. To ensure you get the most from the game, please read this manual before you begin to play. Please ensure proper usage.

2
3
- CHARACTERS -
· CHARACTERS ·
GALEN
A noble knight who served a once great kingdom. He is the ultimate warrior, possessing all the traits of a leader, including excellent swordsmanship, command skills, judgment, and decisiveness.
ZAZI
Guardian of the Dark Elves and descendant of another clan of Elves. Her tribe was the first people to take notice of the Lord of the Night's appearance and swiftly moved to counter his threat, only to be defeated.
LEVV
A Goblin assassin of who is a master in his deadly trade. He has traveled to the land of the final battle according to Emperor Mura's dying wish to help the forces of Orphea regain the Orb of Darkness.
- CHARACTERS -
· CHARACTERS ·
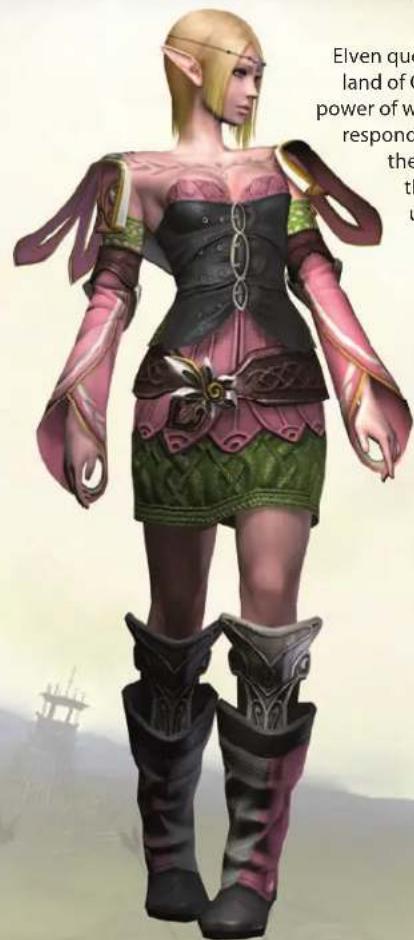
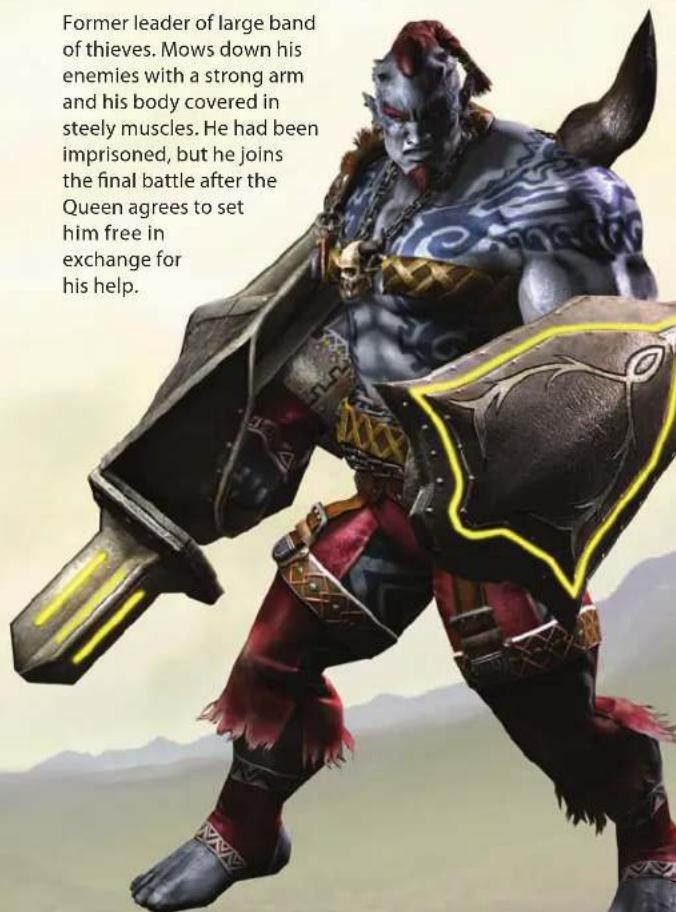
SEPHIA MAGGNI
Elven queen who rules the holy land of Orphea and wields the power of wind. She courageously responds until the very end to the unprecedented crisis that her kingdom faces under the onslaught of the Forces of Night.
6
Former leader of large band of thieves. Mows down his enemies with a strong arm and his body covered in steely muscles. He had been imprisoned, but he joins the final battle after the Queen agrees to set him free in exchange for his help.
7
• CONTROLS •
• GETTING STARTED •
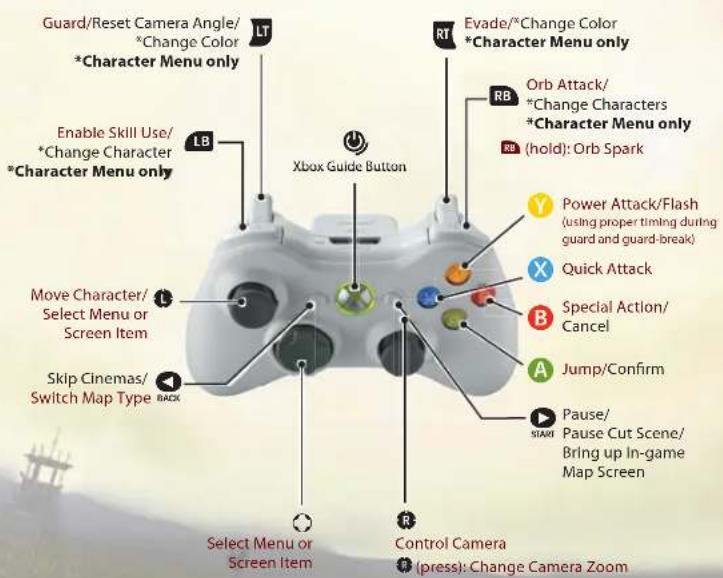
Controller buttons and their basic functions are described below.
The red text indicates controls during a mission, while the black text indicates controls used in menu and event screens. Button assignments can be changed in Options – Controller Options – Control Config.
The title screen appears after you have switched on console power and properly inserted the game disc. Press the ▶ or ⚠ button to go to the title menu.
TITLE MENU
Move left/right on the D-pad or Left Stick to make a selection on the title menu and then press the Ⓐ button to confirm. Note that if no controller buttons are pressed for certain length of time, a movie will automatically start playing. Press any button to stop the movie and return to the title menu.
NEW GAME
Select this to start the game from beginning of the story.
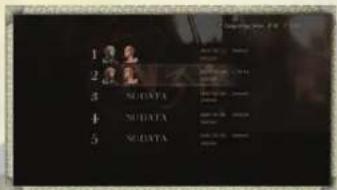
LOAD GAME
This lets you load a saved game so that you can continue playing it. Select a saved game and then confirm with the A button to proceed to the Character Menu. Press the Y button if you want to load data from a different storage device. If there is auto-save data from during a mission, you can select Continue to resume from a checkpoint.

8
9
• GETTING STARTED •
• GETTING STARTED •
ABOUT SAVING GAMES
Selecting Save under System on the Character Menu saves your game progress (up to five game files can be saved). 595 KB of free space (225 KB minimum) is required on a storage device to create a save file.
ABOUT AUTO-SAVES
Once you reach a certain checkpoints during a mission, your progress up to that point will be automatically saved. Selecting Continue under Load Game on the title menu or RESTART FROM LAST CHECKPOINT on the GAME OVER screen loads auto-save data and resumes the mission from the saved checkpoint.
* Only one auto-save file is used at a time. If you play a different mission or start a mission over from the beginning, the existing auto-save data will be overwritten.
Xbox LIVE
Connect to Xbox LIVE to play Co-Op games with other players.
OPTIONS
Change various Game Options. There are four different types of settings you can change. Move up/down on the D-pad or Left Stick to select an item and left/right to switch it on/off or adjust volume. When you are done changing settings, select Exit or press the ① button. Selecting Return to Default Settings returns settings to their defaults.
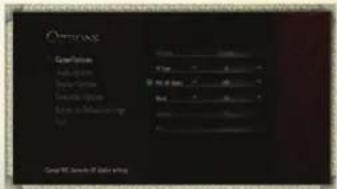

Game Options
| Difficulty | Set one of three difficulty levels: Easy, Normal, or Hard. |
| UI Type | Select type A, B, or C for the screen display to use during missions. |
| NPC HP Display | Set to On to display health gauges for enemies. |
| Blood | Set to On to display blood when dealing and receiving damage. |
| Subtitles | Set to On to display subtitles during events. |
Audio Options
| Music Volume | Adjust the volume of background music. |
| SE Volume | Adjust the volume of sound effects. |
| Display Volume | Adjust the volume of character dialogue. |
| Voice Language | Change the language of character dialogue. |
| Text Language | Change the language of the text displayed onscreen. |
Display Options
| Brightness | Adjust the brightness of the screen. |
Controller Options
| Vibration | Turn the vibration feature on/off. |
| Vertical Cam | Switch the control direction of the Right Stick when moving the camera up/down. |
| Horizontal Cam | Switch the control direction of the Right Stick when moving the camera left/right. |
| Cam Tracking | Set this to On to have the camera follow behind the character. |
| Control Config | Move the cursor to this item and then press the A button to change controller button assignments any way you want. |
• HOW TO PLAY •
• HOW TO PLAY •
There are a variety of missions per character in this game, and you advance through the game's story by completing each of them.
GAME FLOW
This game mainly cycles between missions and the Character Menu.
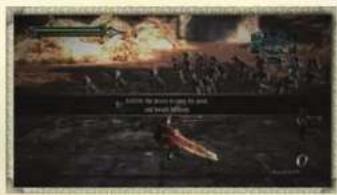
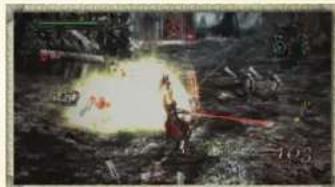
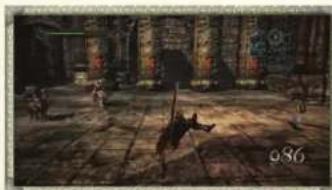
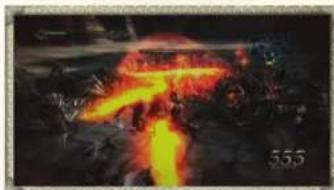
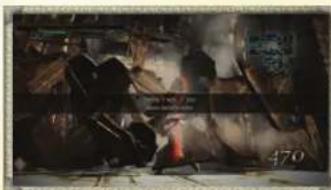
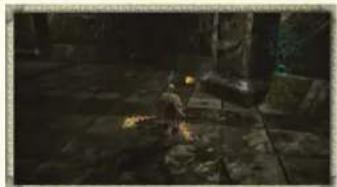
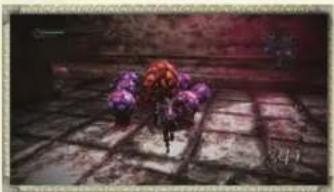
MISSIONS
Control your character as you battle enemy forces and deal with interactive objects in an effort to complete the stage.
natural_image
Dark, smoky battlefield scene with explosions and smoke (no visible text or symbols)
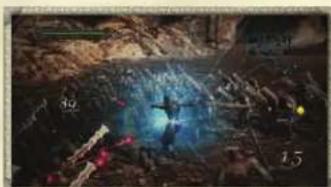
natural_image
Illustration of a warrior fighting in water with smoke and debris, no visible text or symbolsCHARACTER MENU
When you complete a mission, the Character Menu appears so that you can select other characters, change equipment, level up, or perform other such operations if you so desire. Use this menu to prepare for your next mission.

12 13
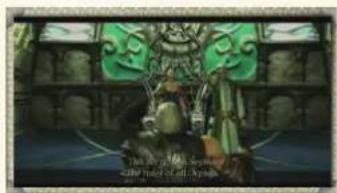
STORY EVENTS
Story events are sometimes added at the start of a mission or during the mission itself. Story events can be paused by pressing the button and skipped by pressing the button.
natural_image
Illustration of a fantasy scene with two figures in green attire, set against a dark architectural backdrop (no text or symbols visible)MISSIONS
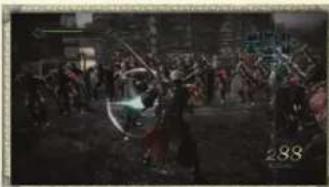
Use a variety of actions to defeat enemies as you make your way through the stage, trying to satisfy its win conditions. During a stage, a variety of main missions will occur, depending on your progress. As you complete a stage's main missions, you come closer to achieving its win conditions.
SUBMISSIONS
Submissions also occur, depending on the places you visit and your progress during a mission. Submissions are not mandatory for completing the game, but when you complete them, you get a higher score upon finishing a stage.
• HOW TO PLAY •
• GAME SCREEN •
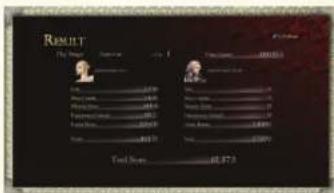
RESULTS SCREEN
Once you clear all main missions and achieve the stage's win conditions, you will be taken to the Results screen. Your score on this screen depends on a number of factors, including the time you took to complete missions and the number of enemies you defeated. Your rank will be announced based on your results. Once you have checked your results, press the A button to proceed to the Character Menu.

GAME OVER
Your mission falls and the following menu appears on the GAME OVER screen if your character's health gauge runs out or you are subject to defeat conditions.
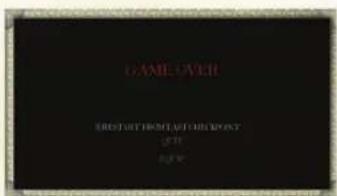
| RESTART FROM LAST CHECKPOINT | Restart the mission from the last checkpoint you passed through. |
| QUIT | Quit the mission and return to the Character Menu. |
| EQUIP | Change character equipment. |
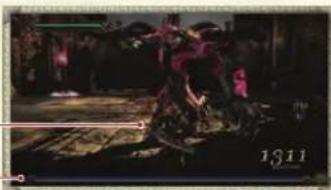
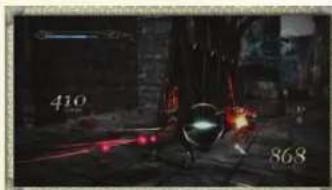
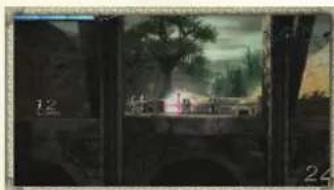
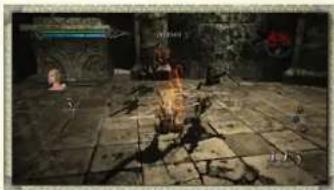
The mission screen displays a variety of information, including your character's status and the status around you. Take some time to learn how to read the information displayed onscreen.
MISSION SCREEN
The character you control is displayed at the center of the screen, and you can move the camera using the Right Stick. Clicking the Right Stick cycles the camera distance from the character between three different levels.
natural_image
Game scene showing a warrior fighting with a weapon in a chaotic battlefield (no visible text or symbols)*There are three types of UI types for the mission screen (A, B, and C). Select the one you want using UI Type under Game Options on the Options menu. Note that this manual shows the screens provided by type A.
MINI-MAP
Shows the status around you. Zoom in/out using the 🎨 button.


• GAME SCREEN •
• GAME SCREEN •
HEALTH GAUGE
Displays your character's health. Goes down when your character suffers damage.
ORB GAUGE
Rises when you defeat enemies and get items. When it fills up, you can activate Orb Attack and Orb Spark.
EXPERIENCE POINTS
Shows the experience points your character has acquired.
COMBO DISPLAY
Shows the number of consecutive hits when dealing a combo attack.
KILL COUNT
Shows the number of enemies you defeated during the mission.
SKILL ICONS
Shows the status of skill use.
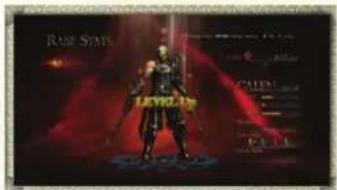
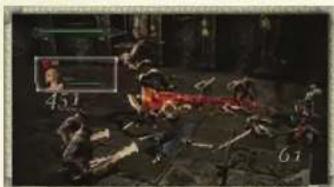
ABOUT EXPERIENCE POINTS
When you defeat enemies or break open a treasure chest, a red light, as shown to the right, appears and engulfs the character. When touched by this light, the character acquires experience points. When experience points accumulate to a certain level, you can strengthen your characters, weapons, and accessories, by selecting Raise Stats under Settings on the Character Menu.
natural_image
Black fantasy character in dynamic pose, holding a badge with number 17, standing in front of ornate wooden steps (no readable text or symbols)- STATUS AILMENTS
While a character's status are modified by an item, enemy attack, or interactive object, specific icons will appear to the left of the health gauge.


ATK goes up for a set length of time.
Covered in flames and suffer continual damage for a set length of time.
Skills are unavailable for set length of time.
Stunned and unable to move for a set length of time.
Damage from enemies is increased for a set length of time.
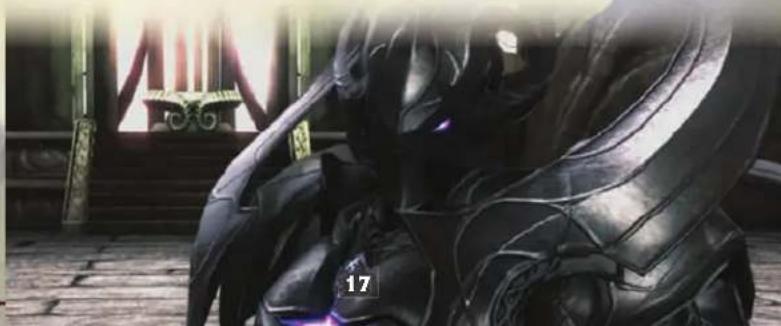
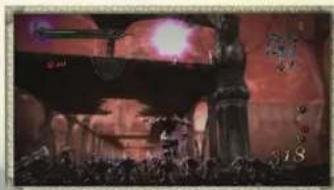
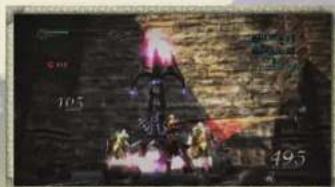
BOSS BATTLES
During battles against bosses, the health gauge for the boss in question appears on the bottom of the screen.
natural_image
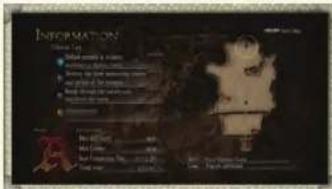
Dark scene with indistinct figures and a large number '1311' in the corner (no readable text or symbols)INFORMATION SCREEN/PAUSE MENU
Pressing the 📋 button during a mission pauses the game and displays the Information screen, where you can check win conditions and select the Pause Menu to change settings and check missions. To return to your mission, press the 📋 button again or select Return.
18 19
- STATUS AILMENTS
MISSION LIST
A list of main missions and submissions that have occurred so far. Those that you have completed will have "COMPLETED" displayed next to them.
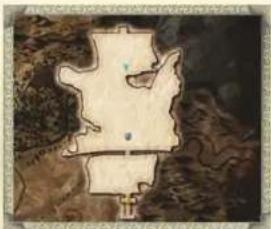
FULL MAP
The triangle shows your current location.
natural_image
Illustration of a stylized map or landscape with no visible text, numbers, or symbolsPAUSE MENU
| Mission | Move up/down on the Left Stick or D-pad to check missions on the list one at a time. When you select a mission, the location at which it occurred on the full map will glow. |
| Resume | Resume the current mission. |
| Options | Change game settings.* There are some settings that cannot be changed during a mission, such as Difficulty and Subtitles. |
| Quit | Quit a mission midway through and return to the Character Menu. |
• ACTIONS •
• ACTIONS •
This section describes how to control your character during missions. Try to master the art of using attacks, defense, and special actions to defeat enemies and destroy interactive objects.
MOVE ▶ LEFT STICK
Use the Left Stick to move. Move the Left Stick all the way to run or just a little bit to walk. When continuously running, the character starts dashing, which gives an extra boost of speed.
natural_image
Game scene showing a character in a dark outfit on the ground with a distant vehicle and debris (no visible text or symbols)JUMP ▶ A BUTTON
Press the Ⓐ button to jump. Moving the Left Stick while pressing the Ⓐ button jumps in the direction you moved the stick.

natural_image
Dark outdoor scene with indistinct figures and trees, no visible text or symbolsNORMAL ATTACKS ▶ ✕ BUTTON / ⚙ BUTTON
Pressing the Ⓧ or ⎿ button makes your character attack the enemy with a weapon. The Ⓧ button unleashes a Quick Attack and the ⎿ button a Power Attack.
natural_image
Black-and-white action scene showing a dynamic battle scene with soldiers and red blood, no visible text or symbols
20 21
Pressing the ⬤ button while dashing enables a Dash Attack.
Press the Ⓐ button, and then while Jumping, press the ✗ or ⭕ button to unleash a Jump Attack.
natural_image
Forest scene with a firefighter battling a fire, no visible text or symbolsCOMBO ATTACK AND DEADLY ATTACK
Normal Attacks and Jump Attacks can be performed up to five times in a row by mashing the attack buttons. However, it is not possible to perform a Quick Attack after a Power Attack. Holding down the button while unleashing the first through fourth Power Attacks ends with a powerful Deadly Attack. (This only applies if the attacks are made while on the ground.)
natural_image
Historical battle scene with soldiers and explosions (no visible text or symbols)COMBO ATTACK FLOWCHART
| First Second Third Forth | Fifth | ||||
| Quick Attack Quick Attack Quick | Attack Quick Attack Quick Attack | ||||
| X | → X | X | → X | X | → X |
| Power Attack Y | → Y | Power Attack Y | → Y | Power Attack Y | → Y |
• ACTIONS •
• ACTIONS •
EVADE ▶ RIGHT TRIGGER
Pull the button to evade an enemy attack by rolling across the ground.
natural_image
Dark, low-contrast image of a cracked surface with scattered dark fragments and faint diagonal lines (no text or symbols)REACT ▶ A BUTTON WHILE IN MID AIR
When your character is sent flying by an enemy attack or for some other reason, press the Ⓐ button while in midair to land safely and ready for action.
natural_image
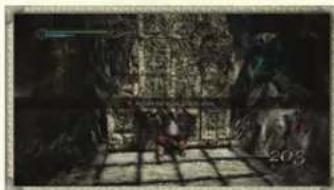
Interior scene of a dimly lit, ornate hall with stone columns and a central figure (no visible text or symbols)GUARD ▶ LEFT TRIGGER
Your character will guard while you pull the button, allowing you to prevent frontal attacks. There are some attacks, however, that you cannot prevent by guarding.
natural_image
Black-and-white action scene with multiple characters in dynamic poses, no visible text or symbols* While guarding, the camera automatically moves behind your character.
22 23
FLASH ▶ ⚙ BUTTON AFTER BREAKING THROUGH AN ENEMY'S ATTACK OR GUARD
If you are guarding and you press the button at the right time during an enemy's attack, you can deflect the enemy's weapon. Pressing the button again immediately after this allows you to unleash an incredibly powerful attack. You can also break through an enemy's guard by unleashing a special attack on a guarding enemy. Press the button again immediately after this also allows you to unleash an incredibly powerful attack.

natural_image
Historical battle scene with red and black explosions, no visible text or symbolsUSE SKILL ▶ LEFT BUMPER + ⚠ BUTTON / Ⓑ BUTTON / ✕ BUTTON / ⚙ BUTTON
Holding down the 📄 button displays skill names on the skill icons that are onscreen. Pressing the A, B, X, or Y buttons while the skill names are displayed activates the skill associated with the accessories equipped there.
natural_image
Dark, debris-filled environment with glowing blue light and scattered red and yellow markers (no readable text or symbols)SKILL ICON GAUGE
After activating a skill, the skill icon gauge will fall to empty, indicating the skill in question cannot be used for the time being. Once a certain length of time passes, the gauge will fill up again, indicating that the skill can be used once more.
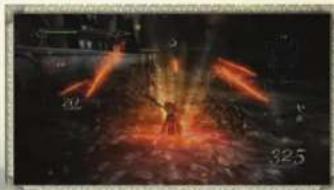
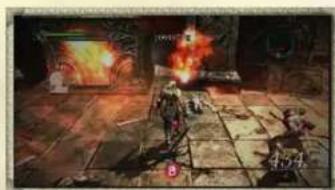
Pressing the button while the orb gauge is up one segment or higher uses the power stored there to activate an Orb Attack. During an Orb Attack, the character becomes invincible and the power of normal attacks is dramatically boosted. Continuing to attack an enemy during an Orb Attack raises the additional gauge. When the additional gauge is full, player will be able to execute the additional great attack.
natural_image
Dark scene with glowing yellow smoke or flame rising from a central structure, no visible text or symbolsABOUT THE ORB GAUGE
The orb gauge can rise up to a maximum of three segments. The more segments, the greater the power and the longer the duration of Orb Attacks and Orb Sparks.
natural_image
Night scene with a glowing robot and debris, no visible text or symbolsORB SPARK ▶ HOLD DOWN ■ BUTTON
Holding down the button while the orb gauge is up one segment or higher uses the power stored there to activate an Orb Spark, which is a powerful attack on multiple enemies within a certain area. Note that the additional gauge will rise if you continue to move the Left Stick up, right, down, and left in that order during an Orb Spark. When the additional gauge is full, the damage dealt to enemies will increase.
natural_image
Dark scene with glowing orange smoke or fire effects, no visible text or symbols
CHARACTER SPECIAL ACTIONS ▶ Ⓑ BUTTON
Pressing the Ⓑ button allows you to use actions that differ by character. There are some points in missions where you have to use such actions to advance, so make sure you memorize the special characteristics of each character.
GALEN/DESTRUCTION
When you are controlling Galen, you can destroy objects with the red mark shown on the right by facing them and pressing the B button. Do this when you are faced with situations such as a wall blocking a road you want to use. You can also attack by facing an enemy and pressing the B button.
natural_image
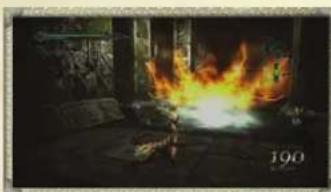
Black-and-white photo of a dimly lit scene with indistinct figures and debris, no visible text or symbolsSEPHIA/WIND
When you are controlling Sephia, you can generate a magical wind by pressing the ⑥ button. The wind you generate can extinguish flames, activate special interactive objects, and hold enemies In place for a short length of time when it hits them. The range of the wind generated varies depending on how long you hold down the ⑧ button.
natural_image
Interior scene with a bright fire and smoke, no visible text or symbols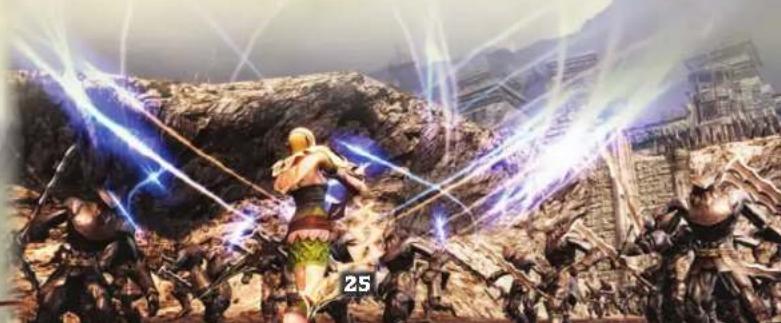
natural_image
Dramatic battle scene with two warriors in combat, surrounded by explosions and debris (no visible text or symbols)• ACTIONS •
• ITEMS •
MAGGNI/MOVE
When you are controlling Maggni, you can move rocks and other large objects by facing them and pressing the B button to grab on, and then with the B button still held down, moving the Left Stick to carry them. To release the rock or other object, press the B button once more. When you press the B button while facing enemies, Maggni can grab and throw them.
natural_image
Dark, low-resolution image of a dimly lit scene with indistinct figures and geometric shapes (no readable text or symbols)ZAZI/SNIPING
When you are controlling Zazi, you can switch the camera view to first-person by pressing the 8 button. While in first-person view, you can move the character with the Left Stick, and move the target with the Right Stick. Pressing the X or Y button fires arrows toward the target mark. To return the camera to its original view, press the 8 button once more.
natural_image
View through a window showing a rural landscape with houses, trees, and a fence (no visible text or symbols)LEVV/LEAP
When you are controlling Levv, purple spheres like the one shown to the right, will start glowing when you move near them. Pressing the B button while they are glowing makes Levv extend his weapon chain toward the sphere and take a huge leap into the air.
natural_image
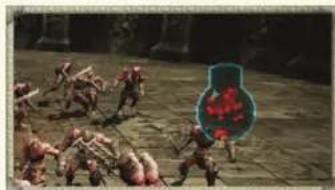
Illustration of a fantasy scene with glowing elements and a figure in a dark coat (no visible text or symbols)Items that you get have a variety of effects, such as restoring gauges or powering up characters. Use them skillfully to make your missions a success.
ITEM INTRODUCTION
Items appear when you destroy pots or treasure chests as shown to the right or defeat special enemies.
EQUIPPABLE ITEMS
Equippable items that you get include weapons and accessories. They will become equipable under Equipment in Settings, found in the Character Menu.
RECOVERY ITEMS
Getting recovery items allow you to recover the health gauge and orb gauge. The larger the item, the greater the recovery volume.
26 27
• ITEMS •
• ITEMS •
POWER-UP ITEMS
When you get one of these Items, your character's ATK goes up for certain length of time. The larger the item, the longer its duration.
natural_image
Dark stone pavement with scattered bright light sources, possibly a glowing object or artifact (no text or symbols visible)A number of interactive objects appear during missions. They include those that allow you to move forward when activated and those that are disadvantageous to characters if left alone.
INTRODUCTION TO INTERACTIVE OBJECTS
The most typical interactive objects found in the game will be introduced here. However, there are many more different types of interactive objects you will encounter.
NAMED ENEMIES
Special enemies known as named enemies will sometimes appear during missions. Such enemies are powerful, but they always drop accessories when defeated.

natural_image
Illustration of a dynamic battle scene with warriors in combat (no visible text or symbols)SWITCHES
Switches turn from red to blue when attacked, opening doors or bridging gaps among other things.
natural_image
Dark scene with a glowing pink arrow emerging from a doorway, no visible text or symbols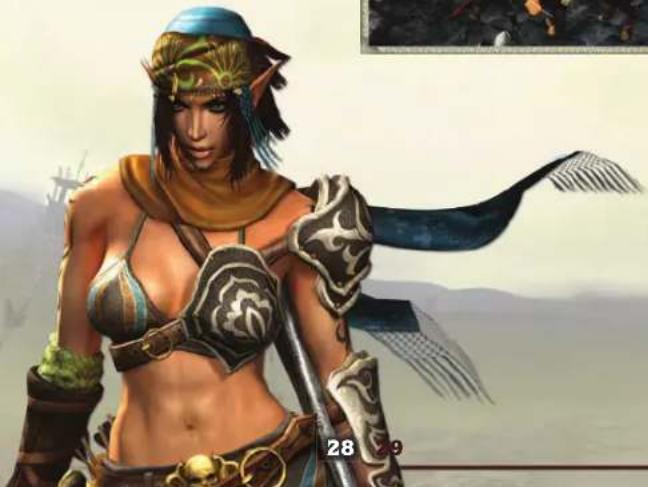
natural_image
Fantasy female character in ornate armor and helmet, holding a spear, with distant landscape background (no text or symbols)SUMMONING TOWERS
These towers summon enemies one after another. They can be destroyed by dealing a certain amount of damage to them. It is a good idea to destroy them as soon as you find one.
natural_image
Illustration of a futuristic battle scene with explosions and smoke (no readable text or symbols)
- INTERACTIVE OBJECTS
- CHARACTER MENU -
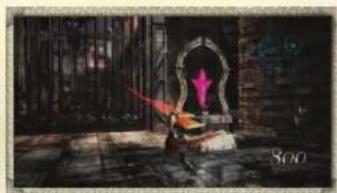
SEAL TOWERS AND ALTARS
As you continue attacking a seal tower, its color will change from red to blue, and once it is completely blue, the seal will be completely broken. Seal towers are associated with a nearby altar, and once you disable all of the seal towers in the area, the altar's seal will be broken.

natural_image
Illustration of a fantasy warrior in red attire standing on a stone floor with red flames and a building in the background (no text or symbols)*NOTE: This can only be activated by Galen. Seal towers and altars also appear in Maggni's, Zazi's, and Levv's scenarios, but are not activated.
SPORES AND BLOBS
Spores release a poison mist that damages characters. Find and destroy the nearby blob to eliminate its spores.
natural_image
Black-and-white illustration of a character standing on a tiled floor with purple flowers, no visible text or symbolsIn the Character Menu, you can select the character you want to play, change character equipment, and level up characters among other things.
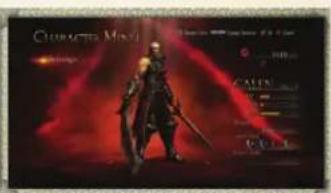
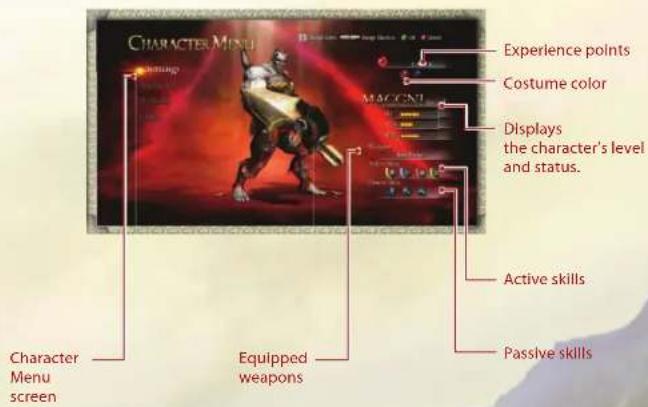
CHARACTER MENU SCREEN
Press the 📄 or 📄 button to select a character. If the character has a costume color, press the 📄 or 📄 button to change the character's color. When you are ready, select Mission from the Character Menu to start playing.
- CHARACTER MENU -
- CHARACTER MENU -
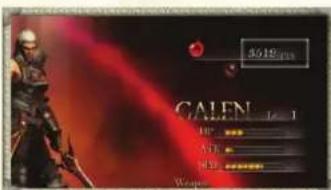
ABOUT STATUS
The character's status include three parameters (HP, ATK, and SPD) that can be modified depending on the character's level, equipped weapons, and accessories.
| HP | Affects the level of the health gauge. |
| ATK | Affects the power of attacks. |
| SPD | Affects attack and movement speed. |
ABOUT COSTUME COLOR
During missions, you may get an item known as Costume Color. If you get this item and complete the mission, the number of costume colors the character can use will increase, enabling you to change colors on the Character Menu.
Color change
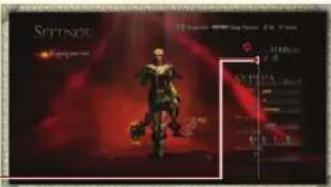
SETTINGS
Select Settings on the Character Menu to prepare for missions by changing equipment and enhancing your characters.

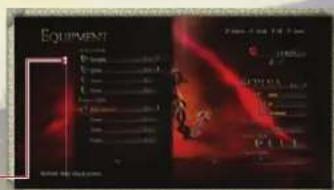
EQUIPMENT
Change the character's equipment. To change weapons, select Weapons and then select the weapon you want to equip from among those available. To change accessories, select Accessories and then select the location to equip it. Next, select the accessory you want to
32 33
equip from among those available. You can remove an accessory by pressing the Ⓥ button and view detailed Information by pressing the ⚗ button. Accessories are shared between all your characters.

EQUIPPABLE ITEMS
You may view the level of each equipable item. The higher their level, the greater the power or effect.

WEAPON CHANGE AND STATUS CHANGE
The character's status will change when the selected item is equipped. An upward facing blue triangle will be displayed for parameters that go up and a downward facing red triangle for those that go down.

ACCESSORIES AND SKILLS
Each accessory has an associated skill. When you equip an accessory, the character acquires its associated skill. There are two types of skills (passive and active) and four accessories for each skill. Up to eight accessories can be equipped.

ACTIVE SKILLS
These are skills that you can use whenever you want during the mission. The icon's color corresponds to the color of the button for using it.

PASSIVE SKILLS
These are skills that automatically have an effect, such as raising a character's stats while the accessory is equipped.
Equipping accessories
• CHARACTER MENU •
- CHARACTER MENU -

LEVEL UP
You can level up characters, weapons, and accessories by expending the experience points you have acquired thus far. Select what you want to level up and then check the amount of experience points that will be expended and status parameter that will go up. If you want to proceed, select Yes when the confirmation message appears.
Characters
Level up characters to raise their HP. (The maximum level is 10.)
Weapons
Level up weapons to raise their ATK and special effects. (The maximum level is 10.)
Accessories
Level up accessories to raise the power and effect of their skills. (The maximum level is 5.)
*NOTE: Accessories levels cannot be shared between all characters.

MISSION
Select Mission on the Character Menu to start you mission. In the Mission Map that appears, move up/down on the D-pad or Left Stick to select a mission and then confirm with the A button. Pressing the 10 or 12 button lets you check the Mission List, the overall map, and results recorded so far on the Information screen.

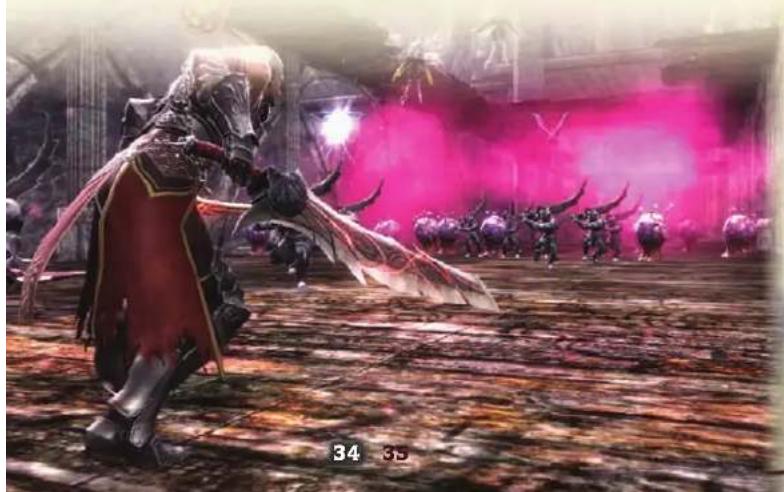
natural_image
Fantasy battle scene with armored warrior holding shield, armored warriors in background under pink smoke (no visible text or symbols)
ABOUT THE COLOSSEUM
You can practice using skills and combos against an unlimited number of enemies at the Colosseum, which you can select from the very beginning on the Mission Map. When you finish the mission, stand on the glowing emblem within the stage.
* At the Colosseum, you do not get experience points for defeating enemies.
- CHARACTER MENU -
• MULTIPLAYER •
SYSTEM MENU
Select System Menu under System on the Character Menu to save/load game data and change game settings.

LOAD
Load data saved for the game you have played so far and continue playing. Move up/down on the D-pad or Left Stick to select a saved game and then press
the A button to confirm. Pressing the Y button lets you change the storage device to load from. Note that if you have not saved your current game, loading another one will cause you to lose the data for the game in progress.
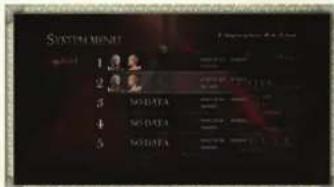

SAVE
You can save your current game progress. Move up/down on the D-pad or Left Stick to select a save slot and then press the A button to confirm. Pressing the Y button lets you change the storage device to which to save data. Note that if you select a slot that already has a saved game, the data there will be overwritten.


OPTIONS
Change various game settings.

QUIT
Selecting Quit returns you to the title screen. If you have not saved, any game progress up to that point will be lost.
36 37
In Xbox LIVE mode, you can connect to the Internet and play cooperative missions with another player.
Multiplayer Menu
On the title menu, select Xbox LIVE and then the saved game you want to play. The Multiplayer menu appears. Use the D-pad or Left Stick to make a menu selection and then press the Ⓐ button to confirm.
| Quick Match | Search for a session that is seeking players and proceed immediately to the lobby as a guest when one is found. Select this if you want to play a multiplayer game right away without specifying rules. |
| Create Room | Host your own session. Set Public Room to allow anyone to join and Private Room if you want to play with only your friends. Once you create the session, you will move to the lobby where you wait for players to join. |
| Custom Match | Search for a session that is seeking players. A list of sessions appears once the search is complete. Select the session you want to join. You will proceed to the lobby as a guest. |
| Leader board | View player rankings. |
| Quit | Exit Xbox LIVE mode and return to the title screen. |

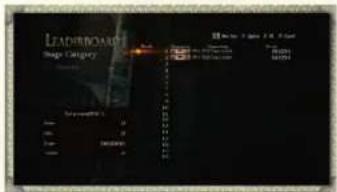
LEADERBOARD
Select Leaderboard on the Multiplayer menu to view score rankings for players on the various stages in Xbox LIVE mode. Select the stage type and display conditions.

RANKING
Displays the player's rank, Gamertag, and score. You can switch between pages using the left trigger and right trigger.

STAGE TYPE
Select this to switch between the stages for which you want to view rankings.

• MULTIPLAYER •
• MULTIPLAYER •

DISPLAY CONDITIONS
Select All Players to view rankings for everyone and Friends to view those for only your friends.

GAMER INFORMATION
Displays the Gamertag, score and kills recorded so far, time, and number of hits for your current character.

LOBBY
The Lobby screen appears once you join a session. Press the LfL or Rn button to select a character. If you have the Costume Color item, you can change your character's color with the lf and st button. The host will decide what stage to play. Select Ready when you are ready to play. The stage begins once the host and the guest have both selected Ready.

STAGE INFORMATION
Displays the rules and level of the currently selected stage.

The left side is the host's character, and the right side the guest's. The players' Gamertags are displayed on the top left.

LOBBY MENU
| Select Stage | The host can select what stage to play. The guest can only check information for that stage. |
| Settings | Change character equipment and level up. |
| Accept Changes | Complete preparations and start your mission. (When you select this, "READY" will be displayed next to the character you are using.) If you decide you are not ready yet, press the 8 button and continue with your preparations. |
| Exit | Leave the session and return to the Multiplayer menu. |

ABOUT STAGES
The following stages are available in multiplayer games, and each has its own set of rules. Each stage has a level, and when you first start playing, you will only be able to select level 1. Once you clear a stage, you can select the stage for the next level.
| Survival | In this stage, the players help each other defeat enemies that appear one after another. You complete it by withstanding three rounds and then standing on the glowing emblem. For every 100 enemies defeated, you get bonus time, during which your get bonus experience points every time you defeat a certain number of enemies. |
| Maze | In this stage, the players proceed over separate routes. There are also points along the stage where they must help each other in order to move forward. |
| Race | In this stage, the players compete against each other to see who can get a bonus by defeating a set amount of enemies first. |
| Escort | In this stage, the players proceed over separate routes while escorting Elf soldiers to their destination. |
| Hell | This highly difficult stage is divided into Hell First and Hell Second. Players must help each other in order to move forward. |

HOW TO PLAY MULTIPLAYER GAMES
The screens and action during multiplayer games are the same as single-player games as a general rule, but there are a few differences, including the onscreen display.
MULTIPLAYER SCREEN
On the multiplayer screen, you can check the stats and status of the player (partner) you are playing with.
natural_image
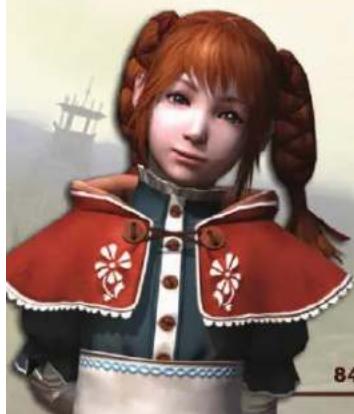
Interior scene of a dimly lit, stone-paved room with glowing elements and scattered debris (no visible text or symbols)PARTNER'S INFORMATION
Your partner's Gamertag, character, health gauge, and orb gauge are displayed.
natural_image
Game scene with multiple characters in action, one holding a red object (no visible text or symbols)
natural_image
Illustration of a girl with red hair in a pigtails wearing a red embroidered garment (no text or symbols)40
HOW TO PLAY MULTIPLAYER GAMES
MINIMAP
The status around you is displayed. The yellow triangle is your partner.
natural_image
Game scene with multiple warriors in combat on a stone battlefield, one player highlighted with red smoke (no visible text or symbols)STUN AND GAME OVER
When the health gauge runs out during a multiplayer game, the character will be stunned for set length of time and then automatically recover. You can also immediately recover stunned players by moving next to them and pressing the button. Both players getting stunned will end the game and display the GAME OVER screen.
natural_image
Game scene with character fighting in a dimly lit room, no visible text or symbols
natural_image
Illustration of two armored warriors in armor holding a sword, with mountainous background (no text or symbols)
TIME UNTIL RECOVERY
The player can recover once the gauge is full.
RESULTS SCREEN
The Results screen appears once a stage has been completed. The total score for you and your partner will be uploaded to the Leaderboard. Pressing the ✗ button in this screen allows you to check detailed information for extra bonuses (bonus that you get for fulfilling special conditions). After the information has been displayed you are sent back to the lobby.
natural_image
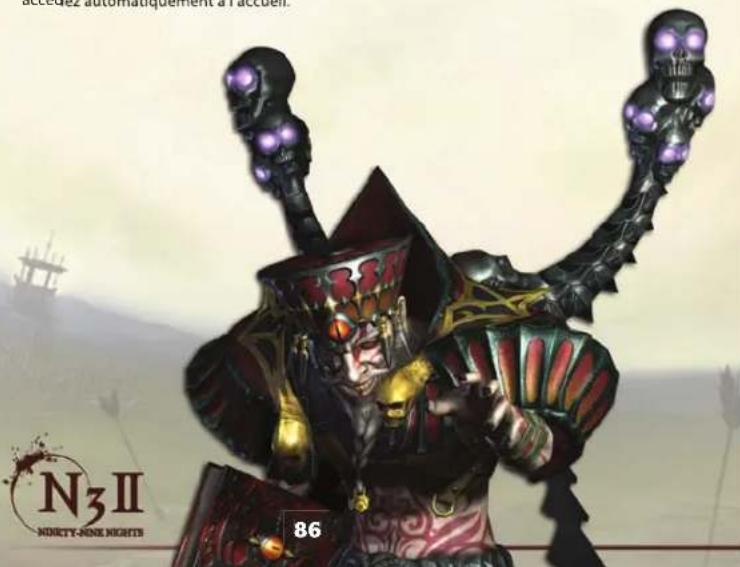
Fantasy illustration of a fantasy warrior with horns and armor, standing in a desert environment (no text or symbols)WARRANTY
Konami Digital Entertainment, Inc. warrants to the original purchaser of this Konami software product that the medium on which this computer program is recorded is free from defects in materials and workmanship for a period of ninety (90) days from the date of purchase. This Konami product is sold 'as is,' without express or implied warranty of any kind, and Konami is not liable for any losses or damages of any kind resulting from use of this program. Konami agrees for a period of ninety (90) days to either repair or replace, at its option, free of charge, any Konami product, postage paid, with proof of date of purchase, at its Factory Service Center. This warranty is not applicable to normal wear and tear. This warranty shall not be applicable and shall be void if the defect in the Konami software product has arisen through abuse, unreasonable use, mistreatment, or neglect.
THIS WARRANTY IS IN LIEU OF ALL OTHER WARRANTIES AND NO OTHER REPRESENTATIONS OR CLAIMS OF ANY NATURE SHALL BE BINDING ON OR OBLIGATE KONAMI. ANY IMPLIED WARRANTIES APPLICABLE TO THIS SOFTWARE PRODUCT, INCLUDING WARRANTIES OF MERCHANTABILITY AND FITNESS FOR A PARTICULAR PURPOSE, ARE LIMITED TO THE NINETY (90) DAY PERIOD DESCRIBED ABOVE. IN NO EVENT WILL KONAMI BE LIABLE FOR ANY SPECIAL INCIDENTAL OR CONSEQUENTIAL DAMAGES RESULTING FROM POSSESSION, USE OR MALFUNCTION OF THIS KONAMI PRODUCT.
Some states do not allow limitations as to how long an implied warranty lasts and/or exclusions or limitations of incidental or consequential damages so the above limitations and/or exclusions of liability may not apply to you. This warranty gives you specific rights, and you may also have other rights which vary from state to state.
If you experience technical problems with your game, please head to www.konami.com/support for assistance, here you will have access to many support materials, as well as our Knowledge Base which is available 24 hours a day, 7 days a week. All products must be deemed defective by a Konami Customer Service representative and an RMA number assigned prior to returning the product. All products received not matching this criteria will be returned if a Konami Customer Service Representative cannot reach you within three days upon receipt of the unauthorized return.
Konami Digital Entertainment, Inc.
Attention: Customer Service-RMA # XXXX
2381 Rosecrans Ave, Suite 200
Register now at www.konami.com
to receive exclusive product news, special offers and more!
www.konami.com/n3ii
INTRODUCTION...47......
PERSONNAGES...48....
COMMANDES...52.....
DÉMARRAGE...53....
COMMENT JOUER...56.....
ÉCRAN DU JEU...59....
MODIFICATIONS D'ÉTAT...62.....
ACTIONS...64......
OBJETS....71....
OBJETS INTERACTIFS....74.....
MENU PERSONNAGE...75.....
MULTIJOUEUR...81.....
COMMENT JOUER AU MODE MULTIJOUEUR....84
GARANTIE ET ASSISTANCE....87
ESPAÑOL 89
• HISTOIRE •
· Xbox LIVE ·
• INTRODUCTION •
54 55
Options du Jeu
natural_image
Dark scene with a person in a boat navigating through a large, spiky arena or fortress (no visible text or symbols)
natural_image
Black-and-white photo of a chaotic scene with figures and a large red object, possibly a weapon or aircraft (no visible text or symbols)MENU PERSONNAGE
56 57
ÉVÈNEMENTS DE L'HISTOIRE
natural_image
Illustration of a historical or mythological figure in traditional attire, standing beside a glowing green statue (no visible text or symbols)MISSIONS
OBJECTIFS SECONDAIRES
• COMMENT JOUER •
• ÉCRAN DU JEU •
ÉCRAN DES RÉSULTATS
ATK goes up for a set length of time.
Covered in flames and suffer continual damage for a set length of time.
Skills are unavailable for set length of time.
Stunned and unable to move for a set length of time.
Damage from enemies is increased for a set length of time.
COMBATS DE BOSS
natural_image
Dark scene with glowing pink characters and a small figure, no visible text or symbolsÉCRAN RENSEIGNEMENTS/MENU PAUSE
CARTE COMPLÈTE
natural_image
Illustration of a stylized map or structure with no visible text or symbolsMENU PAUSE
natural_image
Dark, low-resolution interior scene with a glowing object on a textured floor and a distant screen (no visible text or symbols)SAUTER TOUCHE
natural_image
Dark fantasy scene with glowing elements and a figure in motion, no visible text or symbolsATTAQUES NORMALES TOUCHE ✉ / TOUCHE ✎
natural_image
Dark scene with a figure in motion near a red banner, possibly a weapon or game (no visible text or symbols)
64 65
natural_image
Black-and-white illustration of a person holding a large orange flame in a dimly lit street (no visible text or symbols)ATTAQUE COMBINÉE ET ATTAQUE DÉVASTATRICE
natural_image
Futuristic battlefield scene with explosions and smoke (no readable text or symbols)TABLEAU DES COMBOS
natural_image
Black-and-white photo of a damaged scene with a damaged object and a tank in the background (no visible text or symbols)RÉAGIR TOUCHE DANS LES AIRS
natural_image
Dark scene with a bright blue explosion in the sky, surrounded by debris and no visible text or symbolsPOSTURE DÉFENSIVE ▶ GÂCHETTE GAUCHE
natural_image
Black-and-white illustration of a person standing in a chaotic battlefield with debris and smoke (no visible text or symbols)natural_image
Dark, abstract image with red and yellow patterns, no visible text or symbolsUTILISER COMPÉTENCE ▶ GÄCHETTE HAUTE GAUCHE + TOUCHE A/B/X/Y + Ⓐ / Ⓑ / ✗ / ✘
natural_image
Black-and-white action scene with glowing yellow and red smoke effects, no visible text or symbolsAU SUJET DE LA JAUGE D'ORBES
natural_image
Interior scene of a dimly lit stone building with a person walking on the cobblestone path (no visible text or symbols)ÉTINCELLE ORBE ▶ MAINTENIR TOUCHE ENFONCE
natural_image
Interior scene with a red figure in a suit, surrounded by equipment and a wall-mounted monitor (no visible text or symbols)SEPHIA/VENT
natural_image
Night scene of a person standing on stone pavement with glowing green light in the background (no visible text or symbols)
natural_image
Game scene from a fantasy RPG showing a warrior fighting with lightning and fallen warriors in a rocky battlefield (no visible text or symbols)• ACTIONS •
• OBJETS •
MAGGNI/DÉPLACEMENTS
natural_image
Dark scene with two figures standing near a textured wall, possibly a stone structure or fence (no visible text or symbols)ZAZI/TIR DE LOIN
natural_image
Illustration of a forest scene with figures near a wooden fence and trees (no visible text or symbols)LEVV/SAUT
natural_image
Illustration of a dimly lit, ornate street scene with a statue and abstract lighting (no visible text or symbols)
70 71
INTRODUCTION AUX OBJETS
natural_image
Dark outdoor scene with a small figure standing on a stone path, surrounded by trees and debris (no visible text or symbols)INTRODUCTION TO AUX OBJETS INTERACTIFS
natural_image
Dark scene with multiple figures in a dimly lit environment, one holding a glowing green object (no visible text or symbols)LEVIERS
natural_image
Dark scene with glowing blue light and a stone structure, no visible text or symbols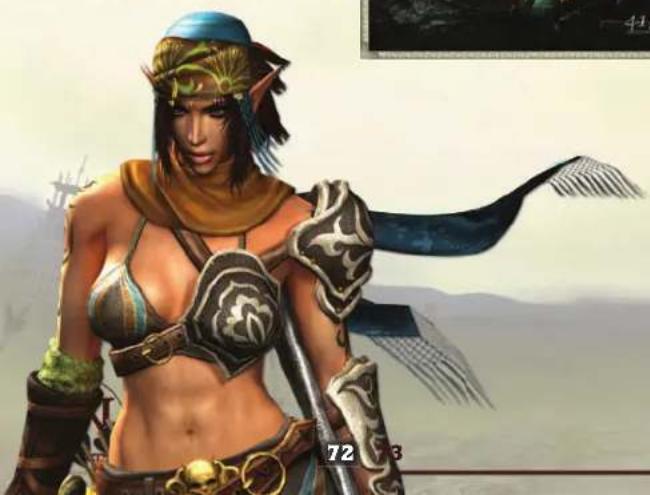
natural_image
Fantasy female character in armor and helmet holding a staff, set against a mountainous landscape background (no text or symbols)TOURS D'INVOCATIONS
natural_image
Illustration of a fantasy scene with a figure in motion, smoke, and glowing elements against a dark sky (no text or symbols)
• OBJETS INTERACTIFS •
· MENU PERSONNAGE ·
AUTELS ET TOURS DE PROTECTION
natural_image
Illustration of a warrior in red attire wielding a weapon, standing before a building with red fire and smoke (no text or symbols visible)natural_image
Dark, low-resolution image of a dimly lit corridor with a red object on the ground (no visible text or symbols)PARAMÈTRES
Personnages
natural_image
Fantasy battle scene with armored warrior wielding a sword, armored unit in background, and armored warriors in combat (no visible text or symbols)MISSION

RENSEIGNEMENTS RELATIFS AU JOUEUR
natural_image
Interior view of a dimly lit, stone-paved courtyard with scattered debris and two figures in the background (no visible text or symbols)RENSEIGNEMENTS RELATIFS AU PARTENAIRE
natural_image
Illustration of a girl with red hair in a pigtails wearing a red and black embroidered outfit (no text or symbols)84
• COMMENT JOUER AU MODE MULTIJOUEUR
MINI-CARTE
natural_image
Historical battle scene with soldiers and a red flag, no visible text or symbolsPARALYSIE ET FIN DE LA PARTIE
natural_image
Game scene with multiple characters on a tiled floor, no visible text or symbols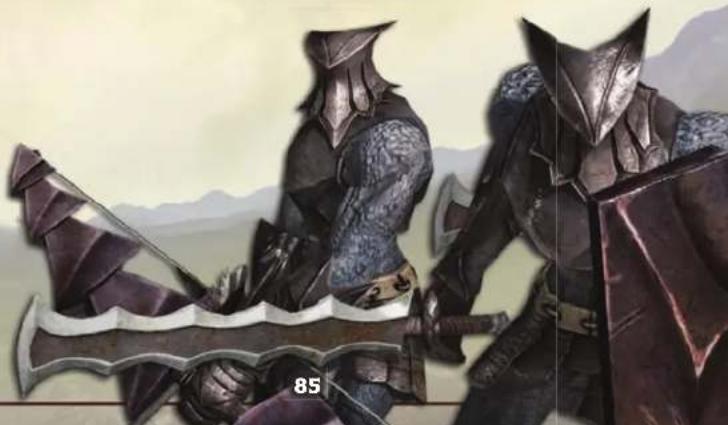
natural_image
Illustration of two armored warriors in armor holding a sword, with mountainous background (no text or symbols). COMMENT JOUER AU MODE MULTIJOUEUR
DURÉE AVANT RÉCUPÉRATION
natural_image
Fantasy illustration of a fantasy warrior with horns and glowing purple eyes, standing in a desert environment (no text or symbols on the main figure)GARANTIE LIMITÉE
Attention: Customer Service-RMA # XXXX
2381 Rosecrans Ave, Suite 200
• INICIO •
· INICIO ·
GUARDAR PARTIDAS
98 99
Opciones de Juego
natural_image
Black-and-white photo of a domed building with ornate roof and large windows, surrounded by water and a distant structure (no visible text or symbols)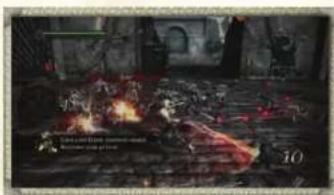
natural_image
Dark scene with glowing red fire and debris on a wooden surface, no visible text or symbolsMENÚ DE PERSONAJES

100 101
EVENTOS DE LA HISTORIA
natural_image
Illustration of a fantasy scene with two figures in front of a mannequin, no visible text or symbolsMISIONES
natural_image
Exterior view of a large, ornate building with arched windows under a cloudy sky (no visible text or symbols)SUBMISIONES
• CÓMO JUGAR •
natural_image
Dark, textured outdoor scene with indistinct figures and debris (no visible text or symbols)natural_image
Black fantasy character in dynamic pose, holding a small object, standing in front of a palace entrance (no visible text or symbols)105
ATK goes up for a set length of time.
Covered in flames and suffer continual damage for a set length of time.
Skills are unavailable for set length of time.
Stunned and unable to move for a set length of time.
Damage from enemies is increased for a set length of time.

BATALLAS CONTRA EL ENEMIGO FINAL
natural_image
Game scene showing two pink characters fighting on a wooden board with debris (no visible text or symbols)natural_image
Illustration of a historical map with a central cart and surrounding terrain (no text or labels)MENÚ PAUSA
natural_image
Black-and-white photo of a wooden board with scattered debris and a green arrow pointing to it (no visible text or symbols)SALTAR▶ BOTÓN Ⓐ
natural_image
Game scene showing a character standing on a wooden bridge with a river and trees in the background (no visible text or symbols)natural_image
Interior scene of a dimly lit, debris-filled room with scattered debris and a red fire (no visible text or symbols)
108 109
natural_image
Interior scene with a red abstract shape and dark background, no visible text or symbolsnatural_image
Black-and-white photo of a chaotic battlefield scene with red and black smoke, no visible text or symbolsnatural_image
Black-and-white action photo of a character in a dynamic pose with armored vehicles and debris (no visible text or symbols)REACCIONAR ► BOTÓN Ⓐ MIENTRAS ESTÁS EN EL AIRE
natural_image
Historical battle scene with soldiers in combat, no visible text or symbolsGUARDIA ▶ GATILLO IZQUIERDO
natural_image
Dark scene with a character in red dress standing near a large vehicle (no visible text or symbols)natural_image
Game scene with character fighting on a red fire, no visible text or symbolsnatural_image
{{}^{60} \text{ and }^{269} \text{ illustrations of a dynamic battle scene with explosions and a warrior figure (no readable text or symbols)LA BARRA DE ORBES
natural_image
Illustration of a stylized creature with glowing red-orange skin and surrounding dark foliage (no text or symbols)natural_image
Illustration of a futuristic battle scene with explosions and smoke (no readable text or symbols)
natural_image
Interior view of a vehicle showing internal components and a red overlay (no visible text or symbols)SEPHIA/VIENTO
natural_image
Dark scene with a person standing near a glowing fire, no visible text or symbols- ACCIONES -
· OBJETOS ·
MAGGNI/MOVIMIENTO
natural_image
Interior scene of a dimly lit stone structure with two people walking, no visible text or symbolsZAZI/CONTRAATAQUE
LEVV/LEAP
natural_image
Illustration of a fantasy scene with a figure, a sword, and a glowing tower (no visible text or symbols)natural_image
Dark outdoor scene with a glowing object on a stone path, no visible text or symbolsnatural_image
Dark scene with a person standing near a doorway, no visible text or symbolsLLAVES
natural_image
Game scene showing a stone archway with a glowing blue arrow, surrounded by stone walls and a doorway (no readable text or symbols)
natural_image
Fantasy illustration of a female warrior in armor with a shield, standing before a landscape (no text or symbols)natural_image
Dark scene with a glowing red light source in front of a stone wall and rocky terrain (no visible text or symbols)
• OBJETOS INTERACTIVOS •
- MENÚ DE PERSONAJES
TORRES SELLADAS Y ALTARES
natural_image
Illustration of a warrior in red attire wielding a weapon, standing before a building with red fire and tanks (no text or symbols)natural_image
Dark, dimly lit scene with a large red object on the ground and a faint window in the background (no visible text or symbols)CONFIGURACIÓN
Personajes
natural_image
Fantasy battle scene with armored warrior wielding a sword, surrounded by pink smoke and armored warriors (no visible text or symbols)EL COLISEO

OPCIONES
natural_image
Game scene showing a character in a stone arena with surrounding characters and debris (no readable text or symbols)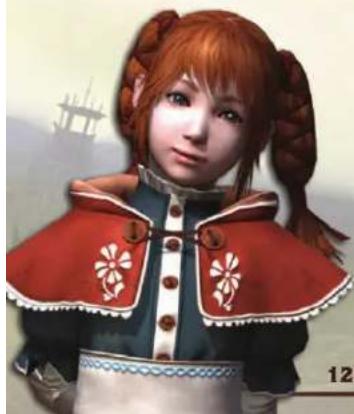
natural_image
Illustration of a girl with red hair in a pigtails wearing a red embroidered coat (no text or symbols)128
natural_image
Black-and-white illustration of a battlefield scene with soldiers and equipment (no visible text or symbols)PERSONAJES PARALIZADOS Y FIN DEL JUEGO
natural_image
Interior scene of a dimly lit, stone-paved room with two figures in combat (no visible text or symbols)129
natural_image
Fantasy illustration of a fantasy warrior with large spiky hair and glowing eyes, standing in front of a distant fortress (no text or symbols on the main figure)GARANTÍA LIMITADA
Attention: Customer Service-RMA # XXXX
2381 Rosecrans Ave, Suite 200
© 2010 Konami Digital Entertainment KONAMI is a registered trademark of KONAMI CORPORATION. Ninety-Nine Nights is a trademark of Microsoft Corporation. Q? is a trademark of Q Entertainment Inc.
Xbox, Xbox 360, Xbox LIVE, and the Xbox logos are trademarks of the Microsoft group of companies and are used under license from Microsoft.