
HD4426 - Barbecue PHILIPS - Free user manual and instructions
Find the device manual for free HD4426 PHILIPS in PDF.
| Brand | Philips |
| Model | HD4426 |
| Product type | Tabletop electric barbecue |
| Power supply | 220-240 V (AC) |
| Thermostat | Adjustable (positions 1 to 5) with temperature indicator light |
| Smoke reduction function | Integrated water tray to reduce smoke and odors |
| Grill coating | Non-stick |
| Grill | Removable, dishwasher safe |
| Drip tray | Removable, dishwasher safe, can be lined with aluminum foil |
| Base | Washable with soapy water |
| Thermostat unit | Specific (ref. TKSP-S007I), detachable, do not immerse |
| Safety | Disconnect thermostat unit before removing grill; hot surface during operation |
| Usage | Indoor only |
| Warranty | International Philips (see leaflet) |
| Included accessories | Thermostat unit, grill, drip tray |
| Materials | Steel, plastic (insulated handles) |
| Cleaning | Grill and tray dishwasher safe; base and thermostat unit wipe clean |
| Preheating | Required, wait until temperature indicator light turns off |
| Recommended temperature | Varies by food (see cooking chart) |
Frequently Asked Questions - HD4426 PHILIPS
User questions about HD4426 PHILIPS
0 question about this device. Answer the ones you know or ask your own.
Ask a new question about this device
Download the instructions for your Barbecue in PDF format for free! Find your manual HD4426 - PHILIPS and take your electronic device back in hand. On this page are published all the documents necessary for the use of your device. HD4426 by PHILIPS.
USER MANUAL HD4426 PHILIPS
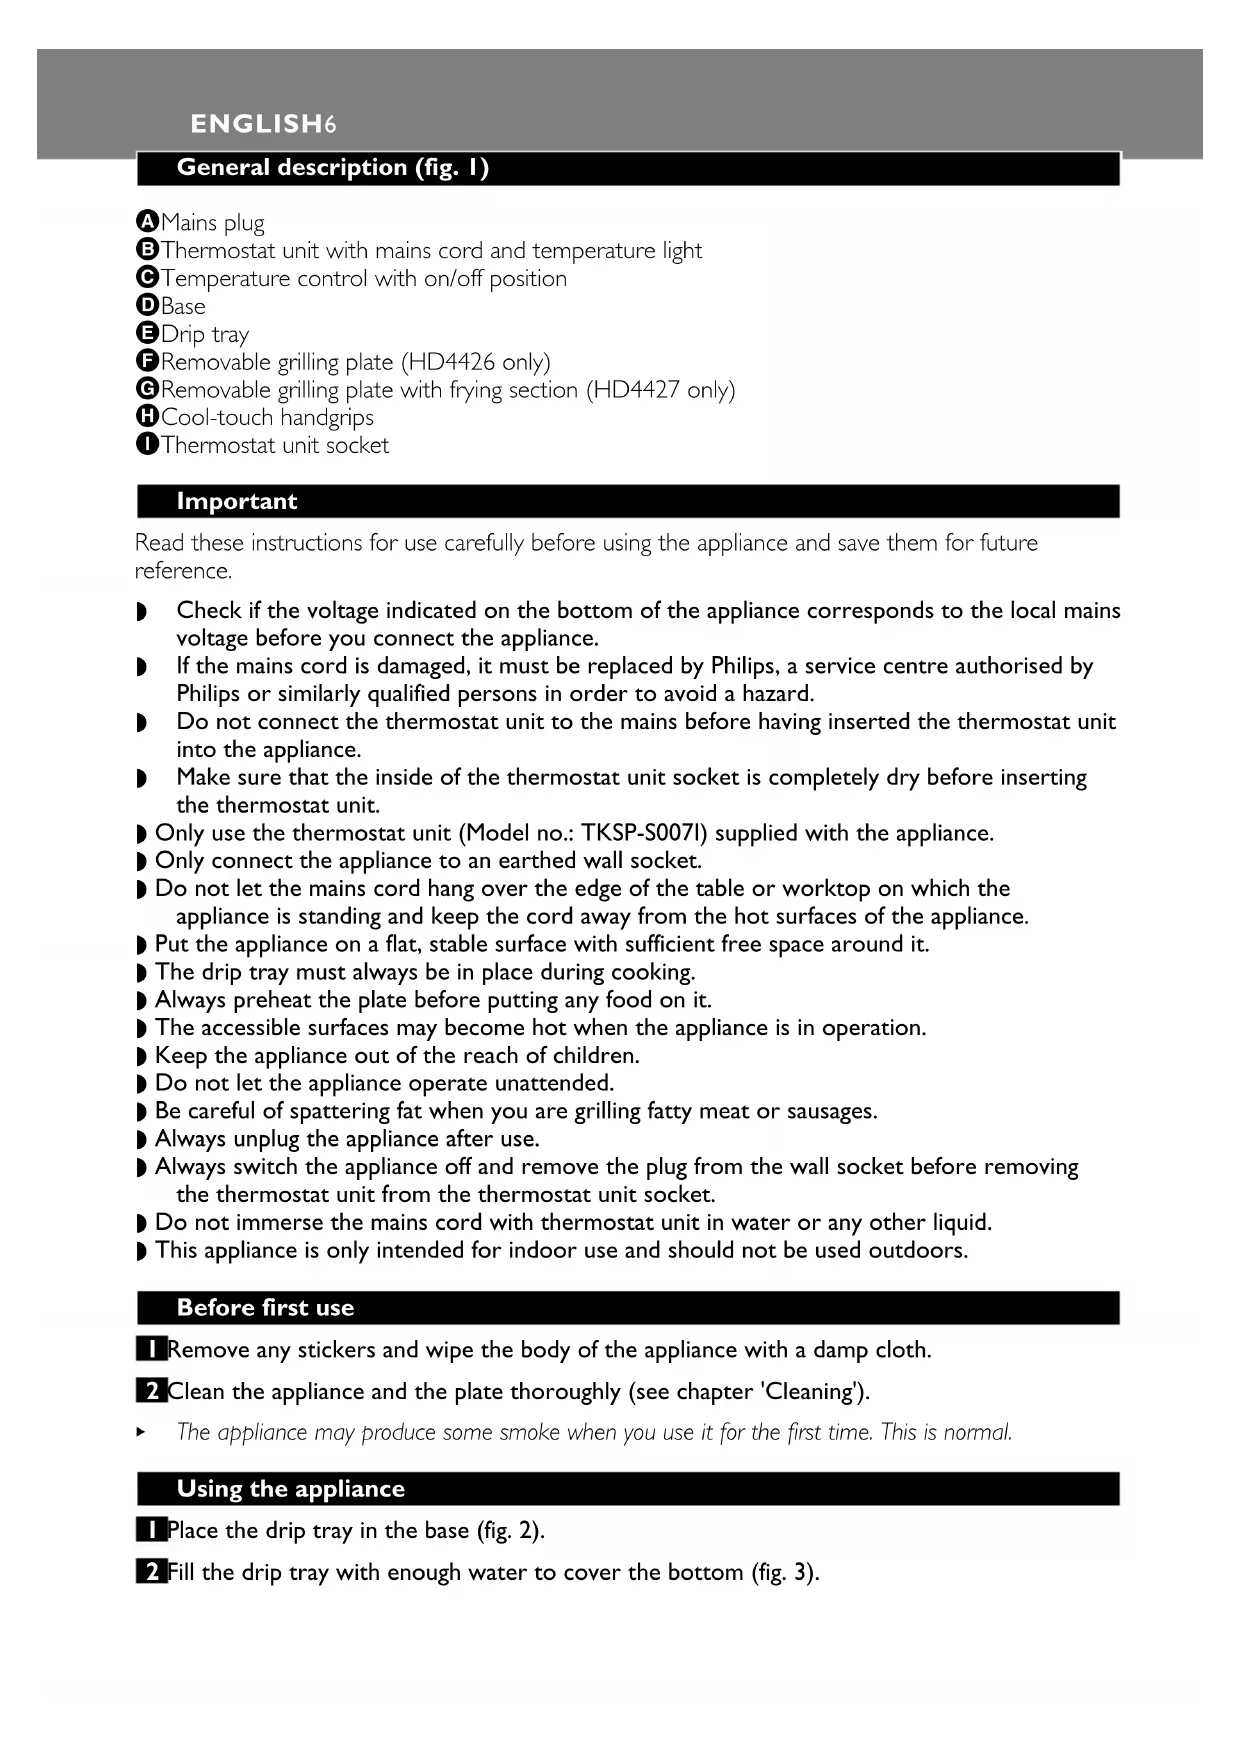
A Mains plug
Thermostat unit with mains cord and temperature light
Temperature control with on/off position
DBase
Drip tray
FRemovable grilling plate (HD4426 only)
Removable grilling plate with frying section (HD4427 only)
Cool-touch handgrips
Thermostat unit socket
Important
Read these instructions for use carefully before using the appliance and save them for future reference.
Check if the voltage indicated on the bottom of the appliance corresponds to the local mains voltage before you connect the appliance.
If the mains cord is damaged, it must be replaced by Philips, a service centre authorised by Philips or similarly qualified persons in order to avoid a hazard.
Do not connect the thermostat unit to the mains before having inserted the thermostat unit into the appliance.
Make sure that the inside of the thermostat unit socket is completely dry before inserting the thermostat unit.
Only use the thermostat unit (Model no.: TKSP-S007I) supplied with the appliance.
Only connect the appliance to an earthed wall socket.
Do not let the mains cord hang over the edge of the table or worktop on which the appliance is standing and keep the cord away from the hot surfaces of the appliance.
Put the appliance on a flat, stable surface with sufficient free space around it.
The drip tray must always be in place during cooking.
Always preheat the plate before putting any food on it.
The accessible surfaces may become hot when the appliance is in operation.
- Keep the appliance out of the reach of children.
Do not let the appliance operate unattended.
Be careful of spattering fat when you are grilling fatty meat or sausages.
Always unplug the appliance after use.
Always switch the appliance off and remove the plug from the wall socket before removing the thermostat unit from the thermostat unit socket.
Do not immerse the mains cord with thermostat unit in water or any other liquid.
This appliance is only intended for indoor use and should not be used outdoors.
Before first use
Remove any stickers and wipe the body of the appliance with a damp cloth.
Clean the appliance and the plate thoroughly (see chapter 'Cleaning').
The appliance may produce some smoke when you use it for the first time. This is normal.
Using the appliance
1 Place the drip tray in the base (fig. 2).
2 Fill the drip tray with enough water to cover the bottom (fig. 3).
- The water in the drip tray will take away smoke and nasty smells, as it prevents food particles from getting burnt.
- To make cleaning easier, you can line the drip tray with aluminium foil before filling it with water.
- When lining the drip tray, make sure the foil does not hang over the sides of the tray, as this will prevent proper air circulation.
Place the grilling plate in the base (fig. 4).
The grilling plate only fits in the base in one way.
4 Lightly grease the grilling plate with butter or oil.
Insert the thermostat unit into the thermostat unit socket in the side of the appliance (fig. 5).
Put the mains plug in the wall socket.
7 Turn the temperature control to the position appropriate for the ingredients to be grilled (see section 'Grilling times' in this chapter).
The temperature light goes on.
Place the ingredients on the grilling plate when the temperature light goes out.
Be careful: the grilling plate is hot!
During the grilling process, the temperature light comes on and goes out from time to time as an indication that the heating element is switched on and off to maintain the correct temperature.
9 Turn the food from time to time by means of a wooden or plastic spatula or tongs.
10 Remove the food when it is done.
Use a wooden or plastic spatula or tongs to remove the food from the appliance. Do not use metal, sharp or abrasive kitchen utensils.
For optimal results, remove excess oil from the plate with a piece of kitchen paper before grilling the next batch of food.
To continue grilling, place the next batch of food on the grilling plate when the temperature light goes out.
Grilling times
In the table at the end of these instructions for use you will find some types of food you can cook on this table grill. The table shows which temperature to select and how long the food should be grilled. The time required to preheat the appliance has not been included in the grilling times indicated in the table. The grilling time and temperature depend on the type of food that is being prepared (e.g. meat), its thickness and its temperature and, of course, also on your own taste. You can also refer to the indications on the base of the table grill.
Cleaning
Never use abrasive cleaning agents and materials, as this will damage the non-stick coating of the plate.
Do not immerse the mains cord with thermostat unit in water or any other liquid.
Set the temperature control to the 'off' position.
2 Remove the mains plug from the wall socket and let the appliance cool down.
3 Remove the thermostat unit by pulling it out of the appliance (fig. 6).
4 Remove the grilling plate by lifting it from the base by its handgrips. The grilling plate cannot
ENGLISH8
Always remove excess oil from the grilling plate with a piece of kitchen paper before removing it for cleaning.
5 Remove the drip tray by lifting it out of the base (fig. 8).
6 Clean the grilling plate, drip tray and base with a soft cloth or sponge in hot water with some washing-up liquid or in the dishwasher.
Food residues or grease can be removed by soaking the grilling plate in hot water with some washing-up liquid for five minutes or by drizzling some lemon juice onto the grilling plate. This will loosen any caked food or grease.
7 Dry the grilling plate, drip tray and base, and reassemble them.
The inside of the thermostat unit socket must be completely dry before you reinsert the thermostat unit into it. To dry the socket, wipe the inside with a dry cloth. If necessary, shake out excess water first.
Clean the outside of the thermostat unit with a damp cloth.
Tips
The grilling plate is ideal for preparing meat, poultry, fish and vegetables. Fat and juice drip through the grill into the drip tray, which ensures almost smoke-free grilling and healthy, low-fat food (fig. 9).
The frying section (HD4427 only) is ideal for preparing fish, eggs, ham, mushrooms, tomatoes, onions, etc. It is also very handy for keeping food hot (fig. 10).
You can also use the table grill as a thermostatically controlled hotplate that automatically keeps your dishes at the required temperature. Cover the grilling plate with aluminium foil with the shiny side facing upwards and then set the temperature control to position 2 or 3.
Tender pieces of meat are best suited for grilling.
- Pieces of meat such as steaks or spare rib chops become more tender if marinated overnight.
The grilled food should not be turned too frequently. When the items are brown on both sides, they should be grilled at a lower temperature to ensure they do not dry out and are cooked more evenly.
If you want to defrost frozen food, wrap the frozen food in aluminium foil and set the temperature control to position 3 or 4. Turn the food from time to time. The defrosting time depends on the weight of the food.
- When you are preparing satay, chicken, pork or veal, first sear the meat at a high temperature (position 5). If necessary, you can then set the temperature control one position lower and grill the food until it is done.
- When making satay or kebab, soak bamboo or wooden skewers in water to prevent them from getting scorched during grilling. Do not use metal skewers.
Sausages tend to burst when they are being grilled. To prevent this, punch a few holes in them with a fork.
Fresh meat gives better grilling results than frozen or defrosted meat. Do not put salt on the meat until after you have grilled it. This will help to keep the meat juicy. For the best result, make sure the pieces of meat you are going to prepare are not too thick (approx. 1.5 cm).
This table grill is not suitable for grilling breadcrumbed food.
Environment
Do not throw the appliance away with the normal household waste at the end of its life, but hand it in at an official collection point for recycling. By doing this you will help to preserve the environment (fig. 11).
Guarantee & service
If you need information or if you have a problem, please visit the Philips website at www.philips.com or contact the Philips Customer Care Centre in your country (you will find its phone number in the worldwide guarantee leaflet). If there is no Customer Care Centre in your country, turn to your local Philips dealer or contact the Service Department of Philips Domestic Appliances and Personal Care BV.
| Type of food | Grilling times (minutes) | Temperature setting |
| Salmon or tuna steak | 5-7 | 4-5 |
| Gambas | 3-4 | 4-5 |
| Fish (small pieces) | 4-6 | 4 |
| Turkey/chicken fillet | 6-8 | 4-5 |
| Sausage | 8-10 | 4-5 |
| Hamburger (frozen, precooked) | 6-15 | 4-5 |
| Lamb chop | 8-12 | 4-5 |
| Meat that takes little time to grill (e.g. steaks/veal fillet) | Depending on the thickness of the meat and your personal preference. | 5 |
| Pieces of meat | 4-7 | 5 |
| Vegetables/fruit | 4-7 | 5 |
| Vegetables/fruit covered with cheese | 4-5 | 5 |
| Mixed grill (small pieces) | 8-10 | 5 |
| Shashlik/satay | 8-10 | 5 |
| Keeping hot | 2-3 | |
| Defrosting | 3-4 |
This table grill is not suitable for grilling breadcrumbed food.
Ubersicht (Abb.1)
| Yiyecek Türü | Izgara süresi (dakika) | Sıçakkı ayarı |
| Somon vya ton fileto | 5-7 | 4-5 |
| Jumbo karides | 3-4 | 4-5 |
| Balık (kılıç parçalar) | 4-6 | 4 |
| Hindi/tavuk fileto | 6-8 | 4-5 |
| Sosis | 8-10 | 4-5 |
| Hamburger (dondurulmugs, hazir) | 6-15 | 4-5 |
| Pirzola | 8-12 | 4-5 |
| Etin pişmesi biraz zaman alir (örmeğin biftek/dana fileto) | Bu, etin kalınkı ve kişisel tercihlerinize®,®,®,®,®,®,®,®,®,®,®,®,®,®,®,®,®,®,®,®,®,®,®,®,®,®,®,®,®,®,®,®,®,®,®,®,®,®,®,®,®,®,®,®,®,®,®,®,®,®,®,®,®,®,®,®,®,®,®,®,®,®,®,®,®,®,®,®,®,®,®,®,®,®,®,®,®,®,®,®,®,®,®,®,®,®,®,®,®,®,®,®,®,®,®,®,®,®,®,®,® | 5 |
| Parça et | 4-7 | 5 |
| Sebze/meyve | 4-7 | 5 |
| Peynir kaplı meyve/sebze | 4-5 | 5 |
| Kanır ilegara (kılıç parçalar) | 8-10 | 5 |
| Şiş kebab/çöp Şiş | 8-10 | 5 |
| Sıçak tutma | 2-3 | |
| Buz çözme | 3-4 |
PeIeTeKa-rgnMbMOKcT6bITb yCTaHOBaeHa Ha OCHOBaHHe eINHCTBeHHO BepHbIM 6pa3OM.
4 CλeRka cMaXbTe peWeTky-rgnAb paCTHTeAusbIM HAN CAnBOUHbIM MaCAOM.
5 ToaKauHte TepMoCTaT K pa3bemy, pacnoaoKeHHOMy c6oky np6opa (pnc. 5).
6 BCTaBbTe BnAky CeTeBOrO uHypa B Po3eTKy əλeKtpocetN.
7VcTaHOBHTpepeyAToP HArpeBa B NOAOKeHne, COOTBeTCTByIOUeepnIroTAANBAEMbIM npOaYKTam (cm. pa3deA daHHo IaAbbI PpOAnKHTeMbHocTb PnIROTOBaeHna).
3aoropntcHnDnKaTOpHaIpeBa.
8 Korda HndkaTOp HarpeBa noracheT, nooXnTe npOaYkTbI Ha peWetKy-rgnAb.
OcToPoXHo! PeWeTka-rgnAb ropaya!
Bo Bpemj KApKn Hngkamop HarpeBa 6ygem nepnogueckn 3aropambcra, cnHaun3npy o BKIOUeHN n omKIOUeHN HArpeBamebHoro 3AemeHma gna noggeKaHna Hyxhoi memnepamypbl.
9BpeMa OT BpeMeHn IpeBopauHbAaTe PPOyKtBi Pn NOMOuN AepeBraHHoH Nn PAACTIKOBOH AONaTOUKN HAn UINuOvB.
10No doCTNXKeHHI rTOBHOCTH, CHMnTe IPOyKtbl C rPnA.
YTo6bI CHaTb npOyKtbl c npi6opa, nOaB3yInTeCb nAactNKOBOn HAn DepeBraHHOn AOnaTOUckOn HAn UINuamn. He nCNoA53yInTe MeTaAMueckne, oCTpbie nn a6pa3NHBbie KxOHbIe npncnoc6Aehnna.
I A I I I I I I I I I I I I I I I I I I I I I I I I I I I I I I I I I I I I I I I I I I I I I I I I I I I I I I I I I I I I I I I I I I I I I I I I I I I I I I I I I I I I I I I I I I I I I I I I I II
12IomeCTHTe cAeAIOUyIO NOpuHIO PPOyKTOB Ha peWetKy-rpNAb, KaK TOAkbO IORaCHET HAnKaTOp HArpeBa.
PpOoAaKHTeAbHOCTb PnHrTOBaehna
B Ta6Hue, NOMeueHHoB KOHue DaHHo HNCTpyKuHn, PnIBOaTc HekOTOpbie 6AIOda, KOTOpbIE MOxHNO PPnIROTOBHTb Ha 3TOM HaCTOaBHOM rPnAE. B Ta6Hue yKa3aHbI TempeatypbI n PPOAOXHTeALBOCTb PPnIROTOBAAEHHn NIIu. Bpemr Heo6xoAnMoE Ha nporpeB pnp6opBa He BXoHT B PPOAOXHTeALBOCTb PPnIROTOBAAEHHn, YKa3aHHO R Ta6Hue. PPOAOXHTeALBOCTb IN TEMpepaTypa PPnIROTOBAAEHHn 3aBNCAT OT TUNa PPOyKTOB (HaNPmep, Mca), IN TOAUHNbI IN TEMpepaTypbI, I, KOHeuHO JKe, OT BaJero BKyCa. MoxHNo TaKke CBeprTbcra C O6O3HaueHnMa H oCHOBAHn PPn60pa.
OuHcTka npH6opa
He nCnoB3yIte a6pa3nBbIe nn uHCTaIe CpeACTBa nn MaTePnaAbl, YTO6bl He NOBpeAHTb aHTnnpnrapHOe NOKpbITne peWetKN-rgnAb.
3anpeuaeTcnaorpykaTb npnbop nAn ceTeBOH uHyp B BOy nn Apyrne KnAkoCTn.
UcTaHOBnTepeyAaTOpHarpeBaBnoOxHeHneoff(BbIK).
OTKIAOHTe np6Op OT 3AeKTpocetn DaHTe emy OCTbITb.
3 N3Baeknte TepMoCTaT n3 np6opa (pnc. 6).
4 CHIMITE peweTKy-tpnAb c oCHOBaHnA np6opa, B3aBwnCb 3a pyuKn. PeweTKy-tpnAb HeAb3r ChTb, eAn TepMOCTaT He OTKIAUeH OT np6opa (pnc.7).
PpeKdE cHrTb peWetKy-ΓpNtB AIA OUcCTKN, OUcNTte eE OT Knpa KyANHaPHoI 6ymarO.
5Ппнлднгteи cHIMTe IOdOH c ochobahna np6opa (pnc. 8).
OuHCTIte peWetKy-tpnA, NOADOH N OCHOBaHne npnbopa c NOMOUsbMOrKoN TkaH. TkaHb MOxHO CMOHTb rOpayeB BOAOc MOUUM CpeAcTBOM. TaKke BO3MOxHO NCPOAb3OBAHne NocyAdOMOeyHO MaunHbl.
OcTaTKn npOaYKTOB n JnP MoXHO ydaAHTb C peWeTKN-rgnab, IpombIe eB rOprae N BoDe c He6oAusbIM KOAnueCTBOM MOIOJIeRO CpeAChBa B TeueHne PAnuMHyT. MoXHO TaKKe O6pb3rA Tb peWetKy-rgnAB AAMOHHBIM COkOM. 3TO pa3MaRHT npriPoReBwne KycOuyKn PnUnn HJnp.
7BbicyuHTe peWetKy-rgnA, noaOH n OCHOBHne np6opa n CHOba co6epnte np6op.
IpeA NOAKIOUeHEm TepMOCTaT a K np6Opy y6eAnTEcb, YTO BHyTpEHnRA NOBepXHOCTb
rHe3da pa3bema a6coIoTHo cyxra. Pn Heo6xoAMOCHT bItprxHnTe KaAN BOAb I3 rHe3Da
pa3bema n IpOTpnte erO cyxOHTKaHbIO.
8HapyXHyIO NOBepxHOCTb TepMOCTaT MOXHO OUYUaTB C NOMOUB BAJHOI TKAHN.
NoAe3HbIe COBeTbI
PeWetka-rpnaIb NdeaIbHO NOxOAnT AIA IpiHroTOBaeHnMa Ca, NTuCbI, Pb6bl N OBOUeJ. KaIaN Jnpa HcKa IOnaAiaOT B NoAOH, YTO rapaHTnpyET NOUTN POANHOOTCYTCTBne YaDaI nNoAyehne 3AoPoBOI Niun C Hn3Km CoAdepKaHNem Jnpa (pnc.9).
ПOTИВЕнь (Тоько Дд модд HD4427) Иддп NOДхОДТ Дд пиг�тOBаEHЯ рбbl, RAH, BETCHHbI, ГИБО, NOMДОРOB, AYKA n T.A. OH TAKKHe OчЕнь yO6eH Dд pa3OrpeBaHЯ PnUH (pnc. 10).
HactoIbHbIMrPHaMoxHOHCNOAb3OBaTbB KaueCTBe yCTPOINCTBaAIA NOAdepKaHHa 3aHaHHO TeMnepaTypb6AIOA.HakpoTe peWetKy-rPna bAAOMHHeBOIfoABro 6aeTJeu cTOPOHOBBepxNycTaHOBtpepyAITopHarpeBaBnoOKeHne2nn3.
A npurotoBaeHn Ha rPnAe Auywe BCero NOxOaT MArKne Kyckn MaCa.
Takoe Mco, KaK 6nΦwTeKcbI HAn OT6NBbIe Ha KOCTOyKe CTAHET MaYHe, eCan erOppeBapuTEaBHO 3aMapuHOBaTb.
Bo Bpem npuroTOBaeHnMaCO He CAEyET CAnWKOM qacto nepeBopauHBaTb. IocAe TOrO, KaK Maco NOpDpyMHNTCa CObENx CTOpOH, peKOMEHdyeTc NOHN3NTb TEMpepaTyPj XapeHnA, YTo6bl He NepeCyuHTb INpoXapuTB paBHomePHo.
Pn Heo6xOAnMoCTn pa3MOp03NTb 3aMOp0XeHHbIe npOyKtbl, O6epHnTe Hx aIOMHHneBOH oAbyroH uYcTaHOBnTE peYrAToP harpeBa B noOxKeHne 3 nA4. BpEmr OT BpemeHn nepeBopauHBaTe pa3MopaxkNBAeMbIe npOyKtbl. BpEmr pa3MOp03Kn 3aBNCHT OT BECa npOdyKTOB.
ПрипригOTOBаEHи КсOCYKOB МяСа Ha UлЯЖКe, LьПАЕнka, CBHINHbI HAN TeAryTHbI, peKOMeHApETcR ChaHaа ПОДPyMЯHHTb MяСо пri BBICOKOf TempepaTpe (noLoXKeHne 5). 3aTeM, no KeaHnO, MoxHo NOHn3HTb TempepaTyP Ha OAnO NoLoXKeHne peryAraTopa HarpeBa n JapNTb DO rOTOBHOCTN.
Pn npiroTOBaeHn KycOyKOB Mca Ha 7naXke Hn Ke6a6a, BbIMOnTe 6am6yKOBblc Hn DepeBHHbIe 7naXkn DAn PpeDoTbpaueHn IX NOpAanBaHn BO Bpemx KapKn. He nCNOAb3ynte MeTaAunueckne 7aMnpbl.
Ko6ackn BO Bpemx Japkn Moryt AOnHytb. 4To6bl n36eXkAtb 3Toro IpOTKHHTe INX BNAKOJ.
Ддяпнг�овеня на грпа leуше похоант naphoe мясо, a He pa3mopoxkeHHoe. He cAeAyeT coaHTb MRCO AO erO rTO TO COxpaHNT COUHOCTb MraC. AЯ HaNAYuXp X pe3yAbTaTOB KycOCHK Mrca He DOAXHbI 6bITb CAnWKOM ToACTbIMn (peKOMEHApETc TOnuHHa I,5 cm).
3TOT HacToA hBbI rHb He npeHa3HaueH dA I NOJkaPbAHn Xa6hBIX npOaYkTOB.
3aunTa OKpyKaIoUeN cpeAbl
Pocae OKOHuaHn CPOKa CAYK6bI He BbI6paCbIBaHTe Pn6Op BMeCTe C 6bITOBbIMN OTXoAAMn. PepeaHTe erO B CneuHaUN3npOBaHHbI NyHKT AaBHeWEn YTHAN3aUHN. TTM Bbl NOMoKeTe 3aunTtB OkpykaOuyo Cpeay (pnc.11).
TapaHTma n 06cayXnBaHne
Ara nayehn aonanhteBHOH HOpmaunn B CAYae BO3NkHOBeHHn npo6aem 3aAnTe Ha Be6-caNT www.philips.com nn ObaTneB LcHTp noAdepKn NokyNaTeeB BAwei cTpaHe (Homep TeAeOHa ceHTpa yka3aH Ha rapaHTnHOM TaLoHe). Ecn noo6bHn ceHTp B BAwei cTpaHe oTCyTCTByeT, oBaTneB B MeCTHyIO TropBOyIO opraHn3aunio Philips nn B OTdeA IoadepKKn nokyNaTee KOMPahnnn Philips Domestic Appliances and Personal Care BV.
JLLIJIgblallllgaii jybjnBjaglglgglgglgglgglgglgglgglgglgglgglgglgglgglgglgglgglgglgglgglgglgglgglgglgglgglgglgglgglgglgglgglgglgglgglgglgglgglgglgglgglgglgglgglgglgglgglgglgglgglggl
J 1 1 1 1 1 1 1 1 1 1 1 1 1 1 1 1 1 1 1 1 1 1 1 1 1 1 1 1 1 1 1 1
jlll lliy oIbta aalst alglal aalna yae algalal
#
a a a a a a a a a a a a a a a a a a a a a a a a a a a a a a a a a a a a a a a
a
(bddHD4427j1b) jll jjjll jll jll jll jll
A 1
B. 3x+1y
C
DscIJI
B
F
G
H
1
L a
Jaaaallg aagagagagagagagagagagagagagagagagagagagagagagagagagagagagagagagagagagagagagagagagagagagag
jaii iiaagaiil d aeg jai gai jaiy kai jai yai jaiy aiaiy aiiaagaiil d aay iaiy
Lwagjll 1sJg Jd jI Lwagjll sds gJg Jg plalg Jg
a aaa aaa aa aaa jlaal paaagaae
(“julil"Jzg)
1 1
jolll
(J)
(4)
aallll lil jaii iai laL. 4yllg yll gll yll gll yll gll yll gll
Llal llo 10gol 10o 100
aallll lalll aln a n nn nnnn nnnn nnnn nnnn nnnn nnnn nnnn nnnn nnnn nnnn nnnn nnnn nnnn nnnn nnnn nnnn nnnn nnnn nnnn nnnn nnnn nnnn nnnn nnnn nnnn nnnn nnnn nnnn nnnn nnnn nnnn nnnn nnnn nnnn
()sclg
aalg aayb bde alg jSj
↓
一
一
.
78
| مizuاني نزه جانع | (الإستعمال) مizuاني نزه جانع | الإستعمال |
| 0-4 | V-0 | الإستعمال |
| 0-4 | F-4 | الإستعمال |
| 4 | 5-4 | (الإستعمال) |
| 0-4 | A-5 | الإستعمال |
| 0-4 | 1-4 | سليم |
| 0-4 | 10-5 | (الإستعمال) |
| 0-4 | 17-4 | الإستعمال |
| 0 | بُّرْسَبُّلِيَ وَسَّحيِسَّحيِسَّحيِسَّحيِسَّحيِسَّحيِسَّحيِسَّحيِسَّحيِسَّحيِسَّحيِسَّحيِسَّحيِسَّحيِسَّحيِسَّحيِسَّحيِسَّحيِسَّحيِسَّحيِسَّحيَسَّحيِسَّحيِسَّحيِسَّحيِسَّحيِسَّحيِسَّحيَسَّحيِسَّحيِسَّحيَسَّحيِسَّحيَسَّحيِسَّحيَسَّحيِسَّحيَسَّحيَسَّحيِسَّحيَسَّحيَسَّحيَسَّحيَسَّحيَسَّحيَسَّحيَسَّحيَسَّحيَسَّحيَسَّحيَسَّحيَسَّحيَسَّحيَسَّحيَسَّحيَسَّحيَسَّحيَسَّحيَسَّحيَسَّحي— | |
| 0 | V-4 | الإستعمال |
| 0 | V-4 | سليم |
| 0 | 0-4 | سليم |
| 0 | 1-4 | (الإستعمال) |
| 0 | 1-4 | (الإستعمال) |
| F-4 | الإستعمال | |
| F-4 | الإستعمال |
i 1
V
y j j j j j j j j j j j j j j j j j j j j j j j j j j j j j j j j j j j j j j j j j j j j j j j j j j j j j j j j j
1 1
i 1
A
#
a 1
(9 J) 154
J 1 J 1 1 1 1 1 1 1 1 1 1 1 1 1 1 1 1 1 1 1 1 1 1 1 1 1 1 1 1 1 1 1 1 1 1 1
(1·)
Lai
m = 311
13/14
a 1
g a 1s sss g ss das as gaa jiaha Lys
y 1
J 1000000000000000000000000000000000000000000
(0 1)
Lg 15 g 15 g 15 g 15 g 15 g 15 g 15 g
J 1 J 1 J 1 J 1 J 1 J 1 J 1 J 1 J 1 J 1 J 1 J 1 J 1 J 1 J 1 J 1 J 1 J 1 J 1 J 1 J 1 J 1 J 1 J 1 J 1 J 1 J 1 J 1 J 1 J 1
m = 311
a a a a a a a a a a a a a a a a a a a a a a a a a a a a a a
j 10 j 10
Laiyai yuua liu li yuoyu 15
#
a a a a a a a a a a a a a a a a a a a a a a a a a a a a

- Important
- Before first use
- Using the appliance
- Be careful: the grilling plate is hot!
- Grilling times
- Cleaning
- ENGLISH8
- Tips
- Environment
- Guarantee & service
- Ubersicht (Abb.1)
- OcToPoXHo! PeWeTka-rgnAb ropaya!
- PpOoAaKHTeAbHOCTb PnHrTOBaehna
- OuHcTka npH6opa
- NoAe3HbIe COBeTbI
- 3aunTa OKpyKaIoUeN cpeAbl
- TapaHTma n 06cayXnBaHne
- #
- a
- L a
- jolll
Brand : PHILIPS
Model : HD4426
Category : Barbecue