AS 2958 - Slicer CLATRONIC - Free user manual and instructions
Find the device manual for free AS 2958 CLATRONIC in PDF.
| Product type | Electric slicer |
| Brand | Clatronic |
| Model | AS 2958 |
| Power supply | 230 V~, 50/60 Hz |
| Nominal power consumption | 150 W |
| Maximum power consumption | 180 W |
| Net weight | Approx. 1.98 kg |
| Adjustable speeds | 3 levels (1 slow, 2 medium, 3 fast) |
| Maximum slice thickness | Approx. 15 mm |
| Maximum continuous operation | 3 minutes, then cooling 30 minutes |
| Safety | Unlock switch + on/off switch, protection against accidental starts |
| Blade | Serrated circular blade, removable for cleaning |
| Included accessories | Sliding carriage, heel pusher (finger guard), carriage support |
| Protection class | II (double insulation) |
| Maintenance | Exterior cleaning with damp cloth; carriage and heel pusher with soapy water; blade cleaned with damp cloth, do not immerse |
| Materials | Plastic, stainless steel (blade) |
| Intended use | Slicing of food (meat, bread, vegetables, cheese) – not suitable for frozen foods or with bones |
| Compliance | EC directives (EMC, Low Voltage) |
Frequently Asked Questions - AS 2958 CLATRONIC
User questions about AS 2958 CLATRONIC
0 question about this device. Answer the ones you know or ask your own.
Ask a new question about this device
Download the instructions for your Slicer in PDF format for free! Find your manual AS 2958 - CLATRONIC and take your electronic device back in hand. On this page are published all the documents necessary for the use of your device. AS 2958 by CLATRONIC.
USER MANUAL AS 2958 CLATRONIC
Thank you for selecting our product. We hope that you will enjoy use of the appliance.
Symbols in this user manual
Important notes for your safety are marked distinctively. Pay absolute attention to them to avoid accidents and damage to the device:
WARNING:
Warns of dangers for your health and indicates potential risks of injury.
CAUTION:
Indicates potential dangers for the device or other objects.
NOTE:
Highlights tips and information for you.
General Safety Guidelines
Before using this device, carefully read this user manual and keep it together with the Warranty Certificate, cashier receipt and if possible, the original package inclusive its interior packing. If you hand on the device to any third person, include the user manual as well.
- Use the device for private and its intended purpose only. The device is not intended for commercial use. Do not use the device outdoors. Protect it from heat, direct sunlight, humidity (do not immerse into liquids under any circumstances) and sharp edges. Do not use the device with wet hands. If the device gets wet, unplug it immediately.
- Always switch off and unplug the device (pull the plug, not the cable) when you do not use the device, or when you attach accessories, during cleaning or malfunctioning.
- Do not leave the device unattended during operation. Always switch off the device when leaving the room. Unplug the device.
- Regularly check the device and cable for signs of damage. Do not continue to operate the device in case of damage.
- Do only use original parts.
- For the safety of your children, keep any packing parts (plastic bags, cartilage, Styrofoam etc.) out of their reach.
WARNING!
Don't let small children play with foils for danger of suffocation!
- Please observe the following "Special safety instructions".
Special Safety Precautions for this Device

WARNING: Risk of injury!
- Always disconnect the appliance from the supply if it is left unattended and before assembling, disassembling or cleaning.
- Use this appliance with the sliding carriage and finger guard in operating position, unless the size and shape of the food do not allow for their use.
- Do not repair the device by yourself. Please contact authorized personnel. In order to avoid hazards, a damaged mains cable must be replaced with an equivalent cable by the manufacturer, our customer service or any other qualified specialist.
- This appliance shall not be used by children.
- Keep the appliance and its cord out of reach of children.
Children shall not play with the appliance.
WARNING: Risk of injury!
- Appliances can be used by persons with reduced physical, sensory or mental capabilities or lack of experience and knowledge if they have been given supervision or instruction concerning use of the appliance in a safe way and if they understand the hazards involved.
WARNING: The cutting side of the blade is very sharp!
- Handle the blade with the necessary care! There is a risk of injury especially during cleaning!
- Do not guide the food to be cut to the blade by hand, but only with the slider.
- Always use the last slice device when you want to cut small pieces.
CAUTION:
Do not cut any overly hard food like frozen foods or meat containing bones.
Location of Controls
1 Speed switch 0-1-2-3
2 Unlock switch and on/off button
3 Positioning plate
4 Last slice device
5 Slide
6 Sliding carriage support
7 Interlocks for sliding carriage support
8 Slice thickness control
Intended Use
This appliance is designed for the slicing of food.
It is only designed for this use and should only be used for this intended purpose.
Only use this device as instructed in this user manual. Do not use this device commercially.
No other use is intended and can cause damage or personal injuries.
The manufacturer is not responsible for any damages incurred due to improper use.
Unpack Device
Take the device out of its packaging.
- Remove all packaging materials, such as foils, filling materials, cable ties and cartons.
- Check that all accessories are included in the box.
NOTE:
Clean manufacturing residues and dust from the device as described under "Cleaning".
Instructions for use
Initial operation
- Place the appliance on an even work surface.
- Fold the sliding carriage support open (6).
- Secure the sliding carriage support with the interlocks (7). Please observe the markings on the interlocks.
- Attach the sliding carriage (5) onto the sliding carriage support:
There are guide pegs located on the bottom of the sliding carriage. Place these pegs in the openings of the sliding carriage support. The sliding carriage must be able to move inside the guide rail.
- Place the finger guard (4) on the sliding carriage in order to hold the food to be sliced.
Electric operation
- Before you plug the mains plug into the outlet, check whether the system voltage that you want to use, matches the one of the appliance. You will find information about it on the type plate.
- Connect the appliance to a correctly installed grounded outlet.
Turning on/off
The appliance is equipped with a safety switch combination:
- It can only be turned on if you press the unlock switch (2) on the back first and then press the on/off switch (2) on the top at the same time.
- When cutting, release the unlock switch.
- When releasing the on/off switch, the appliance will turn off automatically.
Speed switch (1)
Use the speed switch to set the speed level. In addition, you can set this switch to "0" position to secure the appliance against unauthorized use.
$$ \begin{array}{l} \text {L e v e l} 0 = \text {o f f} \ \text {L e v e l} 1 = \text {s l o w} \ \text {L e v e l} 2 = \text {m e d i u m} \ \text {L e v e l} 3 = \text {f a s t} \ \end{array} $$

CAUTION: Short-term operation
Do not use the appliance continuously for more than 3 minutes. Let it cool down for about 30 minutes before using it again.
Operation

NOTE:
If you want to cut especially thin, lightly moisten the blade with a moist towel. This way you prevent the cut food from sticking to the blade.
- Use the stepless control (8) to adjust the slice thickness. Maximum slice thickness: approx. 15 mm.
- Use the speed switch to choose a speed level between 1 and 3.
- Connect the appliance to a properly installed isolated ground receptacle.
- Set the food to be cut onto the slider.
- If necessary, slightly Push the food to be cut gently in the direction of the blade.
- Turn on the appliance using the switches (2).
- Guide the slide back and forth in a consistent movement while pushing gently.
Ending operation
Disconnect the plug from the outlet.
Cleaning

WARNING:
Always remove the power cord before cleaning.
- Never immerse the appliance in water to clean it. It could result in an electric shock or fire.
- The surface of the blade is very sharp. Injury may occur! Handle it with the necessary care!

CAUTION:
- Do not use a wire brush or other abrasive utensils for cleaning.
-
Do not use aggressive or abrasive cleaning agents.
-
Clean the housing and blade with a slightly damp cloth.
- Remove any residual water with a dry cloth.
- Clean the sliding carriage and finger guard in soapy water and dry afterwards.
Blade

CAUTION:
- Should you remove the blade from its locking mechanism, do not remove the lubricants on the back of the blade.
- Do not clean the blade in a bowl of water.
Disassembly and installation of the blade:
- Pull the sliding carriage to the front or remove it.
- There is a blade interlock located in the center of the blade. Turn the screw of the lock in clockwise direction.
- Carefully remove the blade whilst wearing a glove.
- Wipe the serrated blade and the front of the blade with a moist towel. Remove any residual water with a dry cloth.
- Set the blade back into the locking mechanism.
- Turn the screw anti-clockwise until it audiably clicks into place.
- Check that the blade is secure.
Troubleshooting
Appliance does not turn on
Possible cause:
No power supply to the appliance.
Solution:
Check the mains connection.
Other possible causes:
Your appliance features several safety switches. They prevent the blade from being operated accidentally.
The speed switch is set to "0".
Solution:
Select a speed level between 1 and 3.
- You did not press the unlock switch.
Solution:
First press the unlock switch on the back of the appliance and then press the on/off button on the top at the same time.
Noise Emission
The workplace-related emission value is less than 70 dB(A).
Technical Specifications
Model: AS 2958
Power supply: 230 V~, 50/60 Hz
Power consumption:
nominal: 150 W
maximum: 180 W
Protection class: II
Short term operation: 3 minutes
Net weight: approx. 1.98 kg
The right to make technical and design modifications in the course of continuous product development remains reserved.
This device complies with all current CE directives, such as electromagnetic compatibility and low voltage directive and is manufactured according to the latest safety regulations.
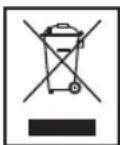
Disposal
Meaning of the "Wheelie Bin" Symbol
Take care of our environment, do not dispose of electrical.
appicances via the household waste.
Dispose of obsolete or defective electrical appliances via municipal collection points.
Please help to avoid potential environmental and health impacts through improper waste disposal.
You contribute to recycling and other forms of utilization of old electric and electronic appliances.
Your municipality provides you with information about collecting points.
Bnpo6HnK He Hece BiDnOBiDaIbHoCTa 6yDb-kyI NOnKO-DKeHN, CnpuHHeH He npabNtBnHm BnKOpNCtAHHM qN BnKOpNCtAHHM He 3a Pn3HaYeHHM
Po3nakyBaHHa
BIMITb npnna3 ynaKOBKn.
- NobHicTHO 3HIMITb yci nakyBaIbnHi MaTepiAIn, a came: fOnbry, MaTepiAIn HAnOBHeHHa, CKpyTKn UHypiB Ta KapTOH.
- Penebipte HareBHCt bycboto npnila y kopo6ci.
I\PUMITKA.
Budanitb 3 npnany nnt Ta 3aunukn BiD Bnpo6HnTBA (onncano B po3diin "HueHHA".
IHCTpykuii ODO BVKOPnCTaHHA
IoyatkoBn eTan
- BctaHOBnHOte npncTpiHa pibHy po6oOhy nobepxHIO.
- P03kpniTe onopy nepecyBhoi KapeTkn (6).
- 3akpiritbn onopy nepecybhoi kapeKn pfikcatopamn (7). DToPmMyTeCe no3haueHb Ha pfikcatopax.
- BctahOBiBt nepecyBHy kapeTy (5) Ha onopy: Bn3y Ha nepecyBHi kapeTuJ 3haxOjTbc HaprMHi uTnΦTn. BCTaHOiB tui TnΦTn y O TbOpn Ha onopi nepecyBHOi KapeTKn. IpecyBHa kapeTkna NobHHa BiNbHO npemiuatncn no HaprMMH.
5.BcTaHOBtB 3axnCT nI naIbuiB (4)Ha nepeCyBHy Kapetky, Uo6 TpIMaTI npOyKT dIra HapizAHH.
- Bn He Hatachyn6nokipatop.
PiuhenHra:
Cnepuy HATNCHTb 6JIOKipatop, 10c 3haxoDntbc8c3aNy npnauy, a NOTIM TOI, kNk 3haxoDntbc8c3Bepxy.
TexhiHixapakTepcntKn
MoeB: AS 2958
DkepeIIO XNBHeHHra: 230B\~,50/60T
CnoXnBaHHxKbJIeHHa:
HOMIHJIbHe: 150BT
MaKcImaJIbHe: 180BT
Klac 6e3neKi:
KopoTkiuKpO6Tu: 3XBUNH
CMMBOJI B DAHHOM pyKOBOCTBE NOJb3OBaTeJIa
Baxhble yka3aHnna, kacaouneecBauee 6e0anacnoctn, OMe-yeHbI ocObo.Bo n36eKAnHe HeCuaCTbIX ClyuAEB N NOBpeKdEHNy ycTpoiCTBa obaaaiTe Ha HInx ocOc0e BHMaHne:
PENEYUNPEXDEHNE:
IpeDynpexJeHme 6 onaChocn IJn3IzOpOBy, yKa3bIbAeT Ha BO3MOxHOCtB NOpeKJeHn.
BHIMAHINE:
IontenuaJIbHna onaChocTb Iyra yctpoiCTBa nn npynx npedmetOB.
ITPIMEYAHNA:
CobetbI INHOpMaLJN DnBAC.
06uine npabnnaTexnkn 6e3onacHOCTN
Ipeep noJIb3OBAHnEM npIbOpOM BHNMaTeIbHO O3HaKoMbTeCb C daHHbIM pyKOBoDCTBOM. CoXpaHIne erO, a TAKKe rapaHTnHbT TaIOH, KaccOBbI Yek N NO BO3MOxHoCTN opINHaNbHyU yNAKOBy, BKIIouaA ee BNYTpEHnE 3JeMeHtbl. B cnyuae nepeDaun npIbOpa TpeTBm Niucam K Hemy DoJxHo npinaraTbc DaHHoe pyKOBoDCTBO.
ДоуckaetcaинльзоваимпибopaТOLькВ6ытУИ NOHA3HauehHIO.YCTpoIcTBO He npedHa3HauehOДЯKOMMepueckoro NcNoIb3oBaHn. He nCnoIb3yIte yCTpoIcTBO Ha OTkpblTom BO3dyXe.3aunuAte erOOT Bo3dEiCTBnTENNa, npamoro coHHeHOro CBeta,BlaJxHoCTn (3anpeuaeTcNORpykKaTbBXnIKocTb) nOCTpbIX KpaEB.He noJIb3yIteCbYCTpoIcTBOMecIn y Bac BlaJxHbIe pyKn.EcnI yCTpoIcTBo HAMOKIO,HEMeDIIeHHO OTCoeDNHITe erO TcTN.
- O63aTeIbHO OTKIIouaIte yCTpOietBO (TAHHe 3a BUNKy, HO He 3a SHyp),ecnYCTpOietBO He NcNoJIb3yeTCy,ecnBbI yCTaHABINBaTe DOIOJIHInTeJIbHBe IpiHAnDJIeXHOCTN, a TAKKE BO BpEMr OUNCTK ININ B CUYae HEHCNPabHOCTN.
He octabJIyTe yCTpoiCTBO 6e3 HAp30pa BO BpeMa paOToI. O6a3aTeNbHO BbIKNoaTe yCTpoiCTBO,ecnN pOKndaete NOMEueHMe.N3BLeKaTe BUNky n3 po3ETKn.
Peyrnapno npoBepaTe yctpoCTBO n ka6eIb Ha np3Ha- KIN NOBpeXdEHNI. PIPekpatte NOLb3OBAHne yCTPOCTBOM pni HAIuHNI NOBpeXdEHNI.
- IcnoJb3yIte ToJIbKO opIMHaJIbHbIe pIINaIeXHOCTN.
- IV3 coo6paKeHn DeTcKoB 6e3onacHOCTn XpaHHTe BCE 3NeMeHTbI yNAKOBKn (PiactNKOBbIE NaKeTbI, KapTOHHbIE IN 3OJALIOHHbI MaTePnaJIbI N T.I.) B HeJoCTyINbIX IJIa JTei MeCTax.
IPEyIPEXJEHNEI
He no3B0JIe MaNEHbKIM DeTAM INpapb C nIeHKoJ. Onachoctb ydysb!
CobIIOdaIte OINcaHHbIe HNKe "DOnONHITbHbIe Mepbl 6e3onacHOCTn".
Oco6bIe MepbI npedocTopoxHocTn DnI 3TOrO yCTpoiCTBa

OCHNTTE NOBEPXHOCTb yCTPOIcTBA OT nbJIN N OCTaTKOB npON3BODCTBEHHORo pOncecca, KaK ONCAHO B pa3dJe "HcTka".
HCTpykunno nCNOJb3OBaHHIO
BkJIIOUeHHe / BbIKJIIOUeHHe
YcTpoIcTBo 6obopyoBaHO KOM6nHaCnei npedeoxpaHHTeNbHbIX BbIKNoHOTeNeI:
- YcTpoIcTBo MOxHOb BKNIOuHTb TOJIbKO NocJe HaxaTnpa36JIOKINPOBkN (2), KOTOpbI paCNOJIOKeH Na 3aJHeiCTopoHe, a 3aTeM OJHOBpeMeHHO HaxaTb BbIKIOUaTeJIb "on/off" (2), KOTOpbI HAXOJNTc CBepxy.
- Bo Вторяне КИ оптуckайт e pазблорови.
- Ecnn OTnyctntb nepeknnoateJIb "on/off", ycTpoNCTBO BblKlnHoyaeTCABOTMATUHeKN.
IpeeknoateJb ckopoctn (1)
Дя ВьборуpoBня ckopoCTи nCNoIb3yIte nepeKIOuatoIbCKopoCTe.ДЯ 3aIHTbI OT HeCAHkuOHIPOBaHHO nCIOJI-3OBAHn DaHHbI nepeKIOUaTeIb MoXHO yCTaHOBtHa "0".
YPOBEHb 0 =OTKJIIOHeHHe
ypoBHeb 1 = MeDJIeHHaI
ypoBHeB 2 = cpeHnra
ypoBeHb3=6bIcTpa

BHIMAHHE:KpaTkoBpeMeHHa pa60Ta
He nCIOJIb3yIte yCTpoIcTBO H enpepbIBHOM pexIme 60-Jee 3 MNHT. Ipeep CNeIyoUIM NcIOJIb3OBAHnEM daIte Emy OCTbITB TEueHnE 30 MNHT.
IcnoJb30BaHne

PIMEYAHIA:
Hape3Kn O06eHHo TOHKx JOMTe CMOHTe HOX BIAKbIM NONOTHeM. 3To IpeDOrBpaTIT npINnnaHne npOyKa KHOxy.
1.ДянгострочиToJIuINHbI KcKa NcNoJIb3yIte TnabHyIOpeRyInpoBky (8).MakcmaJbHaT OToJIuHa KcKa: npImepHo 15 MM.
2.ДЯ Вьбopa уровя скорости OT 1do 3испolyte nepekeючateNBCKOPoTei.
3.ПиборВКЛЮЧаETСВБpo3eTky,IMMeIQUHIOHaJIeKaUe3a3eMnEHeHne
4.Пометichte пюдукт Ha Kapetky.
5. Пин HeobxOДIMOCn CneIgKa HaxmMaTe Ha Hape3aEmbI npOdyKT B HanpaBHeHn HOka.
6. BknoHTe yctpoCTBO, nCnOb3yra nepeKIOUaTeTI (2).
7.Перемаajte kapeKу Bnepei И ha3aI paBHomepHbIMn DBIXeHnMn C He6OJIbShm HaxnOMM.
3aBepWeHne pa6oTbI
BbHbTe BnKy n3 po3eTkn.
UcTka

IPEyIPEKDEHNE:
Bcerda otKlouaTe cTeBoi Ka6JIb nepeu nCtkoI.
HnKoIa He nOpykaIte np6op B Body IJNA uCTKn.3To MOKeT pINBecTI K NOpaxeHNIO 3NeKTPuHeCKM TOKOM INI BO3rOpaHIO.
- Поверхонсь HOжа OчЕнь OCTра. Можно поанпьс!
Осторожно образайТecь с HOжOM!

BHIMAHINE:
He nnoIb3yIte MeTaJIInuYeckyU TeKU nn HbIe a6pa3nBbIe KxOHHbIe npHaJnEKeHOctn Dn OCHKTN.
He nOJIb3yIte arpeccnBhIe nn a6pa3nBhIe YnCTa Ⅲne cpeCTBa.
Ouchntte Kopnyc n Ne3BVe BnaXhoT TpIkoI.
- YdaJIte OCTaTKI BObI cyXIM NIOJTeHcEM.
- BbIMOnTe KapETky I nIpaTmHy Iy IaIuNTbI IaIbUeB MbIbHO BDOJ, 3aTEM BbICyUInTe.
Hox

BHIMAHHE:
B cnyuae cHnTna HOXa cero fNkCnpUoIeero MExAHn3Ma He ydaanTe CmA3Ky c3aDn HOXA.
He MoTe HOK B aHaWe C BODoI.
CHTne uycTaHOBka Hoka:
- Notaryte Kapetky Bnepei JIIN CHIMITE ee.
- B ueHtpe Ie3BnI eCt b fikCaTOp. TOBepHHT BnHT fikCaTopa no Yacoboi CTpeJIke.
- AkkypaTHO CHIMMTE HOK, NaDeB NpEurATKn.
4.ПрOTРNTe pNФЛЕнь HOK ИпеpeДHIOчAcTb HOKa BnajxHbIM NOIOTeHcEM.YdaJIte OCTaTKI BOJbI CyXIM NOIOTeHcEM. - CHOBA yCTaHOBtE HoK Ha qHKcPuyIoum MExaHn3M.
- KpyTInTE BnHT nPOTnB YacBOB CTpeKn, NOKa He NocJIbI- IINTcra IeJHOK.
- Поверьтей Наджховъ кpenпени HOXа.
Ponck u yctpaHene HencnpaBHOCTe
YcTpoCTBO He BkHouaetc
Bo3MOxHn npUuHa:
OTcyTCTByeT NITaHMe.
Pewehue:
IpoBepbte ceteBOe nOdkNIOueHne.
Ду汞eEO3MOKHbIe npUuHbI:
Ha Baewem npBope npedymoTeHo Heckonbko npedoxpaHHTeNbHbIX BbIKHouateJeI. OHn npedotBpaauOT ne3BVE ot CnyaHHO BKIOUeyHra.
-ПepeknHoyateJIb ckOpoCTeY yctaHOBJIeH Na "0".
Pueehue:
BbIbepeTe ypoBeHb ckOpocTOn 1do3.
- Bын нехалу pa36nokipobky.
Pewehue:
Chayana haxmnte pa36nokpobky, pacnoJoxeHHyo Ha 3aHHe yactn ycTpoiCTBa, a 3aTeM oHOBpeMeHHo Haxmnte BbIKIOuateIb "on/off" (2), KOTOpB HaxOHTC8 CBepxY.
TexHnueckne xapaKTepeNCTNK
MoeB: AS 2958
3NeKtpoMTaHHe: 230B\~,50/60T
Notpe6IeMaM MOUHOCb:
HOMINaJIbHO: 150BT
MaKcIMaJIbHo: 180BT
Klacc 3aunTbI:
BecnpepbIBha pa6ota: 3 MNHyT
Bec HeTTO: npi6I 1,98 K
CoxpaHcHo npaBO Ha texHnueckme IN KOHCTpyKuONHHbIe n3-MeHeHnB pamkax npoDoJXaIoUeIcR pa3pa6oTkn npOdyKta.
DaHHoe yCTPOIcTBO COOTBeTCTByET BCEM TeKUIM DInpeKTNBaM CE, TAKIM KAK 3NEKTpOMaTHNTHAR COBMECTMOCTb Hn3KOE HnpanjKeHHe; OHO IPOUN3BeDEHO B COOTBeTCTBmC HOBeiUMN INpaBnIaMn TEXHNK 6e3OnaCHOCTn.
aaii iagai
AS 2958
60/50 230
jiall Jalllale (5) jilaiJalll
gdi jia gai jiall jai jia jia jia jia
jia jiall Jalll Jaiy jui jiall Jalll
aegnlll 154
15 2
aalaaal aal alalal
:
aal 1 aalaaal 1 1 1 1 1 1 1
aiee
slll
3-2-1-0 1
Jusill jssll 2
3
cilll j 4
5
6
jijil jolal aolay yauo jui 7
8
#
gill jil gll plabill gbbil uana jll l
jai jai alalilui iig, bai jai jai lalalilui
aaiin 19. piaiinai iaii gao saas lae jieal lai prinai
.
a 10d2i d jag jai iiaai jai jai
a a a a a a a a a a a a a a a
blz
ai 120000000000000000000000000000000000000000000000000000000000000000000000000000000000000000
ailllll aalll lalld
L
jglal plzduu ciui j Jaii liia i jiaiege all
pssu 1iui jgo
1 1 1 1 1 1 1 1 1 1 1 1 1 1 1 1 1 1 1 1 1 1 1 1 1 1 1 1 1 1 1 1


aaleal aealeel calee
Lai Lai, liai, jai, Jai, Jai, Jai, Jai, Jai, Jai, Jai, Jai, Jai, Jai, Jai, Jai, Jai, Jai, Jai, Jai, Jai, Jai, Jai, Jai, Jai, Jai, Jai, Jai, Jai, Jai, Jai, Jai, Jai, Jai, Jai, Jai, Jai, Jali, Jali, Jali, Jali, Jali, Jali, Jali, Jali, Jali, Jali, Jali, Jali, Jali, Jali, Jali,
i
!:
Jg g Jg j 11 11 11 11 11 11 11 11 11 11 11 11 11 11 11 11 11 11 11 11 11 11 11 11 11 11 11 11 11 11 11 11 11 11


CTC
CATRONIC INTERNATIONAL GMBH
Internet: http://www.clatronic.de