DVM8838 - Thermometer VELLEMAN - Free user manual and instructions
Find the device manual for free DVM8838 VELLEMAN in PDF.
| Product type | Infrared thermometer |
| Brand | Velleman |
| Model | DVM8838 |
| Temperature range | -50°C to 1,000°C (-58°F to 1,832°F) |
| Accuracy | ±1.5% of reading ±2°C (from -20°C to 200°C); ±2.0% ±2°C (200-538°C); ±3.5% ±5°C (538-1,000°C) |
| Resolution | 0.1°C / 0.1°F |
| Distance-to-spot ratio | 30:1 |
| Response time | < 1 s |
| Spectral response | 8 to 14 µm |
| Emissivity | Adjustable from 0.10 to 1.00 in steps of 0.01 |
| Laser | < 1 mW, wavelength 630-670 nm, class 2 |
| Power supply | 1 9V battery |
| Dimensions | 100 x 56 x 230 mm |
| Weight | 290 g |
| Display | LCD with backlight |
| Main functions | MIN, MAX, DIF, average (AVG) measurements; display hold (HOLD); lock; high/low alarms (HAL/LAL); °C/°F selection |
| Operating temperature | 0°C to 50°C (32°F to 122°F) |
| Storage temperature | -20°C to 60°C (-4°F to 140°F) |
| Operating humidity | 10% to 90% RH |
| Maintenance and cleaning | Clean the sensor with a soft cloth or cotton swab; do not use alcohol or solvent |
| Safety | Do not look into the laser beam; do not open the device; keep out of reach of children |
| Spare parts and repairability | No user-serviceable parts; contact dealer for replacement parts |
| General information | Warranty not applicable in case of non-compliance with instructions; intended use only |
Frequently Asked Questions - DVM8838 VELLEMAN
User questions about DVM8838 VELLEMAN
0 question about this device. Answer the ones you know or ask your own.
Ask a new question about this device
Download the instructions for your Thermometer in PDF format for free! Find your manual DVM8838 - VELLEMAN and take your electronic device back in hand. On this page are published all the documents necessary for the use of your device. DVM8838 by VELLEMAN.
USER MANUAL DVM8838 VELLEMAN
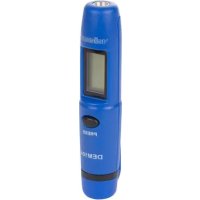
INFRARED THERMOMETER (-50°C TO +1000°C)
INFRAROODTHERMOMETER (-50°C \~ +1000°C)
THERMOMÈTRE INFRAROUGE (-50°C \~ +1000°C)
IR-THERMOMETER (-50°C \~ +1000°C)
TERMÓMETRO INFRARROJO (-50°C \~ +1000°C)
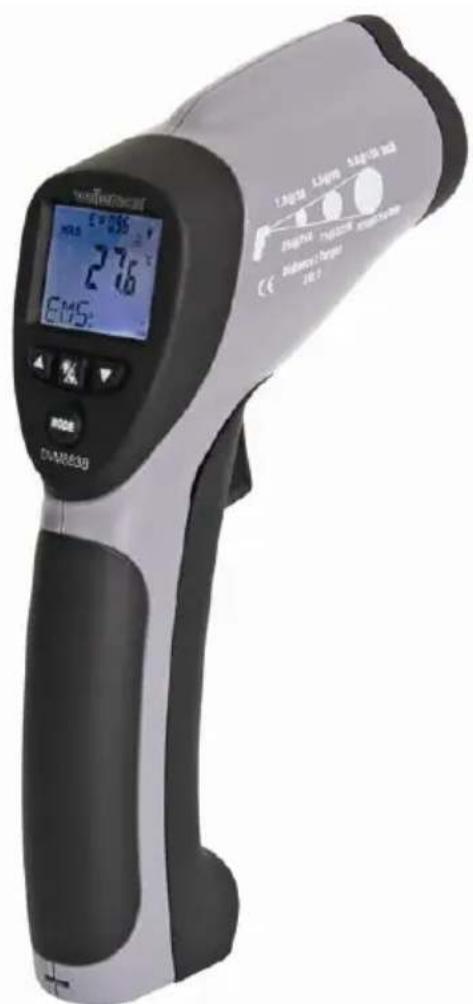
text_image
TOMATOCH E=236 HLS 276 EMS: 1.50V/50 5.5V/50 5.5V/50 300Ω 2.0V/50 2.0V/50 2.0V/50 Sensitivity / Target 10.0 DIA-M853BUSER MANUAL 3
GEBRUI KERSHANDLEIDING 8
NOTICE D'EMPLOI 13
MANUAL DEL USUARIO 18
To all residents of the European Union
Important environmental information about this product
This symbol on the device or the package indicates that disposal of the device after its lifecycle could harm the environment.
Do not dispose of the unit (or batteries) as unsorted municipal waste; it should be taken to a specialized company for recycling.
This device should be returned to your distributor or to a local recycling service. Respect the local environmental rules.
If in doubt, contact your local waste disposal authorities.
Thank you for choosing Velleman! Please read the manual thoroughly before bringing this device into service. If the device was damaged in transit, don't install or use it and contact your dealer.
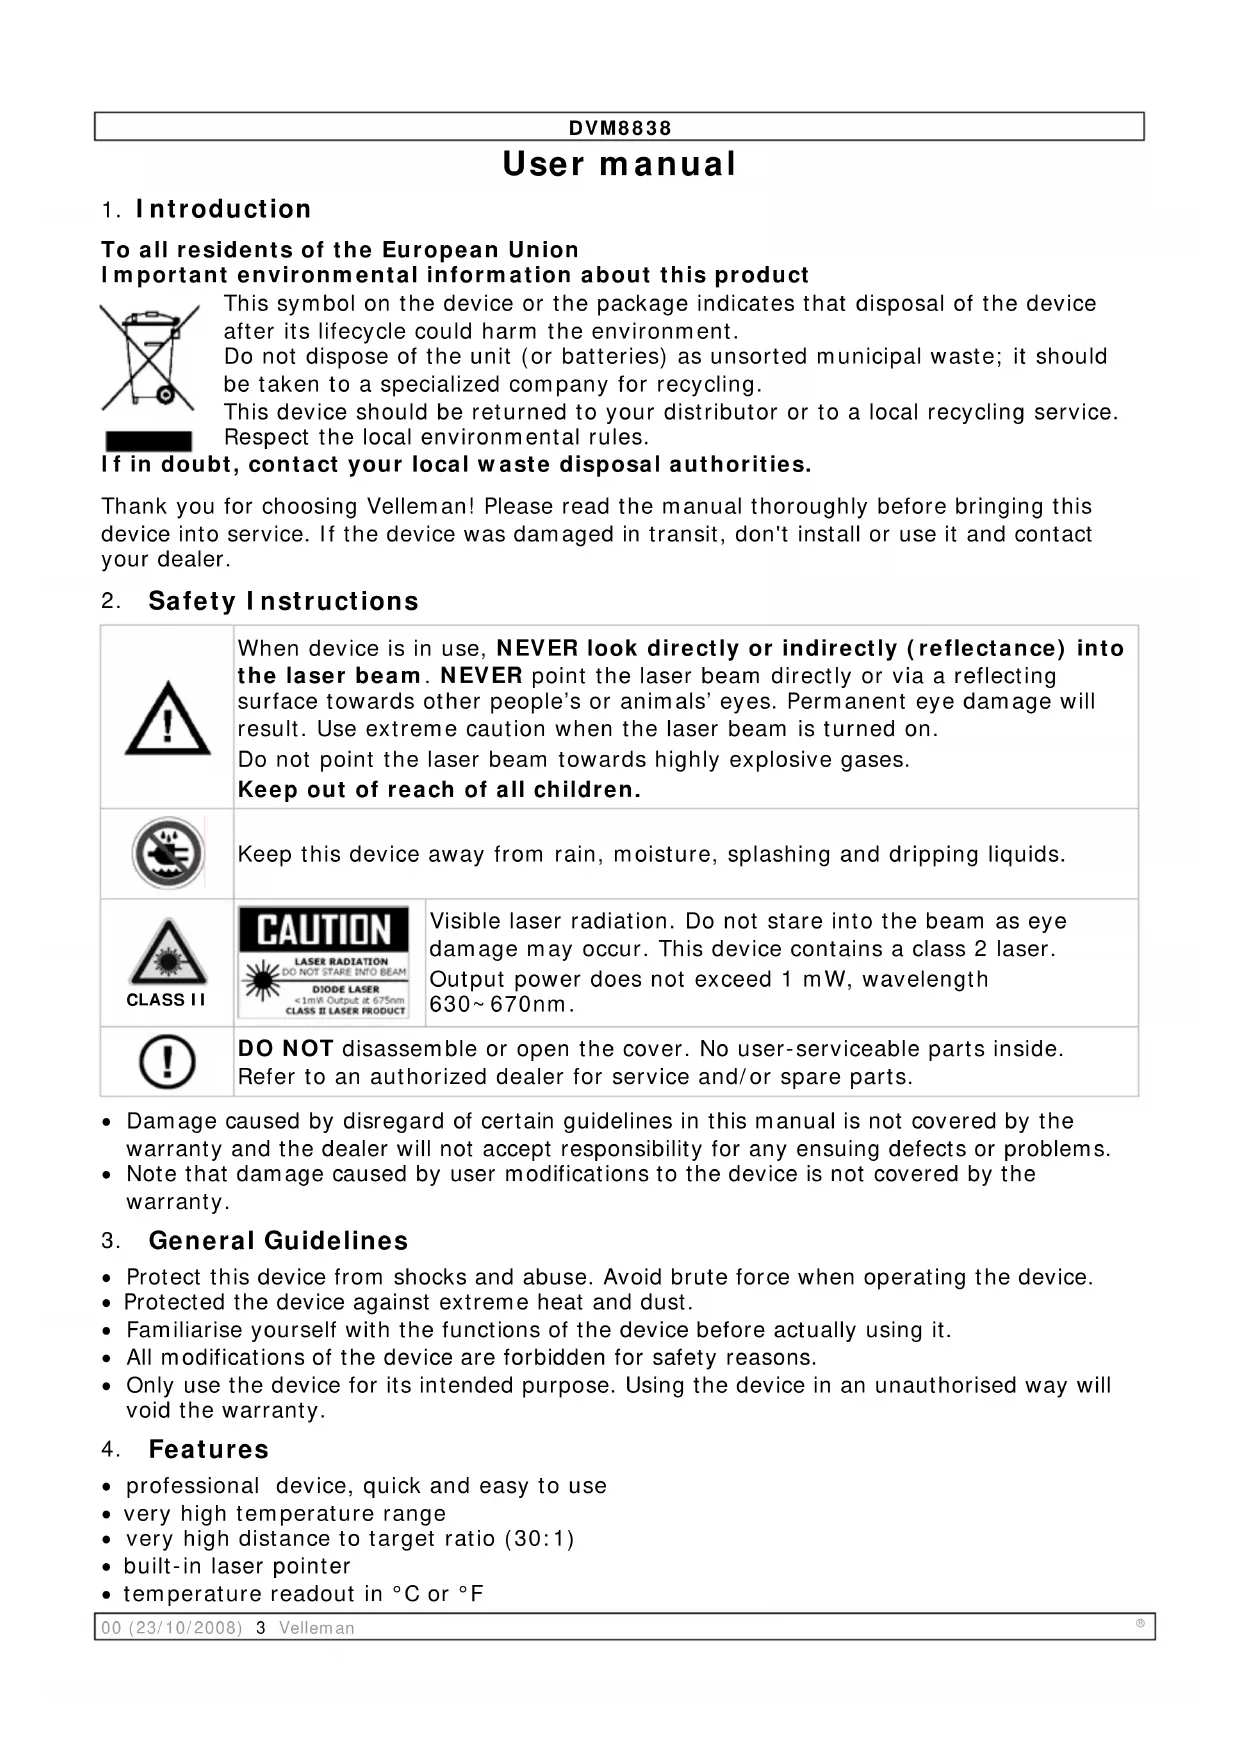
2. Safety Instructions
 | When device is in use, NEVER look directly or indirectly (reflectance) into the laser beam. NEVER point the laser beam directly or via a reflecting surface towards other people's or animals' eyes. Permanent eye damage will result. Use extreme caution when the laser beam is turned on.Do not point the laser beam towards highly explosive gases.Keep out of reach of all children. | |
 | Keep this device away from rain, moisture, splashing and dripping liquids. | |
 |  | Visible laser radiation. Do not stare into the beam as eye damage may occur. This device contains a class 2 laser. Output power does not exceed 1 mW, wavelength 630~670nm. |
 | DO NOT disassemble or open the cover. No user-serviceable parts inside. Refer to an authorized dealer for service and/or spare parts. | |
- Damage caused by disregard of certain guidelines in this manual is not covered by the warranty and the dealer will not accept responsibility for any ensuing defects or problems.
- Note that damage caused by user modifications to the device is not covered by the warranty.
3. General Guidelines
- Protect this device from shocks and abuse. Avoid brute force when operating the device.
- Protected the device against extreme heat and dust.
- Familiarise yourself with the functions of the device before actually using it.
- All modifications of the device are forbidden for safety reasons.
- Only use the device for its intended purpose. Using the device in an unauthorised way will void the warranty.
4. Features
• professional device, quick and easy to use
• very high temperature range
• very high distance to target ratio (30:1)
• built-in laser pointer
• temperature readout in °C or °F
DVM8838
• LCD display with backlight
- data-hold, auto power-off and lock-on function
• MIN, MAX, DIF and record functions
- adjustable emissivity
- high and low alarm
5. Overview
Refer to the drawings on page 2 of this manual.
| 1 | IR sensor 6 mode button | ||
| 2 | laser pointer beam 7 laser/backlight button | ||
| 3 | LCD display 8 measurement trigger | ||
| 4 | down button 9 grip | ||
| 5 | up button 10 battery cover |
| A | hold indication | F | °C or °F indication |
| B | measuring indication | G | high and low alarm indication |
| C | emissivity indication and value | H | MAX, MIN, DIF, AVH, HAL and LAL value |
| D | battery, lock and laser ON indication | I | indication for H |
| E | backlight ON indication | J | current measurement value |
| K | °C and °F switch | M | alarm set switch |
| L | lock on/off switch | ||
6. Operation
- Hold the thermometer by the grip [9] and point the IR sensor [1] towards the surface of which the temperature needs to be measured.
- Pull and hold the measurement trigger [8]. The LCD display [3] shows the current temperature [J].
- During measurement, the word 'SCAN' [B] is visible in the LED display. When the measurement stops (trigger [8] released), the word 'HOLD' [A] is shown. The last measured value will remain on the display until the measurement trigger [8] is pulled again, or when the thermometer powers-off automatically (after ± 7 seconds).
- Depending on the mode, the bottom of the screen shows the MAX, MIN, DIF, AVH, HAL and LAL value. Use the mode button [6] to scroll through the modes of the device. The mode [I] and corresponding value [H] are shown on the display.

flowchart
graph LR
    A["EMS"] --> B["MAX"]
    B --> C["MIN"]
    C --> D["DIF"]
    D --> E["AVG"]
    E --> F["HAL"]
    F --> G["LAL"]
    G --> H["MODE"]
| EMS | Emissivity(*) |
| MAX | Highest measured value |
| MIN | Lowest measured value |
| DIF | Difference between the highest and lowest measured value |
| AVG | Average value of the temperature |
| HAL | Higher alarm limit |
| LAL | Lower alarm limit |
(*) For more information on emissivity, refer to §7 Useful information.
- To set EMS, HAL or LAL, use the up [5] or down [4] button to adjust the value and press the mode button [6] again to save the value and go to the next item. To cancel mode selection, pull the measurement trigger [8]. Pushing the mode button [6] after setting the lower alarm limit will start the set-up cycle again.
DVM8838
- Note that MAX, MIN, DIF and AVG only apply to the current measuring session (time between pulling the trigger [8] and releasing it). Their value is reset when an new measurement starts or the thermometer switches off.
- To switch between measurements in °C and °F, open the battery cover [10]. The battery cover has a hinge at the bottom of the device. Hold the battery cover at the top (next to the measurement trigger [8]) and gently pull away from the device.
- The °C/°F switch [K] is located just below the measurement trigger [8]. Move this switch to the desired setting. The current setting is indicated [F] in the display.
- Also under the battery cover [10], there is a lock switch [L]. Move this switch to the ON-position for continuous measurement. The current setting is indicated with a lock symbol [D] in the display. Start measuring by pulling the measurement trigger [8] once. Consider disabling the laser targeting beam in continuous measuring mode to save battery power. To stop and disable lock mode, set the switch [L] back to the OFF-position. In lock mode, it is still possible to adjust EMS, HAL and LAL values.
- The third switch under the battery cover [10] is the alarm set switch [M]. Move this switch to the ON-position to enable alarm warnings when high or low alarm limits are exceeded. When enabled, a Hi- and LOW indication [G] are shown on the display.
- Close the battery cover [10] by pushing it back towards the device until it snaps in place.
- When the measured value exceeds a preset alarm limit, an audible alarm signal will be produced (when the alarm set switch [M] is set to ON), and the according alarm icon in the display [G] will flash. Alarm will stop when temperature is back within preset limits.
- Push the laser/backlight button [7] to cycle through the laser and backlight options. Note that the laser beam is only an aiming aid, be careful when using it. Refer to the safety instructions.
| Push | result | display |
| 1 backlight on indicator [E] | ||
| 2 | backlight on and laser enabled | indicator [E] + [D] |
| 3 | backlight off and laser enabled | indicator [D] |
| 4 backlight off and laser disabled no indication | ||
Notes:
- The device powers off automatically (after ± 7 seconds) when no activity is detected, unless it is in lock mode.
- The unit will not measure correctly through transparent surfaces (e.g. glass), as it will measure the surface temperature of the transparent surface.
- Steam, dust, smoke etc. will have a negative impact on the measurements accuracy.
• Measurements on shiny and/or polished surfaces are not recommended.
7. Useful information
Working principle
The Infra Red sensor of the unit detects energy that is emitted, reflected and transmitted by a surface. This energy is focussed onto a detector that converts this information into a temperature reading. The laser beam is only used for aiming purposes.
Ambient temperature
The thermometer automatically compensates ambient temperature conditions. Allow the thermometer to stabilise to ambient temperature for at least 30 minutes for accurate measurements.
Surface temperature
When going from low temperature to high temperature measurements or vice versa, the IR sensor of the thermometer needs a few minutes to adjust.
Distance and spot size
Refer to the drawing on page 2 of this manual.
As the distance (D) from the object increases, the spot size (S) of the area measured by the unit becomes larger. The focal point for this unit is 914mm (36"). Note that the laser beam points 16mm above the measurement centre point.
Field of view
The target must be larger than the spot size to ensure correct measurement. This means that for smaller targets, the thermometer must be held closer to the target. For best accuracy, make sure the target is at least twice as large as the spot size.
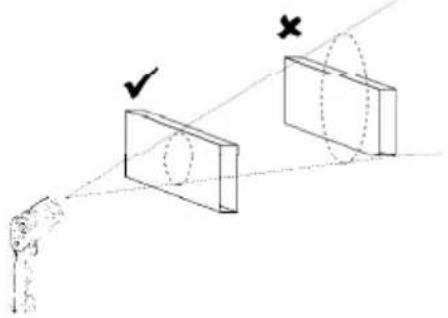
natural_image
Diagram showing two rectangular blocks with a checkmark and an 'X' mark, connected by dashed lines to a human figure (no text or symbols)Emissivity
Emissivity describes the energy-emitting characteristics of materials. Most organic or oxidized surfaces have an emissivity of ±0.95 (default setting). Measuring shiny or polished surfaces will be inaccurate. Use some masking tape or paint to compensate, allow sufficient time for the tape or paint to reach the surface temperature.
| Substance | Emissivity | Substance Emissivity | |
| Asphalt 0.90 to 0.98 Cloth (black) 0.98 | |||
| Concrete 0.94 | Human skin | 0.98 | |
| Cement 0.96 | Leather | 0.95 to 1.00 | |
| Sand 0.90 | Charcoal (powder) | 0.96 | |
| Earth 0.92 to 0.96 | Lacquer | 0.80 to 0.95 | |
| Water 0.92 to 0.96 | Lacquer (matt) | 0.97 | |
| Ice 0.96 to 0.98 | Rubber (black) 0.94 | ||
| Snow 0.83 | Plastic | 0.85 to 0.95 | |
| Glass 0.90 to 0.95 Timber | 0.90 | ||
| Ceramic 0.90 to 0.94 | Paper | 0.70 to 0.94 | |
| Marble 0.94 | Chromium oxides 0.81 | ||
| Plaster 0.80 to 0.90 | Copper oxides | 0.78 | |
| Mortar 0.89 to 0.91 | Iron oxides | 0.78 to 0.82 | |
| Brick 0.93 to 0.96 | Textiles | 0.90 | |
8. Troubleshooting
| LCD display doesn’t light up when the measurements trigger is pulled. | Possibly a battery problem. Check and replace the battery. |
| The measured temperature changes very quickly and the shown value seems unlikely. | Check the emissivity value. When set too low, inaccurate readings will result. |
- Repairs or service should only be carried out by qualified and trained technicians.
9. Cleaning and storage
- The IR sensor (1) is the most delicate part of the thermometer and should be kept clean at all times. To do this, only use a soft cloth or cotton bud. Do not use excessive pressure on the sensor.
DVM8838
- Wipe the other parts of the thermometer regularly with a dry cloth. Do not use abrasive solutions or solvents.
- Do not submerge the thermometer in water or any other liquid.
- There are no user-serviceable parts.
- Contact your dealer for spare parts if necessary.
- The device must be stored in a place with temperature conditions between -20^ and +60^ (-4°F and +140°F) and relative humidity lower than 80%.
10. Battery
- When the battery indicator [D] indicates low battery, replace the battery with a new one.
- Open the battery cover [10]. The battery cover has a hinge at the bottom of the device. Hold the battery cover at the top (next to the measurement trigger [8]) and gently pull away from the device.
- If necessary switch the lock switch [L] to the OFF-position first.
- Connect a new 9V battery to the thermometer with the battery clip and insert the battery in the battery compartment.
- Push the cover back towards the device until it snaps into place.

WARNING: malfunction may occur if the power is on when the battery is replaced. Dispose of batteries in accordance with local regulations. Keep the battery away from children.
- Technical specifications
| Temperature Overall range -50°C ~ 1,000°C (-58°F ~ 1,832°F) | ||
| Temperature accuracy T_amb=23~25°C(T_amb=73~77°F) | -50~20°C (-58~68°F)-20~200°C (-4~392°F)200~538°C (392~1,000°F)538~1,000°C (1,000~1,832°F) | ±5°C (±9°F)±1.5% reading ±2°C (3.6°F)±2.0% reading ±2°C (3.6°F)±3.5% reading ±5°C (9°F) |
| Display resolution 0.1°C (0.1°F) | ||
| distance-to-spot ratio D:S = 30:1 | ||
| Response time < 1s | ||
| Spectral response 8~14μm | ||
| Emissivity Adjustable from 0.10 to 1.00 - step 0.01 | ||
| Over range indication Display shows ‘-OL’ or ‘+OL’ | ||
| Operating temperature 0~50°C (32~122°F) | ||
| Storage temperature -20~60°C (-4°F~140°F) | ||
| Relative humidity 10%~90% operating, < 80% storage | ||
| Diode laser Output <1mW, wavelength 630~670nm, Class II laser product | ||
| Battery type 1x 9V battery | ||
| dimensions | 100x56x230mm | |
| weight | 290g (10.2oz.) | |
Use this device with original accessories only. Velleman nv cannot be held responsible in the event of damage or injury resulted from (incorrect) use of this device. For more info concerning this product, please visit our website www.velleman.eu. The information in this manual is subject to change without prior notice.