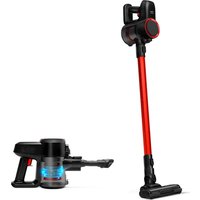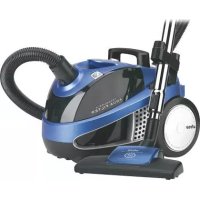
AP8110 - Vacuum Cleaner UFESA - Free user manual and instructions
Find the device manual for free AP8110 UFESA in PDF.


User questions about AP8110 UFESA
0 question about this device. Answer the ones you know or ask your own.
Ask a new question about this device
Download the instructions for your Vacuum Cleaner in PDF format for free! Find your manual AP8110 - UFESA and take your electronic device back in hand. On this page are published all the documents necessary for the use of your device. AP8110 by UFESA.
USER MANUAL AP8110 UFESA
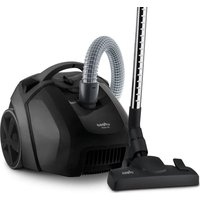
DESCRIPTION OF THE APPLIANCE
- Floor brush
- Telescopic tube
- Hose
- Suction regulating flap
- Suction hole
- On/Off pedal
- Power regulator
- Automatic cable rewind pedal
- Carrying handle
- Parking aid
- Sponge
- Permanent HEPA filter
- Container unit release button
- Air outlet grill
- Air outlet filters
- Upholstery nozzle
- Furniture nozzle
- Crevice nozzle
- Brush for wooden floor
Container unit
-
Water container
-
Water container release button
- Locking nozzle
- Nylon filter
- Filter retainer
- Additional inlet filter
- Container handle
IMPORTANT ADVICE
- Never vacuum up hot or glowing substances, sharp-edged objects and inflammable or explosive substances.
- The appliance must be switched off before plugging it in or unplugging it.
- This vacuum cleaner must not be used without water in the water container and the filters. This could damage the appliance.
- Do not use the vacuum cleaner if any of its openings are obstructed, as this will reduce the air flow causing it to overheat, which may damage the appliance.
- This appliance can be used by children aged from 8 years and above and persons with reduced physical, sensory or
mental capabilities or lack of experience and knowledge if they have been given supervision or instruction concerning use of the appliance in a safe way and understand the hazards involved. Children shall not play with the appliance. Cleaning and user maintenance shall not be made by children without supervision.
- Read these instructions carefully. Safeguard them for future reference.
- This appliance has been designed exclusively for domestic use. It must only be used in accordance with these instructions. The manufacturer will not be held any responsibility for any damage caused by improper use or incorrect operation.
- Do not use the vacuum cleaner on people or animals.
- Do not expose the vacuum cleaner to outdoor weather conditions, dampness or heat. Do not leave the vacuum cleaner beside hot ovens, heaters or radiators.
- Before plugging the appliance into the mains supply, make sure that the voltage corresponds to that stated on the characteristics plate.
- Do not operate the appliance with the cable still coiled.
- Do not unplug the appliance by tugging on the cable.
- Unplug the vacuum cleaner from the mains supply when not in use and before proceeding to clean it or change the bags or filters.
- Do not hold the appliance upside down or park the vacuum cleaner vertically on its rear end when there are water in the container.
- Do not handle either the vacuum or the plug with wet hands. Do not immerse the appliance in water.
- Do not pull on either the cable or the suction tube to move the vacuum cleaner. Use the carrying handle.
- Do not use the appliance if either the cable or plug is damaged or if it can be detected that the appliance is not working correctly.
- When closing doors, make sure not to pinch the cable.
- At the end of its life, the vacuum cleaner should be disposed of in an appropriate manner.
- Cable repairs and replacements must be carried out exclusively by an authorized technical service centre.
SUCTION SYSTEM
This appliance operates with water container using water inside to filter dirt. Make sure there is water in the container for each use.
PREPARATION FOR USE
-
Before use, make sure the water container (20) contains some water. To do this, press the container unit release button (13) and remove the container unit. (Fig. 1)
-
Remove the water container (20) from the unit by pressing the water container release button (21). (Fig. 2)
- Fill the water container with ordinary tap water up to the level between the Max and the Min level line marked on the container. (Fig. 3)
- Reassemble the water container back and put the unit back to the appliance.
SWITCHING ON AND OPERATION
- Insert the hose (3) into the suction hole (5) so that it clicks into position.
Pressing down the release button will help you to insert or remove the hose (3). (Fig. 4) - Attach the telescopic tube (2) to the suction hose (3), and adjust the length to suit the user. (Fig. 5)
- Fit the floor brush (1), or whichever accessory is required, to the vacuum tube. (Fig. 6)
- Holding the power cord by the plug, pull out the required length and plug it into the mains socket. (Fig. 7)
- Press the On/Off pedal (6), (Fig. 8). Regulate the power using the power regulator (7), and turn clockwise to increase power while turning anti-clockwise to reduce power (Fig. 9). The intensity can be regulated from the handgrip. Opening the flap (4) reduces suction, whereas closing it increases suction. (Fig. 10)
- You can use the parking aid on the back of the vacuum cleaner if you wish to stop vacuuming for a short while. Slide the catch on the brush into the groove at the rear of the appliance. (Fig. 11)
- The wheels and 360^ swivel joint and the carrying handle, make this vacuum cleaner extremely mobile.
WHEN FINISHED
When you have finished using the appliance, set the power regulator (7) to the minimum position and press the On/Off pedal. Press the automatic cable rewind pedal (8) to wind the cable back in. (Fig. 12)
CLEANING AND MAINTENANCE
When the water is very dirty, the suction is powerless and the motor's turning over audibly faster. This means the dust in the water container is enough or the filters are clogged.
Follow the instructions for emptying the water container (20) and cleaning the filters.
Emptying and cleaning the water container
The container (20) must be emptied after each use.
- Press the container unit release button (13) and remove the container unit.
- Remove the water container from the unit and empty the contents into a dust bin.
- Clean the container, reassemble and put it back on the vacuum cleaner.
Caution: Water in the container won't damage the appliance by normal operation, but do not hold the appliance upside down or park the vacuum cleaner vertically on its rear end when there is water in the container. This will let large amount of water dampen the inlet filter and HEPA filter and even cause blockage. You can hold the container unit by the container handle (26).
Cleaning the additional inlet filter
The nylon filter (23) and additional inlet filter (25) must always be cleaned whenever any type of blockage occurs with the suction.
- Take out the container unit and remove the water container (20).
- Turn the locking nozzle (22) anti-clockwise in the direction of the arrow marked on it to remove it. (Fig. 13)
- Take the nylon filter (23) out and clean it by knocking out the dirt and rinse it. (Fig. 14)
- Remove the inlet filter unit (Fig. 15) and take the inlet filter (25) out of the filter retainer (24). (Fig. 16)
- Clean the inlet filter by tapping it or rinsing it when it's very dirty.
Cleaning the Permanent HEPA filter
- Remove the container unit from the appliance. Take out the HEPA filter (12) with the sponge (11). (Fig. 17)
- The sponge and HEPA filter (12) can be washed under the tap.
- Leave them to completely dry before refitting it.
Cleaning the air outlet filter
- Remove the filter grill (14) by pressing the release catch and take it out. (Fig. 18)
- Remove the filters (15) and clean them by tapping on rinsing. (Fig. 19)
- Leave them to completely dry before refitting.
Important:
- Always switch off the vacuum cleaner and disconnect the power cord from the mains before cleaning the appliance.
- The vacuum cleaner must never be switched on unless these filters are fitted correctly.
- Do not use a scrouer, glass-cleaning agent or multipurpose cleaning product.
- Never immerse the whole vacuum cleaner in water.
- To guarantee trouble-free operation only use original Ufesa filters.
- Ufesa recommends that the inlet filter, HEPA filter and the air outlet filters be replaced yearly (depending on use). You can find these replacements at your local shopping centre.
ACCESSORY
Upholstery nozzle (16)
This accessory has been designed to clean all types of upholstery.
Furniture nozzle (17)
This accessory is ideal for vacuum cleaning furniture and other delicate surface, preventing surfaces from being damaged.
Crevicenozzle (18)
Use this accessory to vacuum crevices and deep grooves and nooks, etc.
Brush for wooden floor (19)
This brush has been specially designed to clean wooden floor surfaces. The soft hair bristles brush over the surface picking up the dust but without damaging the floor.
ADVICE ON DISPOSAL:
Our goods come in optimized packaging. This basically consists in using non-contaminating materials which should be handed over to the local waste disposal service as secondary raw materials.
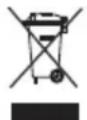
This product complies with EU Directive 2002/96/CE. The crossed wheelie bin symbol shown on the appliance indicates that when it comes to dispose of the product it
must not be included in with household refuse. It must be taken to a special refuse collection point for electric and electronic appliances or returned to the distributor when purchasing a similar appliance. Under current refuse disposal regulations, users who fail to take discarded appliances to special refuse collection points may be penalized. Correct disposal of discarded appliances means that they can be recycled and processed ecologically, helping the environment and allowing materials used in the product to be reused. For more information on available waste disposal schemes contact your local refuse service or the shop where the product was purchased. Manufacturers and importers are responsible for ecological recycling, processing and disposal of products, whether directly or via a public system. Your local town council can provide you with information about how to dispose of obsolete appliance.
DESCRIPTION DE L'APPAREIL
aai jiai jia jia jia jia jia jia jia jia jia jia jia jia jia jia jia jia jia jia jia jia jia jia jia jia jia jia jia jia jia jia jia jia jia jia jia jia jia jia
jaiy jslj yjly jalal ciylil jy 1
jlaa jia aai jie g jao all ialey y jay jsi
i j 100000000000000000000000000000000000000000
jia jydi liqipaii pi aill qiyidaiuai iuii
-
-
-
-
-
-
-
-
-
-
-
-
-
-
-
-
-
-
-
-
-
-
-
-
-
-
-
-
- 1.
-
-
-
-
-
-
-
-
-
-
-
-
-
-
-
-
-
-
-
-
-
-
-
-
-
-
-
yds 1abgsa aayj yda jaxnnll jglldn no dssill
y
jso Jg jia jia i 1000
ylll jaoaessll jey Jauayy pa ylll jao aessll
jlll jll lll
jssll jssll sle! j yssall yss
aeg a 100
jz11 jw wlll g 1y! yks o
A. lozilali
aJyIyIyIyIyIyIyIyIyIyIyIyIyIyIyIyIyIyIyIyIyIyIyIyIyIyIyIyIyIyIyIyIyIyIyIyIyIyIyIyIyIyIyIyIyIyIyIyIyIyIy
Jai aill jSra Jai aill bba Laaal ai
(17) 0234567890
211 111 111 111 111 111 111 111 111
aikally aaii jaii jai i jai i jai i jai i jai
(1)
(19)
aaiiie 1
j 1 j 1 j 1 j 1 j 1 j 1 j 1 j 1 j 1 j 1 j 1 j 1 j 1 j 1 j 1 j 1 j 1 j 1 j 1 j 1 j 1 j 1 j 1 j 1 j 1 j 1 j 1 j 1 j 1 j 1 j 1 j 1 j 1 j 1 j
j_4 = 21 d_i = i
aall aagaa baaal nssy aylaay lall yssy loie 12gall jz ggsaagaa gaa J 3gaaal all gcll aga
jaiy jy
Jaaai J 10 (r) jzj 10
Jzjall g jil p(17) jzj 10
Jzjll qg jil g jil
Aiiyjgll Aikall g iiau u 10 jzl jdl
Sgl gialll ie jlgll jnl jzl glll: jdi
Iiayi ayil ykall iiggi lglal jl jzl
Czssnla jzl g cdo g jzl gall gjolll g
Aial all gell gell gell gell gell gell gell gell gell
(17) 1j jall jiaia jiai jai
JibI 1000000000000000000000000000000000000
J 1
i 1
I 1
a
11
aaiyiaayjbjgaiy
p1234567890
jIJIyJJIbJgJgJI
Jlcl J1bV 1 jg g
e 1
a
Jaiuall g Caleal jal Xe bala. jauy ciulj y oai jai
Lis, baia xaiiu. baig jiall JiauiuJuae jieall li
Jaaai jae aalil jaiyai jayia y gailll.
jie 1ie jie jie
aaii
j 8 j 8 j 8 j 8 j 8 j 8 j 8 j 8 j 8 j 8 j 8 j 8 j 8
a 100 g a 100 g a 100 g a 100 g a 100 g a 100 g a 100 g a 100 g a 100 g a 100 g a 100 g a 100 g a 100 g a 100 g a 100 g a 100 g a 100 g a 10
A
ailllll lnnn a 111