TRA2425PSW - Radio ROADSTAR - Free user manual and instructions
Find the device manual for free TRA2425PSW ROADSTAR in PDF.


User questions about TRA2425PSW ROADSTAR
0 question about this device. Answer the ones you know or ask your own.
Ask a new question about this device
Download the instructions for your Radio in PDF format for free! Find your manual TRA2425PSW - ROADSTAR and take your electronic device back in hand. On this page are published all the documents necessary for the use of your device. TRA2425PSW by ROADSTAR.
USER MANUAL TRA2425PSW ROADSTAR
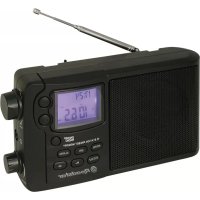
MULTIBAND PORTABLE RADIO WITH ALARM CLOCK
TRA-2425PSW
Instructionmanual
Bedienungsanleitung
TRA-2425PSW
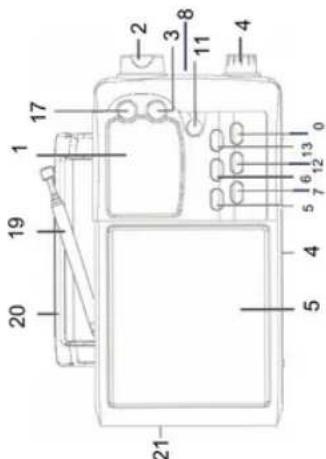
Front view
text_image
Technical diagram of a device with numbered components for identificationEnglish En
ish
WARNINGS


The exclamation point within the triangle is a warning sign alerting the user of important instructions accompanying the product.
The lightening flash with arrowhead symbol within the triangle is a warning sign alerting the user of "dangerous voltage" inside the unit.
To reduce the risk of electric shock, do not remove the cover. No user serviceable parts inside the unit. Refer all servicing to qualified personnel.
230v\~


Thisunit operates on 230V \~ 50Hz. If the unit is not usedfora long period of time, remove the plug from theAC mains.
This unit must not be exposed to moisture or rain.
Ensure all connections are properly made before operating the unit.
This unit should be positioned so that it is properly ventilated. Avoid placing it, for example, close to curtains, on the carpet or in a built-in installation such as a bookcase.
Do not expose this unit to direct sunlight or heat radiating sources.
Correct Disposal of This Product
(Waste Electrical & Electronic Equipment)
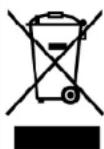
This marking shown on the product or its literature, indicates that it should not be disposed with other household wastes at the end of its working life. To prevent possible harm to the environment or human health from uncontrolled waste disposal, please separate thisfromothertypesof wastes and recycle it responsibly to promote the sustainable reuse of material resources.
Household users should contact either the retailer where they purchased this product, or their local government office, for details of where and how they can take this item for environmentally safe recycling.
Business users should contact their supplier and check the terms and conditions of the purchase contract. This product should not be mixed with other commercial wastes for disposal.
2
TRA-2415PSW
Portable AM/FM/SW Radio with Alarm CLock.
INSTRUCTION MANUAL
Please read this instruction manual carefully and familiarize yourself with your new Radio before using it for the first time. Please retain this manual for future reference.
LOCATION OF CONTROLS
- LCD Display
- Tuning UP
- Set Button
- Volume Knob
- MW/FM Band Button
- SW Band Button
- Snooze / Sleep Button
- Headphone output
- NOT USED
- Preset Memory +
- Power On/Off Button
- Preset Memory M-
- Alarm Button
- Battery Compartment
- Speaker
- Skip - Button
- Mode Button (Tuner/Clock/Alarm)
- Tuning Knob
- FM Antenna
- Handle
- Power Cord
CONNECTING TO POWER
Before switching on make sure that the voltage of your electricity supply is the same as that indicated on the rating plate.
For your own safety read the following instructions carefully before attempting to connect this unit to the mains.
English En
ish
This unit is designed to operate on AC 230V 50Hz current only. Connecting it to other power sources may damage the unit.
Caution
To prevent electric shock disconnect from themains before removing cover. Nouser serviceable parts inside. Refer servicing to qualified service personnel.
Safety Precaution
Do not allow this unit to be exposed to rain or moisture.
Mains Supply: AC230Volts / 50Hz - AC only

This symbol means that this unit is doubleinsulated. An earthconnection is not required.
POWER SUPPLY
- Remove the Radio carefully from the box, retaining the packaging for future use.
- Please read this instruction book carefully beforeoperating this unit.
AC Power Operation
- Connect the AC Power Cord to your AC household mains outlet and switch on the mains supply. Make sure the voltage is compatible.
Battery Operation
- Remove mains lead from the unit for batteryoperation.
- Open the Battery Compartment at the back of the radio and insert four UM3 batteries following the polarity diagram shown inside the battery compartment.
- Batteries should be removed from the compartment if the unit is not to be used for some time.
- Flat batteries should be removed from the unit to avoid leakage
RADIO OPERATION
Antenna
For FM reception there is a built-in telescopic FM antenna (19) at the rear of the unit. Extend the antenna and move itaround to obtain the best reception.
For MW / SW reception the signals are picked up through a built-in ferrite antenna. Your may have toorient the unit to obtain the best reception.
4
- Press the Power ON/OFF Button (11) to power ON the unit.
• Choose the radio wave band (MW, FM or SW) using the BAND Button (5 or 6)
• Search for the station of your choice using the Tuning knob (18).
• To switch off the radio, press the Power button (11) to OFF.
Store Radio Stations manually
This unit can store 24 stations (8 FM, 8 MW and 8 SW).
• Tune the desired station as explained above
- Press the SET button (3) to enter in preset mode
• The icon "CH" flash and appear in the display
- Press the M+ or M - buttons to choose the preset number, from 1 to 8.
- Press the SET button (3) to confirm the memory setting.
Store Radio Stations automatically
Keep pressed the SET button (3) 3 seconds and the Radio will be stored in the memory sequentially.
Make sure the POWER switch is set to the 'Off' position. The time or alarm time cannot be set or adjusted while the unit is 'On'.
- Press the SET button (3) and the display will show the minute 00 will flash and press Tune +/- to select the minute.
- Press the SET button (3) again to confirm setting, then the Display will show 00:00 and the first 00 will flash, then press Tune +/- to select the correct hours.
- Press the SET button (3) again to confirm setting, then the Display will show 24H will flash, then press Tune +/- to select the 12H or 24H.
- Press the SET button (3) to confirm the clock setting,
CALENDAR SETTING
When the display show the time, press the MODE button (17) once, it shows calendar mode.
• Press SET button once (3) to select the year
• Turn the Tune +/- knob to set the correct year
• Press SET button (3) again to select the month
• Turn the Tune + / - knob to set the correct month
English En

- Press SET button (3) again to select the day
- Turn the Tune + / - knob to set the correct day
- Press SET button (3) to confirm the calendar setting
ALARM SETTING
Make sure the POWER switch is set to the 'Off' position. The time or alarm time cannot be set or adjusted while the unit is 'On'.
- Press theAlarm button (13) and select the Alarm 1 orAlarm 2
- Press the SET button (3) and the display will show the minute 00 will flash and press Tune +/- to select the minute.
- Press the SET button (3) again to confirm setting, then the Display will show 00:00 and the first 00 will flash, then press Tune +/- to select the correct hours.
- Press SET button (3) to confirm the alarm setting
- PressALARM button (13) to enter in normal clock mode
ALARM OFF
DuringAlarm on, press SET button (3) or ON/OFF button (11). The alarm sound goes off but theAlarm setting remains.
ALARM VOLUME SETTING
- InRadioAlarm, theAlarm Volume isset withthe lastvolumelevel used during playback.
- In BuzzerAlarm, theAlarmlevel is fixed.
WAKE TO BUZZER ALARM
- Alarm 1 andAlarm 2 both have "wake to buzzerAlarm" function
- Set theAlarm time as shown above
- Turn the Tuning knob to set Alarm to wake up to Buzzer alarm
WAKE TO MUSIC
- Repeat the steps of Alarm Time Setting, Alarm 1 and Alarm 2 both have the "wake to music" function.
-
Press theAlarm button (13) once to set the desired Alarm 1 time
-
Press theAlarm button (13) twice to set the desired Alarm 2 time
- Turn the Tune +/- knob once after alarm setting to activate wake to Radio function
- After finish theAlaem 1 orAlarm 2 time setting, press the SET button (3) once to confirm alarm timer setting
6
- The Radio Memory icon appear in the display. During that time, turn the Tuning +/- knob to select the desired Radio station stored in the memory before
- Press the Set button (3) to confirm
- Press the ON/OFF button (11) to turn ON the unit, then adjust the Volume to the desired level. Press the ON/OFF button(11)to switch OFFthe Radio,then itswitchONautomatically at the preset Alarm time
SNOOZE / SLEEP
SLEEP FUNCTION
- Press ON button (11) to switch ON the radio. Press the Snooze / Sleep Button (7) sequentially to display will show 90, press again is 80/70/60/50.....10, then press again is off.
• After set the Sleep function and when finish, then the unit will off automatically.
SNOOZE
The alarm can be temporarily turned off manually by pressing the SNOOZE button; the alarm will turn back on 5 minutes later automatically.
This feature can be repeated endlessly.
HEADPHONES
Headphonesshouldhave a 3.5mm diameterstereoplug andan impedance of 8-32ohms.When headphones are connected (8), the speaker is automatically disconnected.
SPECIFICATIONS
Power Supply
| AC: | 230V~50Hz |
| DC: | 4 x UM3Battery |
Radio Frequency Coverage
| FM: | 88 -108 MHz |
| MW: | 540 - 1600 kHz |
| SW: | 3,16 - 18.10 MHz in 10 bands |
Speaker 4 Ohms, 3-5 W
| Ouputpower: | 0.8 W RMS, 10% THD |
General
| Headphone: | 3.5mm jack plug, 8-32W |
| Impedance | 32 Ohms |
Specifications and the design are subject to possible modifications without notice due to improvement.
WARNUNGEN


NETZBETRIEB (BEI WECHSELSTROM)
The exclamation point within the triangle is a warning sign alerting the user of important instructions accompanying the product.
The lightening flash with arrowhead symbol within the triangle is a warning sign alerting the user of "dangerous voltage" inside the unit.
To reduce the risk of electric shock, do not remove the cover. No user serviceable parts inside the unit. Refer all servicing to qualified personnel.
230v\~


Thisunitoperates on 230V \~ 50Hz. If the unit is not usedfora long period of time, remove the plug from the AC mains.
This unit must not be exposed to moisture or rain.
Ensure all connections are properly made before operating the unit.
This unit should be positioned so that it is properly ventilated. Avoid placing it, for example, close to curtains, on the carpet or in a built-in installation such as a bookcase.
Do not expose this unit to direct sunlight or heat radiating sources.
Correct Disposal of This Product
(Waste Electrical & Electronic Equipment)
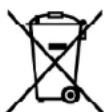

This marking shown on the product or its literature, indicates that it should not be disposed with other household wastes at the end of its working life. To prevent possible harm to the environment or human health from uncontrolled waste disposal, please separate this from their types of wastes and recycle it responsibly to promote the sustainable reuse of material resources.
Household users should contact either the retailer where they purchased this product, or their local government office, for details of where and how they can take this item for environmentally safe recycling. Business users should contact their supplier and check the terms and conditions of the purchase contract. This product should not be mixed with other commercial wastes for disposal.