TC 37 Clip - Phone SWITEL - Free user manual and instructions
Find the device manual for free TC 37 Clip SWITEL in PDF.

User questions about TC 37 Clip SWITEL
0 question about this device. Answer the ones you know or ask your own.
Ask a new question about this device
Download the instructions for your Phone in PDF format for free! Find your manual TC 37 Clip - SWITEL and take your electronic device back in hand. On this page are published all the documents necessary for the use of your device. TC 37 Clip by SWITEL.
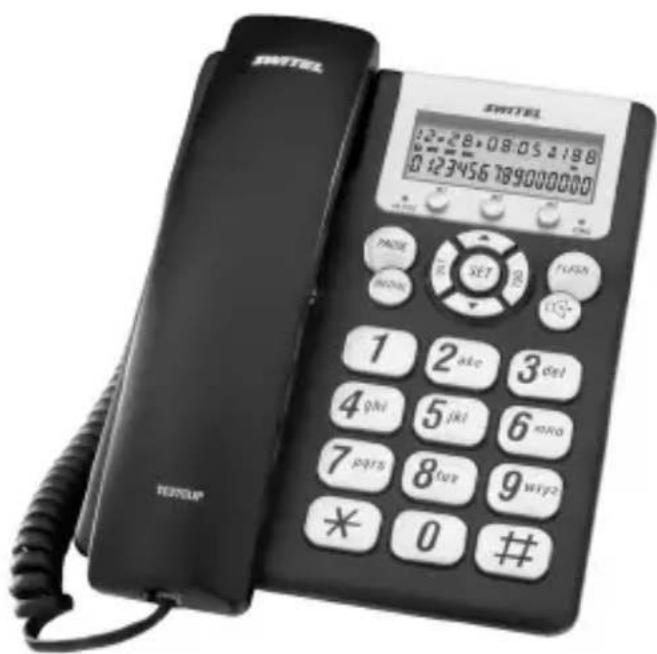
USER MANUAL TC 37 Clip SWITEL
Coreded telephone with handsfree function
TC 37 CLIP
Bedienungsanleitung
Mode d'emploi
Operating Instructions

SWITEL
Operating Instructions 40.
Declaration of Conformity 52. . .
Installations PABX / Services comfort
7 Installations PABX / Services comfort
FLASH
Touche flash et services comfort
Please read this operating instruction manual thoroughly.
Intended use
The telephone is suitable for telephoning within a public telephone network system. Any other use is considered unintended use. Unauthorised modification or reconstruction is not permitted. Under no circumstances open the device or complete any repair work yourself.
Installation location
Prevent excessive exposure to smoke, dust, vibration, chemicals, moisture, heat and direct sunlight.
Hearing aid compatible
The telephone is compatible with most popular hearing aids on the market. However, it cannot be guaranteed that all hearing aids will work perfectly.
Disposal
In order to dispose of your device, take it to a collection point provided by your local public waste authorities (e.g. recycling centre). According to laws on the disposal of electronic and electrical devices, owners are obliged to dispose of old electronic and electrical devices in a separate waste container. The adjacent symbol indicates that the device must not be disposed of in normal domestic waste!
Batteries represent a hazard to health and the environment!


Never open, damage or swallow batteries or allow them to pollute the environment. They may contain toxic, ecologically hazardous heavy metals. You are legally obliged to dispose of power packs and batteries at the point of sale or in the corresponding containers provided at collection points by local public waste authorities. Disposal is free of charge. The adjacent symbols indicate that the batteries must not be disposed of in normal domestic waste and that they must be brought to collection points provided by local public waste authorities.
Packaging materials must be disposed of according to local regulations.
Putting the Telephone into Operation
2 Putting the Telephone into Operation
Safety information
Attention: It is essential to read the Safety Information in Chapter 1 before starting up.
Checking the package contents
The package contains:
- a telephone - a receiver
- a telephone connection cable
- a tabletop support - an operating manual
- three batteries, AA 1.5 V alkaline
Connecting the receiver
Plug one end of the helix cable in the socket on the bottom end of the receiver. Then plug the other end in the socket on the left-hand side of the telephone.
Inserting the batteries
Insert the batteries before connecting the telephone to the telephone network, paying careful attention to correct polarity.
Always use AA 1.5 V alkaline batteries.

Prior to inserting or replacing the batteries, ensure that the telephone is disconnected from the telephone network.
Connecting the telephone
Connect the telephone connection cable enclosed to the telephone line socket and the telephone socket on the rear of the telephone.
Mounting the tabletop support
If you want to have the telephone on a table, you must mount the tabletop support supplied. Insert the two clips in the slots provided for them on the rear side.
GB
Operating Elements
Wall installation
The telephone can also be installed on a wall. Use two screws for the necessary fixation. Drill two holes 67mm apart and horizontal to each other and insert the screws leaving approx. 5mm projecting from the wall. The tabletop support is not required for wall installation. Attach the base unit by hooking it in the two screws protruding from the wall and pushing it down a bit.
Warning: Ensure that there are no lines (cables or pipes et wall where you want to drill the holes.
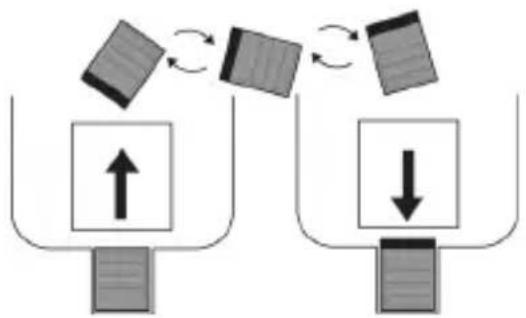
In order that the receiver does not fall when placed on-hook, the receiver cradle is equipped with a small receiver hook. Turn the receiver hook in the receiver cradle 180^ so that the receiver can be hooked in.
3 Operating Elements
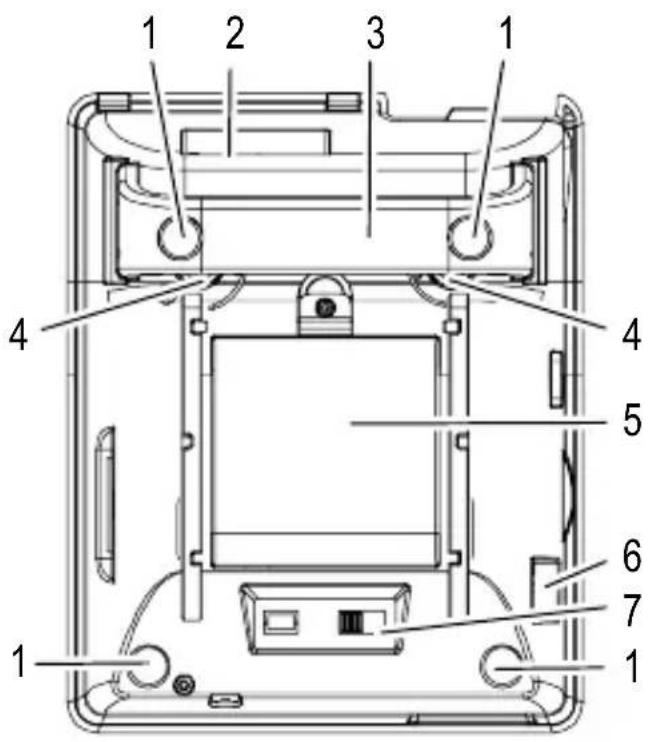
Underside
1 Rubber footpads
2 Telephone line connection
3 Tabletop support
4 Bracket for wall installation
5 Battery compartment
6 Jack for helix cable, receiver
7 "Ringing volume" sliding switch
Top side
1 LED: "Connection active"
2 One-touch dialling buttons
3 LC display
4 LED: "phone is ringing"
5 Scroll upwards/ Incoming calls list
6 Flash button
7 Delete
8 Handsfree button
9 Menu / OK button
10 Digit keys
11#button
12*button
13 Loudspeaker
14 Scroll downwards
15 Redialling
16 Outgoing calls list
17 Dialling pause
18 Receiver hook for wall installation
19 Receiver cradle
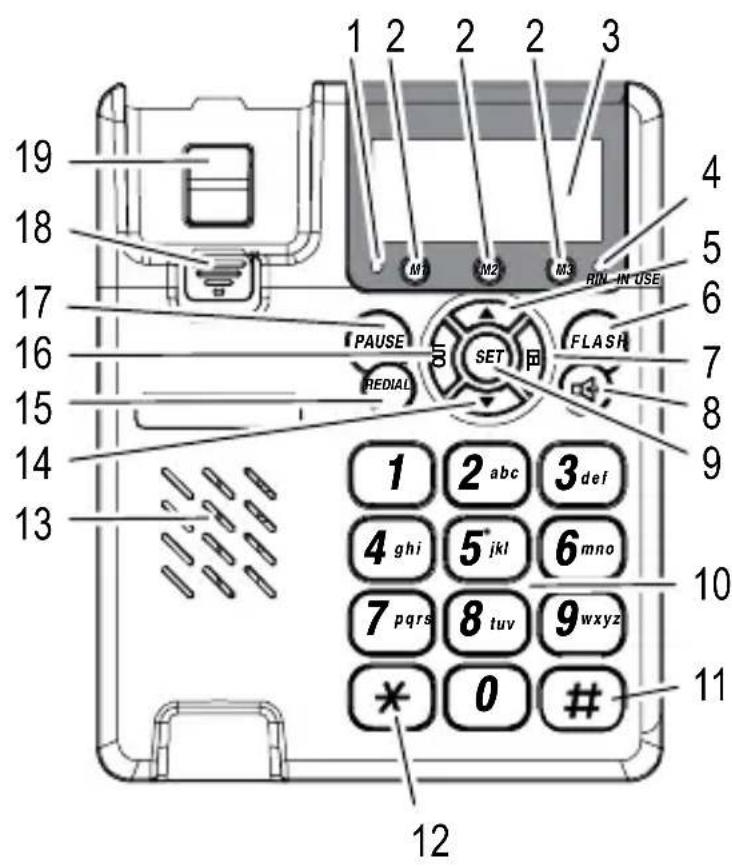
The buttons in this operating manual are depicted with a uniform contour. Variations in the symbols on the telephone buttons compared to those depicted here are possible.
4 Telephoning
Display and explanation of operation sequences
Enter digits or letters
Press the button depicted briefly
4 sec Press the button depicted for 4
seconds
Lift the receiver
GB
Telephoning
Replace the receiver on-hook
Icons in the display
Display Description
NEW The entry in the calls list is new.
REP The caller has called several times (repeat).
IN Calls list, incoming calls
OUT Calls list outgoing calls
Number of entries in the calls list
MAIL Answering machine provided in the telephone network.
Supplementary service offered by the telephone network provider.
00:00 Time display
M Month display
Day's date display
2005 Year display
MON Weekday display
Taking a call
or Take the call
Ending a call
or End the call
Making a call
Enter the phone number
(max. 32 digits)
DEL Delete the last digit if it is wrong
REDIAL Dial the phone number
You can also lift the receiver or press the Handsfree button first and wait for the dialling tone. The digits then entered are dialled immediately. It is not possible to correct wrong digits individually using this dialling procedure.
Redialling
The telephone stores the last phone numbers dialled.
or Dial the number
REDIAL Dial the last number dialled
again
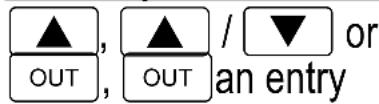
or
OUT, OUT Open the calls list and select an
entry
REDIAL Dial the phone number
Calling back calls received
The telephone stores the numbers of the last 66 calls received in a call list.
Open the call list
/,REDIAL
Select the entry required and dial it
Displaying the duration of a call
The duration of a call is displayed in minutes and seconds during the call.
Handsfree
This function is used to listen to the caller via the loudspeaker.
Activate the handsfree function
Deactivate the handsfree facility
Ringing volume
The ringing volume can be adjusted or switched off by means of the sliding switch on the underside of the telephone.
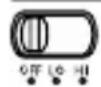
Adjust the volume using the sliding switch
One-touch dialling buttons
You can assign one phone number each to the one-touch dialling buttons M1, M2 and M3.
Assigning phone numbers to one-touch dialling buttons
Enter the phone number (max. 32 digits)
SET Initiate the storing process
M1 / M2 / M3
Select the one-touch dialling button
Dialling using the one-touch dialling buttons
M1/M2/M3
The number is dialled
5 Calls List
A total of 66 incoming and outgoing phone numbers are stored a call list.

ller number display function is an optional service
offered by telephone network providers. The caller's number appears in the display if the service is offered by your telephone network provider. Contact your network provider for further information.
Displaying incoming phone numbers in the calls list

Open the calls list and select an entry
Two different display messages indicate whether the caller has called once or several times.
Display Description
NEW The entry in the calls list is new.
REP The caller has called several times.
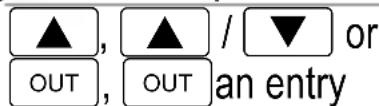
Displaying outgoing numbers in the calls list
OUT, OUT Open the calls list and select an entry
Storing numbers in the calls list for one-touch dialling
A phone number in the calls list can be assigned to a one-touch dialling button directly.
Open the calls list and select


Select the one-touch dialling button
Deleting phone numbers in the calls list
Deleting individual phone numbers
Open the calls list and select

Deleting all phone numbers

4 sec DEL Delete all the entries
GB
6 Menu Structure
Main menu
Press the SET button to open the main menu. Then use the / buttons to select an entry and confirm it by pressing the SET button. Use the / buttons to define the settings. Press the SET button to confirm the setting defined. Press the DEL button to cancel the process.
| SEt 1 dAtE | Set the date and time |
| SEt 2 COdE Set | the local access code |
| SEt 3 PCOdE Set | the number for an outside line |
| SEt 4 FLASH Set | the Flash time (100 / 300 / 600 / 1000) |
| SEt 5 IP AUtO IP: Set the call-by-call number FrEE IP: No function | |
| SEt 6 P-t Set the dialling mode (tONE / PULSE) | |
| SEt 7 ALERT Set | the alarm |
| SEt 8 hour No function | |
| SEt 9 LCd Set the contrast | |

Setting a call-by-call number in the SET 5 IP menu option has the effect that when calling back a number in the incoming calls list beginning with a 0, the call-by-call number is automatically predialled. If you activate this setting, please note that the price of call-by-call numbers can vary greatly from day to day.
7 PBX / Supplementary Services
FLASH button on private branch exchanges
If the telephone is connected to a private branch exchange, functions such as transferring calls and automatic call back can be used via the FLASH button. The sales outlet where you purchased the exchange can provide information as to whether the telephone will work properly with the exchange.
Dialling pause
When using private branch exchanges, it is necessary to dial an access code to obtain the dialling tone for an outside line. When using some older private branch exchanges, it takes a little time before the dialling tone becomes audible. In the case of such private branch exchanges, a dialling pause can be inserted after the number for an outside line in order to continue dialling directly without having to wait for the dialling tone.
PAUSE Insert a dialling pause
After dialling the number for the outside line, the telephone waits approx. 3 seconds before dialling the actual phone number.
FLASH button and supplementary services
Your telephone supports supplementary services provided by your telephone network provider, such as brokering, call waiting and conference facilities. These supplementary services can be used by implementing the FLASH button. Also contact your telephone network provider with regard to enabling supplementary services.
Caller number display (CLIP ^1 )
If this function is available with your telephone line, the number of the caller appears in the display when the phone rings. If the caller has suppressed transmission of his phone number, the corresponding message appears in the display. The phone number is not displayed and, as a result, is not stored in the call list.
The caller number display function is an optional service offered by telephone network providers. Contact your network provider for further information.
GB
1 CLIP: Calling Line Identification Presentation = Displays the caller's phone number.
In Case of Problems
8 In Case of Problems
Service Hotline
In the case of technical problems, you can contact our hotline service, Tel. 0900 00 1675 within Switzerland (Swisscom fees at time of going to print: CHF 2.60/min). In the case of claims under the terms of guarantee, please contact your sales outlet. There is a 2 year period of guarantee.
Problems and solutions
Problems Solutions
No telephone calls possible -
The telephone line is not connected properly or is defective. Only use the telephone connection cable supplied.
9 Maintenance / Guarantee
Maintenance
- Clean the housing surfaces with a soft, fluff-free cloth.
- Do not use any cleaning agents or solvents.
Guarantee
SWITEL equipment is produced and tested according to the latest production methods. The implementation of carefully chosen materials and highly developed technologies ensure trouble-free functioning and a long service life. The terms of guarantee do not apply where the cause of equipment malfunction is the fault of the telephone network operator or any interposed private branch extension system. The terms of guarantee do not apply to the batteries or power packs used in the products. The period of guarantee is 24 months from the date of purchase.
All deficiencies related to material or manufacturing errors within the period of guarantee will be redressed free of charge. Rights to claims under the terms of guarantee are annulled following tampering by the purchaser or third parties. Damage caused as the result of improper handling or operation, normal wear and tear, incorrect positioning or storage, improper connection or installation or Acts of God and other external influences are excluded from the terms of guarantee. In the case of complaints, we reserve the right to repair defect parts, replace them or replace the entire device. Replaced parts or devices become our property. Rights to compensation in the case of damage are excluded where there is no evidence of intent or gross negligence by the manufacturer.
If your device does show signs of a defect within the period of guarantee, please contact the sales outlet where you purchased the SWITEL device, producing the purchase receipt as evidence. All claims under the terms of guarantee in accordance with this agreement can only be asserted at the sales outlet. No claims under the terms of guarantee can be asserted after a period of two years from the date of purchase and hand-over of the product.
Declaration of Conformity
This device fulfils the requirements stipulated in the EU directive:

1999/5/EC directive on radio equipment and telecommunications terminal equipment and the mutual recognition of their conformity. Conformity with the above mentioned directive is confirmed by the CE symbol on the device. To view the complete Declaration of Conformity, please refer to the free download available on our web site at www.switel.com.
SWITEL
Declaration of Conformity
This equipment complies with the European R&TTE directive. To view the complete Declaration of Conformity, please refer to the free download available at our web site: www.switel.com
Service Hotline
In the event of technical problems, you can contact our hotline service, Tel. 0900 00 1675 within Switzerland (cost via Swisscom at time of going to print: CHF 2.60/min).