
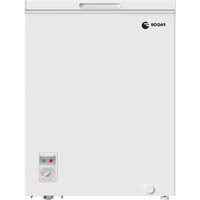
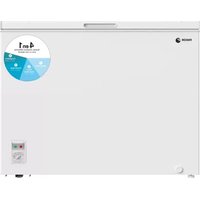
ZFK1745X - Freezer FAGOR - Free user manual and instructions
Find the device manual for free ZFK1745X FAGOR in PDF.
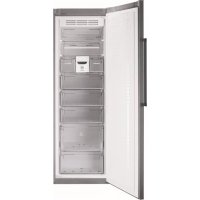



| Product type | Freezer |
| Brand | Fagor |
| Model | ZFK1745X |
| Climate class | SN-T (from +10°C to +43°C) |
| Supply voltage | 220-240 V |
| Refrigerant | R600A |
| Fast cooling function | Yes (maximum duration 52 hours) |
| ECO function | Yes (energy saving, stable temperature) |
| Quick cooling function | Yes (bottle cooling in 15 minutes) |
| Child lock | Yes (prevents accidental changes) |
| Open door alarm | Yes (except model e, after 1 minute) |
| Power failure alarm | Yes (cold chain break indicator) |
| Twist Ice ice cube tray | Yes (up to 24 ice cubes) |
| Door reversal | Possible (procedure described in manual) |
| Interior cleaning | Warm water and baking soda, non-abrasive sponge |
| Exterior cleaning | Soft cloth, no steam cleaner |
| Rear grille cleaning | Vacuum once a year |
| Accessories | Hand wash (not dishwasher) |
| Safety instructions | Do not obstruct ventilation grilles, do not damage refrigeration circuit |
| Repairability | Contact technical support service |
| Recycling | Device to be taken to a specific collection center |
Frequently Asked Questions - ZFK1745X FAGOR
User questions about ZFK1745X FAGOR
0 question about this device. Answer the ones you know or ask your own.
Ask a new question about this device
Download the instructions for your Freezer in PDF format for free! Find your manual ZFK1745X - FAGOR and take your electronic device back in hand. On this page are published all the documents necessary for the use of your device. ZFK1745X by FAGOR.
USER MANUAL ZFK1745X FAGOR
Very important: Please read this manual fully before using your freezer.
This manual has been designed so that the text is linked to the relevant drawings.

Identification

Identify the model of your freezer ("a", "b", "c", "d", "e") by comparing the control panel with the illustrations.
Your freezer is a NO FROST model if NO FROST appears on the control panel.
1
Installation
1.1 Unpacking. Remove all the protection. 1.2 Location. Position the freezer away from heat sources and protected from direct sunlight to reduce consumption.
Do not install the freezer outside or anywhere it is exposed to rain.
Air must be able to circulate around the back of the freezer. Leave 25 mm between the back of the freezer and the wall behind it. Do not block the space between your freezer and the floor or ceiling with any object.
Level the freezer to prevent any vibrations or noise. Remember that if the freezer is located next to a wall or cabinet, it might make a small noise.
Also check that the shelves have been fitted correctly, and place containers apart to prevent any vibrations.
1.3 Electrical connection. Stand the freezer upright for at least 2 hours before plugging it in. Check the information on the specifications plate (220-240V earthed) (1.3.1, 1.3.2).
Do not use any adapters or extension leads.
Make sure that the lead is not touching the motor or trapped underneath it.
1.4 Changing the direction the door opens. Unplug the freezer from the mains supply and empty it completely.
Gently lay the appliance on its back (1.4.1).
Undo the screws (1.4.2) and remove the top hinge and the rotating bushing with the aid of a screwdriver (1.4.3).
Unplug by pressing on the connector tab (1.4.4). Remove the freezer door (1.4.5). Remove the control panel, levering it up by inserting a screwdriver in the notches provided for that purpose (1.4.6).
Make a notch for the lead on the other side, in the area indicated on the casing (1.4.7). Replace the control panel passing the lead through the notch made (1.4.8).
Undo the screws from the bottom hinge and remove it. Change the position of the pin in the hinge and position it on the other side (1.4.9).
Remove the vertical handle and fit it on the other side of the door turning it 180° (1.4.10).
Fit the closing capsule in the top hinge space on the other side (1.14.12). Press the connector to plug it into the door (1.4.13).
Fit the top hinge and the rotating bushing, inserting any spare lead in the control panel (1.4.14) and replace the screws (1.4.15).
Lift the freezer up carefully (1.4.16).
1.5 Levelling the appliance. Adjust the feet so that it is tilting backwards slightly, to help the door close correctly (1.5.1). 1.6 Climate class. This freezer is designed for optimum functioning at a room temperature of between +10°C and +43°, climate class SN-T (1.3.2). Higher or lower temperatures may affect its performance.
2
Use
2.1 Switching on the freezer. Press the ① button (2.1.1). Press +, — until a digit appears on the display (2.1.2) or turn the control (2.1.3, 2.1.4). The display ( models) or the On light ( K e s) will light up to indicate the appliance is switched on.
The child lock is automatically activated in model a, to release it press the button for 3 seconds (2.3.7).
2.2 Setting the temperature. Press the + buttons (2.2.1). Press +, - (2.2.2), or turn the control (2.2.3, 2.2.4). When you have selected the temperature you want, the indicator lights (2.2.7) will show you the real temperature or you can press the keys for 5 seconds to see this +, (2.2.5), or +, - (2.2.6). buttons for five seconds. The temperature will flash. Model c does not have this function.
Recommendation: The recommended temperature for your freezer is -19. If you want to freeze, the recommended temperature is -24.
Remember that the temperature inside the freezer depends on the ambient temperature, the location and how often the freezer door is opened.
2.3 Freezer functions.
Fast cooling function: This function makes the freezer work at the minimum temperature for a maximum of 52 hours. We recommend you use this function whenever you put large quantities of food in the freezer. You should activate the function 24 hours in advance. To activate and deactivate it: Press (2.3.1) or SUPER (2.3.2, 2.3.3, 2.3.4). In the models the screen shows 5F while the function is active.
ECO setting: The ECO setting gives substantial energy savings and keeps the freezer at a stable temperature. This function stays active even after a power cut. When using this mode, we recommend you store all the food on the shelves in the centre. To activate or switch off pressECO (2.3.5, 2.3.6). In the models bc the screen shows c while the function stays activated. Models do not have this option.
Quick cooling function: Put the bottle or bottles into the freezer and press for a few seconds until the icon appears (2.3.7). The freezer will supply cold for 15 minutes, after which time the function fi nishes, will flash and an alarm will sound for 20 minutes, telling you it is time to remove the bottle to prevent it from bursting. Stop the alarm by pressing any key. If the function is interrupted by a power cut, when the power comes on again, it will fi nish and the alarm will sound.
Lock: The lock is used to prevent the appliance settings from being changed by
accident or due to interference by children. The display shows the icon when the appliance is locked. Press (2.3.8) or (2.3.9). The screen will show alternating with the normal display while the function is activated. Models do not have this option.
2.4 Arranging food in your freezer. The temperature is not uniform inside your freezer. Some areas are colder than others. Food must be stored in the right area to make sure that it is kept correctly (2.4.1):
- Medium-sized containers
- Ice cream
- Twist Ice (optional feature)
- Medium-sized containers
- Medium-sized containers
- Large-sized containers
- Medium-sized containers
2.5 TWIST ICE. This is an accessory in your freezer that makes up to 24 ice cubes. If your freezer has Twist Ice, take out the ice drawer (2.5.1). Fill the ice tray without going over the level (2.5.2). Replace the ice drawer being careful not to spill the water (2.5.3).
After two hours the ice cubes will be ready to use. Turn both knobs several times until the ice cubes fall out (2.5.4, 2.5.5). Open the lower drawer to take them out (2.5.6).
2.6 Switching the freezer off. Press ① for 3 seconds or press — until no temperature appears on the display (2.6.1, 2.6.2), or turn the control to the off setting (2.6.3, 2.6.4). The display (b c models) or the On light (d e models) will switch off.
2.7 Recommendations for use.
- Do not open the doors for longer than necessary or put hot food into the freezer. This will ensure your freezer works more efficiently and will avoid increased energy consumption. If you have a NO FROST freezer, do not block the ventilation grills and leave some space between the food so the air can move freely.
- Do not put bottles containing fizzy drinks or glass bottles containing liquid in the freezer, because they may burst.
- Store food in sealed containers to prevent it from drying out.
- Do not eat excessively cold ice creams or food because they may burn your mouth. To make the most of the freezer's capacity (2.4.1) you can remove the baskets (5), the small drawers (4) or the Twist Ice (3). Do not remove the lower baskets (6 and 7) or the upper lids (1 and 2) as this will affect the appliance's consumption performance.
3
Maintenance and cleaning

3.1 Cleaning the inside. Use a sponge or cloth soaked in water with bicarbonate of soda to clean the inside of the freezer to prevent any smells from forming. Never use a steam cleaner, solvents or scouring powders. 3.2 Cleaning the outside. Never use a steam cleaner to clean the displays. It is a good idea to clean the grille at the back once a year with a vacuum cleaner. 3.3 Cleaning the accessories. Do not put them in the dishwasher. Clean them by hand with the help of a sponge or cloth. Keep used and new liters out of the reach of children; digesting large quantities can be dangerous.
4
Troubleshooting

4.1 Door open. On all models except if you leave the door open for longer than 1 minute the signal will light up and an alarm beep will sound (4.1.1, 4.1.2, 4.1.3). The alarm will switch off when you close the door. 4.2 Electricity cuts.
Open the freezer doors as infrequently as possible. If the temperature inside the freezer drops below -11°C the following will happen:
On ab and cd, the Cold Chain Failure alarm beep will sound for
30 minutes. You can disable the alarm by pressing any button.
- The SUPER is also enabled automatically. To disable it, press the SUPER button or wait for it to be disabled automatically. The red pilot light will come on (4.1.1, 4.1.2, 4.1.3).
Checking the food preservation status.
On abc models, the following indications may appear on the display:
SF The food has not thawed and it is safe to keep it frozen. The food has thawed partially. It will not be safe unless you cook it. The food has thawed and is not safe to eat. You must throw it away.
For models, check the state of preservation yourself and do whatever is best.
4.3 Some other alarms that may appear are:
This is a safeguard mode for guaranteeing food preservation. It starts up automatically, but you must call the technical assistance service. One of the freezer components is not working correctly. There is no danger for food preservation, but you must call the technical assistance service.
4.4 Normal noises in the freezer.
Your freezer may make a number of quite normal operating noises which should not concern you.
- The refrigerant may make a gargling noise as it passes through the circuits.
- The compressor may make a buzzing and/or a slight knocking noise, above all when it switches on.
- The dilation or contraction of the materials used can make clicking or creaking noises. The air moved by the freezer fan can make a small background noise.
Do not tamper with your freezer in an attempt to repair it. Call for service.

Safety

- Keep the ventilation grills clear.
- Be careful not to damage the refrigeration circuit.
- Do not use any electrical appliances inside your freezer unless they are of the type recommended by the manufacturer.
- Do not use any mechanical devices or any other means to speed up defrosting other than those recommended by the manufacturer.
- This appliance is not intended for use by people (including children) with reduced physical, sensory or mental capabilities, or lack of experience or knowledge, unless they have been given supervision or instruction concerning use of the appliance by a person responsible for their safety. Children should be supervised to ensure that they do not play with the appliance.
- If the power lead is damaged, it must be replaced by the manufacturer, or by their after sales service or a similar qualified person to prevent any risk.
Even if the display is switched off, there is still voltage to the freezer.

The environment

This freezer was designed with environmental conservation in mind.
The appliance operates with coolant R600A, which does not damage the environment.
Respect the environment. Protect the environment by using the temperatures recommended for each function you require, to ensure efficient use of your freezer. They will depend on the mode you need for efficient use of your freezer.
Unplug the freezer from the mains if you will not be using the appliance for a long period of time. You will reduce power consumption and save energy.
Avoid leaving the doors open more time than necessary. It causes an increase in power use.
Waste management of electrical and electronic appliances.
The symbol indicates that the appliance must not be disposed of in traditional bins for domestic waste.
Deliver your freezer to a special collection centre.
Recycling domestic appliances prevents negative impacts on health and the environment and helps save energy and resources.
For more information, contact your local authorities or the establishment where you purchased your freezer.
Determine which type of freezer you have ("a", "b", "c", "d", "e"), by comparing the control panel with the illustrations.
If the control panel does not have the NO FROST marking, your freezer chamber is of the NO FROST type.

Installation
1.1 Unpacking. Remove all protective elements. 1.2 Location. To reduce electricity consumption, the refrigerator should be installed away from heat sources in a specially designated place, protected from direct sunlight.
The refrigerator should not be installed under an open window, nor in a place where it could be exposed to rain.
When installing the appliance, leave space behind it for air circulation. Between the base of the appliance and the rear wall, there should be a distance of 25 mm. Do not obstruct the space between the refrigerator and the floor, as well as between the refrigerator and the ceiling of the room with foreign objects. To avoid vibration and noise, the position of the appliance must be adjusted so that it is not tilted. Note that if the refrigerator is placed near a wall or cabinet, during operation slight noises may occur. To avoid vibration, also check the correct installation of the adjustable feet, and when placing items in the refrigerator, make sure they do not touch each other. 1.3 Connection to the electrical network. Before connecting the appliance to the network, it must be left standing in a vertical position for at least 2 hours. Check that the actual parameters of the electrical network match the data indicated in the nameplate (from 220 to 240 V with grounding) (1.3.1, 1.3.2).
The use of adapters (converters) and extension cords is not allowed. Make sure that the power cord does not touch the compressor and is not pinched under it.
1.4 To open the door from the other side. Disconnect the appliance from the power supply and remove all items and accessories from inside. Carefully tilt the appliance onto its back (1.4.1). Loosen (1.4.2) the upper hinge and the rotating bushing, using a screwdriver to help (1.4.3). Disconnect the connector by pressing the "release" tab (1.4.3). Remove the door of the freezer compartment (1.4.5). Remove the fixing bracket, make a notch in the designated places using a screwdriver (1.4.6). Make a groove for the cable on the opposite side - in the place indicated on the body (1.4.7). Install the fixing bracket in place, passing the cable through the made groove (1.4.8). Loosen the screw of the lower hinge and remove it. Change the direction of the axis on the hinge and install it on the opposite side (1.4.9). Install it at the top (1.4.11). Loosen the vertical handle and install it on the opposite side of the door, turning it 180° (1.4.10). Install the gap gasket in the space of the upper hinge on the opposite side (1.4.12). Press the connector to insert it into the slot on the door (1.4.13). Install the upper hinge and the rotating bushing, inserting the loose section of the cable into the fixing bracket (1.4.14) and install the screws (1.4.15). Carefully lift the freezer (1.4.16). 1.5 Leveling the appliance. Adjust the feet so that the freezer is slightly tilted backwards, which ensures proper closing of the door (1.5.1). 1.6 Climate class. This freezer is designed for optimal operation at ambient temperatures from +10 to +43 °C; climate
class SN-T (1.3.2). Operating the appliance at temperatures outside the specified range may adversely affect its characteristics.

2. Operating the appliance

2.1 Switching on the freezer. Press the button ① (2.1.1). Press and hold until the appearance of a numeric value on the display (2.1.2) or turn the knob (2.1.3, 2.1.4). In models with a display, the display lights up, and in models without, the indicator light "On" lights up, indicating that the appliance is currently operating. The freezer door is automatically locked; to unlock the appliance, press and hold the button for 3 seconds (2.3.7). 2.2 Setting the temperature. Press the button + or - (2.2.1). Press - (2.2.2) or turn the knob (2.2.3, 2.2.4). After setting the desired temperature, you can check the actual temperature by looking at the light indicators (2.2.7) or by holding down the button + or - (2.2.5, 2.2.6) for 5 seconds. The temperature value will appear on the display. In models with this function, it is not provided.
Recommendation. The recommended temperature for your freezer is -14. If you need to freeze products, it is recommended to set the temperature level to -24.
Remember that the temperature inside the freezer compartments depends on the ambient temperature, the location of the appliance, and the frequency of door openings.
2.3 Operating modes of the freezer compartment.
Quick cooling mode. When this mode is enabled, the freezer compartment will maintain a lower temperature for 52 hours. It is recommended to use this mode when a large quantity of products is placed in the freezer compartment. Enable the mode 24 hours before placing the products. To enable or disable: press * (2.3.1) for SUPER (2.3.2, 2.3.3, 2.3.4); in models b, c, and d, the operation of the appliance in this mode is indicated on the display.
ECO mode: ECO mode allows significant energy savings while maintaining a constant temperature in the freezer. The appliance continues to operate in this
mode with the power supply disconnected. When this mode is enabled, it is recommended to store all products on the middle shelves. To enable or disable this mode, use the ECO button (2.3.5, 2.3.6). In models b, c, and d, the operation of the appliance in this mode is shown on the display; in models d and e, this mode is not available.
Quick cooling mode: Place the bottle or bottles in the freezer compartment and press the button, holding it pressed for a few seconds until the symbol (2.3.7) appears on the display. Intensive cooling will be provided in the freezer compartment for 15 minutes; after this time, operation in this mode will end, and the symbol will flash with an audible signal for 20 minutes. This serves as a warning that the bottle must be removed to prevent it from freezing. The audible signal can be turned off by pressing the button again. If the operation of the refrigerator in this mode is interrupted due to a power failure, then after the power supply is restored, the mode will be considered completed, and an audible signal will sound.
Lock: This mode is recommended to prevent accidental changes in the appliance settings, as well as to prevent children from operating it. When the lock mode is enabled, the symbol will be displayed on the display. Press (2.3.8) and (2.3.9). While the lock mode is enabled, the display will alternately show the normal display. In models d and e, this mode is not available.
2.4 Product distribution. The temperature inside the freezer is not uniform in different parts. In some zones, the temperature is lower than in others. To ensure proper storage of products, products should be placed in the appropriate zones (2.4.1):
- Medium-sized compartments. 2.3 Frozen food zone.
- Twist Ice (optional component).
- Medium-sized compartments.
- Medium-sized compartments.
- Large-sized compartment.
- Medium-sized compartments.
2.5 TWIST ICE. This is an accessory of the freezer that allows you to produce up to 24 ice cubes. If your appliance has Twist Ice, remove the
ice cube tray (2.5.1). Fill the tray with water up to the level (2.5.2). Install the tray in place, trying not to spill water (2.5.3).
After 2 hours, the ice cubes are ready for use. Turn both ends of the tray until all the ice cubes come out (2.5.4, 2.5.5). To remove them, open the lower drawer (2.5.6).
2.6 Switching on the freezer. Press and hold the button for 3 seconds. Press repeatedly until any numerical temperature value appears on the display (2.6.1, 2.6.2). Then turn the knob to the OFF position (2.6.3, 2.6.4). In models with a display, the indicator light will turn on; in models without a display, the light will turn on.
2.7 Recommendations for operation.
Do not keep the doors open longer than necessary, and do not place hot products in the freezer. This will make the freezer more efficient and you will avoid increased energy consumption.
If the freezer is equipped with a FROST function, do not block the ventilation openings and leave some space between products, allowing air to circulate between them.
Do not place bottles of carbonated drinks or glass bottles with liquid in the freezer, as they may burst.
To prevent products from drying out, place them in the refrigerator in airtight containers.
Do not consume very cold ice cream or heavily frozen products, as this may cause mouth burns.
To use the space in the freezer compartment to the maximum (2.4.1), you can remove the baskets (5), small drawers (4), and Twist Ice (3) from it. The lower baskets (6 and 7) and the upper lids (1 and 2) must remain in the freezer compartment so that the appliance's consumption characteristics do not change.
3
Cleaning and care
3.1 Cleaning the interior. To clean the interior, use a sponge or cloth dampened with a mild soda solution to remove unpleasant odors.
It is strictly forbidden to use cleaning agents, abrasive detergents, or solvents for cleaning.
3.2 Defrosting. It is recommended to use plastic scrapers for defrosting.
It is recommended to clean the drain hole regularly.
3.3 Cleaning accessories. It is forbidden to clean accessories in dishwashers. Hand washing with a sponge or cloth is recommended.
Spare and replacement filters must be stored out of the reach of children; if a child swallows them in large quantities, it can be dangerous.

Diagnostics of the device condition

4.1 Door open. In all models, except for the freezer, if the door remains open for more than 1 minute, the symbol lights up and the appliance emits an audible signal (4.1.1, 4.1.2, 4.1.3). After closing the door, the signal is canceled.
4.2 Power failure.
Open the freezer door as rarely as possible. If the temperature inside the appliance rises above -11°C, then:
In models AB and above, an audible alarm about interruption of freezing is emitted for 30 minutes. The alarm can be stopped by pressing any button.
In addition, the SUPER mode is activated automatically. To turn it off, press the SUPER button until it turns off automatically.
- The red indicator lights up (4.1.1, 4.1.2, 4.1.3).
Checking the preservation state of products.
In the appliance, the following designations may appear.
SF Products have thawed, so their consumption is safe, and storage can be continued.
I Products have partially thawed, and before use they must be cooked, subjected to heat treatment.
A2 Products have thawed, and they cannot be consumed. Products should be thrown away.
In the appliance, the user must independently assess the state of preservation of products and act accordingly to the situation.
4.3 Other warning designations that may appear.
Automatic defrosting cycles ensure product safety, however it is necessary to contact the technical support service.
If the appliance has a component that functions incorrectly, there is no threat to product safety, however it is necessary to contact the technical support service.
4.4 Normal noises during operation of the freezer.
During operation, the appliance may emit various sounds that are normal phenomena, and there is no need to worry about them.
- The circulation of refrigerant along the contours may cause bubbling noise.
- During compressor operation, a loud hum or light knocking may occur, especially when it is turned on.
- When expanding and contracting the materials used, crackling or popping sounds may be emitted. The air movement due to the fan operation may produce a slight hum.
Do not attempt to repair the appliance yourself. In case of malfunction, contact the technical support service.

Safety Rules
Do not block the ventilation grille. Be careful not to damage the cooling circuit. Do not use electrical appliances inside the freezer unless the use of a specific appliance is recommended by the manufacturer.
Do not use mechanical devices or other means to accelerate the defrosting process, except those recommended by the manufacturer. This appliance is not intended for use by persons (including children) with reduced physical, sensory or mental capabilities, or lack of experience and knowledge, unless they have been given supervision or instruction concerning use of the appliance by a person responsible for their safety. Children should be supervised to ensure that they do not play with the appliance. If the supply cord is damaged, it must be replaced by the manufacturer, its service agent or similarly qualified persons in order to avoid a hazard.
Even when the freezer is switched off, the freezer chamber remains under voltage.

Environmental Protection

The design of this freezer incorporates requirements and aspects related to environmental protection.
The appliance uses refrigerant R600a, which is environmentally harmless. Take care of the environment. For efficient operation of the freezer, follow the recommendations regarding temperature levels depending on the required mode. If the freezer will not be used for an extended period, disconnect it from the power supply. This will reduce electricity consumption and ensure its economy. Try not to keep the door open longer than necessary, as this leads to increased electricity consumption. Disposal of waste materials from electrical and electronic appliances.
The symbol indicates that this device must not be disposed of in regular household waste containers. At the end of its service life, the refrigerator should be taken to a designated collection point. Recycling of household electrical appliances helps prevent negative consequences for health and the environment, and also saves energy and resources. For more information, contact the relevant authorities in your country/region or the retailer where you purchased the refrigerator.
Instruction manual
Jell Jn paaa aal grrll.6.1
43+10+
(2.3.1)SN-Tg
1
1.2
jia 1.1.2)① jil bi
(2.1.2)
(4.1.2,3.1.2)
de ailllls b
jll j jnil Joo"on"yssg
Jai
a
jglge baiialllalai jiaolai jy

1.3
1
i
2.3
1
1

4
1.4
1 1 jil jai lai Lioe
aclaw jgi gawaia jorll jaiy
(3.1.4,2.1.4,1.1.4)
∴ y = - ( x - 2) 2 + 9 = - x2 + 4x + 5
2.4
jglii yldll 8,1yall loic jSaa 1ya Jil
:11
cd ab
30 30
a
SLJSSIgjKJSSUPER
Jell bia 1y Jall
Therefore, in right triangle ABD:
Therefore, the area of triangle OBC equals the area of triangle COD plus the area of triangle BOC.
4.4
.
Therefore, sin angle BAC = BC/AC = 3
. 5dK
L
a 1

Therefore, cos α = 1

∴ k 1 = k 2

-

4y
A
R600A,
i 1
aalll 1
- IDENTIFICATION
- INSTALLATION
- USE
- FREEZER FUNCTIONS
- RECOMMENDATIONS FOR USE
- MAINTENANCE AND CLEANING
- TROUBLESHOOTING
- CHECKING THE FOOD PRESERVATION STATUS
- SOME OTHER ALARMS THAT MAY APPEAR ARE
- NORMAL NOISES IN THE FREEZER
- DO NOT TAMPER WITH YOUR FREEZER IN AN ATTEMPT TO REPAIR IT. CALL FOR SERVICE
- SAFETY
- THE ENVIRONMENT
- THIS FREEZER WAS DESIGNED WITH ENVIRONMENTAL CONSERVATION IN MIND
- WASTE MANAGEMENT OF ELECTRICAL AND ELECTRONIC APPLIANCES
- OPERATING THE APPLIANCE
- OPERATING MODES OF THE FREEZER COMPARTMENT
- CLEANING AND CARE
- DIAGNOSTICS OF THE DEVICE CONDITION
- SAFETY RULES
- ENVIRONMENTAL PROTECTION
- INSTRUCTION MANUAL
Brand : FAGOR
Model : ZFK1745X
Category : Freezer