LE920 - Surveillance Camera Lupus Electronics - Free user manual and instructions
Find the device manual for free LE920 Lupus Electronics in PDF.
User questions about LE920 Lupus Electronics
0 question about this device. Answer the ones you know or ask your own.
Ask a new question about this device
Download the instructions for your Surveillance Camera in PDF format for free! Find your manual LE920 - Lupus Electronics and take your electronic device back in hand. On this page are published all the documents necessary for the use of your device. LE920 by Lupus Electronics.
USER MANUAL LE920 Lupus Electronics
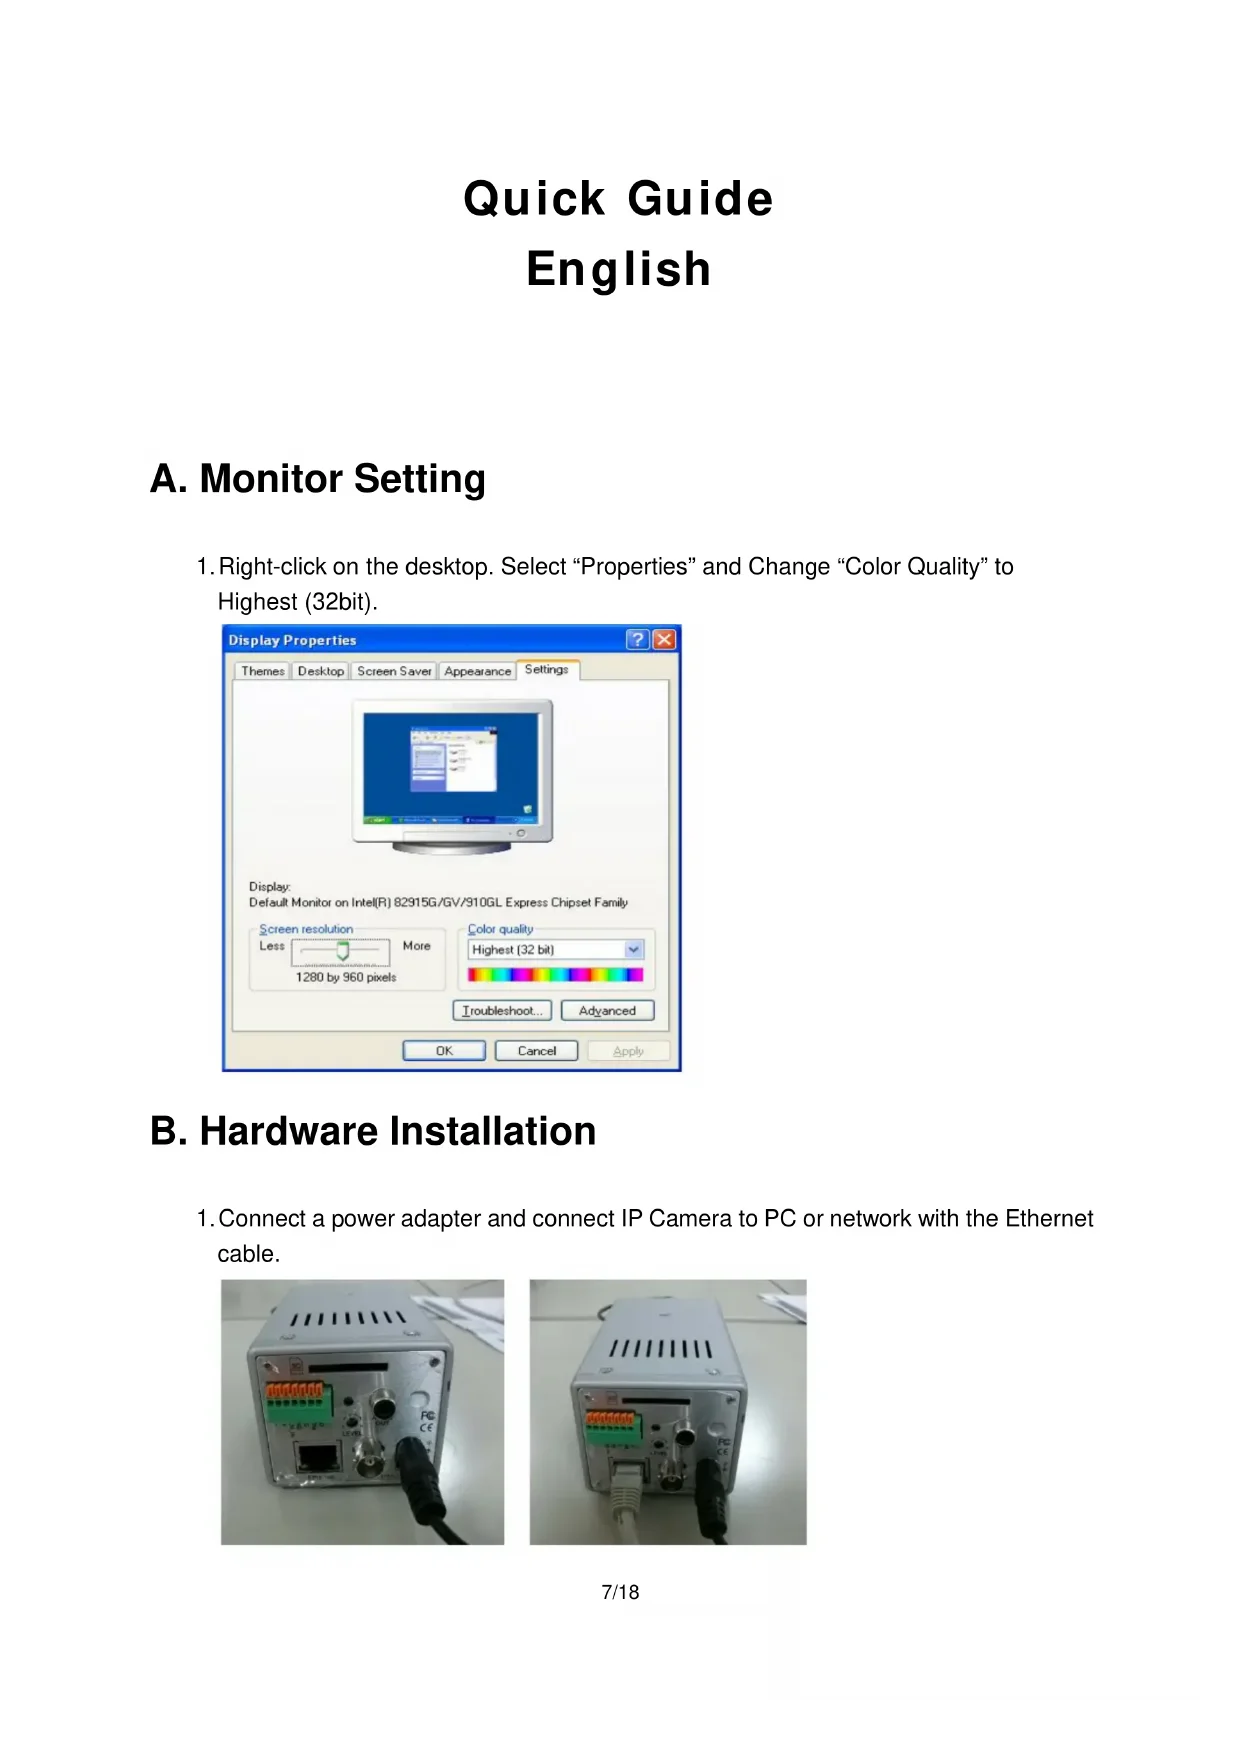
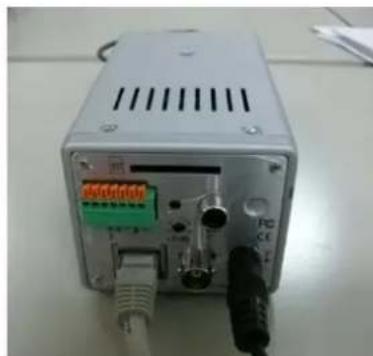
B. Hardware Installation
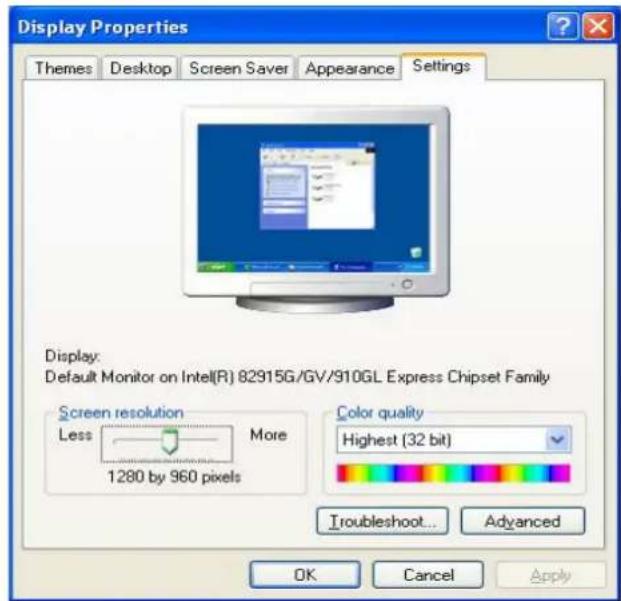
- Right-click on the desktop. Select "Properties" and Change "Color Quality" to Highest (32bit).
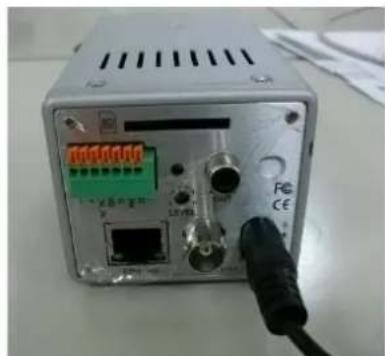
B. Hardware Installation
- Connect a power adapter and connect IP Camera to PC or network with the Ethernet cable.
C. IP Assignment
- Use "IP Installer" to assign an IP address of IP CAMERA.
The IP Installer software is in the attached CD.
- IP Installer supports two languages.
a. LUPUSNET_1pInstallerGER_V2.2.exe : Deutsche Version
b. LUPUSNET_1pInstallerEN_V2.2.exe: Englische Version
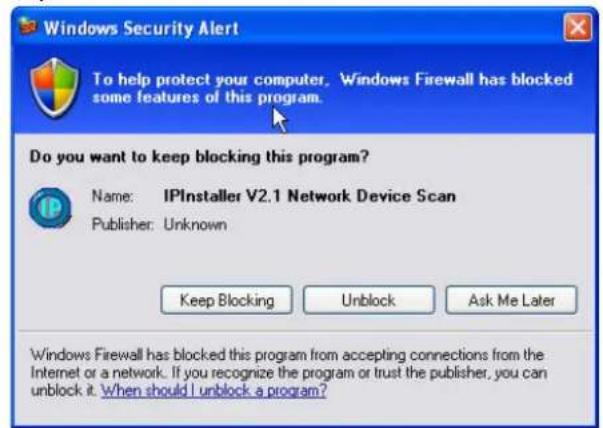
3.OS:WindowsXPSP2orabove.If the following"WindowsSecurityAlert"pickup, please click "Unblock".
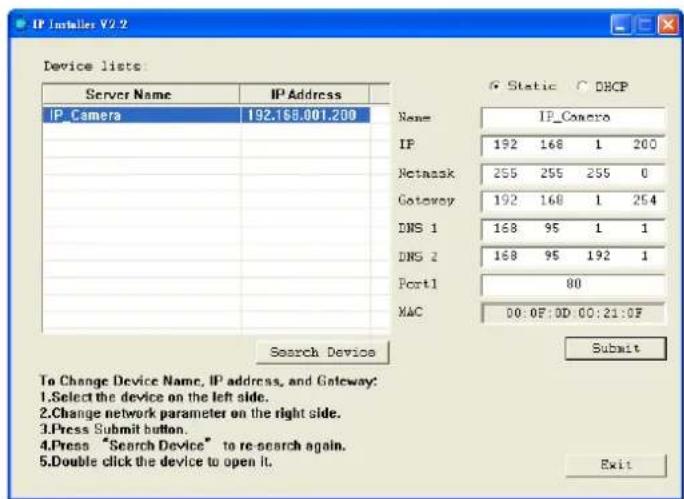
- The GUI of IP Installer is as follows (Default IP: 192.168.1.200).
-
IP Installer will search all IP Cameras connected on LAN. The user can click "Search Device" to search again.
-
Click one of IP Cameras listed on the left side of IP Installer, then the network configuration of that IP Camera will be listed on the right side. If parameters changed, click on "Submit". Then, the network configuration will be changed. Just
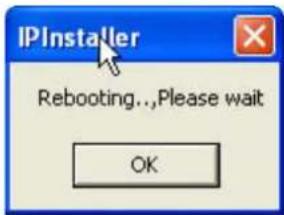
click "OK" to reboot IP Camera.
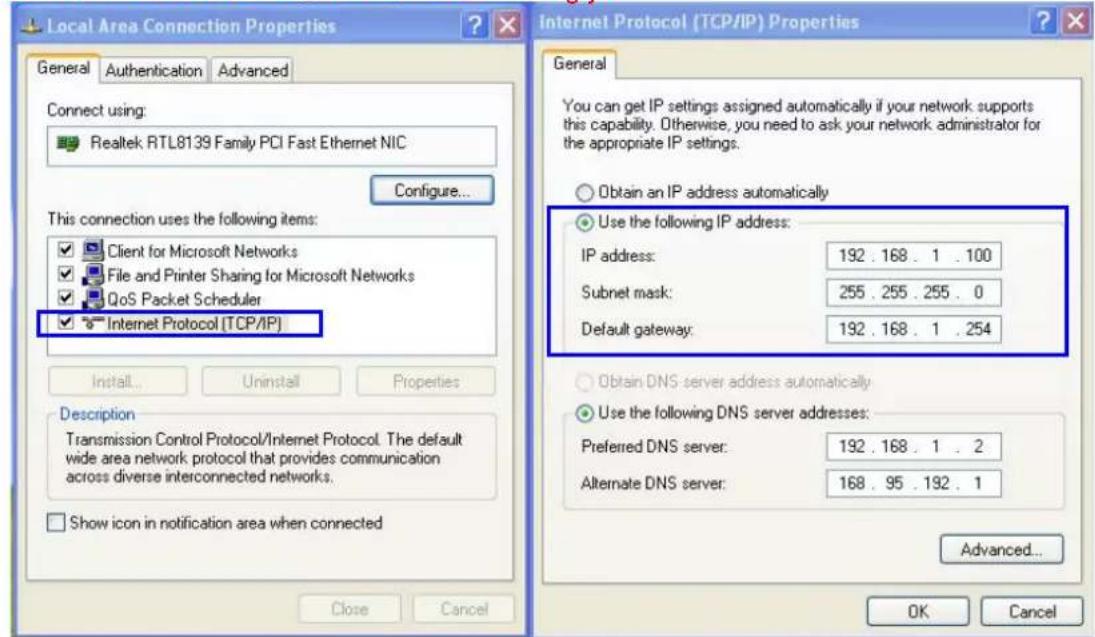
- Please make sure the subnet of IP address of PC and IP CAM is the same.
The same Subnet:
IP CAM IP address: 192.168.1.200
PC IP address: 192.168.1.100
Different Subnets:
IP CAM IP address: 192.168.2.200
PC IP address: 192.168.1.100
Change PC IP address:
Control Panel Network Connections Local Area Connection Properties Internet Protocol (TCP/IP) Properties
Please make sure your IP Camera and PC have the same Subnet. If not, please change IP Camera IP subnet or PC IP subnet accordingly.
-
A quick way to access remote monitoring is to left-click the mouse twice on a selected IP Camera listed on "Device list" of IP Installer. An IE browser will be opened.
-
Then, please key in the default "User name: admin", and "password: admin" in the following message box.
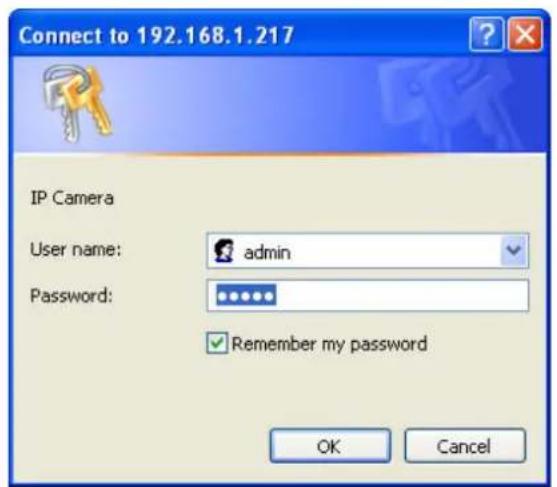
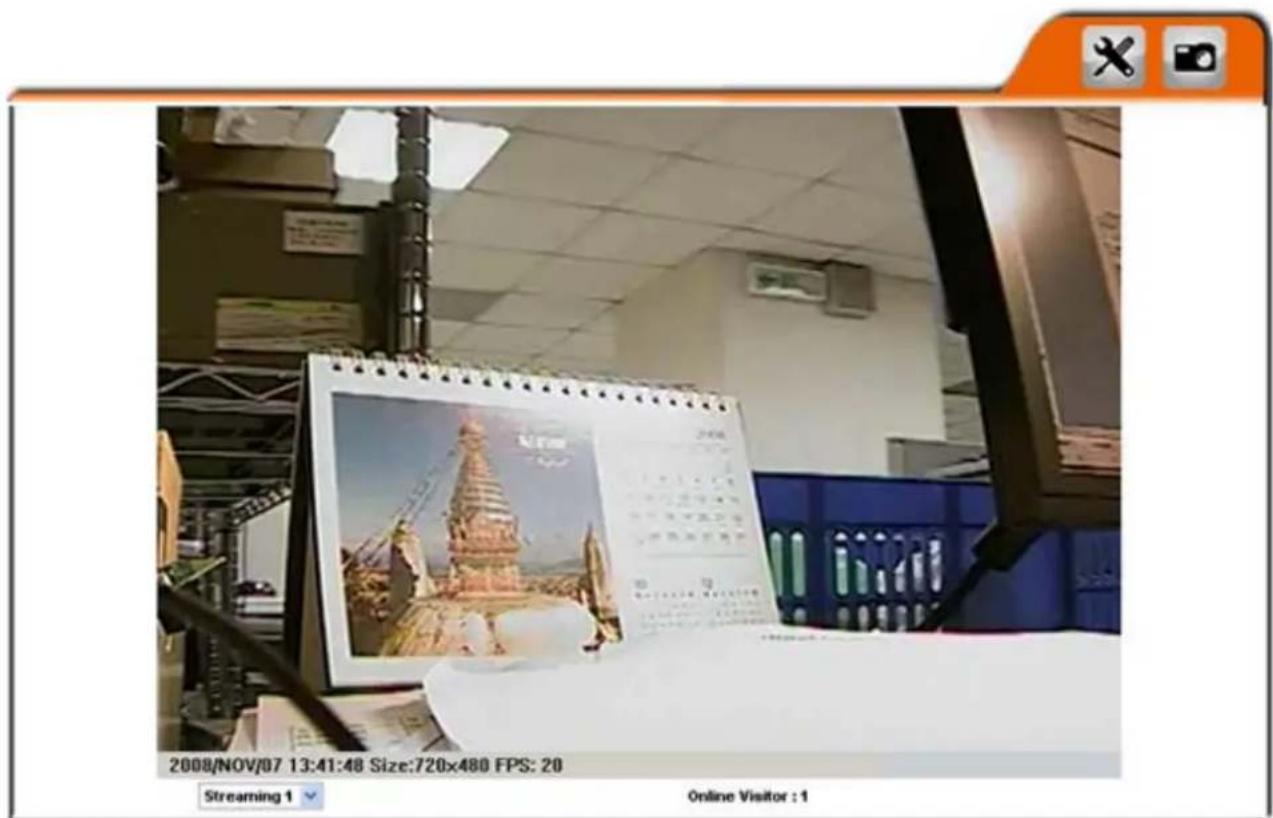
- If the user name and password are input correctly, the following web page will be displayed.
D. Factory Default
- If the user name, password, and IP address are lost, please follow the following instructions.
- Unplug the power adapter first. Then, press the following button in the back of IP Camera.

- Plug in the power adapter and do not release the button during the IP Camera booting.
- It will take around 30 seconds to boot the IP Camera.
- Release the button after the IP Camera finishes booting.
- Reconnect the IP Camera with the default IP address (http://192.168.1.200), user name (admin), and password (admin).
E. SD card Compatibility List
SanDisk 128M
Transcend 128M 80X
SanDisk 256M
Transcend 256M 80X
SanDisk 512M
Transcend 512M 80X
SanDisk 1G
Transcend 1G 80X
SanDisk 2G
Transcend 2G 80X
SanDisk 4G
Transcend 4G 80X
Guide Rapide Français
a. LUPUSNET_IpInstallerGER_V2.2.exe : German Version
b. LUPUSNET_IpInstallerEN_V2.2.exe: English Version