
503273 - Network card / adapter IC Intracom - Free user manual and instructions
Find the device manual for free 503273 IC Intracom in PDF.

| Product Type | Powerline (HomePlug) Ethernet HD Adapter |
| Brand | IC Intracom (INTELLINET NETWORK SOLUTIONS) |
| Model | 503273 |
| Approximate Dimensions | 10 x 6 x 3 cm |
| Approximate Weight | 150 g |
| Power Supply | Via mains socket (100-240 V AC), integrated surge protection |
| Network Interface | Ethernet 10/100 Mbps (RJ45) |
| Main Functions | Data transmission via electrical wiring, private network creation, password security, autoscan |
| Included Software | PowerPacket Utility (configuration, diagnostics, firmware update) |
| Compatibility | HomePlug AV, compatible with all Powerline HD adapters |
| LED Indicators | Power, Link/Act, Ethernet (status and activity) |
| Maintenance and Cleaning | Dust with a dry, soft cloth. Do not use liquid products. |
| Safety | Plug directly into wall socket, avoid surge-protected power strips. Network password for privacy. |
| Spare Parts and Reparability | Not user serviceable. No spare parts available. Contact customer support if malfunctioning. |
| General Information | Complies with R&TTE Directive 1999/5/EC. WEEE symbols: do not dispose with household waste. Warranty: see www.intellinet-network.com/warranty. |
Frequently Asked Questions - 503273 IC Intracom
User questions about 503273 IC Intracom
0 question about this device. Answer the ones you know or ask your own.
Ask a new question about this device
Download the instructions for your Network card / adapter in PDF format for free! Find your manual 503273 - IC Intracom and take your electronic device back in hand. On this page are published all the documents necessary for the use of your device. 503273 by IC Intracom.
USER MANUAL 503273 IC Intracom
This guide presents the basic steps to set up and operate this device. For detailed instructions and specifications, refer to the user manual on the CD enclosed with this product or at www.intellinet-network.com.
HARDWARE INSTALLATION
To connect the existing AC wiring in your home or office to the Ethernet network, this device can be attached to a LAN switch; however, each PC or server plugged into an AC outlet needs to be directly attached to its own PowerLine adapter.
- Using the included Ethernet cable, connect the adapter to the computer.
- Plug the adapter into an AC outlet. IMPORTANT: Because the adapter sends data over home or office AC power lines, plug it directly into an electrical outlet — not a universal power supply or power strip with surge protection. The adapter has its own power filter for protection against surges.
Using a Router
To connect the adapter to a router, disconnect the network cable from the PC and connect it to the uplink port of the router. If only a LAN port is available on the router, use a crossover cable to connect the adapter to the router.
LED STATUS DESCRIPTION
Power On Power on
Off Power off
Link/Act On AC power line port detects another PowerLine device
Blinking Looking for more PowerLine devices
Off AC power line port is not detecting another PowerLine device
Ethernet On Ethernet port link
Blinking Ethernet activity
Off No Ethernet port link
CONFIGURATION UTILITY
After installing the adapter, run the Setup Wizard to install the PowerPacket Configuration Utility. Use this utility to check the PC's direct connection to the AC power network, to search for PowerLine devices on your network, and to set up security using a network password. NOTE: If you want the devices on your PowerLine network to share high-speed Internet access, connect the adapter to a router after you run the PowerPacket Configuration Utility (see above).
Utility Installation
- Insert the included utility CD, then run the setup.exe program to begin the installation. (You can also run the setup program using the CD's autorun program.)
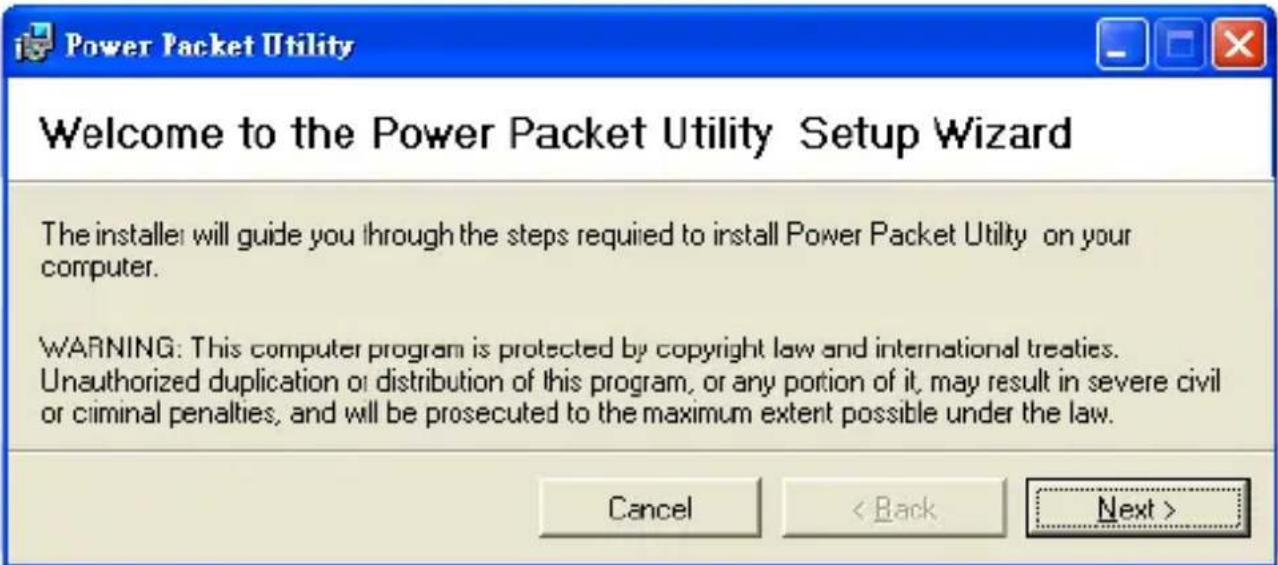
- When the Welcome to the PowerPacket Utility Setup Wizard screen displays, click "Next."
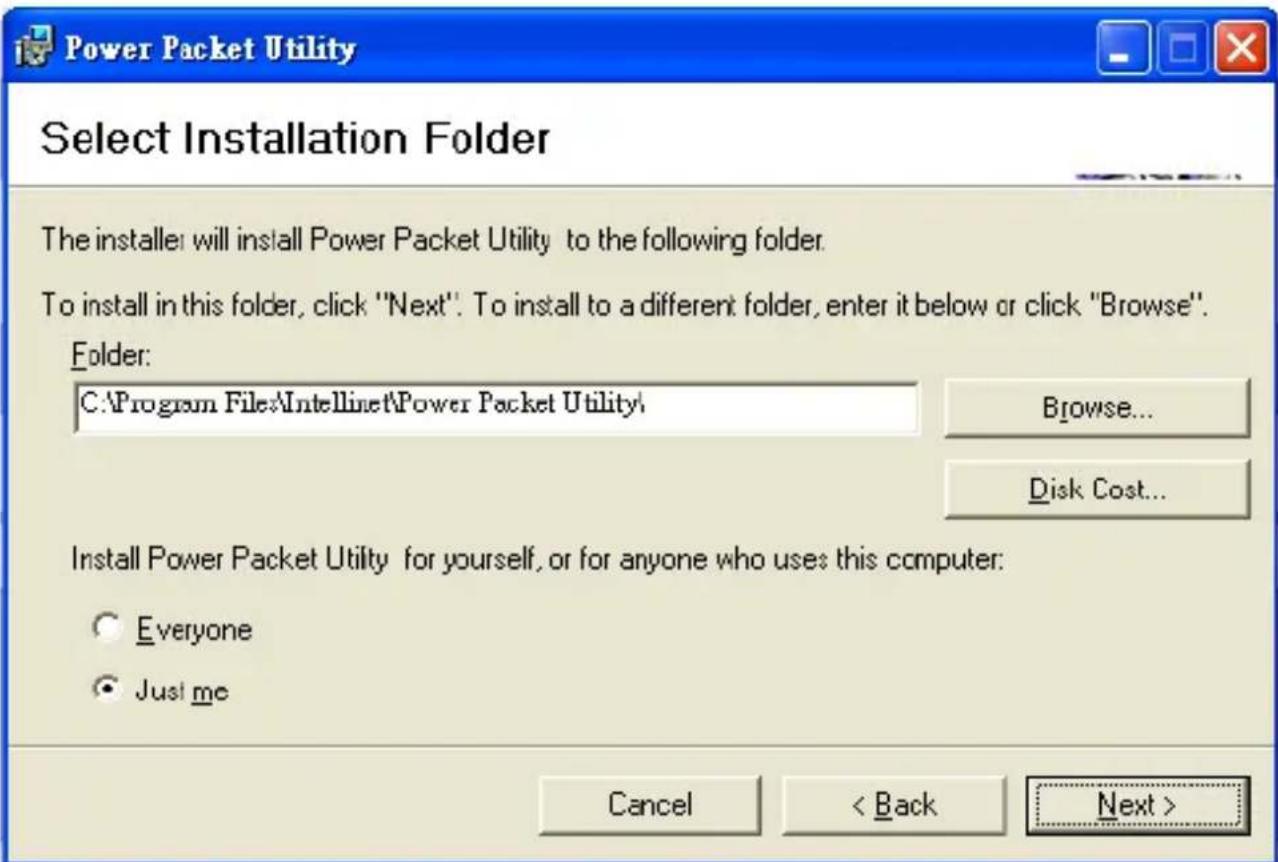
- When the Select Installation Folder screen displays, click "Browse" to select a folder other than the one in the "Folder" field, and click "Next."
- When the Confirm Installation screen displays, click "Next"; when the Installation Complete screen displays, click "Close."
Accessing the PowerPacket Configuration Utility
To open the configuration utility, double-click the PowerPacket Utility icon on your desktop or click to open the "PowerPacket Utility" listing in your Start menu. The Main screen will display initially, with tabs for three other menu/screen options — Privacy, Diagnostics and About — also described below.

Main
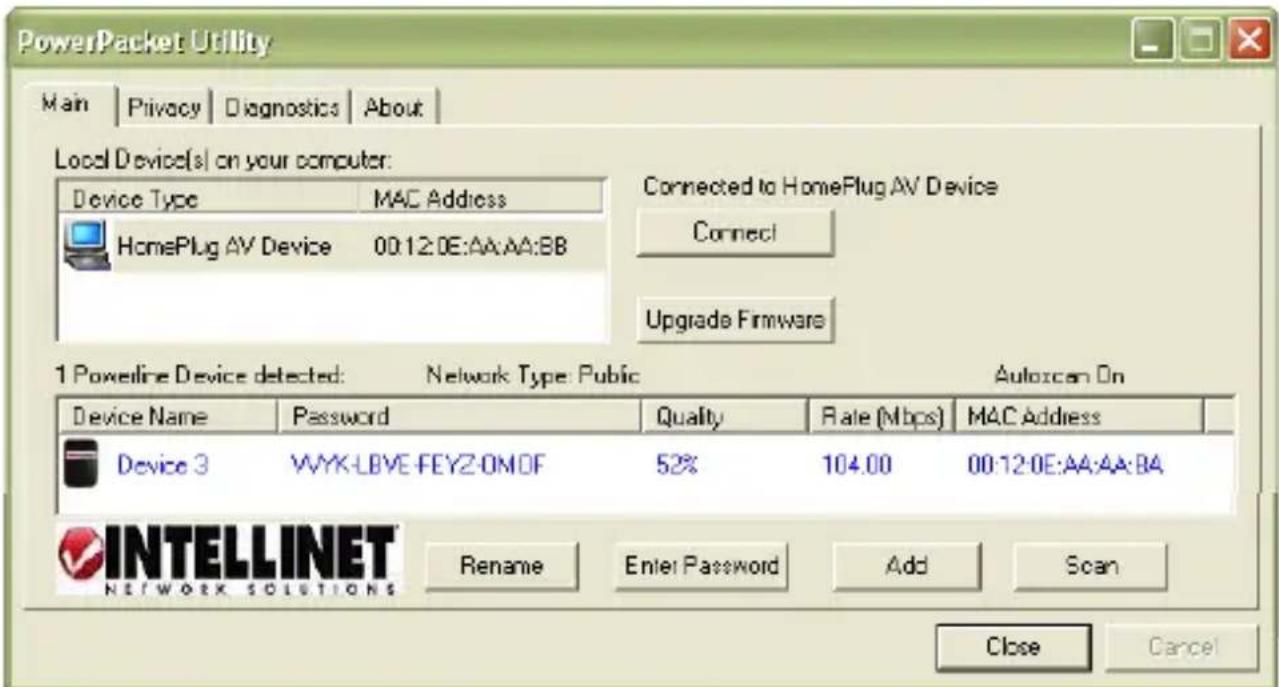
Local Device(s) on your computer: Devices connected locally to the host computer are listed here. In most cases, only one device will be presented.
Connect: To choose a device if there's more than one connected, highlight it and click "Connect."
Upgrade Firmware: Click to update one of the two files (PIB and NVM) that may require updating (and display the screen below). NOTE: Proceed only if you know that a new
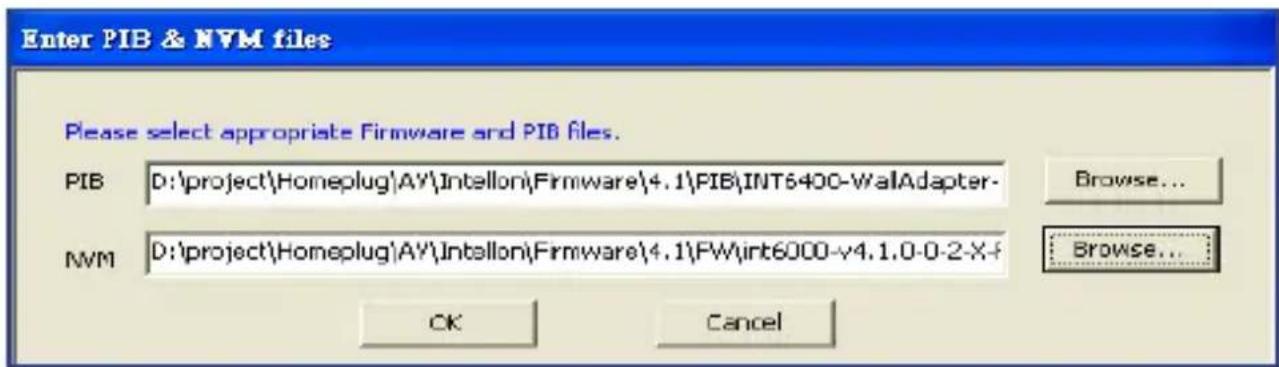
version of either file is available on the INTELLINET Web site or if you're instructed to do so by INTELLINET Tech Support.
Device Detected / Network Type / Autoscan: The number or status of these three references is listed just above the lower-panel window: a count of all HomePlug AV remote devices discovered to be currently on the logical network; public or private network; and whether Autoscan is on or off.
Device Name: Devices are listed in this column by their default name (as shown) unless re-defined by clicking "Rename" or by highlighting the name and editing it in place.
An icon is usually displayed alongside the name, with a color distinction between
HomePlug 1.0 and Turbo devices.
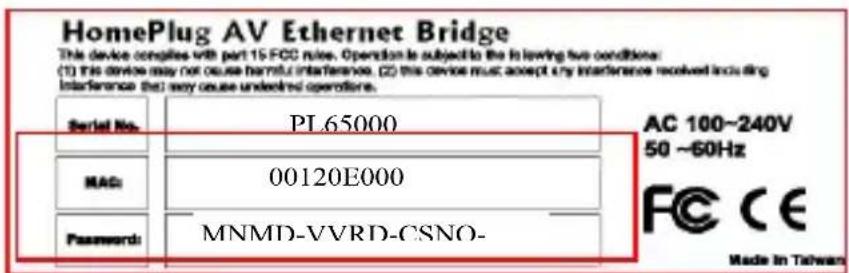
Password: By default, this column is blank; however, clicking "Enter Password" with a device selected on the Main screen allows you to set the password, which is required when creating a private network. When the Set Device Password screen displays, the name of the selected device appears above the "Password" text field. Enter the password, which appears on the back panel of the adapter, then click "OK." NOTE: The password is accepted regardless of the font case entered, but do include any dashes that separate the four- character
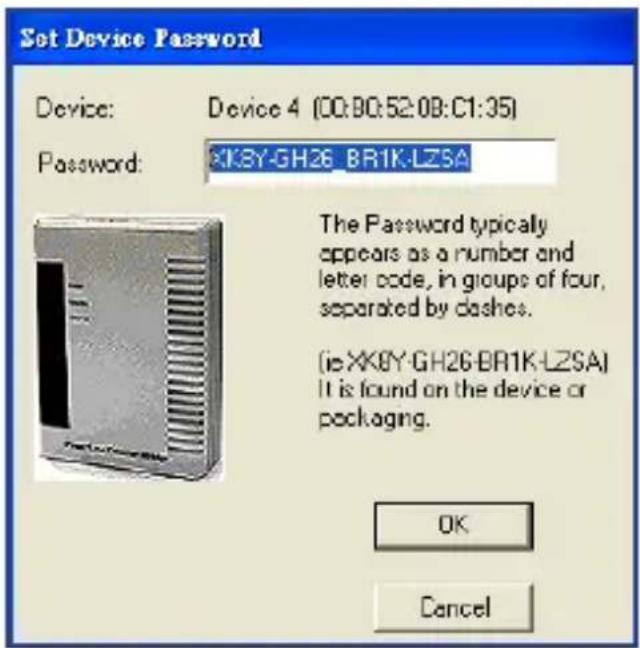
alphanumeric segments. A confirmation box appears if the password was correctly entered. If a device isn't found on the network, a
notification prompt will appear, along with suggested solutions.
Quality: This indicates the quality of the transmission between two devices.
Rate: This indicates the current transmission rate of the selected device.
MAC Address: This is the device's MAC address.
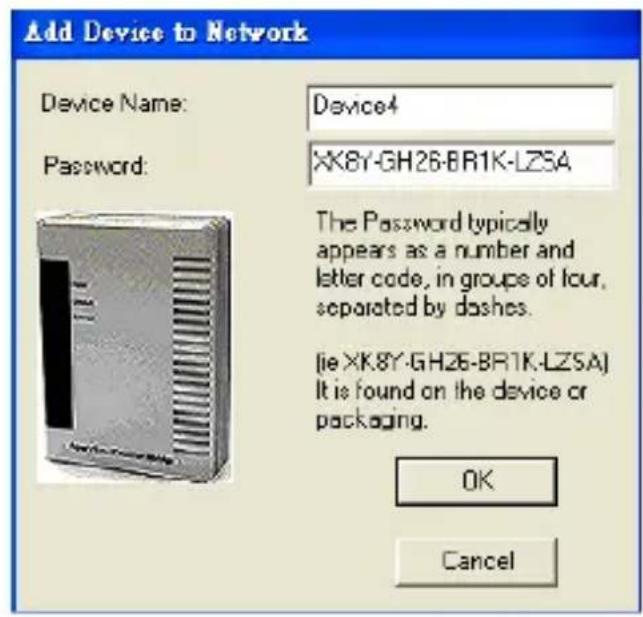
Add: Click to add a remote device to the existing network. When the Add Device to Network screen displays, fill in the "Device Name" and "Password" text fields, then click "OK." A confirmation box appears if the entries are correct. If a device isn't found on the network, a notification prompt will appear, along with suggested solutions.
Scan: Click to search for devices that are connected to the network. By default, the utility automatically scans every few seconds and updates the Local Devices list.
Privacy
This screen allows you to maintain security for the logical network and select the devices to be included in the network.
Private Network Name: All PowerLine HD devices are set with a default logical network (network name): This is normally "HomePlugAV," and will display in the text field when you click "Use Default (Public Network)." Alternatively, you can change to a private network by changing the network name (network password) of devices. You can always reset to the PowerLine HD network (Public) by entering "HomePlugAV" as the network name.
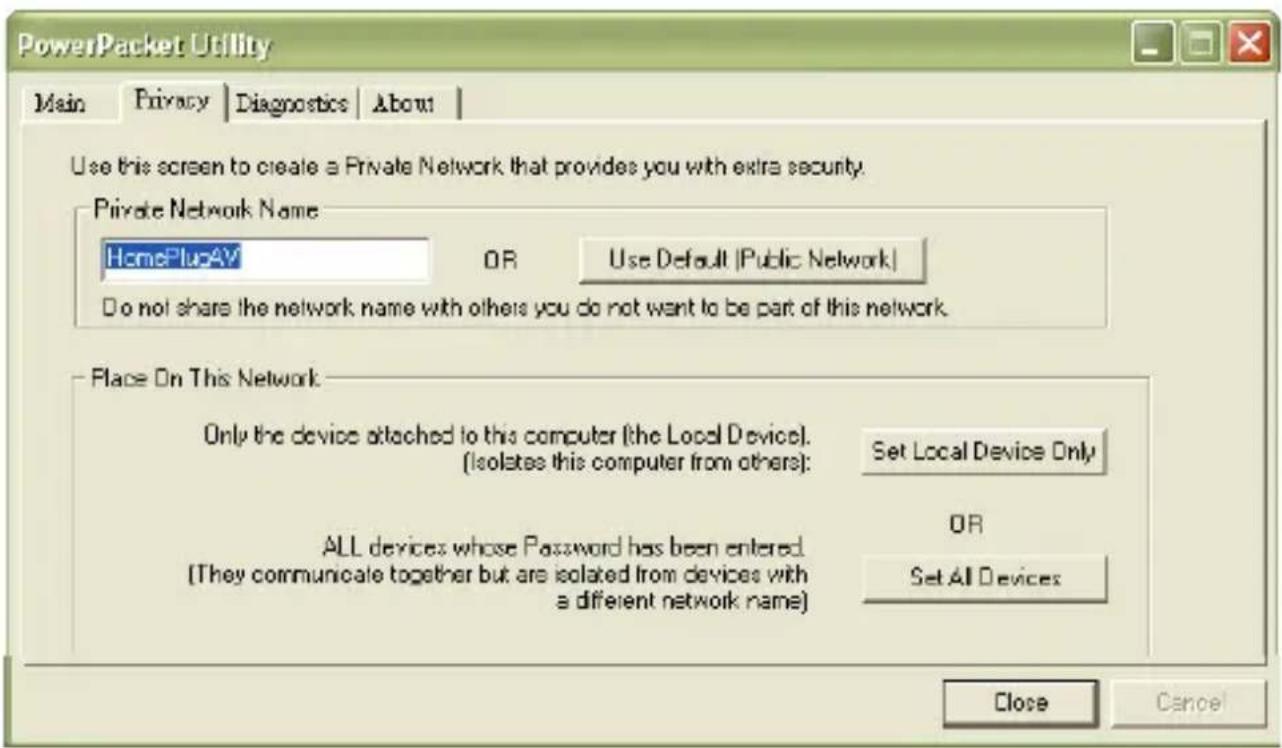
Set Local Device Only: Click to change the network name (network password) of the local device. If a new network password is entered, all the devices previously listed on the Main screen will no longer be present in the new network, effectively preventing the local devices from communicating with the devices in the "old" logical network.
Devices previously set up with the same logical network (same network name) will appear in the device list after selecting this option.
Set All Devices: Click to change the logical network of all devices that appear on the Main screen and whose passwords had been entered for the same logical network. A dialog window will appear to report the success of this operation. For devices whose passwords were not entered, this operation will fail and a failure message will display.
Diagnostics
This screen displays detailed information about both local and remote devices.
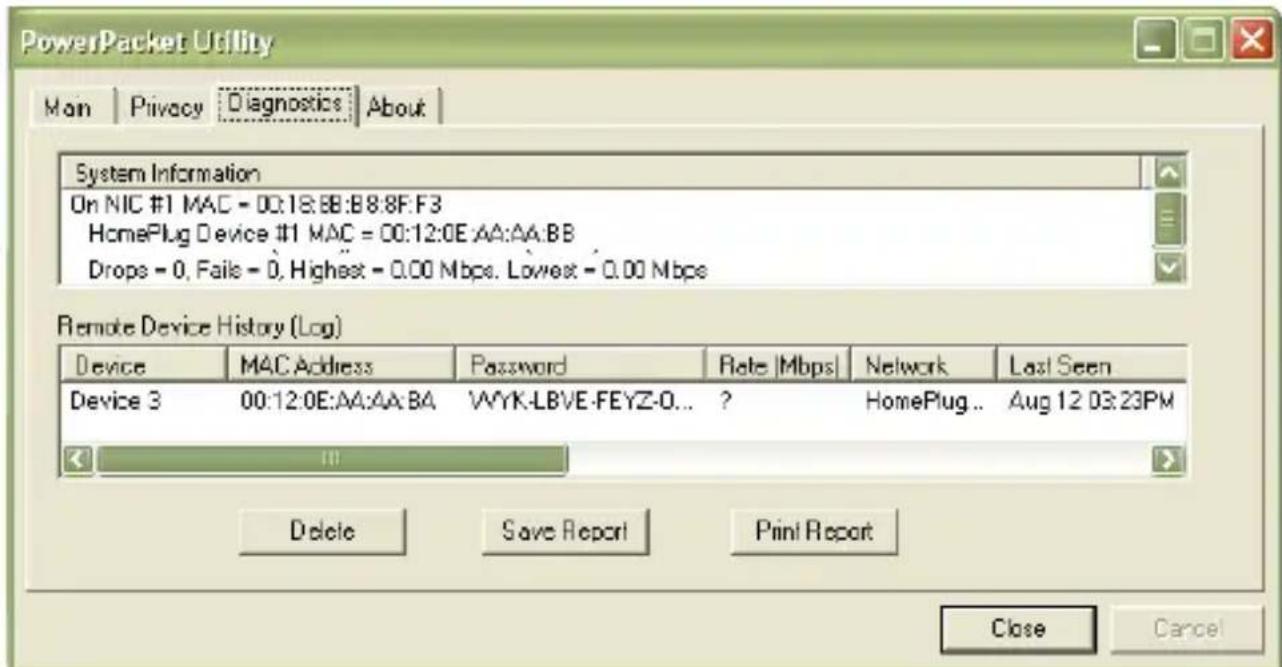
System Information: This window presents device names, user names, firmware versions, packets sent/dropped/missed/failed, and other data that can be useful in monitoring and identifying a device.
Remote Device History (Log): This window presents historical data of all remote devices. Those currently active on the logical network show a transfer rate in the "Rate" column; those that are inactive or no longer exist on the network show a question mark (?) and a "Last Seen" time/date.
Delete / Save Report / Print Report: Diagnostics data can be removed, printed or saved to a text file for later reference by clicking the appropriate button.
About
This screen simply displays the software version and company information. The Autoscan feature can also be selected/activated on this screen.
Power Packet Utility


Welcome to the Power Packet Utility Setup Wizard
The installer will guide you through the steps required to install Power Packet Utility on your computer.
WARNING: This computer program is protected by copyright law and international treaties. Unauthorized duplication or distribution of this program, or any portion of it, may result in severe civil or criminal penalties, and will be prosecuted to the maximum extent possible under the law.
Cancel
<Back
Next>
Power Packet Utility


Select Installation Folder
The installer will install Power Packet Utility to the following folder
To install in this folder, click "Next". To install to a different folder, enter it below or click "Browse".
Folder:
C. Program Files\IntellNet\Power Packet Utility
Browse...
Disk Cost...
Install Power Packet Utility for yourself, or for anyone who uses this computer:
Everyone
Juslmo
Cancel
<Back
Next>

Power Packet Utility Setup.msi


Power Packet Utility


Welcome to the Power Packet Utility Setup Wizard
The installer will guide you through the steps required to install Power Packet Utility on your computer.
WARNING: This computer program is protected by copyright law and international treaties. Unauthorized duplication or distribution of this program, or any portion of it, may result in severe civil or criminal penalties, and will be prosecuted to the maximum extent possible under the law.
Cancel
<Back
Next>
Power Packet Utility


Select Installation Folder
The installer will install Power Packet Utility to the following folder:
To install in this folder, click "Next". To install to a different folder, enter it below or click "Browse".
Folder:
C. Program Files\IntellNet\Power Packet Utility
Browse...
Disk Cost...
Install Power Packet Utility for yourself, or for anyone who uses this computer:

Everyone

Just me
Cancel
<Back
Next>

Power Packet Utility Setup.msi


Power Packet Utility Setup.msi


Disposal of Electric and Electronic Equipment
(applicable in the European Union and other European countries with separate collection systems)
ENGLISH
This symbol on the product or its packaging indicates that this product shall not be treated as household waste.

Instead, it should be taken to an applicable collection point for the recycling of electrical and electronic equipment. By ensuring this product is disposed of correctly, you will help prevent potential negative consequences to the environment and human health, which could otherwise be caused by inappropriate waste handling of this product. If your equipment contains easily removable batteries or accumulators, dispose of these separately according to your local requirements. The recycling of materials will help to conserve natural resources. For more
detailed information about recycling of this product, contact your local city office, your household waste disposal service or the shop where you purchased this product. In countries outside of the EU: If you wish to discard this product, contact your local authorities and ask for the correct manner of disposal.
DEUtsCH
ENGLISH: For warranty information, go to www.intellinet-network.com/warranty.
This equipment has been tested and found to comply with the limits for a Class B digital device, pursuant to Part 15 of Federal Communications Commission (FCC) Rules. These limits are designed to provide reasonable protection against harmful interference in a residential installation. This equipment generates, uses and can radiate radio frequency energy, and if not installed and used in accordance with the instructions may cause harmful interference to radio communications. However, there is no guarantee that interference will not occur in a particular installation. If this equipment does cause harmful interference to radio or television reception, which can be determined by turning the equipment off and on, the user is encouraged to try to correct the interference by one or more of the following measures:
- Reorient or relocate the receiving antenna.
- Increase the separation between the equipment and the receiver.
- Connect the equipment to an outlet on a circuit different from the receiver.
- Consult the dealer or an experienced radio/TV technician for help.
R&TTE
ENGLISH
This device complies with the requirements of the R&TTE Directive 1999/5/EC.
DEUTsCH
INTELLINET NETWORK SOLUTIONS offers a complete line of active and passive networking products. Ask your local computer dealer for more information or visit www.intellinet-network.com.
All products mentioned are trademarks or registered trademarks of their respective owners.
