see & hear the difference.
Main Menu Controls.... 10
Now Playing Controls (Music Playback) ...... 13
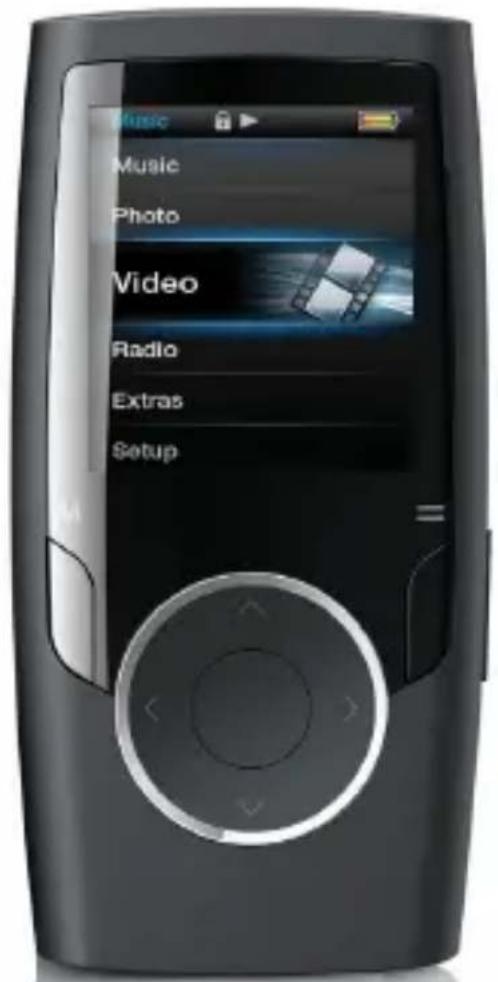
Please make sure that the items shown below are included in the package. Should an item be missing, please contact the local retailer from which you purchased this product.
MP15751.
USB Cable2.
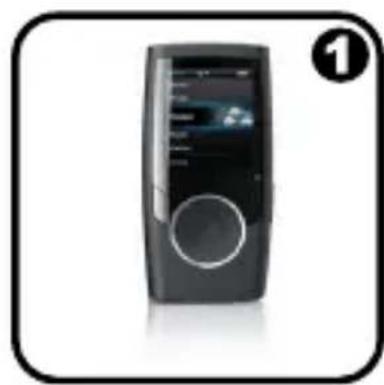
Instruction Manual & Documentation3.
Professional Stereo Headphones4.
Installation CD5.
Your player has an integrated rechargeable battery. Upon initial use, the battery should be charged fully to ensure optimal performance and battery life.
If the player has not been used in a while, the battery may need to be recharged overnight (about 8 hours).
The battery used in this device may present a fire or chemical burn if mistreated. Do not disassemble, incinerate, or heat the battery. Do not leave the battery in a place subject to direct sunlight, or in a car with its windows closed.
Do not connect the player to a power source other than that which is indicated here or on the label as this may result in the risk of fire or electric shock.
Your player can be charged through a USB computer connection. Use the supplied USB cable to connect the player to a high-power USB port of a computer. The computer must be powered on and not in sleep mode.
When the player is connected and charging, a USB symbol will be displayed on the player's screen.
Reset the player if it should freeze and not respond or otherwise malfunction.
Disconnect your player if it is connected to a 1. computer.
You may want to disable the controls to avoid turning on the player or activating the controls accidentally when it is in your pocket or bag.
A lock icon will appear on the screen when the controls are disabled. Re-enable the controls to continue.
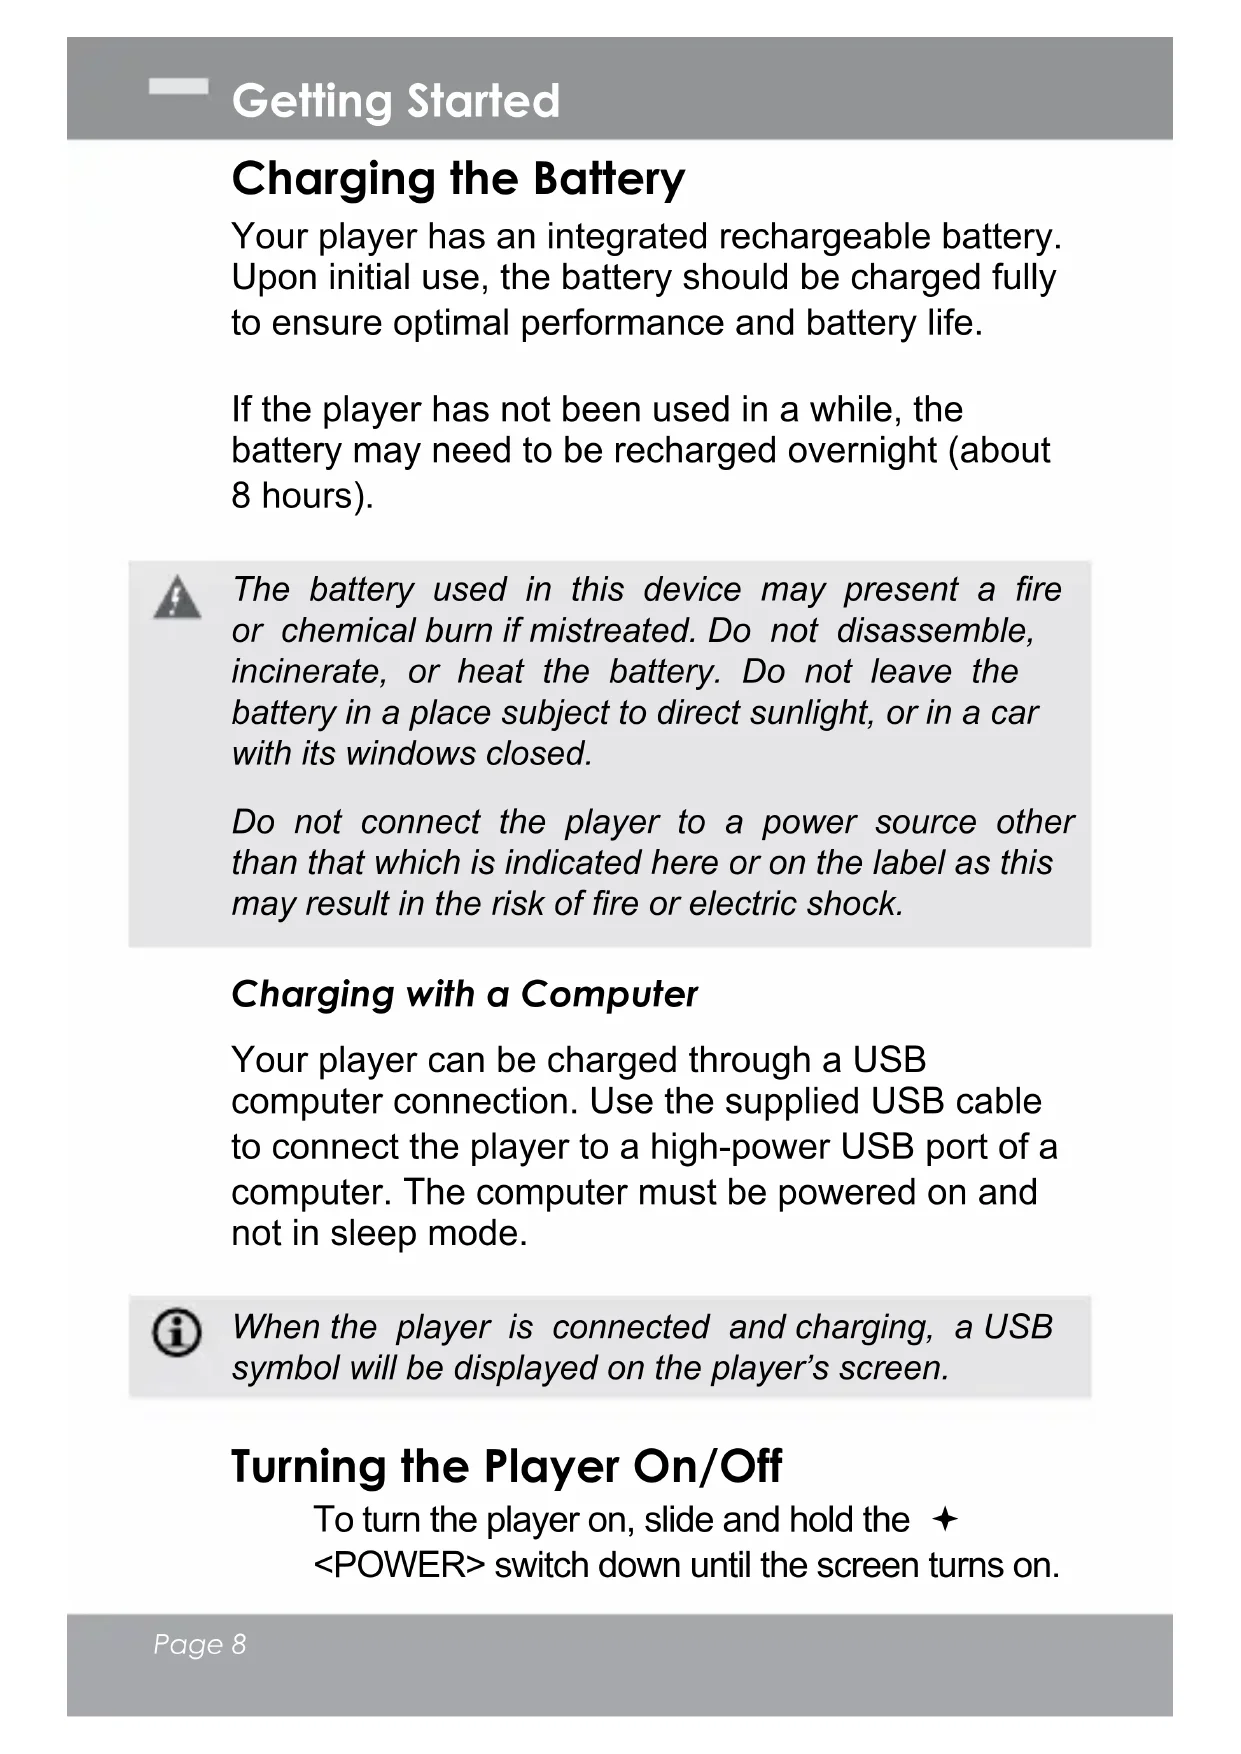
When you turn on the player, you will see the Main menu. The Main menu gives you access to the different function modes of your player. These modes are:
Music: Browse and play music.
Photo: Browse and view Photos.
Video: Browse and play Videos.
Text: Browse and read text files.
Explorer: Browse all files.
Setup: Adjust the player's options.
Select "Extras" from the Main Menu to get the "Text" and "Explorer" menus.
If you have loaded new music files onto the player, the music library will need to be refreshed when you enter Music mode. This process may take several minutes. You will not be able to access the Music Browser screen until you refresh the music library.
For more information about how to get music onto your player, please refer to the section "Transferring Files to the Player".
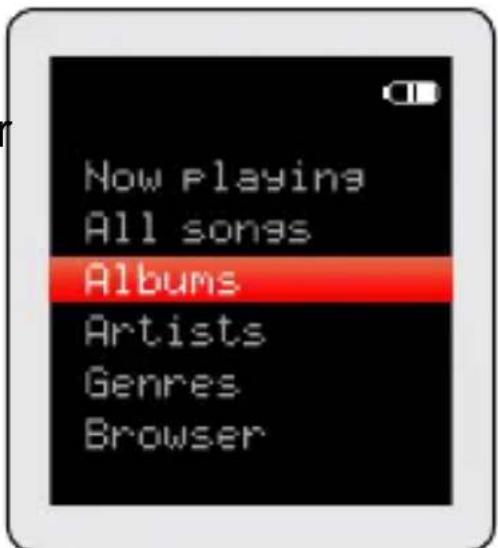
When you choose MUSIC mode from the Main menu, you will see the Music Browser screen. You can choose to browse your music by song name, album, artist, or genre, or you may choose “Browser” to view the music files and folders on the player.
If your music files contain ID3 song information tags, you will be able to view your tracks by Artist, Album, or Genre. To view all files (including those that do not contain ID3 information), select “All Songs” or use the “Browser” option.
If music is already playing, you will have the additional option to return to the Now Playing screen.
Lyric display requires a “.LRC” lyric file which may be found on the internet or may be created with a Lyric file editor. Lyric files can contain synchronized timing information as well as lyric information.
Lyric files must have the same name as its corresponding music file (e.g., “SongTitle1.lrc” and “SongTitle1.mp3”) and must be placed in the same directory.
Select "Browser" from the Music Browser screen.1.
Use the Browser controls to select a song to add.2.
This quick Play List can be played from the Quick Option menu of the Now Playing screen (see page 15 for more details).
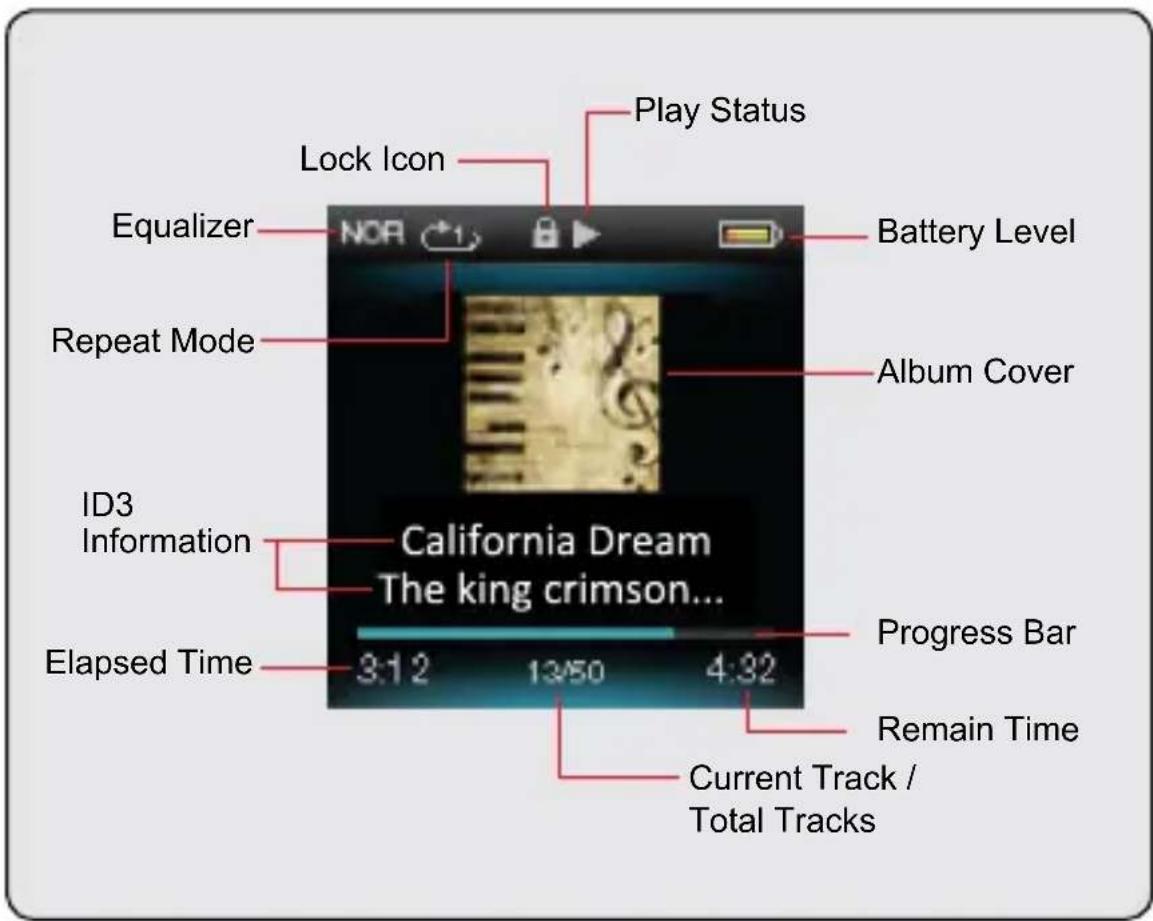
When a song is playing, the Now Playing screen appears (see below).
The following functions may be performed from the Now Playing screen.
★
Music Mode
Equalizer
Select a digital equalizer preset to optimize the way the player processes audio signals. The options are: Normal, Pop, Rock, Classic, Jazz, and Bass.
Repeat
Change the repeat options to adjust the order in which tracks are played.
Item Description No Repeat Play tracks in normal order and no repeat. One Play the current track repeatedly. All Play all tracks repeatedly. RandomAll Play all tracks in random order. Dir Normal Repeat all tracks in the current folder.
Library
Return to the Music Browser screen.
Play List
Selet "Play List" and then "My List" to play a list of your favorite songs.
To add songs to the list, see the section "Music Mode > Music Browser Controls > Using the Quick Playlist".
Lyric
Set the Lyric display ON or OFF.
Browse for and view your photo files (JPG and BMP).
For more information about how to get Photos onto your player, please refer to the section "Transferring Files to the Player".
Photo Browser Controls
When you choose PhotoS mode from the Main menu, you will see the Photo Browser screen. Your Photos will be displayed as thumbnail images.
text_image
Photo
1
2
3
5 Photos
Folder1.
Photo2.
Name of the 3.
selected folder
or photo
Use the Photo Browser to find all Photo files loaded on your player.
Function Key Action To browse through the Photos & folders Press,,,, To select/view an item Press To return to the previous screen Press To return to the Main menu Hold
Photo Viewer Controls
To view a Photo, browse through the thumbnail Photos and then press .
The following functions may be performed from the Photo Viewer screen.
Function Key Action To view the next Photo Press To view the previous Photo Press To start or stop slideshow mode Press To return to the Photo Browser screen Press To return to the Main menu Hold
Browse for and play your Video files.
Your player supports MTV files encoded at 128 x 128 and 20 fps. Videos may need to be encoded with the included software for device playback.
For more information about converting video, please refer to the section "Video Conversion".
For more information about how to get Videos onto your player, please refer to the section “Transferring Files to the Player”.
Video Browser Controls
When you choose VideoS mode from the Main menu, you will see the Video Browser screen.
Use the Video Browser to find all Video files loaded on your player.
Function Key Action To browse through the list of Video files & folders Pressor To select/play an item Press To return to the previous screen Press To return to the Main menu Hold
Video Playback Controls
The following functions may be performed from the Now Playing screen.
Function Key Action To play the next Video Press To play the previous Video Press To forward-scan quickly through the current Video Hold To reverse-scan quickly through the current Video Hold To pause/resume playback Press To adjust the volume level Pressor To return to the Video Browser screen Press To return to the Main menu Hold
Read text files loaded on your player (TXT).
For more information about how to get text files onto your player, please refer to the section "Transferring Files to the Player".
Text Browser Controls
When you choose Text from the Main menu, you will see the Text Browser Screen.
Choose "All EBooks" to view all text files on the player.
If text is already reading, you will have the ★ additional option to return to the “Now Reading” screen.
Use the Text Browser to find all text files loaded on your player.
Function Key Action To browse through the list of text files & folders Press <UP> or <DOWN> To select/view an item Press <ENTER> To return to the previous screen Press <MENU>
Text Reader Controls
The following functions may be performed from the Text Display screen.
Function Key Action To read the next page Press To read the previous page Press To toggle the auto-scroll function Press To return to the Text Browser screen Press To return to the Main menu Hold
The Quick Option menu gives you easy access to your player's option settings.
Press to access the Quick Option menu.
Go to Page
Skip to a page directly.
Press or to select a field to adjust.
Press or to adjust the selected field.
Press to confirm. ★
Bookmark
Select to Save Bookmark, Load Bookmark, or Delete Bookmark.
Text Mode
The player will display the previous bookmark(s) after you confirm Bookmark from the Quick Option menu.
Press or to display the desired ★ bookmark, then press :
Save Bookmark: Save the current location ☆ as a bookmark.
Load Bookmark: Open (go to) the desired ★ bookmark that you chosen just now.
Delete Bookmark: Delete the desired ★ bookmark that you chosen just now.
When you toogle to the last bookmark, press ✦ twice to save the current location as a new bookmark.
Set Font Color
Set the text color of the display.
Auto Scroll
Set the auto page scroll on or off.
Auto Scroll Time
Press or to adjust the amount of time between pages during Auto Scroll mode.
Enter Explorer mode to view and delete folders and files loaded on your player.
To enter Explorer mode, select and confirm EXPLORER from the Main Menu.
Explorer Controls
When you choose EXPLORER mode from the Main menu, you will see the File Explorer screen. You can find and delete files or folders from the player.
Function Key Action To browse through the list of files & folders Pressor To select a folder Press To return to the previous screen Press To delete a selected item Press To return to the Main menu Hold
Enter the Setup mode to set your player's system options.
To enter Settings mode, select SETUP in the Main menu.
Function Key Action To browse through the options Press <UP> or <DOWN> To select an item Press To cancel and return to the previous screen Press <MENU> To return to the Main menu Hold
The following options are available. Some of these options may be set from the Quick Option menus.
Item Description Display Backlight Adjust the duration of time (in seconds) that the backlight will remain on after a key press. A setting of “Always On” will keep the backlight on continuously. Time Sleep Set a sleep timer to turn the player off automatically. Language -- Set the language that the on-screen menus appear in. Sys Tools Format It may become necessary to format your player if data or files become corrupt. You may choose either Quick or Complete formatting. A Complete format will take more time. Reset Restore all of the player's settings to their factory-default state. Sys Info View Firmware & Memory Usage information. Sort Sort all music that loaded on your player.Select “Force Sort” to update the music library immediately. This process may take several minutes if you have transferred music files to the player recently.
Connect the player to a computer with the USB 2.0 cable provided to:
Transfer files to and from your player ★
Perform basic file management functions.
text_image
USB Port
USB Port
Computer
Upon connection:
Your computer will automatically recognize the player as a Removable Disk.
Once you have opened the player's folder, simply drag and drop files to the player as you would a floppy disk.
Copy music files to the root directory.
Copy Video files to the "Video.DIR" folder ★
Copy photo files to the "PHOTO.DIR" folder
Copy text files to the "TEXT.DIR" folder.
Transferring Files to the Player
If you need further assistance with transferring files, please refer to your operating system's instruction manual or on-screen help. If you are using media management software such as iTunes, Winamp, or Windows Media Player, please refer to their documentation for support.
Transferring with Microsoft Windows
Open a file explorer window. Locate the files 1. you would like to transfer from your computer. Select the files/folders with the mouse and press CTRL-C (copy) on the keyboard.
Double-click the “My Computer” icon on 2. your desktop and then double-click the icon that represents your player (e.g., MP1575 / Removable Disk). The computer will display all files and folders currently stored in the player.
Press CTRL-V (paste) on the keyboard to 3. transfer the files you selected in Step 1 to the player.
Transferring with Macintosh OS X
Open a finder window. Locate the files you 1. would like to transfer from your computer. Select the files/folders with the mouse and press APPLE-C (copy) on the keyboard.
Click on the Removable Disk icon located on 2. the left side of the finder window. The computer will display all files and folders currently stored
Transferring Files to the Player
in the player.
Press APPLE-V (paste) on the keyboard to 3. transfer the files you selected in Step 1 to the player.
Disconnecting from a Computer
To avoid data loss or file/firmware corruption, disconnect the player as instructed below or as by your specific operating system.
Microsoft Windows
text_image
12:12
Double-click the green arrow in the taskbar 1. located on the lower-right side of the computer screen (Safely Remove Hardware).
Safely Remove 2. Hardware:
Select "USB Mass Storage Device" from the list that appears and then click on "Stop".
text_image
Unplug or Exact Hardware
Select the device you want to unplug or select, and then click Shop. When Windows notifies you that it is safe to do so unplug the device has your computer.
Hardware devices:
USB Max Storage Device
USB Max Storage MTP Modulator HD Player
Properties Stop
Display device components
Show Unplug/Exact Icon on the taskbox
Close
Stop a Hardware
Device: Select
“USB Mass
Storage Device" from the list that appears and then click on "OK".
When the “Safe to Remove Hardware” window 3. appears, click the OK button and disconnect the USB cable from the player and your computer.
Transferring Files to the Player
Macintosh OS X
On the left side of the Finder Window, identify 1. the appropriate Removable Disk icon.
Click on the "Eject" 2. arrow on the right of the Removable Disk icon.
text_image
USB Disk
Desktop
Disconnect the USB 3.
cable from the player and your computer.
For movie conversion, please use the software supplied in the CD ROM.
Troubleshooting
If you have a problem with this device, please read the troubleshooting guide below.
The player does not turn on.
Ensure that the player is fully charged. Try ★ charging the player overnight (8 hours).
Reset the player (use a paper clip to gently press the Reset button on the rear of the player) and try again.
Reset the player (use a paper clip to gently press the Reset button on the rear of the player) and try again.
I cannot transfer files to the player.
Ensure that your computer is running a supported operating system.
If using a USB extension cable, ensure that it is securely attached to the player and the PC, or try using another USB cable.
If you have connected the player through a ✦ USB hub, try connecting the player directly to your computer.
Ensure that the player's memory capacity is not full.
There is no sound during playback.
Check the volume level. ✦
Ensure that the headphones are attached securely to the player.
The sound quality of the music is poor.
Try playing the file on your computer. If the sound quality is still poor, try downloading the file again or re-encoding the file yourself.
Ensure that the bit rate of the file is not too low. ★ The higher the bit rate of the file, the better it will sound. The minimum recommended bitrate is 128kbps for MP3s and 96kbps for WMAs.
Try lowering the volume of the player. ✦
Ensure that the headphones are attached securely to the player.
The player will not play my music file.
Ensure that the file is in a compatible format. ✦
The file may be copy-protected and you no ★ longer have authorization to play this file. If you feel this is in error, please contact the service from which you downloaded the file.
The LCD characters are corrupted or something is wrong with the display.
Ensure that the correct menu language has ★ been set.
Troubleshooting
Reset the player (use a paper clip to gently press the Reset button on the rear of the player) and try again.
The player has malfunctioned.
Reset the player (use a paper clip to gently press the Reset button on the rear of the player) and try again.
Display Type 1.5” Full-Color LCD @ 128x128 Memory MP1575 FM 2GB: 2GB FlashMP1575 FM 4GB: 4GB FlashMP1575 FM 8GB: 8GB Flash Audio Format Support MP3, WMA Video Format Support MTV: 128x128, 20fps Photo Format Support JPG, BMP Song Info Support ID3, Windows Media FM Frequency Range 87.5 - 108.0MHz PC Interface USB 2.0 (MSC) Plug and Play Support Windows 7/2000/XP/VistaMacintosh OS X Audio Output 3.5mm Stereo (Headphone) Power Supply Rechargeable Lithium-PolymerBatteryUSB Charge Play Time Music: 10 hours* Unit Dimensions 1.65” x 3.18” x 0.38” (WHD)
Specifications and manual are subject to change without notice.
* Music play time is an estimated value based on playing an MP3 encoded at 128 kbps. Actual play time may vary depending on encoding method used and other factors.
www.difrnce.com
Call directly our support on number 0031(0)348409371
DIFRNCE®
see & hear the difference.
MP3- en Videospeler
MP1575
text_image
Music
Music
Photo
Video
Radio
Extras
Setup
Gebruikshandleiding
Gelieve deze handleiding aandachtig te lezen voordat u het toestel gebruikt.
Inhoud
INHOUD 2
INHOUD VERPAKKING 4
KENMERKEN 5
BEDIENINGEN IN HET KORT ....6
HOE MOET U BEGINNEN 8
De batterij laden 8
Opladen met een computer ....8
Uw speler aan/uit zetten 9
Resetten van de speler 9
HOOFDMENU ....10
Besturingen Hoofdmenu 10
MUZIEKMODUS 11
Muziekbrowserbedieningen.... 11
Bedieningen tijdens afspelen (Muziek afspelen) ..... 13
Sneloptiemenu 14
AFBEELDINGSMODUS 16
Fotobrowserbedieningen 16
Besturingen om foto's te bekijken.... 17
FILMMODUS ....18
Filmbrowserbedieningen ....18
Bedieningen om films af te spelen 19
TEXTMODUS ....20
Text Browserbedieningen ......20
Snel Optie Menu ......20
ZOEKMODUS ....23
Verkennerbesturingen....23
INSTELLINGENMODUS ......24
BESTANDEN OVERZETTEN NAAR UW COMPUTER ....26
Overzetten met Microsoft Windows ......27
Overzetten met Macintosh OS X ......27
Afkoppelen van een computer ....28
Microsoft Windows ......28
Macintosh OS X 29
VIDEO'S CONVERTEREN ....30
PROBLEMEN OPLOSSEN ....31
SPECIFICATIES ....34
Zorg ervoor dat de items hieronder in de verpakking zitten. Als er een item ontbreekt, neem dan contact op met de lokale kleinhandelaar bij wie u dit product hebt gekocht.
natural_image
Black electronic device with a circular button and display screen, enclosed in a rounded square frame (no visible text or symbols)
natural_image
Simple line drawing of a cable with connectors, no text or symbols present
natural_image
Simple line drawing of a closed book with a bookmark, no text or symbols present
natural_image
Black hardcover headphones with earbuds and earphones, shown in a plain square frame (no text or symbols visible)
text_image
DIFRnce®
and the 10% of the
moss®
In my life,
64.12%
The first edition of the
10% of the
10% of the
10% of the
10% of the
10% of the
10% of the
10% of the
10% of the
10% of the
10% of the
10% of the
10% of the
10% of the
10% of the
10% of the
10% of the
10% of the
5
MP1575 MP3 Speler1.
USB-kabel2.
Gebruikshandleiding & documentatie3.
Professionele stereokoptelefoon4.
Installatie CD5.
Geïntegreerd flashgeheugen ★
1.5" LCD full-color scherm ★
Speelt muziek, video, foto's en tekst ★
ID3- en LRC-ondersteuning voor weergave ★ song en gesynchroniseerde songtekst
USB 2.0 Hi-speed om snel bestanden over te ★ zetten
text_image
1
2
3
4
5
6
7
8
9
Reset
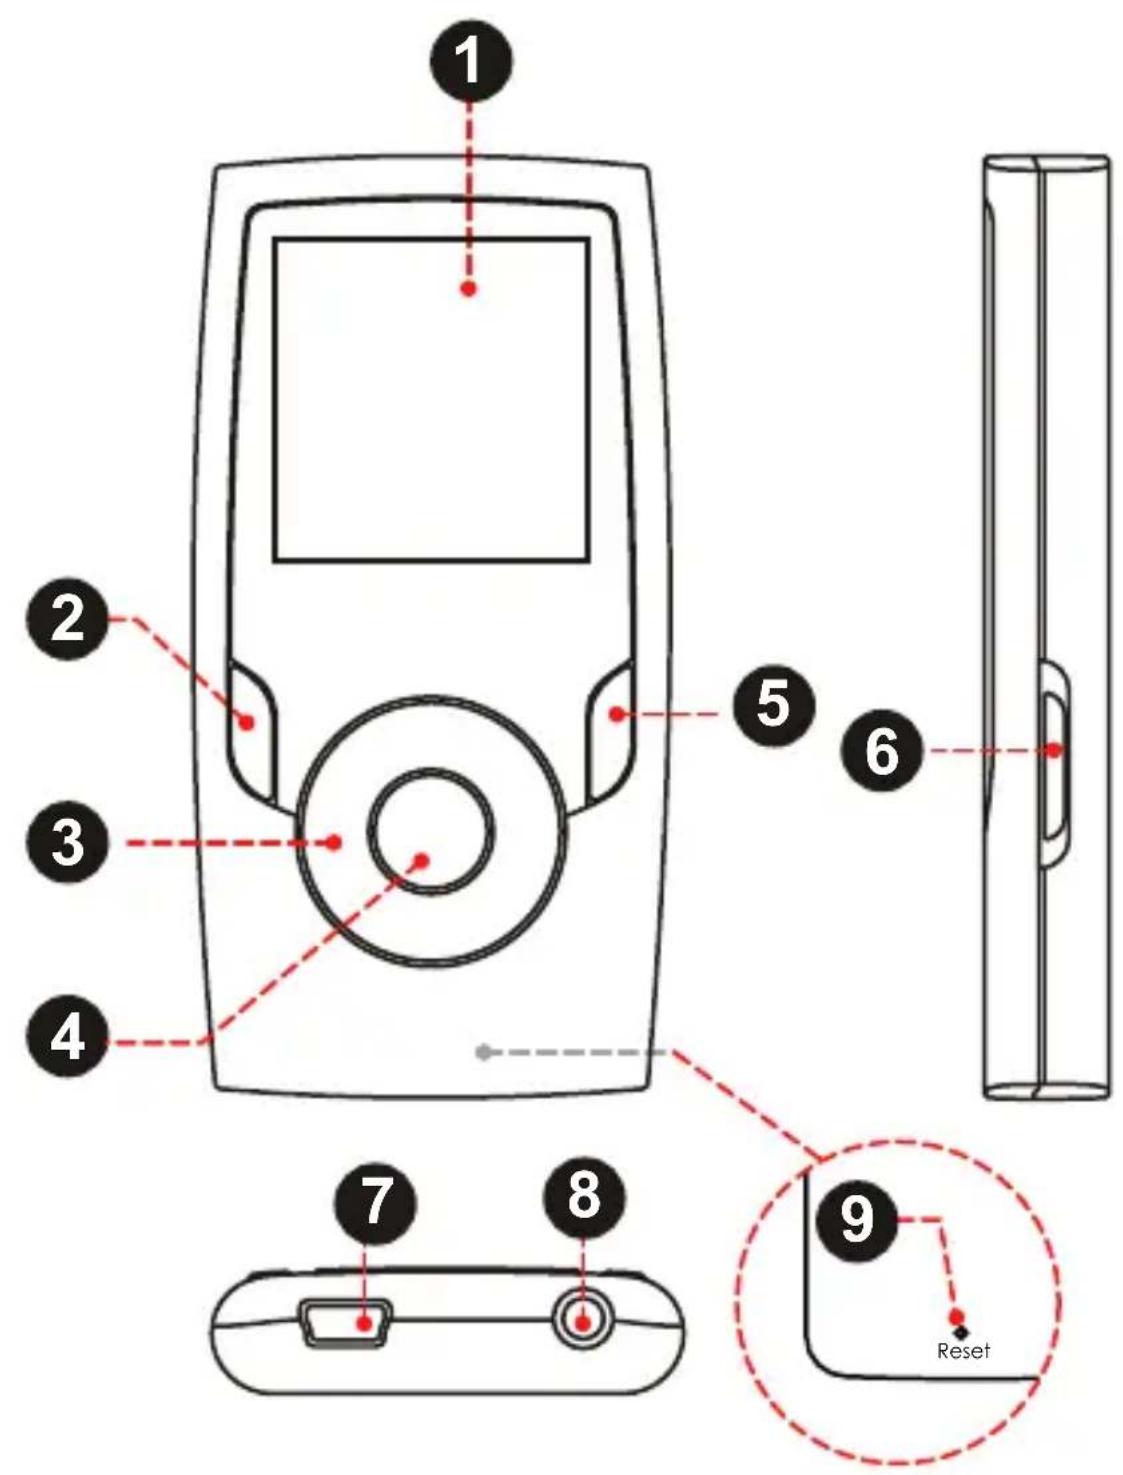
Zicht voorkant 1. LCD-scherm 2. Menuknop 3. Besturingsknoppen 4. Enter knop 5. Keuzerondje Zicht opzij 6. NetschakelaarSchuif en houd de schakelaaromlaag om de macht van despeler aan of uit. Zicht onderaan 7. USB-poort/laden 8. 3,5 mm stekerbus koptelefoon Zicht achteraan 9. Resetknop
De batterij laden
Uw speler is uitgerust met een ingebouwde herlaadbare batterij. Wanneer u de speler voor de eerste keer gebruikt, moet de batterij volledig worden opgeladen om een optimale werking en een optimale gebruiksduur van de batterij te waarborgen.
Als de speler een tijdje niet werd gebruikt, moet de batterij misschien een nacht opgeladen worden (ongeveer 8 uur).
De batterij die wordt gebruikt in dit toestel, kan branden of een chemische brandplek vertonen als ze verkeerd wordt behandeld. De batterij niet uit elkaar halen, verbranden of verwarmen. Laat de batterij niet liggen op een plaats waar ze wordt blootgesteld aan direct zonlicht of in een auto met gesloten ramen.
Sluit de speler niet aan op een andere stroombron dan hier of op het label wordt opgegeven, want dit kan gevaar voor een elektrische schok doen ontstaan.
Opladen met een computer
Uw speler kan worden opgeladen via een USB-computeraansluiting. Gebruik de USB-kabel die werd meegeleverd om de speler aan te sluiten op een krachtige USB-poort of een computer. De computer moet aan staan en mag niet in sleep modus staan.
Wanneer de speler is aanges loten en wordt opgeladen, verschijnt er een USB-symbool op het scherm van de
speler.
Uw speler aan/uit zetten
Als u de speler aan, schuif en houd de ★
schakelaar naar beneden totdat het scherm wordt ingeschakeld.
Als u de speler uit, schuif en houd de ★
schakelaar naar beneden totdat het scherm wordt uitgeschakeld.
Resetten van de speler
Reset uw speler als het zou vriezen en hij niet reageert of een andere functiestoornis vertoont.
Koppel uw speler af als hij is aangesloten op een 1. computer.
Gebruik een paperclip om zachtjes op de 2. Resetknop te drukken op de achterkant van de speler.
Uitzetten van de knoppen
Als de knop op 'OP SLOT' staan, werken de knoppen van de speler niet.
Om de knoppen uit te zetten, schuif de 3.
knop omhoog tot die in de 'Op Slot' positie klikt.
Om de knoppen aan te zetten, schuif de 4.
knop omlaag.
Wanneer u de speler aan zet, ziet u het Hoofdmenu. Het Hoofdmenu geeft u toegang tot de verschillende functiemodi van uw speler. Deze modi zijn:
Muziek:Muziek doorbladeren en afspelen.
Foto's: Foto's doorbladeren en afspelen.
Films: Films doorbladeren en afspelen.
Tekst: Tekstbestanden doorbladeren en lezen.
Verkenner: Alle bestanden doorbladeren.
Instellingen: De opties van de speler aanpassen.
Selecteer "Extra" in het hoofdmenu om de "Tekst" en de "Explorer" menu's.
Om door de verschillende modi te bladeren, ♦ druk op of .
Om een modus te selecteren, druk op de ★ knop.
Doorblader uw muziekbestanden en speel ze af.
Als u nieuwe muziekbestanden in uw speler hebt geladen, moet de muziekbibliotheek worden opgefrist wanneer u in de Muziekmodus gaat. Dit proces kan enkele minuten duren. U hebt geen toegang tot het Muziekbrowserscherm totdat u uw Muziekbibliotheek hebt opgefrist.
Voor meer informatie over hoe u muziek op uw speler kunt zetten, verwijzen we naar het hoofdstuk "Bestanden overzetten naar de speler".
Muziekbrowserbedieningen
Wanneer u de Muziekmodus kiest uit het hoofdmenu, ziet u het Muziekbrowserscherm. U kunt kiezen om door muziek te bladeren per songnaam, album, artiest, of genre, of u kunt “Browser” kiezen om de muziekbestanden en -folders op de speler te zien.
text_image
Now playing
All songs
Albums
Artists
Genres
Browser
Functie Gebruikte toets Om door de lijst te bladeren Druk opof Om een item te selecteren Druk op Om terug te keren naar het vorige scherm Druk op Om terug te keren naar het hoofdmenu Hou ingedrukt
Als uw muziekbestanden ID3-song informatietags bevat, kunt u uw tracks bekijken per artiest, album of genre. Om alle bestanden te bekijken (ook diegene die geen ID3-informatie bevatten), selecteer “All Songs” of gebruik de “Browser” optie.
Als er al muziek wordt afgespeeld, hebt u de bijkomende optie om terug te keren naar het Now Playing scherm.
Om liedjesteksten weer te geven hebt u een ".LRC" liedjestekstbestand nodig dat u terugvindt op het internet of dat u kunt creëren met een Lyric file editor. Liedjestekstbestanden bevatten gesynchroniseerde timinginformatie en liedjestekstinformatie.
Bestanden met liedjesteksten moeten dezelfde naam dragen als het overeenstemmende muziekbestand (vb. “SongTitle1.Irc” en “SongTitle1.mp3”) en moeten in dezelfde directory gezet worden.
De Quick Play lijst gebruiken
Om een snelle Speellijst te creëren met uw favoriete liedjes:
Selecteer "Browser" uit het Muziekbrowserscherm1.
Gebruik de browserbedieningen om een lied te 2. selecteren dat u wilt toevoegen.
Druk op ingedrukt. Op het scherm 3. verschijnt "Add to List".
Druk op om het toevoegen van het lied 4. aan de Speellijst te beëindigen.
Deze snelle Speellijst kan worden afgespeeld vanuit het Sneloptiemenu of het Now Playing scherm (zie pagina 16 voor meer informatie).
Bedieningen tijdens afspelen (Muziek afspelen)
Om muziek te beginnen afspelen, bladert u naar een liedje en druk dan op om het afspelen te starten.
Wanneer een liedje wordt afgespeeld, verschijnt het Now Playing scherm (zie hieronder).
text_image
Spelen Status
Hangslotsymbol
Equalizer
NOR
Batterijniveau
Herhalingsmodus
Albumhoes
ID3-informatie
California Dream
The king crimson...
Verstreken tijd
3:1 2 13:50 4:32
Voortgangsbalk
Blijven menu
Huidige track / Totale tracks
De volgende functies kunnen worden uitgevoerd vanuit het Now Playing scherm.
Functie Gebruikte toets Om het volgende liedje te spelen Druk op Vorig nummer spelen Druk op Om snel voorwaarts te scannen door het huidige nummer Houingedrukt Om snel terug te scannen door het huidige nummer Houingedrukt Om afspelen te onderbreken/te hervatten Druk op Om toegang tot het Sneloptiemenu te krijgen (zie hieronder voor meer informatie) Druk op Om het volumeniveau te regelen Druk opof Om terug te keren naar het Muziekbrowserscherm Druk op Om terug te keren naar het hoofdmenu Houingedrukt
Om toegang te krijgen tot het Sneloptiemenue, druk op ingedrukt in het Now Playing scherm.
Om door de instellingen te bladeren, druk op ★ of
Om een instelling te selecteren, druk op
Om terug te keren naar het vorige scherm, Druk op ★
MUZIEKMODUS
Equalizer
Selecteer een digitale equalizer preset om de manier waarop uw speler audiosignalen verwerkt te optimaliseren. U kunt kiezen uit: Normaal, Pop, Rock, klassiek, Jazz, en Bass.
Herhalen
Wijzig de herhalingsopties om de volgorde waarin de liedjes worden afgespeeld aan te passen.
Item Beschrijving No Repeat Speel liedjes in normale volgorde zonder te herhalen. One Speel het huidige liedje opnieuw. All Speel alle nummers opnieuw. RandomAll Speel alle nummers in willekeurige volgorde. Dir Normal Herhaal alle nummers in de huidige folder.
Bibliotheek
Terugkeren naar het Muziekbrowserscherm.
Speellijst
Selecteer "Play List" en dan "My List" om een lijst met uw favoriete nummers af te spelen.
Om liedjes toe te voegen aan de lijst, zie "De snelle Speellijst gebruiken" op pagina 12.
Lyric
Stel de Lyric display AAN of UIT.
Bladeren in fotobestanden en ze bekijken (JPG en BMP).
Voor meer informatie over hoe u foto's op uw speler kunt zetten, verwijzen we naar het hoofdstuk "Bestanden overzetten naar de speler".
Fotobrowserbedieningen
Wanneer u de FOTO modus kiest uit het hoofdmenu, ziet u het Fotobrowserscherm. Uw foto's worden weergegeven als thumbnail
text_image
Photo
1
2
3
5 Photos
Map1.
Foto2.
Naam van de3.
geselecteerde
foto
afbeeldingen.
Gebruik de Picture Explorer om alle fotobestanden te zien die in uw speler geladen zijn.
Functie Gebruikte toets Om te bladeren door de foto's & folders Druk op, ,, ,, Om een item te selecteren/te bekijken Druk op Om terug te keren naar het vorige scherm Druk op Om terug te keren naar het hoofdmenu Hou ingedrukt
Besturingen om foto's te bekijken
Om een foto te bekijken bladert u door de thumbnail foto's en druk dan op .
De volgende functies kunnen worden uitgevoerd vanuit het Picture Viewer scherm.
Functie Gebruikte toets Om de volgende foto te zien Druk op Om de vorige foto te zien Druk op Start of stop de slideshow modus Druk op Om terug te keren naar het Fotobrowserscherm Druk op Om terug te keren naar het hoofdmenu Houingedrukt
Doorblader uw filmbestanden en speel ze af.
Uw speler ondersteunt MTV-bestanden die zijn gecodeerd aan 128 x 128 en 20 fps. Video's moeten worden gecodeerd met de meegeleverde software om ze te kunnen afspelen.
Voor meer informatie over het converteren van video, verwijzen we naar het hoofdstuk "Filmconversie".
Voor meer informatie over hoe u film op uw speler kunt zetten, verwijzen we naar het hoofdstuk “Bestanden overzetten naar de speler”.
Filmbrowserbedieningen
Wanneer u de MOVIES modus kiest uit het hoofdmenu, ziet u het filmbrowserscherm.
Gebruik de Filmbrowser om alle filmbestanden te vinden die in uw speler geladen zijn.
Functie Gebruikte toets Om door de lijst met films & folders te bladeren Druk opof Om een item te selecteren/spelen Druk op Om terug te keren naar het vorige scherm Druk op Om terug te keren naar het hoofdmenu Houingedrukt
Bedieningen om films af te spelen
De volgende functies kunnen worden uitgevoerd vanuit het Now Playing scherm.
Functie Gebruikte toets Om de volgende film te spelen Druk op Om het vorige nummer te spelen Druk op Om snel voorwaarts te scannen door het huidige nummer Hou<RIGHT>ingedrukt Om snel terug te scannen door het huidige nummer Hou<LEFT>ingedrukt Om het afspelen te onderbreken/te hervatten Druk op<ENTER> Om het volumeniveau te regelen Druk op<UP>of<DOWN> Om terug te keren naar het Filmbrowserscherm Druk op<MENU> Om terug te keren naar het hoofdmenu Hou<MENU>ingedrukt
Lees tekstbestanden die in uw speler geladen zijn. (TXT).
Voor meer informatie over hoe u muziek op uw speler kunt zetten, verwijzen we naar het hoofdstuk "Bestanden overzetten naar de speler".
Tekstbrowser controles
Wanneer u tekst uit het hoofdmenu, ziet u de tekst Browser Screen.
Kies "Alle e-boeken" om alle tekst bestanden te ★ bekijken op de speler.
Als de tekst al lezen, hebt u de extra optie om terug te keren naar de “Nu Reading “scherm.
Gebruik de Text Browser om alle tekst te vinden bestanden geladen op uw speler
Functie Gebruikte toets Om door de lijst met tekstbestanden & folders te bladeren Druk op <UP> of <DOWN> Om een item te selecteren/te bekijken Druk op <ENTER> Om terug te keren naar het vorige scherm Druk op <MENU>
De Quick Optie menu hebt u eenvoudig toegang tot
TEKSTSMODUS
de optie-instellingen van uw speler.
Druk voor toegang tot de Quick Optie-
menu.
Ga naar pagina
Ga direct naar een pagina.
Druk of om een veld ★ aan te passen.
Druk < OMHOOG > of < OMLAAG > om te ★
passen of het geselecteerde veld.
Druk om te bevestigen. ★
Bookmark
Kies Opslaan Bookmark, Laden Bookmark of Verwijderen Bookmark.
De speler geeft de vorige bladwijzer (s) nadat ♦ u bevestigen Favorieten uit de Quick Optie-menu.
Druk < OMHOOG > of < OMLAAG > ☆ om de gewenste bookmark en druk vervolgens op :
Sla Bookmark: Sla de huidige locatie als ☆ een bookmark.
Laden Bookmark: Open (ga naar) de ☆ gewenste bladwijzer die u koos juist nu.
TEKSTSMODUS
Verwijderen Bookmark: Verwijder de gewenste ★ bladwijzer die u koos juist nu.
Wanneer u indrukknop de laatste bookmark, druk tweemaal het opslaan van de huidige locatie als een nieuwe bladwijzer.
Instellen Tekstkleur
De tekst kleur van het tonen.
Auto Scroll
Zet de auto pagina scrollen aan of uit.
Auto Scroll Tijd
Druk aan te passen of de hoeveelheid tijd tussen de pagina's tijdens Auto Scroll-modus.
Ga in de Zoekmodus om alle mappen en bestanden in uw speler te bekijken.
Om in de zoekmodus te gaan, selecteert en bevestigt u EXPLORER vanuit het Hoofdmenu.
Verkennerbesturingen
Wanneer u de EXPLORER modus kiest uit het hoofdmenu, ziet u het File Explorer scherm. U kunt bestanden of folders van de speler terugvinden en wissen.
Functie Gebruikte toets Om door de lijst te bladeren met bestanden & folders te bladeren Druk opof Om een folder te selecteren Druk op Om terug te keren naar het vorige scherm Druk op Om een geselecteerd item te wissen Druk op Om terug te keren naar het hoofdmenu Houingedrukt
Ga in de instellingenmodus om de systeemopties van uw speler in te stellen.
Om in de Instellingenmodus te gaan, selecteert u SETTINGS in het Hoofdmenu.
Functie Gebruikte toets Om door de opties te bladeren Druk opof Om een item te selecteren Druk op Om te annuleren en terug te gaan naar het vorige scherm Druk op Om terug te keren naar het hoofdmenu Houingedrukt
De volgende opties zijn beschikbaar. Sommige van deze opties kunnen worden ingesteld vanuit de Sneloptiemenu's.
Item Beschrijving Scherm Achtergrond-verlichting Pas de tijdsduur aan (in seconden) dat de achtergrondverlichting aan blijft nadat u op een toets hebt gedrukt. De instelling “On” houdt de achtergrondverlichting continu op. Tijd
INSTELLINGENMODUS
Item Beschrijving Sleep Stel de tijdsduur in (in minuten) totdat de speler automatisch uitschakelt. Een “Off” instelling maakt deze stroombesparende functie onmogelijk. Taal Taal Stel de taal in waarin de menu's op het scherm verschijnen. Sys Tools Formaat Soms is het nodig om uw speler te formatteren indien bepaalde gegevens of bestanden corrupt zijn. U kunt kiezen uit Snel of Volledig formatteren. Een volledige formattering zal langer duren. Reset Herstel alle instellingen van de speler naar de standaard status van de fabriek. Sys Info Bekijk informatie over Firmware & Geheugengebruik. Sort Sorteer alle muziek die in uw speler is geladen. Selecteer “Force Sort” om de muziekbibliotheek onmiddellijk te updaten. Dit proces kan enkele minuten duren als u onlangs muziekbestanden hebt overgezet naar de speler.
Sluit de speler aan op een computer met de meegeleverde USB 2.0 kabel om:
Bestanden over te zetten naar en van uw speler
Basisfuncties uit te voeren om uw bestanden ✦ te beheren.
text_image
USB Port
USB Port
Computer
Wanneer de speler is aangesloten:
Uw computer zal automatisch de speler herkennen als een Verwijderbare Schijf.
Zodra u de folder van de speler hebt geopend, moet u gewoon bestanden slepen en neerzetten naar de speler zoals u zou doen met een floppy disk.
Kopieer muziekbestanden naar de root ✦ directory.
Kopieer filmbestanden naar de "MOVIE.DIR" folder
Kopieer fotobestanden naar de "PHOTO.DIR" folder
Kopieer tekstbestanden naar de "tEXT.DIR" folder.
Als u meer hulp nodig hebt bij het overzetten van bestanden, raadpleeg dan de handleiding van uw besturingsysteem of on-screenhulp. Als u mediabeheersoftware gebruikt zoals iTunes, Winamp, of Windows Media Player, raadpleeg dan hun documentatie voor ondersteuning.
Overzetten met Microsoft Windows
Open een bestandverkennervenster. Vind 1. de bestanden die u wilt overzetten van uw computer. Selecteer de bestanden/folders met de muis en druk op CTRL-C (kopiëren) op het toetsenbord.
Dubbelklik op het "My Computer" icoontje op uw 2. desktop en dubbelklik dan op het icoontje dat uw speler weergeeft (vb., MP1575 / Verwijderbare Schijf). De computer geeft alle bestanden en folders weer die momenteel zijn opgeslagen in de speler.
Druk op CTRL-V (plakken) op het toetsenbord 3. om de bestanden die u in Stap 1 selecteerde over te zetten naar de speler.
Overzetten met Macintosh OS X
Open een zoekvenster. Vind de bestanden die 1.
u wilt overzetten van uw computer. Selecteer de bestanden/folders met de muis en druk op APPLE-C (kopiëren) op het toetsenbord.
Klik op het icoontje van de Verwijderbare Schijf 2. links van het zoekvenster. De computer zal alle bestanden en folders weergeven die onlangs werden opgeslagen in de speler.
Druk op APPLE-V (plakken) op het toetsenbord 3. om de bestanden die u selecteerde in Stap 1 over te zetten naar de speler.
Afkoppelen van een computer
Om te vermijden dat gegevens verloren gaan/firmware stuk gaat, moet u de speler afkoppelen zoals hieronder of uw specifieke besturingsysteem wordt beschreven.
Microsoft Windows
Dubbelklik op de 1.
groene pijl in de
takenbalk in de rechter
onderkant van het computerscherm (Hardware veilig verwijderen).
text_image
12:12
Hardware veilig 2. verwijderen:
Selecteer
"USB Mass
Storage Device"
(massageheugen)
uit de lijst die
verschijnt en druk
dan op "Stop".
text_image
Unplug or Eject Hardware
Select the device you need to unplug or eject, and then click Stop. When Windows notifies you that it is able to do so unplug the device into your computer.
Hardware devices:
USB Max Storage Device
USB Max Storage MTP Midplane BD Layer
Properties Stop
Display device components
Show Unplug/Expect icon on the taskbar Close
Een Hardware device stoppen: Selecteer "USB Mass
Storage Device" uit de lijst die verschijnt en klik dan op OK".
Wanneer het "Safe to Remove Hardware" 3. venster verschijnt, klik dan op de OK-knop en koppel de USB-kabel af van de speler en uw computer.
Macintosh OS X
Zoek links van het Findervenster het juiste 1. Removable Disk icoontje.
Klik op de "Eject" 2. pijl rechts van het Removable Disk icoontje.
text_image
USB Disk
Desktop
Koppel de USB-kabel 3.
af van de speler en uw computer.
Om film converteren, gebruik de software die werd meegeleverd in de cd-rom.
PROBLEMEN OPLOSSEN
Als u een probleem hebt met dit toestel, lees dan de gids hieronder om problemen op te lossen.
De speler gaat niet aan.
Zorg ervoor dat de speler volledig geladen is. ★ Probeer de speler een nacht lang op te laden (8 uur).
Reset de speler (gebruik een paperclip om voorzichtig op de Resetknop te drukken op de achterkant van de speler) en probeer opnieuw.
De knoppen werken niet.
Reset de speler (gebruik een paperclip om voorzichtig op de Resetknop te drukken op de achterkant van de speler) en probeer opnieuw.
Ik kan geen bestanden overzetten naar de speler.
Zorg ervoor dat uw computer een ondersteund ★ besturingssysteem gebruikt.
Als u een USB-verlengkabel gebruikt, zorg er dan voor dat hij goed is aangesloten op de speler en op de PC, of probeer een andere USB-kabel te gebruiken.
Als u de speler hebt aangesloten via een USB-hub, probeer dan de speler rechtstreeks aan te sluiten op uw computer.
Zorg ervoor dat de geheugencapaciteit van de ♦ speler niet vol is.
Er is geen geluid bij het afspelen.
Controleer het volumeniveau. ★
Zorg ervoor dat de koptelefoon goed is ✦ aangesloten op de speler.
De geluidskwaliteit van de muziek is slecht.
Probeer het bestand af te spelen op uw computer. Als de geluidskwaliteit nog slecht is, probeer het bestand dan opnieuw te downloaden of hercodeer het bestand zelf.
Zorg ervoor dat de bitsnelheid van het bestand niet te laag is. Hoe hoger de bitsnelheid van het bestand, hoe beter het klinkt. De minimale aanbevolen bitsnelheid is 128kbps voor MP3's en 96kbps voor WMA's.
Probeer het volume van de speler te verlagen. ✦
Zorg ervoor dat de koptelefoon goed is ★ aangesloten op de speler.
De speler speelt mijn muziekbestand niet af.
Zorg ervoor dat het formaat van het bestand ★ compatibel is.
Het bestand is misschien beschermd tegen kopiëren en u hebt niet langer de toestemming om dit bestand af te spelen. Als u denkt dat hier de fout zit, neem dan contact op met de dienst van waar u het bestand hebt gedownload.
De LCD-tekens worden slecht weergegeven, of
PROBLEMEN OPLOSSEN
er is iets mis met het scherm.
Zorg ervoor dat de juiste menutaal werd ✦ ingesteld.
Reset de speler (gebruik een paperclip om voorzichtig op de Resetknop te drukken op de achterkant van de speler) en probeer opnieuw.
De speler werkt niet naar behoren.
Reset de speler (gebruik een paperclip om voorzichtig op de Resetknop te drukken op de achterkant van de speler) en probeer opnieuw.
Type weergeven 1.5" Full-Color LCD @ 128x128 Geheugen MP1575 FM 2GB: 2GB FlashMP1575 FM 4GB: 4GB FlashMP1575 FM 8GB: 8GB Flash Ondersteunde audioformaten MP3, WMA Ondersteunde videoformaten MTV: 128x128, 20fps Ondersteunde fotoformaten JPG, BMP Ondersteunde songinfo ID3, Windows Media FM Frequentiebereik 87.5 - 108.0MHz PC Interface USB 2.0 (MSC) Plug and Play ondersteuning Windows 7/2000/XP/VistaMacintosh OS X Audio-output 3,5mm Stereo (koptelefoon) Stroomvoorziening Herlaadbare Lithium-Polymeer Batterij USB-laden Speeltijd Muziek: 10 uur* Afmetingen toestel 1.65" x 3.18" x 0.38" (WHD)
Specificaties en handleiding kunnen zonder voorafgaand bericht worden gewijzigd.
*De muziekspeeltijd is een geschatte waarde op basis van het afspelen van een MP3 die gecodeerd is aan 128 kbps. De werkelijke speeltijd kan variëren afhankelijk van de codeermethode en andere factoren.
www.difrce.nl
direct naar onze klantenservice
bel 0031(0)348409371
DIFRNCE®
see & hear the difference.
MP3- und VIDEO-Player
MP1575
text_image
Music
Music
Photo
Video
Radio
Extras
Setup
Bedienungsanleitung
Lesen Sie diese Betriebsanleitung sorgfältig, bevor Sie den Player in Betrieb nehmen.
Inhaltsverzeichnis
INHALTSVERZEICHNIS ......2
VERPACKUNGSINHALT 4
MERKMALE 5
BEDIENELEMENTE IM ÜBERBLICK ......6
ERSTE SCHRITTE ....8
Laden der Batterie 8
Aufladen mit einem Computer ....8
Ein- und Ausschalten des Players ......9
Zurücksetzen des Players ......9
Tastensperre (Hold) 9
HAUPTMENÜ ....10
Hauptmenü-Bedienelemente ....10
MUSIKMODUS 11
Music Browser-Bedienelemente 11
"Now Playing" (Aktueller Titel)-Bedienelemente...13
Menü "Quick Option" 14
BILDMODUS 17
Picture Browser-Bedienelemente 17
Picture Viewer-Bedienelemente ....18
VIDEOMODUS 19
Movie Browser-Bedienelemente....19
Videowiedergabe-Bedienelemente .....20
TEXT-MODUS ......21
Text Browser-Bedienelemente ......21
Schnelloption Menü 21
DATEI-EXPLORER-MODUS ....24
Explorer-Bedienelemente ....24
Inhaltsverzeichnis
EINSTELLUNGSMODUS 25
ÜBERTRAGEN VON DATEIEN ZUM PLAYER ......27
Übertragen von Dateien unter Microsoft
VIDEOKONVERTIERUNG ......31
FEHLERBEHEBUNG 32
TECHNISCHE DATEN 35
Stellen Sie sicher, dass alle nachstehend abgebildeten Gegenstände in der Verpackung enthalten sind. Falls ein Gegenstand fehlt, verständigen Sie bitte den Händler, bei dem Sie das Produkt gekauft haben.
natural_image
Black electronic device with a circular button and display screen, enclosed in a rounded square frame (no visible text or symbols)
natural_image
Simple line drawing of a cable with connectors, no text or symbols present
natural_image
Simple line drawing of a closed book with a bookmark, no text or symbols present
natural_image
Black hardcover headphones with earbuds and earphones, shown against a plain background (no text or symbols visible)
text_image
DIFRANCE®
moss®
M. 1025
© 2017-04-26
MP1575 MP3-Player1.
USB-Kabel2.
Bedienungsanleitung und Dokumentation3.
Professioneller Stereo-Kopfhörer4.
Installations-CD5.
Integrierter Flash-Speicher ★
1,5 Zoll LCD-Farbdisplay ★
Wiedergabe von Musik, Video, Fotos und Text ★
ID3- und LRC-Unterstützung zur Anzeige ♦ von Songinformationen und synchronen Songtexten
USB 2.0 Hi-Speed für schnelle ✦
Dateiübertragung
text_image
1
2
3
4
5
6
7
8
9
Reset
BEDIENELEMENTE IM ÜBERBLICK
Vorderansicht 1. LCD Display 2. Menütaste 3. Steuertasten 4. Eingabetaste 5. Option Taste Seitenansicht 6. BetriebstasteHalten Sie die Taste gedrückt, um den Player ein- oder auszuschalten. Unterseite 7. USB-/Ladeanschluß/ 8. 3,5 mm Kopfhörerbuchse Rückseite 9. Rücksetztaste
Laden der Batterie
Der Player verfügt über einen integrierten, wiederaufladbaren Akku. Um die optimale Leistung und Batterielebensdauer zu gewährleisten, sollte der Akku zur anfänglichen Verwendung voll aufgeladen werden, Wenn der Player längere Zeit nicht verwendet wird, muss der Akku über Nacht (ungefähr 8 Stunden lang) aufgeladen werden.
Bei unsachgemäßer Handhabung kann der Akku in diesem Gerät in Brand geraten oder chemische Verbrennungen verursachen. Den Akku nicht zerlegen, verbrennen oder erhitzen. Den Akku nicht an Stellen, an denen er direktem Sonnenlicht ausgesetzt ist oder in einem Fahrzeug mit geschlossenen Fenstern lagern. Den Player nicht an anderen Stromquellen anschließen als in dieser Anleitung oder auf dem Aufkleber angegeben, da sonst Feuer- oder Stromschlaggefahr besteht.
Aufladen mit einem Computer
Der Player kann über einen USB-Computeranschluss geladen werden. Das mitgelieferte USB-Kabel dient zum Anschluss des Players an einen High-Power-USB-Anschluss eines Computers. Der Computer muss eingeschaltet sein und darf sich nicht im Ruhemodus befinden.
Wenn der Player angeschlossen ist und ladet, wird ein USB-Symbol im Bildschirm des Players eingeblendet.
Ein- und Ausschalten des Players
Um den Player einzuschalten, schieben und ✦ halten Sie den Schalter nach unten, bis der Bildschirm sich einschaltet.
Um den Player auszuschalten, schieben und ✦ halten Sie den Schalter nach unten, bis der Bildschirm sich ausschaltet.
Zurücksetzen des Players
Setzen Sie den Player zurück, wenn er nicht mehr reagiert („einfriert“) oder falls andere Störungen auftreten.
Falls der Player an einem Computer 1. angeschlossen ist, trennen Sie die Verbindung.
Drücken Sie die Rücksetztaste auf der 2. Rückseite des Players behutsam mittels einer Büroklammer.
Tastensperre (Hold)
Wenn der Schalter in die "Hold" Position gestellt wurde, sind die Tasten Ihres Spielers gesperrt.
Um die Tasten zu sperren, schieben Sie den 1. Schalter nach oben in die "Hold" Position.
Um die Tasten wieder freizuschalten, schieben 2. Sie den Schalter nach unten, um ihn aus der „Hold“ Position zu entsperren.
Wenn Sie den Player einschalten, wird das Hauptmenü angezeigt. Im Hauptmenü greifen Sie auf die verschiedenen Funktionsmodi des Players zu. Diese Modi sind:
Music: Musik durchsuchen und wiedergeben.
Photo: Bilder durchsuchen und wiedergeben.
Video: Videos durchsuchen und wiedergeben.
Text: Textdateien durchsuchen und lesen.
Explorer: Sämtlich Dateien durchsuchen.
Setup: Player-Optionen einstellen
Wählen Sie "Extras" im Hauptmenü, um die "Text-" und "Explorer"-Menüs aufzurufen.
Hauptmenü-Bedienelemente
Zum Navigieren durch die Modi drücken Sie die ✦ Taste oder .
Zum Auswählen eines Modus, drücken Sie die ✦Eingabetaste .
Musikdateien durchsuchen und wiedergeben.
Wenn Sie neue Musikdateien auf den Player geladen haben, wird die Musikbibliothek aktualisiert, sobald Sie zum Musikmodus wechseln. Dieser Vorgang kann mehrere Minuten lang dauern. Sie können erst wieder auf den Bildschirm "Music Browser" zugreifen, wenn die Musikbibliothek aktualisiert ist.
Nähere Hinweise über das Laden von Musik auf den Player finden Sie im Abschnitt "Übertragen von Dateien zum Player".
Music Browser-Bedienelemente
Wenn Sie im Hauptmenü den Musikmodus (MUSIC) wählen, wird der Bildschirm "Music Browser" angezeigt. Sie können die Musiktitel nach Namen, Album, Interpreten oder Genre durchsuchen. Sie können aber auch
text_image
Now playing
All songs
Albums
Artists
Genres
Browser
“Browser” wählen, um die auf dem Player gespeicherten Musikdateien und Ordner anzuzeigen.
Funktion Tastenaktion Durch die Liste navigieren < AUFWÄRTS>oder< ABWÄRTS>drücken Ein Objekt auswählen < ENTER>drücken Funktion Tastenaktion Zum vorherigen Bildschirm zurückkehren Zum Hauptmenü zurückkehren gedrückt halten
Wenn die Musikdateien ID3-Tags mit Songinformationen besitzen, können Sie die Titel nach Interpreten, Album oder Genre sortiert anzeigen. Um alle Dateien (einschließlich solcher ohne ID3-Tags) anzuzeigen, wählen Sie "All Songs" (Alle Songs) oder verwenden Sie die Option "Browser".
Wenn die Musik bereits wiedergegeben wird, steht eine zusätzliche Option zur Rückkehr zum Bildschirm "Now Playing" (Aktueller Titel) bereit.
Zum Anzeigen von Songtexten sind ".LRC"-Dateien erforderlich, die im Internet zu finden sind oder mit einem Songtext-Dateieditor erstellt werden können. Songtextdateien können Synchronzeit- und Songtextdaten enthalten.
Songtext-Dateien müssen denselben Namen wie die dazugehörige Musikdatei haben (z.B. "Titel1.Irc", "Titel2.Irc") und im selben Verzeichnis gespeichert sein.
Verwenden der Funktion "Quick Playlist"
So erstellen Sie im Handumdrehen eine "Quick Playlist" Ihrer Lieblingstitel:
Wählen Sie im Bildschirm “Music Browser” die 1. Option “Browser”.
Wählen Sie mit den Browser-Bedienelementen 2. einen Song aus, den Sie zur Playliste hinzufügen möchten.
Drücken Sie . Auf dem Bildschirm wird 3. "Add to List" (Zur Liste hinzufügen) angezeigt. Drücken Sie , um den Titel zur Playliste 4. hinzuzufügen.
Diese “Quick Playlist” kann vom Menü “Quick Option” (Schnelloption) des Bildschirms “Now Playing” (Aktueller Titel) wiedergegeben werden
"Now Playing" (Aktueller Titel)-Bedienelemente
Um die Musikwiedergabe zu starten, navigieren Sie zu einem Titel und drücken Sie . Während der Wiedergabe eines Titels erscheint der Bildschirm "Now Playing" (Aktueller Titel).
text_image
Spielern Status
Schloss-Symbol
Equalizer
NOR
Ladezustand der Batterie
Repeat-Modus
Album-Cover
ID3-Informationen
California Dream The king crimson...
Verstrichene Zeit
3:1 2 13:50 4:32
Fortschrittsbalken
Zeit bleiben
Aktuellen Titels / Total Titel
Im Bildschirm "Now Playing" (Aktueller Titel) stehen folgende Funktionen ausgeführt werden:
Funktion Tastenaktion Nächsten Titel wiedergeben drücken Vorherigen Titel wiedergeben drücken Schneller Vorlauf durch den aktuellen Titel gedrückt halten Schneller Rücklauf durch den aktuellen Titel gedrückt halten Wiedergabe unterbrechen/fortsetzen drücken Das Menü “Quick Option” (Details siehe unten) öffnen drücken Lautstärke regeln oderdrücken Zum Bildschirm “Music Browser” zurückkehren drücken Zum Hauptmenü zurückkehren gedrückt halten
Menü "Quick Option"
Um auf das Schnelloptions-Menü "Quick Option" zuzugreifen, drücken Sie im Bildschirm "Now Playing" (Aktueller Titel) gedrückt.
Zum Navigieren durch die Einstellungen ✦ drücken Sie die Tasten oder
Um eine Einstellung auszuwählen, drücken Sie ♦ die Taste .
Um zum vorherigen Bildschirm zurückkehren, ✦ drücken Sie die Taste .
Equalizer
Wählen Sie eine Voreinstellung des digitalen Equalizers aus, um die Verarbeitung der Audiosignale durch den Player zu optimieren. Die Optionen sind: Normal, Pop, Rock, Classic, Jazz und Bass.
Repeat (Wiederholung)
Mit den Wiederholungsoptionen ändern Sie die Reihenfolge, in der die Musikdateien wiedergegeben werden.
Option Beschreibung No Repeat Keine Wiederholung - einmalige Wiedergabe aller Musikdateien in der gespeicherten Reihenfolge. One Wiederholte Wiedergabe der aktuellen Musikdatei. All Wiederholte Wiedergabe aller Musikdateien. RandomAll Wiedergabe aller Musikdateien in zufälliger Reihenfolge. Dir Normal Wiederholte Wiedergabe aller Musikdateien im aktuellen Ordner.
Library (Bibliothek)
Zum Bildschirm "Music Browser" zurückkehren.
Play List
Wählen Sie "Play List" und dann "My List" aus, um die Playliste Ihrer Lieblingstitel wiederzugeben.
Um Titel zur Liste hinzuzufügen, siehe "Verwenden der Funktion "Quick Playlist" auf Seite 12.
Lyric
Schalten Sie die Lyric-Anzeige EIN oder AUS.
BILDMODUS:
Fotodateien (JPG und BMP) durchsuchen und anzeigen.
Nähere Hinweise über das Laden von Fotos auf den Player finden Sie im Abschnitt "Übertragen von Dateien zum Player".
Picture Browser-Bedienelemente
Wenn Sie im Hauptmenü den Bildmodus "PICTURES" wählen, wird der Bildschirm "Picture Browser" angezeigt. Ihre Bilder werden als
text_image
Photo
1
2
3
5 Photos
Ordner1.
Bild2.
Name des 3.
ausgewählten
Bildes
Miniaturbilder angezeigt.
Verwenden Sie den Picture Browser, um alle Bilddateien zu finden, die auf dem Player gespeichert sind.
Funktion Tastenaktion Navigieren durch die Bilder und Ordner ,,,drücken Ein Bild auswählendrücken Zum vorherigen Bildschirm zurückkehren drücken Zum Hauptmenü zurückkehrengedrückt halten
Picture Viewer-Bedienelemente
Um ein Bild anzuzeigen, navigieren Sie durch die Miniaturbilder und drücken Sie dann .
Die folgenden Funktionen stehen im Bildschirm "Picture Viewer" zur Verfügung:
Funktion Tastenaktion Nächstes Bild anzeigendrücken Vorheriges Bild anzeigendrücken Diashow-Modus starten oder stoppendrücken Zum Bildschirm “Picture Browser” zurückkehren drücken Zum Hauptmenü zurückkehren gedrückt halten
Videodateien durchsuchen und wiedergeben.
Der Player unterstützt MTV-Dateien, die mit 128 x 128 Pixel Auflösung und 20 fps kodiert sind. Videos müssen unter Umständen mit der mitgelieferten Software kodiert werden, um auf dem Player wiedergegeben werden zu können.
Nähere Hinweise über das Konvertieren von Videos finden Sie im Abschnitt "Videokonvertierung".
Nähere Hinweise über das Laden von Videos auf den Player finden Sie im Abschnitt "Übertragen von Dateien zum Player".
Movie Browser-Bedienelemente
Wenn Sie im Hauptmenü den Videomodus "MOVIES" wählen, wird der Bildschirm "Movie Browser" angezeigt.
Verwenden Sie den Movie Browser, um alle Videodateien zu finden, die auf dem Player gespeichert sind.
Funktion Tastenaktion Navigieren durch die Liste der Videodateien und Ordner < AUFWÄRTS>oder< ABWÄRTS>drücken Ein Video auswählen/wiedergeben< ENT> < drücken Zum vorherigen Bildschirm zurückkehren < MENU>drücken Zum Hauptmenü zurückkehren <MENU> gedrückt halten
Videowiedergabe-Bedienelemente
Im Bildschirm “Now Playing” (Aktueller Titel) stehen folgende Funktionen bereit:
Funktion Tastenaktion Nächstes Video wiedergeben drücken Vorheriges Video wiedergeben drücken Schneller Vorlauf durch das aktuelle Video gedrückt halten Schneller Rücklauf durch das aktuelle Video gedrückt halten Pause/Wiederaufnahme der Wiedergabe drücken Lautstärke regeln oderdrücken Zum Bildschirm “Movie Browser” zurückkehren drücken Zum Hauptmenü zurückkehren gedrückt halten
Lesen von Textdateien (TXT) auf dem Player
Nähere Hinweise über das Laden von Textdateien auf den Player finden Sie im Abschnitt "Übertragen von Dateien zum Player".
Text Browser-Steuerelemente
Wenn Sie Text wählen Sie aus dem Hauptmenü, werden Sie die Text-Browser-Bildschirm zu sehen.
Wählen Sie "Alle eBooks" für alle Text-Dateien auf den Player anzuzeigen.
Wenn der Text bereits lesen, werden Sie ✦ zusätzlich die Möglichkeit zur Rückkehr in die "Now Reading haben "Bildschirm.
Verwenden Sie die Text-Browser auf den gesamten Text finden Sie Dateien auf Ihrem Player geladen.
Funktion Tastenaktion To browse through the list of text files & folders < AUFWÄRTS>oder< ABWÄRTS>drücken Eine Textdatei auswählen/anzeigen < EN TER> drücken Zum vorherigen Bildschirm zurückkehren < MENU> drücken Zum Hauptmenü zurückkehren < MENU> gedrückt halten
Schnelloption Menü
TEXT-MODUS:
Das Schnelloptionmenü ermöglicht, dass Sie die Option-Einstellungen Ihres Plays schnell aufrufen können.
Drücken Sie , um das Schnelloption Menü aufzurufen.
Ene Seite direkt Awählen
Wählt eine Seite direkt an.
Drücken Sie oder ; um ✦ eine Option auszuwählen.
Drücken Sie oder , um die ✦ ausgewählte Option zu ändern.
Drücken Sie zu bestätigen. ✦
Lesezeichen
Wählen Sie, Lesezeichen zu speichern, Lesezeichen aufzurufen oder Lesezeichen zu löschen.
Der player wird das vorige Lesezeichen zeigen, nachdem Sie es vom Schnelloption Menü bestätigt haben.
Drücken Sie oder ; um das erwünschte Lesezeichen auszuwählen, dann drücken Sie :
TEXT-MODUS:
Lesezeichen speichern: Speichern Sie ☆ den aktuellen Lesezeichen-Platz als ein Lesezeichen.
Lesezeichen aufrufen: Wählen Sie (go to) ☆ das erwünschte Lesezeichen an.
Lesezeichen löschen: Löschen Sie das ☆ angewählte Lesezeichen.
Wenn Sie bis das letzte Lesezeichen erreichen, ✦ drücken Sie zweimals, um die aktuelle Stelle als ein neues Lesezeichen eingespeichert zu werden.
Farbe des Fonts ändern
Stellen Sie die Farbe des Textes auf dem Bildschirm ein.
Auto Scroll
Schalten Sie die Auto-Page-Scroll ein oder aus.
Autom. Scroll-Zeit
Drücken Sie oder , um die Zeitangabe im Autom. Scroll-Modus festzulegen.
Verwenden Sie den Datei-Explorer-Modus, um Ordner und Dateien anzuzeigen und zu löschen, die auf dem Player gespeichert sind.
Um den Datei-Explorer-Modus zu aktivieren, wählen Sie EXPLORER im Hauptmenü aus und bestätigen Sie die Auswahl.
Explorer-Bedienelemente
Wenn Sie im Hauptmenü den Modus "EXPLORER" wählen, wird der Bildschirm "File Explorer" (Datei-Explorer) angezeigt. Hier können Sie Dateien oder Ordner auf dem Player suchen und löschen.
Funktion Tastenaktion Navigieren durch die Liste der Dateien und Ordner < AUFWÄRTS>oder< ABWÄRTS>drücken Einen Ordner auswählen < ENTER> drücken Zum vorherigen Bildschirm zurückkehren < MENU> drücken Ein ausgewähltes Objekt löschen < OPTION> drücken Zum Hauptmenü zurückkehren < MENU> gedrückt halten
Im Einstellungsmodus "Settings" stellen Sie die Systemoptionen des Players ein.
Um den Modus “Settings” zu aktivieren, wählen Sie SETTINGS im Hauptmenü aus.
Funktion Tastenaktion Durch die Optionen navigieren < AUFWÄRTS>oder< ABWÄRTS>drücken Ein Objekt auswählendrücken Abbrechen und zum vorherigen Bildschirm zurückkehren < MENU>drücken Zum Hauptmenü zurückkehren < MENU> gedrückt halten
Folgende Optionen sind verfügbar. Einige dieser Optionen können über das Menü "Quick Option" eingerichtet werden:
Option Beschreibung Display (Anzeige) Backlight(Hintergrund-beleuchtung) Gibt an, wie lange (in Minuten) die Hintergrundbeleuchtung nach einem Tastendruck aktiviert bleibt. In der Einstellung "On" (Ein) bleibt die Hintergrundbeleuchtung ständig aktiviert. Zeit Sleep (Ruhezustand) Gibt an, nach wie vielen Minuten Inaktivität sich der Player automatisch ausschaltet. Die Einstellung "Off" (Aus) deaktiviert diese Stromsparfunktion. Language (Sprache) Language (Sprache) Gibt an, in welcher Sprache die Bildschirmmenüs angezeigt werden. Sys Tools (Systemwerkzeuge) Format (Formatieren) Wenn Daten oder Dateien beschädigt sind, kann eine Formatierung des Players erforderlich sein. Die Formatierungsoptionen "Quick" (Schnell) oder "Complete" (Komplett) können gewählt werden. Die Formatierung mit der Option "Complete" dauert länger. Reset (Zurücksetzen) Alle Einstellungen des Players werden auf die werkseitigen Voreinstellungen zurückgesetzt. Sys Info Anzeige von Informationen über Firmware und Speicherbelegung Sort (Sortieren) Sortieren aller Musiktitel auf dem Player. Wählen Sie "Force Sort", um die Musikbibliothek sofort zu sortieren. Dieser Vorgang kann mehrere Minuten lang dauern, falls Sie vor Kurzem Musikdateien zum Player übertragen haben.
Schließen Sie den Player mit dem mitgelieferten USB 2.0-Kabel an einen Computer an, um folgende Schritte durchzuführen:
Musikdateien von und zum Player zu ✦ übertragen
Grundlegende Dateiverwaltungsfunktionen ✦ auszuführen
text_image
USB Port
USB Port
Computer
Bei Herstellung der Verbindung:
Der Computer erkennt den Player automatisch als Wechsellaufwerk.
Nachdem Sie den Ordner des Players geöffnet haben, können Sie die Dateien einfach wie bei einer Diskette durch Ziehen und Ablegen auf den Player übertragen.
Kopieren Sie Musikdateien in das ★ Stammverzeichnis.
Kopieren Sie Videodateien in das Verzeichnis ♦ "MOVIE.DIR".
Kopieren Sie Fotodateien in das Verzeichnis ♦ "PHOTO.DIR".
Kopieren Sie Textdateien in das Verzeichnis ★ "TEXT.DIR"
Falls Sie für das Übertragen von Dateien zusätzliche Unterstützung benötigen, lesen Sie im Benutzerhandbuch Ihres Betriebssystems oder in der Online-Hilfe nach. Falls Sie Medienverwaltungssoftware wie iTunes, Winamp oder Windows Media Player verwenden, beziehen Sie sich zwecks Unterstützung auf die Dokumentation.
Übertragen von Dateien unter Microsoft Windows
Öffnen Sie ein Explorer-Fenster. Navigieren Sie 1. zu den Dateien, die Sie von Ihrem Computer übertragen möchten. Wählen Sie die Dateien/Ordner mit der Maus aus und drücken Sie STRG-C (Kopieren) auf der Tastatur.
Doppelklicken Sie auf das Symbol “Arbeitsplatz” 2. auf dem Desktop und doppelklicken Sie dann auf das Symbol des Players (z.B. MP1575 / Wechsellaufwerk). Der Computer zeigt alle Dateien und Ordner an, die gegenwärtig im Ordner gespeichert sind.
Drücken Sie STRG-V (Einfügen) auf der 3.
Tastatur, um die in Schritt 1 ausgewählten Dateien zum Player zu übertragen.
Übertragen von Dateien unter Macintosh OS X
Öffnen Sie ein Finder-Fenster. Navigieren Sie 1. zu den Dateien, die Sie von Ihrem Computer übertragen möchten. Wählen Sie die Dateien/Ordner mit der Maus aus und drücken Sie APPLE-C (Kopieren) auf der Tastatur.
Klicken Sie auf das Wechsellaufwerk-Symbol 2. in der linken Spalte des Finder-Fensters. Der Computer zeigt alle Dateien und Ordner an, die gegenwärtig im Ordner gespeichert sind.
Drücken Sie APPLE-V (Einfügen) auf der 3. Tastatur, um die in Schritt 1 ausgewählten Dateien zum Player zu übertragen.
Trennen von einem Computer
Um Datenverlust oder Beschädigung von Dateien/Firmware zu vermeiden, trennen Sie den Player mit den Schritten, die nachstehend für Ihr Betriebssystem angegeben sind.
Microsoft Windows
Doppelklicken Sie auf 1.
den grünen Pfeil in
der Taskleiste rechts
unten im Computerbildschirm (Hardware sicher entfernen).
text_image
12:12
Hardware sicher 2. entfernen
Wählen Sie "USB-
text_image
Unplug or Eject Hardware
Select the device you want to unplug or eject, and then click. Stop. When
Windows notifies you that it is safe in do so unplug the device from your
computer.
Hardware devices:
USB Max Storage Device
USB Max Storage MTP Microsoft HD Player
□ Display
□ Display device components
☑ Show Unplug/Inject Icon on the Text Bar
Close
Massenspeichergerät" aus der eingeblendeten Liste aus, und klicken Sie dann auf "Stopp".
Stoppen eines Hardware-Geräts: Wählen
Sie "USB-Massenspeichergerät" aus der eingeblendeten Liste aus, und klicken Sie dann auf "OK".
Wenn die Meldung “Hardware kann sicher entfernt 3. werden” angezeigt wird, klicken Sie auf die Schaltfläche “OK” und trennen Sie das USB-Kabel vom Player und vom Computer.
Macintosh OS X
Finden Sie das entsprechende Wechsellaufwerk-1. Symbol in der linken Spalte des Finder-Fensters.
Klicken Sie auf 2.
das "Auswerfen"-
Pfeilsymbol rechts
neben dem Symbol des
Wechsellaufwerks.
text_image
USB Disk
Desktop
Trennen Sie das USB-Kabel vom Player und vom 3. Computer.
Zum Konvertieren Video- und verwenden Sie die Software auf der mitgelieferten CD-ROM.
Bei Problemen mit diesem Gerät lesen Sie bitte den nachstehenden Leitfaden zur Fehlerbehebung.
Der Player lässt sich nicht einschalten.
Stellen Sie sicher, dass der Akku des Players ♦ voll geladen ist. Versuchen Sie, den Player über Nacht (8 Stunden) aufzuladen.
Setzen Sie den Player zurück (verwenden Sie eine Büroklammer, um die Rücksetztaste auf der Rückseite des Players sanft zu drücken), und versuchen Sie es nochmals.
De Tasten funktionieren nicht.
Setzen Sie den Player zurück (verwenden Sie eine Büroklammer, um die Rücksetztaste auf der Rückseite des Players sanft zu drücken), und versuchen Sie es nochmals.
Ich kann keine Dateien auf den Player übertragen.
Stellen Sie sicher, dass der Computer ✦ eingeschaltet ist und unter einem unterstützten Betriebssystem läuft.
Wenn Sie ein USB-Verlängerungskabel ♦ verwenden, stellen Sie sicher, dass es sicher am Player und am PC angeschlossen ist, oder versuchen Sie ein anderes USB-Kabel zu verwenden.
FEHLERBEHEBUNG
Wenn der Player über einen USB-Hub ★ angeschlossen ist, versuchen Sie den Player direkt am Computer anzuschließen.
Stellen Sie sicher, dass der Speicher des Players nicht voll belegt ist.
Kein Ton bei der Wiedergabe.
Prüfen Sie die Lautstärkeeinstellung. ✦
Stellen Sie sicher, dass die Kopfhörer sicher ✦ am Player angeschlossen sind.
Schlechte Klangqualität des Players.
Versuchen Sie die betreffende Datei auf ✦ dem Computer wiederzugeben. Wenn die Klangqualität immer noch schlecht ist, versuchen Sie die Datei erneut herunterzuladen oder selbst neu zu kodieren.
Stellen Sie sicher, dass die Bitrate der Datei ✦ nicht zu niedrig ist. Je höher die Bitrate ist, desto besser ist die Klangqualität. Die empfohlenen Mindestbitraten sind 128 kB/s für MP3- und 96 kB/s für WMA-Dateien.
Versuchen Sie, die Lautstärke des Players zu ✦ verringern.
Stellen Sie sicher, dass die Kopfhörer sicher ✦ am Player angeschlossen sind.
Der Player gibt meine Musikdatei nicht wieder.
Stellen Sie sicher, dass die Datei ein kompatibles Format hat.
Möglicherweise ist die Datei mit einem ✦ Kopierschutz versehen und Sie sind nicht mehr zur Wiedergabe der Datei berechtigt. Falls Sie annehmen, dass es sich um einen Fehler handelt, kontaktieren Sie den Service, von dem Sie die Datei heruntergeladen haben.
Die LCD-Textzeichen sind beschädigt oder die Anzeige weist Fehler auf.
Stellen Sie sicher, dass die korrekte ★ Menüsprache eingestellt wurde.
Setzen Sie den Player zurück (verwenden Sie eine Büroklammer, um die Rücksetztaste auf der Rückseite des Players sanft zu drücken), und versuchen Sie es nochmals.
Funktionsstörung des Players.
Setzen Sie den Player zurück (verwenden Sie eine Büroklammer, um die Rücksetztaste auf der Rückseite des Players sanft zu drücken), und versuchen Sie es nochmals.
Anzeigetyp 1,5" Vollfarb-LCD -Display, Auflösung128 x 128 Speicher MP1575 FM 2GB: 2 GB FlashMP1575 FM 4GB: 4GB FlashMP1575 FM 8GB: 8GB Flash Unterstützte Audioformate MP3, WMA Unterstützte Videoformate MTV: 128x128, 20fps Unterstützte Fotoformate JPG UnterstützteSonginformationen ID3, Windows Media UKW-Frequenzbereich 87.5 - 108.0MHz PC-Schnittstelle USB 2.0 (M$C) Plug-and-Play-Unterstützung Windows 7/2000/XP/VistaMacintosh OS X Audio-Ausgang 3.5mm Stereo (Headphone) Stromversorgung Wiederaufladbarer Lithium-Polymer-AkkuUSB-Ladung Wiedergabedauer Musik: 10 Stunden* Abmessungen 42mm x 80 mm x 10 mm (B x H x T)
Technische Daten und Betriebsanleitung können ohne Vorankündigung geändert werden.
* Die Musikwiedergabedauer ist eine Schätzung, basierend auf MP3-Dateien mit 128 kB/s-Kodierung. Die tatsächliche Wiedergabedauer kann je nach Kodierungsmethode und anderen Faktoren unterschiedlich sein.
www.difrnce.com
direkt zu unserer Kundendienstabteilung
call 0031(0)348409371
DIFRNCE®
see & hear the difference.
Lecteur MP3 et VIDEO
MP1575
text_image
Music
Music
Photo
Video
Radio
Extras
Setup
Mode d'emploi
Veuillez lire attentivement ce manuel avant d'utiliser le produit.
Table des matières
TABLE DES MATIÈRES ......2
CONTENU 4
CARACTÉRISTIQUES ....5
APERCU DES COMMANDES ....6
GUIDE DE DEMARRAGE 8
Chargement de la batterie ....8
Mise sous/hors tension du lecteur ......9
Réinitialisation du lecteur ....9
Commandes du menu principal .... 11
MODE MUSIQUE ....12
Commandes du Navigateur musical ..... 12
Commandes de la Lecture en cours (Lecture musicale) 14
Menu d'Option rapide 15
MODE IMAGES ....18
Commandes du Navigateur d'images (Picture Browser) ...18
Commandes de l'Affichage d'images
(PictureViewer) ......19
MODE FILMS ......21
Commandes du Navigateur de vidéos .....21
Commandes de lecture de films .....22
MODE TEXT ......23
Contrôles pour Parcourir les Textes ......23
Menu Quick Option (Option Rapide) ......25
MODE EXPLORATEUR ......27
Commandes de l'Explorateur ......27
Table des matières
MODE PARAMÈTRES ......28
TRANSFERT DE FICHIERS VERS VOTRE ORDINATEUR ....30
Transfert avec Microsoft Windows ...... 31
Transfert avec Macintosh OS X ......32
Déconnexion d'un ordinateur ....32
Microsoft Windows 32
Macintosh OS X 33
CONVERSION DE VIDÉOS ....34
RECHERCHE DES PANNES......35
SPÉCIFICATIONS ......38
Vérifiez que l'emballage contient les éléments illustrés ci-dessous. S'il vous manque un de ces éléments, contactez le revendeur local qui vous a vendu ce produit.
natural_image
Black electronic device with circular button and screen, no visible text or symbols on the device itself
natural_image
Simple line drawing of a cable with connectors and a connector, no text or symbols present
natural_image
Simple line drawing of a blank notepad inside a rounded square frame (no text or symbols)
natural_image
Black hardcover headphones with earphones and earplids, shown against a plain background (no text or symbols visible)
text_image
DIFRnce
© 12.10.1973
For model No.
M41076
© 12.10.1973
For model No.
M41076
Lecteur MP3 MP15751.
Câble USB2.
Mode d'emploi et documentation3.
Ecouteurs stéréo professionnels4.
Le CD d'installation5.
Mémoire Flash intégrée ✦
Ecran LCD full color de 1,5 pouces ✦
Lecture de fichiers musicaux, vidéo, photos et ♦ texte
Prise en charge ID3 et LRC pour l'affichage ✦ synchronisé des paroles et de la chanson
USB 2.0 à haute vitesse pour les transferts ★ rapides de fichiers
text_image
1
2
3
4
5
6
7
8
9
Reset
Vue de face 1. Afficheur LCD 2. Bouton Menu 3. Boutons de Commande 4. Bouton ENTER (Entrée) 5. Bouton Option Vue de côté 6. Basculer Puissance/Tenir Vue de dessous 7. Port USB/Charge 8. Prise casque 3,5mm Vue arrière 9. Touche de réinitialisation
Chargement de la batterie
Votre lecteur dispose d'une batterie rechargeable intégrée. Lors de la première utilisation, la batterie doit être entièrement chargée pour garantir des performances optimales et la durée de vie de la batterie.
Si le lecteur n'a pas été utilisé pendant une période prolongée, la batterie doit être rechargée toute une nuit (environ 8 heures).
La batterie utilisée dans cet appareil peut présenter un risque d'incendie ou de brûlure chimique si elle est maltraitée. Ne démontez et ne brûlez pas la batterie et ne la soumettez pas à une chaleur extrême. N'exposez pas la batterie à la lumière directe du soleil et ne la laissez pas dans une voiture avec les vitres fermées.
Ne branchez pas le lecteur à une source d'alimentation autre que celle indiquée ici ou sur l'étiquette au risque d'entraîner un incendie ou un choc électrique.
Chargement avec un ordinateur
Vous pouvez charger votre lecteur via une connexion USB de votre ordinateur. Utilisez le câble USB fourni pour brancher le lecteur à un port USB de forte puissance d'un ordinateur. L'ordinateur doit être mis sous tension et ne pas être en mode veille.
Lorsque le lecteur est connecté et en cours de chargement, un symbole USB s'affiche sur l'écran du lecteur.
Mise sous/hors tension du lecteur
Pour la mise en marche du lecteur, faites ✦ glisser le bouton vers le bas et maintenez-le jusqu'à ce que l'écran s'allume.
Pour éteindre le lecteur, faites glisser le bouton vers le bas et maintenez-le jusqu'à ce que l'écran s'éteigne.
Réinitialisation du lecteur
Réinitialisez le lecteur s'il ne répond plus ou s'il présente un dysfonctionnement.
Déconnectez votre lecteur s'il est connecté à un 1. ordinateur.
Utilisez un trombone pour appuyer légèrement 2. sur l'orifice de réinitialisation situé à l'arrière du lecteur.
Désactiver les Commandes (Maintenir)
Lorsque le bouton est en position « Hold », les commandes de votre lecteur sont désactivées.
Les commandes peuvent être désactivées pour éviter de mettre le lecteur en marche ou d'activer les commandes accidentellement lorsque le lecteur est dans votre poche ou sac.
GUIDE DE DEMARRAGE
Pour désactiver les commandes, faites glisser le bouton vers le haut jusqu'à ce qu'il s'enclenche en position « Hold ».
Pour activer les commandes, faites glisser le ✦ bouton vers le bas pour le relâcher de la position « Hold ».
Une icône de verrouillage s'affichera sur l'écran lorsque les commandes seront désactivées. Réactivez les commandes pour continuer.
Lorsque vous mettez l'appareil sous tension, le menu principal s'affiche. Le menu principal vous donne accès aux différents modes de fonctions de votre lecteur. Ces modes sont les suivants :
Musique : Parcourir et lire des fichiers musicaux.
Images : Parcourir et afficher des fichiers images.
Films : Parcourir et lire des films.
Text (Livres électroniques) : Parcourir et lire des fichiers texte.
Explorateur : Parcourir tous les fichiers.
Paramètres : Régler les options du lecteur.
Sélectionnez "Extras" du Menu Principal pour avoir les menus "Text" (Texte) et "Explorer" (Explorateur).
Commandes du menu principal
Pour vous déplacer entre les différents modes, appuyez sur ou .
Pour sélectionner un mode, appuyez sur le ✦ bouton .
Parcourez et lisez vos fichiers musicaux.
Si vous avez chargé de nouveaux fichiers musicaux sur le lecteur, la bibliothèque musicale doit être rafraîchie lorsque vous entrez dans le mode Musique. Ce processus peut prendre quelques minutes. Vous ne pourrez pas accéder à l'écran Navigateur musical avant d'avoir rafraîchi la bibliothèque musicale.
Pour obtenir de plus amples informations sur la manière d'ajouter des fichiers musicaux sur votre lecteur, consultez la section « Transfert de fichiers vers le lecteur ».
Commandes du Navigateur musical
Lorsque vous choisissez le mode MUSIQUE dans le menu principal, l'écran Navigateur musical apparaît. Vous pouvez choisir de parcourir vos fichiers musicaux par noms de chanson, albums,
text_image
Now playing
All songs
Albums
Artists
Genres
Browser
artiste ou genre, ou vous pouvez choisir « Navigateur » pour afficher les fichiers musicaux et les dossiers sur le lecteur.
Fonction Action Parcourir la liste Appuyez sur <HAUT>ou <BAS> Sélectionner un élément Appuyez sur <ENTRÉE> Fonction Action Revenir à l’écran précédent Appuyez sur Revenir au menu principal Maintenez le boutonenfoncé
Si vos fichiers musicaux contiennent des balises d'information ID3, vous pourrez afficher vos pistes par Artiste, Album ou Genre. Pour afficher tous les fichiers (y compris ceux qui ne contiennent pas de balises d'information ID3), sélectionnez « Toutes les chansons » (All Songs) ou utilisez l'option « Navigateur ».
Si la lecture de fichiers musicaux est déjà en cours, vous disposez de l'option pour revenir à l'écran Lecture en cours.
L'affichage des paroles exige un fichier de paroles « LRC », que vous pouvez trouver sur Internet ou créer avec un éditeur de fichiers de paroles. Les fichiers de paroles peuvent contenir des informations synchronisées sur la durée, ainsi que des informations sur les paroles.
Les fichiers de paroles doivent avoir le même nom que le fichier musical correspondant (ex. « Titredechanson1. lrc » et « Titredechanson1.mp3 ») et doivent être placés dans le même répertoire.
Utilisation de la Liste de lecture rapide
Pour créer une Liste de lecture rapide qui contient vos morceaux favoris :
Sélectionnez « Navigateur » depuis l'écran 1.
Navigateur musical
Utilisez les commandes du Navigateur pour 2. sélectionner un morceau à ajouter.
Appuyez sur le bouton . L'écran va 3. afficher « Ajouter à la liste » (Add to list).
Appuyez sur pour terminer l'ajout du 4. morceau à la Liste de lecture.
Cette Liste de lecture rapide peut être lue depuis le menu d'Option rapide de l'écran Lecture en cours (voir page 16 pour de plus amples informations).
Commandes de la Lecture en cours (Lecture musicale)
Pour commencer la lecture musicale, parcourez la liste des morceaux et appuyez ensuite sur pour lancer la lecture.
Lorsqu'un morceau est en cours de lecture, l'écran Lecture en cours apparaît (voir ci-dessous).
text_image
Play Status
Lock Icon
Equalizer
NOA
Battery Level
Repeat Mode
Album Cover
ID3 Information
California Dream
The king crimson...
Elapsed Time
3:12 13/50 4:32
Progress Bar
Remain Time
Current Track /
Total Tracks
MODE MUSIQUE
Les fonctions suivantes peuvent être activées à partir de l'écran Lecture en cours.
Fonction Action Lecture de la piste suivante Appuyez sur Lecture de la piste précédente Appuyez sur Faire une avance rapide sur le morceau en cours de lecture Maintenez le boutonenfoncé Faire un retour rapide sur le morceau en cours de lecture Maintenez le boutonenfoncé Mettre en pause/reprendre la lecture Appuyez sur Accéder au menu d’Option rapide (voir les détails ci-dessous) Appuyez sur Régler le niveau du volume Appuyez surou Revenir à l’écran Navigateur musical Appuyez sur Revenir au menu principal Maintenez le boutonenfoncé
Pour accéder au menu d'Option rapide, appuyez sur le bouton à l'écran Lecture en cours.
Pour parcourir les paramètres, appuyez sur ✦ ou
MODE MUSIQUE
Pour sélectionner un paramètre, appuyez sur ✦
Pour revenir à l'écran précédent, appuyez sur ✦
Égaliseur
Sélectionnez une présélection d'égaliseur numérique pour améliorer la réception des signaux audio. Les options sont : Normal, Pop, Rock, Classique, Jazz, et Grave.
Repeat (Répéter)
Changez les options répétition pour ajuster l'ordre de lecture des pistes.
Elément Description Aucune Répétition Lecture de pistes dans l'ordre normal et sans répétition. Un (One) Répète la lecture du morceau en cours. Tous (All) Répète la lecture de tous les morceaux. RandomAll (Tous Aléatoire) Lecture aléatoire de tous les morceaux. Dir Normal (Normal Dir) Répétition de toutes les pistes dans le dossier actuel.
Bibliothèque
Pour retourner à l'écran Music Browser (Navigateur de Musique)
Liste de Lecture
Sélectionnez "Play List" (Liste de Lecture) et ensuite "My List" (Ma Liste) pour lire une liste de vos chansons favorites.
Pour ajouter des chansons à la liste, voir "Mode Music > Commandes de navigation musicale > Utilisation de la Liste de Lecture Rapide".
Paroles
Active ou désactive l'affichage de Paroles.
Parcourez vos fichiers images et affichez-les (JPG et BMP).
Pour obtenir de plus amples informations sur la manière d'ajouter des fichiers images sur votre lecteur, consultez la section « Transfert de fichiers vers le lecteur ».
Commandes du Navigateur d'images (Picture Browser)
Lorsque vous choisissez le mode IMAGES dans
text_image
Photo
1
2
3
5 Photos
Dossier1.
Photo2.
Nom du 3.
dossier ou
une photo
sélectionnée
le menu principal, l'écran Navigateur d'images apparaît. Vos images seront affichées en images miniatures.
Utilisez le Navigateur d'images pour rechercher tous les fichiers images téléchargés sur votre lecteur.
Fonction Action Parcourir les images et les dossiers Appuyez sur,,, Sélectionner/afficher un élément Appuyez sur Revenir à l’écran précédent Appuyez sur Revenir au menu principal Maintenez le boutonenfoncé
Commandes de l'Affichage d'images (Picture Viewer)
Pour afficher une image, parcourez les images miniatures et appuyez ensuite sur .
Les fonctions suivantes peuvent être activées à partir de l'écran Affichage d'images.
Fonction Action Afficher l’image suivante Appuyez sur Afficher l’image précédente Appuyez sur Lancer ou arrêter le mode diaporama Appuyez sur Revenir à l’écran Navigateur d’images Appuyez sur Revenir au menu principal Maintenez le bouton<MENU> enfoncé
Parcourez et lisez vos fichiers vidéo.
Votre lecteur prend en charge des fichiers MTV encodés à 128 x 128 et 20 images/seconde. Les vidéos doivent être encodées avec le logiciel fourni afin d'être lues sur l'appareil.
Pour de plus amples informations sur la conversion de vidéos, consultez la section « Conversion de films ».
Pour obtenir de plus amples informations sur la manière d'ajouter des films sur votre lecteur, consultez la section « Transfert de fichiers vers le lecteur ».
Commandes du Navigateur de vidéos (Movie browser)
Lorsque vous choisissez le mode FILMS dans le menu principal, l'écran Navigateur de vidéos apparaît.
Utilisez le Navigateur de vidéos pour rechercher tous les fichiers vidéo téléchargés sur votre lecteur.
Fonction Action Parcourir la liste de fichiers et de dossiers de vidéos Appuyez sur<HAUT> ou <BAS> Sélectionner/lire un élément Appuyez sur<ENTRÉE> Revenir à l’écran précédent Appuyez sur<MENU> Revenir au menu principal Maintenez le bouton <MENU> enfoncé
Commandes de lecture de films
Les fonctions suivantes peuvent être activées à partir de l'écran Lecture en cours.
Fonction Action Lire le film suivant Appuyez sur Lire le film précédent Appuyez sur Faire une avance rapide sur le film en cours de lecture Maintenez le bouton enfoncé Faire un retour rapide sur le film en cours de lecture Maintenez le bouton enfoncé Mettre en pause/reprendre la lecture Appuyez sur Régler le niveau du volume Appuyez sur ou Revenir à l’écran Navigateur de vidéos Appuyez sur . Revenir au menu principal Maintenez le bouton enfoncé
Lire des fichiers texte chargés sur votre lecteur (TXT).
Pour obtenir de plus amples informations sur la manière d'ajouter des fichiers texte sur votre lecteur, consultez la section « Transfert de fichiers vers le lecteur ».
Contrôles pour Parcourir les Textes
Lorsque vous choisissez Text (Texte) à partir du menu principal, vous verrez l'écran Text Browser (Navigateur de Texte).
Choisissez “All EBooks” (Tous les EBooks) pour visualiser tous les fichiers texte sur le lecteur.
Si la lecture de texte est déjà en cours, vous aurez l'option supplémentaire de retourner à l'écran "Now Reading" (En Cours de Lecture).
MODE TEXT
Utilisez le navigateur texte pour retrouver tous les fichiers textes chargés sur votre lecteur.
Fonction Action Pour parcourir la liste des fichiers et dossiers textes Appuyez sur <UP> (Haut) ou <DOWN> (Bas) Pour sélectionner/visualiser un élément Appuyez sur <ENTER> (Entrée). Pour retourner à l’écran précédent Appuyez sur <MENU>
Commandes pour Lire les Textes
Les fonctions suivantes peuvent être exécutées à partir de l'écran Text Display (Affichage de Texte).
Fonction Action Pour lire la page suivante Appuyez sur(Bas) Pour lire la page précédente Appuyez sur(Haut) Pour passer à la fonction défilement automatique Appuyez sur(Entrée) Pour retourner à l’écran Text Browser (Navigateur de Texte) Appuyez sur Pour retourner au menu principal Maintenez
Le menu Quick Option (Option Rapide) vous permet d'accéder facilement aux paramètres d'options de votre lecteur.
Appuyez sur pour accéder au Menu Quick Option (Option Rapide).
Aller à la Page
Sauter directement à une page.
Appuyez sur (Gauche) ou ★ (Droite) pour sélectionner un champ à ajuster.
Appuyez sur (Haut) ou (Bas) pour régler le champ choisi.
Appuyez sur (Entrée) pour ✦ confirmer.
Bookmark (signet)
Sélectionnez pour Save Bookmark (Sauvegarder Signet), Load Bookmark (Charger le Signet) et Delete Bookmark (Supprimer le Signet).
Le lecteur affichera les signets précédents après la confirmation de votre Signet à partir du menu Quick Option (Option Rapide).
Appuyez sur (Haut) ou (Bas) pour afficher le signet souhaité, et ensuite appuyez sur (Entrée) :
Save Bookmark (Sauvegarder Signet) : ☆ Sauvegarder l'endroit comme signet.
Load Bookmark (Charger Signet) : Ouvrir ☆ (aller au) le signet souhaité que vous venez de choisir.
Delete Bookmark (Supprimer Signet) : ✸ Supprimer le signet souhaité que vous venez de choisir.
Quand vous passez au dernier signet, ✦ appuyez sur (Entrée) deux fois pour sauvegarder l'endroit actuel en tant que nouveau signet
Set Font Color (Régler Couleur de Police)
Permet de régler la couleur du texte affiché.
Auto Scroll (Défilement Automatique)
Permet de faire défiler la page automatiquement.
Auto Scroll Time (Temps Défilement Automatique)
Appuyez sur (Haut) ou (Bas) pour ajuster la durée de l'intervalle entre les pages pendant le mode Auto Scroll (Défilement Automatique).
Accédez au mode Explorateur et effacez tous les dossiers et fichiers téléchargés sur votre lecteur.
Pour accéder au mode Explorateur, sélectionnez et confirmez EXPLORATEUR dans le menu principal.
Commandes de l'Explorateur
Lorsque vous choisissez le mode EXPLORATEUR dans le menu principal, l'écran Explorateur de fichiers apparaît. Vous pouvez rechercher et supprimer des fichiers ou des dossiers du lecteur.
Fonction Action Parcourir la liste de fichiers et de dossiers Appuyez surou Sélectionner un dossier Appuyez sur Revenir à l'écran précédent Appuyez sur Supprimer un élément sélectionné Appuyez sur,et ensuite sélectionnez “YES” (OUI) Revenir au menu principal Maintenez le boutonenfoncé
Accédez au mode Paramètres pour définir les options système de votre lecteur.
Pour accéder au mode Paramètres, sélectionnez PARAMETRES (Settings) dans le menu principal.
Fonction Action Parcourir les options Appuyez surou Sélectionner un élément Appuyez sur Annuler et revenir à l'écran précédent Appuyez sur Revenir au menu principal Maintenez le boutonenfoncé
Les options suivantes sont disponibles : Certaines de ces options peuvent être définies à partir du menu d'Option rapide.
Elément Description Affichage Rétroéclairage Règle le temps (en secondes) pendant lequel le clavier restera allumé. Le réglage « toujours » gardera le clavier allumé. Heure Sommeil Régler le minuteur de sommeil pour qu'il éteigne le lecteur automatiquement. Langue -- Sélection de la langue pour afficher les informations à l'écran. Sys Tools (Outils Sys) Format(Formater) Il peut s'avérer nécessaire de formater votre lecteur si les données ou les fichiers sont corrompus. Vous pouvez choisir soit formatage Quick (Rapide) ou Complete (Complet) Un formatage Complet prendra plus de temps. Reset (Remise à zéro) Restaure les réglages par défaut du lecteur, en sortie d'usine. Sys Info (Info Sys) Visualise les informations d'utilisation de la mémoire et du micrologiciel. Sort (Trier) Trier toutes les musiques que vous avez chargé sur votre lecteur. Sélectionnez "Force Sort" (Triage Forcé) pour mettre à jour la bibliothèque de musique immédiatement. Ce processus peut prendre quelques minutes si vous avez transféré des fichiers musique sur votre lecteur récemment.
Branchez le lecteur à un ordinateur au moyen du câble USB 2.0 fourni pour :
Transférer des fichiers vers et à partir de votre
lecteur
Effectuer des fonctions de base de gestion des ✦ fichiers.
text_image
USB Port
USB Port
Computer
Lors de la connexion :