HM 3471 - Blender CLATRONIC - Free user manual and instructions
Find the device manual for free HM 3471 CLATRONIC in PDF.
User questions about HM 3471 CLATRONIC
0 question about this device. Answer the ones you know or ask your own.
Ask a new question about this device
Download the instructions for your Blender in PDF format for free! Find your manual HM 3471 - CLATRONIC and take your electronic device back in hand. On this page are published all the documents necessary for the use of your device. HM 3471 by CLATRONIC.
USER MANUAL HM 3471 CLATRONIC
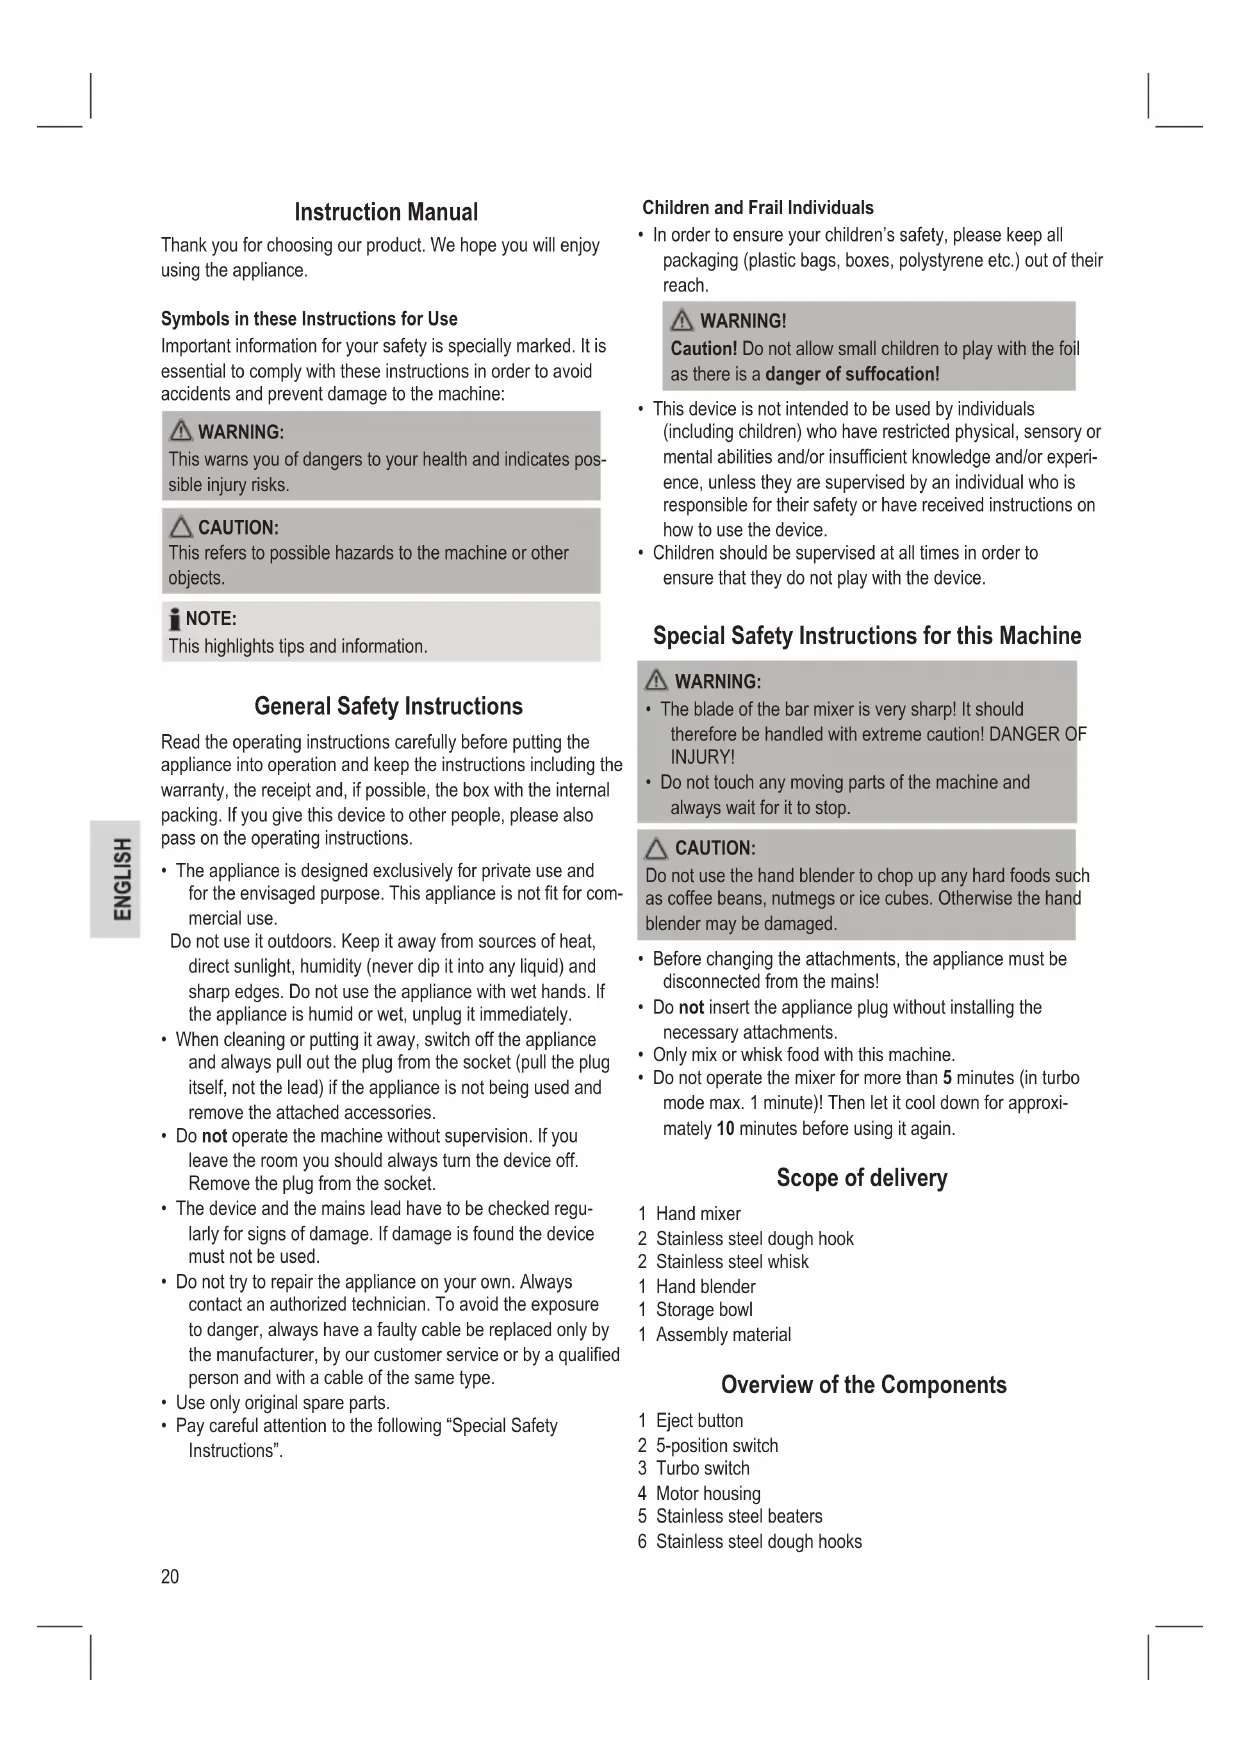
natural_image
Black and silver kitchen blender with hand mixer and stand (no visible text or symbols)CE
| DEUTSCH | ENGLISH | ||
| InhaltÜbersicht der Bedienelemente......Seite 3Bedienungsanleitung......Seite 4Technische Daten......Seite 6Garantie......Seite 6Entsorgung......Seite 7 | ContentsOverview of the Components......Page 3Instruction Manual......Page 20Technical Data......Page 22Disposal......Page 22 | ||
| NEDERLANDS | JEZYK POLSKI | ||
| InhoudOverzicht van de bedieningselementen......blz 3Gebruiksaanwijzing......blz 8Technische gegevens......blz 10Verwijdering......blz 10 | Spis treściprzejad elementów obsugi......Strona 3Instrukcja obsługi......Strona 23Dane techniczne......Strona 25Ogólne warunki gwarancji......Strona 25Usuwanie......Strona 26 | ||
| FRANÇAIS | MAGYARUL | ||
| SommaireListe des différents éléments de commande......Page 3Mode d'emploi......Page 11Données techniques......Page 13Élimination......Page 13 | TartalomA kezelőelemek áttekintése......Oldal 3Használati utasítás......Oldal 27Műszaki adatok......Oldal 29Hulladékkezelés......Oldal 29 | ||
| ESPAÑOL | YKPAÏHCBKA | ||
| IndiceIndicación de los elementos de manejo......Página 3Instrucciones de servicio......Página 14Datos técnicos......Página 16Eliminación......Página 16 | ЗмістОгляд елементів управління......стор 3Інструкція з експлуатації......стор 30Технічні параметри......стор 32 | ||
| ITALIANO | РУССКИЙ | ||
| IndiceElementi di comando......Pagina 3Istruzioni per l'uso......Pagina 17Dati tecnici......Pagina 19Smaltimento......Pagina 19 | СодержаниеОбзор деталей прибора......стр. 3Руководство по эксплуатации......стр. 33Технические данные......стр. 35 | ||
| العربيةالغويات3 Smallerن تجECم38 دليل الت oxideيات36 البايات الفنية | |||
Thank you for choosing our product. We hope you will enjoy using the appliance.
Symbols in these Instructions for Use
Important information for your safety is specially marked. It is essential to comply with these instructions in order to avoid accidents and prevent damage to the machine:

WARNING:
This warns you of dangers to your health and indicates possible injury risks.

CAUTION:
This refers to possible hazards to the machine or other objects.

NOTE:
This highlights tips and information.
General Safety Instructions
Read the operating instructions carefully before putting the appliance into operation and keep the instructions including the warranty, the receipt and, if possible, the box with the internal packing. If you give this device to other people, please also pass on the operating instructions.
- The appliance is designed exclusively for private use and for the envisaged purpose. This appliance is not fit for commercial use.
Do not use it outdoors. Keep it away from sources of heat, direct sunlight, humidity (never dip it into any liquid) and sharp edges. Do not use the appliance with wet hands. If the appliance is humid or wet, unplug it immediately. - When cleaning or putting it away, switch off the appliance and always pull out the plug from the socket (pull the plug itself, not the lead) if the appliance is not being used and remove the attached accessories.
- Do not operate the machine without supervision. If you leave the room you should always turn the device off. Remove the plug from the socket.
- The device and the mains lead have to be checked regularly for signs of damage. If damage is found the device must not be used.
- Do not try to repair the appliance on your own. Always contact an authorized technician. To avoid the exposure to danger, always have a faulty cable be replaced only by the manufacturer, by our customer service or by a qualified person and with a cable of the same type.
- Use only original spare parts.
- Pay careful attention to the following "Special Safety Instructions".
Children and Frail Individuals
- In order to ensure your children's safety, please keep all packaging (plastic bags, boxes, polystyrene etc.) out of their reach.
Caution! Do not allow small children to play with the foil as there is a danger of suffocation! - This device is not intended to be used by individuals (including children) who have restricted physical, sensory or mental abilities and/or insufficient knowledge and/or experience, unless they are supervised by an individual who is responsible for their safety or have received instructions on how to use the device.
- Children should be supervised at all times in order to ensure that they do not play with the device.

WARNING!
Special Safety Instructions for this Machine

WARNING:
- The blade of the bar mixer is very sharp! It should therefore be handled with extreme caution! DANGER OF INJURY!
- Do not touch any moving parts of the machine and always wait for it to stop.

CAUTION:
Do not use the hand blender to chop up any hard foods such as coffee beans, nutmegs or ice cubes. Otherwise the hand blender may be damaged.
- Before changing the attachments, the appliance must be disconnected from the mains!
- Do not insert the appliance plug without installing the necessary attachments.
- Only mix or whisk food with this machine.
- Do not operate the mixer for more than 5 minutes (in turbo mode max. 1 minute)! Then let it cool down for approximately 10 minutes before using it again.
Scope of delivery
1 Hand mixer
2 Stainless steel dough hook
2 Stainless steel whisk
1 Hand blender
1 Storage bowl
1 Assembly material
Overview of the Components
1 Eject button
2 5-position switch
3 Turbo switch
4 Motor housing
5 Stainless steel beaters
6 Stainless steel dough hooks
7 Hand blender
8 Cover for the hand blender connection
Instructions
- For optimum results use high-walled vessels that are not too large.
- In order to avoid splashing, always insert the rods fully into the food being mixed before you switch the mixer on.
- Pay attention to the slowing down of the motor after shutting off.
- The device is only designed for small quantities! You should therefore only fill the maximum quantities stated in the table into a container!
- To turn off the device, switch the speed setting (2) to "0" (see Fig. B).
Hand blender (7)
Chop up large pieces of solid food before mashing (max. ∅ 1.5 cm) and add a little liquid.

CAUTION:
Only use the hand blender at settings 1 - 2. Do not use the hand blender at settings 3 - 5 or turbo. This could result in damage to the appliance.
Turbo operation (3)
This is for switching to maximum speed for a short time. Press at short intervals for pulsed mode operation.

CAUTION:
Do not use this function for more than one minute.
Initial Operation
Preparation
• Take out all the parts carefully out of the packing.

WARNING:
Please be extremely careful when removing the foil from the blade of the hand mixer!
- Clean the device before using it for the first time as described in "Cleaning".
Mounting the storage bowl
The storage bowl can be mounted to a wall. To do so, please proceed as follows:
- Check whether no electric cables or water pipes are located in the intended position.
- Drill two holes, with a diameter of 5 mm at a distance of 90 mm horizontally, into the wall.
- Push the supplied dowels into the holes.
- Twist the supplied screws into the dowels so that the screws still protrude out of the wall by approx. 5 mm.
- Hang the storage bowl onto the screws using the slits on the rear side.
Electrical connection
Check whether the electrical voltage that you intend to use is the same as that of the machine. You can find this information on the nameplate.
How to use the Kneader hooks/beater
- Turn the power level selector switch (2) to "0" and ensure that the mixer has been disconnected from the mains.
- Press the end of the kneader hooks/beater into the corresponding mixer openings until the hooks click into place. While pressing, turn slightly in order to facilitate the whole operation

NOTE:
The kneading hook with the curved washer on the shaft can only be inserted on the left-hand side of the mixer when viewed from the bottom.
- Connect the device to a duly installed 230 V/50 Hz protective contact socket.
- The hand mixer can be used at various speeds set with the speed regulator (2).
- In order to release the kneading hook/whisk turn the power level selector switch to "0" and ensure that the mixer has been disconnected from the mains.
- Press the button (1) to release the kneading hook/whisk. Remove the device by turning it slightly.
Using the Hand Blender
- Turn off the appliance and disconnect it from the power outlet.
- Slide the cover (8) for the connection of the hand blender (7) upwards into the housing so that the slot is exposed.
- Fit the hand blender (7) into the opening and secure it by turning it anti-clockwise (see Fig. D).
- Plug the connector into the power outlet.
- Immerse the hand blender up to a maximum of 34 deep into a filled mixing bowl.
- The hand mixer can be used at various speeds set with the speed regulator (2).

CAUTION:
Only use the hand blender in the settings 1 - 2. Do not use the hand blender at settings 3 - 5 or turbo. This could result in damage to the appliance.
- When you would like to stop mixing, turn the power level selector switch to "0" and unplug the device from the mains.
- To detach the hand blender from the motor housing, turn it clockwise and carefully pull it off.
Always choose a utensil and a speed according to the following table:
| Product/Type of Preparation | Max. Quan- tity | Utensil Level | Max Operating Time |
| Heavy dough (e.g. yeast dough) | 500 g | kneider hook | 1 – 4 3 min. |
| Cake mixture, light crêpes mixtures | 750 g | beater 2 – 5 | 5 min. (with turbo 1 min.) |
| Sponge mixture, wafer mixture, Cream | 750 g | beater 2 – 5 | 5 min. (with turbo 1 min.) |
| Salad dressings | Hand | blender | 1 – 2 5 min. |
| Fruit Hand | blender | 1 – 2 5 min. | |
| Onions, garlic Hand | blender | 2 5 Min. |
Cleaning

WARNING:
• Always remove the plug before cleaning!
- Under no circumstances should you immerse the device in water for cleaning purposes. Otherwise this might result in an electric shock or fire.

CAUTION:
- Do not use a wire brush or any abrasive items.
-
Do not use any acidic or abrasive detergents.
-
Only a damp cloth should be used for cleaning the outside of the machine.
- Clean the equipment in the usual way in soapy water.
Noise development
The workplace-related emission value is less than 73 dB(A).
Technical Data
Model: HM 3471
Rated voltage/ frequency: 220-240 V, 50 Hz
Rated power consumption: 300 Watt
Protection class: II
Short-term operation: 5 min
Turbo operation: 1 min
Net weight: 1.1 kg
The right to make technical and design modifications in the course of continuous product development remains reserved.
This device has been tested according to all relevant current CE guidelines, such as electromagnetic compatibility and low voltage directives, and has been constructed in accordance with the latest safety regulations.
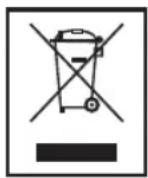
Disposal
Meaning of the "Dustbin" Symbol
Protect our environment: do not dispose of electrical equipment in the domestic waste.
Please return any electrical equipment that you will no longer use to the collection points provided for their disposal.
This helps avoid the potential effects of incorrect disposal on the environment and human health.
This will contribute to the recycling and other forms of reutilization of electrical and electronic equipment.
Information concerning where the equipment can be disposed of can be obtained from your local authority.
Instrukcja obsługi
CTC Clatronic Sp. z o.o