
800ETC1-20030.1 - Tile cutter DEXTER - Free user manual and instructions
Find the device manual for free 800ETC1-20030.1 DEXTER in PDF.
| Product type | Electric tile cutter |
| Brand | DEXTER |
| Model | 800ETC1-20030.1 |
| Rated voltage | 230 V~ |
| Rated frequency | 50 Hz |
| Rated power | 800 W (S1) / 900 W (S2, 10 min max) |
| No-load speed | 3000 min⁻¹ |
| Diamond wheel diameter | 200 mm |
| Wheel bore | 25.4 mm |
| Max. cutting depth at 90° | 30 mm |
| Max. cutting depth at 45° | 25 mm |
| Max. cutting length | 520 mm |
| Max. workpiece dimensions | 520 x 400 x 10 mm |
| Machine weight | 26.6 kg |
| Max. operating weight | 45 kg |
| Max. workpiece weight | 20 kg |
| Protection class | I |
| Protection type | IP54 |
| Miter cutting range | 0° - 45° |
| Sound pressure level (LpA) | 75 dB(A) (uncertainty 4 dB(A)) |
| Sound power level (LWA) | 89 dB(A) (uncertainty 4 dB(A)) |
| Cooling | Water (integrated pump) |
| Required safety equipment | Hearing protection, gloves, safety glasses, dust mask |
| Warranty | 24 months |
Frequently Asked Questions - 800ETC1-20030.1 DEXTER
User questions about 800ETC1-20030.1 DEXTER
0 question about this device. Answer the ones you know or ask your own.
Ask a new question about this device
Download the instructions for your Tile cutter in PDF format for free! Find your manual 800ETC1-20030.1 - DEXTER and take your electronic device back in hand. On this page are published all the documents necessary for the use of your device. 800ETC1-20030.1 by DEXTER.
USER MANUAL 800ETC1-20030.1 DEXTER
Thank you for purchasing this product. We recommend that you read General safety warnings, Specific safety warnings & instructions manual carefully before use. We have designed this product in order to ensure your complete satisfaction. If you require assistance, please ask the aftersales team on hand to help you at your retailer.


H


REEMPLACEMENT DE LA DISQUE A COUPE
Móvo yia xwpecs TCS EE

WYKONYWANIE CIEC POD KATEM 90^
LJIe npOaYKT nIiNpARee BToPnHHnNepeo6bJI. JaKIo BIn 6blIbe He npDaHTnHnIyBnKOpCTaHnE, 6bJb naKa, B1DHeCtIb IyoO To CEHTpy Nepeo6Kn BiXoID.

BAXJIINBO! IPOUHTAITE TA 3BEPIGAITE JIJI NOJALbIWOBO BIKOPNCTAHHJ.
3MICT
- BKNOPNCTAHHJIINTKOPI3A 3A INPNI3HAUEHHJM
- IHCTPYKUII 3 TEXHIKN B3NEKNI
- ONIC
- TEXHIHDAHI
- IEPEDIOTYATKOM BIKOPNCTAHN OBJAHAHH
- 3BIPKA
-
EKCINLYATALI
-
TEXHlUHE OBCJyFOBYBAHH
- YCYHEHHH HECNPABHOCTE
- YTNJI3ALIJA T A IPEPEPO6KA
- 306PAXEHHH B PO3IBPAHOMY BIVJI
- NEPEJIK DETAJEI
13.「APAHTI
1. BUKOPUCTAHNJIITKOPI3A 3A IPN3HAUEHHYM
Byd-kae iHw BnKOpncTaHHB BbXaetbCBA KOpncTahHM He 3a npn3HaehnM.
3a 3bntk m ab6 ydy-bi kpi TpaBMn, 100 BmHnkaioTb y pe3yIbTaTI TAKORo HnnpabnHoro BnKOpNCTaHHB iDnOBiJaNbHiCTb Hece KOpNCTyBaU/onePapot, a He BnPo6Hnik.
Donyckaetbca BkopnctaHn TilbKn Cymichnx 3 npntpoe m i3aIbnx nickib.
3a60pOH8cTbB KINKOPHCTAHN HnBnHx NOTIOEN. To BNOKOPHTAHN 3a pRTHAeHHM TAKOX BIDHOCHTBCDOTPMHAAH BMOR TEXHIX 6BeKNK, hICTyPKo 6nbIpy TaekCNYATAUYU, 1OcMIPTbB y NOCiHKNYK OPICYTBAA.
Oc6n, kvi BOKOPCtOByIb i 06cIyROBvIb npCTpii, nobHHi 6ytN 03HaiOMJIeHI 3 cIMM iHCTpyKJIAm 3 ekCpNyataaII Ta npoiHfopMOBaHI npoNTeuHny He6e3NeKy.
Kpim TOrO, he6bXIO chTPODOTPMYBATCSIOHx y BAOUIM pRABI IOA 30aOBiIRAHN HUEACNH X BNAIDKB, A TOAK IHUMIX 3aBnALX npRANIN OXOPONH 3doPORA h BAPOOHM MCIUI i npRAN IN TECHIKI 6EZNk.
Y pasi BHEENCHI 6ybl-kaix 3MH B Pnctpr npaHTI BnO6Hna HnyIOCTB. BnO6Hne He Hece BiNIOBIDaIbHocI 3a 6ybl-jaK 3bNTIK, zo BHNKNI Bpe3yIbTstAT TAKX 3MH.
Haiitb kio npinad BnKOpncTObyEc7c8 3riDho 3 IHCTpykucic, HEMOxJIMBO NOBHCtIO BKNIOUHTN deKei 3aIIMKOBi faktorp n3IKy. 3aENKHO BID KOHCTpykui i 6yDoBI npInCTPOIO MOKyTB BHNKHUTN Taki He63neKIN:
KoHTaKT 3 aIma3Hm pi3aIbHM dNcKOM TaM, De BiH He 3akpntn.
- PioctraHH pyk B o6nactb o6epTahna anMa3Horo pi3aIbHoro dNcKa.
- YIaMKn HecnpaBHX aIMa3Hnx dNcKb a60 BiKuHaHH 3aROTOKn a60 YaCTINH 3aROTOKn.
- Poiokodkennh Cnyxy, kuo He BnKOpncbTyOToBc 3ac063axNCTy opraHb Cnyxy.
- PekomehnyeTbc yHnKaTu KOHTaTKy 3 DeTaIaMn, kI o6epTaIOTbc.
3Bephtb yary, 10e iHcTpyMeHT He npn3aHenn Dn B B KOpuCtAHH B KOpCpuiNHX, TropOBHX abo npomncBOnBX cIyra. Gapantia 6yde aHybObaHa, kIIO HcTpyMeHT BKNOPCtOByBaTMbCe B KOpCpuiNHX, TropOBHX, npomncBOnBX abo cxoknx liyax.
2. IHCTPYKII3 TEXHIK B3NEKNI
BCTAHOBJIENHH BOJHORO HACOCA
- 06epexno nidimtb npictpi i nomictb horo B konthehep dna BOi. Lio onepaio nobHHBnKohyBaTN oohmene duoc nIOde BCTaBe BOdHn Hacoc y TpMauch konthehepa dna BOi.
- PepeKoHaITeC8, 10 Tpy6Ka i 1Hyp Hacoc a He pepeHyTt I He nepeKpyHei. PepeKoHaITeC8, 10 Tpy6Ka i 1Hyp Hacoc a MoKyb BilbHO pyxatnc, He CTnCKaIOb I He nepeTnCKaIOb OdnH OndHO.
Tepe akypaTHo nepemictb ha pamy nonepedhbo 3ibpaHn npctpi. Lio onepaio nobHHI BIKOHyBaTn oHaMeHe DBOe IIOde.
BCTAHOBJIIEHHRAYCEHNHOOI CTPIKIN B 3BOPI
Pocna6te 2di Kckyoju pyKm (no Ondn 3 KoxHoro 6Oky naenii 3 kpyroBMM o6epTannm) i HaxnIbTB dBHyr npnctpO, 0o6 3nInnnohactoB 6NkO.
- TObepHtB DmRyH npCtpoB nOoATkoBe noNoXeHHa I 3aTgHtB dI φiKcyuOi pyuKn.
- Bidyncitb 3an60hny pykny dprnacnoptybaan, uo6 3punm Dnyr h 3 naeHni 3 kpyroBIM o6epTahnnH. Iocna6te i BtirnHt bOTurpi rBNHTN 3 xpeCTOnoDlBnM 7uINIO (Da h naHne 3 kpyroBIM o6epTahnnH i Dba H naBHyH), aKapinltB rCeHmHcy CTPIky B 36Opi B heo6diHOMy npoxenHH 3a DOONMOOTOpHXpOBx RnTHITX pectOnoDlBnHM 7uINIO.
BCTAHOBJIENHH KYTOBOI HANPRMHOI
Tocyhte KTOBY HnpanMHy B na3 HanpmaHOI.
3akpinib kytoby hnapmHy b notpiHomy noLoxehHi, 3aTaryhBUn dBa 3aTnckhN x rBuHTa.

YBAG! He po3taosobyte kytoby hnapmny ha odni lihii 3 pi3aHIM DnCKOM TOMy, zo BOHa MoKe 6ytu ykoDxkeHa n dac pObotn.
BCTAHOBJIENHH PUYKIN OBMEKYBAU DOBXHNI PI3AHH
3aTIRHITbIpyuKoOBMeJyBaUdOBoKHHiPiaAHnHO TBnHTaHa HApRMHi peui.ObMeKeHHiPiIM NOBHeH NPOXoDHTN BCEpeHHi HApRMHOI peKi.
7. EKCnnyatauia
BUNKACH
PONEPEDXEHH!Ipeed noaTkom p6oToN:
- PepekoHaiTeCe y BiDcyTHOCTI BUNIMNX NOUKoJXeHb.
- IpekeohaiTeecy y BiDcyTHoCTi CTOpOHHix PneDMETiB B po6OHi 30Hi, kI MoRn 6 ycklaDHHTN BVKOHaHHPO6OTN.
- IpekeohaiTeCBAHABHOCTIOCTaTHbOIKINbKOCTOXOJNOKByBaIbHOI BOH.
- IpekoHaiTeCe, 30 3axnChKoKyx BCTaHOBHeH HaleXHM YHOM.
- PepekoHaTeC, 10 B pO6oH 30H HEmaE hIKoro, KpIM onepaTopa.
- Y pa3i BnraBneHna 6yNb-RAKO rnoNkoJKeHHr iHCTpyMeHTa 3amHiTb Ioro 3 mipkyBaHb 6e3neKn.
Uo6yBIMKHyTnHaTNCiTb"1"HaBIMNkai. - Пешд почтkom pi3aHHя дочекайпеся, рOKI pi3aIbHи дИСК He po3BnHE MaKcMaIbHy IWBnKicTb i BOda noCHe HAnXoDITN Ha pi3aIbHи дИСК.
- Ⅲo6 BmKHyTn HaTnCHiTb "0" Ha BmNkai.
BINKOHAHNPO3PI3IBI KYTOM 90^
- Pocna6te ctonopny pyky ky KTOBOI hAnpMHO i BnCTABTe ky 0, notim 3aTAYHtB ctonopny pyky, u6b 3aFikCyBaTH kTOBY hAnpMHy.
- Picna 2b0rno nocna6Te 3aTnckHn rBnHT i nepemicti b Ioro B notpi6he noIooxehra.
Toi nepemictitb roBkny npicrtpoHa3a3a donomoroo pykn. - NomictiB nIITky mixK hanpmaHOIO i kyTOBOHO HapmHOIO.
- YbIMKHTb npnCTpii.
Baxnbo!3auekaTe, nOK oxoJoxoJxkyBaIbHa B0a He doCraHpei3aIbHorO dNcKa.
BukopncToByouHpyky, nobInbHo i nIaBHO nepemiiauTe rOIOBky npicTropo BpepeNo pIITu.
BKNOHAHN DIAFOHAJIbHINXPO3PI3IB NID KYTOM 45^
BctaHObIb kyTOBy HAnpMHy NiD kyTOM 45^
3po6itbpo3pi3.
BKNKOHHHIIO3IOBXHIXPO3PI3IBIIKDYOM 45^
- Pocna6Te DbI φikcyuoi pyuyni Ipn iiaHHN niK cytom.
Haxnilt ha npymHy peky BliBO Ha kyt 45^ hA shkaji 3 kyTOBOIO PO3MITKOIO. - NOBTOPO 3aTARHITb fikcyuipyuk.
3po6itb po3pi3.
OBMEXEHHIIOBXINHPI3AHH
3a donomoroo DBOX pyoK o6mexyBaHa doBxHHPi3AHn MOHs o6mexyBaTn MoXnBicTB nepeMiueHH DaBryHa/pia3JIbHorO 6JIOy.
- Pocna6te obuDbI pyuKn o6mexyBaau i BiDpeRyIIOJIe ix do noTpi6HOro po3mipy. IkaJaHa hAnpMaHnI dOnomOKe ze 3po6ntn.
- Yac BiJ yacy nepebipjTe, nH He 3MiHnIOsc HanaHTyBaHH.
3AMIHA PI3AJIbHOrO DnCKA
BnIMtBnIky3po3ETK!
-Дайтприпаду oxoNoHyTN.
3akpinitb DnBryH/piaJbHn6bnokfikcyaJIbHMn TBnHTaMn i nlaCTNKOBIO nlaHOIO.
- Поссантухостюдбнг виntк ршшк pi3aJIbHOrO ncka i BiJkpNte kpiWky.
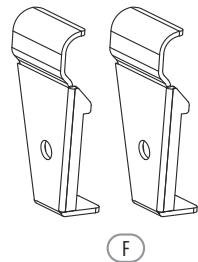
-ПомICTITb belenkni raiKOBn KIIOU 3 6OKOBm 3IBOM Ha IeCTMgpanHy raiKy, a iHsII KIIIOU 3 6OKOBm 3IBOM Ha BaI DInrhya i yTpmyTe HJoro.
3a donomoro BOeNko 360KOBIM 3IBOM nocla6te 8ectnpaHHy raHky, noBepHyBwn II B 6ik o6epTaHHp i3aIbHorO dNcKa. (ybara: nioboctopOHH p136a).
3Himits 30BhiuHiIΦaHaHeUb i piaJbHnI DNCK.
OuHCTIb Kpinnnbln H Pnaeueypeep yctAHOBKOHO HOBOr piaJbHORo dNcKa.
BctaHObIb HOBI p3aJIbHm DnCK, BIKOHABuN II B 3BOPOTHomY nopAky, i3aTHiTb.
Baxklnbo! 3BeptaTe ybary Ha hAnpymok o6eTpHa npiaIbHoro dNcka!
8. TEXHIYHE OBCJNYTOBYBAHHRA

PONEPEIXEHH! 3aBxDn BnMaJTe BnKy 3 pO3eTKn pepei BnKOHaHHM 6yDb-ayKnx peRyIIOBaHb, TexHiCyHoro 06cIyROByBaHHa 6o peMOHTy.
| Очирения на{Tатемпуне обл,cуровавлий Перед кожим Занусков Шо Переврие мерековий Кабел, Вилку, Кабел Кабел Рожимени, Насoc对于我们 nodачу охолodжевалы军建ши вори різальский наPreдmet поскожени. | Ж? ВизуалныOrтяд. | |
| Рergларно, залешно Вд умов Викорисанно Шо Переврие вci Гинтои 3'\'днанно я заIGNHпь IX ри Нeoбхidноctri. | Ж? ВизуалныOrтяд. | |
| Виданшп i осколки 3 пістrodu. | Здочten pіп i осколки зд допомогою стусяногу повіря або БИКорис的一项Уг. БИКорис的一项Ug. БИКORIS的一项Ug. БИКORIS的一项Ug. БИКORIS的一项Ug. БИKORIS的一项Ug. БИKORIS的一项Ug. БИKORIS的一项Ug. БИKORIS的一项Ug. БИKORIS的一项Ug. БИKORIS的一项Ug. БИKORIS的一项Ug. БИKORIS的一项Ug. БИKORIS的一项Ug. БИKORIS的一项Ug. БИKORIS的一项Ug. БИKOL БИKOL БИKOL БИKOL БИKOL БИKOL БИKOL БИKOL БИKOL БИKOL БИKOL БИKOL БИKOL БИKOL БИKOL БИKOL БИKOL БИKOL БИKOL БИKOL БИKOL | БИДаліпь піп i осколки зд допомогою стусяногу повіря або БИКорис的一项Уг. БИКORIS的一项Ug. БИKORIS的一项Ug. БИKORIS的一项Ug. БИKORIS的一项Ug. БИKORIS的一项Ug. БИKORIS的一项Ug. БИKORIS的一项Ug. БИKORIS的一项Ug. БИKORIS的一项Ug. БИKORIS的一项Ug. БИKORIS的一项Ug БИKORIS的一项Ug БИKORIS的一项Ug БИKORIS的一项Ug БИKORIS的一项Ug БИKORIS的一项Ug БИKORIS的一项Ug БИKORIS的一项Ug БИKORIS的一项Ug БИKORIS的一项Ug БИKORIS的一项Ug БИKORIS的一项Ug BIS БИKORIS的一项Ug БИKORIS的一项Ug БИKORIS的一项Ug БИKORIS的一项Ug БИKORIS的一项Ug БИKORIS的一项Ug БИKORIS的一项Ug БИKORIS的一项Ug БИKORIS的一项Ug БИKORIS的一项Ug БИKORIS的一项Ug |
| При Нeoбхidноcti Шо Замиа різаль碍�о диска. | Ж? Замиа різаль碍�о диска. | |
| Почкокоженny shana ng对于我们 почкокожаь军建ши вори BODи. | Замиотушни дд рordу рordу охолodжевалы军建ши вори (Ди. Ч. Ч. Ч. CH. CH CH CH CH CH CH CH CH CH CH CH CH CH CH CH CH CH CH CH CH CH CH CH CH CH CH CH CH CH CH CH CH CH CH CH CH CH CH CH CH CH CH CH CH CH CH CH CH CH CH CH |
KaIuO shaHrA OIOXyBAAHbO BOD CTAB KPNKHM, 3ACM1BcBAo AIO IOIOBNCBBO, 0R0 MOKH NIEKO 3AMHITN HUIMANUMTO RTO X TINTY. 3BilntbE3dHaAHn ITRMAH. BCTAOHbTbOBH NsAHTAK KO DOBKNH3, 3AkpInbTHO (TAK CMO, RaI cTAPN).
3MAUUBAHH
Yac BiJ Yacy Heo6xIHO 3MaUyBaTn HAprrMHi peKni iNiDiunHnKn DmRyHa.
TPAHCIOPTYBAHH
- Pēneid πepebe3eHNM He6xIDHnpeKoHaTNC, 100 3a1o6bXhA pyuKa Ira TpAHCNoptyBaHHn I naCPIIeHnI pIcTAPCHOpTyBaHHn 3aΦiKoBaHnA, aPiNaCTKOBaPiNaKA 3a NeHIO pRINBmHeHa Do DBrYHa/pi3aIbHorO 6nOKy. DBrYH/pi3aIbHn B6nK He nobHNH pyuxATOn No HaparnM peui.
- Ipeed nepeBe3eHHm Heo6xidno nepeKoHaTcS, 10 3aIyka BITrHyTa Ta 0B KOHTeHepi HemaC BODn.
HikonHe nepebo3te npictpi camoctiHo. Dnpe napebe3eHHn pntcpoIO notp6HO He MeHue dBox oc6. Pnctpi BaxkM. Kpaee 3Hrtn po6OCHt cTl 3OCHOBi.
-Пд ac napebe3eHn npictpi noBHeH 6ytu BeCb cac niHrTn haZemJeIO. 3a6OpOHeo ITOBxAtN a60 Tarynt no no NiJIo3i. - Kaio Heo6xioho nepemictihi npncpii B iHue Micue 3a Mekei po6ooyo 30Hn, HapnKiaad B aBTOMo6ini, kpaie po3ibpatn npncpti i nepebo3HTI Ioro B opirihalbni ynakobci.
36EPITAHN
36epiraite obladnHra Ta npiaadBra HeocTyHomy dIaTeMicuB TEmHomy i cyxmy npimiuHenPi np Tempepatyi Bnue 0^ IdaeJbHa Temepatypa 36epirahna CtahOBt Bi 5 do 30^ . 36epiraite enektroipchymetB oprrhanhniynakobci.
9. YCYHEHHH HECNPABHOCTEIN
| Read the operator's manual | Ukrainian Conformity Mark |
| Read the operator's manual | The product complies with the applicable European directives and an evaluation method of conformity for these directives was done. |
| Warning! | |
| Ear protection shall be worn | |
| Hand protection shall be worn | |
| Eye protection shall be worn | |
| Wear a protective mask | |
| Caution, risk of cutting | |
| Segmented diamond cutting wheels must not be used | |
| This product is recyclable. If it cannot be used anymore, please take it to waste recycling centre. | |

IMPORTANT: READ AND KEEP FOR FUTURE REFERENCE.
CONTENTS
- INTENDED USE FOR THE TILE CUTTER
- SAFETY INSTRUCTIONS
3.DESCRIPTION - TECHNICAL DATA
- BEFORE STARTING THE EQUIPMENT
- ASSEMBLY
-
OPERATION
-
MAINTENANCE
- TROUBLE SHOOTING
- DISPOSAL AND RECYCLING
- EXPLODED VIEW
- PART LIST
13.GUARANTEE
1. INTENDED USE FOR THE TILE CUTTER
The tile cutting machine is designed for standard cutting of small and medium-size tiles (glazed tiles, ceramic tiles or similar) which can be accommodated by the size of the machine.
It is designed for DIY applications and craft businesses in particular. It should never be used for cutting wood or metal.
The machine should be used exclusively for its intended purpose.
Any other use is deemed to be a case of misuse.
The user/operator and not the manufacturer will be held liable for damage and/or injuries of any kind that result from such misuse.
The machine is to be operated only with suitable cutting wheels.
Saw blades should never be used. Intended use also includes complying with the safety information, the assembly instructions and the operating instructions contained in the operating manual.
All persons who use and service the equipment must be acquainted with these operating instructions and must be informed about the equipment's potential hazards.
In addition, strict compliance with the accident prevention regulations in force in your area, as well as all other general rules on health and safety at work, is imperative.
The manufacturer's liability shall be deemed void if the machine is modified in any way and the manufacturer shall accept no liability for any damages arising as a result of modifications.
Even when the equipment is used as prescribed it is still impossible to eliminate certain residual risk factors.
The following hazards may arise as a result of the machine's construction and design:
- Contact with the diamond cutting wheel where it is not covered.
- Reaching into the diamond cutting wheel while it is rotating.
- Defective diamond tips flying off the cutting wheel or projection of workpieces and parts of workpieces.
- Damage to hearing if ear-muffs are not used.
- It is advisable to avoid contact with the rotating parts.
Please note that our equipment has not been designed for use in commercial, trade or industrial applications. Our warranty will be voided if the equipment is used in commercial, trade or industrial businesses or for equivalent purposes.
2. SAFETY INSTRUCTIONS
2.1 GENERAL SAFETY RULES

WARNING! Read all safety warnings, instructions, illustrations and specifications provided with this power tool. Failure to follow all instructions listed below may result in electric shock, fire and/or serious injury.
Keep all safety instructions and information for future reference!
The term "power tool" in the warnings refers to your mains-operated (corded) power tool or battery-operated (cordless) power tool.
1. Work area safety
a) Keep work area clean and well lit. Cluttered or dark areas invite accidents.
b) Do not operate power tools in explosive atmospheres, such as in the presence of flammable liquids, gases or dust. Power tools create sparks which may ignite the dust or fumes.
c) Keep children and bystanders away while operating a power tool. Distractions can cause you to lose control.
2. Electrical safety
a) Power tool plugs must match the outlet. Never modify the plug in any way. Do not use any adapter plugs with earthed (grounded) power tools. Unmodified plugs and matching outlets will reduce risk of electric shock.
b) Avoid body contact with earthed or grounded surfaces, such as pipes, radiators, ranges and refrigerators. There is an increased risk of electric shock if your body is earthed or grounded.
c) Do not expose power tools to rain or wet conditions. Water entering a power tool will increase the risk of electric shock.
d) Do not abuse the cord. Never use the cord for carrying, pulling or unplugging the power tool. Keep cord away from heat, oil, sharp edges or moving parts. Damaged or entangled cords increase the risk of electric shock.
e) When operating a power tool outdoors, use an extension cord suitable for outdoor use. Use of a cord suitable for outdoor use reduces the risk of electric shock.
f) If operating a power tool in a damp location is unavoidable, use a residual current device (RCD) protected supply. Use of an RCD reduces the risk of electric shock.
3. Personal safety
a) Stay alert, watch what you are doing and use common sense when operating a power tool. Do not use a power tool while you are tired or under the influence of drugs, alcohol or medication. A moment of inattention while operating power tools may result in serious personal injury.
b) Use personal protective equipment. Always wear eye protection. Protective equipment such as dust mask, non-skid safety shoes, hard hat, or hearing protection used for appropriate conditions will reduce personal injuries.
c) Prevent unintentional starting. Ensure the switch is in the off-position before connecting to power source and/or battery pack, picking up or carrying the tool. Carrying power tools with your finger on the switch or energising power tools that have the switch on invites accidents.
d) Remove any adjusting key or wrench before turning the power tool on. A wrench or a key left attached to a rotating part of the device may result in personal injury.
e) Do not overreach. Keep proper footing and balance at all times. This enables better control of the power tool in unexpected situations.
f) Dress properly. Do not wear loose clothing or jewellery. Keep your hair and clothing away from moving parts. Loose clothes, jewellery or long hair can be caught in moving parts.
g) If devices are provided for the connection of dust extraction and collection facilities, ensure these are connected and properly used. Use of dust extraction can reduce dustrelated hazards.
h) Do not let familiarity gained from frequent use of tools allow you to become complacent and ignore tool safety principles. A careless action can cause severe injury within a fraction of a second.
4. Power tool use and care
a) Do not force the power tool. Use the correct power tool for your application. The correct power tool will do the job better and safer at the rate for which it was designed.
b) Do not use the power tool if the switch does not turn it on and off. Any power tool that cannot be controlled with the switch is dangerous and must be repaired.
c) Disconnect the plug from the power source and/or remove the battery pack, if detachable, from the power tool before making any adjustments, changing accessories, or storing power tools. Such preventive safety measures reduce the risk of starting the power tool accidentally.
d) Store idle power tools out of the reach of children. Do not allow persons unfamiliar with the power tool or these instructions to operate the power tool. Power tools are dangerous in the hands of untrained users.
e) Maintain power tools and accessories with care. Check for misalignment or binding of moving parts, breakage of parts and any other condition that may affect the power tool's operation. If damaged, have the power tool repaired before use. Many accidents are caused by poorly maintained power tools.
f) Keep cutting tools sharp and clean. Properly maintained cutting tools with sharp cutting edges are less likely to bind and are easier to control.
g) Use the power tool, accessories, tool bits etc. in accordance with these instructions. Take into account the working conditions and the work to be performed. Use of the power tool for operations different from those intended could result in a hazardous situation.
h) Keep handles and grasping surfaces dry, clean and free from oil and grease. Slippery handles and grasping surfaces do not allow for safe handling and control of the tool in unexpected situations.
5. Service
a) Have your power tool serviced by a qualified repair person using only identical replacement parts. This will ensure that the safety of the power tool is maintained.
2.2 ADDITIONAL SAFETY INSTRUCTIONS
Please read the operating instructions carefully and observe the information provided. It is important to refer to these instructions in order to acquaint yourself with the equipment, its proper use and safety information.
- Set up the machine on a level, non-slip floor. Make sure that the machine does not wobble.
- Check that the voltage on the rating plate is the same as your supply voltage. Do not insert the power plug in the power outlet until you have done so. Connect the power supply by a insulation transformer or Residual Current Devices.
- Important: The cutting wheel will continue to rotate after the machine is switched off!
- Never apply side pressure to the diamond cutting wheel in order to bring it to a halt.
- Important: The diamond cutting wheel must be cooled with water at all times.
- Always pull out the power plug before changing the cutting wheel.
- Use only suitable diamond cutting wheels. Do not use cutting wheels with a maximum operating wheel speed that is less than the rated spindle speed of the machine.
- If the replacement of the supply cord is necessary, this has to be done by the manufacturer or his agent in order to avoid a safety hazard.
- Keep electric parts away from water and from persons in the working area.
- Never leave the machine unattended in rooms with children.
- Always pull out the power plug before examining the electric motor compartment system.
- Disorder in the work area can easily lead to accidents.
- Make sure that you stand squarely and solidly while working. Avoid abnormal body positions and always keep your balance.
- If the cutting wheel becomes jammed by dust, chips, or workpiece fragments, or if you need to interrupt your work, switch off the device and hold it motionless until the wheel has come to a standstill. Never attempt to pull a still operating cutting disc out of a cut as this may cause a kickback. Investigate and take corrective actions to eliminate the cause of the jam.
- The maximum permissible system impedance is 0.3535 at the interface point of the user's supply. The user should determine in consultation with the supply authority, if necessary, that the equipment is connected only to a supply of that impedance or less.

WARNING! Read all the safety information and instructions. Failure to adhere to the safety information and instructions set out below may result in electric shock, fire and/or serious injury. Keep all the safety information and instructions in a safe place for future use.
Any modification which could lead to a change in the original characteristics of the machine, for example, the rotation speed or the maximum diameter of the cutting wheel, may be carried out only by the manufacturer of the machine who confirm that the machine is still in conformity with safety regulations.
3. DESCRIPTION
- Open the packaging and take out the equipment with care.
- Remove the packaging material and any packaging and/or transportation braces (if present).
- Check to see if all the items are supplied.
- Inspect the equipment and accessories for damage in transit.
- If possible, keep the packaging until the end of the guarantee period.

WARNING! The equipment and packaging material are not toys.
Do not let children play with plastic bags, plastic sheets and small parts. There is a risk of choking and suffocating!
For detail items supplied, please see provided "Assembly instruction".
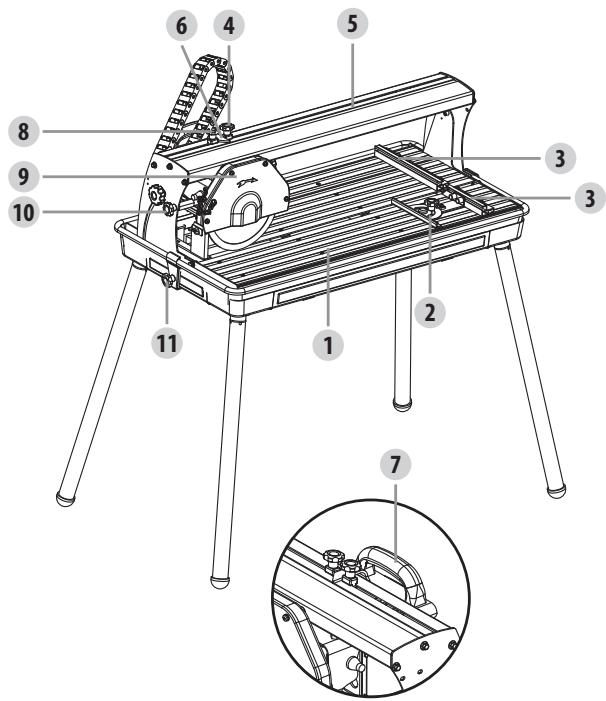
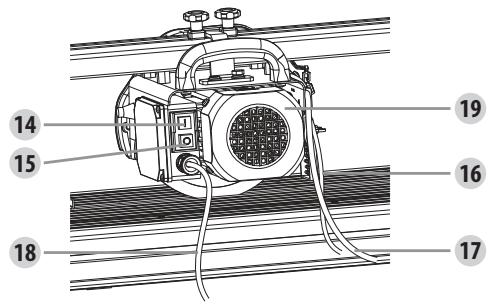
- Machine table
- Angle guide
- Guide
- Cutting length limiter knob
- Scale guiding rail for length of the cut
- Scale display
- Guiding grip
- Cutting length limiter knob
-
Protective cover for cutting disc with protective rubber
-
Transport safety knob
- Container fixing knob
- Fixing knob for litre cut
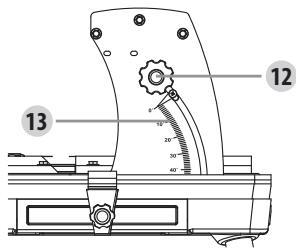
- Angle scale for mitre cut
- On-switch (I)
- Off-switch (O)
- Cooling water pipe
- Electric cord for pump
- Electric cord
- Motor/cutting unit
4. TECHNICAL DATA
| Nominal voltage | 230 V~ |
| Nominal frequency | 50 Hz |
| Nominal power | S1: 800W; S2: 900W 10min |
| No load speed | 3000 min-1 |
| Nominal mass of machine | 26.6 kg |
| Max. operating mass of machine | 45 kg |
| Max. mass of workpiece | 20 kg |
| Max. demensions of workpiece | 520 X 400 x 10mm |
| Diameter of diamond cutting wheel | 200 mm |
| Bore diameter of diamond cutting wheel | 25.4 mm |
| Max. cutting depth at 90° | 30 mm |
| Max. cutting depth at 45° | 25 mm |
| Max. cutting length | 520 mm |
| Kip area litre cut | 0-45° |
| Protection class (SK) | I |
| Protection type | IP54 |
Note: Recommendation for the operator to wear hearing protection.
The machine is designed for operating in S1 mode (continuous operation) under 800W power and S2 mode (short-term operation) under 900W power. S2 mode means that you can operate the machine for an uninterrupted period of 10 minutes at most with a nominal load after this period of time has elapsed, you must switch off the appliance and allow it to cool down completely. Afterwards, it can be used again for a maximum of 10 minutes.
Sound and vibration
The noise emission values were measured in accordance with EN 61029 and EN 12418.
| LpA sound pressure level | 75 dB(A) |
| KpA uncertainty | 4 dB(A) |
| LWA sound power level | 89 dB(A) |
| KWA uncertainty | 4 dB(A) |
Note:
that the declared noise emission value(s) have been measured in accordance with a standard test method and may be used for comparing one tool with another;
that the declared noise emission value(s) may also be used in a preliminary assessment of exposure.
Warning:
the noise emissions during actual use of the power tool can differ from the declared values depending on the ways in which the tool is used especially what kind of workpiece is processed;
need to identify safety measures to protect the operator that are based on an estimation of exposure in the actual conditions of use (taking account of all parts of the operating cycle such as the times when the tool is switched off and when it is running idle in addition to the trigger time).
Suggestions:
1) Wear gloves while using the tool.
2) Limit the time spent using the tool.
Residual risks
Even if you use this electric power tool in accordance with the instructions, certain residual risks cannot be eliminated. The following hazards may arise as a result of the equipment's construction and layout:
- Lung damage if no suitable protective dust mask is used.
- Damage to hearing if no suitable ear protection is used.
- Damage to health caused by hand-arm vibrations if the equipment is used over long periods of time or is not properly guided and maintained.

WARNING! This machine is likely to emit non-ionizing radiation, producing an electromagnetic field during operation. In some circumstances, this field may interfere with active or passive medical implants. To reduce the risk of serious or fatal injury, we recommend persons with medical implants to consult their physician and the medical implant manufacturer before operating this machine.
5. BEFORE STARTING THE EQUIPMENT
- The machine must be set up so that it stands firmly, i.e. it must be securely screwed to a work bench, to the provided base frame, or similar. Before setting up the machine, choose a stable surface, that is free of obstacles (except materials to be cut) and adequately lit.
- All covers and safety devices must be properly fitted before the equipment is switched on.
- The cutting wheel must rotate smoothly.
- Check that the voltage on the rating plate is the same as your supply voltage before you connect the equipment to the power supply.
- Always stand on the front of the machine (close to the transport handle) when operating.
6. ASSEMBLY

WARNING! Pull out the power plug before assembling, adjusting and changing the cutting wheel.
ATTACH THE LEGS TO THE METAL FRAME
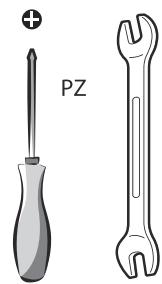
- Loosen the hex bolts on the bottom of four legs with 8mm hex key (supplied).
- Align the holes on the top of four legs with the holes on the metal frame of the water container, then put the profiled washers inside of the metal frame, then insert the hex bolts through the holes in the two side metal frame and profiled washers from the inside.
- Tighten the hex bolts with 8mm hex key.
- Place the metal frame with legs assembly on an even, stable and non slip surface and secure the four legs in place.
FITTING THE WATER CONTAINER
-
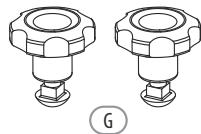
Loosen and remove the screw from the container fixing knob.
-
Align hole on the sheet metal with hole on the left side of the metal frame, insert the screw through holes in the two side metal frame and sheet metal from inside of metal frame and gently tighten the container fixing knob.
- Repeat the other sheet metal on the right side of the metal frame.
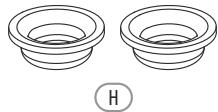
- Put the water container in the metal frame. The round side of the two sheet metals must hold on the upper edge of the water container.
- Tighten the container fixing knobs.
- Loosen the transport safety knob to unlock the motor/cutting unit.
FITTING THE WATER PUMP
- Lift the machine carefully with at least two persons into the water container. Push the water pump in the holder of the water container.
- Make sure that the pipe and pump cord are without bending or twisting. Make sure that the pipe and the pump cord can still move freely and are not pressed together or squeezed.
- Now place the pre-mounted machine carefully with at least two persons to the frame.
FITTING THE CONTINUOUS TRACKS GROUPWARE
- Loosen two fixing knobs (one on each side of the circumrotate board) and tilt the machine motor to remove the foam blocks.
- Retilt the machine motor to original position and tighten two fixing knobs.
- Loosen the transport safety knob to slide the motor away from the circumrotate board. Loosen and remove four cross-screws (two on the circumrotate board and two on the motor), fasten the continuous tracks groupware to intended positons using four cross-screws.
FITTING THE ANGLE GUIDE
- Slide the angle guide into the groove of the guide.
Fix the angle guide in the desired position by tighten the two clamping screws.

CAUTION! Do not position the angle guide in line with the cutting wheel line or else it could be cut during operation.
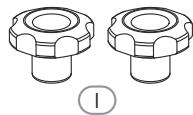
FITTING THE CUTTING LENGTH LIMITER KNOB
- Tighten two cutting length limiter knobs to the screw on the heading rail. Limited rise must run inside of the heading rail.
7. OPERATION
ON/OFF SWITCH
WARNING! Before starting:
- Ensure that there are no visible defects.
- Ensure that there is nothing in the work area that may hamper the work to be performed.
- Ensure that there is sufficient cooling water.
- Ensure that the guard is correctly mounted.
- Ensure that no one other than the operator is in the working area.
- For safety reasons replace the tool if it is found to be damaged in any way.
- To switch on, press the "1" on the on/off switch.
- Before you begin cutting, wait until the cutting wheel has reached maximum speed and wait for the cutting disc to get wet.
- To switch off, press the "0" on the on/off switch.
MAKING 90^ CUTS
- Loosen the angle guide locking knob and set the angle to 0^ degrees, then tighten the locking knob again in order to secure the angle guide.
- Then loosen the clamping screw and push it to the required position.
-
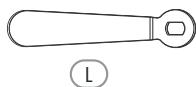
Now move the machine head to the rear using the handle.
-
Place a tile against the guide and the angle guide.
- Switch on the machine.
- Important: Wait until the cooling water has reached the cutting wheel.
- Using the handle, move the machine head forward slowly and smoothly through the tile.
MAKING 45^ DIAGONAL CUTS
- Set the angle guide to 45^ .
Make the cut.
MAKING 45^ LONGITUDINAL CUTS ("JOLLY CUTS")
- Loosen two Fixing knobs for litre cut.
- Tilt the guide rail to the left to 45^ on the angle scale.
- Retighten the fixing knobs.
Make the cut.
CUTTING LENGTH LIMITATION
With the two cutting length limiter knobs and you can limit the possible movement of the motor/ cutting unit.
- Release both limiter knobs and adjust the limiter knobs to the desired size. The scale on the guide will help with this.
- Check from time to time if the adjustment is fixe.
EXCHANGING THE CUTTING DISC
- Pull out the power plug.
- Let the machine cool down.
Fix the motor/cutting unit with the xing screws and the plastic beam. - Loosen the four cross-screws of the cover for the cutting disc and open the cover.
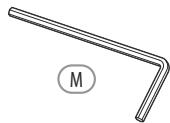
- Attach the big angle wrench to the hex nut and place the other angle wrench on the motor shaft and hold.
- Using the big angle wrench to loosen the hex nut in the direction of rotating of the cutting disc. (caution: Left-hand thread).
- Remove the outer flange and the cutting disc.
- Clean the mounting flange before fitting the new cutting disc.
Install the new cutting disc in reverse order and tighten. - Important: Pay attention to the direction of rotation of the cutting disc.
8. MAINTENANCE

WARNING! Remove the plug from the power socket before carrying out any adjustment, servicing or maintenance.
| Cleaning and maintenance overview Prior to every start What Check mains cable, mains plug, supply cables, cold water pump and cutting wheel for damage. | How? Visual inspection. |
| Regularly, depending on conditions of use What Check all screwed connections and tighten them if necessary. | How? Visual inspection. |
| Clean dust and splinters from the machine. | Blow dust and splinters away with compresses air, or use a brush. |
| Remove all dust and splinters from the ventilation slits of the motor. | Remove the dust and splinters with a vacuum cleaner or a brush. |
| Remove deposits from the cold water pump. | Wipe the deposits away with a cloth. |
| Change the cooling water. | Let the cooling water out of the water container, cleaned up debris and filling the product with clear water. |
| If necessary What Changing the cutting disc. | How? Exchanging the cutting disc. |
| Cooling water pipe is damaged. | Replace the cooling water pipe. (See below) |
If the cooling water pipe gets brittle, blocked or is damaged it can easily be replaced by another pipe of the same type. Release the connections and the holders. Mount a new pipe with the same length. Fix it (just like the old one).
LUBRICATING
From time to time the guiding rails and the bearings of the motor need to be lubricated.
TRANSPORT
- Before transport you should make sure, that the transport safety knob for transport securing is fixed and the plastic beam behind it is screwed well into the motor/cutting unit. The motor/cutting unit should not be allowed to move within the guiding rail.
- Before transport you should makse sure, that the plug is pulled and no water is found in the container.
- Never transport the device alone. The transport of device requires at least two people. The machine is heavy. The best way is for the machine table is be separated from the basis.
- When transporting the device, it should always be lifted off from the ground. It should not be pushed or pulled over the floor.
- If you do not transport the device in the working area, but at another place such as in a vehicle, it is better to demount the device and transport it in the original packing material.
STORAGE
Store the equipment and its accessories out of the reach of children in a dark, dry place at above freezing temperature.
The ideal storage temperature is between 5 and 30^ . Store the electric tool in its original packaging.
9. TROUBLESHOOTING
| Problem | Possible reason | Remedy |
| 1. Machine will not start | • Power supply has been cut • Cord or plug is faulty • Other electric error in the device | • Test the power supply with a different device • Consult a qualified electrician • Consult a qualified electrician |
| 2. Motor / cutting unit can not or hardly be moved | • Transport securing is fixed • Guiding rail and bearing fixed | • Release the transport securing • Grease the guiding rail or bearing |
| 3. No water cooling | Twisted, bend or damaged cooling water pipe Too little cooling water in container Blocked pumping sieve Blocked pump Other fault or electric error in the pump | Check the running of cooling water, remove blocking if needed or exchange the pipe Fill in cooling water to cover the pump Clean the sieve Test the pump, clean remove blocking Test by qualified technician, repair if needed |
| 4. Machine suddenly stops during use | Power supply broken Cutting disc blocked | Test the power supply with a different device Unplug immediately! Remove blocking carefully, afterwards test cutting disc |
| 5. Low efficiency cutting | Extension cord too long and / or with too small diameter. Power supply (e.g. generator) has too low current. Exceed maximum cutting depth Cutting disc unsuited or wrong direction of rotation | Use extension cord with allowed length and/or sufficient diameter. Connect the device to different power supply Check the maximum cutting depth Test cutting disc for type of use, condition and rotation direction |
| 6. Strong vibration, unexpected noise, strong smell | Unplug immediately! Cutting disc is not being cooled, wrong mounted or worn Unplug immediately! Other fault. | Test cooling, cutting disc mounting and direction of rotation, if needed mount a new, suitable cutting disc Consult a qualified electrician |
10. DISPOSAL AND RECYCLING
The equipment is supplied in packaging to prevent it from being damaged in transit. The raw materials in this packaging can be reused or recycled.
The equipment and its accessories are made of various types of material, such as metal and plastic.
Defective components must be disposed of as special waste. Ask your dealer or your local council.
For EU countries only

Never dispose of any electric power tools with your household refuse. To comply with European Directive 2012/19/EU on waste electric and electronic equipment, and its implementation in national laws, old electric power tools must be separated from other waste and disposed of in an environment-friendly fashion, e.g. by taking them to a recycling depot.
Recycling alternative to returns
As an alternative to returning the equipment to the manufacturer, the owner of the electrical equipment must make sure that the equipment is properly disposed of if he no longer wants to keep the equipment.
Old equipment can be returned to a suitable collection point that will dispose of the equipment in accordance with national recycling and waste disposal regulations.
Electric and electronic equipment can be hazardous for the environment and for human health since they contain hazardous substances.
This does not apply to any accessories or aids without electrical components supplied with the old equipment.
11. EXPLODED VIEW

- PART LIST
| No. | Description | QTY |
| 1 | Hex bolt m10x40 | 4 |
| 2 | Spring washer 10 | 4 |
| 3 | Big washer | 4 |
| 4 | Side press board | 2 |
| 5 | Knob (A) | 3 |
| 6 | Stand (A) jointing body | 3 |
| 7 | Bottom feet (A) | 3 |
| 8 | Screw M6x14 | 2 |
| 9 | Bottom feet (B) | 1 |
| 10 | Stand (B) jointing body | 1 |
| 11 | Stand jointing group | 1 |
| 12 | Label | 1 |
| 13 | Bolt m5x10 | 5 |
| 14 | Spring washer 5 | 11 |
| 15 | Washer 5 | 11 |
| 16 | Chain group | 1 |
| 17 | Cover group (A) | 1 |
| 18 | Nut m12 | 1 |
| 19 | Out plywood | 1 |
| 20 | Blade | 1 |
| 21 | Inside plywood | 1 |
| 22 | Nut m6 | 1 |
| 23 | Plywood | 1 |
| 24 | Cover skin | 1 |
| 25 | Square bolt M6x14 | 1 |
| 26 | Bolt M6x12 | 5 |
| 27 | Spring washer 6 | 3 |
| 28 | Cover (B) | 1 |
| 29 | Lock nut M8 | 4 |
| 30 | Spirng washer 8 | 4 |
| 31 | Flat washer 8 | 6 |
| 32 | Motor bracket | 1 |
| 33 | Cushion insert | 2 |
| 34 | Flat washer 6 | 2 |
| 35 | Bolt m5x12 | 7 |
| 36 | Press wire block | 1 |
| 37 | Pointer board | 1 |
| 38 | Hex screw M8x12 | 2 |
| 39 | Suport pole | 4 |
| 40 | Bearing | 4 |
| 41 | Ring for shaft | 4 |
| 42 | Handle | 1 |
| 43 | Motor | 1 |
| No. | Description | QTY |
| 44 | Knob (B) | 2 |
| 45 | Limited piece (A) | 2 |
| 46 | Limited piece (B) | 2 |
| 47 | Screw M6x20 | 2 |
| 48 | Guide bar | 1 |
| 49 | Label | 1 |
| 50 | Bolt M4x10 | 14 |
| 51 | Screw M6x18 | 6 |
| 52 | Lock nut | 2 |
| 53 | Washer board | 2 |
| 54 | Screw M6x16 | 2 |
| 55 | Circumrotate board (B) | 1 |
| 56 | Table bracket | 1 |
| 57 | Worktable (A) | 1 |
| 58 | Worktable (B) | 1 |
| 59 | Worktable (C) | 1 |
| 60 | Hex screw M5x25 | 4 |
| 61 | Big washer 5 | 4 |
| 62 | Scale label (B) | 1 |
| 63 | Scale seat (B) | 1 |
| 64 | Circumrotate board (A) | 1 |
| 65 | Pointer | 1 |
| 66 | Scale label (A) | 1 |
| 67 | Scale seat (A) | 1 |
| 68 | Bolt M4x6 | 1 |
| 69 | Washer 4 | 1 |
| 70 | Miter guide pointer | 1 |
| 71 | Sliding block | 1 |
| 72 | Miter guide convection board | 1 |
| 73 | Tank | 1 |
| 74 | Iron knob | 2 |
| 75 | Miter guide | 1 |
| 76 | Card board | 1 |
| 77 | Rubber washer | 1 |
| 78 | Card board cap | 1 |
| 79 | Pump elbow | 1 |
| 80 | Water connector | 1 |
| 81 | Water pipe | 1 |
| 82 | Nylon belt | 4 |
| 83 | Pump fix block | 1 |
| 84 | Pump | 1 |
| 86 | Crawler belt groupware | 1 |
| 87 | Bolt M4x8 | 4 |
13. GUARANTEE
- Dexter products are designed to the highest DIY quality standards. Dexter provides a 24-month warranty for its products, from the date of purchase. This warranty applies to all material and manufacturing defects which may arise. No further claims are possible, of whatever nature, direct or indirect, relating to people and/or materials. Dexter products are not intended for professional use.
- In the event of a problem or defect, you should first always con sult your Dexter dealer. In most cases, the Dexter dealer will be able to solve the problem or correct the defect.
- Repairs or the replacement of parts will not extend the original warranty period.
- Defects which have arisen as a result of improper use or wear are not covered by the warranty. Amongst other things, this relates to switches, protective circuit switches and motors, in the event of wear.
5. Your claim upon the warranty can only be processed if:
Proof of the purchase date can be provided in the form of a receipt.
- No repairs and/or replacements have been carried out by third parties.
- The tool has not been subjected to improper use (overloading of the machine or fitting nonapproved accessories).
- There is no damage caused by external influences or foreign bodies such as sand or stones.
- There is no damage caused by non-observance of the safety instructions and the instructions for use.
- There is no force majeure on our part.
- A description of the complaint is enclosed.
-
The warranty stipulations apply in combination with our terms of sale and delivery.
-
Faulty tools to be returned to Dexter via Dexter dealer will be collected by Dexter as long as the product is properly packaged. If faulty goods are sent directly to Dexter by the consumer, Dexter will only be able to process these goods if the consumer pays the shipping costs.
- Products which are delivered in a poorly packaged condition will not be accepted by Dexter.
817357
Nom et adresse du fabricant ou de son mandataires [Nombre y direccion del fabricante o de su representante autorizado [Norte e endere do fabricante ou do seu représentante autorizzato]La presente diricharizationo conformità e rilasciate alla responsabilità esclusiva del fabricamente]
ADEO Services, 135 Rue Sadi Carnot - CS 00001 59790 RONCHIN - France
817357 - EAN Code: 3276007357332
Industrial Type Design Reference: 800ETC1-20030.1
DEXTER
SN SSSSSS XX DDMMYY nn PPPPPP (SN: Serial No., SSSSSS: Supplier code, XX : Production line ID, DDMMYY: Production date, nn: number of version of product, PPPPPP : Incremental number)
Références des normes harmonisées pertinentes appliquées ou des specifications par rapport auxquelles la conformité est déclaré ee)Référencias a las normas armonizadas pertinentes realizadas, o referencingias a las espécografías respecta a las cuales se declarare la conformadidad)Referencias as normas harmonizadas pertinentes realizadas ou referencingias as espécografías para aquais quasiformadie déclarada/Riferimenti alle pertinente norme armonizzateutilizzatoealle specifiquein relatione alle qui èdichariata la conformadity
EN 62841-1.2015
EN 12418:2000+A1:2009
ENIEC55014-1:2021
ENIEC55014-2:2021
ENIEC61000-3-2:2019+A1:2021
EN61000-3-3:2013+A1:2019:A2:2021
Directive (EU)2015/863 amending Directive 2011/65/EU
IEC 62321-1:2013
IEC 62321-2:2013
IEC 62321-3:1:2013
IEC 62321-4:2013+AMD1:2017 CSV
IEC 62321-5:2013
IEC 62321-6:2015
IEC 62321-7:1:2015
IEC 62321-7:2:2017
ISO 17075:2017
IEC 62321-8:2017
EN IEC 63000:2018
817357 - EAN Code: 3276007357332
Industrial Type Design Reference: 800ETC1-20030.1
DEXTER
SN SSSSS XX DDMMYY nn PPPPPP (SN: Serial No., SSSSSS: Supplier code, XX : Production line ID, DDMMYY: Production date, nn: number of version of product, PPPPPP: (Incremental number)
Mveia tvu oxyekiv evapouovqevuov tvoptuvv tuo xynpnuot ovoiyvi n vyei tva tvpoayovav oe oxeyn me tio otoreg 8nV oveta t ouoppoepo;Odwalonia do odnosy norm zhanomazifying, ktoz stazosowan, lub do specifikaci, w onodsienu i do tkiyckdarekana jest zgodnoec;Referinte standarder armonize relevante folosite sae referinte specificitari In tegatura cu care se declara conformitatea;References to the relevant harmonised standards used or references to the specifications in relation to which conformity is declared)
EN 62841-1:2015
EN 12418:2000+A1:2009
EN IEC 55014-1:2021
EN IEC 55014-2:2021
EN IEC 61000-3-2:2019+A1:2021
EN 61000-3-3:2013+A1+A19:2022
Directive (EU)2015/863 amending Directive 2011/65/EU IEC 62321-1:2013
IEC 62321-2:2013
IEC 62321-3:1:2013
IEC 62321-4:2013+AMD1:2017 CSV
IEC 62321-5:2013
IEC 62321-6:2015
IEC 62321-7:1:2015
IEC 62321-7:2:2017
ISO 17075:2017
IEC 62321-8:2017
EN IEC 63000:2018
Otoyoojyo ywotouonituevoovao kai tovapoiu to u evayrtniouo tuo eoeuae vnti otonotoukai nivvaa opa oto yeyappao/ Wtossowny przypakdash Kofitfokana nawa i numer laboratorial, ktore wydalo certifikat oraz odcniesienie do dokumentu|Lunde czastu numele si numarul de laborator notified care al eberlat certificare s i trimiterea la document[When applicable, the name and number of notified body number]
Signature
Eric LEMOINE International Project Quality Leader
2023/8/25

Attention danger / Atencion: Peligro / Atencion perigo / Atencione pericolo / Iipoooxkivdvoc/Uwaga niebepezciefstwo/BHmamane! Onacno! / Ybara! Hebezneuho! / Atentie, pericol / Caution danger

Observez / Atencion / Aviso / Osservare / Pioo0eTe/ Przestrzegac / Co6noJaIte npabnla TexnIKs 6e3onacHocTn / DoTpImyTeCra npabn l texhikn 6e3neKn / Respecta / Observe

Imported by Adeo South Africa (PTY) LTD T/A Leroy Merlin, Hosted in Leroy Merlin Fourways Store 35 Roos Street, Witkoppen Ext 97, Sandton, 2191 Johannesburg, Gauteng, South Africa
Tel: +27 10 493 8000 Email: contact@leroymerlin.co.za
Imnoprep: TOB "Ipeya Mepneh Ykpaia", 04201 Ykpaia, M.Kiib, Byn.
Ipapna 17A, +380 44 498 46 00. Imnoprep npriimae npeteh3i BiD cnOxKIBaHbU IOIO TApBA, a TAKO npoBoJHbI Ioro pEmOnT, TeXHcHne i rapaHIte o6cbNtOyBaHHa
- REEMPLACEMENT DE LA DISQUE A COUPE
- Móvo yia xwpecs TCS EE
- WYKONYWANIE CIEC POD KATEM 90°
- 3MICT
- BUKOPUCTAHNJIITKOPI3A 3A IPN3HAUEHHYM
- IHCTPYKII3 TEXHIK B3NEKNI
- BCTAHOBJIENHH BOJHORO HACOCA
- BCTAHOBJIIEHHRAYCEHNHOOI CTPIKIN B 3BOPI
- BCTAHOBJIENHH KYTOBOI HANPRMHOI
- BCTAHOBJIENHH PUYKIN OBMEKYBAU DOBXHNI PI3AHH
- EKCnnyatauia
- BUNKACH
- BINKOHAHNPO3PI3IBI KYTOM 90°
- BKNOHAHN DIAFOHAJIbHINXPO3PI3IB NID KYTOM 45°
- BKNKOHHHIIO3IOBXHIXPO3PI3IBIIKDYOM 45°
- OBMEXEHHIIOBXINHPI3AHH
- 3AMIHA PI3AJIbHOrO DnCKA
- TEXHIYHE OBCJNYTOBYBAHHRA
- 3MAUUBAHH
- TPAHCIOPTYBAHH
- 36EPITAHN
- YCYHEHHH HECNPABHOCTEIN
- IMPORTANT: READ AND KEEP FOR FUTURE REFERENCE.
- CONTENTS
- INTENDED USE FOR THE TILE CUTTER
- SAFETY INSTRUCTIONS
- GENERAL SAFETY RULES
- Keep all safety instructions and information for future reference!
- Work area safety
- Electrical safety
- Personal safety
- Power tool use and care
- Service
- ADDITIONAL SAFETY INSTRUCTIONS
- DESCRIPTION
- WARNING! The equipment and packaging material are not toys.
- Do not let children play with plastic bags, plastic sheets and small parts. There is a risk of choking and suffocating!
- TECHNICAL DATA
- Sound and vibration
- Note:
- Warning:
- Suggestions:
- Residual risks
- BEFORE STARTING THE EQUIPMENT
- ASSEMBLY
- ATTACH THE LEGS TO THE METAL FRAME
- FITTING THE WATER CONTAINER
- FITTING THE WATER PUMP
- FITTING THE CONTINUOUS TRACKS GROUPWARE
- FITTING THE ANGLE GUIDE
- CAUTION! Do not position the angle guide in line with the cutting wheel line or else it could be cut during operation.
- FITTING THE CUTTING LENGTH LIMITER KNOB
- OPERATION
- ON/OFF SWITCH
- MAKING 90° CUTS
- MAKING 45° DIAGONAL CUTS
- MAKING 45° LONGITUDINAL CUTS ("JOLLY CUTS")
- CUTTING LENGTH LIMITATION
- EXCHANGING THE CUTTING DISC
- MAINTENANCE
- LUBRICATING
- TRANSPORT
- STORAGE
- TROUBLESHOOTING
- DISPOSAL AND RECYCLING
- For EU countries only
- Recycling alternative to returns
- EXPLODED VIEW
- GUARANTEE
- Your claim upon the warranty can only be processed if:
- 817357
- ADEO Services, 135 Rue Sadi Carnot - CS 00001 59790 RONCHIN - France
- DEXTER
- SN SSSSS XX DDMMYY nn PPPPPP (SN: Serial No., SSSSSS: Supplier code, XX : Production line ID, DDMMYY: Production date, nn: number of version of product, PPPPPP: (Incremental number)
Brand : DEXTER
Model : 800ETC1-20030.1
Category : Tile cutter