
900BS2.52 - Belt sander DEXTER - Free user manual and instructions
Find the device manual for free 900BS2.52 DEXTER in PDF.

| Product type | Belt sander |
| Brand | DEXTER |
| Model | 900BS2.52 |
| Supply voltage | 230-240 V ~ 50 Hz |
| Power input | 900 W |
| Belt speed | 350 to 500 m/min (adjustable) |
| Abrasive belt dimensions | 75 x 533 mm |
| Sound pressure level (LpA) | 90.9 dB(A) (K=3 dB(A)) |
| Sound power level (LwA) | 98.9 dB(A) (K=3 dB(A)) |
| Vibration level (ah) | 6.407 m/s² (K=1.5 m/s²) |
| Guarantee | 36 months |
| Package contents | Sander with 80 grit belt, dust extraction adapter, manual, belt |
| Protection class | Class II (double insulated) |
| Power source | Mains (corded) |
| Speed adjustment | Continuous regulating wheel |
| Extraction system | Vacuum cleaner connection |
| Safety | Switch lock, emergency stop |
| Maintenance | Clean ventilation slots, no lubrication required |
| Repairability | Repair by approved service center |
| Main use | Dry sanding of wood, metal, plastic, paint |
Frequently Asked Questions - 900BS2.52 DEXTER
User questions about 900BS2.52 DEXTER
0 question about this device. Answer the ones you know or ask your own.
Ask a new question about this device
Download the instructions for your Belt sander in PDF format for free! Find your manual 900BS2.52 - DEXTER and take your electronic device back in hand. On this page are published all the documents necessary for the use of your device. 900BS2.52 by DEXTER.
USER MANUAL 900BS2.52 DEXTER

EAN code: 3276007573725
FR Manuel d'Instructions
EL Eyxειρίδο Oδηγιών
UA Inctpykui3 Eeknnyatauui
ES Manual de Instruetiones
PL Instrukacja Obstugi
RO Manual de Instruetioni
PT Manual de Instruções
RykoBODCTBa nO 3Kcnnyaataun
EN Instructions Manual
Thank you for purchasing this product. We recommend that you read the installation, user and maintenance instructions carefully. We have designed this product to ensure your complete satisfaction. If you require assistance, the team at your retailer is on hand to help you.

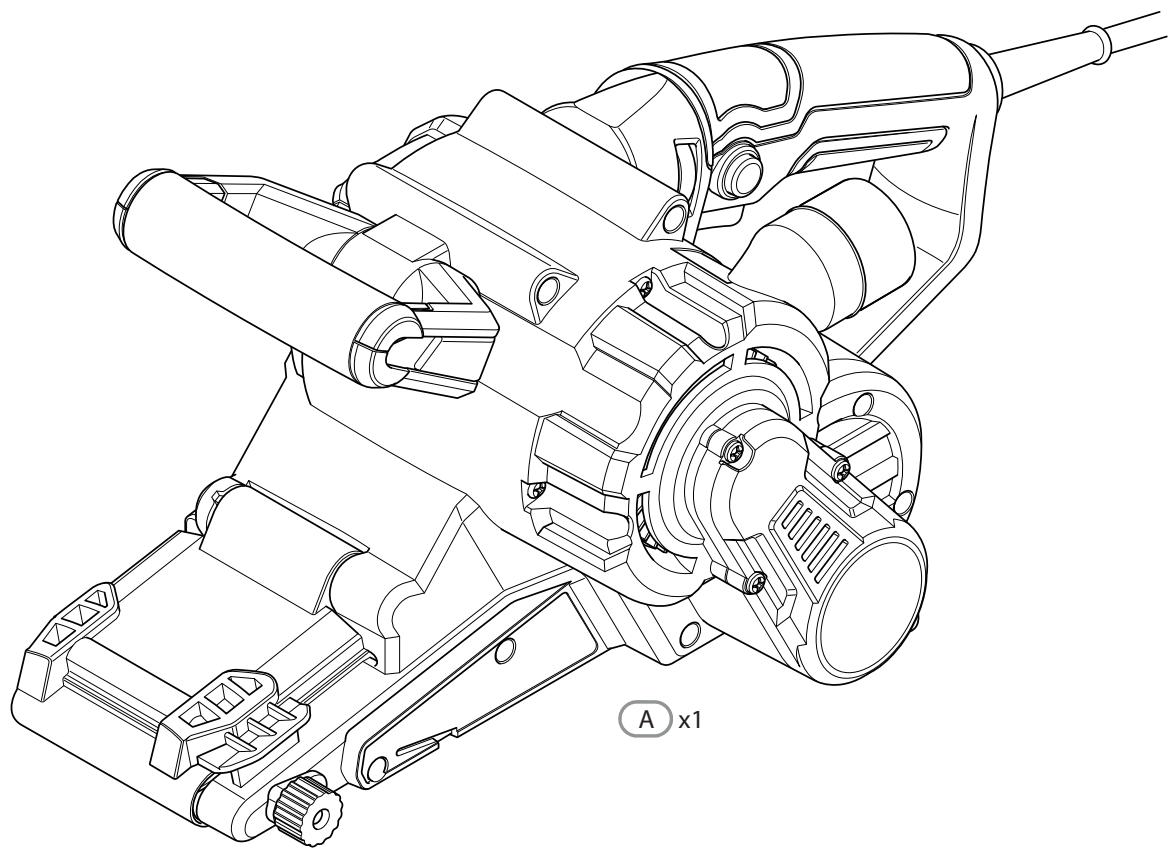
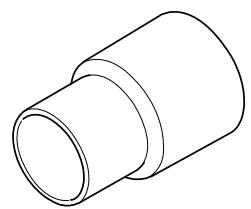
B x1
SYMBOLES


2. SAFETY INSTRUCTIONS
H M E I H
-H ouvoikn tiun kpaadaouw ka n 0n 0wuev n tui n eknoptnc opuou exi uetpn0ei ouoov a e tn npotunn me0do elyoukai npoeiv a xpnoipoine i yia tn oukypion evoc epyaieou m kanoio alho.
-H ouvoIikn tiun kpaadaoWv kai n tiun eknoinc oopouu npopevi xaonoiin0ei enionyia tnvpokatapktikn aiooynon tnc ekthetaoc.

PPOEIANOIOIHsH:
- Oi napayóveoi kpaδaouoi kai o θópuβoc katá tyn npaymuikn xρñon tou nλεκτριού εpyaλεiou μπoεi va δiaφépouv anó tic δηλωμéνec tiμεc aváloya με tov tpóno πou χρηομοioεiαi to εpyaλεio kai kupiwç aváloya με to τεμáxio unó επεξερyaoia.
-Avaopika TnV TnV EKIOuWv UApXeI avayKn PpOoiopiooou METPov aOopaia c yia Tnv npooataia Tou xeiipotn, n onoia BaoiZetai oE mia EKtiunon Tnc TiuNC EKthetaoc uno npayatikc ouvHekc xponc (laubavovTac unoyn ola ta Tmuata Tou Kuklou λeitoupyiac, onwC noec φopc diakontetai n λeitoupyia Tou epyaaleiou kai note λeitoupyei OTO pElambdaTi, EINIAEV Tou Xpovou EVepyoinonc TnC OkavdaanC).
-ΣvviotωΦopατε ωτοπροστασία.
4. TEXNIKA XAPAKTHPISTIKA
Ieipexóμεva ouokεuaoiac
3. IHHIBIyAJIbHA TEXHIKA BE3NEKNI
8. YCYHEHRA HECIPABHOCTEY
2. SAFETY INSTRUCTIONS
2. SIGURANTA ELECTRICA
2. SAFETY INSTRUCTIONS
To reduce the risk of injury, user must read instruction manual
In accordance with essential applicable safety standards of European directives
Sign of product circulation in the market of Customs Union member states.
Class II machine - Double insulation - You don't need any earthed plug
Denotes risk of personal injury, or damage to the tool in case of nonobservance of the instructions in this manual
Indicates electrical shock hazard.
Faulty and/or discarded electrical or electronic apparatus have to be collected at the appropriate recycling locations
Immediately unplug the plug from the mains electricity in the case that the cord gets damaged and during maintenance.
Wear eye protection
Wear dust mask
Wear ear protection
Wear safety shoes
Wear protective gloves
Conformity marking that product comply with applicable Ukraine technical regulations
CONTENTS
- Intended use of Belt Sander
- Safety Instructions
3.Description - Technical data
- Before putting the equipment into Operation
-
Operation
-
Maintenance
- Trouble Shooting
- Protect our environment
- Warranty
1. INTENDED USE OF BELT SANDER
This machine is intended to be used for dry sanding with suitable sanding belts. It is suitable for surface grinding on wood, metal, plastic, filler, removal of layers of old paint, intermediate grinding and rust removal. Do not use machines, tools and accessories for additional applications (see manufacturer's instructions) for works other than those for which they are designed for. All other applications are expressly ruled out. Do not use machines in severe cold, moist or other extreme environments.
2. SAFETY INSTRUCTIONS
GENERAL POWER TOOL SAFETY WARNINGS

WARNING! Read all safety warnings, instructions, illustrations and specifications provided with this power tool. Failure to follow all ons listed below may result in electric shock, fire and/or serious injury.
SAVE ALL WARNING AND INSTRUCTIONS FOR FUTURE REFERENCE.
The term "power tool" in the warnings refers to your mains-operated (corded) power tool or battery-operated (cordless) power tool.
1. WORK AREA SAFETY
a) Keep work area clean and well lit. Cluttered or dark areas invite accidents.
b) Do not operate power tools in explosive atmospheres, such as in the presence of flammable liquids, gases or dust. Power tools create sparks which may ignite the dust or fumes.
c) Keep children and bystanders away while operating a power tool. Distractions can cause you to lose control.
2. ELECTRICAL SAFETY
a) Power tool plugs must match the outlet. Never modify the plug in any way. Do not use any adapter plugs with earthed (grounded) power tools. Unmodified plugs and matching outlets will reduce risk of electric shock.
b) Avoid body contact with earthed or grounded surfaces such as pipes, radiators, ranges and refrigerators. There is an increased risk of electric shock if your body is earthed or grounded.
c) Do not expose power tools to rain or wet conditions. Water entering a power tool will increase the risk of electric shock.
2. SAFETY INSTRUCTIONS
d) Do not abuse the cord. Never use the cord for carrying, pulling or unplugging the power tool. Keep cord away from heat, oil, sharp edges or moving parts. Damaged or entangled cords increase the risk of electric shock.
e) When operating a power tool outdoors, use an extension cord suitable for outdoor use. Use of a cord suitable for outdoor use reduces the risk of electric shock.
f) If operating a power tool in a damp location is unavoidable, use a residual current device (RCD) protected supply. Use of an RCD reduces the risk of electric shock.
3. PERSONAL SAFETY
a) Stay alert, watch what you are doing and use common sense when operating a power tool. Do not use a power tool while you are tired or under the influence of drugs, alcohol or medication. A moment of inattention while operat- ing power tools may result in serious personal injury.
b) Use personal protective equipment. Always wear eye protection. Protective equipment such as dust mask, non-skid safety shoes, hard hat, or hearing protection used for appropriate conditions will reduce personal injuries.
c) Prevent unintentional starting. Ensure the switch is in the offposition before connecting to power source and /or battery pack, picking up or carrying the tool. Carrying power tools with your finger on the switch or energising power tools that have the switch on invites accidents.
d) Remove any adjusting key or wrench before turning the power tool on. A wrench or a key left attached to a rotating part of the power tool may result in personal injury.
e) Do not overreach. Keep proper footing and balance at all times. This enables better control of the power tool in unexpected situations.
f) Dress properly. Do not wear loose clothing or jewellery. Keep your hair and clothing away from moving parts. Loose clothes, jewellery or long hair can be caught in moving parts.
g) If devices are provided for the connection of dust extraction and collection facilities, ensure these are connected and properly used. Use of dust collection can reduce dust-related hazards.
h) Do not let familiarity gained from frequent use of tools allow you to become complacent and ignore tool safety principles. A careless action can cause severe injury within a fraction of a second.
2. SAFETY INSTRUCTIONS
4. POWER TOOL USE AND CARE
a) Do not force the power tool. Use the correct power tool for your application. The correct power tool will do the job better and safer at the rate for which it was designed.
b) Do not use the power tool if the switch does not turn it on and off. Any power tool that cannot be controlled with the switch is dangerous and must be repaired.
c) Disconnect the plug from the power source and/or remove the battery pack, if detachable, from the power tool before making any adjustments, changing accessories, or storing power tools. Such preventive safety measures reduce the risk of starting the power tool accidentally.
d) Store idle power tools out of the reach of children and do not allow persons unfamiliar with the power tool or these instructions to operate the power tool. Power tools are dangerous in the hands of untrained users.
e) Maintain power tools and accessories. Check for misalignment or binding of moving parts, breakage of parts and any other condition that may affect the power tool's operation. If damaged, have the power tool repaired before use. Many accidents are caused by poorly maintained power tools.
f) Keep cutting tools sharp and clean. Properly maintained cutting tools with sharp cutting edges are less likely to bind and are easier to control.
g) Use the power tool, accessories and tool bits etc. in accordance with these instructions, taking into account the working conditions and the work to be performed. Use of the power tool for operations different from those intended could result in a hazardous situation.
h) Keep handles and grasping surfaces dry, clean and free from oil and grease. Slippery handles and grasping surfaces do not allow for safe handling and control of the tool in unexpected situations.
5. SERVICE
a) Have your power tool serviced by qualified repair person using only identical replacement parts. This will ensure that the safety of the power tool is maintained.
EXTRA SAFETY REGULATIONS CONCERNING BELT SANDER
- Hold the power tool by insulated gripping surfaces, because the sanding surface may contact its own cord. Cutting a "live" wire may make exposed metal parts of the power tool "live" and could give the operator an electric shock.
2. SAFETY INSTRUCTIONS
- WARNING: Contact with or inhalation of harmful / toxic dusts arising from sanding painted surfaces, woods and metals can endanger the health of operator and bystanders.
TAKE SPECIAL CARE TO GUARD AGAINST THESE DUSTS, INCLUDING THE FOLLOWING:
- All persons entering the work area must wear an approved mask specially designed for protection against harmful / toxic dusts, in addition to using the dust extraction facility, and keeping work area well ventilated.
Children and pregnant women must not enter the work area. - Do not eat, drink or smoke in the work area.
ANY PRE1960 BUILDING MAY HAVE PAINT CONTAINING LEAD ON WOOD OR METAL SURFACES. IF YOU SUSPECT WORKPIECE CONTAINS LEAD SEEK PROFESSIONAL ADVICE.
- Some wood and wood type products especially MDF (Medium Density Fibreboard) can produce dust that can be hazardous to your health. We recommend the use of an approved face mask with replaceable filters when using this machine in addition to using the dust extraction facility.
- Hold the machine correctly using two hands and adopt a stable stance, make sure that the mains cable is prevented from coming into contact with the machine or getting caught up on other objects preventing completion of the sanding pass.
- This tool is intended to remove surface material using an abrasive medium.
- Ensure that you have removed foreign objects such as nails and screws from the workpiece before commencing sanding.
- Do not use it for wet sanding, for dry sanding only.
- Where possible, secure smaller workpieces to prevent them from moving under the sander.
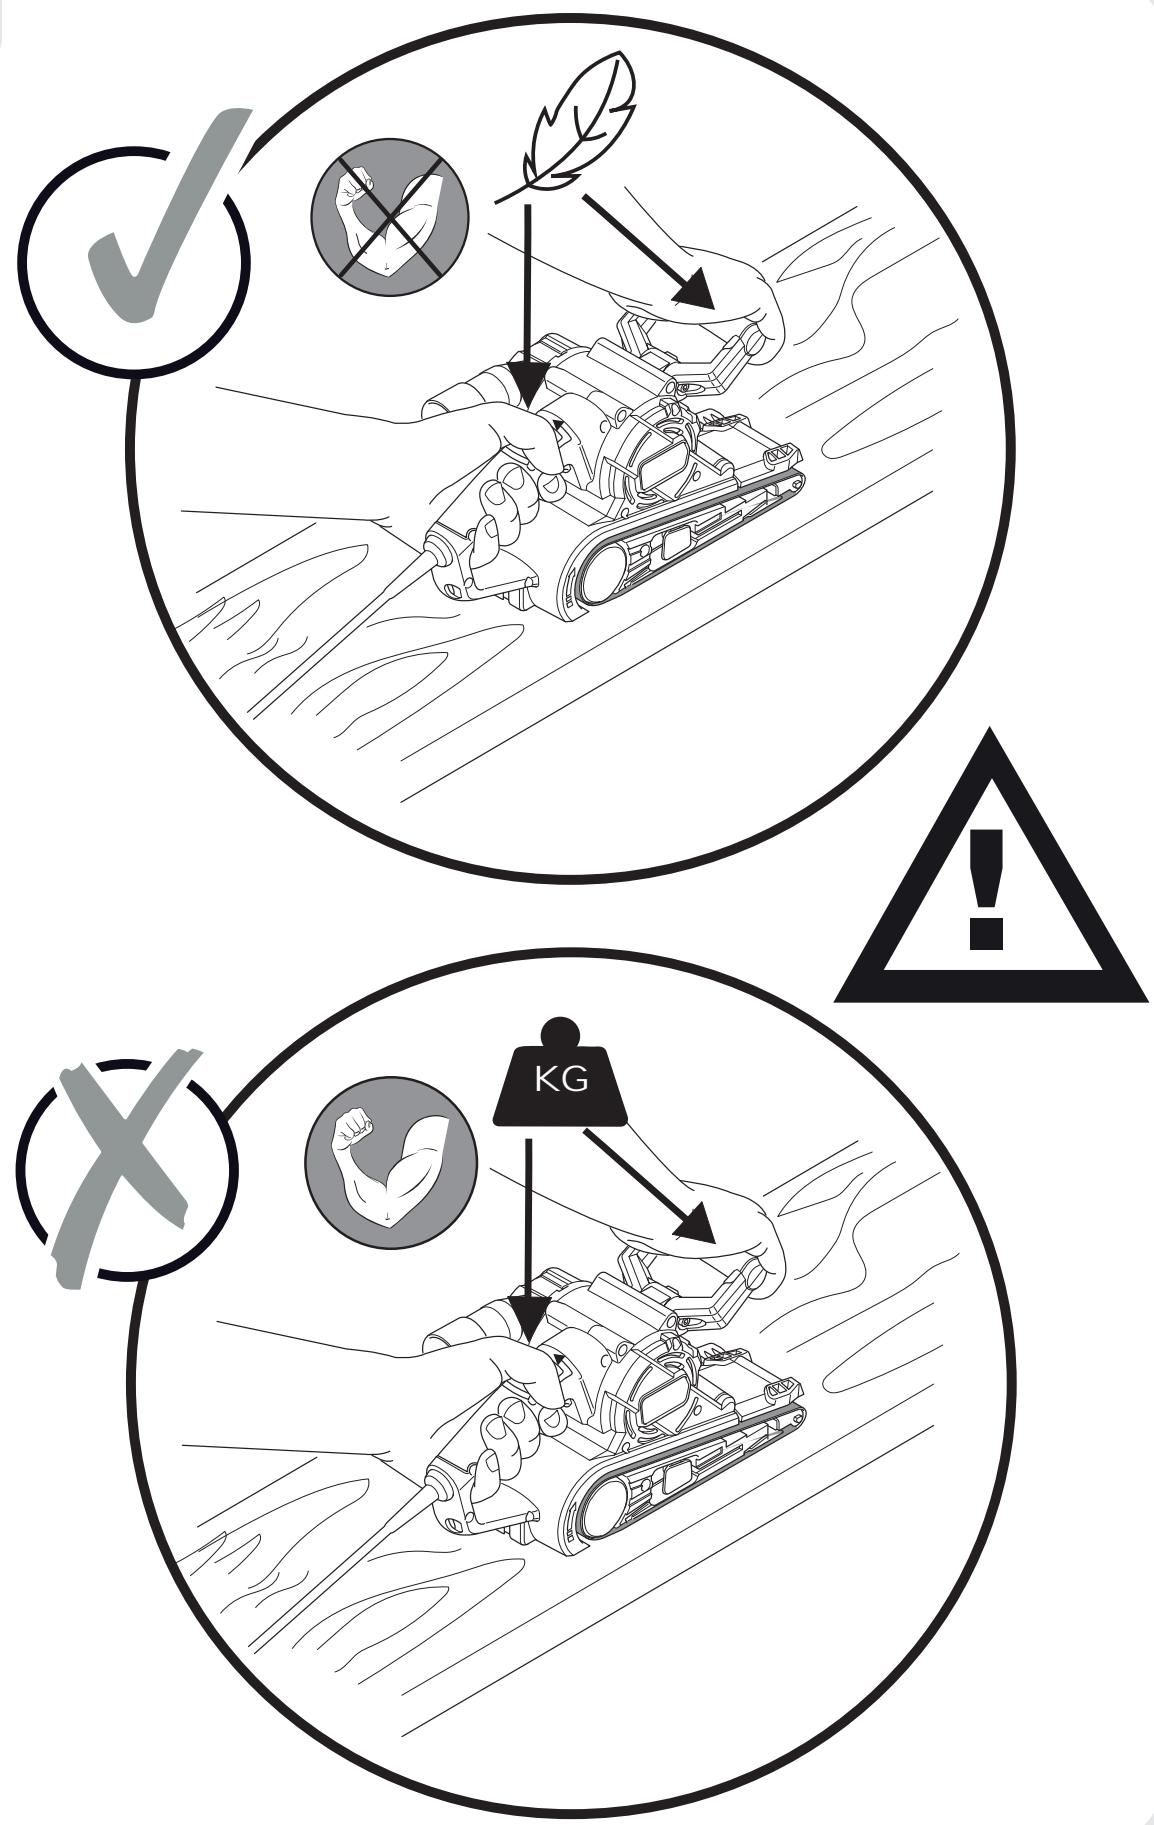
- Do not force the sander, let the tool do the work at a reasonable speed. Overloading will occur if too much pressure is applied and the motor slows resulting in inefficient sanding and possible damage to the sander motor.
- Do not use the dust collection box when sanding metal. The hot metal particles could cause residual wood dust or the internal filter paper to catch fire.
- Do not continue to use worn, torn or heavily clogged sanding belts.
- Do not touch the moving sanding belt.
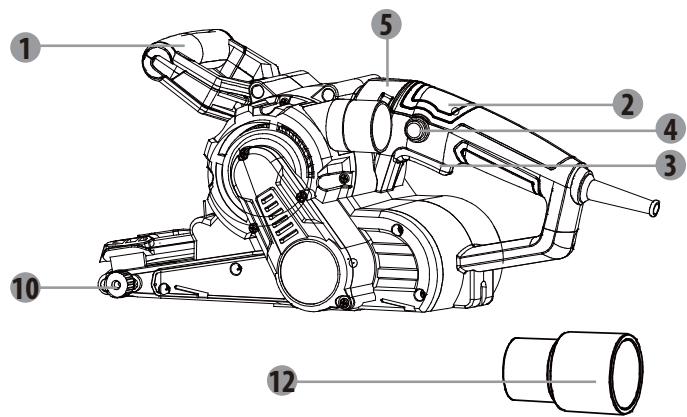
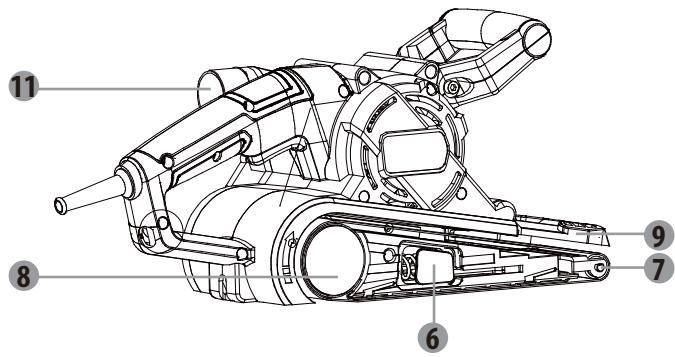
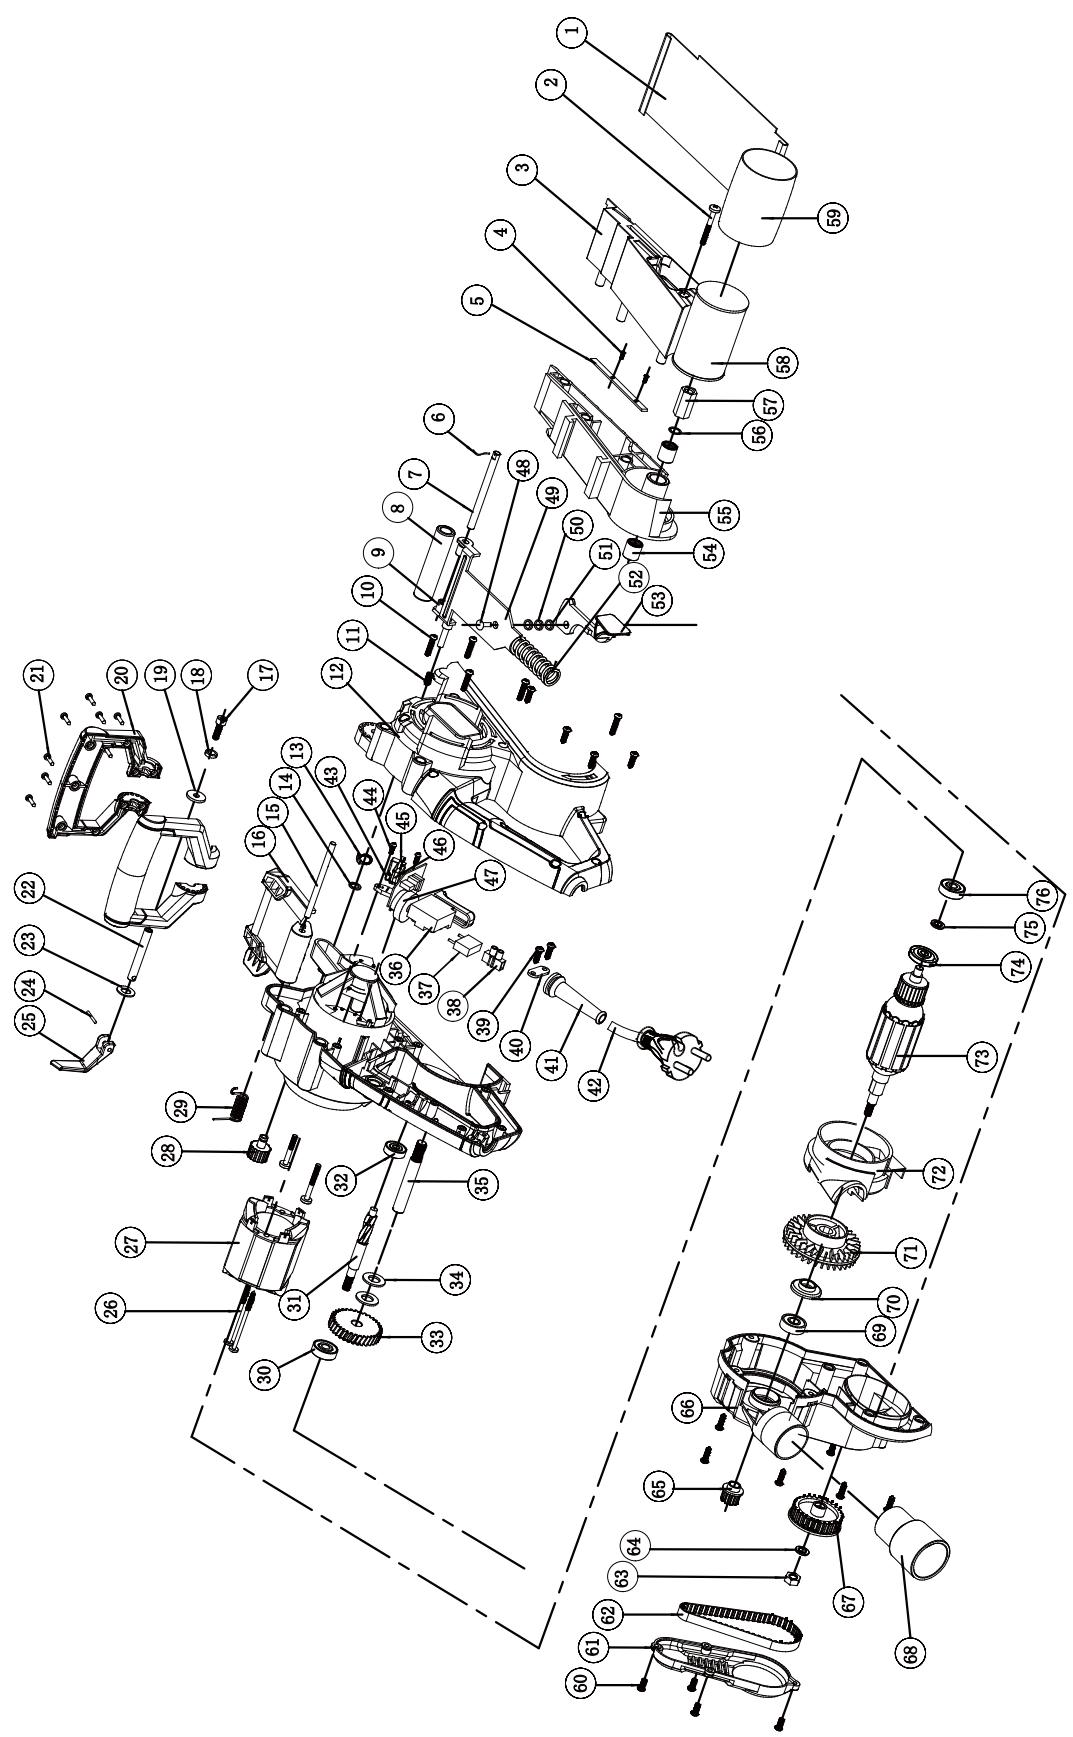
3.DESCRIPTION
1 Front handle
2 Main handle
3 Trigger switch
4 Lock on button
Speed adjust knob
6 Sanding belt tension lever
Front roller
8 Drive roller
9 Movable shield
10 Tracking adjustment knob
11 Dust extraction port
12 Dust extraction tube
4. TECHNICAL DATA
| Type designation | 900BS2.52 Belt Sander |
| Rated voltage | 230-240V~ 50Hz |
| Rated power input | 900W |
| Speed, n0 | 350-500m/min |
| Sanding belt size | 75 x 533mm |
| Level of acoustic pressure LpA | 90,9 dB(A) (KpA=3dB(A)) |
| Level of acoustic power LwA | 98,9 dB(A) (KwA=3dB(A)) |
| Level of vibration ah | 6.407 m/s2 (K=1.5m/s2) |
4. TECHNICAL DATA
NOTE:
- The declared total vibration value (s) and the declared emission value (s) sound have been measured in accordance with a standard test method and can be used to compare tools;
- The declared total vibration value (s) and the declared emission value (s) sound can also be used in a preliminary exposure assessment.

WARNING:
- Vibration emission and sound emission while using the power tool can be different from the declared values according to the ways of using the tool, in particular the type of workpiece; and
- Of the need to identify safety measures to protect the operator that are based on an estimation of exposure in the actual conditions of use (taking account of all parts of the operating cycle such as the times when the tool is switched off and when it is running idle in addition to the trigger time).
- Recommendation for the operator to wear hearing protection.
Contents of packing
1 Belt sander with sanding belt (80 Grain)
1 Dust vacuum adaptor
1 Instruction manual (with 1 safety instructions and 1 guarantee card)
1 Belt
After unpacking, check the tool and accessories for damages and do not use the tool in case something is defective.
5. BEFORE PUTTING THE EQUIPMENT INTO OPERATION
Selecting the right grade of sanding belt
Different grades of sanding belt can be purchased from the store where you purchased the tool. Available grades are: Coarse, Medium and Fine. Use a coarse grit to sand down rough finishes, medium grit to smooth the work and fine grit to finish off. It is best to make a trial run on a scrap piece of material to determine the optimum grades of sanding belt for a particular job.
5. BEFORE PUTTING THE EQUIPMENT INTO OPERATION
| GRIT CHART | ||
| Grit | Type | Example of use |
| 60 or less | Very Coarse | Material removal, heavy paint removal, shaping wood |
| 80 – 100 | Coarse | Paint removal, rough surface preparation (e.g. non-planed wood) |
| 120 – 150 | Medium | Surface preparation planed wood |
| 180 – 220 | Fine | Sanding between coats |
| 240 or more | Very Fine | Final finishing |
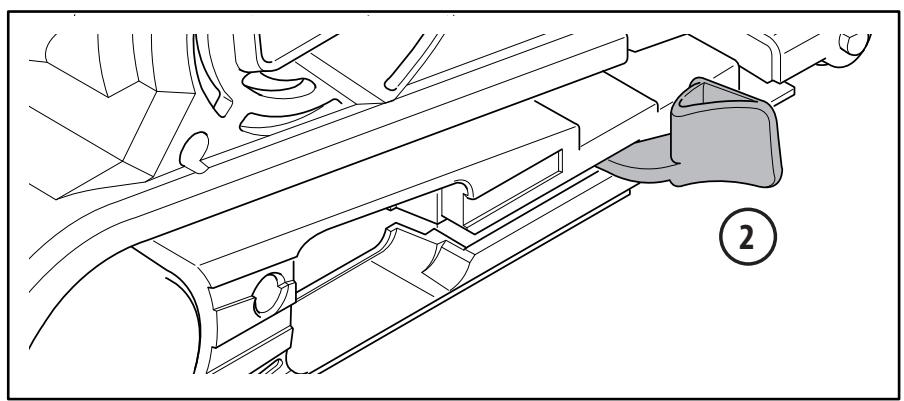
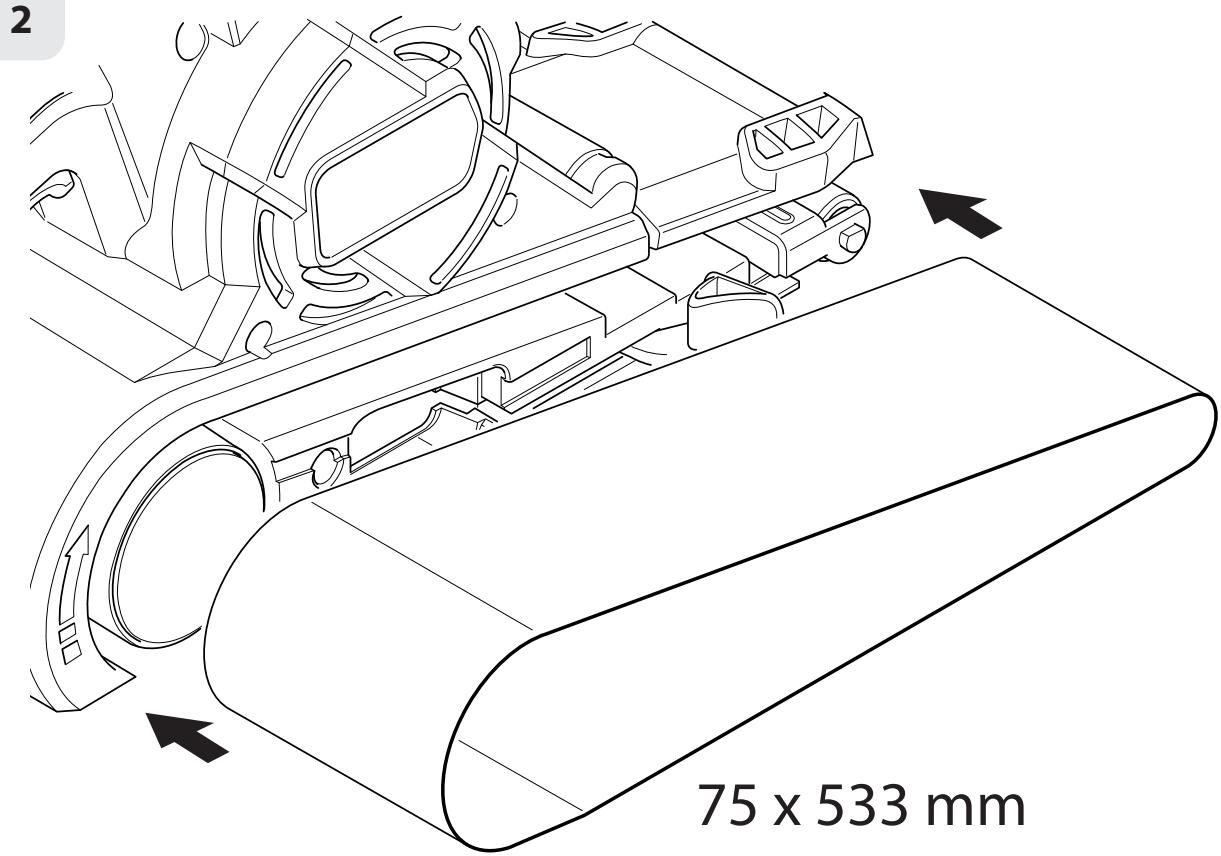
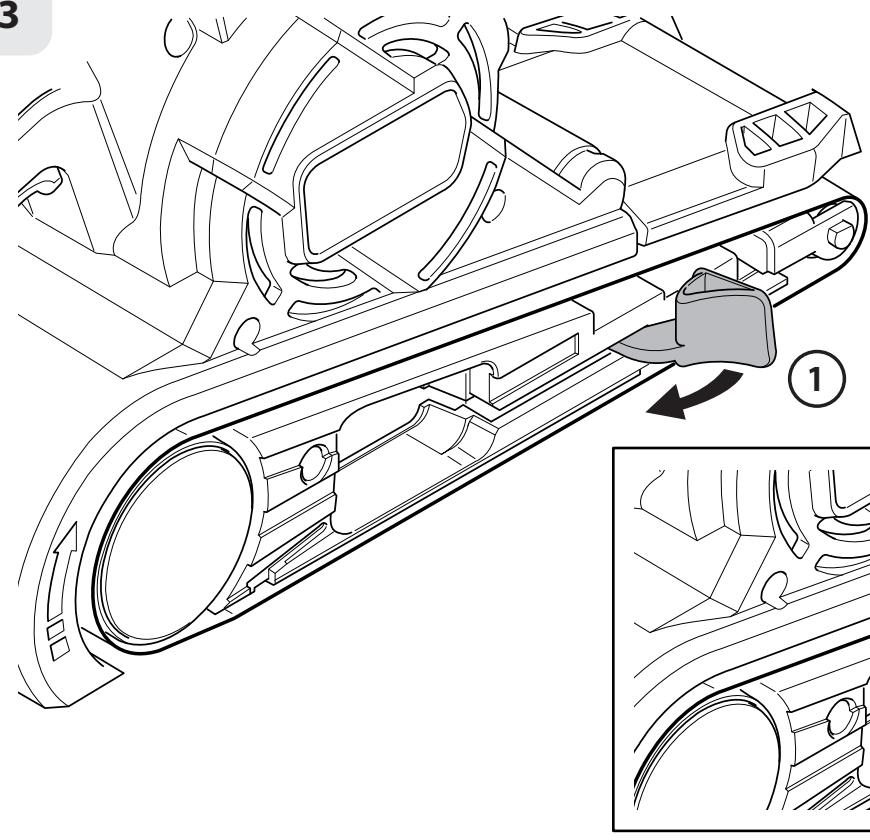
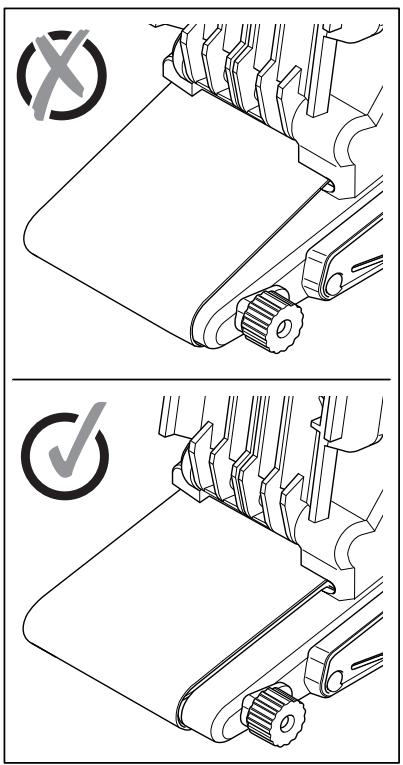
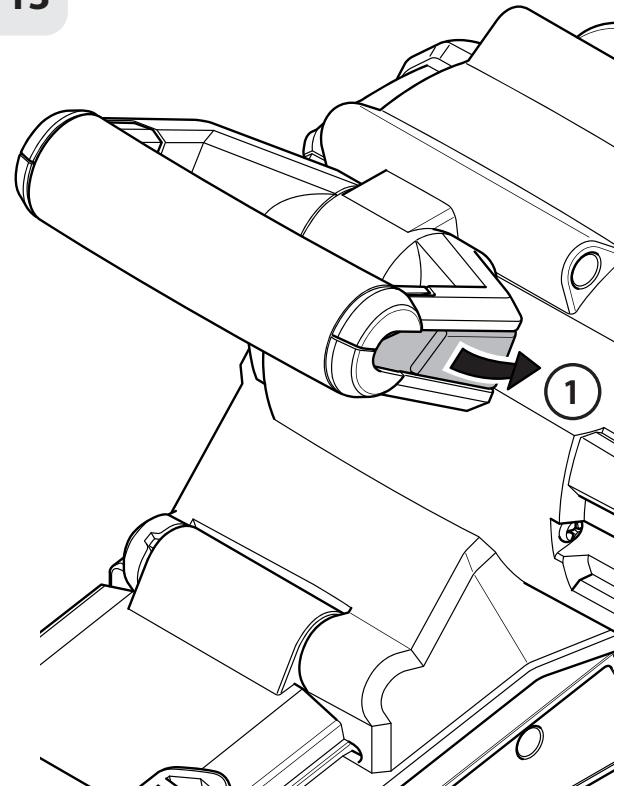
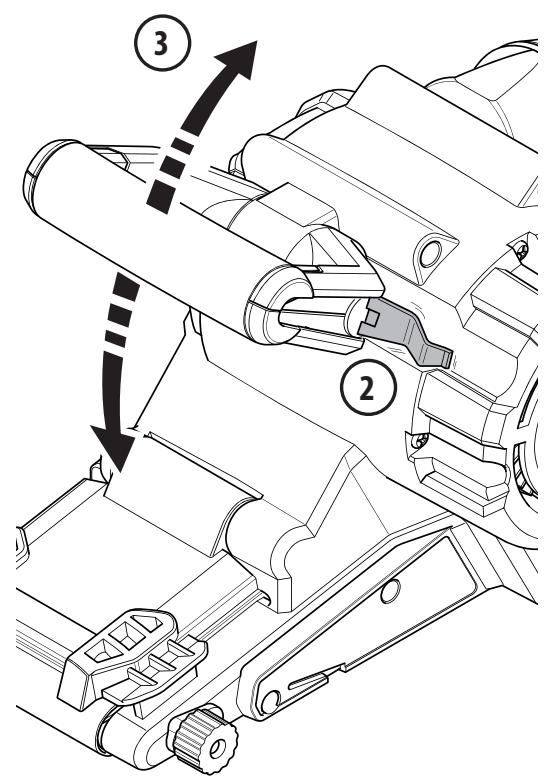
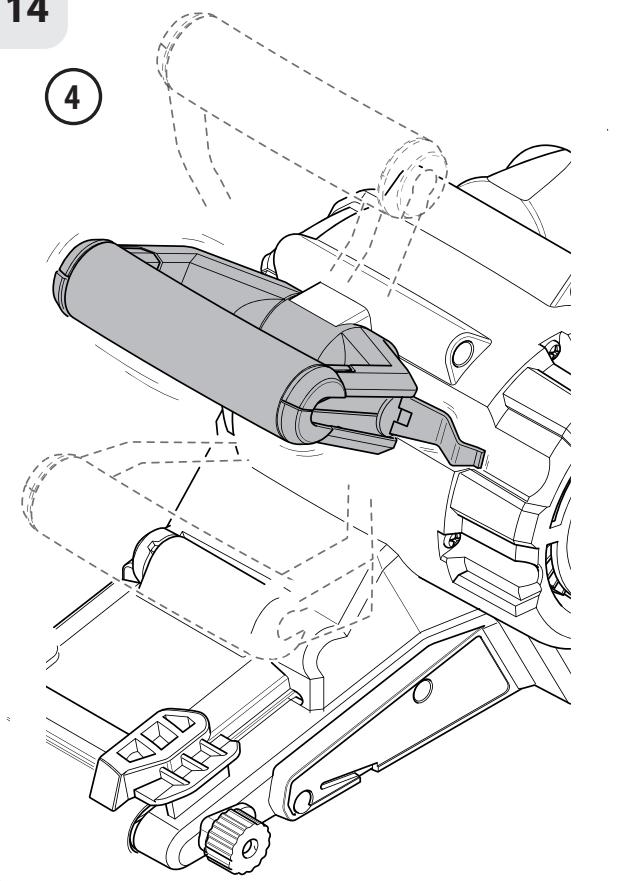
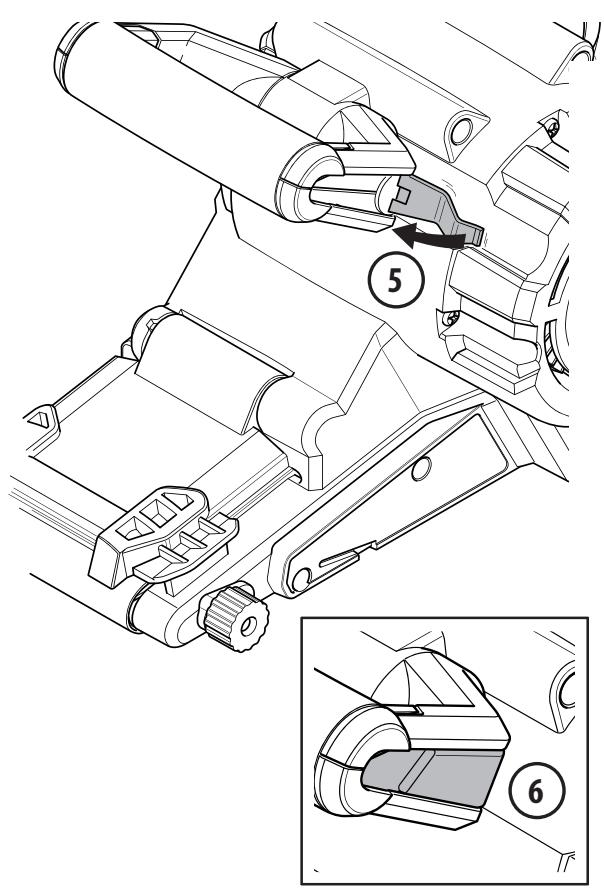
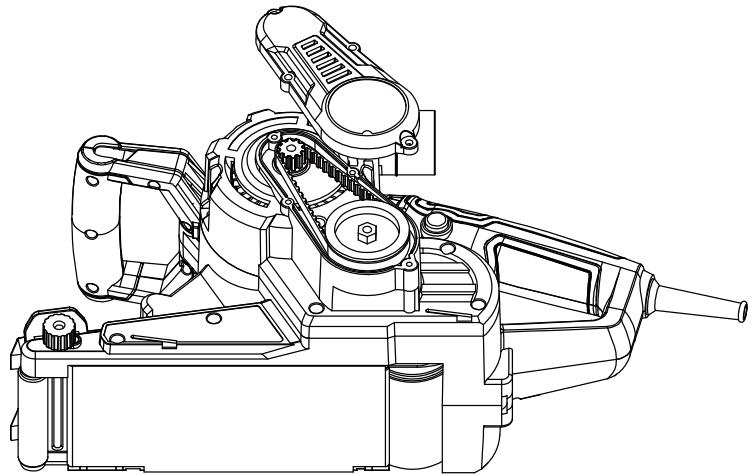
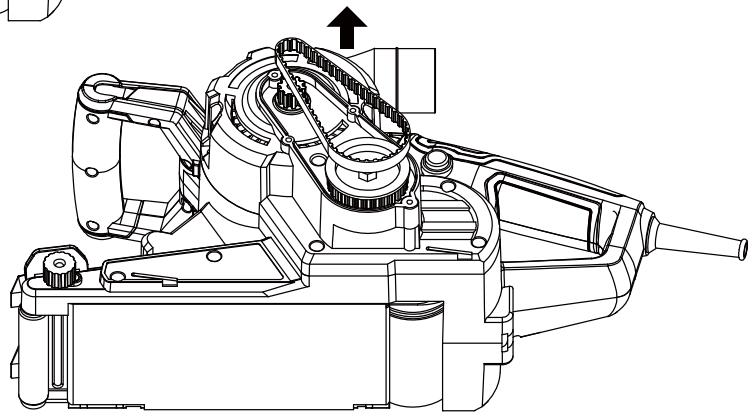
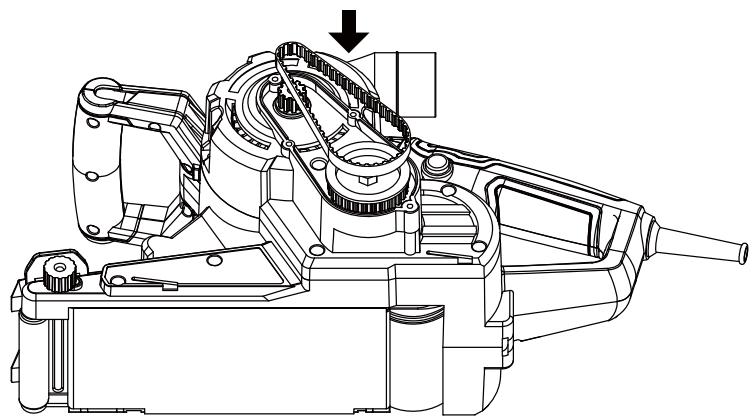
Attaching a sanding belt

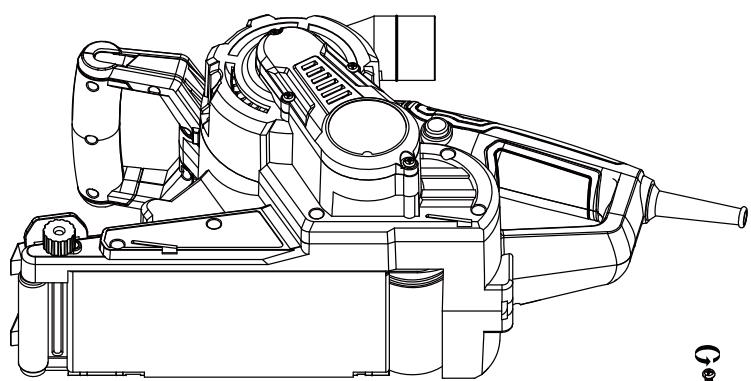
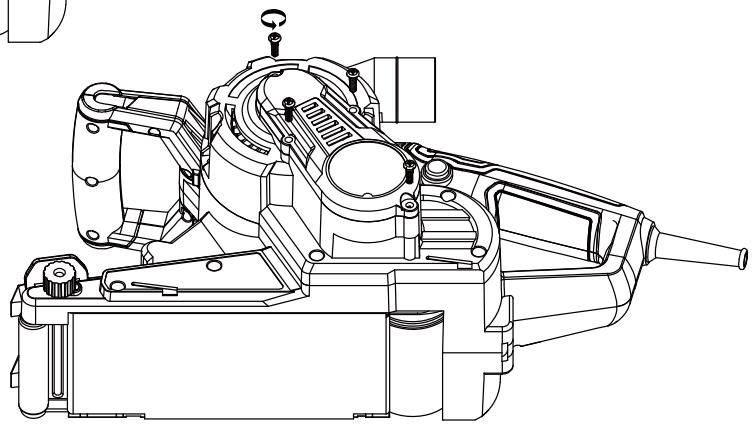
Always ensure that the machine is switched off and plug is removed from the power point before making any adjustment.
- Select the required grade of sanding belt.
- Pull the belt tension lever.
- Slip a sanding belt into position with the arrow on the inside of the belt pointing in the same direction as the rotation indicator on the sander.
- Fold down the lever.

WARNING: Do not continue to use the sander with a sanding belt that is overworn or damaged.

WARNING: Do not use the same sanding belt for wood and metal. Metal particles become embedded in the belt and will scour a wooden surface.

WARNING: Clean the air vents on your power tool regularly. The motor's fan will draw the dust inside the housing and excessive accumulation of powdered metal may cause electrical hazards.
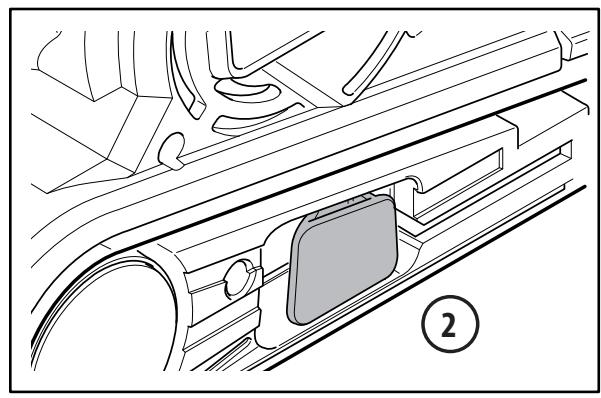
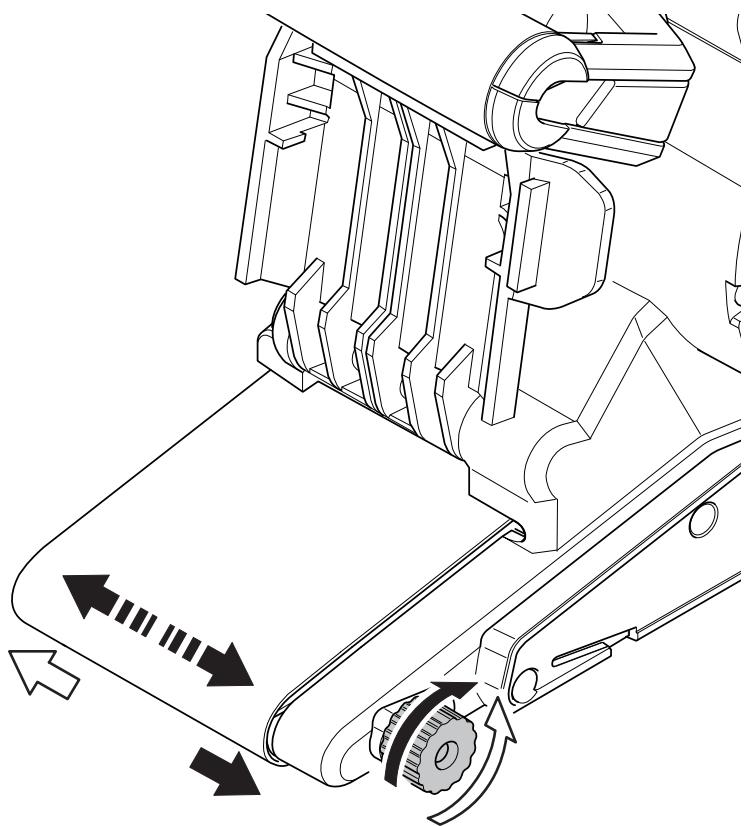
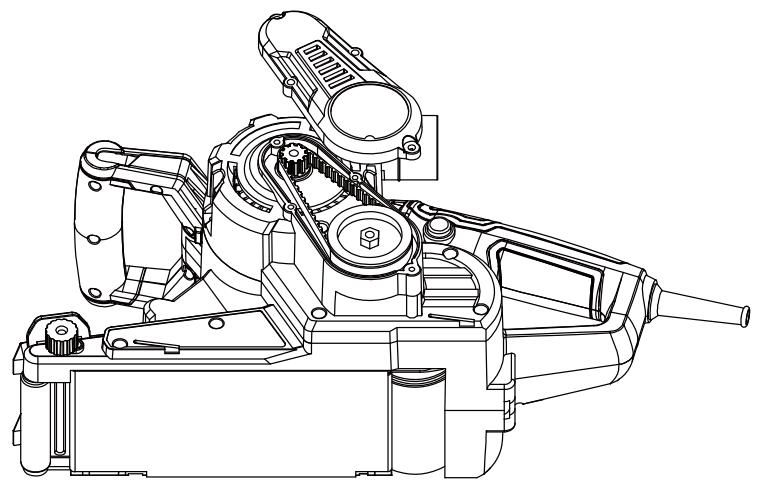
Adjusting sanding belt tracking

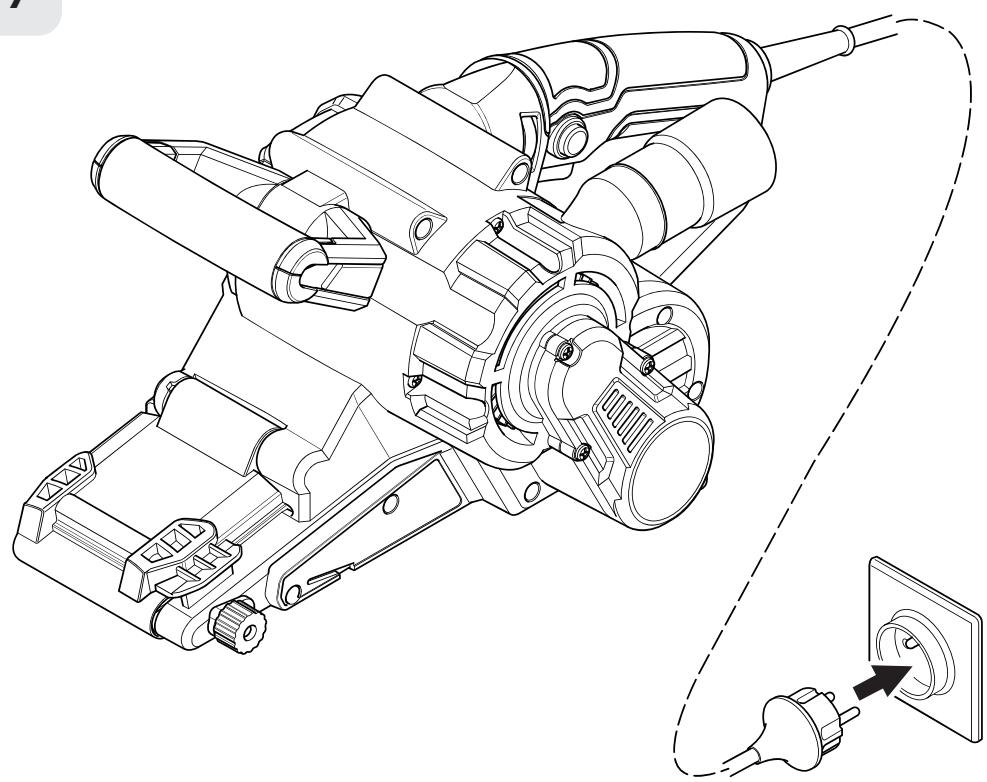
WARNING: For your safety, before plugging the tool into a power point, ensure that the trigger switch is set to the "off" position.
5. BEFORE PUTTING THE EQUIPMENT INTO OPERATION
- Plug the sander into a power point and with the sander belt tight, press the trigger switch and then release it. The belt rotates for a short period.
- Whilst the belt is running, adjust the tracking adjustment knob to align the belt to the centre of the roller.
- Repeat the trigger action and tracking adjustment until the belt is correctly aligned.
- Run the sander for a minute or so to ensure correct alignment before using the sander on a workpiece.
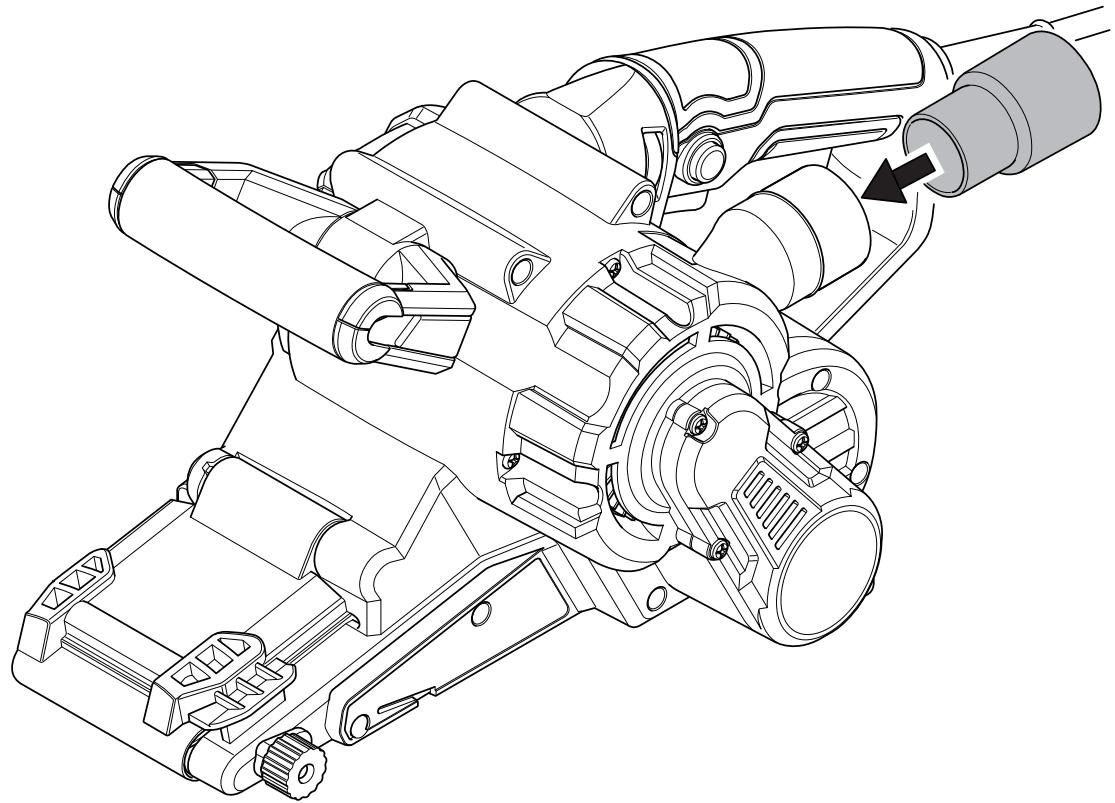
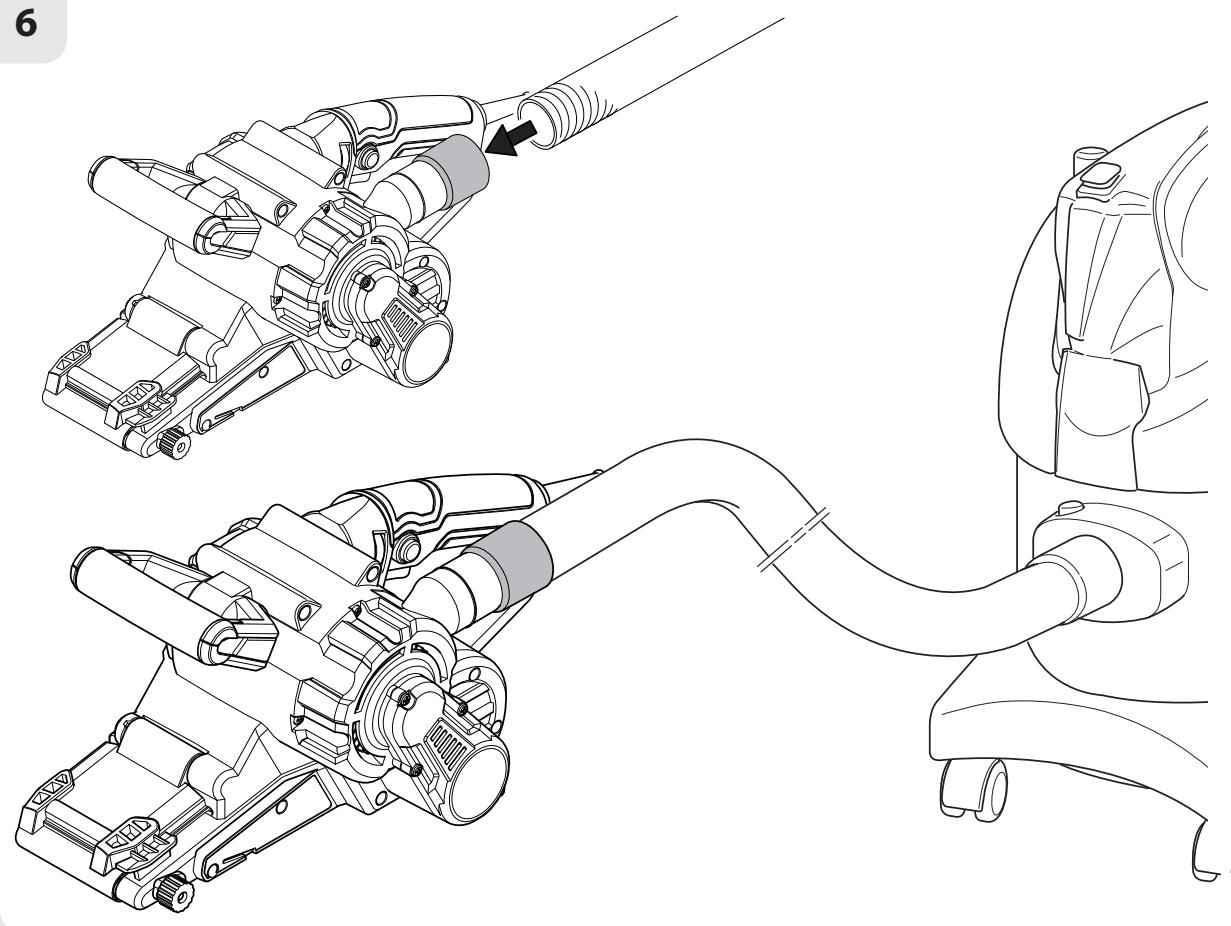
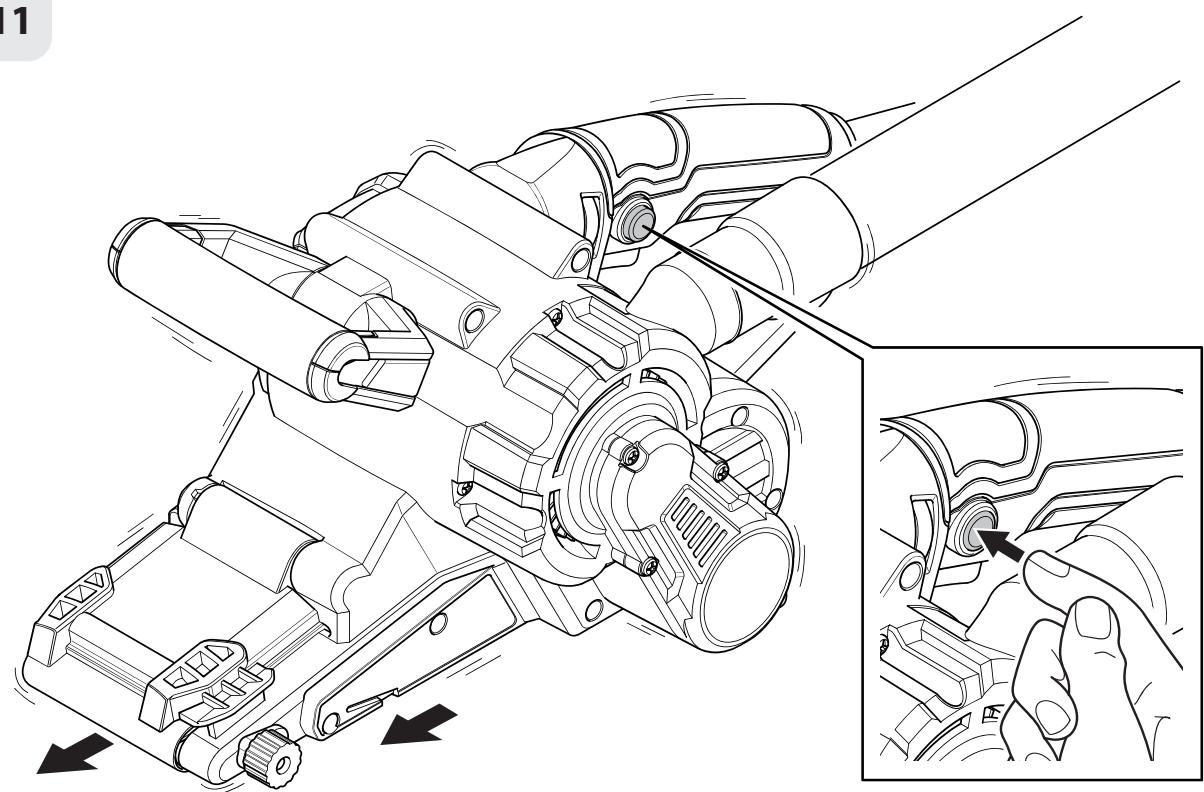
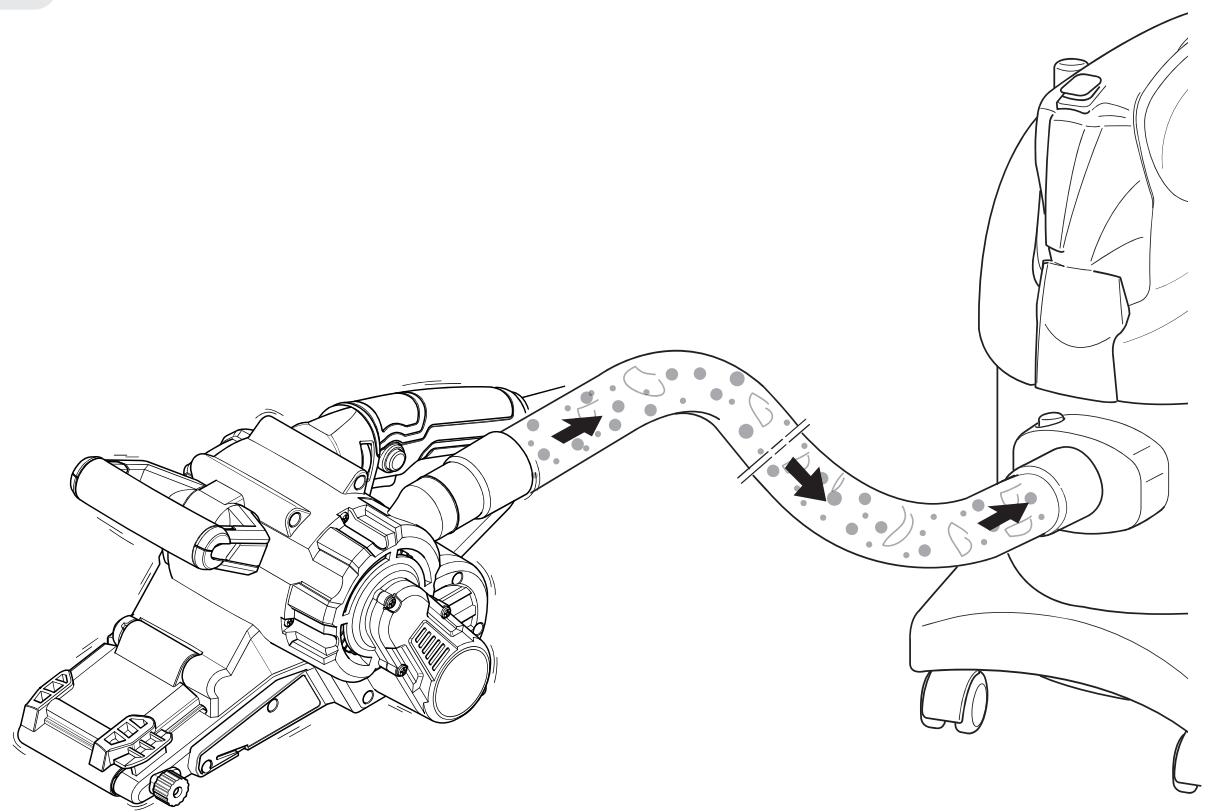
Dust extraction
We recommend the use of the dust extraction facility at all times. Simply slide the dust bag onto the dust extraction port. For longer periods of use or on large pieces of work, it is advisable to use a suitable vacuum cleaner.
6. OPERATION
Switch on and off

WARNING: Always check that the power supply is the same as that indicated on the nameplate of the tool.
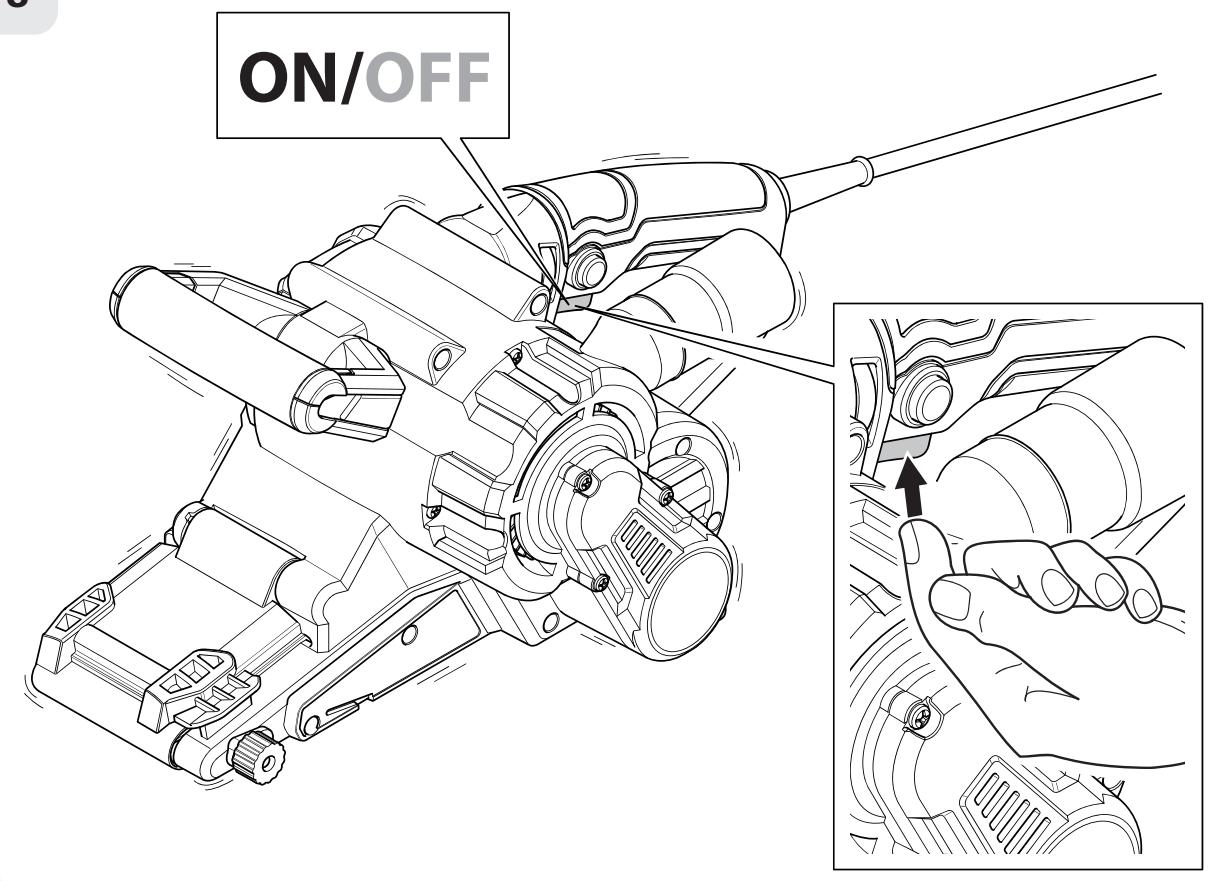
To start the sander, press the trigger switch.
To stop the sander, release the trigger switch.
If you press the lock on button while the trigger switch is depressed, the switch is kept in the operating position. This is convenient when continuous operating for extended periods of time is required.
To release the lock on button, press and release the trigger switch.

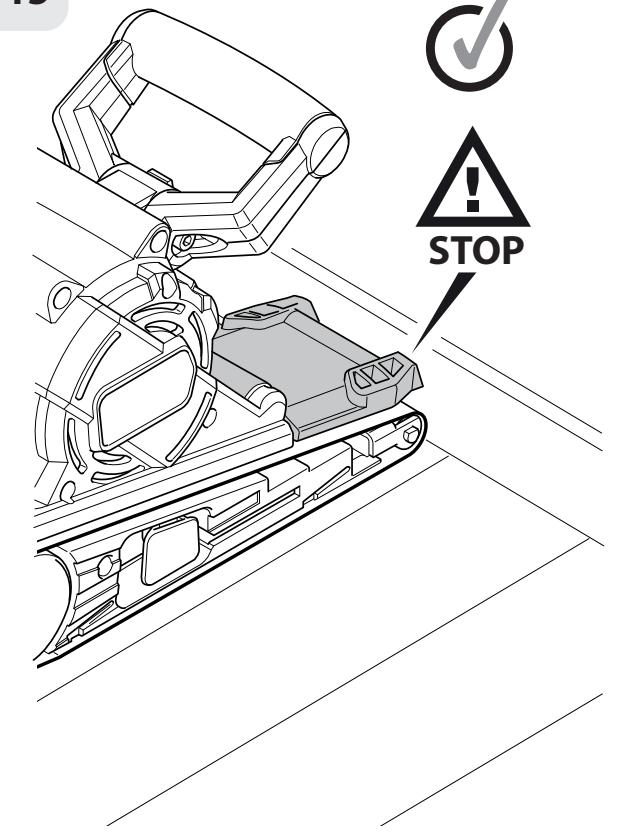
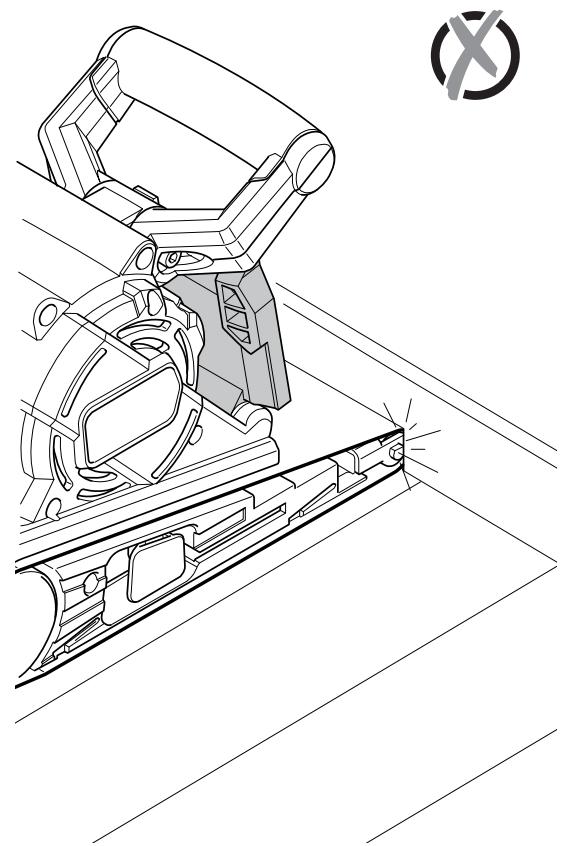
NOTE: Always lift the sander from the work before switching on or switch off.
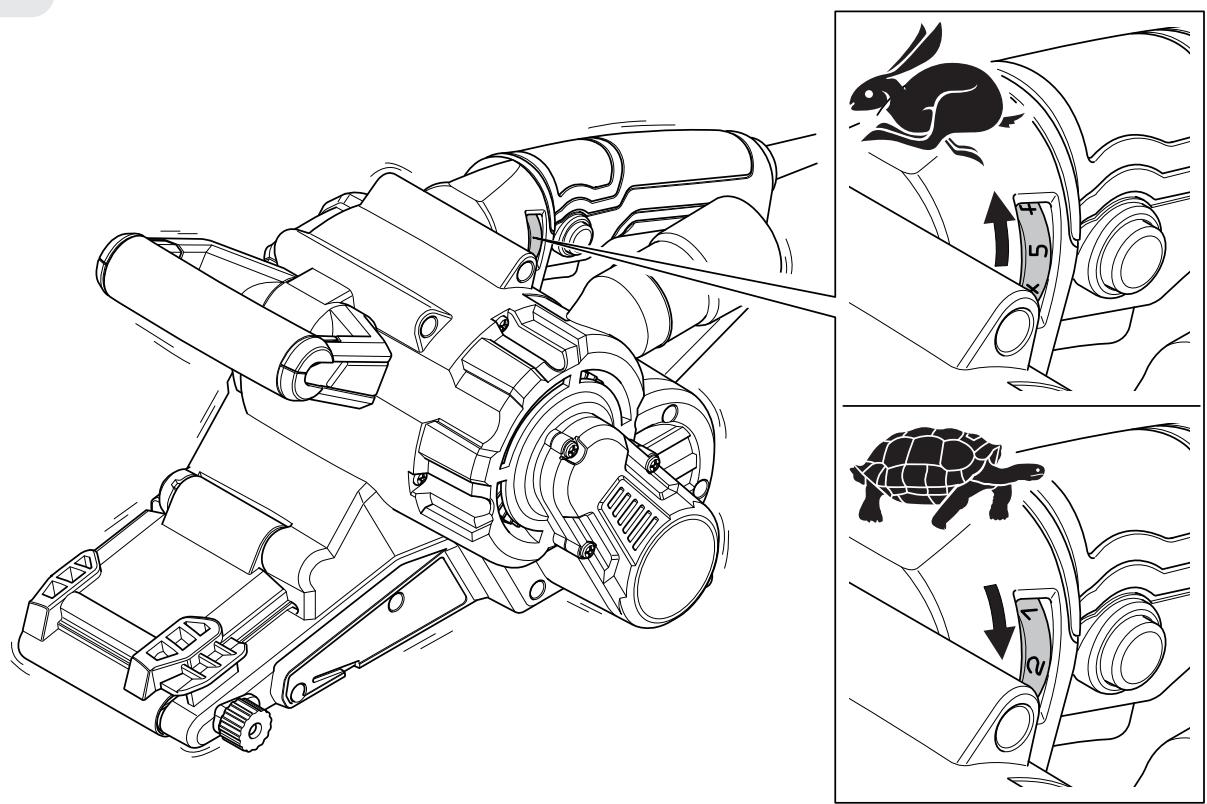
The sanding performance and the surface quality obtained depend mainly on the choice of the sanding belt and the pre-selected belt speed. The higher the belt speed, the greater the material removal and the smoother the sanding surface becomes. Only perfect sanding belts ensure a good sanding job and are gentle on the power tool. Work with minimal pressure to increase the life of the sanding belts. The weight of the power tool on its own is sufficient to ensure a good sanding job. Too much pressure on the unit does not result in better sanding performance, but in more wear and tear on the power tool and the sanding belt.
6. OPERATION
Speed adjust knob
Rotate the speed adjustable knob, it allows for variable speed for different function.
Sanding
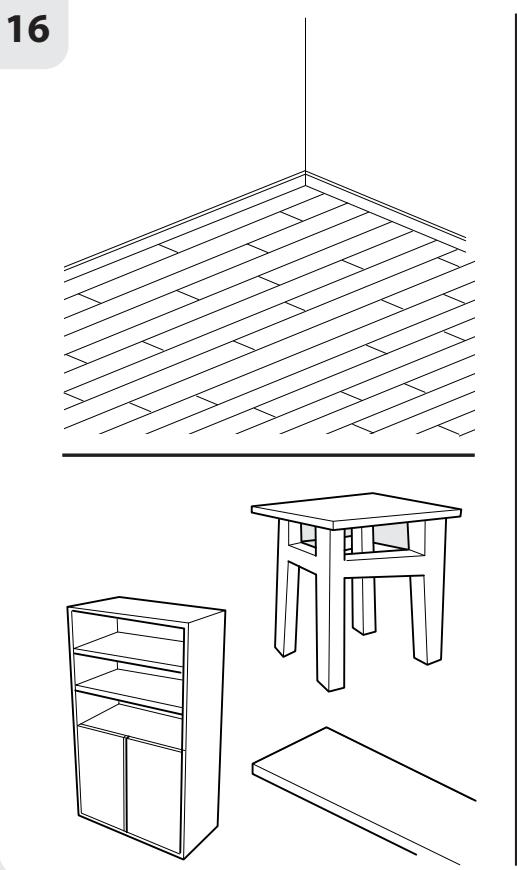
The sander can be used for most sanding operations on materials such as wood, plastic, metal and painted surfaces.


WARNING : Don't use this machine on plaster.
Wear safety goggles and dust mask.
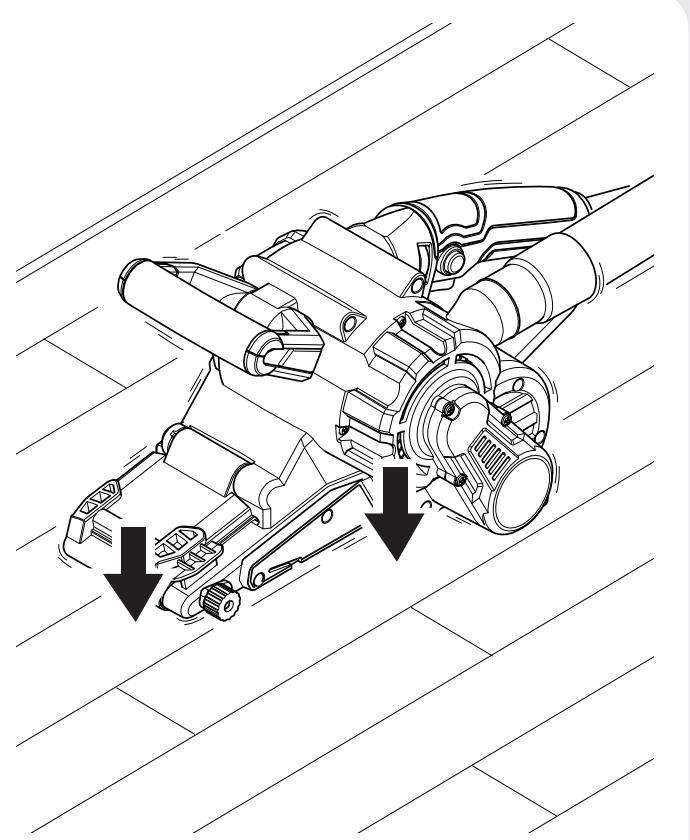
Where possible, secure smaller workpiece to prevent them from moving under the sander. Lower the sander in contact with the workpiece without pressure and then start the sander.
Move the sander slowly over the surface of the workpiece, for best results use the sander in a linear motion not circular. Using the sander in a circular motion may result in the belt tracking slipping. Sand with the grain, in parallel over lapping strokes.
To remove paint or smooth very rough wood, sand across the grain at 45^ in two directions, and then finish parallel with the grain. Use the front roller only to sand corners or irregular shapes.
Lift the sander off the work before switching off. Remember to keep your hands away from the moving belt, as it will continue to move for a short time after the machine is switched off.
If there are still scratches on your work after sanding, try either of the following:
- Go back to a coarser grit and sand the marks out before recommencing with the original choice or,
- Try using new sanding belt of the same grit to eliminate the unwanted marks before progressing to a finer grit and finishing the job.
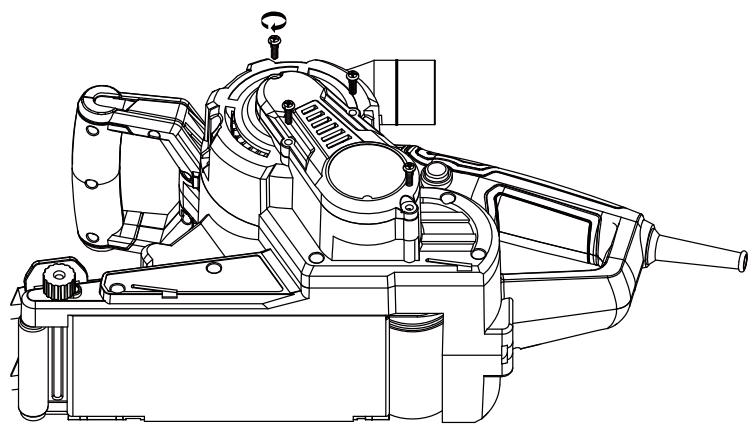
7. MAINTENANCE

Always disconnect the device before performing any adjustment or maintenance operation. If the supply cord is damaged, it must be replaced by the manufacturer or its service agent in order to avoid a hazard.
Disconnect from the power supply immediately if the supply cord is damaged. Take care not to expose this tool to the rain.
If the carbon brushes need to be replaced, have this done by a qualified repair person (always replace the two brushes at the same time)
Cleaning
Avoid using solvents when cleaning plastic parts. Most plastic parts are susceptible to damage from various types of commercial solvents and may be damaged by their use. Use clean cloths to remove dirt, carbon dust, etc.
Lubrication
All the bearings in this tool are lubricated with a sufficient amount of high grade lubricant for the life of the unit under normal operating conditions, therefore no further lubrication is required.
8. TROUBLE SHOOTING
Suspected malfunctions are often due to causes that the users can fix themselves. Therefore check the product using this section. In most cases the problem can be solved quickly.

WARNING! Only perform the steps described within these instructions! All further inspection, maintenance and repair work be performed by an authorised service centre or a similarly qualified list if you cannot solve the problem yourself!
8. TROUBLE SHOOTING
| Problem | Possible cause | Solution |
| Product does not start | Not connected to power supply | Connect to power supply |
| Power cord or plug is defective | Check by a specialist electrician. | |
| Other electrical defect to the product | Check by a specialist electrician | |
| Product does not reach full power | Extension cord not suitable for operation with this product | Use a proper extension cord |
| Power source (e.g. generator) has too low voltage | Connect to another power source | |
| Air vents are blocked | Clean the air vents | |
| Unsatisfactory result | Sanding belt is worn | Replace with a new one |
| Sanding belt not suitable for work piece material | Use suitable sanding belt |
9. PROTECT OUR ENVIRONMENT
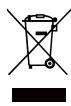
Electrical products must not be thrown out with domestic waste. Recycle them at the special disposal centers provided for the purpose. Contact your local authorities or stockiest for advice on recycling.
The potential effects on the environment and human health as a result of the presence of hazardous substances in electrical and electronic equipment.
For disposal, this tool also can be returned to the hardware store or vendor (or Dexter dealer).
10. WARRANTY
- Dexter products are designed to highest DIY quality standards. Dexter provides a 36-months warranty for this belt sander (model n° 900BS2.52), from the date of purchase. This warranty applies to all material and manufacturing defects which may arise. No further claims are possible, of whatever nature, direct or indirect, relating to people and /or materials. Dexter products are not directed to professional use.
- In the event of a problem or defect, you should first always consult your Dexter dealer. In most cases, the Dexter dealer will be able to solve the problem or correct the defect.
- Repairs or the replacement of parts will not extend the original warranty period.
- Defects which have arisen as a result of improper use or wear are not covered by the warranty. Amongst other things, this relates to switches, protective circuit switches and motors, in the event of wear.
-
Your claim upon the warranty can only be processed if:
-
Proof of the purchase date can be provided in the form of a receipt.
- No repairs and/or replacements have been carried out by third parties.
- The tool has not been subjected to improper use (overloading of the machine or fitting non-approved accessories).
- There is no damage caused by external influences or foreign bodies such as send or stones.
- There is no damage caused by non-observation of the safety instructions and the instructions for use.
- There is no force majeure on our part.
-
A description of the complaint is enclosed.
-
The warranty stipulations apply in combination with our terms of sale and delivery.
- Fault tools to be returned to Dexter via Dexter dealer will be collected by Dexter as long as the product is properly packaged. If faulty goods are sent directly to Dexter by the consumer, Dexter will only be able to process these goods if the consumer pays the shipping costs.
- Products which are delivered in a poorly packaged condition will not be accepted by Dexter.
DETAILED VIEW


1
2
3
①
4
5
6

7
8
9
10
11
12
13
14
15
16
17
18
STEP 1
STEP 2
STEP3
STEP 4
19
STEP 5
STEP 6
STEP 7
2014_30_EU_EMC (Electromagnetic Compatibility (EMC) Directive)
ENIEC55014-1:2021
ENIEC55014-2:2021
ENIEC61000-3-2:2019+A1:2021
EN61000-3-3:2013+A1:2019+A2:2021
2011_65_EU_RoHS (Restriction of Hazardous Substances in Electrical and Electronic Equipment (RoHS) Directive)
EU)2015/863 EN IEC 63000:2018
2006_42_EC_MACHINE (Machinery Directive)
EN 62841-1:2015+AC:2015+A11+2022 EN 62841-2:4-2014+AC:2015
International Projects Quality Leader
Ronchin-FRANCE
30/08/2024

Lieu d'etablisement | Luogo |.), Tonoç
Date | data del rilascio | Data wydiaia | ngepoynvia eksoonc
Modelo do produits | Product Model | Modelo del produits | Modelul de produs/produsul:
85635365
This declaration of conformity is issued under the sole responsibility of the manufacturer
| La presente declaración de conformidad se expide bajo la exclusiva responsabilidad del fabricante | Declarata de conformitate este emisă pe raspunderea exclusiva a
producatorului
Objeto da declaracao | Object of the declaration | Objeto de la declaracion | Obiectul declaratiei :
conformidade e declarada | References to the relevant harmonised standards used or references to the
specifications in relation to which conformity is declared | Referencias a las normas armonizadas pertinent
applicable, the name and number of notified body number
2014_30_EU EMC (Electromagnetic Compatibility (EMC) Directive)
-
- EU RoHS (Restriction of Hazardous Substances in Electrical and Electronic Equipment (RoHS) Directive)
2006_42_EC_MACHINE (Machinery Directive)
EN IEC 55014-1:2021
ENIEC55014-2:2021 ENIEC61890-3:2:2019
EN 1EC 61000-3-2:2019+A1:2021 EN 61000-3-3:2019+A1:2019+A2
EN 61000-3-3.2013+A1.2019+A2.2021
(EU) 2015/863
EN IEC 63000:2018
EN 62841-1: 2015+AC: 2015+A11:2022
EN 62841-2-4: 2014+AC:2015
Local | Place | Lugar | Locatie
International Projects Quality Leader
Ronchin-FRANCE
30/08/2024

Fe Ce produit est recyclable. S'il ne peut plus etre utilise, veuillez I'apporter dans un centre de recyclage de déchets.
Este producto es recicable. Si ya no se possible usar, Ilevelo a un centro de recicaje de residuos.
Peste produto e reciclavel. Se deixar de o'utilizar, entrega-o num centro de reciclagem de residuos.
NtOstro prodotto puo essere riciclato. Se deve essere smaltito, portalo presso un centro de reciclaggio.
Auto to npoiov evai avakukkwio. Eav dev opei neov va xnpouonoine, etaepet e tnv oKANOIO Kevtpo avakukwong anoppmuatv.
P6 Ten produit poddawany jest recyklingowy, kiedy przystastejby uzyteczny danezy dostarczy go do punktu zbiórki odpadów.
80 3TOT npOyKT MoKET nepepa6aTbIBaTbcra. Ecnn OH 6oJIbIe He npirodeH dIg nonb3OBaHn, cdaTe erO B yTuIN3aUOHbIu cHTp.
bIyIeHIM kaIa Ta eHdeyre KeJeI. Ohbl epi KOnJaHyf a BoJMaTbH JkaFdaJa, OHbl KaIa Ta eHneTIn opTaIbIKKa TaIcIpybIb3dbI eTIHeM3
Ue npoykt moke nepepo6nca. Kso BOHO 6iIbwe He c npdaTHe dne BnkopncTyBaHHa, 3aTe mOro BytniiauiHn UeHTp.
Aceast produs este reciclabil. Daca nu mai poate ti folosit, va rugam sa il aducei intr-un centru de reciclare a deseurilor.
83 Este produit e reciclavel. Se nao puder mais ser uso, descarte em um centro de reciclagem de resíduos.
This product is recyclable. If it cannot be used anymore, please take it to waste recycling centre.

Made in China 2024
SERIAL NUMBER


PAP


*Garantie 3 ans / 3 años de garantía / Garantia de 3anos / Garanzia 3 anni / Eyyunon 3 ετών / Gwarancja 3-letnia / Γαραπη 3 ύσιa / Keninikík 3 kýiln / Γαραπίδ 3 pokiv / Garantie 3ani / Garantia 3anos / 3-year guarantee
ADEO Services - 135 Rue Sadi Carnot - CS 00001
59790 RONCHIN - France
LM - 18B, Building 4,2 Dajiaoting Zhongjie, Chaoyang District, Beijing 100022 - CHINA, P.R.C
000JIEPYAMEPJHEBOCTOK,141031,MocKOBcKa8 6oNaIbT, r.MbITmUuOtAaKOBcKoe WoCCe,d,1,POCUM
Imported by Adeo South Africa (PTY) LTD T/A Leroy Merlin
Leroy Merlin Greenstone Store - Corner Blackrock Street
and Stoneridge Drive, Greenstone Park Ext 2,
Edenvale, 1610 - Johannesburg, Gauteng, South Africa
- SYMBOLES
- SAFETY INSTRUCTIONS
- H M E I H
- PPOEIANOIOIHsH:
- TEXNIKA XAPAKTHPISTIKA
- Ieipexóμεva ouokεuaoiac
- IHHIBIyAJIbHA TEXHIKA BE3NEKNI
- YCYHEHRA HECIPABHOCTEY
- SIGURANTA ELECTRICA
- CONTENTS
- INTENDED USE OF BELT SANDER
- GENERAL POWER TOOL SAFETY WARNINGS
- SAVE ALL WARNING AND INSTRUCTIONS FOR FUTURE REFERENCE.
- WORK AREA SAFETY
- ELECTRICAL SAFETY
- PERSONAL SAFETY
- POWER TOOL USE AND CARE
- SERVICE
- EXTRA SAFETY REGULATIONS CONCERNING BELT SANDER
- TAKE SPECIAL CARE TO GUARD AGAINST THESE DUSTS, INCLUDING THE FOLLOWING:
- ANY PRE1960 BUILDING MAY HAVE PAINT CONTAINING LEAD ON WOOD OR METAL SURFACES. IF YOU SUSPECT WORKPIECE CONTAINS LEAD SEEK PROFESSIONAL ADVICE.
- 3.DESCRIPTION
- TECHNICAL DATA
- NOTE:
- WARNING:
- Contents of packing
- BEFORE PUTTING THE EQUIPMENT INTO OPERATION
- Selecting the right grade of sanding belt
- Attaching a sanding belt
- Adjusting sanding belt tracking
- Dust extraction
- OPERATION
- Switch on and off
- WARNING: Always check that the power supply is the same as that indicated on the nameplate of the tool.
- NOTE: Always lift the sander from the work before switching on or switch off.
- Speed adjust knob
- WARNING : Don't use this machine on plaster.
- MAINTENANCE
- Cleaning
- Lubrication
- TROUBLE SHOOTING
- PROTECT OUR ENVIRONMENT
- WARRANTY
- DETAILED VIEW
- 2014_30_EU_EMC (Electromagnetic Compatibility (EMC) Directive)
- 2011_65_EU_RoHS (Restriction of Hazardous Substances in Electrical and Electronic Equipment (RoHS) Directive)
- 2006_42_EC_MACHINE (Machinery Directive)
- 85635365
Brand : DEXTER
Model : 900BS2.52
Category : Belt sander