USER MANUAL HELIS auto-alimenté - CARE - ergomètre connecté CARE FITNESS
Important: Read these instructions before using the equipment!
Safety
HOW TO USE A BIKE WITH A GENERATOR SYSTEM
The generator bike is delivered with an adaptor.
This adaptor must be plugged for at least 8 hours before the first use of the bike and in case the bike is not used for a long time, to load the battery.
Afterwards, the battery will be loaded by the generator during the training.
- Read this user manual and keep it in a safe place. Use this product exclusively in the manner indicated.
- This equipment must be assembled and used by adults.
- The equipment complies with the EN-957 standard, classification HA for use in the home. It must not be used in a sports center or any other public, associative or rented space.
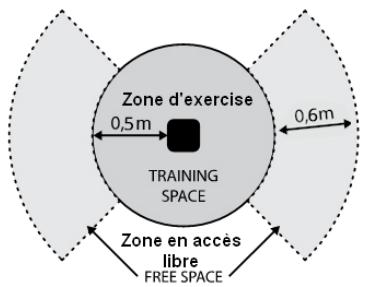
- Ensure the installation base is levelled and stable. Please make sure there is 0.6m free space around the machine (see picture below-solid circle indicates the radius of training area) and at least 0.5m of free space on each side of the machine (see picture below-dashed line indicates an additional free space.
- WARNING! Rhythm control systems heart rate may be inaccurate. Overtraining can lead to serious injury or death. If you feel unwell, stop training immediately.
- For totally safe use, a stable, level surface is required. Protect your floor covering with a mat. Do not use the equipment in damp areas (swimming pool, sauna, etc.).
- Do not allow children to play with this equipment. CARE declines all responsibility for any injuries they may incur. Do not allow children close to this equipment when you are training.
- CARE declines all responsibility if technical modifications are made to any of its products by the user.
- Maximum weight of user: 150kg
- Before you start training, it is essential that you consult your doctor to determine the intensity level of the program you use.
CAUTION: The control systems of the heart rate may be incorrect. Excessive exercise can cause serious injury or cause death. If you feel any discomfort, stop the exercises immediately.
- Excessive or badly programmed training can damage your health.
- Keep your back straight when exercising.
- It is strongly recommended that your wear suitable clothing and footwear.
Maintenance
- Regularly check that elements fastened with nuts and bolts are correctly tightened.
- To maintain the level of safety, the equipment must be regularly checked. It is vital that any faulty parts are replaced and that it is not used until completely repaired. Remember regularly to grease moving parts.
- As sweat is very corrosive, do not allow it to come into contact with the enameled or chromed parts of the equipment, particularly the computer. Immediately wipe the equipment after training. The enameled parts can be cleaned using a damp sponge. All aggressive or corrosive products should be avoided.
- Poids unitaire : 57 kg
- Dimensions : 145 x 64 x 170 cm (0.93m²)
- The braking system is independent of speed
- This class C crank training device is not suitable for high precision exercises
Guarantee: the chassis is guaranteed for 5 years. Moving parts are guaranteed for 2 years. The guarantee applies to normal use by a private individual in his home. Validate your product warranty on line www.carefitness.com
Recycling: The « crossed out dustbin » sign means that this product and its batteries cannot be thrown out whit domestic waste. They should be treated apart. When you have finished with them, drop them at an authorised collection point so they can be recycled. This gesture will go towards protecting the environment and your health.
*the parts most subject to wear is the grip foam and end cap.

If the battery needs changing
Connection application Kinomap
https://cloud-carefitness.com/index.php/s/E2WD22KMNBQzERL
E mail : https://www.carefitness.com/sav
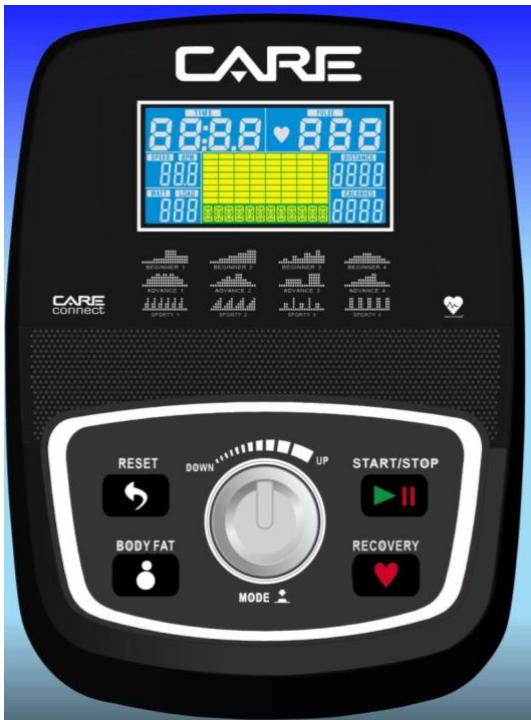
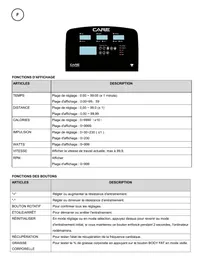
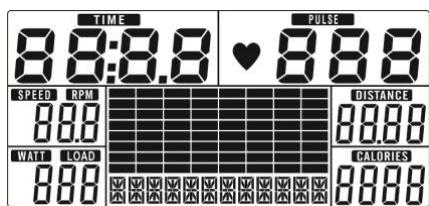
DISPLAY FUNCTIONS
| ITEM | DESCRIPTION |
| TIME | Count up - No preset target, Time will count up from 00:00 to maximum 99:59 with each increment is 1 minute.Count down - If training with preset Time, Time will count down from preset to 00:00.Each preset increment or decrement is 1 minute between 00:00 to 99:00. |
| SPEED | Displays current training speed. Maximum speed is 99.9 KM/H or ML/H. |
| RPM | Displays the Rotation Per Minute. Display range 0~15~999 |
| DISTANCE | Accumulates total distance from 0.00 up to 99.99 KM or ML. The user may preset target distance data by using UP/DOWN button.Each preset increment or decrement is 0.1KM or ML between 0.00 to 99.90. |
| CALORIES | Accumulates calories consumption during training from 0 to maximum 9999 calories.(This data is a rough guide for comparison of different exercise sessions which can not be used in medical treatment.) |
| PULSE | User may set up target pulse from 0 - 30 to 230; and computer buzzer will beep when actual heart rate is over the target value during workout. |
| WATTS | Display current workout watts. Display range 0~999. |
| MANUAL | Manual mode workout. |
| BEGINNER | 4 PROGRAM selection. |
| ADVANCE | 4 PROGRAM selection. |
| SPORTY | 4 PROGRAM selection. |
| CARDIO | Target HR training mode. |
| WATT PROGRAM | WATT constant training mode. |
| Up (Encoder) | Increase resistance level
Setting selection. |
| Down (Encoder) | Decrease resistance level
Setting selection. |
| Mode / Enter | Confirm setting or selection. |
| Reset | Press and hold for 2 seconds, computer will reboot and start from user setting.
Reverse to main menu during preset workout value or stop mode. |
| Start/ Stop | Start or Stop workout. |
| Recovery | Test heart rate recovery status. |
| Body fat | In stop mode, press it for body fat measurement |
OPERATION:
POWER ON
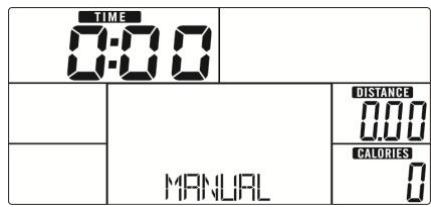
Plug in power supply, computer will power on and display all segments on LCD for 2 seconds (Drawing 1).
Drawing 1
WORKOUT SELECTION
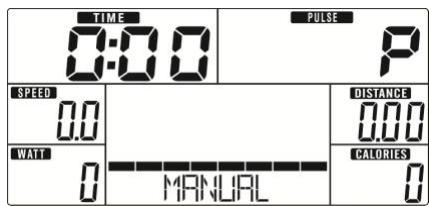
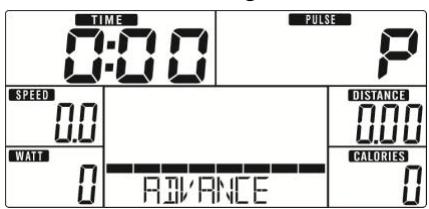
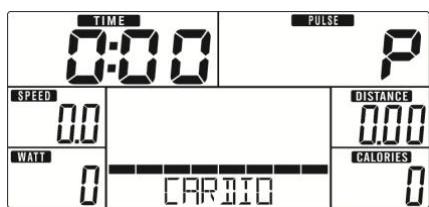
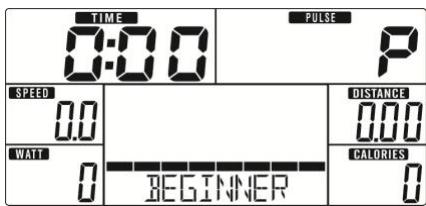
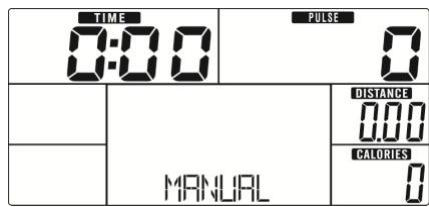
Use UP or DOWN (Encoder) to select workout Manual (Drawing 2) Beginner(Drawing 3) Advance (Drawing 4) Sporty(Drawing 5) Cardio(Drawing 6) Watt(Drawing 7).
Drawing 2
Drawing 4
Drawing 6
Drawing 3
Drawing 5
Drawing 7
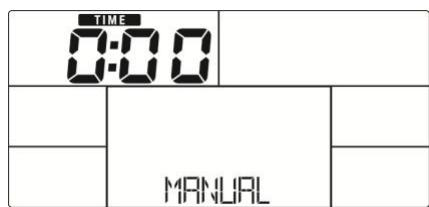
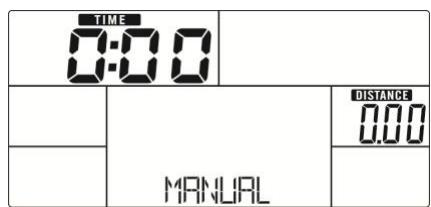
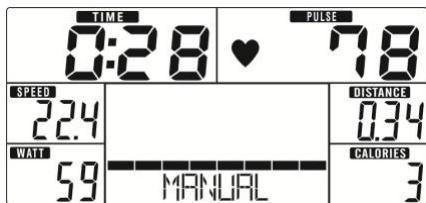
Manual Mode
Press START in main menu may start workout in manual mode.
- Use UP or DOWN (Encoder) to select workout program, choose Manual and press MODE / ENTER to get into.
- Use UP or DOWN (Encoder) to set TIME (Drawing 8), DISTANCE (Drawing 9), CALORIES (Drawing 10), PULSE (Drawing 11) and press MODE / ENTER to confirm.
- Press START/STOP keys to start workout. Use UP or DOWN (Encoder) to adjust load level. Load level display in WATT window, no adjusting for 3s, it will switch to display WATT (Drawing 12).
- Press START/STOP keys to pause workout. Press RESET to reverse to main menu.
Drawing 8
Drawing 9
Drawing 10
Drawing 11
Drawing 12
Beginner Mode
- Use UP or DOWN (Encoder) to select workout program, choose Beginner mode and press MODE / ENTER to get into.
- Use UP or DOWN (Encoder) to select Beginner program 1~4 (Drawing 13) and press MODE / ENTER to get into.
- Use UP or DOWN (Encoder) to set TIME.
- Press START/STOP key to start workout. Use UP or DOWN (Encoder) to adjust load level.
- Press START/STOP key to pause workout. Use RESET to reverse to main menu.
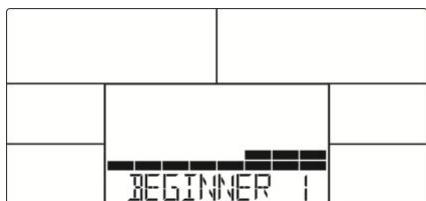
Drawing 13
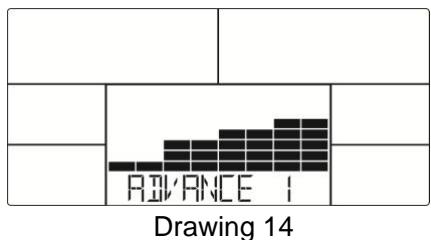
Advance Mode
- Use UP or DOWN (Encoder) to select workout program, choose Advance mode and press MODE / ENTER to get into.
- Use UP or DOWN (Encoder) to select Advance program 1~4 (Drawing 14) and press MODE / ENTER to get into.
- Use UP or DOWN (Encoder) to set TIME.
-
Press START/STOP key to start workout. Use UP or DOWN (Encoder) to adjust load level.
-
Press START/STOP key to pause workout. Use RESET to reverse to main menu.
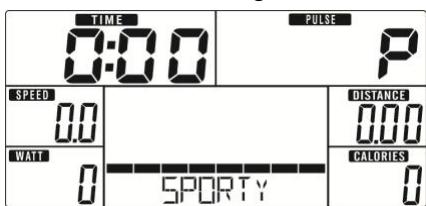
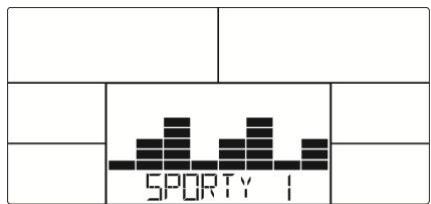
Sporty Mode
- Use UP or DOWN (Encoder) to select workout program, choose Sporty mode and press MODE / ENTER to get into.
- Use UP or DOWN (Encoder) to select Sporty program 1~4 (Drawing 15) and press MODE / ENTER to get into.
- Use UP or DOWN (Encoder) to set TIME.
- Press START/STOP key to start workout. Use UP or DOWN (Encoder) to adjust load level.
- Press START/STOP key to pause workout. Use RESET to reverse to main menu.
Drawing 15
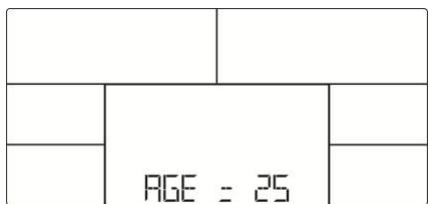
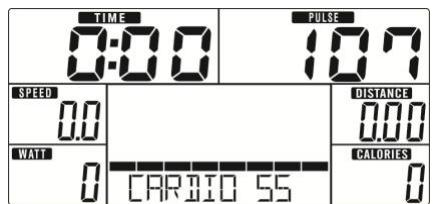
Cardio Mode
- Use UP or DOWN (Encoder) to select workout program, choose CARDIO and press MODE / ENTER to get into.
- Use UP or DOWN (Encoder) to set Age (Drawing 16).
- Use UP or DOWN (Encoder) to select 55% (Drawing 17). 75% .90% or TAG (TARGET H.R.) (default: 100).
- Use UP or DOWN (Encoder) to set workout TIME.
- Press START/STOP key to start or stop workout. Use RESET to reverse to main menu.
Drawing 16
Drawing 17
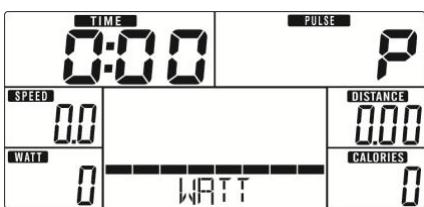
Watt Mode
- Use UP or DOWN (Encoder) to select workout program, choose WATT and press MODE / ENTER to get into.
- Use UP or DOWN (Encoder) to set WATT target. (default: 120, Drawing 18)
- Use UP or DOWN (Encoder) to set TIME.
- Press START/STOP key to start workout. Use UP or DOWN (Encoder) to adjust Watt level.
- Press START/STOP key to pause workout. Use RESET to reverse to main menu.
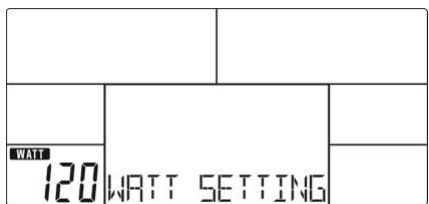
Drawing 18
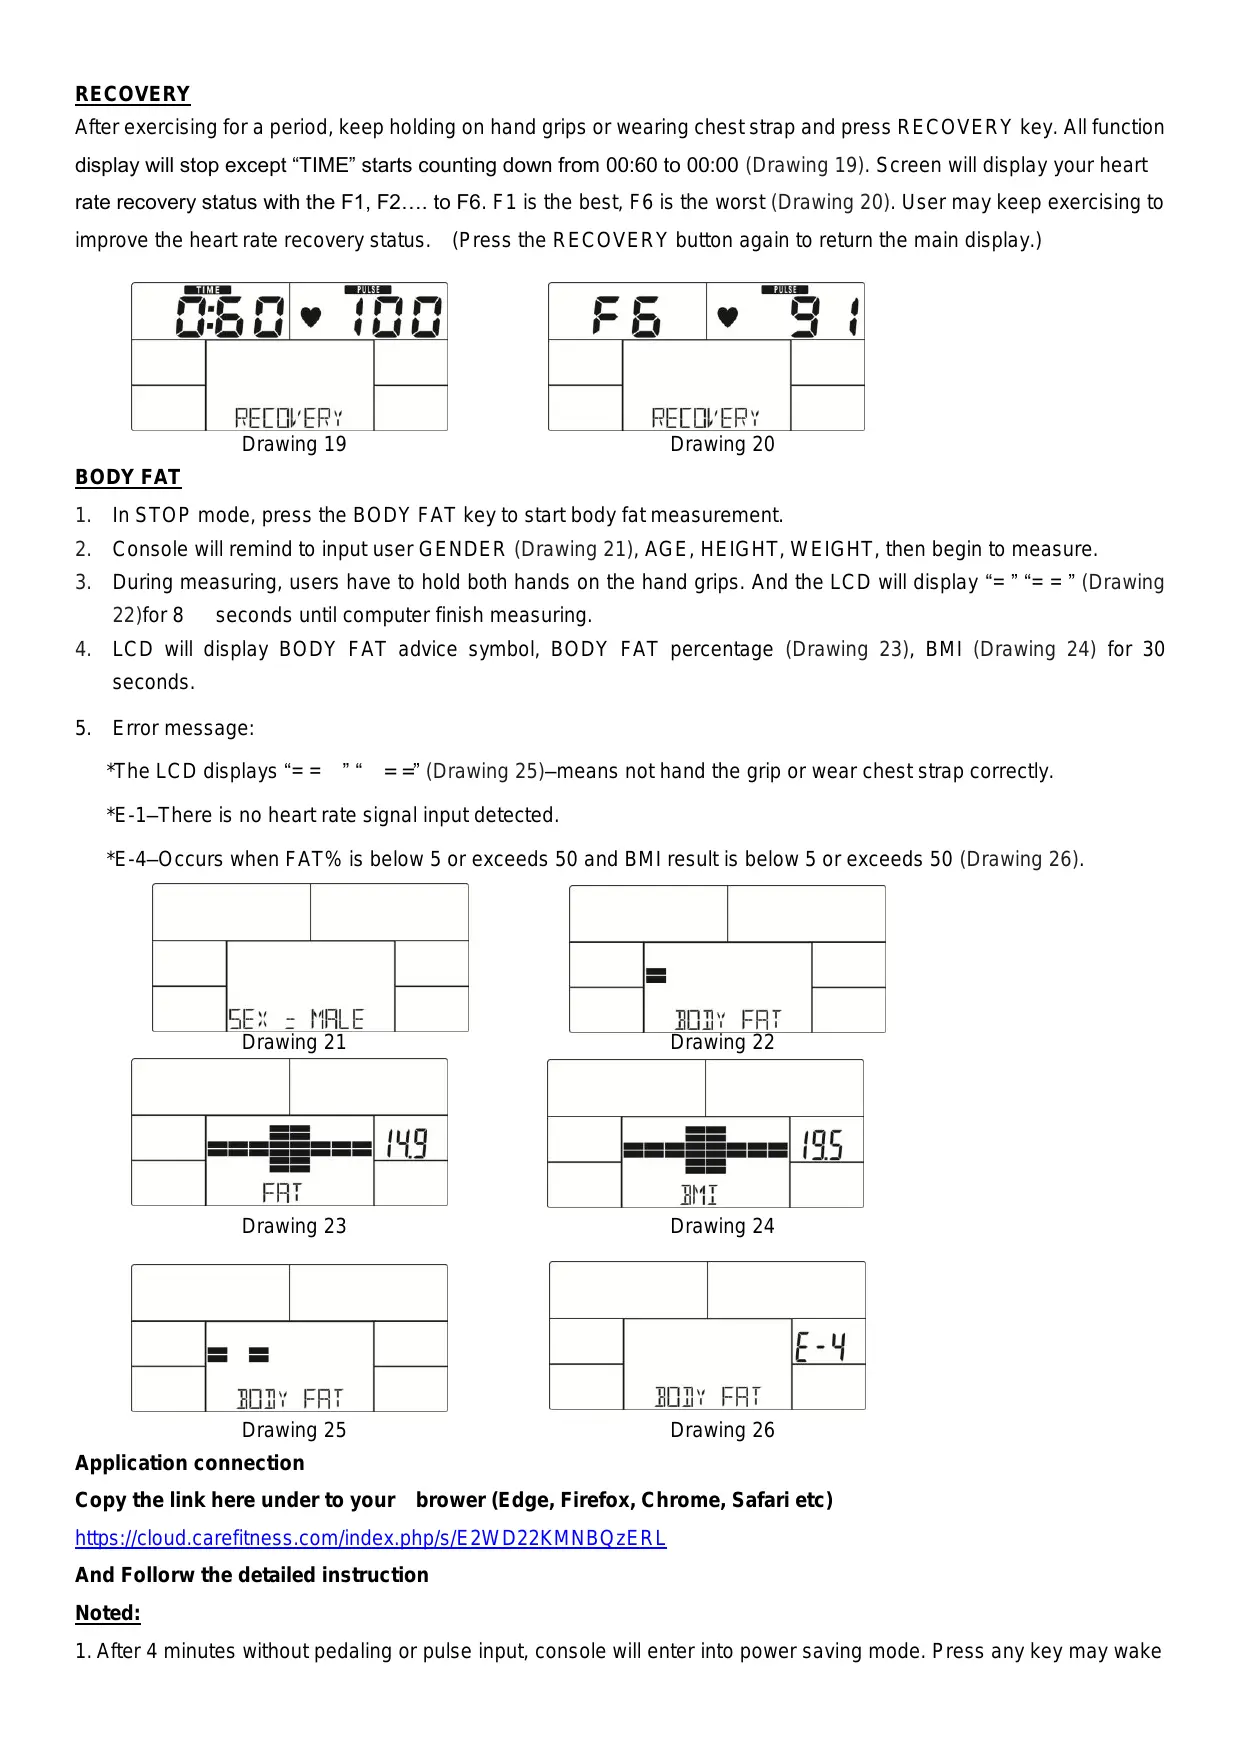
RECOVERY
After exercising for a period, keep holding on hand grips or wearing chest strap and press RECOVERY key. All function display will stop except “TIME” starts counting down from 00:60 to 00:00 (Drawing 19). Screen will display your heart rate recovery status with the F1, F2.... to F6. F1 is the best, F6 is the worst (Drawing 20). User may keep exercising to improve the heart rate recovery status. (Press the RECOVERY button again to return the main display.)
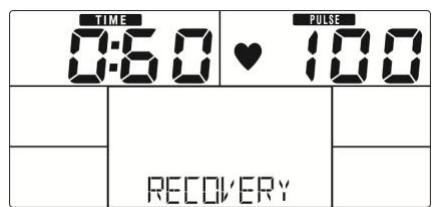
Drawing 19
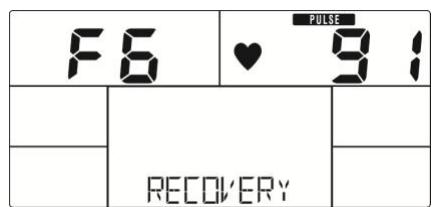
Drawing 20
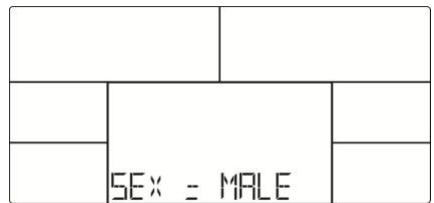
BODY FAT
- In STOP mode, press the BODY FAT key to start body fat measurement.
- Console will remind to input user GENDER (Drawing 21), AGE, HEIGHT, WEIGHT, then begin to measure.
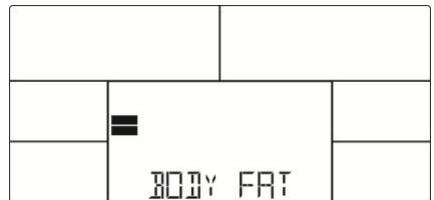
- During measuring, users have to hold both hands on the hand grips. And the LCD will display “=” “=” (Drawing 22) for 8 seconds until computer finish measuring.
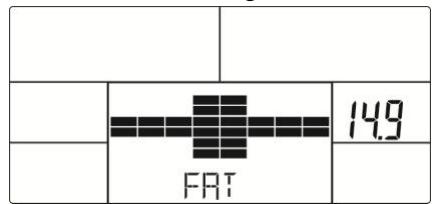
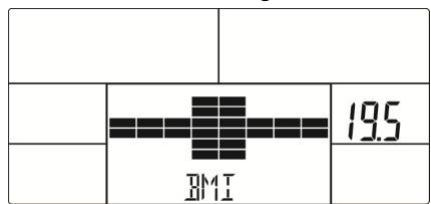
- LCD will display BODY FAT advice symbol, BODY FAT percentage (Drawing 23), BMI (Drawing 24) for 30 seconds.
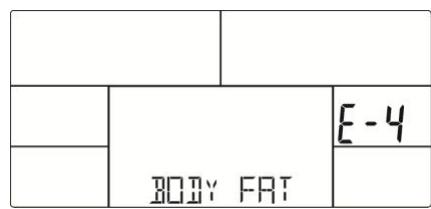
- Error message:
*The LCD displays “= = ” “ = =” (Drawing 25)—means not hand the grip or wear chest strap correctly.
*E-1-There is no heart rate signal input detected.
*E-4-Occurs when FAT% is below 5 or exceeds 50 and BMI result is below 5 or exceeds 50 (Drawing 26).
Drawing 21
Drawing 22
Drawing 23
Drawing 24

Drawing 25
Drawing 26
Application connection
Copy the link here under to your brower (Edge, Firefox, Chrome, Safari etc)
https://cloud-carefitness.com/index.php/s/E2WD22KMNBQzERL
And Followw the detailed instruction
Noted:
- After 4 minutes without pedaling or pulse input, console will enter into power saving mode. Press any key may wake
the console up.
- When computer act abnormal, please plug out the adaptor and plug in again
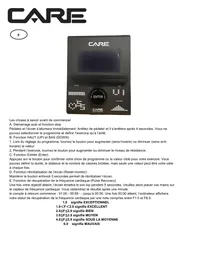
Cardio - Training:
Before programming your training, it is essential to take account of your age, particularly for people of more than 35 years of age, as well as your physical condition. If you have a sedentary lifestyle without regular physical activity, it is vital that you consult your doctor to determine the level of intensity of your training. Once determined, do not attempt to achieve your maximum during the first training sessions. Be patient; your performance will quickly improve.
This enables you to develop your cardiovascular system (fitness of the heart / blood vessels). During Cardio-Training, the muscles need a supply of oxygen and nutritive substances. They also need to liminate waste. Our heart increases its rhythm and sends a larger amount of oxygen to the body by means of the cardiovascular system.
The more often you exercise regularly and repetitively, the more your heart will develop, just like any other muscle. In daily life, this translates into the ability to bear greater physical effort and improve your intellectual faculties.
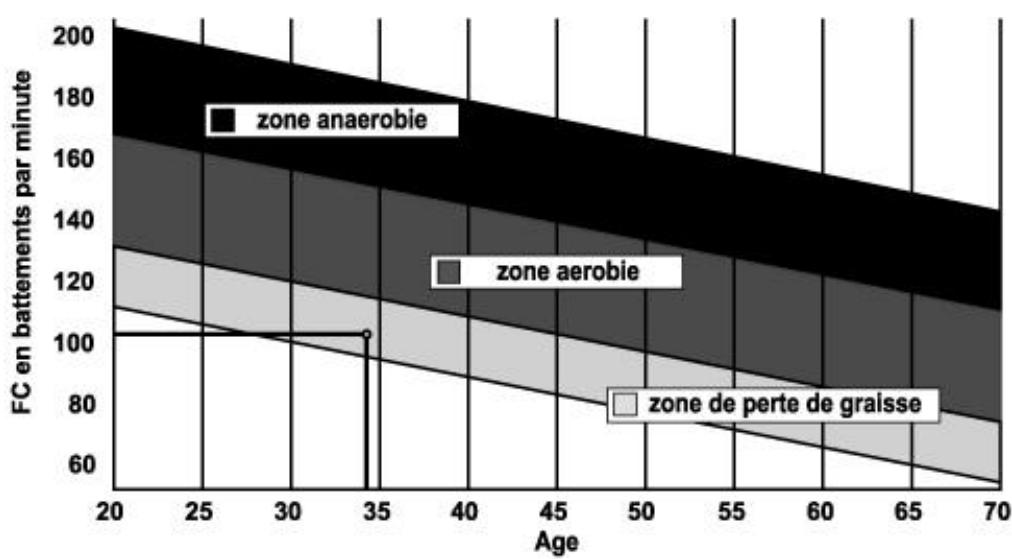
Definition of your work Zone:
The Maximum Heart Rate (MHR) = 220 - age (180 - age for sedentary people).
The Warming Up Zone and Cooling Down Zone are equal to 55% of your MHR.
The Fat Loss Zone is between 55 / 65% of your MHR.
The Aerobic Zone is between 65 / 85% of your MHR.
The Anaerobic Zone is between 85% of your MHR and your MHR.
Make a diagram of the target zones
The progressive training stages:
A warming up phase:
Start each training session by warming up progressively (10-20 min, more if you are over 50) which will put your muscles
on standby and gently increase your heart rate. Gently increase your pulse to 55% of your MHR (Maximum Heart Rate).
Keep your Heart Rate at this level for the duration of the warming up time. If you
begin your training too quickly, you are in danger of increasing the risk of tendon or muscle injury.
2) A work phase:
This is the main part of the training session. Depending on your specific goals and your initial physical condition, weight loss, improvement of cardiovascular resistance (aerobic work), development of stamina (anaerobic work), it is possible to choose the appropriate target zone.
The Fat Loss Zone, 55 - 65%
The heart rate must be low and the duration of the exercise quite long. This zone is advised for people resuming physical activity after a long period of idleness, who
are trying to eliminate excess weight or are susceptible to cardiac problems. Do not forget that for this type of training the duration of the exercise must be at least 30 minutes and the Heart Rate (HR) between 55 and 65% of the MHR. -
Gradually increase from 30 to 60 minutes per session.
Exercise 3 or 4 times a week.
The Aerobic Zone, 65 - 85%
This zone is recommended for those who are in good physical condition who train
regularly. By training in this zone, you will improve your physical condition but avoid overworking.
- Duration: 20 to 30 minutes per session.
- Frequency: At least 3 or 4 times a week.
The Anaerobic Zone, 85% - MHR
This zone is exclusively for experienced athletes and is never recommended
without medical approval and supervision. This zone is designed only for very fit people. It is used for interval training (or for short sprints) to help you to improve or measure your level of stamina.
The time spent in this zone must be brief to avoid the risk of accident.
3) A cooling down phase:
This entails a reduction of exertion (10 to 20 min). It enables you to return your cardiovascular system to normal (55% of your MHR) and prevent or reduce muscular pain such as cramp and stiffness. You must follow the training with a session of stretching exercises while your joints
are still warm. This relaxes the muscles and helps to prevent stiffness. Stretch slowly and gently. You must never stretch until you reach the pain threshold. Hold each stretch for 30 to 60 seconds while breathing out.
Check your progress
As it improves, your cardiovascular system will have an HR which will be lower when at rest. You will take longer to reach your target zone and it will be easier for you to maintain it. Sessions will seem easier and easier and you will have more stamina in your daily life.
If, on the other hand, your HR is higher than usual when at rest, you will have to rest or reduce the intensity of your training.
Do not be discouraged by the initial sessions. Motivate yourself by scheduling specific training times. Work hard!
To order spare parts
To guarantee an efficient service, make sure you have the following items before you
contact our After Sales Service:
The name or reference of the product.
After Sales Service
Email: service-uk@carefitness.com

ANZEIGEFUNKTIONEN
https://cloud.carefitness.com/index.php/s/E2WD22KMNBQzERL
https://cloud.carefitness.com/index.php/s/E2WD22KMNBQzERL
https://cloud.carefitness.com/index.php/s/E2WD22KMNBQzERL
De harttraining (cardiotraining):
Dagelijke training = circa 10 minutes per keer.
2 tot 3 trainingen per week = circa 30 minutes per keer.
1 tot 2 trainingen per week = circa 50 minutes per keer.
E-mail: service-nl@carefitness.com
CARE
FITNESS