USER MANUAL AL-F50B JVC
Hotline Darty France
WARNING 2
PARTS 2
MOUNTING THE DUST COVER 3
3
OPERATION 4
Preparing to Play 4
Playing the Vinyl Record 5
Recording Audio Tracks. 5
TIPS FOR BETTER TURNTABLE PERFORMANCE 6
SPECIFICATIONS 6
DISPOSAL 6
[European Union]
Dear Customer,
This apparatus is in conformance with the valid European directives and standards regarding electromagnetic compatibility and electrical safety.
European representative of the manufacturer is:
- This appliance is intended for domestic household use only and should not be used for any other purpose or in any other application, such as for non domestic use or in a commercial environment.
- Ventilation
- Allow at least a 10 cm gap all around the product.
The ventilation should not be impeded by covering the ventilation openings with items, such as newspapers, table-cloths, curtains, etc.
- No naked flame sources, such as lighted candles, should be placed on the apparatus.
- Attention should be drawn to the environmental aspects of battery disposal.
- This apparatus is not suitable for use in a tropical climate.
- The apparatus shall not be exposed to dripping or splashing and that no objects filled with liquids, such as vases, shall be placed on the apparatus.
- To protect the environment, use local recycling facilities for battery disposal.
- Where the MAINS plug or an appliance coupler is used as the disconnect device, the disconnect device shall remain readily operable.
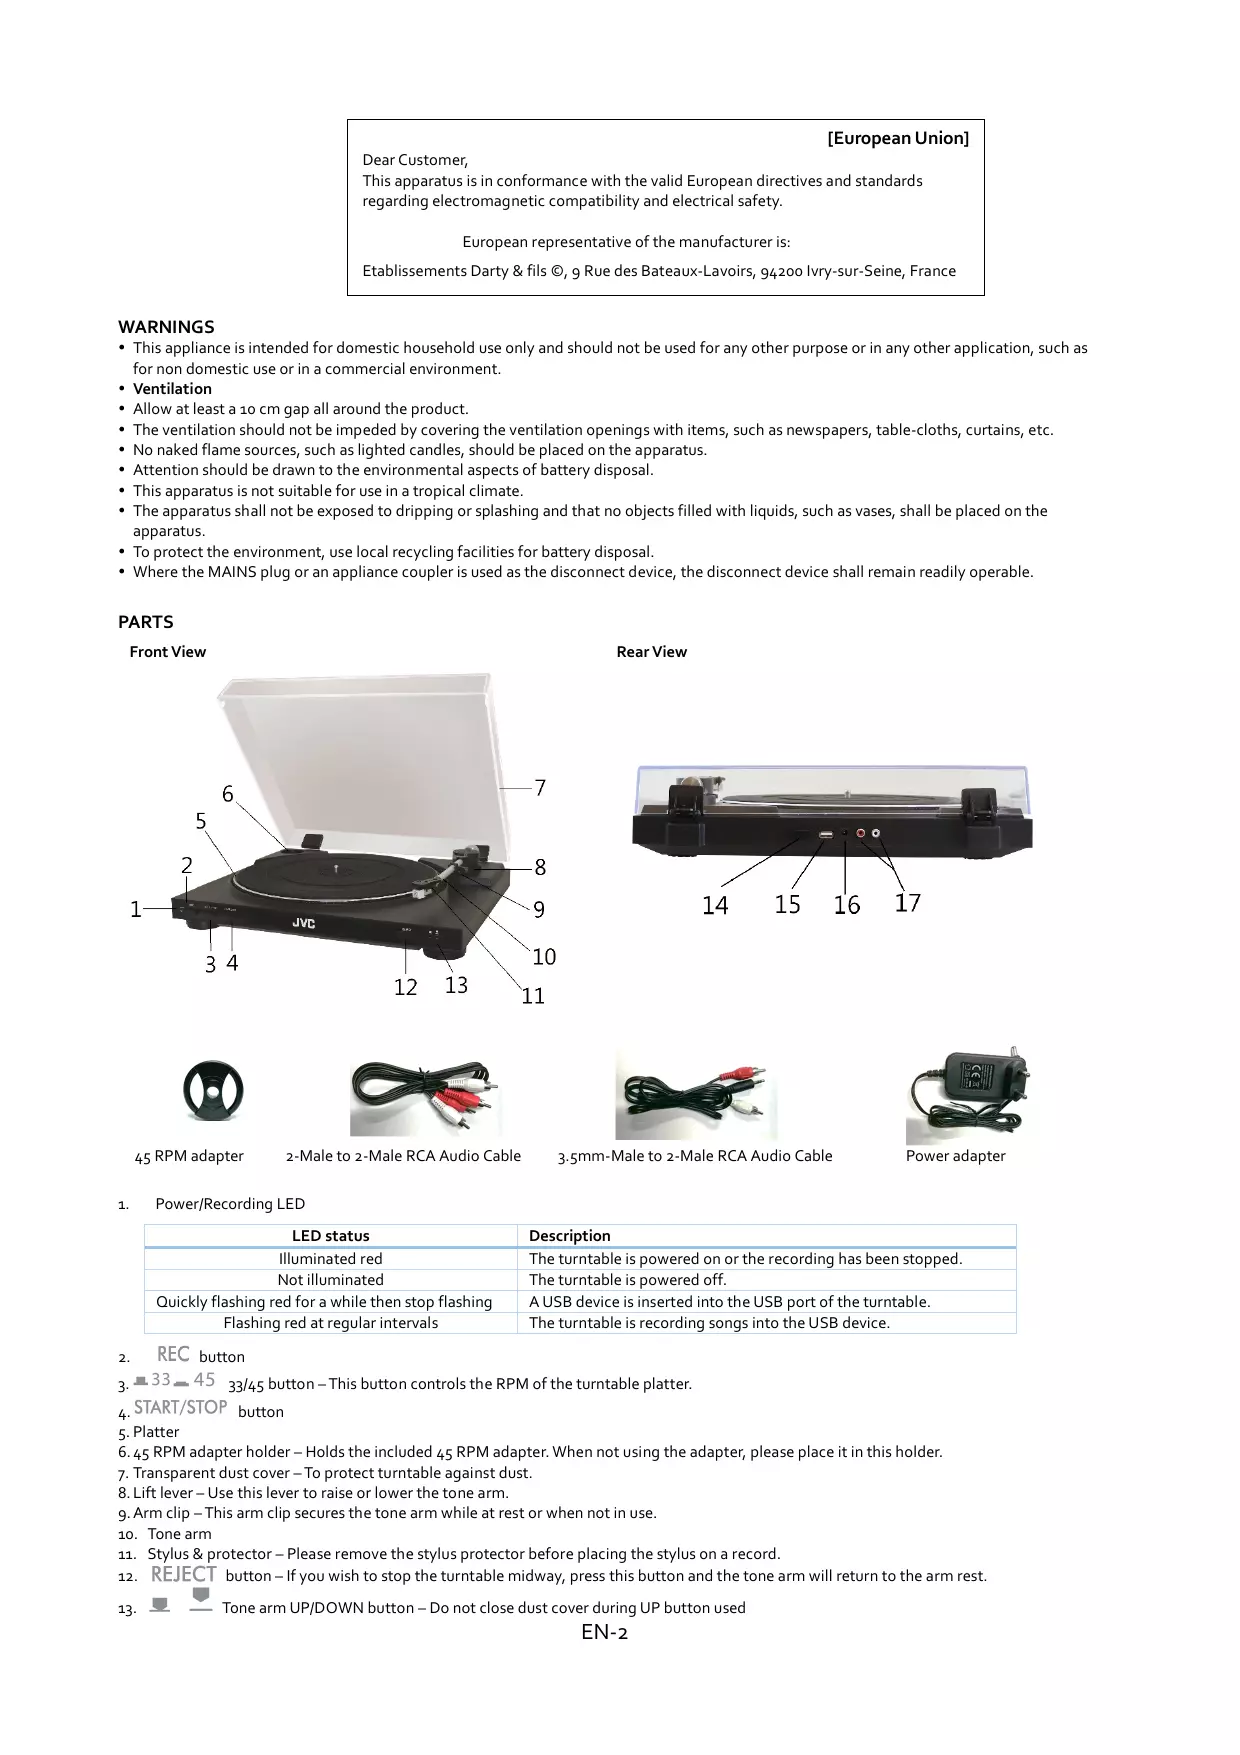
PARTS
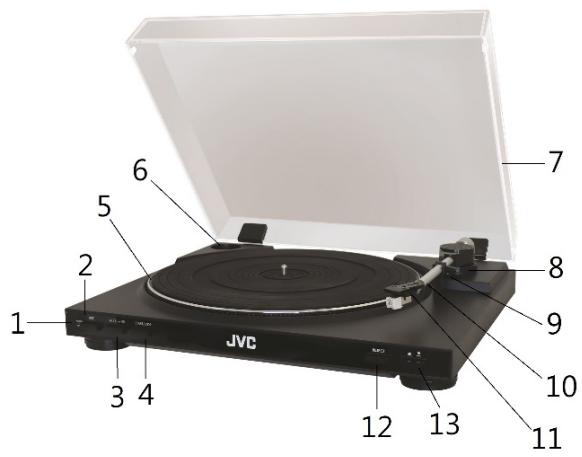
Front View
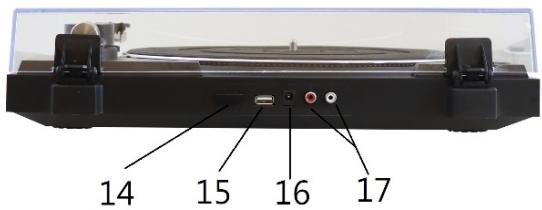
Rear View

45 RPM adapter
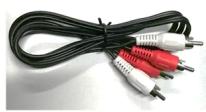
2-Male to 2-Male RCA Audio Cable
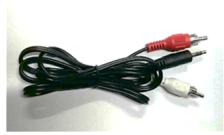
3.5mm-Male to 2-Male RCA Audio Cable
Power adapter
1. Power/Recording LED
| LED status | Description |
| Illuminated red | The turntable is powered on or the recording has been stopped. |
| Not illuminated | The turntable is powered off. |
| Quickly flashing red for a while then stop flashing | A USB device is inserted into the USB port of the turntable. |
| Flashing red at regular intervals | The turntable is recording songs into the USB device. |
-
REC button
-
33-45 33/45 button - This button controls the RPM of the turntable platter.
- START/STOP button
- Platter
6.45 RPM adapter holder - Holds the included 45 RPM adapter. When not using the adapter, please place it in this holder.
- Transparent dust cover - To protect turntable against dust.
- Lift lever - Use this lever to raise or lower the tone arm.
- Arm clip – This arm clip secures the tone arm while at rest or when not in use.
- Tone arm
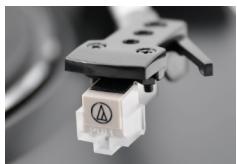
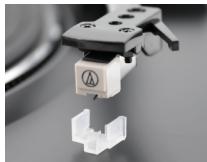
- Stylus & protector - Please remove the stylus protector before placing the stylus on a record.
- REJECT button - If you wish to stop the turntable midway, press this button and the tone arm will return to the arm rest.
13.


e arm UP/DOWN button – Do not close dust cover during UP button used
- POWER button
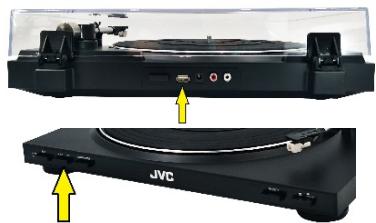
- USB port
- DC 12V jack
- AUDIO OUT jacks – Used to connect to a powered speaker (not included), ensuring that the speaker has PHONO L&R jacks or LINE/AUX-IN jack.
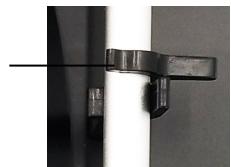
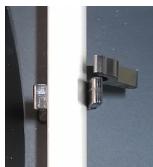
MOUNTING THE DUST COVER
- Insert the two supplied hinges fully into the holder at the back of the turntable.
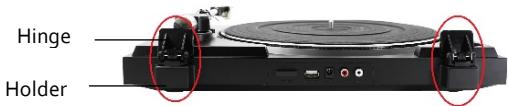
- Insert the dust cover fully into the hinges.
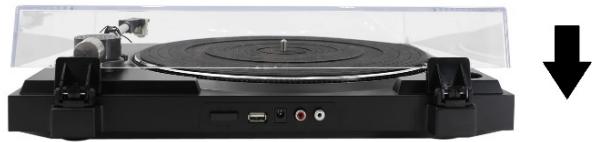
To remove the dust cover, open the dust cover then hold it near hinges to pull it out of the turntable.
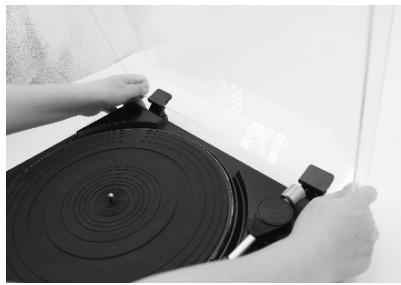

CAUTION: Be careful not to pinch your fingers when you install or remove the dust cover.
CONNECTION
- Connect the supplied audio cable from the turntable to your powered speaker. Make sure to insert the plugs firmly into the jacks.

- Connect the power adapter to the unit and then plug the adapter in the mains socket.
OPERATION
Preparing to Play
- Remove the rubber belt from the whole cartridge.
Gently pull this belt out of the whole cartridge.
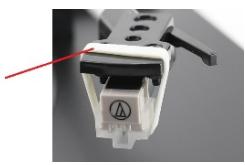
-
The stylus may become worn out, damage or dirty depending on your use case. In such condition, replace the whole cartridge. For replacement cartridge, you may purchase Audio Technica AT 3600 L Cartridge online.
-
Unlock the tone arm from the arm clip if it is locked.
Arm clip
Tone arm locked
Tone arm unlocked
- Press down POWER and the LED will illuminate red.

Button lowered: Power on
Button raised: Power off
-
Place a vinyl record on the platter, lining up its center hole with the center spindle.
-
For 45 RPM records, place the supplied 45 RPM adapter on the center spindle before placing the record on the platter.
-
Press the 33 / 45 button to set the platter rotation speed.
33 45 Button raised: 33 RPM Button lowered: 45 PRM
Playing the Vinyl Record
- Raise the tone arm by lifting the lever to the up position.
- Position the tone arm over the desired location (groove) on the record.
- Press START/STOP. The platter will begin to rotate.
- Lower the tone arm by moving the lift lever to the down position.
- Adjust the volume on your external audio device.
- When playback is finished, the tone arm will return to the arm rest automatically, then the platter will stop rotating.
To pause playing
Press the UP/DOWN button

to raise the stylus off the record.
To stop playing
Press REJECT. The tone arm will return to the arm rest and the platter will stop rotating.
To play a different part of the record
- During playing, press the UP/DOWN button to lift the tone arm.
- Move the tone arm to the position you want.
- Press the UP/DOWN button.
- The tone arm will descend to the record then playback will start.
NOTE:
When the dust cover is closed, do not press the tone arm UP/DOWN button to avoid any damage to the tone arm caused by possible contact with the dust cover.
Recording Audio Tracks
NOTE: Please follow the steps below to properly record audio tracks, otherwise the first 2.5 seconds of the audio track will be missing.
- Lift the lever to raise the tone arm away from the record.
- You can record audio tracks of a vinyl record by plugging a USB device (not supplied) into the USB port of the turntable.
- The LED will quickly flash for a while and then stop flashing.
-
During recording, the LED will flash at regular intervals.
-
Press REC and it will automatically create audio files.
-
After about 2 seconds, lower the lever until the stylus hits the groove on the record.
-
To stop recording, press REC.
The LED will stop flashing.
The recording will be recorded on one track as one audio file – the file name will be ALBUM_01, ALBUM_02 until ALBUM_99.
NOTE: The track will not be created into separate songs.
If you want to record each song as one track, repeat the above steps 1 to 4 and then press REC when a song is finished. You can do this to record all the desired songs created in the USB device as one audio file per song.
- When opening or closing the turntable cover, handle it gently, gripping it either at the center or at each side.
- Do not touch the stylus tip with your fingers; avoid bumping the stylus against the turntable platter or record edge.
- Frequently clean the stylus tip - use a soft brush in a back-to-front motion only.
Gently wipe the dust cover and turntable housing with a soft cloth. Use only a small amount of mild detergent to clean the turntable.
- Never use any abrasive or chemical cleaning agents.
SPECIFICATIONS
Rating Information:
DC12V 1A
Driving Method:
Belt-drive
Turntable Speeds:
33 and 45 RPM
USB Function:
USB recording function
Product dimension (WxDxH):
398 × 359 × 95 ~mm
Product net weight:
2.8 kg

This mark is applied to show the equipment conforms to
European safety and electro-magnetic compatibility standards

Direct Current
External power supply
| Information published | Value and precision | Unit |
| Manufacturer's name or trade mark, commercial registration number and address | Shenzhen Tianhangxing Electronics Co., Ltd. 5/F, Building 10, Zhengzhong Industrial Park, Qiaotou Village, Fuyong Town, Baoan District, Shenzhen, Guangdong, P.R.China |
| Model identifier | THX-120100KDV |
| Input voltage | 100-240 | V |
| Input AC frequency | 50/60 | Hz |
| Output voltage | DC 12,0 | V |
| Output current | 1,0 | A |
| Output power | 12,0 | W |
| Average active efficiency | 82.96 | % |
| Efficiency at low load (10%) | 78.28 | % |
| No-load power consumption | <0.1 | W |

For indoor use only

Positive polarity

This equipment is double insulated and an earth connection is not required.
DISPOSAL


As a responsible retailer we care about the environment. As such we urge you to follow the correct disposal procedure for the
product, packaging materials and if applicable, accessories and batteries. This will help conserve natural resources and ensure that the materials are recycled in a manner that protects health and the environment.
You must follow laws and regulations about disposal. Waste electrical products and batteries must be disposed of separately from household waste when the product reaches the end of its life.
Contact the store where you bought the product and your local authority to learn about disposal and recycling.
The batteries must be disposed of at your local recycling point.
We apologise for any inconvenience caused by minor inconsistencies in these instructions, which may occur as a result of product improvement and development.
This product is manufactured, distributed, serviced and warranted exclusively Etablissements DARTY et Fils.
"JVC" is the trademark of JVCKENWOOD Corporation, used by Etablissements DARTY et Fils under license.
EU Declaration of Conformity
Product Description:
Turntable with built-in phono preamp
The object of the declaration described above is in conformity with the relevant Union
harmonisation legislation: