
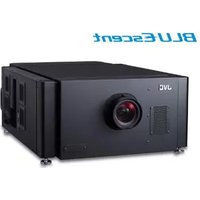
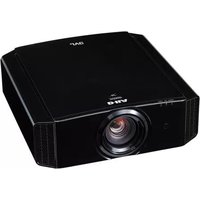
LX-NZ3W - Projector JVC - Free user manual and instructions
Find the device manual for free LX-NZ3W JVC in PDF.


| Product Type | Home Theater Projector |
| Brand | JVC |
| Model | LX-NZ3W |
| Projection Technology | D-ILA (LCoS) |
| Native Resolution | 3840 x 2160 (4K UHD) |
| Brightness | 2,000 ANSI Lumens |
| Contrast Ratio | ∞:1 (Dynamic) |
| Light Source | Laser Phosphor |
| Lamp Life | Up to 20,000 hours |
| Lens Shift | Vertical ±80%, Horizontal ±34% |
| Zoom Type | Motorized, 2x |
| Keystone Correction | None (optical only) |
| Input Ports | HDMI 2.1 (2x), USB-A (2x), RS-232C, Ethernet |
| Output Ports | Trigger out (12V), Audio out (3.5mm) |
| Noise Level | 24 dB (Eco mode) |
| Power Consumption | 420W (max), 0.5W (standby) |
| Dimensions (W x H x D) | 500 x 234 x 484 mm |
| Weight | 19.6 kg |
| Color | White |
| Warranty | 3 years |
Frequently Asked Questions - LX-NZ3W JVC
User questions about LX-NZ3W JVC
0 question about this device. Answer the ones you know or ask your own.
Ask a new question about this device
Download the instructions for your Projector in PDF format for free! Find your manual LX-NZ3W - JVC and take your electronic device back in hand. On this page are published all the documents necessary for the use of your device. LX-NZ3W by JVC.
USER MANUAL LX-NZ3W JVC
Important safety instructions 4
Overview 9
Shipping contents......9
Projector exterior view......10
Controls and functions...... 11
Control panel 11
Remote control 12
Installation 14
Choosing a location....14
Obtaining a preferred projected image size ....15
Connection 17
Operation.... 18
Starting up the projector .....18
Shutting down the projector..... 18
Selecting an input source ..... 19
Adjusting the projected image ... 20
Adjusting the projection angle .....20
Fine-tuning the image size and clarity 20
Correcting keystone....20
Menu Functions...... 21
About the OSD Menus ...... 21
Using the OSD menu 21
PICTURE menu....22
DISPLAY menu 25
INSTALLATION menu ......26
SYSTEM SETUP: Basic menu .....27
SYSTEM SETUP: Advanced menu 28
INFORMATION menu ......28
OSD menu structure 30
Maintenance.... 32
Care of the projector.... 32
Light source information ...... 33
Getting to know the light source hour 33
Extending light source life.... 33
Indicators 34
Troubleshooting 35
Specifications.... 36
Projector specifications.... 36
Dimensions 37
Timing chart 38
Warranty and Copyright information.... 43
Warranty 43
Copyright 43
Disclaimer 43
Safety precautions
FCC INFORMATION (U.S.A. only)
CAUTION:
Changes or modifications not approved by the party responsible for compliance could void the user's authority to operate the equipment.
NOTE:
This equipment has been tested and found to comply with the limits for a Class B digital device, pursuant to Part 15 of the FCC Rules. These limits are designed to provide reasonable protection against harmful interference in a residential installation. This equipment generates, uses, and can radiate radio frequency energy and, if not installed and used in accordance with the instructions, may cause harmful interference to radio communications. However, there is no guarantee that interference will not occur in a particular installation. If this equipment does cause harmful interference to radio or television reception, which can be determined by turning the equipment off and on, the user is encouraged to try to correct the interference by one or more of the following measures:
- Reorient or relocate the receiving antenna.
- Increase the separation between the equipment and receiver.
- Connect the equipment into an outlet on a circuit different from that to which the receiver is connected.
- Consult the dealer or an experienced radio/TV technician for help.
Declaration of Conformity
Model Number: LX-NZ3BG, LX-NZ3WG, LX-NZ3BK, LX-NZ3WK
Trade Name: JVC
Responsible party: JVCKENWOOD USA Corporation
Address: 500 Valley Road, Suite 203 Wayne, NJ 07470
Telephone Number: 973-317-5000
This device complies with Part 15 of the FCC Rules.
Operation is subject to the following two conditions:
(1) This device may not cause harmful interference, and (2) this device must accept any interference received, including interference that may cause undesired operation.
NOISE EMISSION DECLARATION
The sound pressure level at the operator position is equal or less than 60dB(A) according to ISO7779.
Dear Customer,
This apparatus is in conformance with the valid European directives and standards regarding electromagnetic compatibility and electrical safety.
European representative of JVCKENWOOD Corporation is: JVCKENWOOD Deutschland GmbH Konrad-Adenauer-Allee 1-11, 61118 Bad Vilbel, GERMANY
Information for Users on Disposal of Old Equipment and Batteries

Products
Battery
[European Union only]
These symbols indicate that equipment with these symbols should not be disposed of as general household waste. If you want to dispose of the product or battery, please consider the collection systems or facilities for appropriate recycling.
Notice: The sign Pb below the symbol for batteries indicates that this battery contains lead.
Important safety instructions
Your projector is designed and tested to meet the latest standards for safety of information technology equipment. However, to ensure safe use of this product, it is important that you follow the instructions mentioned in this manual and marked on the product.
- Please read this user manual before you operate your projector. Keep this manual in a safe place for future reference.
- Always place the projector on a level, horizontal surface during operation.
- Do not place the projector on an unstable cart, stand, or table as it may fall and be damaged.
- Do not place inflammables near the projector.
- Do not use if tilted at an angle of more than 10 degrees left to right, nor at angle of more than 15 degrees front to back.
- Do not store the projector on end vertically. Doing so may cause the projector to fall over, causing injury or resulting in damage.
- Do not place the projector in any of the following environments:
- Space that is poorly ventilated or confined. Allow at least 50 cm clearance from walls and free flow of air around the projector.
- Locations where temperatures may become excessively high, such as the inside of a car with all windows closed.
- Locations where excessive humidity, dust, or cigarette smoke may contaminate optical components, shorten the projector's lifespan and darken the screen.
- Locations near fire alarms.
- Locations with conditions beyond those listed in "Projector specifications".
- Do not block the vents while the projector is on (even in standby mode).
- Do not cover the projector with any item.
- Do not place the projector on a blanket, bedding or any other soft surface.
- In areas where the mains power supply voltage may fluctuate by ±10 volts, it is recommended that you connect the projector through a power stabilizer, surge protector or uninterruptible power supply (UPS) as appropriate to your situation.
- Do not step on the projector or place any objects upon it.
- Do not place liquids near or on the projector. Liquids spilled into the projector will void your warranty. If the projector does become wet, disconnect it from the power outlet and contact service to have the projector repaired.
- Do not look straight into the projector lens during operation. It may harm your sight.
RG2 IEC 62471-5:2015
- This projector is capable of displaying inverted images for ceiling mount installation. Use only a proper ceiling mount kit for mounting.
- THIS APPARATUS MUST BE EARTHED.
- When installing the unit, incorporate a readily accessible disconnect device in the fixed wiring, or connect the power plug to an easily accessible socket-outlet near the unit. If a fault should occur during operation of the unit, operate the disconnect device to switch the power supply off, or disconnect the power plug.
High temperature Caution
The temperature of the cabinet around and above the exhaust vents can become hot during projector operation. Touching these areas during operation could cause burns to the hands. Do not touch these areas. Doing so may cause burns. Pay particular attention in preventing young children from touching these parts. Additionally, do not place any metal objects on these areas. Due to the heat from the projector, doing so could cause an accident or personal injury.
Ceiling mounting the projector
If you intend to mount your projector on the ceiling, we strongly recommend that you use a proper fitting projector ceiling mount kit and ensure it is securely and safely installed.
If not, there is a safety risk that the projector may fall from the ceiling due to an improper attachment through the use of the wrong gauge or length screws.
You can purchase a proper projector ceiling mount kit from the place you purchased your projector. We recommend that you also purchase a separate Kensington lock compatible security cable and attach it securely to both the Kensington lock slot on the projector and the base of the ceiling mount bracket. This will perform the secondary role of restraining the projector should its attachment to the mounting bracket become loose.
Do not attempt to disassemble this projector. There are dangerous high voltages inside which may cause death if you should come into contact with live parts.
Under no circumstances should you ever undo or remove any other covers. Refer servicing only to suitably qualified professional service personnel.

Please keep the original packing for possible future shipment. If you need to pack your projector after use, adjust the projection lens to an appropriate position, put the lens cushion around the lens, and fit the lens cushion and projector cushion together to prevent damage during transportation.
When you think service or repair is required, take the projector only to a suitably qualified technician.
Moisture condensation
Never operate the projector immediately after moving it from a cold location to a hot location. When the projector is exposed to such a change in temperature, moisture may condense on the
crucial internal parts. To prevent the projector from possible damage, do not use the projector for at least 2 hours when there is a sudden change in temperature.
Avoid volatile liquids
Do not use volatile liquids, such as insecticide or certain types of cleaner, near the projector. Do not have rubber or plastic products touching the projector for a long time. They will leave marks on the finish. If cleaning with a chemically treated cloth, be sure to follow the cleaning product's safety instructions.
Disposal
This product contains the following materials which are harmful to human bodies and environment.
- Lead, which is contained in solder.
To dispose of the product, consult your local environment authorities for regulations.
For the customers in the U.S.A. and Canada
CAUTION
Use the controls or adjustments or performance of procedures other than those specified herein may result in hazardous radiation exposure.
This Projector is classified as a CLASS 3R LASER PRODUCT.
This CLASS 3R LASER PRODUCT label and Caution label is located on the Rear Side surface of the projector.

Location information of the label

LASER CAUTION LABEL
APERTURE LABEL

The APERTURE LABEL is located on the top cover.

WARNING
LASER RADIATION AVOID DIRECT EYE EXPOSURE CLASS 3R LASER PRODUCT
CAUTION
Do not look into the lens while in use.
Light source specifications
95 W Laser diodes x 1
Wavelength 449 - 461 nm
Maximum output is 64 mW
Beam divergence angle from lens of this unit
Wide: \(\alpha = 30.3^{\circ}\)
Tele: \(\alpha = 19.9^{\circ}\)

For customers in other countries
CLASS 1 LASER PRODUCT
LASER CAUTION LABEL

WARNING
Do not look into the lens while in use.
CAUTION
Use of controls or adjustments or performance of procedures other than those specified herein may result in hazardous radiation exposure.
Location information of the label

IEC62471-5
Location information of the icon

As with any bright light source, do not stare into the beam, RG2 IEC62471-5:2015
Overview
Shipping contents
Carefully unpack and verify that you have the items below. Some of the items may not be available depending on your region of purchase. Please check with your place of purchase.

Some of the accessories may vary from region to region.


Projector, remote control and batteries, user manual CD


Power cable*, quick start guide

*The power cable supplied is different according to regions.
Projector exterior view
Front and upper side view

Rear/bottom view
- Vent (heated air exhaust)
- Front IR remote sensor
- Zoom ring: Adjusts the size of the projected image.
- Projection lens
- Control panel (See "Control panel" for details.)
- Lens shift knob (Left/Right)
Adjusts the horizontal position of the projected image.
- Lens shift knob (Up/Down)
Adjusts the vertical position of the projected image.
- Vent (cool air intake)
- Focus ring
Adjusts the focus of the projected image.
10. AC Power cable inlet
- Kensington lock slot
12. Computer (D-Sub 15pin) input jack
13. HDMI 1 port (HDCP 2.2)
14. HDMI 2 port
15. USB Type-A port
Used for charging external devices.
16. RS-232 control port
- Mini USB port
Used for service.
18. 12VDC output terminal
Used to trigger external devices such as an electric screen or light control, etc.
Consult your dealer for how to connect these devices.
- Security bar
- Ceiling mount holes
- Adjuster feet
Controls and functions
Control panel

1. POWER
Toggles the projector between standby mode and on.
2. Top IR remote sensor
3. TEMPerature warning light
Lights up red if the projector's temperature becomes too high.
4. LIGHT indicator light
Indicates the status of the light source.
Lights up or flashes when the light source has developed a problem.
5. HIDE
Used to blank the screen picture. Press most of the keys on the projector or remote control to restore the picture.
6. Arrow keys ( ,◀ ,▲) ▶ ▼
When the On-Screen Display (OSD) menu is activated, these keys are used as directional arrows to select the desired menu items and to make adjustments.
7. MENU
Displays the menu, or hides the menu if it is displayed.
8. POWER indicator light
Lights up or flashes when the projector is under operation.
9. Keystone keys ( , )
Launches the Keystone window. Use ▲, ▼ to manually correct distorted images resulting from an angled projection.
10. INPUT
Displays the source selection bar.
11.
Activates panel key lock. To unlock the keys, press and hold ▶ for 3 seconds or setting OSD menu using the remote control.
12.0K
Activates the selected On-Screen Display (OSD) menu item.
13.BACK
Goes back to previous OSD menus, exits and saves any changes made using the On-Screen Display (OSD) menu.
Remote control

1. INPUT
Displays the source selection bar.
2. LIGHT
Turns on the remote control backlight for a few seconds. To keep the backlight on, press any other key while the backlight is on. Press the key again to turn the backlight off.
3. NATURAL
Selects the picture mode: Natural.
4. CINEMA
Selects the picture mode: Cinema.
5. USER1
Selects the picture mode: User 1.
6. USER2
Selects the picture mode: User 2.
7. HIDE
Used to blank the screen picture. Press most of the keys on the projector or remote control to restore the picture.
8. OK
Activates the selected On-Screen Display (OSD) menu item.
9. MENU
Displays the menu, or hides the menu if it is displayed.
10. BRIGHTNESS
Displays the setting bar for brightness adjustment.
11. POWER
Toggles the projector between standby mode and on.
12. DYNAMIC
Selects the picture mode: Dynamic.
13. GAMMA
Displays the Select Gamma menu.
14. TEST
Displays the test pattern.
15. Right
Activates panel key lock. To unlock the keys, press and hold ▶ for 3 seconds or setting OSD menu using the remote control.
16. Arrow keys (Left, Right, Up, Down)
When the On-Screen Display (OSD) menu is activated, these keys are used as directional arrows to select the desired menu items and to make adjustments.
17. BACK
Goes back to the previous OSD menu, exits and saves menu settings.
18. CONTRAST
Displays the setting bar for contrast adjustment.
Installing/replacing the remote control battery
- To open the battery cover, turn the remote control over to view its back, press on the finger grip on the cover and slide it up in the direction of the arrow as illustrated.
- Remove any existing batteries (if necessary) and install two AA batteries observing the battery polarities as indicated in the base of


the battery compartment. Positive (+) goes to positive and negative (-) goes to negative.
- Refit the cover by aligning it with the base and pushing it back up into position. Stop when it clicks into place.

- Avoid leaving the remote control and battery in an excessive heat or humid environment like the kitchen, bathroom, sauna, sunroom or in a closed car.
- Replace only with the same or equivalent type recommended by the battery manufacturer.
- Dispose of the used batteries according to the manufacturer's instructions and local environment regulations for your region.
- Never throw the batteries into a fire. There may be danger of an explosion.
- If the batteries are drained or if you will not be using the remote control for an extended period of time, remove the batteries to avoid damage to the remote control from possible battery leakage.
Remote control effective range
The remote control must be held at an angle within 30 degrees perpendicular to the projector's IR remote control sensor(s) to function correctly. The distance between the remote control and the sensor(s) should not exceed 8 meters (~26 feet).
Make sure that there are no obstacles between the remote control and the IR sensor(s) on the projector.
- Operating the projector from the front

- Operating the projector from the top

Installation
Choosing a location
Before choosing an installation location for your projector, take the following factors into consideration:
- Size and position of your screen • Electrical outlet location
- Location and distance between the projector and the rest of your equipment
You can install your projector in the following ways.
| 1. Front:Select this location with the projector placed near the floor in front of the screen.This is the most common way to position the projector for quick setup and portability.Turn on the projector and make the following settings:INSTALLATION > Projector Mode > Front |  | 3. Front Ceiling:Select this location with the projector suspended from the ceiling in front of the screen.Turn on the projector and make the following settings:INSTALLATION > Projector Mode > Front Ceiling |  |
| Purchase the proper ceiling mount kit from your dealer to mount your projector on the ceiling. | |||
| 2. Rear:Select this location with the projector placed near the floor behind the screen.Turn on the projector and make the following settings:INSTALLATION > Projector Mode > Rear |  | 4. Rear Ceiling:Select this location with the projector suspended from the ceiling behind the screen.Turn on the projector and make the following settings:INSTALLATION > Projector Mode > Rear Ceiling |  |
| A special rear projection screen is required. A special rear projection screen and a proper ceiling mount kit are required. | |||
Obtaining a preferred projected image size
The distance from the projector lens to the screen, the zoom setting, and the video format each factor in the projected image size. To shift the lens, turn the knobs on the projector to shift the projection lens in any direction within the allowable range depending on your desired image position
Front projection
- When adjusting the projection position vertically in lens shift
- When adjusting the projection position horizontally in lens shift


A: Distance from the center of the lens to the bottom edge of the projected image (when lens shift is raised to its highest level) B: Distance from the center of the lens to the bottom edge of the projected image (when lens shift is lowered to its lowest level) C: Lens center movement distance (when lens shift is set to maximum left) D: Lens center movement distance (when lens shift is set to maximum right) E: Projection distance from the projector to the screen F: Size of the projected image
• The screen aspect ratio is 16:9 and the projected picture is in a 16:9 aspect ratio
| Screen size | Size of the projected image (F) | Projection distance (E) | Offset (A) | Offset (B) | Offset (C, D) | ||||||||||
| Diagonal Height Width | Shortest (Wide) | Longest (Tele) | |||||||||||||
| Inch | cm | Inch | cm | Inch | cm | Inch | cm | Inch | cm | Inch | cm | Inch | cm | Inch | cm |
| 80 20 | 3 39 | 100 70 | 177 | 94 240 | 151 3 | 84 3.9 | 10 | 43.1 | 110 1 | 6.0 41 | |||||
| 90 | 229 | 44 | 112 | 78 | 199 | 106 | 270 | 170 | 432 | 4.4 | 11 | 48.5 | 123 | 18.0 | 46 |
| 95 | 241 | 47 | 118 | 83 | 210 | 112 | 285 | 180 | 456 | 4.7 | 12 | 51.2 | 130 | 19.0 | 48 |
| 100 25 | 4 49 | 125 87 | 221 | 118 30 | 0 189 | 480 4 | .9 | 12 53 | .9 137 | 20.0 5 | 1 | ||||
| 110 | 279 | 54 | 137 | 96 | 244 | 130 | 330 | 208 | 528 | 5.4 | 14 | 59.3 | 151 | 22.1 | 56 |
| 120 | 305 | 59 | 149 | 105 | 266 | 142 | 360 | 227 | 576 | 5.9 | 15 | 64.7 | 164 | 24.1 | 61 |
| 130 | 330 | 64 | 162 | 113 | 288 | 154 | 390 | 246 | 624 | 6.4 | 16 | 70.1 | 178 | 26.1 | 66 |
| 140 | 356 | 69 | 174 | 122 | 310 | 165 | 420 | 265 | 672 | 6.9 | 17 | 75.5 | 192 | 28.1 | 71 |
| 150 3 | 81 74 | 187 1 | 31 332 | 177 4 | 50 28 | 3 720 | 7.4 19 | 80.9 | 205 30 | 1 76 | |||||
| 160 4 | 06 78 | 199 1 | 39 354 | 189 4 | 80 30 | 2 768 | 7.8 20 | 86.3 | 219 32 | 1 81 | |||||
| 170 4 | 32 83 | 212 1 | 48 376 | 201 5 | 10 32 | 1 816 | 8.3 21 | 91.7 | 233 34 | 1 87 | |||||
| 180 4 | 57 88 | 224 1 | 57 398 | 213 5 | 40 34 | 0 864 | 8.8 22 | 97.1 | 247 36 | 1 92 | |||||
| 200 5 | 08 98 | 249 1 | 74 443 | 236 6 | 00 37 | 8 960 | 9.8 25 | 107.9 | 274 4 | 0.1 102 | |||||

All measurements are approximate and may vary from the actual sizes. If you want a permanent installation of the projector, we recommend that you use the actual projector to physically test the projection size, distance, and the projector's optical characteristics prior to the installation. This helps you determine the exact mounting position which best suits your installation.
The projection range for lens shift

a: Maximum horizontal range (H × 23%) b: Maximum vertical range (V × 60%) c: 1/2 the vertical height of the image d: 1/2 the horizontal width of the image

Be sure to stop turning the adjustment knob when you hear a clicking sound indicating that the knob has reached its limit. Over-turning the knob may cause damage.

- You cannot move the image to both the horizontal and vertical maximum values.
- Lens shift adjustment does not result in a degraded picture quality. In the unlikely event that the image distortion is produced, see "Adjusting the projected image" for details.
Connection
When connecting a signal source to the projector, be sure to:
- Turn all equipment off before making any connections.
- Use the correct signal cables for each source.
- Make sure the cables are firmly inserted.
In the connection illustrations shown below, cables are not included with the projector (see "Shipping contents"). They are commercially available from electronics stores.
![graph TD A["Notebook or desktop computer"] -->|1| B["USB port"] C["A/V device"] -->|2| D["USB port"] B -->|or| E["Computer 4"] D -->|or| F["Computer 5"] E --> G["HD/MI"] F --> H["HD/MI"] G --> I["TYPELA 7.3A"] H --> J["HD/MI"] I --> K["HD/MI"] J --> L["UV TRIGGER"] style A fill:#f9f,stroke:#333 styl…](/content/2026/06/1336774/images/8751d8e13d665312328dbf69f58155da54f91c4c3ef2c7c89116bd9e64cb8d11.jpg)
| Terminal HDCP ver. Used for | |
| HDMI 1 2.2 4K/HDR source | |
| HDMI 2 1.4 Up to 4K/30Hz source |
Only HDMI 1 connector supports 4K (Ultra HD)/HDR.
Use a certified Premium High Speed HDMI Cable (18 Gbps compatible) and connect to HDMI 1 terminal when inputting 4K video signals from an external device.
Operation
Starting up the projector
- Plug the power cable into the projector and a power outlet. Turn on the power outlet switch (where fitted). The POWER indicator light on the projector lights orange after power has been applied.

Please use the supplied power cable to avoid possible dangers such as electric shock and fire.
- Press ⏻ to start the projector. The POWER indicator light flashes green and stays green when the projector is on.
The fans start operating, and a start-up image displays on the screen while it warms up. The projector does not respond to further commands while it is warming up.

Shutting down the projector
- Press The projector displays a shutdown confirmation message.
- Press a second time. The POWER indicator light flashes orange and the fans run for about two minutes to cool the light source. The projector doesn't respond to any commands during the cooling process.
- When the cooling process ends, the POWER indicator light will show a solid orange.
If the projector will not be used for an extended period, unplug the power cable from the power outlet.


Avoid turning on the projector immediately after turning it off as excessive heat may shorten light source life. The actual light source life may vary due to different environmental conditions and usage.
Selecting an input source
The projector can be connected to multiple equipment at the same time. However, it only displays one full screen at a time. When starting up, the projector automatically searches for the available signals.
If you want the projector to always automatically search for the signals:
- Go to the SYSTEM SETUP: Basic menu, and then enable Auto Input Search. (see "Auto Input Search" on page 27)
To select the video source:
- Press INPUT to display the source selection bar.

- Press ▲/▼ until your desired signal is selected and press OK.
Once detected, the selected source information displays on the screen for seconds. If there are multiple pieces of equipment connected to the projector, repeat steps 1-2 to search for another signal.
Refer to "Projector specifications" for the native display resolution of this projector. For best display picture results, you should select and use an input signal which outputs at this resolution. Any other resolutions will be scaled by the projector depending upon the Aspect Ratio setting, which may cause some image distortion or loss of picture clarity. See "Aspect Ratio" for details.
Adjusting the projected image
Adjusting the projection angle
The projector is equipped with 2 adjuster feet. These adjusters change the image height and projection angle. Screw the feet in or out as appropriate to aim and level the projection angle.

If the screen and the projector are not perpendicular to each other, the projected image becomes vertical trapezoidal. To correct this, see "Correcting keystone" for details.


Do not look into the lens while the light source is on. The strong light from the light source may cause damage to your eyes.
Fine-tuning the image size and clarity
To adjust the projected picture size, turn the zoom ring on the projector.
To sharpen the picture, rotate the focus ring on the projector.


Correcting keystone
Keystoning refers to the situation where the projected image is noticeably wider at either the top or bottom. It occurs when the projector is not perpendicular to the screen.
Besides adjusting the height of the projector, you may correct this manually by following the instructions below:
- Do one of the following steps to display the Keystone window:
- Press ▲/▼ on the projector.
- Press / or / on the remote control.
- The illustrations below show how to correct keystone distortion:

- To correct keystoning at the bottom of the image, use ▼ or ★ ■
- To correct keystoning at the top of the image, use ▲ or ▲/▼.
When done, press BACK to save your changes and exit.

Depending on your installation conditions, keystone correction may not be possible. In such a case, if possible, reset the installation conditions and project straight to the screen.
Menu Functions
About the OSD Menus
To access the OSD menu, press MENU.

Using the OSD menu

To access the OSD menu, press MENU on the projector or remote control. It consists of the following main menus. Check the links after the menu items below to learn more details.
- PICTURE menu (see page 22)
- DISPLAY menu (see page 25)
- INSTALLATION menu (see page 26)
- SYSTEM SETUP: Basic menu (see page 27)
- SYSTEM SETUP: Advanced menu (see page 28)
- INFORMATION menu (see page 28)
Available menu items may vary depending on the connected video sources or specified settings. Menu items that are not available will become grayed out.
- Use the arrow keys (/ʌ/ ) on the projector or remote control to move through the menu items. • Use OK to confirm the selected menu item.
PICTURE menu
| Submenu Functions and Descriptions | ||||
| Picture Mode | Selects a preset picture mode to suit your operating environment and input signal picture type.The preset picture modes are described as below:Natural:With well-balanced color saturation and contrast with a low brightness level, this is most suitable for video images.Cinema:With well-balanced color saturation and contrast with a low brightness level, this is most suitable for enjoying movies in a totally dark environment (as you would find in a commercial cinema).Dynamic:Maximizes the brightness of the projected image. This mode is suitable for environments where extra-high brightness is required, such as using the projector in well lit rooms.User 1/User 2:Recalls the customized settings. After User 1/User 2 is selected, some of the sub-menus under the DISPLAY menu can be adjusted, according to your selected input signal.When HDR10 or HLG (Hybrid Log-Gamma) content is inputted to the projector, it automatically switches to the appropriate picture mode. | |||
| The following functions are only available when Picture Mode is set to User 1 or User 2.User Mode Settings | Load Settings: Selects a picture mode that best suits your need for the image quality and as a starting point, you can further fine-tune the image based on the selections listed below.Rename User Mode: Select to rename the customized picture modes (User 1 or User 2). The new name can be up to 9 characters including English letters (A-Z, a-z), digits (0-9), and space (_). | |||
| Brightness | Adjusts the brightness of the picture. When adjusting this control, the black areas of the picture appear just as black and details in the dark areas are visible.   The higher the value, the brighter the picture, while the lower the value, the darker the picture. The higher the value, the brighter the picture, while the lower the value, the darker the picture. | |||
| Contrast | Adjusts the degree of difference between dark and light areas in the picture. After adjusting the Brightness value, adjust Contrast to set the peak white level.   The higher the value, the greater the contrast. The higher the value, the greater the contrast. | |||
| Color | Adjusts the color saturation level - the amount of each color in a video picture. Lower settings produce less saturated colors; setting to the minimum value makes the image black and white.If the setting is too high, colors on the image will be overpowering, which makes the image unrealistic. | |||
| Tint | Adjusts the red and green color tones of the picture.The higher the value, the more reddish the picture becomes. The lower the value, the more greenish the picture becomes. | |||
| Sharpness | Makes the picture look sharper or softer. | |||
 |  |  | The higher the value, the sharper the picture becomes. The lower the value, the softer the picture becomes. | |
| Advanced | Select GammaGamma refers to the relationship between input source and picture brightness.2.2: Normal gamma value.1.8/2.0/2.1/2.3/2.4/2.6: The higher the value, the darker the picture.Contrast Priority:Places more emphasis on the contrast compared to the Normal setting.Brightness Priority:Places more emphasis on the brightness compared to the Normal setting. | |||
| Color TemperaturePreset:-High:Makes pictures appear bluish white.-Normal:Maintains normal colorings for white.-Low:Makes pictures appear reddish white.You can also set a preferred color temperature by adjusting the following options.Red Gain/Green Gain/Blue Gain:Adjusts the contrast levels of Red, Green, and Blue.Red Offset/Green Offset/Blue Offset:Adjusts the brightness levels of Red, Green, and Blue. | ||||
| Advanced | 3D Color ManagementProvides six sets (RGBCMY) of colors to be adjusted. You can select any of them to adjust its color range and saturation.Press OK to display the 3D Color Management window.Select Primary Color and use ◀/► to select a color from R (Red), G (Green), B (Blue), C (Cyan), M (Magenta), and Y (Yellow).Press▼ to select Hue and use ◀/► to set its range. Increase in the range will include colors consisted of more proportions of its two adjacent colors.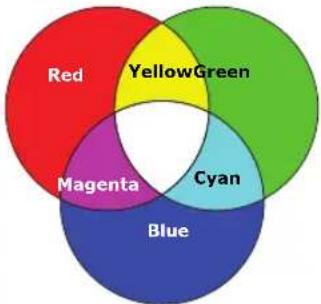 The illustration shows how the colors relate to each other.For example, if you select R and set its range at 0, only pure red is selected. Increasing its range will include both the red color close to yellow and red color close to magenta.4. Press▼ to select Gain and use ◀/► to set its values. The contrast level of the primary color you select will be affected. Every adjustment made will reflect to the image immediately.5. Press▼ to select Saturation* and use ◀/► to adjust its values. Every adjustment made reflects to the image immediately.6. Repeat steps 2 to 5 until you have made all of the desired adjustments.7. When done, press BACK to exit.*About saturationIt is the amount of that color in a video picture. Lower settings produce less saturated colors; a setting of “0” removes that color from the image entirely. If the saturation is too high, that color will be overpowering and unrealistic. The illustration shows how the colors relate to each other.For example, if you select R and set its range at 0, only pure red is selected. Increasing its range will include both the red color close to yellow and red color close to magenta.4. Press▼ to select Gain and use ◀/► to set its values. The contrast level of the primary color you select will be affected. Every adjustment made will reflect to the image immediately.5. Press▼ to select Saturation* and use ◀/► to adjust its values. Every adjustment made reflects to the image immediately.6. Repeat steps 2 to 5 until you have made all of the desired adjustments.7. When done, press BACK to exit.*About saturationIt is the amount of that color in a video picture. Lower settings produce less saturated colors; a setting of “0” removes that color from the image entirely. If the saturation is too high, that color will be overpowering and unrealistic. | |||
| MovieProColor Enhancement: Allows you to fine-tune the saturation of colors with larger flexibility. It modulates complex color algorithms to flawlessly render saturated colors, fine gradients, intermediate hues and subtle pigments.Skin Tone: Provides a smart adjustment of hue only for calibrating people's skin color, not other colors in the image. It prevents discoloration of skin tones from the light of the projection beam, portraying every skin tone in its most beautiful shade.Super Resolution: It is a super-resolution technology which radically enhances Full HD content in terms of colors, contrast, and textures. It's also a detail enhancement technology refines surface details for true-to-life images that pop off the screen. Users can adjust levels of sharpness and detail enhancement for optimal viewing. | ||||
| Advanced | HDR SettingsAuto/HDR10 / HLG/ SDR: The projector supports HDR imaging sources. It can automatically detect the dynamic range of the source, and optimize settings to reproduce contents under wide range of light conditions. If the input source is not defined with dynamic range, you can also manually select HDR10, HLG or SDR for it.Picture Tone: The projector can automatically adjust the brightness levels of your image according to the input source's meta data information. You can also manually select a brightness level to display better picture quality. When the value is higher, the image becomes brighter; when the value is lower, the image becomes darker. | |||
| Reset Current Picture Mode | Returns all of the adjustments you've made for the selected Picture Mode (including preset modes, User 1, and User 2) to the factory preset values. | |||
DISPLAY menu
| Submenu Functions and Descriptions | |
| Aspect Ratio | In the following illustrations, the black portions are inactive areas and the white portions are active areas.Auto 15:9 picture Scales a picture proportionally to fit the projector's native resolution in its horizontal or vertical width.This makes the most use of the screen and maintains the aspect ratio of a picture.4:3 15:9 picture Scales a picture proportionally to fit the projector's native resolution in its horizontal or vertical width.This makes the most use of the screen and maintains the aspect ratio of a picture.4:3 4:3 picture Scales the picture so that it is displayed in the center of the screen with a 4:3 aspect ratio.16:9 4:3 picture Scales the picture so that it is displayed in the center of the screen with a 4:3 aspect ratio.16:9 16:9 picture Scales a picture so that it is displayed in the center of the screen with a 16:9 aspect ratio.16:10 16:9 picture Scales a picture so that it is displayed in the center of the screen with a 16:9 aspect ratio.16:10 16:10 picture Scales a picture so that it is displayed in the center of the screen with a 16:10 aspect ratio. 16:10 picture Scales a picture so that it is displayed in the center of the screen with a 16:10 aspect ratio. |
| Image Position | Displays the Image Position window. You may use the directional arrow keys on the projector or remote control to adjust the position of the projected picture.The values shown on the lower position of the window change with every key press you made.This function is only available when the PC signal is selected. |
| Overscan Adjustment | Conceals the poor picture quality in the four edges.The greater the value, the more portion of the picture is concealed while the screen remains filled and geometrically accurate. Setting 0 means the picture is 100% displayed. |
| Phase | Adjusts the clock phase to reduce picture distortion.This function is only available when the PC signal is selected. |
| H. Size | Adjusts the horizontal width of the picture.This function is only available when the PC signal is selected. |
| Auto | Automatically determines the best picture timings for the displayed image. |
| e-shift | Switches the display resolution.Off: Switches to 2K resolution.Picture Mode will automatically be set to fixed mode.On (recommended): Switches to 4K resolution. |
INSTALLATION menu
| Submenu Functions and Descriptions | ||
| Projector Mode | See "Choosing a location" for details. | |
| Test Pattern | Is used to adjust the image size and focus and check that the projected image is free from distortion. To close the test pattern, go back to this menu and select Off. |  |
| Light Source Settings | ·Light Source ModeSelect the projector light source power from the following modes.·Normal: Provides full light source brightness.·Eco: Reduces system noise and light source power consumption by 30%.·Variable LOW: Adjusts the output of the light source according to the brightness of the projected image. The maximum output is same as that of the Eco mode.·Variable HIGH: Adjusts the output of the light source according to the brightness of the projected image. The maximum output is same as that of the Normal mode.If the Eco, Variable LOW or Variable HIGH mode is selected, the light output will be reduced and result in darker projected pictures. See "Setting Light Source Mode" for details.·Light Source InformationSelect to learn the duration (in hours) of light source usage which is automatically calculated by the built-in timer. | |
| 12V Trigger | There is one 12V trigger that works according to your needs for installation scenarios. Two selections are available:Off: If this is selected, the projector will not send electronic signal out when it is turned on.On: The projector will send a low to high electronic signal out when it is turned on, a high to low signal out when it is turned off. | |
| High Altitude Mode | The mode is for operation in areas like high altitude or high temperature environments. Activate the function when your environment is between 1500 m–3000 m above sea level and ambient temperature is between 0°C–30°C.Operation under High Altitude Mode may cause a higher decibel operating noise level because of increased fan speed necessary to improve overall system cooling and performance.If you use this projector under other extreme conditions excluding the above, it may display auto shut-down symptoms, which is designed to protect your projector from over-heating. In cases like this, you should switch to High Altitude Mode to solve these symptoms. However, this is not to state that this projector can operate under any and all harsh or extreme conditions. | |
SYSTEM SETUP: Basic menu
| Submenu Functions and Descriptions | |
| Language | Sets the language for the On-Screen Display (OSD) menus. |
| Background Color | Sets the background color for the projector. |
| Splash Screen | Allows you to select which logo screen displays during projector start-up. You can choose JVC logo screen, Blue screen, or Black screen. |
| Auto Power Off | Prevents unnecessary projection when no signal is detected for a long time.See "Setting Auto Power Off" for details. |
| Direct Power On | Allows the projector to turn on automatically once the power is fed through the power cord. |
| Menu Settings | ·Menu PositionSets the OSD menu position.·Menu Display TimeSets the length of time the OSD will remain active after your last key press.·Reminder MessageSets the reminder messages on or off. |
| Rename Input | Renames the current input source to your desired name. use ▲/▼and►OK to set the desired characters for the connected source item. |
| Auto Input Search | Sets whether the projector searches automatically for input sources.Select On to enable the projector to scan for input sources until it acquires a signal. If the function is set to Off, the projector will select the last used input source. |
SYSTEM SETUP: Advanced menu
| Submenu Functions and Descriptions | |
| HDMI Range | Auto: Sets the projector to detect the HDMI range of the input signal automatically.Enhance: Sets the HDMI color range as 0 - 255.Standard: Sets the HDMI color range as 16 - 235. |
| Password | For security purposes and to prevent unauthorized use, you may set up password security for the projector. This limits use of the projector to only those who know the correct password. If you enter an incorrect password 5 times in succession, the projector will automatically shut down in a short time.You will be inconvenienced if you enable this function yet forget the password somehow. Do make a note of your password, and keep the note in a safe place for later recall.You will be asked to set a new password if no password has been set before. As the on-screen display indicates, the 4 arrow keys (▲/▶) respectively represent 4 digits (1, 2, 3, 4). Use the arrow keys to set a 6-digit password. The digits display as ***** when you enter them.Change PasswordYou will be asked to enter the current password before changing to a new one.Power On LockYou will be asked to enter the current password before changing the setting.Once a password has been set and the power on lock is enabled, the projector cannot be used unless the correct password is entered every time the projector is started.If you forget the password, seek help from the local JVC service center. You may be required to provide proof of purchase documentation to verify that you are an authorized user of the projector. |
| Panel Key Lock | With the control keys on the projector locked, you can prevent your projector settings from being changed accidentally (by children, for example).When you selectOnto enable this function, no control keys on the projector will function, exceptPOWER.To unlock the keys, press and hold ▶ on the projector for 3 seconds or selectOffhere using the remote control.The function is accessible through the remote control or keypad. |
| Reset All Settings | Returns all settings to the factory preset values.The following settings will still remain: Picture Mode, Brightness, Contrast, Color, Tint, Sharpness, Aspect Ratio, e-shift, Projector Mode, Password, Select Gamma, Color Temperature, 3D Color Management, MoviePro. |
INFORMATION menu
| Submenu Functions and Descriptions | |
| Input | Displays the current signal source. |
| Picture Mode | Displays the current picture mode under thePICTUREmenu. |
| Resolution | Displays the native resolution of the input source. |
| Color System | Displays input system format. |
| MaxCLL | Displays the Maximum Content Light Level detected. |
| MaxFALL | Displays the Maximum Frame Average Light detected. |
| Light Source Usage Time | Displays the number of hours the light source has been used. |
| Firmware Version | Shows the firmware version of your projector. |

Some information is given only when certain input sources are in use.
OSD menu structure

The OSD menus vary according to the signal type selected.
Main menu Submenu Options
| PICTURE | Picture Mode Natural/Cinema/Dynamic/User 1/User 2 | ||
| User Mode Settings | Load Settings Natural/Cinema/Dynamic/User 1/User 2 | ||
| Rename User Mode | |||
| Brightness | |||
| Contrast | |||
| Color | |||
| Tint | |||
| Sharpness | |||
| Advanced | Select Gamma | 1.8/2.0/2.1/2.2/2.3/2.4/2.6/Contrast Priority/Brightness Priority | |
| Color Temperature | Preset | ||
| Red Gain | |||
| Green Gain | |||
| Blue Gain | |||
| Red Offset | |||
| Green Offset | |||
| Blue Offset | |||
| 3D Color Management | Primary Color | ||
| Hue | |||
| Gain | |||
| Saturation | |||
| MoviePro | Color Enhancement | ||
| Skin Tone | |||
| Super Resolution | |||
| HDR Settings | Auto/HDR10/HLG/SDR | ||
| Picture Tone | |||
| Reset Current Picture Mode Reset/Cancel | |||
| DISPLAY | Aspect Ratio Auto/4:3/16:9/16:10 | ||
| Image Position | |||
| Overscan Adjustment 0-3 | |||
| Phase | |||
| H. Size | |||
| Auto | |||
| e-shift Off/On | |||
| INSTALLATION | Projector Mode Front/Rear/Front Ceiling/Rear Ceiling | ||
| Test Pattern Off/On | |||
| Light Source Settings | Light Source Mode Normal/Eco/Variable LOW/Variable HIGH | ||
| Light Source Information Light Source Usage Time | |||
| 12V Trigger | Off/On | ||
| High Altitude Mode | On/Off | ||
Main menu Submenu Options
| Language | English/Français/Deutsch/Italiano/Espanol/Pyckniŋ/繁體中文/简体中文/日本語/Svenska/Türkçe/Ceština/PortuguêsNorsk/Nederlands/Polski | ||
| SYSTEMSETUP: Basic | Background Color Green/Black/Blue | ||
| Splash Screen Black/Blue/JVC | |||
| Auto Power Off | Disable/5 min/10 min/15 min/20 min/25 min/30 min | ||
| Direct Power On Off/On | |||
| Menu Settings | Menu Position | Center/Top-Left/Top-Right/Bottom-Right/Bottom-Left | |
| Menu Display Time | Always On/5 sec/10 sec/15 sec/20 sec/25 sec/30 sec | ||
| Reminder Message Off/On | |||
| Rename Input | |||
| Auto Input Search Off/On | |||
| SYSTEMSETUP: Advanced | HDMI Range Auto/Standard/Enhance | ||
| Password | Change Password | ||
| Power On Lock On/Off | |||
| Panel Key Lock Off/On | |||
| Reset All Settings Reset/Cancel | |||
| INFORMATION | Input | ||
| Picture Mode | |||
| Resolution | |||
| Color System | |||
| MaxCLL | |||
| MaxFALL | |||
| Light Source Usage Time | |||
| Firmware Version | |||
Maintenance
Care of the projector
Cleaning the lens
Clean the lens whenever you notice dirt or dust on the surface.
Before cleaning any part of the projector, turn it off using the proper shutdown procedure (see "Shutting down the projector"), unplug the power cable, and let it cool down completely.
- Use a canister of compressed air to remove dust.
- If there is dirt or smears, use lens-cleaning paper or moisten a soft cloth with lens cleaner and gently wipe the lens surface.
- Never use any type of abrasive pad, alkaline/acid cleaner, scouring powder, or volatile solvent, such as alcohol, benzene, thinner or insecticide. Using such materials or maintaining prolonged contact with rubber or vinyl materials may result in damage to the projector surface and cabinet material.

Never touch the lens with your finger or rub the lens with abrasive materials. Even paper towels can damage the lens coating. Only ever use a proper photographic lens brush, cloth, and cleaning solution. Do not attempt to clean the lens while the projector is switched on or is still hot from previous use.
Cleaning the projector case
Before cleaning any part of the projector, turn it off using the proper shutdown procedure (see "Shutting down the projector"), unplug the power cable, and let it cool down completely.
- To remove dirt or dust, wipe the case with a soft, dry, lint-free cloth.
- To remove stubborn dirt or stains, moisten a soft cloth with water and a neutral detergent. Then wipe the case.

Never use wax, alcohol, benzene, thinner or other chemical detergents. These can damage the case.
Storing the projector
To store the projector for an extended time:
- Make sure the temperature and humidity of the storage area are within the recommended range for the projector. Refer to "Specifications" or consult your dealer about the range.
- Retract the adjuster feet.
- Remove the batteries from the remote control.
- Pack the projector in its original packing or equivalent.
Transporting the projector
It is recommended that you ship the projector with its original packing or equivalent.
Light source information
Getting to know the light source hour
When the projector is in operation, the duration (in hours) of light source usage is automatically calculated by the built-in timer.
To obtain the light source hour information:
- Press MENU.
- Use the arrow keys (◀/▶/▲/▼) to go to INFORMATION or enter the INSTALLATION > Light Source Settings > Light Source Information menu.
- The Light Source Usage Time information displays.
- Press MENU to exit.
Extending light source life
To keep the light source life as long as possible, you can do the following settings via the OSD menu.
To access the OSD menu, see "Using the OSD menu" for details.
Setting Light Source Mode
Light source life can be extended by changing the light source mode.
- Go to INSTALLATION > Light Source Settings > Light Source Mode.
- Press / to move to your desired mode, and press OK.
- When done, press MENU to save your changes and exit.
Setting Auto Power Off
This function allows the projector to turn off automatically if no input source is detected after a set period of time.
- Go to SYSTEM SETUP: Basic > Auto Power Off.
- Press / to select a time period. If the preset time lengths are not suitable for your presentation, select Disable, and the projector will not automatically shut down in a certain time period.
- When done, press MENU to save your changes and exit.
Indicators
There are 3 indicators which show the status of the projector. Check the following information about the indicator lights. If there is anything wrong, turn the projector off and contact your dealer.
| Light | Status & Description | ||
| LIGHT | TEMP | POWER | |
| Power events | |||
| Off Off | Orange | Stand-by mode | |
| Off Off | Green Flashing | Powering up | |
| Off Off | Green | Normal operation | |
| Off Off | Orange Flashing | Normal power-down cooling | |
| Red Flashing | Red Flashing | Red Flashing | Downloading |
| Red Off | Green | CW start fail | |
| Red Flashing | Off Green | CW spin fail | |
| Red Off | Red | Scaler shutdown fail (data abort) | |
| Light source events | |||
| Red Off | Off | Light source error in normal operation | |
| Orange Flashing | Off Off | Light source is not lit up | |
| Orange Off | Green | Light source life exhausted | |
| Thermal events | |||
| Off Red | Red | Fan 1 error (the actual fan speed is outside the desired speed) | |
| Off | Red Flashing | Red | Fan 2 error (the actual fan speed is outside the desired speed) |
| Off Green | Red | Fan 3 error (the actual fan speed is outside the desired speed) | |
| Off Green | Red | Fan 4 error (the actual fan speed is outside the desired speed) | |
| Off Red | Red Flashing | Fan 5 error (the actual fan speed is outside the desired speed) | |
| Off | Red Flashing | Red Flashing | Fan 6 error (the actual fan speed is outside the desired speed) |
| Off Red | Green | Temperature 1 error (over limited temperature) | |
Troubleshooting
| Problem Cause Remedy | ||
| The projector does not turn on. | There is no power from the power cable. | Plug the power cable into the AC inlet on the rear of the projector, and plug the power cable into to the power outlet. If the power outlet has a switch, make sure that it is switched on. |
| Attempting to turn the projector on again during the cooling process. | Wait until the cooling down process has completed. | |
| No picture. | The video source is not turned on or connected correctly. | Turn the video source on and check that the signal cable is connected correctly. |
| The projector is not correctly connected to the input source device. | Check the connection. | |
| The input source has not been correctly selected. | Select the correct source with the INPUT key on the projector or remote control. | |
| The HDMI cable does not support 4K signal. | Use a certified Premium High Speed HDMI Cable (18 Gbps compatible). | |
| Image is unstable. | The connection cables are not securely connected to the projector or the signal source. | Correctly connect the cables to the appropriate terminals. |
| Picture is blurred. | The projection lens is not correctly focused. | Adjust the focus of the lens using the focus ring. |
| The projector and the screen are not aligned properly. | Adjust the projection angle and direction as well as the height of this projector if necessary. | |
| The lens cover is still closed. (If available) | Remove the lens cover. (If available) | |
| Remote control does not work correctly. | The battery is out of power. Replace | both of the battery with new one. |
| There is an obstacle between the remote control and the projector. | Remove the obstacle. | |
| You are too far away from the projector. | Stand within 8 meters (26.2 feet) of the projector. |
Specifications
Projector specifications

All specifications are subject to change without notice.
Optical
Resolution
1920 x 1080
3840 x 2160 with e-shift
Display system
Single-chip DLP TM system
Lens
F = 1.809, f = 14.3\~22.9 mm
Light source
Laser
Electrical
Power supply
AC100-240V, 3.7 A, 50-60 Hz (Automatic)
Power consumption
360 W (Max); < 0.5 W (Standby);
Output terminals
12VDC (Max. 0.1 A) x 1
DC 5V output (Max. 1.5 A) x 1
Control
RS-232 serial control
9 pin x 1
IR receiver x 2
USB Mini-B x 1
Input terminals
Computer input
RGB input
D-Sub 15-pin (female) x 1
Video signal input
SD/HDTV signal input
Digital - HDMI x 2
Environmental Requirements
Operating temperature
0°C-40°C at sea level
Operating relative humidity
10%–90% (without condensation)
Operating altitude
0–1499 m at 0°C–35°C
1500–3000 m at 0°C–30°C (with
High Altitude Mode on)
Mechanical
Weight
6.3 kg (13.89 lbs)
Dimensions
405 mm x 341 mm x 145.8 mm (15 7/8" x 13 1/2" x 5 3/4") (W x D x H)

Timing chart
Supported timing for PC input
| Format Resolution | Refresh rate (Hz) | Horizontal Frequency (KHz) | Pixel Frequency (MHz) | |
| 720 x 400 720 x | 400_70 70.087 31.469 | 28.3221 | ||
| 640 x 480 | VGA_60 | 59.940 | 31.469 | |
| VGA_72 | 72.809 | 37.861 | ||
| VGA_75 | 75.000 | 37.500 | ||
| VGA_85 | 85.008 | 43.269 | ||
| 800 x 600 | SVGA_60 | 60.317 | 37.879 | |
| SVGA_72 | 72.188 | 48.077 | ||
| SVGA_75 | 75.000 | 46.875 | ||
| SVGA_85 | 85.061 | 53.674 | ||
| SVGA_120 (Reduce Blanking) | 119.854 77.425 | 83.000 | ||
| 1024 x 768 | XGA_60 | 60.004 | 48.363 | |
| XGA_70 | 70.069 | 56.476 | ||
| XGA_75 | 75.029 | 60.023 | ||
| XGA_85 | 84.997 | 68.667 | ||
| XGA_120 (Reduce Blanking) | 119.989 97.551 | 115.500 | ||
| 1152 x 864 1152 x 864_75 75.00 67.500 | 108.000 | |||
| 1280 x 720 | 1280 x 720_60 | 60 | 45.000 74.250 | |
| 1280 x 720_120 | 120 | 90.000 148.500 | ||
| 1280 x 768 | 1280 x 768_60 (Reduce Blanking) | 60 | 47.396 | 68.25 |
| 1280 x 768_60 | 59.870 47.776 | 79.5 | ||
| 1280 x 800 | WXGA_60 | 59.810 49.702 | 83.500 | |
| WXGA_75 | 74.934 62.795 | 106.500 | ||
| WXGA_85 | 84.880 71.554 | 122.500 | ||
| WXGA_120 (Reduce Blanking) | 119.909 | 101.563 146.25 | ||
| 1280 x 1024 | SXGA_60 | 60.020 | 63.981 | 108.000 |
| SXGA_75 75.02 | 5 79.976 135.000 | |||
| SXGA_85 85.02 | 4 91.146 157.500 | |||
| 1280 x 960 | 1280 x 960_60 60.000 | 60.000 108 | ||
| 1280 x 960_85 85.002 | 85.938 148.500 | |||
| 1360 x 768 1360 x 768_60 60.015 47.71 | 2 85.500 | |||
| 1440 x 900 | WXGA+_60(Reduce Blanking) | 60 55.469 88.75 | ||
| WXGA+_60 59.887 | 55.935 106.500 | |||
| 1400 x 1050 SXGA+_60 59.978 65.317 | 121.750 | |||
| 1600 x 1200 UXGA 60.000 75.000 162.000 | ||||
| 1680 x 1050 | 1680 x 1050_60(Reduce Blanking) | 59.883 64.674 | 119.000 | |
| 1680 x 1050_60 | 59.954 65.290 | 146.250 | ||
| 640 x 480@67Hz | MAC13 66.667 | 35.000 30.240 | ||
| 832 x 624@75Hz | MAC16 74.546 | 49.722 57.280 | ||
| 1024 x 768@75Hz MAC19 74.93 | 60.241 80.000 | |||
| 1152 x 870@75Hz | MAC21 | 75.06 | 68.68 | 100.00 |
| 1920 x 1080@60Hz | 1920 x 1080_60(Reduce Blanking) | 60 | 67.5 148.5 | |
| 1920 x 1200@60Hz | 1920 x 1200_60(Reduce Blanking) | 59.95 | 74.038 154 | |

The timings shown above may not be supported due to EDID file and VGA graphic card limitations. It is possible that some timings cannot be chosen.
Supported timing for HDMI (HDCP) input
| Format Resolution | Vertical Frequency (Hz) | Horizontal Frequency (KHz) | Pixel Frequency (MHz) | |
| 640 x 480 | VGA_60 | 59.940 | 31.469 | 25.175 |
| VGA_72 | 72.809 | 37.861 | 31.500 | |
| VGA_75 | 75.000 | 37.500 | 31.500 | |
| VGA_85 | 85.008 | 43.269 | 36.000 | |
| 720 x 400 720 x | 400_70 70.087 31.469 | 28.3221 | ||
| 800 x 600 | SVGA_60 | 60.317 | 37.879 | 40.000 |
| SVGA_72 | 72.188 | 48.077 | 50.000 | |
| SVGA_75 | 75.000 | 46.875 | 49.500 | |
| SVGA_85 | 85.061 | 53.674 | 56.250 | |
| SVGA_120 (Reduce Blanking) | 119.854 77.425 | 83.000 | ||
| 1024 x 768 | XGA_60 | 60.004 | 48.363 | 65.000 |
| XGA_70 | 70.069 | 56.476 | 75.000 | |
| XGA_75 | 75.029 | 60.023 | 78.750 | |
| XGA_85 | 84.997 | 68.667 | 94.500 | |
| XGA_120 (Reduce Blanking) | 119.989 97.551 | 115.500 | ||
| 1152 x 864 1152 | x 864_75 75.00 67.500 | 108.000 | ||
| 1280 x 720 | 1280 x 720_60 60 | 45.000 | 74.250 | |
| 1280 x 720_120 | 120 | 90.000 148.500 | ||
| 1280 x 768 | 1280 x 768_60 (Reduce Blanking) | 60 | 47.396 | 68.25 |
| 1280 x 768_60 | 59.870 47.776 | 79.5 | ||
| 1280 x 800 | WXGA_60 | 59.810 49.702 | 83.500 | |
| WXGA_75 | 74.934 62.795 | 106.500 | ||
| WXGA_85 | 84.880 71.554 | 122.500 | ||
| WXGA_120 (Reduce Blanking) | 119.909 | 101.563 146.25 | ||
| 1280 x 1024 | SXGA_60 | 60.020 | 63.981 | 108.000 |
| SXGA_75 75.025 | 79.976 135.000 | |||
| SXGA_85 85.024 | 91.146 157.500 | |||
| 1280 x 960 | 1280 x 960_60 60.000 60.000 108 | |||
| 1280 x 960_85 85.002 85.938 148.500 | ||||
| 1360 x 768 1360 | x 768_60 60.015 47.712 85.500 | |||
| 1440 x 900 | WXGA+_60(Reduce Blanking) | 60 55.469 88.75 | ||
| WXGA+_60 59.887 55.935 106.500 | ||||
| 1400 x 1050 SXGA+_60 59.978 65.317 | 121.750 | |||
| 1600 x 1200 UXGA 60.000 75.000 162.000 | ||||
| 1680 x 1050 | 1680 x 1050_60(Reduce Blanking) | 59.883 64.674 | 119.000 | |
| 1680 x 1050_60 59.954 65.290 146.250 | ||||
| 640 x 480@67Hz | MAC13 66.667 | 35.000 30.240 | ||
| 832 x 624@75Hz | MAC16 74.546 | 49.722 57.280 | ||
| 1024 x 768@75Hz MAC19 75.020 60.241 80.000 | ||||
| 1152 x 870@75Hz MAC21 75.06 68.68 100.00 | ||||
| 1920 x 1080@60Hz | 1920 x 1080_60(Reduce Blanking) | 60 | 67.5 | |
| 1920 x 1200@60Hz | 1920 x 1200_60(Reduce Blanking) | 59.95 | 74.038 154 | |
| 3840 x 2160 | 3840 x 2160_30 | 30 | 67.5 | |
| 3840 x 2160 | 3840 x 2160_60Only via HDMI 1 port) | 60 | 135 | |

The timings shown above may not be supported due to EDID file and VGA graphic card limitations. It is possible that some timings cannot be chosen.
| Timing Resolution | Vertical Frequency (Hz) | Horizontal Frequency (KHz) | Pixel Frequency (MHz) | |
| 480i 720 (1440) x 480 59.94 15.73 | 27 | |||
| 480p 720 x 480 59.94 31.47 27 | ||||
| 576i 720 (1440) x 576 50 15.63 27 | ||||
| 576p 720 x 576 50 31.25 27 | ||||
| 720/50p 1280 x 720 50 37.5 74.25 | ||||
| 720/60p 1280 x 720 60 45.00 | 74.25 | |||
| 1080/24P | 1920 x 1080 | 24 | 27 74.25 | |
| 1080/25P | 1920 x 1080 | 25 28.13 | 74.25 | |
| 1080/30P | 1920 x 1080 | 30 33.75 | 74.25 | |
| 1080/50i | 1920 x 1080 | 50 28.13 | 74.25 | |
| 1080/60i | 1920 x 1080 | 60 33.75 | 74.25 | |
| 1080/50P | 1920 x 1080 | 50 56.25 | 148.5 | |
| 1080/60P | 1920 x 1080 | 60 67.5 148.5 | ||
| 2160/24P | 3840 x 2160 | 24 | 54 297 | |
| 2160/25P | 3840 x 2160 | 25 56.25 | 297 | |
| 2160/30P | 3840 x 2160 | 30 67.5 297 | ||
| 2160/50P | 3840 x 2160 (Only via HDMI 1 port) | 50 | 112.5 | 594 |
| 2160/60P | 3840 x 2160 (Only via HDMI 1 port) | 60 | 135 594 | |
Warranty and Copyright information
Warranty
JVCKENWOOD Corporation warrants this product against any defects in material and workmanship, under normal usage and storage.
Proof of purchase date will be required with any warranty claim. In the event this product is found to be defective within the warranty period, our only obligation and your exclusive remedy shall be replacement of any defective parts (labor included). To obtain warranty service, immediately notify the dealer from which you purchased the product of any defects.
Important: The above warranty shall be void if the customer fails to operate the product in accordance with our written instructions, especially the ambient humidity and altitude must meet the environmental requirements listed in the user manual, and avoiding to operate the projector in a dusty environment. This warranty gives you specific legal rights, and you may have other rights which vary from country to country.
Copyright
Copyright © 2019. All rights reserved. No part of this publication may be reproduced, transmitted, transcribed, stored in a retrieval system or translated into any language or computer language, in any form or by any means, electronic, mechanical, magnetic, optical, chemical, manual or otherwise, without the prior written permission of JVCKENWOOD Corporation
All trademarks and registered trademarks are the property of their respective owners.
Disclaimer
JVCKENWOOD Corporation makes no representations or warranties, either expressed or implied, with respect to the contents hereof and specifically disclaims any warranties, merchantability or fitness for any particular purpose. Further, reserves the right to revise this publication and to make changes from time to time in the contents hereof without obligation of to notify any person of such revision or changes.
- SAFETY PRECAUTIONS
- FCC INFORMATION (U.S.A. ONLY)
- CAUTION
- NOTE
- DECLARATION OF CONFORMITY
- NOISE EMISSION DECLARATION
- INFORMATION FOR USERS ON DISPOSAL OF OLD EQUIPMENT AND BATTERIES
- [EUROPEAN UNION ONLY]
- IMPORTANT SAFETY INSTRUCTIONS
- HIGH TEMPERATURE CAUTION
- CEILING MOUNTING THE PROJECTOR
- MOISTURE CONDENSATION
- AVOID VOLATILE LIQUIDS
- DISPOSAL
- FOR THE CUSTOMERS IN THE U.S.A. AND CANADA
- APERTURE LABEL
- WARNING
- IEC
- OVERVIEW
- SHIPPING CONTENTS
- PROJECTOR EXTERIOR VIEW
- CONTROLS AND FUNCTIONS
- CONTROL PANEL
- POWER
- TOP IR REMOTE SENSOR
- TEMPERATURE WARNING LIGHT
- LIGHT INDICATOR LIGHT
- HIDE
- ARROW KEYS ( ,◀ ,▲) ▶ ▼
- MENU
- POWER INDICATOR LIGHT
- KEYSTONE KEYS ( , )
- INPUT
- K
- BACK
- REMOTE CONTROL
- LIGHT
- NATURAL
- CINEMA
- USER
- OK
- BRIGHTNESS
- DYNAMIC
- GAMMA
- TEST
- RIGHT
- ARROW KEYS (LEFT, RIGHT, UP, DOWN)
- CONTRAST
- INSTALLING/REPLACING THE REMOTE CONTROL BATTERY
- REMOTE CONTROL EFFECTIVE RANGE
- INSTALLATION
- CHOOSING A LOCATION
- OBTAINING A PREFERRED PROJECTED IMAGE SIZE
- FRONT PROJECTION
- THE PROJECTION RANGE FOR LENS SHIFT
- CONNECTION
- OPERATION
- STARTING UP THE PROJECTOR
- SHUTTING DOWN THE PROJECTOR
- SELECTING AN INPUT SOURCE
- ADJUSTING THE PROJECTED IMAGE
- ADJUSTING THE PROJECTION ANGLE
- FINE-TUNING THE IMAGE SIZE AND CLARITY
- CORRECTING KEYSTONE
- MENU FUNCTIONS
- ABOUT THE OSD MENUS
- USING THE OSD MENU
- PICTURE MENU
- INSTALLATION MENU
- OSD MENU STRUCTURE
- MAINTENANCE
- CARE OF THE PROJECTOR
- CLEANING THE LENS
- CLEANING THE PROJECTOR CASE
- STORING THE PROJECTOR
- TRANSPORTING THE PROJECTOR
- LIGHT SOURCE INFORMATION
- GETTING TO KNOW THE LIGHT SOURCE HOUR
- EXTENDING LIGHT SOURCE LIFE
- SETTING LIGHT SOURCE MODE
- SETTING AUTO POWER OFF
- INDICATORS
- SPECIFICATIONS
- PROJECTOR SPECIFICATIONS
- OPTICAL
- ELECTRICAL
- OUTPUT TERMINALS
- CONTROL
- INPUT TERMINALS
- ENVIRONMENTAL REQUIREMENTS
- MECHANICAL
- DIMENSIONS
- TIMING CHART
- WARRANTY AND COPYRIGHT INFORMATION
- WARRANTY
- COPYRIGHT
- DISCLAIMER
Brand : JVC
Model : LX-NZ3W
Category : Projector