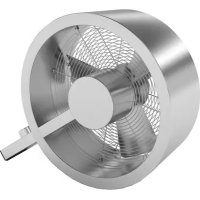
Charly Stand K - Fan STADLER FORM - Free user manual and instructions
Find the device manual for free Charly Stand K STADLER FORM in PDF.
Download the instructions for your Fan in PDF format for free! Find your manual Charly Stand K - STADLER FORM and take your electronic device back in hand. On this page are published all the documents necessary for the use of your device. Charly Stand K by STADLER FORM.
USER MANUAL Charly Stand K STADLER FORM
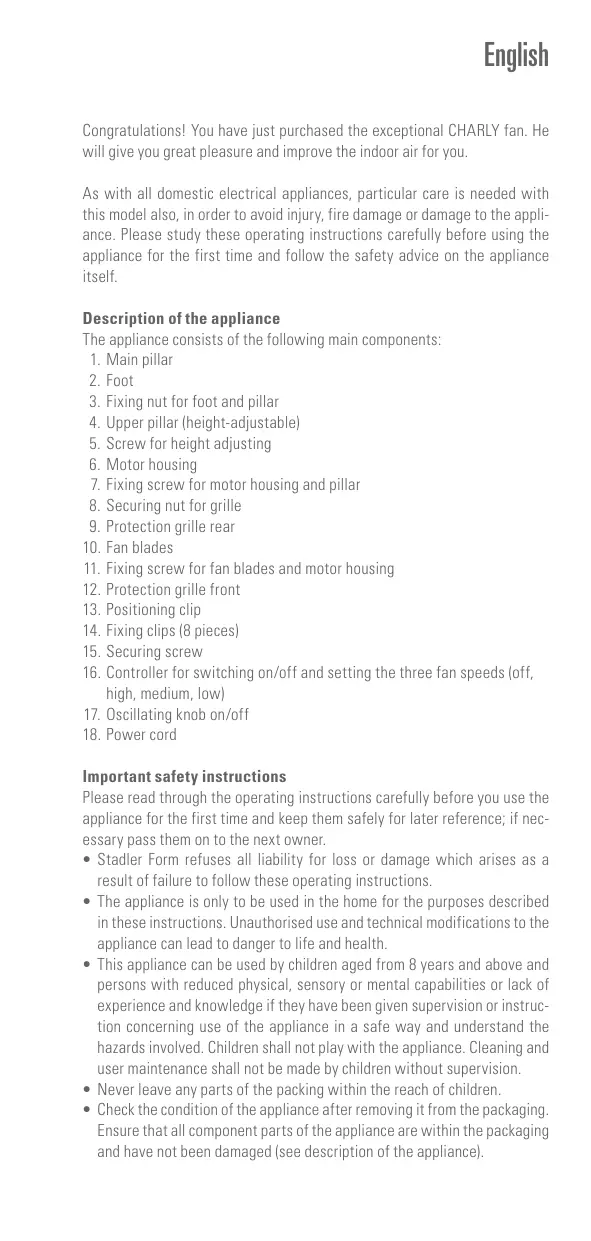
3. Fixing nut for foot and pillar
4. Upper pillar (height-adjustable)
5. Screw for height adjusting
7. Fixing screw for motor housing and pillar
9. Protection grille rear
11. Fixing screw for fan blades and motor housing
16. Controller for switching on/off and setting the three fan speeds (off,
17. Oscillating knob on/off
Important safety instructions Please read through the operating instructions carefully before you use the appliance for the first time and keep them safely for later reference; if necessary pass them on to the next owner.
- • Stadler Form refuses all liability for loss or damage which arises as a result of failure to follow these operating instructions.
- • The appliance is only to be used in the home for the purposes described in these instructions. Unauthorised use and technical modifications to the appliance can lead to danger to life and health.
- • This appliance can be used by children aged from 8 years and above and persons with reduced physical, sensory or mental capabilities or lack of experience and knowledge if they have been given supervision or instruction concerning use of the appliance in a safe way and understand the hazards involved. Children shall not play with the appliance. Cleaning and user maintenance shall not be made by children without supervision.
- • Never leave any parts of the packing within the reach of children.
- • Check the condition of the appliance after removing it from the packaging. Ensure that all component parts of the appliance are within the packaging and have not been damaged (see description of the appliance).
- • Assemble the appliance in accordance with the instructions for Assembly. Follow the instructions for assembly exactly and ensure that all screws are firmly tightened so as to avoid damage and hazards.
- • Never insert objects into the grille of the fan. Do not cover the appliance during operation.
- • Always disconnect the power cord from the socket before removing the protection grille.
- • Only connect the cable to alternating current. Observe the voltage information given on the appliance.
- • Do not use damaged extension cords.
- • Do not run the power cord over sharp edges and make sure that it does not get trapped.
- • Do not pull the plug from the socket with wet hands or by holding on to the power cord.
- • Do not use the appliance in immediate vicinity of a bath tub, a shower or a swimming pool (observe a minimum distance of 3 m). Place the appliance such that a person in the bath tub cannot touch the appliance.
- • Do not place the appliance near a heat source. Do not subject the power cord to direct heat (such as a heated hotplate, open flames, hot iron sole plates or heaters for example). Protect power cords from oil.
- • See to it that the appliance is properly positioned to ensure a high stability during its operation and make sure that no one can trip over the power cord.
- • The appliance is not splash-proof.
- • For indoor use only.
- • Do not store the appliance outdoors.
- • Store the appliance in a dry place inaccessible to children (pack the appliance).
- • If the supply cord is damaged, it must be replaced by the manufacturer, or its service agent, or a qualified person in order to avoid a hazard.
- • Prior to any maintenance, cleaning and after each use, switch off the appliance and unplug the mains cable from the socket.
- • Repairs to electrical appliances must only be carried out by a qualified electrical technician. Assembly (see page 2 and 3) Attention: The protection grille must be properly closed prior to switching on the appliance so as to avoid any damage or hazards. Ensure that all screws and securing nuts are firmly tightened. Only connect the power cable to the socket once assembly has been completed. A. Remove fixing nut (3) on the underside of main pillar (1). Insert main pillar (1) into foot (2) and fix in position with fixing nut for foot and pillar (3). B. The screw for height adjusting (5) for the main pillar is located on the upper pillar (4). By undoing this screw the height of the pillar can be adjusted. Retighten the screw firmly once the pillar is the desired height. C. Undo fixing screw for motor housing and pillar (7) on upper pillar (4). Locate motor housing (6) on upper pillar (4) and secure with fixing screw for motor housing and pillar (7). D. Remove securing nut for grille (8) from motor housing (6) and locate protection grille rear (9) on motor housing (6). When locating, ensure that the handle on protection grille rear (9) is on the top. Now screw securing nut for grille (8) back on to motor housing (6) so as to fix protection grille rear (9) in position. E. Attach fan blades (10) to motor housing (6) and secure in position with fixing screw for fan blades and motor housing (11) (loosely attached to fan blade). Tighten screw to secure fan blades (10). F. Locate protection grille front (12) on protection grille rear (9). In doing so, take care to ensure that positioning clip (13) on protection grille front is fitted on protection grille rear as shown in illustration on page 2-3. Close the two grilles by fastening the 8 fixing clips (14). Ensure that all fixing clips (14) are fastened. G. Secure the two grilles (9 and 12) with securing screw (15). Setting up / operation
1. Place Charly at the desired position on a flat surface. Connect the mains
cable (18) to a suitable plug socket.
2. Switch on the Charly fan at the controller (16) and set the desired speed
(Positions 1-3, from gentle breeze to powerful circulation).
3. Push the oscillating knob (17) down to switch on the oscillation and pull
the oscillating knob up to switch off the oscillation.
4. The direction of airflow can be set in 4 positions. By carefully moving
the motor housing (6) up and down, the direction can be adjusted (clicking noise). Cleaning Prior to any maintenance, cleaning and after each use, switch off the appliance and unplug the mains cable (18) from the socket. Attention: Never submerge the appliance in water (danger of short-circuit).
- • For external cleaning, rub with a damp cloth and then dry thoroughly.
- • To clean the fan blades, remove securing screw (15), undo all fixing clips (14) and carefully lift off protection grille front (12). Now you can wipe the fan blades (10) with a damp cloth and dry well afterwards. After cleaning, replace protection grille front (12) on appliance (fit top positioning clip: 13), fasten all fixing clips (14) and fasten securing screw (15) tightly. Repairs
- • Repairs to electrical appliances must only be carried out by a qualified electrical technician. If improper repairs are carried out, the warranty lapses and all liability is refused.
- • Never operate the appliance if the adaptor or plug is damaged, after it has malfunctioned, if it has been dropped or has been damaged in any other way (cracks/breaks in the casing).
- • Do not push any object into the appliance.
- • If the appliance is beyond repair, make it unusable immediately by cutting through the cable and hand it in at the collection point provided for the purpose. Disposal The European directive 2012 / 19 / CE on Waste Electrical and Electronic Equipment (WEEE), requires that old household electrical appliances must not be disposed in the normal unsorted municipal waste stream. Old appliances must be collected separately in order to optimize the recovery and recycling of the materials they contain and reduce the impact on human health and the environment. The crossed out wheeled bin symbol on the product reminds you of your obligation, that when you dispose of the appli- ance it must be separately collected. Consumers should contact their local authority or retailer for information concerning the correct disposal of their old appliance. Specifications Rated voltage Rated power Dimensions Weight Sound level Complies with EU regulations 230 V / 50 Hz 36 – 60 W 450 x 1’300 x 400 mm (width x height x depth)