
VP-MX20C - Camcorder SAMSUNG - Free user manual and instructions
Find the device manual for free VP-MX20C SAMSUNG in PDF.



| Product Type | Flash Memory Camcorder |
| Brand | Samsung |
| Model | VP-MX20C |
| Internal Storage Media | Built-in Memory |
| External Storage Media | Memory Card (not included) |
| Power Supply | Rechargeable Battery (IA-BP85ST) and AC Adapter (AA-E9) |
| Display | LCD (size not specified) |
| Lens | With open/close switch |
| Microphone | Built-in Microphone |
| Speaker | Built-in |
| Zoom | Zoom Lever (W/T) |
| Modes | Video Recording and Video Playback |
| Connectivity | USB, Composite Video (cable included), DC Input |
| Included Accessories | Battery Pack, AC Adapter, USB Cable, Video Cable, Quick Start Guide, Manual CD, Software CD |
| Included Software | CyberLink MediaShow4 |
| Swivel Handle | Yes |
| Hand Strap | Yes |
| Tripod Socket | Yes |
| TV Compatibility | PAL |
Frequently Asked Questions - VP-MX20C SAMSUNG
User questions about VP-MX20C SAMSUNG
0 question about this device. Answer the ones you know or ask your own.
Ask a new question about this device
Download the instructions for your Camcorder in PDF format for free! Find your manual VP-MX20C - SAMSUNG and take your electronic device back in hand. On this page are published all the documents necessary for the use of your device. VP-MX20C by SAMSUNG.
USER MANUAL VP-MX20C SAMSUNG
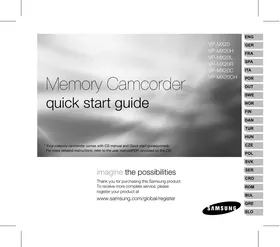
Memory Camcorder quick start guide
VP-MX20
VP-MX20H
VP-MX20L
VP-MX20R
VP-MX20C
VP-MX20CH
- Your memory camcorder comes with a CD manual and a Quick start guide (printed). For more detailed instructions, refer to the user manual (PDF) provided on the CD.
imagine the possibilities
Thank you for purchasing this Samsung product.
To receive more complete service, please register your product at
www.samsung.com/global/register
SAMSUNG
getting to know your memory camcorder
Your new memory camcorder comes with the following accessories. If any of these items is missing from your box, call Samsung's Customer Care Centre.
The exact shape of each item may vary by model.
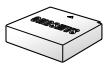
Battery pack (IA-BP85ST)
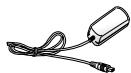
AC power adapter (AA-E9 type)
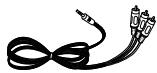
Audio/Video Cable
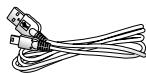
USB Cable

Quick start guide

User manual CD

Software CD*
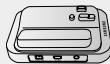
Cradle*

Pouch*

Carrying Case*

- The contents can vary depending on the sales region.
- Parts and accessories are available at your local Samsung dealer and service centre. The memory card is not included.
- You have to connect the AC power adaptor to the cradle when connecting external devices using the cradle.
- Your camcorder includes user manual CD and quick start guide (printed). For more detailed instructions, refer to the user manual (PDF) on the provided CD. * : This is an optional accessory. To buy one, contact your nearest Samsung dealer.
2_English
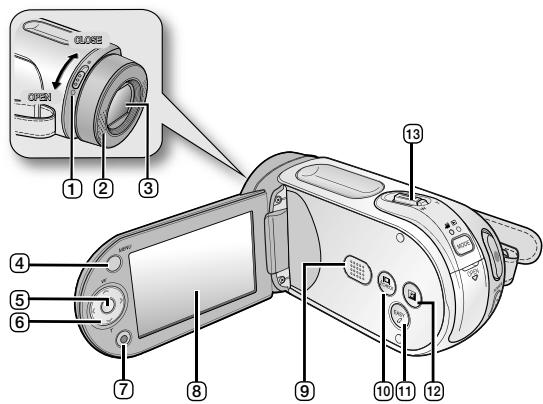
Lens open/close switch 2 Internal microphone 3 Lens ④ MENU button ⑤ OK button ⑥ Control button (▲/▼/◀/▶/W/T) ⑦ Recording start/stop button
⑧ LCD screen ⑨ Built-in speaker ⑩ iCHECK button ⑪ EASYQ button ⑫ LCD ENHANCED button ⑬ Zoom lever (W/T)
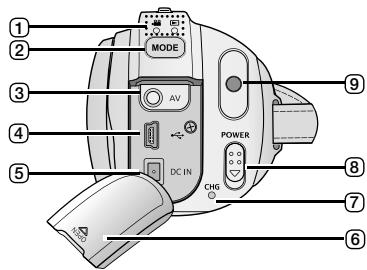
① MODE indicator (Record (●)/Player (▶)) ② MODE button ③ AV cable jack ④ USB jack (USB) ⑤ DC IN jack (DC IN) ⑥ Jack cover ⑦ Charging indicator (CHG) ⑧ POWER switch
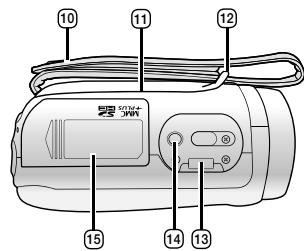
⑨ Recording start/stop button ⑩ Grip belt ⑪ Swivel Hand-grip ⑫ Grip belt hook ⑬ Cradle receptacle ⑭ Tripod receptacle ⑮ Memory card/Battery slot cover
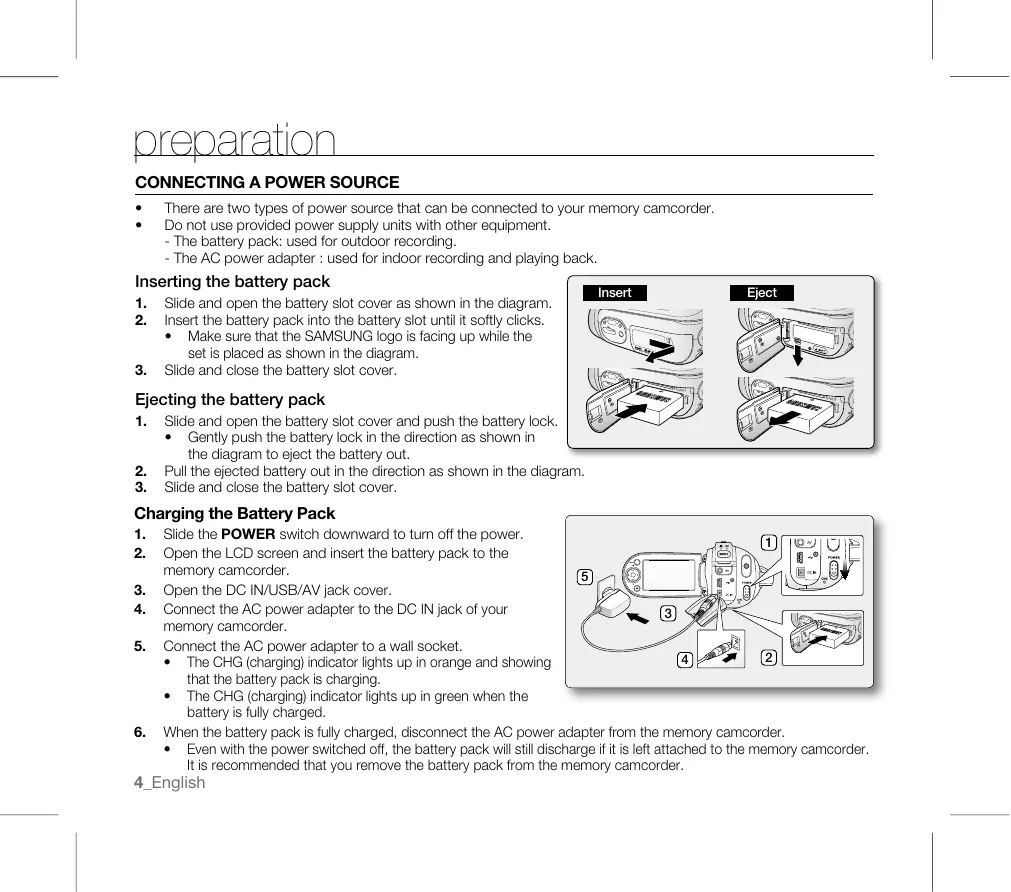
CONNECTING A POWER SOURCE
There are two types of power source that can be connected to your memory camcorder. - Do not use provided power supply units with other equipment.
- The battery pack: used for outdoor recording.
- The AC power adapter: used for indoor recording and playing back.
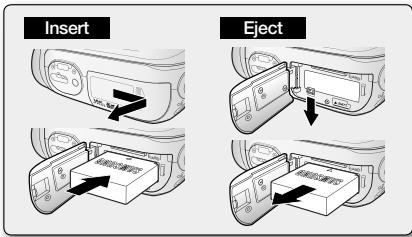
Inserting the battery pack
- Slide and open the battery slot cover as shown in the diagram.
- Insert the battery pack into the battery slot until it softly clicks.
- Make sure that the SAMSUNG logo is facing up while the set is placed as shown in the diagram.
- Slide and close the battery slot cover.
Ejecting the battery pack
- Slide and open the battery slot cover and push the battery lock.
- Gently push the battery lock in the direction as shown in the diagram to eject the battery out.
- Pull the ejected battery out in the direction as shown in the diagram.
- Slide and close the battery slot cover.
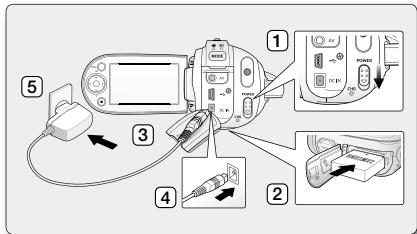
Charging the Battery Pack
- Slide the POWER switch downward to turn off the power.
- Open the LCD screen and insert the battery pack to the memory camcorder.
- Open the DC IN/USB/AV jack cover.
- Connect the AC power adapter to the DC IN jack of your memory camcorder.
- Connect the AC power adapter to a wall socket.
- The CHG (charging) indicator lights up in orange and showing that the battery pack is charging.
- The CHG (charging) indicator lights up in green when the battery is fully charged.
- When the battery pack is fully charged, disconnect the AC power adapter from the memory camcorder.
- Even with the power switched off, the battery pack will still discharge if it is left attached to the memory camcorder. It is recommended that you remove the battery pack from the memory camcorder.
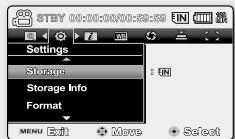
SELECTING THE STORAGE MEDIA (VP-MX20C/MX20CH ONLY)
- You can record on the built-in memory or a memory card, so you should select the desired storage media before starting recording or playback.
- Before inserting or ejecting the memory card, turn the memory camcorder off.
- Press the MENU button.
The menu list will appear.
- Press the Control button (</>) to select "Settings".
- Press the Control button (^/v) to select "Storage", then press the OK button.
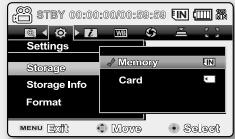
- Press the Control button (A/V) to select "Memory" or "Card", then press the OK button.
"Memory": When using the built-in memory. "Card": When using the memory card.
- Press the MENU button to exit.
INSERTING / EJECTING THE MEMORY CARD
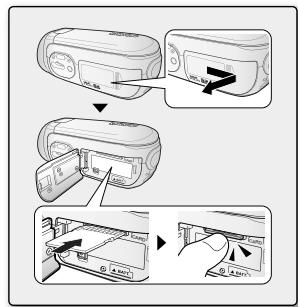
Inserting a memory card
- Turn the memory camcorder off.
- Slide the memory card slot cover to the right to open the cover.
- Insert the memory card into the memory card slot in the direction of the arrow shown in the diagram until it softly clicks.
- Close the cover.
Ejecting a memory card
- Turn the memory camcorder off.
- Slide the memory card slot cover to the right to open the cover.
- Slightly push the memory card inwards to pop it out.
- Pull the memory card out of the memory card slot and close the cover.
RECORDING MOVIE IMAGES
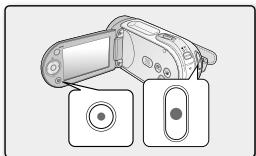
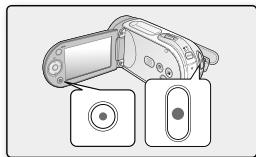
Memory camcorder provides two Recording start/stop buttons.
One is on the rear side of the camcorder and the other one is on the LCD panel.
Select the Recording start/stop button according to the use.
- Turn the memory camcorder on.
- Connect a power source to the memory camcorder. (A battery pack or an AC power adapter)
- Slide the POWER switch downward to turn on the power.
- Set the appropriate storage media. (VP-MX20C/MX20CH only) (If you want to record on a memory card, insert the memory card.)
- Set the Lens open/close switch to open (O). page 3
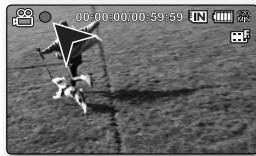
- Check the subject on the LCD screen.
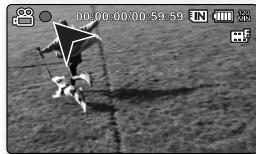
- Press the Recording start/stop button.
The recording indicator (●) will display and recording will start. - Pressing the Recording start/stop button again during recording will set the memory camcorder to recording pause mode.
- When recording is finished, turn the memory camcorder off.
playback
MOVIE IMAGES PLAYBACK
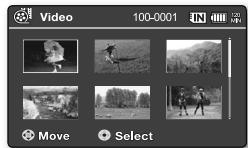
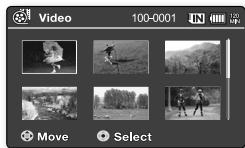
You can find a desired movie image quickly using thumbnail index view.
- Turn the memory camcorder on.
- Slide the POWER switch downward to turn on the power.
- Set the appropriate storage media. (VP-MX20C/MX20CH only) (If you want to record on a memory card, insert the memory card.)
- Open the LCD screen.
- Adjust brightness or contrast of the LCD screen.
- Press the MODE button.
- Switches to Movie Play mode (▶). The recorded movie images are displayed in thumbnail index view.
- Use the Control button (◀/▶) or (▲/▼) to select the desired movie images, then press the OK button.
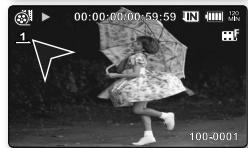
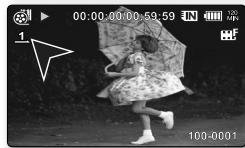
- The shortcut menu for playback will be displayed for a while.
- The selected movie images are played according to the Play Option setting.
- To stop playback and return to the thumbnail index view, move the zoom lever.
INSTALLING CYBERLINK MEDIASHOW4
CyberLink MediaShow4 is software for easily editing MPEG, AVI, and other video files, still images, and other content to create a movie.
Before you begin:
Quit any other software you are using. (Check that there are no other application icons on the status bar.)
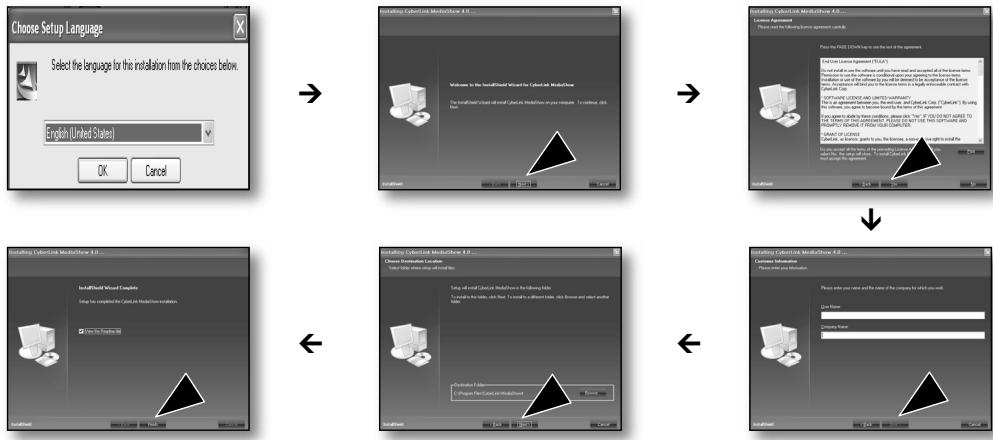

- If you perform installation of software that is already installed, uninstallation will start.
In this case, perform the installation again after uninstallation is finished.
- This manual only refers to software installation and PC connection.
For more details on software, refer to the "Online help/Read me" on the CyberLink MediaShow4 CD.
CONNECTING THE USB CABLE
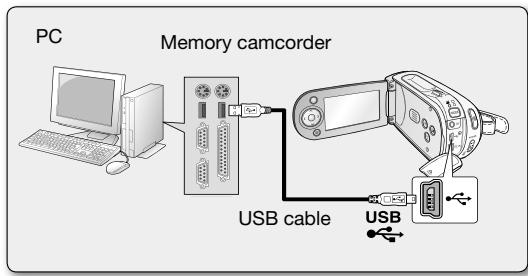
Connect the USB cable to copy movie images in a recording medium to the PC and vice versa. When the USB cable is connected in Record / Play mode, the product will switch to USB mode immediately.
- Connect the memory camcorder to the PC with a USB cable.

- Don't apply excessive force when inserting or extracting a USB jack.
- Insert a USB jack after checking the direction of its insertion is correct.
- It is recommended to use the AC adapter as the power supply instead of the battery pack.
- When the USB cable is connected, turning on or off the camcorder causes malfunctions of the PC.
CONNECTING TO OTHER DEVICES
CONNECTING TO A TV
- To playback your recordings, the television must be PAL compatible.
- We recommend that you use the AC power adaptor as the power source for the memory camcorder.
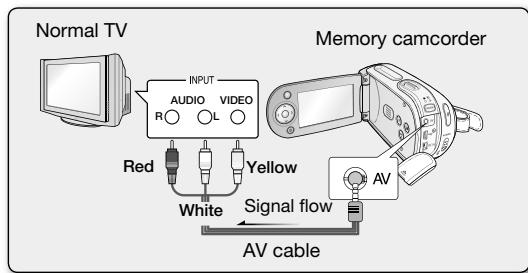
Use the provided AV cable to connect the memory camcorder to a TV as follows:
- Connect the end of the AV cable with the single plug to the AV jack of the memory camcorder.
- Connect the other end with video (yellow) and left (white) / right (red) audio cables to the TV.
Memory Camcorder
Quick Guide
VP-MX20
VP-MX20H
VP-MX20L
VP-MX20R
VP-MX20C
VP-MX20CH
- Turn on the camcorder.
Power adapter (AA-E9 type)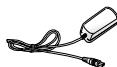
AV cable
USB cable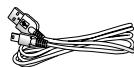
Quick Start Guide
INSERTING/REMOVING A MEMORY CARD
Inserting a memory card
CONNECTING TO A TV
Charge indicator (CHG)

POWER switch

- Turn on the camera with the memory.
Connect the power source to the camera. (Battery charger) - Slide the POWER switch up to turn on. - Press the start/stop button. (Only for VP-MX20C/MX20CH) (If you want to record on a memory card, insert the memory card.) - Set the lens cover to open/close position to open (O).
Page 3
- Aim the object at the LCD screen.
- Press the START/STOP button to record.
- The recording indicator (Ⓞ) will appear and recording will start.
- Press the START/STOP button again during
Recording places the camcorder in pause mode.
- When recording is finished, turn off the camcorder.
Reproduction
Reproduction of film images
You can quickly play back recorded films by using the index display.
- Turn on the camera with the memory card.
- Press the POWER button briefly to turn on the camera.
- Adjust the viewfinder. (Only for VP-MX20C/MX20CH)
(If you want to record onto a memory card, insert a memory card.)
- Open the LCD screen.
- Adjust the brightness and contrast of the LCD screen.
- Press the MODE button.
- Press the button to switch to playback mode ( ). The recorded files will be shown in the index with a magnifier.
4. Use the buttons to control (/>/A/V) to select the desired file and press the OK button.
For a certain time, the playback will be paused. - The selected files are highlighted for playback. To stop playback and return to the index with the magnifier, press the Stop button.
Connecting to a computer
INSTALLING CYBERLINK MEDIASHOW4
CyberLink MediaShow4 is software for easy editing of MPEG, AVI and other video files, still images and other content, for creating films.
Before you start:
Close all other programs that you are using.


- MEMORY CAMCORDER QUICK START GUIDE
- IMAGINE THE POSSIBILITIES
- GETTING TO KNOW YOUR MEMORY CAMCORDER
- THE EXACT SHAPE OF EACH ITEM MAY VARY BY MODEL
- ENGLISH
- CONNECTING A POWER SOURCE
- INSERTING THE BATTERY PACK
- EJECTING THE BATTERY PACK
- CHARGING THE BATTERY PACK
- SELECTING THE STORAGE MEDIA (VP-MX20C/MX20CH ONLY)
- INSERTING / EJECTING THE MEMORY CARD
- INSERTING A MEMORY CARD
- EJECTING A MEMORY CARD
- RECORDING MOVIE IMAGES
- MOVIE IMAGES PLAYBACK
- INSTALLING CYBERLINK MEDIASHOW
- BEFORE YOU BEGIN
- CONNECTING THE USB CABLE
- CONNECTING TO OTHER DEVICES
- CONNECTING TO A TV
- MEMORY CAMCORDER
- QUICK GUIDE
- INSERTING/REMOVING A MEMORY CARD
- REPRODUCTION
- REPRODUCTION OF FILM IMAGES
- CONNECTING TO A COMPUTER
- BEFORE YOU START
Brand : SAMSUNG
Model : VP-MX20C
Category : Camcorder