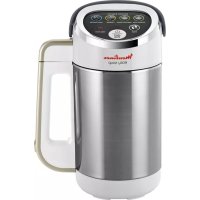
USER MANUAL EASY SOUP LM841B MOULINEX
DESCRIPTION OF THE APPLIANCE (FIG 1)
A Top handle
B Motor unit
C Overflow sensor
D Motor unit connector
E Jug connector
F Side handle
G MAX level - MIN level on the inside of the jug
H Socket for power cord
I Jug
J Power cord
K Four-point blade
P Control panel
P1 Creamed soup
P2 Soup with pieces
P3 Compute
P4 Easy Clean
P5 Blending
P6 Keep warm
P7 Start/stop

USING YOUR APPLIANCE
- Clean the appliance before the first use, as indicated in the cleaning section.
- Your appliance has 5 automatic settings which can be chosen from the control panel (P).
| Temperature (Max) | Preparation time | Blending |
| P1 – Creamed soup (creamy texture) | 100°C | 23 min | 5 times 20 secs ON - 10 secs OFF |
| P2 – Soup with pieces (coarser texture with some small bits) | 100°C | 25 min | No blending |
| P3 – Compote (stewed fruit) | 100°C | 20 min | 2 x 3 secs / 5 secs OFF 2 x 10 secs / 5 secs OFF |
| P4 – Easy Clean | Heat up | 3 min | 6 times 15 secs ON - 15 secs OFF |
| P5 – Blending | No heating | 4 min | 5 times 25 secs ON - 15 secs OFF |
USE
- Hold the side handle of the jug with one hand and remove the motor unit by pulling up the top handle with the other hand (fig 1).
- Put the ingredients into the jug (fig 2).
Tips:
- Defrost the the ingredients before putting them in the jug.
- Cut the ingredients into 2cm pieces.
-
Always put the vegetables in first, followed by the other ingredients (rice, meat).
-
Then add the water, ensuring that you respect the MIN and MAX levels marked on the jug (fig 3) for settings P1 and P2. For the P3 setting, you can add up to
800g of fruit as a maximum, using a minimum of 150ml liquid.
- Stir the liquid and ingredients together manually (fig 4).
- Place the motor unit back on the top of the jug, ensuring that the two connection points (parts D and E) fit together properly (fig 5).
- Plug one end of the power cord into the side handle and connect the other end to the mains socket (fig 6).
- All the settings on the control panel will flash.
USING THE SETTINGS
- Choose your preferred setting by pressing the corresponding button (fig 7). Only the chosen setting will flash.
- Press the start button to start the programme. The appliance will beep, and the start button and chosen setting will stay lit up until the programme has finished (fig 8).
- Once the programme has finished, the appliance will beep again. After settings P1, P2 and P3, the appliance will automatically switch to keep-warm mode for 40 minutes and the button will light up (fig 9).
Note: You can stop the programme at any time by pressing the start/stop button again.
If a soup-making cycle is interrupted by pressing the start/stop button or by opening the motor unit, preparation should be restarted and you should wait 20 mins for the appliance to cool down, before restarting the programme.
- Unplug the cord from the mains socket, and then remove the jug.
- Hold the side handle of the jug with one hand and remove the motor unit by pulling up the top handle with the other hand (fig 1).
- You can now pour the soup, smoothie or compote into a container.
Tip: For a smoother soup, you can then press the blend setting (P5) to give it a creamy texture.
To familiarise yourself with the appliance, we suggest you try out one of the recipes from the recipe booklet.
CLEANING YOUR APPLIANCE
-
Before first use or to clean the appliance as indicated below:
-
Open the appliance (fig 1) and fill the jug with 1.2L of hot water from the tap (up to the MAX level) (fig 3). Do not add washing-up liquid to the jug.
- Put the top back on (fig 5) and plug it in (fig 6).
- Press the P4 Easy cleaning button (fig 10).
-
When you hear the beep indicating the programme has finished, open the appliance (fig 1), empty the water and rinse inside the jug (fig 11).
-
Do not immerse the appliance in water. Do not place the motor unit (B) or the jug (I) under running water.
- If necessary, once the appliance has cooled down, wash the blade under the tap

(fig 12) and finish by cleaning the inside of the jug and the motor unit with a damp sponge.
- If there are still stains on the inside of the jug, leave it to soak for a few hours in hot soapy water, then remove the residue with a plastic scourer.
Rinse the bowl.
- Be careful when you remove the motor unit (B) and when cleaning the blade, which is extremely sharp.
- To clean the outside of the motor unit (B) and the walls of the jug (I), use a damp cloth. Dry carefully.
- Do not put washing-up liquid in the jug while the easy-cleaning programme is running (risk of overflowing during the cleaning cycle).
- The appliance is not designed to be cleaned in a dishwasher.
- TIP: Some foods may stain the bowl of your appliance. This poses no risk whatsoever to your appliance or to your health. To remove stains, add some water mixed with a small amount of cleaning product intended for use in your dishwasher (e.g. a tablet, liquid, powder) to the bowl of your appliance. Leave overnight to soak. Then, gently scrub with a sponge and the stains will disappear.
WHAT TO DO IF YOUR APPLIANCE DOESN'T WORK
| PROBLEMS | CAUSES | SOLUTIONS |
| The appliance does not work. | The plug is not connected or switched on at the mains power socket. | Plug your appliance into a power socket. Ensure that the power cord is correctly inserted into the socket on the side handle and mains socket. |
| The motor unit (B) is not correctly positioned or locked in. | Remove some of the ingredients.
Check that the contents to not exceed the MAX level and ensure that the ingredients are spread evenly over the base of the jug. |
| Excessive vibrations | The appliance has not been placed on a flat surface; the appliance is not stable. | Place your appliance on a stable,flat heat-resistant, clean, and dry surface. |
| Volume of ingredients is too high. | Reduce the quantity of ingredients processed. |
| Leak at the top of the jug. | Overflow sensor (C) is clogged up. | Clean sensor (C). |
| Volume of ingredients is too high. | Reduce the quantity of ingredients processed. |
| Poorly-mixed preparations. | Pieces of food are too large or too hard. | Reduce the size or quantity of ingredients processed. |
| Stop the motor using the motor overload protector. | Leave your product to cool down for at least 20 minutes and reduce the size or quantity of ingredients processed.Add liquid. |
| The appliance has cut the electricity supply. | Appliance is damp. | Leave the appliance to dry for 24 hrs before trying to connect again. |
| Your appliance continually beeps and all the LEDs are flashing. | Fouled up overflow sensor (C)Your appliance is equipped with a level sensor (C). | Clean the sensor (C)Reduce the quantity of ingredients. |
| The food is not properly cooked or something is caught at the base of the jug. | Volume of ingredients is too great. | Do not exceed the maximum level (fig 3) of ingredients. |
| You have not selected the right programme. | Start again, choosing the right programme. |
| Not enough or too much liquid. | Check that the liquid is between the MIN and MAX levels for settings P1 and P2 (fig 3).For P3, ensure there is between 150ml and 300ml of liquid. |
| Ingredients not blended properly. | Stir the liquid and ingredients together manually (fig 4). |
| You have used the appliance to heat up milk. | The soup-maker is not appropriately-designed to do this. |
My appliance still does not work
Go to an authorised service centre (see list in the service booklet).
EN
RECYCLING
- Disposal of the appliance and its packaging materials

The packaging exclusively contains materials that are not dangerous to the environment, which can be disposed of in accordance with the recycling regulations in force in your area.
- Expired electronic or electric products:

Think of the environment!
① Your appliance contains valuable materials which can be recovered or recycled.
Leave it at a local waste collection point for it to be processed.
Directive 2012/19/EU on waste electrical and electronic equipment (WEEE) stipulates that used household appliances must not be disposed of in normal unsorted municipal waste. Used appliances must be collected separately to increase the re-use and recycling rate of the materials they are made from and to reduce the impact on the environment and human health.
BESCHRIJVING VAN HET APPARAAT (FIG 1)
UW APPARAAT WERKT NIET. WAT NU?
Pp6op no-mpexKhemepa60tae?
06paTntecb B aBtopn3OBaHHbI cepBnCHbI ueHtp (cM. cPiNCOK B KHNJKe cepBnCHORO 06CnyKmBaHn).
RU
IPEPEPABOTKA
- YtunuzaIy yanaKOBouhBix MaTePnaIbO u npu6opa

YnakOBKa COCTOIT NCKIIOHTeJIbHO I3 6e3OJaCbIX JIJI OKpykaIOJIe CpeBIMaTePnaIOB IN MOKeT 6bITb YtININ3IPOBAHa B COOTBeTCTBNI C DeJCTByUOIMNnpabINAMM.
Дяутллзацисамого ппбора седует obpatиься 3a ИнфорmaциьВ COOTBETCTBYIOU OJyK6b Y BaWEM paIOnHe.
- OkonuHne cpoka cnjx6bI 3JIeKTPnueckoro n 3JIeKTPoHHoro o6OpydoBaHna:
3aunTmOkpykaiouyo cpey!
① Baaw npinboop codepknt 60nbloe KOJIuYeCTBO MaTePnAIOB, npinroDhIx K MHOrOKpaTHOMY INCNoIb3OBAHmIO INI nepepa6oTke.
PepedaTe erO B CnEuaIIN3NpuOBaHbI NpHKT PpIeMa OTXoOB DJIa NOcNeDuOcei nepepa6oTKI.
Ebponeckay dIpeKNTbva 2012/19/EU no ytInn3aun 3eKtpnueckoro n 3eKtpoHnHOO6OpDyOBaHn (DEEE)Tre6yET, YTO6bI CTpBle 6bTIOBBe 3eKTPoPnpO6pBy HE ytINn3uPoBaNcB BmEcTe C 6bUHyBM 6bITOBM MyCOPOM. NcOnJb3OBAHnBE pRn6Opby Heo6xOdmo Co6npaTb OtJeBn DO rOttMNTHaUNa PPOcecca ytINn3aun IN NOBtOpHn NepepaOTKn COCTABIIouXnx MATEpHaONB IN KOMTOHETOB, A TAKKE Dny UMeHbSeHn IN X BPEDHORO BO3dEiCTBnA H 3dOpOBbe YelOBeka IN OKpyKaHOU cyEdu.
ONIC INPUNIAy (PNC.1)
A BepxHa pyka
B Bnok MoToPa
C DaTnK NpeBaHTaXeHHA
D 3'ENHyBauch6noka MoTopa
E 3'eHnYbauaui
F Bokoba pyuka
G Pio3NaUcN MAX-MIN pIBHn HApOBHeHH BcepeuHi uui
H Wtencelwhypa xmbneHH
I yawa
JUHypXMBHeHHA
K Hixi34Je3aMn
P NaHEnb KepyBaHHa
P1 Pnporpama "Cyn-ncope"
P2 Iporpama "Cyn"
P3Пограма"Пcope"
P4 Pporpama aBTOMaTHOHO cHHeHH
P5 PnporpaMa 3MiUyBaHnHa
P6 IndikaTop nporpamn nidprumkn B terlomy ctahi
P7 3aynck a6o 3yunnka nporpam
BVKOPUCTAHNII PUNIAy
BIMnTe npnilad neped nepiWM BkOpncTaHHaM, kCe Bka3aHO B po3diNi 0do YIuHn.
- Y Baшоуmpилadi € 5 nporpam,яki з苹сякaitьса BTOMaTnUHc 3 naHeni kepyBaHHa(P).
ETEP KYPAJI XYMBIC ICTEMECE, HE ICTEY KEPEK?
| КибIHшьЛыKTAP | CEБЕПТЕ | ШЕШIMDEР |
| Курал жуmbic ictemeidi | Курал заект ржeliche жаллafанбаfasan | Куралды заектмени Кор ekтendир розеткасьн косын. Дэлектмени Кор ekтendир вayсьмьн. 6уйideri салын дысьпсьн.
Жээne желлік розетка-fa дурьссалынfa-hынka кэз кетдз. |
| Козлькыш 6lori (В) дрс ophaылmafahн hemecе 6ekitilmerehen | Курам 6олikтendир ќарысьн alын тасда. Copna nicipriш тостаын bihн. iшнderi курам 6олikтendир MAX Deнг.reиен acna falbanyнTekcepinizжэne курам 6олikтendир.TOTaFahn Ty6iHne 6ipkejki calын falbnyнka кэз кетдз. |
| Ото katты diperin | Курал teric emec 6ette oprahalackан, ophykcsb3 Tур. | Куралды teric 6etke кolyны. |
| Курам 6олikтendир оte көн мөлшepi. | Знделетин Курам 6олikтendир мөлшерin azai'tbiv. |
| TOCTAFHын,
хогары 6elirinien
суьыltькытbing. aуыы
байkanal'da | Толыketkendi 6ilindipetinig bepriiw (C) lactaHaFahn. | Бершт (C) тазааны. |
| Курам 6олikтendир оte көн мөлшepi. | Знделетин Курам 6олikтendир мөлшерin azai'tbiv. |
| Курам 6олikт endapanacnaidы | ÖhimniH 6oliktepi ote ункен hemeces erte kaTы. | Знделетин Курам 6олiktendир оншemim kiшерпiniz hemeces mөлшерin azai'tbiv. |
| Куралдын.aca чуктendiyenet
Туындаfahн козль�кыш 6loriHn TOKtabyl | Козль�дын 6loriHn 20 minuTTan kem emecяakttбын calын dautbiv.Зэне онделетин Курам 6олiktendир олшemim kiшерпiniz hemeces mөлшерin azai'tbiv. A3 fana cyuiktsk kostb. |
| Куралдын, жуmbicbl
элект ржelicinih,
anatblы axkbipaybH
tuDibpaBd | Куралдын iшki 6olirinie
ынлal ntiД. | Куралды кайт кocudan 6byhN 24 carfam 6onyk kentipiH. |
| Курал уздись
дыбістык 6elirinep
шьларды
Жээne bapын
жарыдinoordarbl
Жынлынltaɪdbl. | Тасын тэріндан кор.fay cehscorpы (C)
Сиздін Куралын biz
аca tolbin Kekeнdi
6ilindipetin 6berpiшен (C)
ЖабduktanfaH. | Ссэнорды тазаалay (C)
Курам 6олikтendир мөлшерп inazai'tbiv. |
| КибIHшьЛьБКТAP | CEБЕПТЕР | ШЕШIMДЕР |
| Таfram dурьс
дайынданmaь
нemeces
TOCTaFAHbIn, TV6iHe
Жабсын калы | Кура'm 6эліктердін erte кән
мәлшэр. | Кура'm 6эліктердін TOCTaFAHы
ТOLТырүдын erte кән
Дeнг'reиэн acырmaьз (3 cypet). |
| СiЗ таframдары дайындан
ушin 6a-fdaplamаны дурьс
TAнДамадынь. | Таframы дайындан ушin dурьс
БaFdaplamanы тандан apkылы
copna nicipriшti kaɪta icke
Kocbilly. |
| Суныктik, кeтклікizсi
нemeces оte кәn. | P1жэne P2 рекimдерін колдау
барында суныкткын
Дeнг'reи MINжэne MAX
Дeнг'reиlerpi apacblya对其进行
Кeэ зетклінiz (3 cypet).
P3 рекimi ушin суныкткын
Кeэlemi 150 мл-дан 300 мл-гe
Дeнih bONFaHbN kanaФaJay Kepek. |
| Кура'm 6эліктердін
жeтклінcki3 6bpkeklnirig. | Кура'm 6эліктердін суныкткнeн
бірre apа_naftыньз (4 cypet). |
| СiЗ ст.Yынltынь. | Copna nicipiш ст.Tуті жыltу ушin
apналma-faH. |
Kypan 6ypbHbICbIHwa Jxymbc icTeMeiMi Me?
YakienTki Kbi3Met Kepcety OpTaIbFbHa JyriHl3 (Ti3imDi Kbi3Met Kepcety KitanWacbHaH KaPah3).
KAITATOH,DEY
KanTay MaTePnAaIapbIn KHe KpaIaIbI naIdaFa acbipy

KanTama TeK Kop7aFaH opTa yuH Kayinc3 MaTePnaIapdAn FHa TpaBb JxHe KOnDaHbCTaFb epexeenepe Caikec naJaFa acbIpbl MyMkiH.
KypalbH, 03iH naaFa acbpy 6oBbHa aKnapaT any ywiH ci3diH aydaHbHb3daFb C9kec Kb3MeT KepCteTy opTaIbFbIme XabapacbHb3.
- 3NeKtpnj KHe 3NeKtpOnDbI Jx6bIKtBIn, KbI3MeT eTy Mep3iMiH, aKaTanybl: KopwaFah opTaHbI KopFaNbIK!

① CizinH KpaIbHb3dbH KpaMbHda Kep pet NaJaHaHyFa Hemece KaTa eHdeyre 6oNaTbH MaTePnAaDapBbH KeTterEH MJIeepi 6ap.
OHy KaIy H,ey YIiH MaMaHaHaApBlaFaH KaIbIKTapBla Ka6bldayOpBHa 0K3iH3.
3NeKtpnI JxHe 3NeKtpOnHbI Jx6bHbIKbI naJaFa acbpy 6oBbHwa 2012/19/EU Eyponabik
6acBbIbIK HcKaybl (DEEE) To3bIbI JxetKeH TpymbCTbIK 3NeKtp KpAaDapbl ATeTteri
TyPmbICTbIK KaBbIKen 6ipre naJaFa acbpiMFAaBHHan tan eTeJI. PAnDaFa acbpy JxHe
ObIH, KpAmBHJa MaepnAanapd Me Kpam 6oNtkeptdi KaTa OHJeY epicih OH TaIIaHbipy
yIiH, CObHMeKatar OpanaBHy IaAM DeNCahyFbHa HxOHe KOpSaHa OPta 3IINHbI acepH
a3aIITy yuHIn naJaIaNbHfAH KpAanapdBi JxKeE XHaHaH JeH.
al ailllll 1gagaii
aill jay gill aillle 1jbs kui y aalals algo no alga qallll
biia gaiil lclggiy gill cglggy gai gia
aiiui iiaoi aii jay uaiy jay jayn o wali
aaiiy gaiy aiaiy ai y ai y ai

aalll gaa aagg
1
-
-
-
-
-
-
-
-
-
-
-
-
-
-
-
-
-
-
-
-
-
-
-
-
-
- 1.
①
ailll lalall gjla jg
a jyj yj 00000000000000000000000000000000000000000000000000000000000000000000000000000000000000000000000
AR
aal aal alal alal alal alal alal alal
(6) blll
Sollalglge jagglg ldlalgl
jglgjjl
joo jy. (7 J) uill jll gle bally pall buall aie g jil
.0jai pi gi jil buiall
g“i"yj j 1j j j j j j j
.8 (j) j 11
(9 K) 40 sdo lal plabll
A. Start/Stop 1j jge bdo 1j g a cai 1j
j Start/Stop jge biaaiy aiai yiaiaaiaaia
20 13
Jzj j 1
y
s jlll l l l l l l l l l l l l l l l l l
(1)
4.4.1.2.3.4.5.6.7.8.9.10.11.12.13.14.15.16.17.18.19.20.21.22.23.24.25.26.27.28.29.30.31.32.33.34.35.36.37.38.39.40.41.42.43.44.45.46.47.48.49.50.51.52.53.54.55.56.57.58.59.60.61.62.63.64.65.66.67.68.69.70.71.72.73.74.75.76.77.78.79.80
21 × 2
(12)
y
0iiK 1y g j 2 1 1j j j j j j j
y
14wS
jai 1 jai d4 s g y jy jy jy (B) jg jg aal laa4s gao
1 1
L. 1000000000000000000000000000000000000000000000000000
S OBC = S COD + S_ BOC
J 1 J 1 J 1 J 1 J 1 J 1 J 1 J 1 J 1 J 1 J 1 J 1
()
.2g jai yj gjjb jn jnu 45 cui oui jy dui oui
i 1 i j 1 1 1
y
aaii (yjg 1) jg jy
1000 1000
gai jls laoi olsiuol 4
j0j0j0j0j0j0j0j0j0j0j0j0j0j0j0j0j0j0j0j0j0j0j0j0j0j0j0j0j0j0
joo jao jia jia jia jia jia jia jia jia jia jia jia jia jia jia jia jia jia jia jia jia
aaiiaaaiaaaiaaaaaaaaaaaaaaaaaaaaaaaaaaaaaaaaaaaaaaaaaaaaaaaaaaaaaaaaaaaaaaaaaaaaaaaaaaaaaaaaaaaaaaaaaaaaaaaaaaaaaaaaaaaaaaaaaaaaaaaaaaaaaaaaaaaaaaaaa aa
800 150 jda
(4)
Dblai) Juaill aai jai 4s yis Jala Jiaabal. 2yj yj yj yj yj yj
(5j) jg s jdua dla (E
(6)
.2j 1ai jaii jiljuiy
Culjbjjolalai
aaii (7)
ii 2ai
g 1
(8)
P1: P2 10000000000000000000000000000000000000000000
P3
aJus Jus Jus Jus Jus Jus Jus Jus Jus Jus Jus Jus Jus Jus Jus Jus Jus Jus Jus Jus Jus Jus Jus Jus Jus Jus Jus Jus Jus Jus Jus Jus Jus Jus Jus Jus Jus Jus Jus Jus Jus Jus Jus