
ECH4SE - Food processor CUISINART - Free user manual and instructions
Find the device manual for free ECH4SE CUISINART in PDF.



| Product type | Mini chopper / food processor |
| Brand | Cuisinart |
| Model | ECH4SE |
| Bowl capacity | 900 ml (air volume); max use: 700 ml for thick preparations, 400 ml for liquids |
| Functions | Chop and grind, with two pulse buttons |
| Blade | Double blade with BladeLock system: sharp side for chopping/mixing, flat side for grinding |
| Power | 250 W (estimated) |
| Power supply | 220-240 V, 50/60 Hz |
| Bowl material | Plastic |
| Care and cleaning | All parts except the base are dishwasher safe (top rack recommended); base cleaned with a damp cloth |
| Safety | Bowl and lid locking; very sharp double blade; press-and-hold buttons; full stop before lid removal |
| Spare parts and repairability | Appliance not repairable; accessories available for 5 years after purchase |
| Warranty | 5 years against manufacturing defects |
| Included accessories | Bowl, lid, double blade, spatula, cleaning brush |
| Weight | Approximately 0.8 kg (estimated) |
| Dimensions (L x W x H) | Approximately 20 x 20 x 15 cm (estimated) |
Frequently Asked Questions - ECH4SE CUISINART
User questions about ECH4SE CUISINART
0 question about this device. Answer the ones you know or ask your own.
Ask a new question about this device
Download the instructions for your Food processor in PDF format for free! Find your manual ECH4SE - CUISINART and take your electronic device back in hand. On this page are published all the documents necessary for the use of your device. ECH4SE by CUISINART.
USER MANUAL ECH4SE CUISINART
92120, MoHpyx, ΦpaHcHn
a c 33(0)146564752
CdeNaHO B Kntae
- Safety instructions. 15
2.Introduction. 18
3.Product features 18 - Instructions for use 19
Safety During Use 19
A. Fitting & removing the parts. 19
B.The dual blade. 20
C. Control switches 20
D. Processing 20
5.Troubleshooting 23
6. Cleaning and maintenance 24
7. Recipes 24
International Guarantee. 127
CONTENUTO
READ THESE SAFETY INSTRUCTIONS CAREFULLY BEFORE USING THE APPLIANCE!
- The appliance is intended for domestic use only and is not intended to be used in applications such as: staff kitchen areas in shops, offices, and other working environments; farm houses; by customers in hotels, motels, and other residential type environments; bed and breakfast type establishments.
- This appliance is not intended for use by persons with reduced physical, sensory or mental capabilities, or lack of experience and knowledge, unless they have been given supervision or instruction concerning use of the appliance by a person responsible for their safety.
- Children should always be supervised to ensure that they do not play with this product.
- This appliance shall not be used by children. Keep the appliance and its supply cord out of reach of children during and after use.
- There is a risk of injury if the product is misused.
- Do not use the appliance if the supply cord is damaged. In the event of supply cord damage, discontinue use immediately. If the supply cord is damaged it must be replaced by the manufacturer in order to avoid a hazard.
- Always disconnect the appliance from the supply if it is left unattended and before assembling, disassembling or cleaning
- CAUTION: Take care when handling the sharp cutting blades, emptying the bowls and during cleaning. Do not touch metal blades or cutting edges of discs. All are extremely sharp and contact could cause injury.
- WARNING: Use extra care when working with hot liquids
to avoid injury from overflowing, sudden steaming and splattering. In order to avoid scalds from steam it may be advisable to process smaller quantities on a low speed.
- Always inspect the appliance and appliance accessories before use for noticeable signs of damage. Do not use if damaged, or if the appliance has been dropped.
- Never pull the plug out of the mains socket by the supply cord.
- Do not wrap the supply cord around the main body of the appliance during or after use.
- Always ensure the voltage to be used corresponds with the voltage on the appliance; this is indicated on the bottom of the housing.
- Do not leave the supply cord hanging over the edge of a kitchen table or worktop.
- Avoid contact between the supply cord and hot surfaces.
- Always ensure that your hands are dry before removing the plug from the mains outlet.
- Never place the blade or disc directly on the motor of the housing base. Always ensure the correctly associated work bowl is in place.
- Always carefully insert the blade before adding the ingredients.
- Keep hands, spatulas and other utensils away from moving blades or discs whilst the appliance is in operation. A plastic spatula may be used, but only when the food processor motor is stopped.
- Never push food down by hand when slicing or shredding. Always use a pusher.
- Make sure the motor has completely stopped before removing the lid.
-
Always remove the bowl from the motor base very carefully before removing the blade.
-
Never leave the appliance unattended when switched on or plugged in.
- Always ensure the blades and bowl have been thoroughly cleaned after each use and have dried completely before storing.
- Never store any blade or disc on motor shaft. To reduce the risk of injury, no blade or disc should be placed on the shaft except when the bowl is properly locked in place and the processor is in use. Store blades and discs out of reach of children.
- All parts except the housing base are dishwasher safe, and we recommend washing them in the dishwasher on the top rack only. If you wash the blades, discs, dicing and spiral accessories by hand, do it carefully. When handling, use the plastic hubs. Avoid leaving them in soapy water where they may disappear from sight. To clean the blades, hold the blade by its plastic center and use the cleaning brush provided to clean the inside of the hub.
- Do not immerse the housing base in water or any other liquid or put it in a dishwasher.
- Before switching on the processor, ensure that the blade is locked into place on the motor spindle (taking care to avoid the sharp edges), and that the lid is correctly fitted. Do not force or block the lid mechanism.

WARNING: The polyethylene bags over the product or its packaging may be dangerous. Keep these bags out of the reach of babies and children.
Never use them in cribs, children's beds, pushchairs or playpens. The thin film may cling to the nose and mouth and prevent breathing. A bag is not a toy.
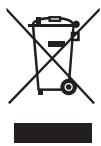
WEEE - END-OF-LIFE ELECTRICAL AND ELECTRONIC EQUIPMENTS
In everybody's interest and to actively participate in protecting the environment and human health:
- Do not discard your products with your unsorted household wastes.
- The WEEE (wastes of electrical and electronic equipments) must be collected separately.
- Use the return and collection systems dedicated to the WEEE available in your area. In this way, some materials can be recycled, re-used or recovered.
- By ensuring this product is disposed of properly, you will help prevent potential negative consequences for the environment and human health due to possible content of hazardous substances.
For more detailed information about the disposal of this product, please contact your local household waste disposal service.
2. INTRODUCTION
Congratulations on the purchase of your new Cuisinart Mini Prep Pro!
For over 30 years Cuisinart's aim has been to produce the very finest kitchen equipment. All Cuisinart products are engineered for exceptionally long life, and designed to be easy to use as well as to give excellent performance day after day. To learn more about our products and for recipe ideas visit our website www.cuisinart.eu.
3.PRODUCT FEATURES (refer to cover)
1.Lid
2. Work bowl with handle
3. Blade (curved sharp blade, flat blunt blade) with BladeLock system
4. Control switches
5. Housing base
6. Spatula (not shown)
4. INSTRUCTIONS FOR USE
SAFETY DURING USE
- Handle the blade with extreme care, it is very sharp.
- Never place the blade directly on the motor of the housing base. Always ensure the bowl is in place.
- Always carefully insert the blade before adding the ingredients.
- Take extra care if using the appliance to process hot liquids. A build up of steam could cause liquid to be ejected from the appliance.
Always wait for the blade to stop before removing the lid. - Always remove the bowl from the motor base very carefully before removing the blade.
- Never leave the appliance unattended when switched on or plugged in.
- Keep hands, spatulas and other utensils away from moving blades whilst appliance is in operation. Only use the spatula once the processor motor has stopped.
- Unplug the unit before cleaning it or removing the blades.
- Always ensure the blades and bowl have been thoroughly cleaned after each use and have dried completely before storing.
A. FITTING & REMOVING THE PARTS
- Place the housing base on a flat, dry, stable surface.
- Place the work bowl over the motor base with the handle facing forward and positioned slightly to the left of the control panel (the bowl will slot onto the base).
- Turn the bowl in an anticlockwise direction until it locks into position on the housing base.
N.B. The work bowl must be securely locked into position. The bowl will be in the correct position once the handle is central to the control panel.
4. Carefully lift the blade assembly, holding the central plastic stem and place over the motor spindle. Push the blade down until it clicks into place. The lower part of the blade assembly should almost touch the bottom of the work bowl.
N.B. Always hold the blade assembly from the plastic stem. Never touch the blade as it is very sharp.
N.B. Never place the blade on the motor shaft until the work bowl is locked into place.
N.B. Always insert the blade in the work bowl before adding ingredients.
5. Add the food you wish to process.
6. Place the lid on the work bowl with the small tab to the left of the work bowl handle. Turn the cover anticlockwise (toward handle) to securely lock.
N.B. The work bowl and lid must be tightly locked into the interlock device. Once securely fitted a loud click is heard. If both the work bowl and the lid are not fitted securely the processor may work intermittently.
7. To remove the lid, hold the housing base with your left hand, securely grip the handle on the top of the lid and rotate it in a clockwise direction.
N.B. Make sure the motor has completely stopped and the blade has stopped moving before removing the lid.
ATTENTION: The lid must always be removed before fitting or removing the work bowl from the base.
- To remove the blade, gently pull up to disengage blade lock away from the motor spindle holding the plastic stem.
- To remove the work bowl, firstly ensure the lid has been removed. Hold the housing base with your left hand, then hold the work bowl handle with your right hand and turn in a clockwise direction to unlock and lift away from the housing base.
B. THE DUAL BLADE (Fig.1) (refer to cover)
This appliance processes using a dual blade with a sharp, curved edge (A) for chopping/mixing and a flat, blunter edge (B) for grinding.
C. CONTROL SWITCHES
To start operation, simply press one of the two switches and hold down for the desired length of time.
Use the 'Chop' speed switch for chopping, puréeing and mixing food with the sharp edge of the blade.
Use the 'Grind' speed switch for grinding and for chopping hard food with the blunt edge of the blade.
A 'pulse' action is best when you are using the sharp edge of the blade. Two or three pulses are often enough. Ensure you check the food frequently to prevent over processing. Over processing will result in a watery paste instead of a fine chop.
N.B. Due to the powerful motor provided with this unit, we recommend using one hand to support the appliance during operation.
Continuous hold action is best when you are using the grind function. When you operate the unit for more than 10 seconds, use a pulse action every 10 seconds or so to allow food to drop to the bottom of the work bowl. This provides more consistent results.
IMPORTANT: Never operate the Mini Prep Pro continuously for longer than 20 seconds at a time.
D.PROCESSING
- Fit the work bowl and blade (refer A).
- Place food in the work bowl. Ensure food is cut into small evenly sized pieces and the work bowl is not overloaded.
- Lock the lid into position.
- Press the appropriate control switch i.e. 'Chop' or 'Grind', depending on the food you are processing, for the required amount of time (refer to 'Processing Techniques' for further details).
- Wait for the blade to stop moving. Unplug the appliance and remove the lid & work bowl.
N.B. The lid must always be removed before fitting or removing the work bowl from the base.
- To remove liquids and sauces from bowl, simply pour ingredients out of work bowl. The BladeLock System keeps blade safely in place.
- To remove thicker ingredients from bowl, carefully remove the blade assembly, holding it by the top of the plastic central stem. Gently pull up to disengage blade lock and remove blade from the work bowl. Remove food with a spatula.
Occasionally food will stick to the sides of the work bowl as you process. If this happens, stop the appliance. After the blade has stopped moving, remove the lid and use the spatula to scrape the food from the sides of the work bowl back into the centre. Do not use your hand.
You can also reverse the motor by alternating between 'Chop' and 'Grind'. This will help to combine the ingredients and clean the sides of the work bowl.
N.B. Do not operate without food contents in the work bowl.
Processing Techniques
The following section includes useful hints and tips on how to use the Mini Prep Pro to achieve a number of processing results. We recommend that you practice using these techniques before processing food to eat.
N.B. Do not process frozen food in the processor.
| Ingredients | Operation | Comments | |
| Chop | Grind | ||
| Anchovy | ✓ | Drain first. Cut in half. | |
| Bacon | ✓ | Should be crispy. | |
| Butter | ✓ | Cut into 1.5cm pieces. Best at room temperature. | |
| Celery | ✓ | Cut into 1.5cm long pieces. | |
| Cheese – Soft Chilled | ✓ | ||
| Cheese – Semi Soft | ✓ | ||
| Cheese – Firm Chilled | ✓ | ||
| Cheese – Hard | ✓ | Cut into 1.5cm pieces. Process 50g at a time. | |
| Chocolate | ✓ | Max 25g at a time, cut into 1.5cm pieces. | |
| Cinnamon sticks | ✓ | Break into 1.5cm pieces. | |
| Coffee beans | ✓ | Max 50g at a time | |
| Fresh herbs dry | ✓ | ||
| Garlic | ✓ | ||
| Meat, poultry, fish | ✓ | Process 316g max at a time. Should be very cold but not frozen. | |
| Mushrooms | ✓ | Choose firm, fresh mushrooms. Cut into even pieces no larger than 1.5cm. | |
| Nutmeg | ✓ | Pulse approximately 5 times to break apart, and then run continuously. | |
| Nuts | ✓ | ✓ | Either operation can be used depending on the desired consistency (see next page for more details). |
| Olives | ✓ | Use pitted olives. | |
| Onions, shallots | ✓ | ||
| Peppers | ✓ | Cut into 1.5cm pieces. | |
| Peppercorns | ✓ | ||
| Seeds (e.g. cumin) | ✓ | ||
| Vegetables, cooked | ✓ | Should be cooked until soft. | |
For best results:
- Always cut large pieces of food into smaller pieces of even size of approximately 1.5cm to achieve even results.
- Use the sharp edge for chopping, puréeing and mixing. It is ideal for chopping softer food such as herbs, celery, onions, garlic and most cheese. It is also useful for puréeing cooked vegetables, making mayonnaise and mixing salad dressing.
- Use the blunt edge for grinding coffee beans and spices, and for chopping hard food such as peppercorns, seeds, chocolate and nuts.
ATTENTION: Do not overload the work bowl. Overloading causes inconsistent results and strains the motor. After being processed, food should not reach more than 2/3 of the way up the central plastic stem of the blade assembly.
N.B. Please note that although the air capacity of the Mini Prep Pro is 900ml the following maximum fill capacities apply for optimum use of the product:
- 700ml - mixture capacity
- 400ml - thin liquid capacity
Chopping fresh herbs
The herbs, work bowl and blade must all be thoroughly cleaned and dried. Remove the stems from herbs. Add the leaves to work bowl and process, using the 'Chop' switch and a 'pulse' action until they are chopped to the desired consistency.
Chopping meat, poultry, fish & shellfish
The food should be very cold but not frozen. Cut into 1.5cm pieces and place in the work bowl. Use the 'Chop' switch and a 'pulse' action until the food is evenly chopped. Use a continuous processing action for a few seconds for a finer chop if required. Use a spatula to scrape food down from the sides of the work bowl as necessary.
Chopping nuts
You can use either the 'Chop' or 'Grind' function depending on the consistency you require. For roughly chopped nuts, process continuously using the 'Chop' switch until chopped to the desired consistency. Check frequently to avoid nuts clumping together. If necessary, use the spatula to redistribute the nuts evenly in the work bowl. If you require more of a powder consistency use the 'Grind' function continuously until the desired consistency is achieved.
Producing a purée
Cut the food into 1.5cm pieces and place in the work bowl. Use the 'Chop' switch and a 'pulse' action to chop coarsely, then process continuously until food is pureed.
N.B. Cooked potatoes are an exception to this procedure. They develop a gluey texture when processed with the metal blade.
Grinding coffee beans and hard foods
Add coffee or hard food to the work bowl. Use the 'Grind' switch and process using a continuous action until desired consistency is reached. Coffee beans may take slightly longer to process, so use a pulse action every 10 seconds or so to allow the beans to drop to the bottom of the work bowl.
Adding liquid
You can add liquids such as water, oil or flavouring while the appliance is running. Pour the liquid through one of the two openings in the lid.
N.B. Add liquid through only one opening at a time. The other opening must be left free for air to circulate.
5.TROUBLESHOOTING
Motor does not start or blade does not rotate:
Check that the plug is securely inserted into the mains.
Check that the work bowl and lid are securely locked into place (see section A for more information).
Ensure only one control switch is being pressed at a time.
Food is unevenly chopped:
Either you are chopping too much food at one time, or the pieces are too large. Try cutting food into smaller pieces of an even size and processing a smaller amount per batch.
Food is chopped too fine or is watery:
The food has been over-processed. Use brief pulses or process for a shorter period of time.
Food collects on lid or sides of work bowl:
You may be processing too much food. Turn the appliance off. When the blade stops moving remove the lid and clean the work bowl and lid with the spatula. You can also reverse the motor by alternating between 'Chop' and 'Grind'. This will help to combine the ingredients and clean the sides of the work bowl.
Food gets stuck on blade:
You may be processing too much food. Turn the appliance off. When the blade stops moving, carefully remove it. Remove food from the blade and work bowl using a spatula, and start again.
6. CLEANING & MAINTENANCE
- When not in use, leave the appliance unplugged.
- All parts except the housing base are dishwasher safe. We recommend washing them in the dishwasher on the top rack. Due to intense water heat, washing the work bowl, lid and accessories on the bottom rack may cause damage over time. Insert the work bowl upside down.
- If you wash the blade by hand, wash with extreme care, the blade is very sharp. Do not leave it in soapy water where it may disappear from sight.
- Take extra care when loading and unloading the blade in the dishwasher.
To simplify cleaning, rinse the work bowl, lid and blade immediately after use so food won't dry on them. - Chopping certain foods may scratch, cloud or discolour the work bowl.
- Do not use abrasive cleaners on the housing base. Simply wipe with a damp cloth and dry thoroughly.
- Apply any cleaning agent to the cloth, not the housing base.
- Always ensure the blades have been thoroughly cleaned after each use and have dried completely before storing.
7. RECIPIES
Here are a few recipe ideas to help you get started with your Mini Prep Pro. For more recipe ideas and inspiration, visit www.cuisinart.eu
CLASSIC MAYONNAISE
Serves 4
2 egg yolks
1 tbsp Dijon mustard
100ml groundnut oil
25ml extra virgin olive oil
1 tbsp white wine vinegar
Juice of 12 a lemon
Salt & pepper
-
Place the egg yolks and Dijon mustard into the processor bowl, season well with salt and pepper and process continuously using the 'Chop' function until well combined.
-
Mix the oils together in a separate container for pouring. Using the 'Chop' function, slowly pulse whilst gradually adding the mixed oils a little at a time through one hole of the lid. Be careful not to add the oil too quickly as this will cause the egg yolks to curdle. Process slowly, adding the oil until the mayonnaise thickens.
-
Once thickened pour the white wine vinegar and lemon juice through the hole of the lid, pulsing to combine.
Variations: Try adding crushed garlic for Aioli, finely chopped herbs or anchovy essence.
HUMMUS
Serves 4
75g chickpeas
5g flat leaf parsley
1 / 2 tsp lemon zest
1 garlic clove, peeled
Juice of 1 lemon
1 / 2 tsp ground cumin
1 tbsp olive oil
- Place the chickpeas, parsley, lemon zest, garlic, lemon juice and the ground cumin into the work bowl and process using the 'Grind' switch until combined.
- Once combined, process the mixture using the 'Chop' switch, whilst adding the olive oil through the opening in the lid until well mixed and thickened.
Serving Suggestion: Serve with pitta bread or as a dip for crudités.
MONKFISH SKEWERS WITH KACHUMBER SALAD
Serves 4
Skewers
750g Monkfish tail
50ml Olive oil
Juice of 1 lemon
1 chilli
1 garlic clove
Salt and pepper
8 bamboo skewers
Mango & Walnut Chutney
2 ripe mangoes, peeled & diced
100g walnuts
1 chilli
40ml cider vinegar
40g brown sugar
Juice of 1 lemon
2cm piece of ginger, finely grated
2 cloves of garlic
1 tbsp mustard seeds
1 tbsp coriander seeds
4 green cardamon pods, crushed
1 cinnamon stick
2 cloves
Pinch of salt
80ml water
Mint Raita
250ml greek yogurt
3 tbsp lemon oil
Zest of 2 lemons
Small handful of mint leaves
Kachumber
150g cucumber
1 small red onion
Small handful of mint leaves
Small handful of flat parsley leaves
Small handful of coriander leaves
3 medium tomatoes
80g pomegranate seeds
50ml olive oil
Juice of 1 lemon
Salt & pepper to taste
Mango & Walnut Chutney (This can be made in advance to improve the flavour)
- Toast the mustard seeds, coriander and crushed cardamom pods in a saucepan for a minute.
- Place the garlic and chilli in the processor and press 'Chop' until there are no large pieces remaining, scraping down the sides if necessary.
- Place all the ingredients (except for the walnuts) into the saucepan with the toasted spices and cook over a low heat for around 30 to 40 minutes until most of the liquid has evaporated.
- Allow to cool to room temperature.
- Place the walnuts in the processor and press 'Grind' until well ground.
- Mix the processed walnuts into the cooled chutney.
- Refrigerate until required.
Mint and lemon raita
- Place all the ingredients together in the processor.
- Press 'Grind' until all of the ingredients combine together to make a very smooth sauce.
- Reserve and refrigerate.
Kachumber
- Cut the cucumber length ways into quarters and remove the core with a teaspoon. Discard the pips and roughly chop the cucumber. Process using the 'Chop' function until there are no large pieces remaining. Transfer to a bowl.
- Peel the red onion and cut into quarters. Process using the 'Chop' until there are no large pieces
remaining. Transfer into the bowl with the cucumber.
- Place the herbs into the processor and press 'Chop' until there are no large pieces remaining. Transfer into the bowl with the cucumber and onions.
- Cut the tomatoes into quarters removing the core. Place into the processor and quickly blitz using the 'Chop' function. Mix in with the other chopped ingredients.
- Add the remaining ingredients to the salad and season to taste.
Skewers
- Cut the monkfish into 24 long strips.
- Place the remaining ingredients into the bowl of the processor. Secure the lid, then press 'Grind' until the marinade is completely combined.
- Pour the marinade over the monkfish strips, ensuring all the fish are well coated. Allow to marinate for 20 minutes.
- Skewer the marinated fish, using 3 monkfish strips per skewer.
- Using a very hot grill pan, grill for 4 min on each side.
- Serve warm.
CINNAMON AND PEAR COMPOTE
75g brown sugar
1 stick cinnamon, broken into 1.5cm pieces
25g butter
2 pears, peeled and cut into 1.5cm cubes
- Place the sugar and cinnamon into the work bowl. Process using the 'Grind' switch and a pulse action until broken, and then use a continuous action, until powdered. Remove the powder, sieve and keep to one side.
- Melt the butter in a saucepan, add the powdered cinnamon mix and pear then simmer for 10 minutes.
- Return to the work bowl and process until pureed.
Variations: Try replacing the pears with other fruits e.g. apples, peaches.
WEEE- ELEKTRO-UND ELEKTRONIK-ALTGERÄTE
ZEEDUVEL-SPIESEN MET KACHUMBER-SALADE
4 porties
Spiesen
D.IPEPABOTKA IPOIyKTOB
1.Co6epnte Bmecte yauyn Hoxc (cm. pa3den A).
2.ПолжиTe pOДуктБВЧашУдпЯпeeрб60ТКИ:ОнДолЖиБь 6ыТь paBHomepHо HapeЗaHыН He6oЛшe KycouKи. He nepenOLнЯte ChaшУдпЯпeeрб60ТКИ.
3.3a6nokpyte KpbiKhv.
4. Haxmnte Ha cootBeTCTbUOyIO KhONky - «Grind» IIN «Chop» - B 3aBcIMOCtN OT nepepa6aTbIbAembIX npOdyKToB, И удржИBaIte ee B HaxatOM nIoJxHIn B TeYeHne Heo6xoIIMoro BpemHn (noDpo6Hee cm. pa3dJe «MeToIbI nepepa60TkN»).
5.Дождnteб,когда HOж nepectaHTBpaaATbCЯ.OTKJIQUHte эл ektpo np6op ot cetn.СнIMTe Chayana KpbIshky C yaSh,3aTEM CHIMITE YAsh y cOCHOBAHy эл ektpo np6opa.
N.B. YctaHaBnBaTb Nm CHMaTb YaSy C OCHOBaHnCJeDyET ToJbKO Co ChrToK KpbIiKoI.
- Bby mojete nepelntb coycbl nlln hble xkndkoctn n3 yaain dny nepepa60tkn B npryu oMKoCTb, He cHmam Hoxa. Cnctema 6IoknpOBKn BladeLock naexKHO ydepXnBaet HOx Ha MeCTe yCTaHOBKn.
- UTo6bI n3BLeuH n3 yauH neKeHHKne nepepa6oTaHHbI pnoyKTb, cJeDyET ChaJana octopoxHo CHaTb HOJ, yepxNBaB erO 3a InactIKOBbl cTepeXeH. AkkypaTHo nOtaHInTe 3a HOJ, UTo6bI pa36IoKnpoBaT b erO n3BLeuH n3 yauH dJa nepepa6oTKn. C nomouhio uHaTeY Bbyrpy3nte n3 yauH nepepa6oTaHHbI npOdyKTb.
Иногда ИнгpeДиentы прллпаOTК CTENKAMЧAsNВ Рpoцесс IXеpepa6OTKN.В NOIO6HOM Clyuae ocTahOBnTe эЛeКТponpni6Op,ИΚΑΚ TOLbKO HOX ПЕСТаHETВраaTaBcγ,СHMNTe KpbIshky I BOCNoJIb3yIteCb IПaTeIeM,чTOБI COCKpeCTN INHgreDIneHTbI CO CTeHOK ChSiN K ee ue ζeHTpy (He DeJaIte 3TORO rOJIbIMn pykam!).
Bb moKTe TaKke NcNoJIb3OBAbpeBepCnBHy IdbIgAteIb, HaxIma IooUepeHOn Ha KhoNKn «Grind» n «Chop». 3To yIyUwI NT nepMeuWBaHne INHrpeJeHTo B OUnCTNT CTeHKn YauN.
N.B. He BkIouaIte 3JIeKTpOpiu6Op, ecn yaua I nepepa6Ot kn nycta.
MeToDbI nepepa6oTKn
B daHomm pa3dene coepkatac npakTnueckne coBeMb n peKOMeHdaun O TOM, KaK NCIOb3OBaTB Kxohnh KOM6aH Mini Prep Pro, yTo6bl nOlyuHTb pa3Ho06pa3HbIe pe3yIbTaTbI nepepa6OTKn. PekomeHnyem Chauana onp6oBaTb daHHbIe MeTobl, npeXde Yem BOCIOb3OBaTBcR NMI dnn nepepa6OTkn npodykTob.
Coyc paeta mraToH nIIMHOHOM
-ПомecтinteВашуВсЕИнгpeДиentblДЯ coуca paйta.
- YdepxnBaIte B HaxaTOM nOLOXeHn KHOKy «Chop» Do Tex nop, POKa BCE INHrpEiNeHTbIXopoIo He nepeMeIaIOTcI N He 6oPa3yIOT COyc 3naCTuHoi KOHCnCTeHcN.
-ПocTaBbTe COyC B XOJOIOINbHNK.
IHHnckn caaT n3 nomuDopOB
- Pa3peXbTe orypeu BdoIb Ha 4 chaTn I doCTaHbTe loKkoI cEmHa. KpyNHO hakpoIte orypeu.ДлЯ 3tOrO haxMnte KhoNkY «ИЗмelbYeHne» I yapedKbAitE ee B haxaTOM nIoJxehn Ido nolUyeHnra paBHomepHoi HapezKn 6e3 6oIbIux KycOB. IpeIooJIte nokpoeHHbI orypeuВdpyrJyEMKOCTb.
- Ouicntte Kpacny lykoBnuy n pa3pejbTe ee Ha 4 qactn. Haxmnte KhONky «Grind» uyepxmbaTe ee B hajatom pnoJxehnn Do noJyueHnnaPabHomepHo Hape3aHHoCmeCn 6e3 60JIbXnx KycKOB. DObaBbTe N3MeJbUeHbI Nyk B EMKocTb C orypcOm.
ПоложиTe B уашу ТраВы, нахшte Кногку «Grind» u yapжИвайе eь в НжаTom положени Do поунеця равноерно наразаанносмecи 6e3бolyшик КСКOB.Добабыт e n3MeЛьчEHьe TраВы B EMKOCTb C наразааньIM OryрцOM IлУКOM. - Pa3peXbTe nomIDopbHa 4 qactn u ydaJIte cemeHa. IonoJnte nomIDopb B aayu n KpaTkoBpeMeHNO haxmnte Ha KhoNky «Grind'. IpeMeaIte nokpoSeHHbIe nomIDopb C dpyTmM n3MeJIbYeHHbIMn INHpeDneHTamn.
-Добавыт В салт erо octaNBьи ИнгpeДиЕнТы и npипраВыт по BKус.
Pb16a Ha ammypax
- HapeKbTe HaJIIMa Ha 24ДИINHbIX JOMTNka
- ПложиTe в чув Се оctальные Ингroduиentы. 3a6лкшип Te Кршky, НжмITE Ha KhoIGNKу «Chop» и уdeckиBaite ee в Нжатом пложени Do tex nop, поka He почITE Маринад Odnoprodnoй консichteци.
- 3aeneTe MapuHaOM Hape3aHHyIO JOMTuKAMn pbI6y TaKIM O6pa3OM, UTo6bI OH NOnHOCTbIO NOKpbBaN BCE JOMTuKN. OctabTe IOd MapuHaOM B TeueHne 20 MNHT.
- HadeHbTe MapINHOBaHbIe JOMTnKn Ha ⅢaMnypbl, No 3 JOMTnKa Ha KaXdbI.
Xopoio paZorpeiTe cKOBOpOHy n PoJxapbTe Ha Hei HAneTyU Ho 7aMnypbl pbl6y n0 4 Mmhytbc KaJdoI CTOpOHbl.
-Подаваитгорчим.
TIPOPE IN3 TpyuC KOPUNCEI
75 r caxapa-cbipca
1 naolouka KopuizbI, noJomMaHHa Ha KycOuyKn B 1,5cm
25 r cIbOuHOro MaCJa
2 rpyu, ouiueHHbI e Hape3aHHbI Ha KycouKn B 1,5 CM
ENGLISH: CUISINART guarantees easier contact with its customer services in every country. For details of the customer services in your area, call:
cuisinart_international@conair.com
Facture - Ticket de caisse / Receipt - Sales ticket / Rechnung - Kassenschein
/ Factuur - Kasticket / Fattura - scontrino / Factura - Tique de caja /
Factura - talão de caixa / Faktura - Paragon / Квитанця - Kaccobby чек
Cuisinart offers you a 5-year warranty. We offer a standard exchange of the appliance (identical or equivalent) during this period. To benefit from the warranty, the original proof of purchase (sales ticket or receipt) must be attached to this warranty slip along with your full contact details. The warranty does not cover damage resulting from misuse, falls, dismantling, or repair by unauthorized persons. This guarantee in no way affects your rights under statutory law.
DEUTsCH: GARANTIE
- CONTENUTO
- READ THESE SAFETY INSTRUCTIONS CAREFULLY BEFORE USING THE APPLIANCE!
- WEEE - END-OF-LIFE ELECTRICAL AND ELECTRONIC EQUIPMENTS
- INTRODUCTION
- Congratulations on the purchase of your new Cuisinart Mini Prep Pro!
- 3.PRODUCT FEATURES (refer to cover)
- INSTRUCTIONS FOR USE
- SAFETY DURING USE
- FITTING & REMOVING THE PARTS
- THE DUAL BLADE (Fig.1) (refer to cover)
- CONTROL SWITCHES
- D.PROCESSING
- Processing Techniques
- For best results:
- Chopping fresh herbs
- Chopping meat, poultry, fish & shellfish
- Chopping nuts
- Producing a purée
- Grinding coffee beans and hard foods
- Adding liquid
- 5.TROUBLESHOOTING
- Motor does not start or blade does not rotate:
- Food is unevenly chopped:
- Food is chopped too fine or is watery:
- Food gets stuck on blade:
- CLEANING & MAINTENANCE
- RECIPIES
- CLASSIC MAYONNAISE
- HUMMUS
- MONKFISH SKEWERS WITH KACHUMBER SALAD
- Skewers
- Mango & Walnut Chutney
- Mint Raita
- Kachumber
- Mango & Walnut Chutney (This can be made in advance to improve the flavour)
- Mint and lemon raita
- CINNAMON AND PEAR COMPOTE
- WEEE- ELEKTRO-UND ELEKTRONIK-ALTGERÄTE
- ZEEDUVEL-SPIESEN MET KACHUMBER-SALADE
- Spiesen
- D.IPEPABOTKA IPOIyKTOB
- MeToDbI nepepa6oTKn
- Coyc paeta mraToH nIIMHOHOM
- IHHnckn caaT n3 nomuDopOB
- Pb16a Ha ammypax
- TIPOPE IN3 TpyuC KOPUNCEI
- DEUTsCH: GARANTIE
Brand : CUISINART
Model : ECH4SE
Category : Food processor