TS 6050 - Inkjet multifunction printer CANON - Free user manual and instructions
Find the device manual for free TS 6050 CANON in PDF.
| Product Type | Inkjet Multifunction Printer |
| Brand | Canon |
| Model | PIXMA TS 6050 |
| Dimensions (L x D x H) | 416 x 363 x 159 mm (excluding trays) |
| Weight | Approximately 6.7 kg |
| Power Supply | 100-240 V AC, 50/60 Hz |
| Main Functions | Printing, copying, scanning |
| Wireless Connection | Built-in Wi-Fi (802.11 b/g/n) |
| Wired Connection | USB 2.0 Hi-Speed |
| Supported Paper Formats | A4, A5, B5, Letter, Envelopes, Photo paper 10x15 cm |
| Paper Capacity (Input) | Cassette: 100 sheets (plain paper), Rear feed slot: 1 sheet (photo paper) |
| Ink Cartridges | PG-540 (black), CL-541 (color) or PG-540XL/CL-541XL (high capacity) |
| Maximum Print Resolution | 4800 x 1200 dpi |
| Print Speed (A4 document) | Approximately 11 ipm (black), 6 ipm (color) |
| Scanning | Flatbed scanning, optical resolution 1200 x 2400 dpi |
| Copy | Multiple copies up to 99, reduction/enlargement 25-400% |
| Touchscreen | Color LCD screen 4.3 cm (1.7 inch) |
| Maintenance and Cleaning | Print head cleaning via the printer menu, automatic alignment |
| Security | Configurable automatic shutdown, PIN code protection for settings |
| Spare Parts and Repairability | User-replaceable ink cartridges, print head integrated into cartridges |
| General Information | Compatibility: Windows, macOS, iOS, Android. Canon PRINT app |
Frequently Asked Questions - TS 6050 CANON
User questions about TS 6050 CANON
0 question about this device. Answer the ones you know or ask your own.
Ask a new question about this device
Download the instructions for your Inkjet multifunction printer in PDF format for free! Find your manual TS 6050 - CANON and take your electronic device back in hand. On this page are published all the documents necessary for the use of your device. TS 6050 by CANON.
USER MANUAL TS 6050 CANON
Installation of printeren side1
Connecting with Computer and Smartphone/Tablet............page5
For the procedure with icon, you can watch the video tutorials for installing the printer by accessing the following URL or scanning the QR codes.

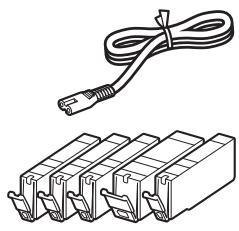
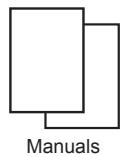
Checking Included Items

Removing Packing Materials/Turning on the Printer
You can watch the procedure on a movie by scanning the QR codes.

Android

iOS
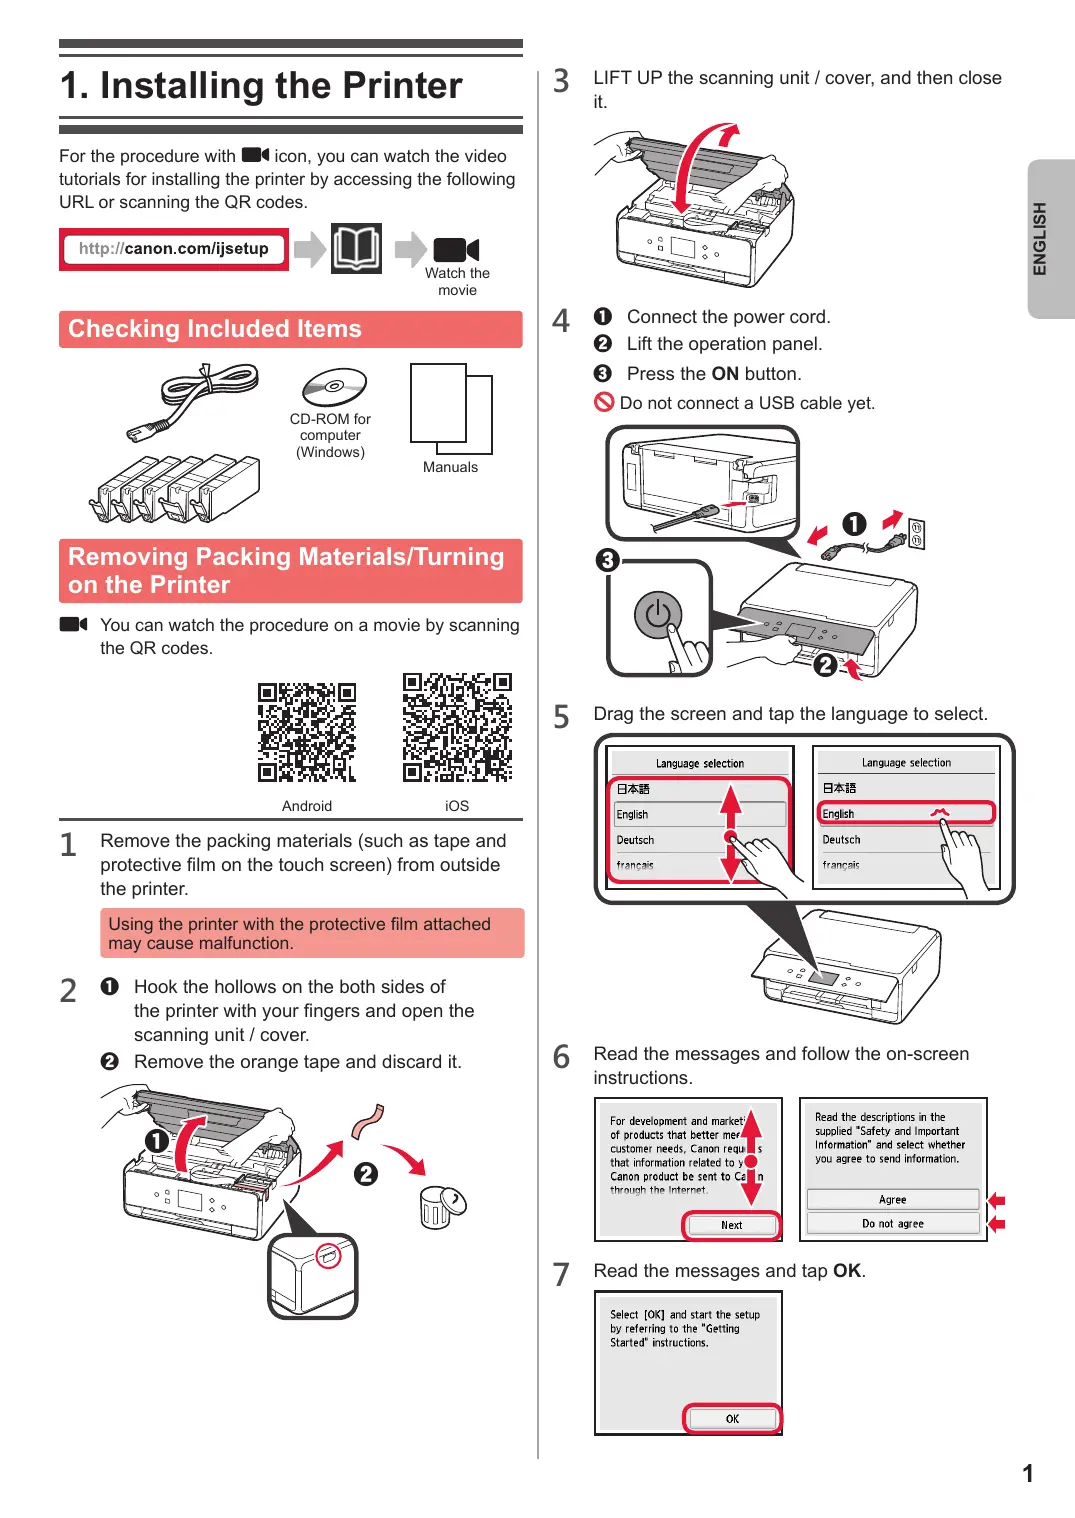
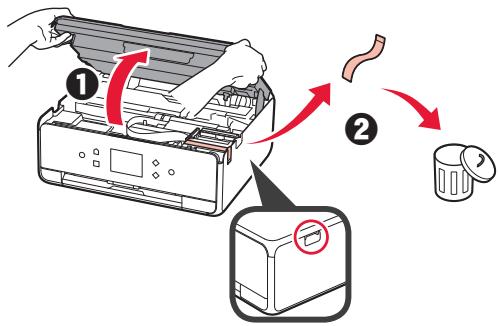
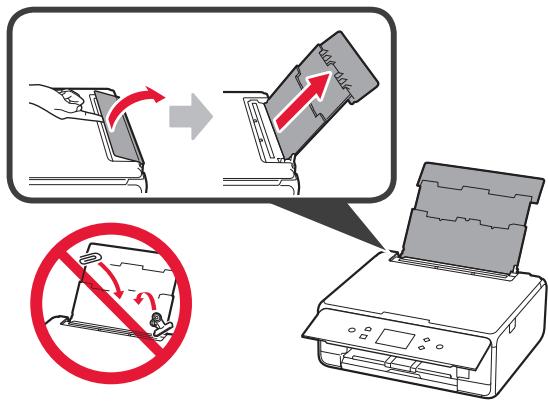
1 Remove the packing materials (such as tape and protective film on the touch screen) from outside the printer.
Using the printer with the protective film attached may cause malfunction.
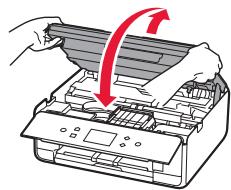
2 Hook the hollows on the both sides of the printer with your fingers and open the scanning unit / cover.
2 Remove the orange tape and discard it.
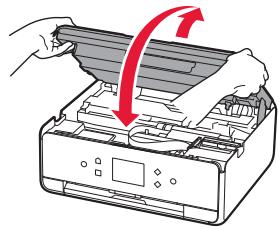
3 LIFT UP the scanning unit / cover, and then close it.
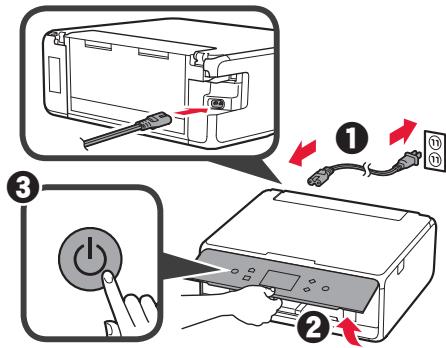
4 ① Connect the power cord.
Lift the operation panel.
3 Press the ON button.
Do not connect a USB cable yet.
5 Drag the screen and tap the language to select.

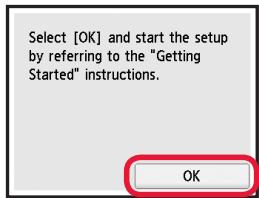
6 Read the messages and follow the on-screen instructions.
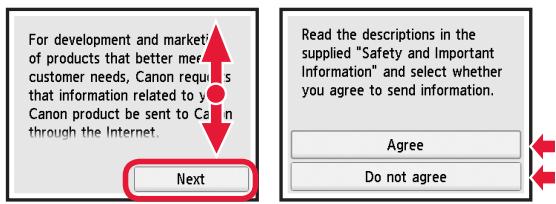
7 Read the messages and tap OK.
Installing the Ink Tank
You can watch the procedure on a movie by scanning the QR codes.

Android

iOS
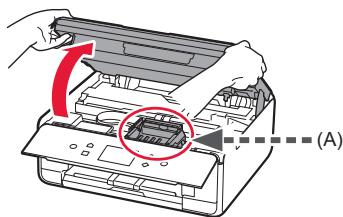
1 Open the scanning unit / cover.
Do not touch the print head holder (A) until it stops.
2 Remove the orange tape.
2 Remove the protective wrap.
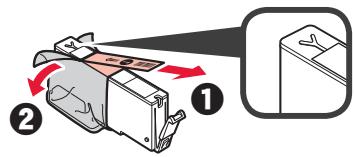
Remove the orange tape completely.
3 Hook the orange cap with your finger to remove it GENTLY.
(A) Do not push the both sides of the ink tank with the Y-shape air hole blocked.
(B) Do not touch.
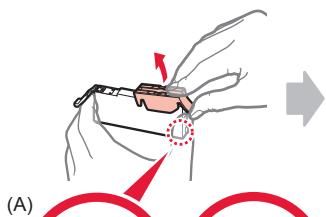
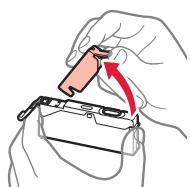
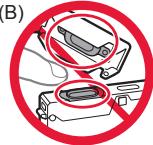
(B)
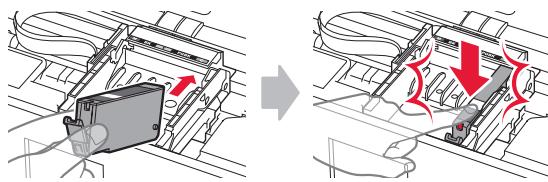
4 Insert the ink tank into the print head holder and push it down firmly until it snaps into place.
After the lamp lights up, install the next ink tank.
5 Check that all lamps are lit.
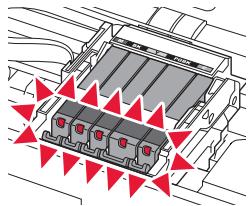
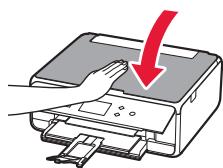
6 LIFT UP the scanning unit / cover, and then close it.
If an error message appears, make sure the ink tanks are installed correctly.
Loading Paper / Aligning the Print Head
You can watch the procedure on a movie by scanning the QR codes.

Android

iOS
To obtain better print result, print a pattern for print head alignment and scan it.
1 ① Pull out the cassette.
2 Remove the cassette cover.
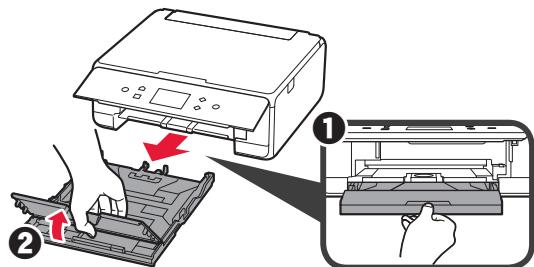
2 1 Pull out the cassette forward while pressing the lock on the cassette.
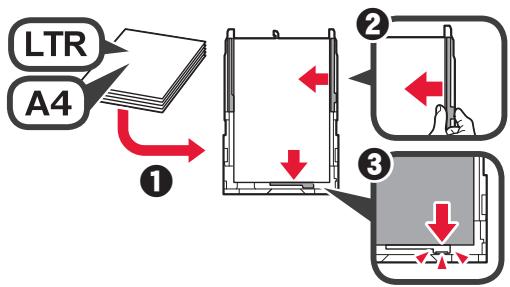
Open the paper guides, and then align the guide in front with the mark of LTR or A4.

3 1 Load several sheets of plain paper with the print side facing down.
Slide the right paper guide to align it with the side of the paper stack.
Align the paper stack with the paper guide in front.
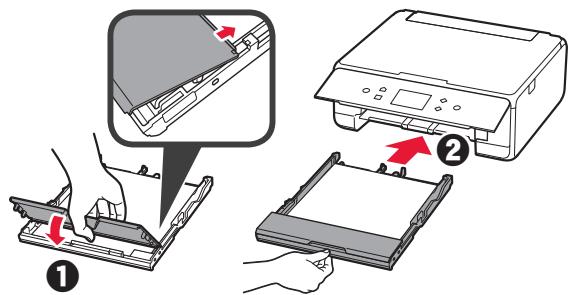
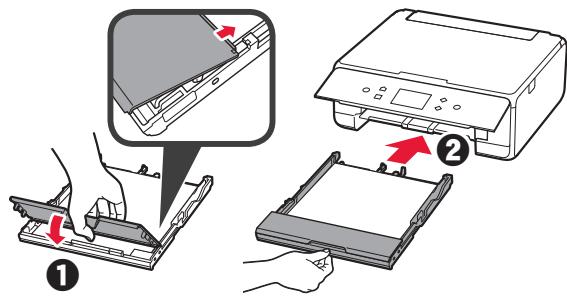
4 ① Attach the cassette cover.
Insert the cassette.
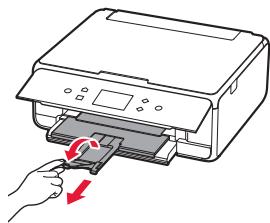
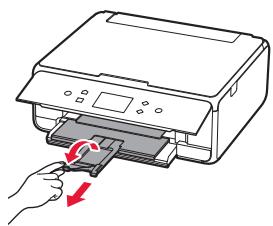
5 Pull out the paper output tray.
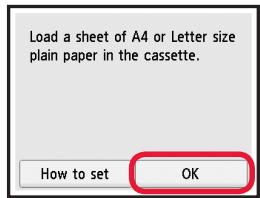
6 Read the messages and tap OK.
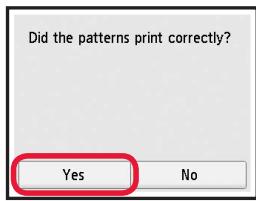
7 When the pattern for print head alignment is printed, tap Yes.
8 Follow the on-screen instructions to load the pattern on the platen glass.
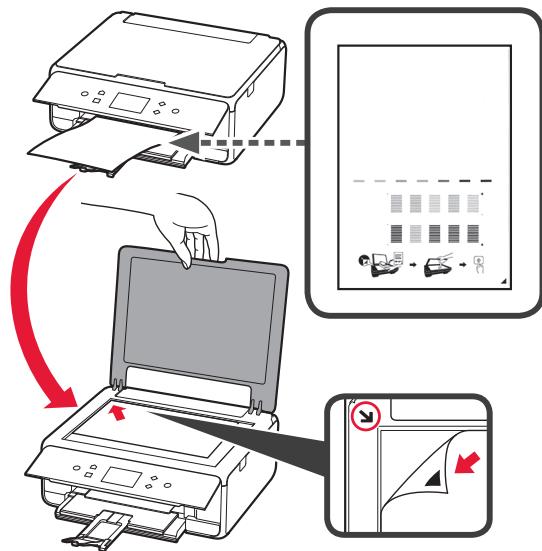
9 Close the document cover, and then follow the on-screen instructions to tap OK.
10 If the following screen appears, tap OK.
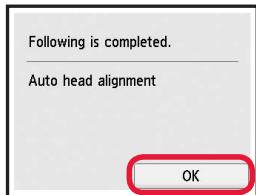
The print head alignment is now complete.
Selecting a Printer Connection Method
The connection method varies depending on how you use the printer. Select a printer connection method according to the table below. In the following description, smartphones and tablet devices are collectively described as smartphone.
| Using the printer with your computer or smartphone connected | Using the printer without connecting any other devices | |
| Wireless LAN connection | USB connection | Do not connect |
| Connecting the printer to your computer or smartphone via a wireless router | USB cable | |
| Connecting the printer to your computer or smartphone directly without a wireless router * | Tap Do not connect on the connection method selecting screen. The setup is now complete. | |
- You may not connect your smartphone to the Internet wirelessly during connecting the printer to the smartphone directly. In that case, you may be charged depending on the contract with your service provider.
- Up to 5 devices can be connected to the printer via wireless LAN connection directly.
1 Tap your printer connection method.
| Select the connection method. |
| Wireless LAN connection |
| USB connection |
| Do not connect |
Follow the on-screen instructions to proceed with the setup.
Users who select USB connection:
Do not connect a USB cable until you are instructed.
2 If the following screen appears, proceed to the next page.
If you select Wireless LAN connection:

If you select USB connection:
2. Connecting with Computer and Smartphone/Tablet
If you connect the printer to both your computer and your smartphone, connect it to the computer first.
To connect the printer only to your smartphone, proceed to "Connecting with Smartphone" on page 6.
Connecting with Computer
You need connection setup for each computer. Proceed with the setup from step 1 for each computer.
The followings describe the procedures for Windows and Mac OS.
If you use a computer except for Windows or Mac OS such as Chrome OS, access "http://canon.com/ijsetup", and then follow the instructions on the Canon website to set up your computer.
1 Select one of the following steps A or B to start up the setup file.
A MacOS Windows
Accessing the Canon website
Visit the Canon website below and click Setup.

Follow the on-screen instructions to proceed with the setup.
2 If the following screen appears, click Download.
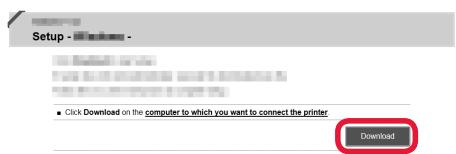
3 Start up the downloaded file.
B Windows
Using the Setup CD
Insert the setup CD into your computer.

When using Windows 10, Windows 8.1 or Windows 8:
2 Click or File Explorer on the taskbar.
3 Select This PC or Computer on the left side of the opened window.
4 Double-click the CD-ROM icon on the right side of the window.
- If the contents of the CD-ROM appear, double-click MSETUP4.EXE.
2 Click Start Setup.
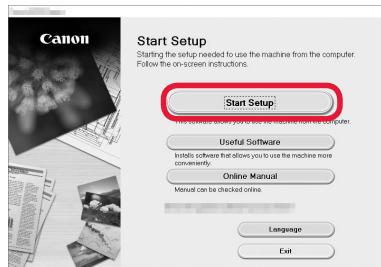
Follow the on-screen instructions to proceed with the setup.
You can set up your smartphone in the middle of the steps.
On the following screen, click Instructions to proceed with setup of your smartphone.
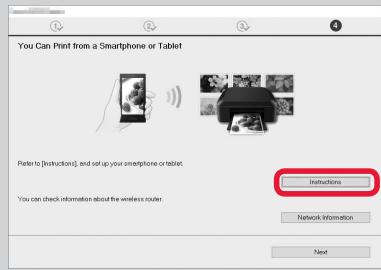
- Depending on your settings, the screen above may not appear. In that case, proceed to "Connecting with Smartphone" on page 6 after finishing the connection to your computer.
3 If the following screen appears, click Exit.

The connection with your computer is now complete. You can print from your computer.
Connecting with Smartphone
You need connection setup for each smartphone. Proceed with the setup from step 1 for each smartphone.
Preparation
- Turn on Wi-Fi on your smartphone.
- If you have a wireless router, connect your smartphone to the wireless router.
- For operations, refer to manuals of your smartphone and the wireless router or contact those manufacturers.
1 Install the application software Canon PRINT Inkjet/SELPHY in your smartphone.

iOS
: Search "Canon PRINT" in App Store.
Android
: Search "Canon PRINT" in Google Play.
Or access the Canon website by scanning the QR code.

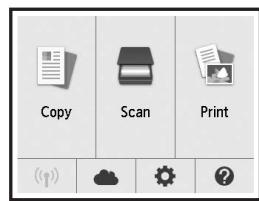
2 Check the display on the printer.
The screen turns off when no operation is made for 10 minutes. Press one of the buttons on the operation panel (except for the ON button) to display the screen.
If the following screen appears:
Check the icon on the lower left, and then proceed to A or B.
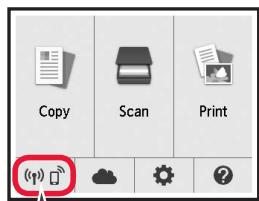
The following icon appears.
(The printer is connected to a network.)

Yes
If the following screen appears:
Proceed to B
The printer is performing initial adjustments...
Do not turn off power.
You can continue with the setup procedure on the computer or smartphone, etc.
See "Getting Started".
No (Proceed to B.)
If () appears, the printer can not communicate by wireless LAN connection. For details, access "http://canon.com/ijsetup" to see Frequently Asked Questions.

iOS
Android
1 Tap the installed application software.
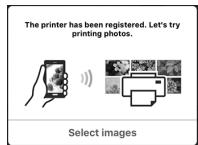
Follow the on-screen instructions to register the printer.
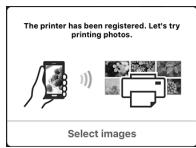
3 Make sure that the following screen appears.
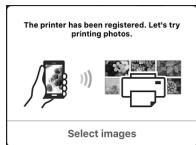
The connection with your smartphone is now complete. You can print from your smartphone.
To print photos, load photo paper. Proceed to "Loading Photo Paper" on page 8.

Procedures below vary depending on iOS or Android. Select your operating system and proceed to its procedure.
iOS
Tap Settings on the HOME screen, and then tap Canon_ij_XXXX on the Wi-Fi settings.


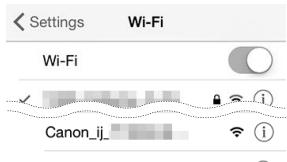
If Canon_ij_XXXX does not appear on the list, see "Preparation of the Printer" below to operate the printer, and then repeat step ①.
Tap the installed application software.
Follow the on-screen instructions to register the printer.
Follow the on-screen instructions to proceed with the setup.
If you select Auto Select Conn. Method (recommended) on the connection method selecting screen, the appropriate connection method is selected automatically depending on your environment.
4 Make sure that the following screen appears.
Android
1 Tap the installed application software.
2 Follow the on-screen instructions to register the printer.
If a message saying "Printer is not registered. Perform printer setup?" does not appear, see "Preparation of the Printer" below to operate the printer, and then wait for a while until a message appears.
Follow the on-screen instructions to proceed with the setup.
The appropriate connection method is selected depending on your environment.
3 Make sure that the following screen appears.
The connection with your smartphone is now complete. You can print from your smartphone.
To print photos, load photo paper. Proceed to "Loading Photo Paper" on page 8.
Preparation of the Printer
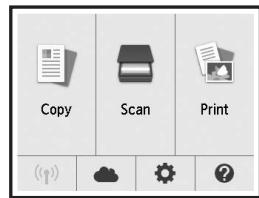
Press the HOME button on the printer.
2 Tap the icon on the lower left of the HOME screen.
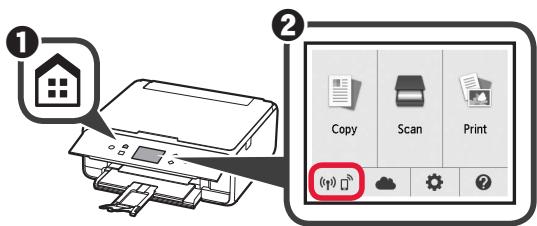
3 Tap Yes or No.
Tap LAN settings > Wireless LAN > Wireless LAN setup > Easy wireless connect.
5 Tap Yes.
Return to the operation of your smartphone.
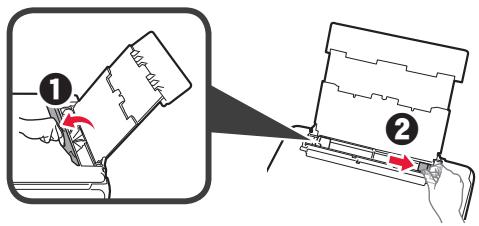
Loading Photo Paper
Load photo paper in the rear tray.
1 Open the rear tray cover and pull out the paper support.
2 1 Open the feed slot cover.
Slide the right paper guide to the end.
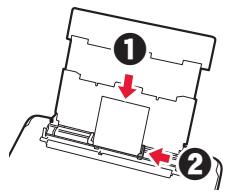
3 1 Load several sheets of photo paper with the print side facing up.
Slide the right paper guide to align it with the side of the paper stack.
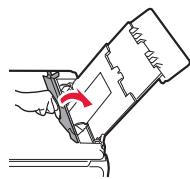
4 Close the feed slot cover.
Read the message on the printer's screen and register the information of the loaded paper.
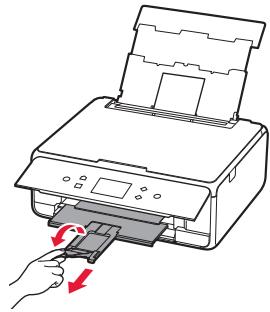
5 Pull out the paper output tray.
Copying Photos
You can scan the printed photo and print it. You can also scan several photos and print them at once.
1 Make sure the printer is turned on.
2 Load several sheets of photo paper.
3 Tap Copy on the HOME screen.
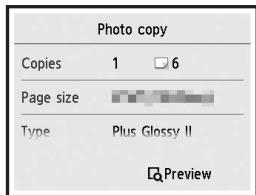
4 Drag the screen and tap Photo copy.
5 Read the messages and tap OK.
6 Follow the on-screen instructions to load the printed photo on the platen glass, and then tap OK.
When the scanning is complete, the print settings confirmation screen appears.
7 Specify the print settings as necessary.
8 Press the Color button for color copying.
Press the Black button for monochrome copying.
The printer starts printing.
1. Installation de l'imprimante
The printer is performing initial
adjustments...
Do not turn off power.
You can continue with the setup
procedure on the computer or
smartphone, etc.
See "Getting Started".
iOS : Zoek "Canon PRINT" in App Store. Android : Zoek "Canon PRINT" in Google Play.
The printer is performing initial
adjustments...
Do not turn off power.
You can continue with the setup
procedure on the computer or
smartphone, etc.
See "Getting Started".
The printer is performing initial adjustments...
Do not turn off power.
You can continue with the setup procedure on the computer or smartphone, etc.
See "Getting Started".
The printer is performing initial adjustments...
Do not turn off power.
You can continue with the setup procedure on the computer or smartphone, etc.
See "Getting Started".
The printer is performing initial adjustments...
Do not turn off power.
You can continue with the setup procedure on the computer or smartphone, etc.
See "Getting Started".
No (Continu a B.)
Av EπiAεEεT Euvδεση USB (USB connection):
The printer is performing initial adjustments...
Do not turn off power.
You can continue with the setup procedure on the computer or smartphone, etc.
See "Getting Started".
Ox1 (Ppoxwnpnte oTo B.)
Av eipavioTe to EIKovio (1), o EKTUTIWtns 6v mTOpE i va ETIKOVWvnoe Ie aoupuat Ouvdoen LAN.ia AETTIOpeIEc, atIOKNTOTE TPOObaon OTO http://canon. com/ijsetup ia va deiTE TIG UxVcE EPWTnOEIC.
A iOS Android
1 PntnoTe To EkyKatoeTnIevo loyioikó eapuoynsos.

AkalouohtneTcOdbnyic Otnv oboynia va kataxwnpnoTe TOV EKTUTWTn.
| Select the connection method. |
| Wireless LAN connection |
| USB connection |
| Do not connect |
The printer is performing initial adjustments...
Do not turn off power.
You can continue with the setup procedure on the computer or smartphone, etc.
See "Getting Started".
Nej (Fortsatt till B.)
2 Sett inn kassetten.
5 Trekk ut papirutmatingsbrettet.
| Select the connection method. |
| Wireless LAN connection |
| USB connection |
| Do not connect |
The printer is performing initial adjustments...
Do not turn off power.
You can continue with the setup procedure on the computer or smartphone, etc.
See "Getting Started".
1. Installation of printeren
The printer is performing initial
adjustments...
Do not turn off power.
You can continue with the setup
procedure on the computer or
smartphone, etc.
See "Getting Started".
Nej (FortsaettilB.)
The printer is performing initial adjustments...
Do not turn off power.
You can continue with the setup procedure on the computer or smartphone, etc.
See "Getting Started".
Frequently Asked Questions