
ESSENTIAL GRAINS YY4540FD - Kitchen appliance KRUPS - Free user manual and instructions
Find the device manual for free ESSENTIAL GRAINS YY4540FD KRUPS in PDF.
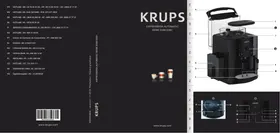


| Product type | Automatic espresso coffee machine with grinder |
| Brand | KRUPS |
| Model | ESSENTIAL GRAINS YY4540FD |
| Dimensions (L x W x H) | Approximately 25 x 35 x 40 cm |
| Weight | Approximately 8 kg |
| Power supply | 220-240 V ~ 50/60 Hz, 1450 W |
| Pressure | 15 bars |
| Water tank capacity | 1.6 L (approx) |
| Bean hopper capacity | 200 g (approx) |
| Used coffee collector | Capacity of 9 coffees |
| Main functions | Ristretto, espresso, lungo, steam for cappuccino, 2-cup function, strong coffee |
| Grinder | Metal burr, grind adjustment |
| Settings | Coffee volume (20-220 ml), temperature (3 levels), water hardness (5 levels), auto-off (1-4 h) |
| Heating system | Compact Thermoblock System |
| Maintenance | Automatic programs: cleaning, descaling, long rinse, circuit rinse |
| Safety | Auto-off, water tank detection, used coffee collector lock |
| Included accessories | Steam wand, drip tray, cleaning needle |
| Optional accessories | Auto-cappuccino set XS 6000, Claris filter cartridge |
| Repairability | Specific KRUPS cleaning tablets and descaling agent, spare parts available from after-sales service |
Frequently Asked Questions - ESSENTIAL GRAINS YY4540FD KRUPS
User questions about ESSENTIAL GRAINS YY4540FD KRUPS
0 question about this device. Answer the ones you know or ask your own.
Ask a new question about this device
Download the instructions for your Kitchen appliance in PDF format for free! Find your manual ESSENTIAL GRAINS YY4540FD - KRUPS and take your electronic device back in hand. On this page are published all the documents necessary for the use of your device. ESSENTIAL GRAINS YY4540FD by KRUPS.
USER MANUAL ESSENTIAL GRAINS YY4540FD KRUPS
FR HOTLINE: BE: 3270233159 - FR: 0974501061 - CH: 0800377737 EN HOTLINE: UK: 0345 3306460 - ROI: (01)6774003 DE HOTLINE: DE: 0800980000 - AT: 0800225225 - CH: 0800377737 NL HOTLINE: NL: 0318582424 IT SERVIZIO CONSUMATORI: IT: 199 207701 - CH: 0800 37 77 37 ES HOTLINE: ES: 902312300 PT Centro de Contacto do Consumidor: PT: 808 284 735 EL ΕΛΛΑΔΑ: GR: 2106371251 RU TOPYAA JINHNA: RU: 4952133228 UK TAPRAJIHIJ: UK: 0443001304 PL INFOLINIA: PL: 0801300420 CZ HOTLINE: CZ: 731 010 111 SK ZAKAZNICKA LINKA: SK: 233595224 HU Ügyfélszolgálat: HU: (1)8018434
www.krups.com
J Grille repose-tasses

CAUTION: Please read the safety instructions before using your appliance
| Lights | Meaning | ||||
| Cleaning accessories | Fill tank | Clean | Calc | On / Off | |
| ● | The appliance is ready to be used. | ||||
| * | Slow flashing: a task is in progress | ||||
| ** | Double flash: a 2 coffee cycle is in process. | ||||
| * | ** | Empty the coffee grounds collector (a 2 coffee cycle is underway). | |||
| * | ● | Empty the coffee grounds collector+ empty the drip tray. | |||
| ● | ● | Check coffee grounds collector is not missing or incorrectly positioned. | |||
| ● | Fill tank with water. Check water tank is not missing or incorrectly positioned. | ||||
| * | * | Coffee cycle has stopped due to lack of water. Fill tank with water. | |||
| * | ** | Double coffee cycle has stopped due to lack of water. Fill tank with water. | |||
| * | ● | Cleaning program requested. | |||
| ● | * | Cleaning program: cycle in progress. | |||
| * | ● | * | Cleaning program: empty the coffee grounds collector. | ||
| * | ● | Descaling program requested. | |||
| ● | * | Descaling program: cycle in progress. | |||
| * | ● | * | Descaling program, rinsing cycles: in progress. Request to empty and to fill water tank. | ||
| * | * | * | ● | Empty the coffee grounds collector before the long rinse cycle. | |
| * | * | ● | Long rinse request. | ||
| ● | ● | * | Long rinse in progress. | ||
| * | * | * | * | Constant flashing: operating fault. | |
| *→ | *→ | *→ | *→ | Alternate flashing: Switching off of the appliance under progress. | |

Light on

Light flashing

Light double flashing
Sound signals:
One beep when pressing ON/OFF: turning on the power on the activated appliance. One beep every ten seconds: the appliance is awaiting instructions from the user. One double beep: the appliance has registered your request and will stop as soon as possible.
Dear Customer,
Thank you for having purchased this Krups Espresseria Automatic. We are sure you will enjoy both the quality of the coffee it makes and how easy it is to use.
Whether you want a short, strong shot of a ristretto, a good espresso, a larger and milder lungo, or a creamy cappucino, your automatic coffee / espresso machine has been designed so you can enjoy the same quality at home as at the bistro, whatever the time of day and right through the week.
Thanks to its Thermoblock System, its 15 bar pump and because it uses real coffee beans that are ground just before the coffee is made, your Espresseria Automatic will give you a drink containing maximum aroma, with a fine creamy golden brown top produced by the natural oils contained in coffee beans.
To obtain an espresso at just the right temperature and a nice compact creamy top, we advise you to pre-heat your cup. After a few trial runs you will find the type of mix and roast of the coffee beans that suits your taste. The quality of the water used is obviously another essential factor in the coffee you get.
Make sure the water is fresh from the tap (contact with the air tends to make it stale), that it is free from chlorine odours and relatively cold.
Espresso coffee is richer in aroma than a conventional filter coffee. Despite its stronger, longer-lasting taste, espresso in fact contains less caffeine than filter coffee.
DESCRIPTION
A Water tank handle/lid B Water tank C Coffee grounds collector D Coffee outlets with height adjusting handle E Removable drip grid and tray F Coffee bean container lid

Control panel
K Steam button L "On/Off" key and light M Coffee volume rotating button N "empty the coffee grounds" and "empty the drip tray" warning light O "Fill water tank" light P Strong coffee key Q Standard coffee key R "Scale removal" light S "Clean" light T "Rinsing/servicing" key U Steam nozzle V Water level floats
SYMBOL INFORMATION

Danger:
Warning against the risk of serious or fatal injuries.
The lightning bolt symbol warns against electrical dangers.

A. Attention:
Warning against the risks of incorrect operation, damage or destruction of the appliance.

Important:
General or important note on the operation of the appliance.
Warning signals
Empty the coffee grounds collector and the drip tray, and wipe clean the area where the coffee drawer sits; the light will remain on if the coffee grounds collector is not properly inserted or if it has been put back in place 4 seconds earlier.

Fill water tank

Coffee bean grinding fineness setting
CLEAN Proceed with cleaning

andard

Strong coffee
CALC Proceed with scale removal
Steam button
CLEAN + CALC Carry out a long rinse
Rinsing/servicing
BEVERAGE PREPARATION
| TYPES OF COFFEE | Number of cups possible | Possible volume settings (ml) | Possible strength settings |
| RISTRETTO | 1 | 20 to 30 ml | ☐ or ☐ |
| 2 x 1 | 2 x 20 to 30 ml in two cycles | ||
| ESPRESSO | 1 | 30 to 70 ml | ☐ or ☐ |
| 2 x 1 | 2 x 30 to 70 ml in two cycles | ||
| COFFEE or LUNGO | 1 | 80 to 220 ml | ☐ or ☐ |
| 2 x 1 | 2 x 80 to 220 ml in two cycles |
BEFORE FIRST USE
Preparing the appliance
Pull out and fill the water tank - Fig. 1 and 2.
Put it back in place by pressing firmly and close the lid again - Fig. 3.
Open the coffee bean container lid. Add the coffee beans - Fig. 4.
Close the coffee bean container lid again.
Do not fill the water tank with hot water, milk or any other liquid. If you turn on the appliance when the water tank is not in place or not correctly filled (under the "min." level), the light will come on and making an espresso or a cup of coffee will be made impossible.

NEVER PUT GROUND COFFEE IN THE COFFEE CONTAINER.
It is recommended that you do not use oily, caramelised or flavoured coffee beans for this appliance. These kinds of beans may damage the appliance.
Check that the coffee beans do not contain any foreign particles such as grit, as any damage caused by the presence of foreign particles will invalidate the guarantee.
Do not put water into the coffee bean container.
Remember to fit the drip tray to avoid waste water flowing onto the work surface and staining it or scalding you.
Check that your water tank is clean.
Initialisation cycle - total duration: around 3 minutes
Turn on the appliance by pressing the button (Fig. 5). The light is constant.
Put a container with a minimum capacity of 0.6 litres underneath the two coffee outlets and steam nozzle.
Press the button (Fig. 6): the appliance starts the initialisation cycle for rinsing of the steam and coffee circuits. The light flashes.
The cycle is finished when the light becomes constant. The appliance is now ready to use.

It is preferable to rinse the 2 circuits out at least once after the appliance has not been used for several days. Each time you plug your appliance in, it will carry out an initialisation cycle.
Preparing the grinder
You can choose the strength of your coffee by setting the coffee bean grinding fineness. The finer the grinding setting, the stronger and creamier the coffee should be. Set the desired fineness for grinding by turning the 'Grinding fineness setting' knob. Turn to the left for finer grind. Turn to the right for coarser grind.

CHANGE THE SETTING DURING GRINDING.
Never force the grinding fineness setting button.
PREPARING ESPRESSO AND LONG COFFEES

YOUR APPLIANCE IS DESIGNED TO MAKE COFFEE FROM COFFEE BEANS ONLY.
When you first make coffee with the appliance or after a long period of absence or a cleaning or scale removal procedure, a little steam and hot water will come out of the steam nozzle (priming).
Splashing or scalding may occur if the coffee outlets are set too high in relation to the size of the cups.
Note:
The amount of water needed to make an espresso is between 30 and 70 ml.
The amount of water needed to make a coffee is between 80 and 220 ml.
Production of an espresso or coffee
Plug in your appliance.
Press the button ①. The light will flash during the pre-heating and initialisation cycle.
The light ① becomes constant.
Put a cup under the coffee outlets. You can lower or raise the coffee outlets to suit the size of your cups - Fig. 7.
Select the key to get a strong espresso or the key to get a standard espresso - Fig. 8.
You can change the volume of water at any time - Fig. 9
To stop coffee flowing into the cup, you can either again press one of the or , keys or turn the knob to the min. position.

The ground coffee is moistened with a little hot water after the grinding stage. A few moments later, percolation as such starts. Beyond a certain amount of coffee in the cup, we recommend - in order to obtain a stronger coffee - to divide your preparation into two separate cycles. Example 2 x 70 ml cycles for a cup of 140 ml.
2 cup function
You can prepare 2 cups of coffee or espresso with your appliance.
Press the button the light flashes during the pre-heating of the appliance
The light becomes constant.
Place 2 cups under the coffee outlets. You can lower or raise the coffee outlets to suit the size of your cup - Fig. 10.
Select the button or according to your choice, by quickly pressing the button twice. The light comes on with a double flash to inform you that you have requested two cups of coffee.

The appliance will automatically sequence 2 complete coffee-making cycles.
Make sure that you don't remove the cups after the first cycle.
If you press the button once and the button a second time (or the other way round), the second one isn't taken into account.
PREPARING STEAM
Steam froths up the milk to make a cappuccino or a caffè latte, for example, and also heats up liquids. As you need a higher temperature to produce steam than to make an espresso, the appliance runs an additional pre-heating phase for steam.
Plug in your appliance.
Press the ⊕ button: the light flashes during the pre-heating of the appliance.
The light ① becomes constant.
Press the button ② - Fig. 11.
The light ① flashes during the pre-heating.
Once the pre-heating is finished, the light ① stays constant and you can start the steam production by pressing the ② button again.
Press the button again to stop the cycle.

The appliance goes back to its initial position if the steam control is not used after 2 mins.

BE CAREFUL, BECAUSE THE CYCLE DOES NOT STOP IMMEDIATELY.
Frothing milk
We recommend that you use pasteurised or UHT milk that has been recently opened. Untreated milk does not give the best results.
Pour the milk into your milk jug. Immerse the nozzle in the milk - Fig. 12.
Initiate the steam function as explained in the paragraph above.
Once your milk is frothy enough - Fig. 13 - again press the button to stop the cycle.
To remove any milk traces from the steam nozzle, place a container under the nozzle and restart a preparation with steam (around 10 seconds).
The steam nozzle can be removed for more intense cleaning. Wash it out with water and a little washing up liquid and a small non-abrasive brush. Rinse and dry it - Fig. 14. Before putting it back, ensure that the air inlet holes are not blocked by any milk residues. If necessary, unblock them using the needle supplied - Fig. 15.

Do not wash the steam nozzle in a dishwasher.
To interrupt the steam function, simply press any button.
If the nozzle is obstructed, unblock it with the needle provided.
Steam can be produced for a maximum of 2 minutes per cycle.

After the steam function has been used, the nozzle can be hot, and we recommend that you wait for a few moments before handling it.
Auto-cappuccino XS 6000 Set (sold separately)
This auto-cappuccino accessory enables you to make cappuccinos or lattes - Fig. 16. Connect the different parts to each other. Ensure that you do not pierce the pipe by keeping the button in the correct place.
After removing the lid, fill the jug with milk - Fig. 17 and place a cup or glass under the auto-cappuccino nozzle - Fig. 18. Select the cappuccino or latte position on the special nozzle - Fig. 19.
Start the steam, as indicated in the chapter 'Making drinks with steam'.
Once you have made the milk froth, place your cup under the coffee outlets and start a coffee cycle - Fig. 20.
To prevent the milk from drying on the auto-cappuccino accessory, ensure that you clean it thoroughly. You are advised to wash it immediately by running a steam cycle with the accessory jug filled with water in order to clean the inside of the nozzle. You can use the KRUPS liquid cleaner for this, available separately.
MAINTAINING YOUR APPLIANCE
Emptying the coffee grounds collector and the drip tray.
If the light flashes,
Remove, empty and clean the coffee ground collector - Fig. 21.
Replace the coffee grounds collector - Fig. 22.
Remove, empty and clean the drip tray - Fig. 23.
The drip tray is equipped with floats to indicate when it needs to be emptied.
Put all parts back in place.
As soon as you remove the coffee grounds collector, you will have to empty it completely to avoid any overflow.

The light will remain on if the coffee drawer (1) area is not cleaned thoroughly and if the used grounds collector is not pushed firmly into place or is incorrectly installed.
You cannot make espresso or coffee while the light is on or is flashing. The coffee grounds collector has a capacity of 9 coffees.
Rinsing of circuits
These 2 functions are available anytime, except if the appliance requests a 'CLEAN' and/or 'CALC' cycle.
Rinsing out the coffee circuit:
Place a container under the coffee nozzles. Press the button - Fig. 6 quickly to start a coffee circuit rinsing cycle, which will automatically stop after around 40 ml.
Rinsing out the steam circuit:
Place a container under the steam nozzle and press the button for 3 seconds to start a steam circuit rinsing cycle, which will automatically stop after around 300 ml.
Appliance cleaning program, 3 times a year (total duration: about 13 minutes)
For hygienic reasons and to preserve all best coffee flavor we recommend you to clean the coffee system when the machine asks you to, about 3 times a year.
To perform this cleaning you will need:
- 1 KRUPS cleaning tablet
- 1 container of minimum 600ml several flows will follow one another
When to carry out this program?
When it is necessary to run a cleaning program, the appliance alerts you by flashing the CLEAN indicator light. This program can only be accessed when the appliance requests it (approximately every 300 brews of coffee or espresso).
To comply with the warranty conditions, it is essential to perform the cleaning cycle when the appliance alerts you. Follow the order of operations carefully
Use only KRUPS cleaning tablets (available on our KRUPS.com store)
How to start the automatic cleaning program?
- Start the cleaning program by pressing the button A. The CLEAN indicator becomes solid and the B and D indicators flash.
- Remove, empty, clean and replace the coffee grounds collector Fig 21-22 The indicator light go off.
- Remove, empty, clean and replace the drip tray Fig 23.
- Fill and replace the water tank.
- Place the 600 ml container under the coffee nozzles Fig 24.
- Open the maintenance hatch Fig 25.
- Insert the KRUPS XS3000 cleaning tablet into the cleaning chute Fig 26.
- Press the button to start the cleaning cycle
- The cleaning phase (about 13 min) starts. Several water flows follow one another in several phases without any necessary intervention. They allow the device to be rinsed and the cleaning residue to be removed.
- The cleaning cycle is finished when the light ① stays on and the CLEAN light goes out, empty the drip tray.
Your device is ready to be used.
Important :
You do not have to run the cleaning program as soon as the appliance requests it, but you must do it reasonably soon after. If cleaning is postponed, the alert message will remain displayed as long as the operation has not been performed.
if you unplug your machine or if you turn it off during cleaning or in the event of electrical failure, the cleaning program will resume the current step at the time of the incident.
It will not be possible to postpone this operation: rinsing the water circuit is mandatory.
If there is not enough water in the water tank when you start the program, the light will come on to warn you. Add the appropriate amount of water to the container and cleaning will continue automatically.

If you unplug the appliance during cleaning, press the ① button, or there is an electrical power cut, the cleaning program will start again from the beginning. In this case, another cleaning tablet may be necessary. Make sure to carry out the full cleaning cycle to ensure good maintenance of your appliance. The cleaning cycle is intermittent: do not put your hands under the water outlets ‘E’ and ‘W’ while the cycle is in progress.
Only use KRUPS (XS3000) cleaning tablets. We cannot be held responsible for any damage that may result from the use of tablets from other brands.
You can obtain cleaning tablets from KRUPS Service Centres.
Scale removal program - total duration: about 20 minutes
The quantity of scale deposited depends on the hardness of the water used. The appliance will automatically warn you by the 'CALC' light coming on when you need to proceed with scale removal.
This program is only accessible when the appliance requests it.

To benefit from the guarantee conditions, it is essential to perform the appliance's scale removal cycle when informed to do so. Be sure to follow the procedure closely step by step. You can continue to use the appliance when the light is on, but you are advised to perform the program as soon as possible.
If your appliance is fitted with our Claris - Aqua Filter System F088 cartridge, please remove the cartridge during the descaling operation.
Only use KRUPS scale removal products. You can obtain scale removal products from KRUPS Service Centres.
We cannot be held responsible for any damage that may result from the use of tablets from other brands.

Make certain to protect your work surface during cleaning and scale removal cycles, especially if it is made of marble, stone or wood.
Start the descaling program by pressing the button. The 'CALC' light becomes constant and the indicator lights and φ flash.
Remove and clean the drip tray.
Place a container with a minimum capacity of 0.6 l under the coffee outlets as well as under the steam nozzle - Fig. 24.
Empty the tank and refill it with warm water up to the line 'CALC' - Fig. 33.
Dissolve a sachet of Krups (40g) F054 descaler in the tank - Fig. 33.
Replace the water tank. The indicator light switches off.
Press the button after carrying out all of these operations.
The first phase (approximately 8 min) begins.
The descending cycle will start automatically.
At the end of this phase, the sound signal beeps every 10 seconds and the indicator light 0 flashes.
Empty the used water container and put it back in place.
Empty and rinse the water tank - Fig. 34.
Refill the tank with water and put it back into place. The warning light 日 goes out.
Press the button again to start the second phase. The sound signal stops.
The second phase (about 6 min) begins.
The program continues. It rinses the appliance and removes any traces of the descaler.
At the end of this phase, the sound signal beeps every 10 seconds
Remove and empty your used water container and put it back in place.
Press the button again to start the final phase. The sound signal stops.
The final phase (approximately 6 min) begins.
The program continues. It removes the last particles of descaler.
When the descending cycle is finished, the indicator light 'CALC' goes out.
Refill your water tank.
Your appliance is ready for the next use.
If there is not enough water in the water tank, you will be warned by the light. Add the appropriate amount of water to the tank and scale removal will continue automatically.

If you unplug the appliance during cleaning, press the ① button, or there is an electrical power cut, the cleaning program will start again from the beginning. In this case, another cleaning tablet may be necessary. Make sure to carry out the full cleaning cycle to ensure good maintenance of your appliance.
The cleaning cycle is intermittent: do not put your hands under the water outlets 'E' and 'W' while the cycle is in progress.
Long rinsing program - total duration: about 2 minutes
When it is necessary to make a long rinsing program, the appliance warns you of this by flashing the 'CLEAN' and 'CALC' lights.
Remove, fill and replace the water tank.
Place a container with a minimum capacity of 0.6 I under the coffee outlets and the steam nozzle.
Start the long rinsing program by pressing the button. The lights 'CLEAN' and 'CALC' become constant and the indicator light starts flashing.
When the long rinse is finished, the lights 'CLEAN' and 'CALC' go out and the indicator light becomes constant.
Your appliance is ready for the next use.
The appliance can ask you to empty the coffee ground collector.
OTHER FUNCTIONS
To switch the appliance off
You can switch off your appliance at any time. As the appliance is switching off, a double beep is emitted and all of the red lights flash, one after the other. The appliance has registered your request and will stop as soon as possible.
Installation of the filter cartridge - total duration: around 2 min
To get the best taste from your coffee and extend your appliance's service life, we advise you to use only the Claris - Aqua Filter System cartridge sold as an accessory.
Fig. 30 : Mechanism to indicate the month the cartridge was fitted and when to replace it (after 2 months at most). Installing the cartridge in the appliance. On first use, screw the filter cartridge into the bottom of the water tank - Fig. 31. Place a 0.6 I container under the steam nozzle.
Press the button for more than 3 seconds (unless the appliance requires a 'CLEAN' and/or 'CALC' maintenance). The indicator light flashes.
When the installation of the filter cartridge is finished, the indicator light becomes constant.
Your appliance is ready for the next use.
The Claris cartridge needs to be replaced after about every 50 litres of water or every two months at least. If you are using the Claris - Aqua Filter System cartridge, set the water hardness to level 0.
Coffee temperature display
Appliances are pre-set in the factory to level 2.
Connect the appliance to the mains supply but do not switch it on.
Press the and p buttons together, - Fig. 27.
The LED flashes during the setting phase.
Twist the knob to 20ml to set the coffee temperature - Fig. 28.
Press the button to increase or touch the button to decrease the setting - Fig. 32.
Select the coffee temperature level: 1 LED lit = temperature 1, 2 LEDs lit = temperature 2, 3 LEDs lit = temperature 3, the hottest setting.
To exit settings mode, press
Water Hardness Setting
Appliances are pre-set in the factory to hardness level 4.
Before using the appliance for the first time or after a change to the water hardness, it is advisable to set the appliance to the correct water hardness. Contact your water supplier to find out the water hardness for your area.
| Degree of hardness | 0 Verv soft | 1 soft | 2 moderately hard | 3 hard | 4 extremely hard |
| °f | < 5,4° | >7,2° | >12,6° | >25,2° | >37,8° |
| °dH | < 3° | >4° | >7° | >14° | >21° |
| °e | < 3,75° | >5° | >8,75° | >17,5° | >26,25° |
Connect the appliance to the mains supply but do not switch it on.
Press the and buttons together, -Fig.27.
The LED flashes during the setting phase.
Twist the knob to 120ml to set the water hardness - Fig. 28.
Press the button to increase or touch the button to decrease the setting - Fig. 32.
Select the level of water hardness to be used: 0 LEDs lit = very soft, 1 LED lit = soft, 2 LEDs lit = average hardness, 3 LEDs lit = hard, 4 LEDs lit = very hard - Fig. 29.
To exit settings mode, press 心
Setting the electrical supply cut-off mechanism
Appliances are pre-set in the factory to 1 hour.
You can program your machine's automatic shut-off following a pre-programmed number of hours.
Connect the appliance to the mains supply but do not switch it on.
Press the A and E buttons together, - Fig. 27.
The LED flashes during the setting phase.
Twist the knob to 220 ml to set the automatic cut-off duration - Fig. 28.
Press the E button to increase or touch the button to decrease the setting - Fig. 32.
Select the desired hardness: 1 LED lit = 1 hour, 2 LEDs lit = 2 hours, 3 LEDs lit = 3 hours, 4 LEDs lit = 4 hours - Fig. 29. To exit settings mode, press the up-down button.
Information on cycle number
Connect the appliance to the mains supply but do not switch it on.
Press the and buttons together, - Fig. 27.
The LED flashes during the setting phase.
To go to "cycle number" mode, press and hold the button for 3 seconds; all of the red LEDs flash three times before displaying the information - Fig. 29.
Cycle number:
- Less than 3000: 1 LED lit.
- Greater than 3000: 2 LEDs lit.
- Greater than 6000: 3 LEDs lit.
To exit settings mode, press the O button.

At each of these steps you can exit settings mode by pressing the < > button if you have finished your settings. All of the lights are off. These settings will be saved even if there is an electrical failure. You can modify these settings at any time by repeating these steps.
TROUBLESHOOTING, CORRECTIVE ACTIONS
| PROBLEM MALFUNCTION | CORRECTIVE ACTION |
| Your appliance detects a fault. | Switch off and disconnect the appliance, remove the fil- ter cartridge, wait for a minute and restart the appliance. |
| The appliance does not turn on when the ① button is pressed. | Check your fuses and plug sockets. Check that the two power plugs are correctly pushed in the socket. |
| The coffee grinder makes a strange noise. | There is a foreign body in the grinder. Disconnect the apppliance before investigating. See if you can extract the foreign body using your vacuum cleaner. |
| The steam nozzle makes a noise. | Check that the steam nozzle is correctly attached to its corresponding end piece. |
| The steam nozzle on your appliance seems partially or completely clogged. | Ensure that the opening in the end piece is not ob- structed by milk residue or limescale. Unclog the holes with the needle supplied with your appliance. |
| The steam nozzle makes little or no milk froth. | For milk-based drinks, use very fresh, very cold pa- seurised or UHT milk. It is also advisable to use a cold container. If the results do not improve, try changing the brand of milk. |
| No steam comes out of the nozzle. | Empty the tank and temporarily remove the filter car- tridge. Fill the water tank with mineral water which is high in calcium (>100 mg/l) and run successive steam cycles. |
| The auto-cappuccino set makes little or no froth. The auto-cappuccino set does not take in milk. | Check that the accessory is correctly attached to the apppliance, remove it then replace it. Check that the flexible tube is not obstructed or pierced and that it is correctly attached to the accessory so as to make it airtight. Rinse and clean the accessory (refer to the “Auto-cappuccino accessory” chapter). |
| PROBLEM MALFUNCTION | CORRECTIVE ACTION |
| There is water underneath the appliance. | Before removing the water tank, wait for 15 seconds after the coffee has finished flowing so that the appli-ance finishes its cycle properly. Check that the drip tray is correctly positioned on the appliance; it should always be in place, even when the appliance is not in use. Check that the drip tray is not full. The drip tray should not be removed during a cycle. Clean the tank and its connection regularly to avoid the build up of scale, which can cause leaks. |
| After emptying the coffee grounds collector, the warning message is still displayed on the screen. | Remove the coffee grounds collector and ensure it is empty and clean. Wait at least 6 seconds before replac-ing, and ensure it is correctly installed. |
| The coffee dispenses too slowly. | Turn the coffee fineness dial to the right to make the grounds courser (this could also depend on the type of coffee used). Run one or several rinsing cycles. Change the Claris Aqua Filter System cartridge (see “Installing the filter”). |
| The water/steam is not dispensed normally from the steam nozzle. | At the beginning or end of making a drink, the steam nozzle may drip slightly. |
| The coffee fineness dial is difficult to turn. | Only change the grinder setting when it is running. |
| The espresso or coffee is not hot enough. | Change the coffee temperature setting. Warm the cup by rinsing it with hot water before making the drink. |
| The coffee is too lightly coloured or too weak. | Avoid using oily, caramelised or flavoured coffee. Check that the coffee bean container has coffee in it and that it is dispensing correctly. Decrease the drink volume, increase the drink strength. Turn the coffee fineness dial to the left to make the grounds finer. Make the drink in two cycles by using the 2 cups func-tion. |
| The appliance is not producing coffee. | A problem has been detected during preparation of the drink. The appliance has restarted automatically and is ready for a new cycle. |
| Why can I not start the descaling or cleaning program? Why does my appliance not request to be descaled or cleaned? | The appliance only requests to be cleaned once it has made several types of coffee. The appliance only requests a descaling cycle once it has made a certain number of drinks using steam. |
| A power failure occurs during a cycle. | The appliance is automatically restarted when power is switched back on. |
| Coffee flows behind the coffee nozzles. | Pour cold or room-temperature water into the tank. Re-duce the temperature level. |
| The appliance is working but no liquid comes out. | Check that the water tank is in the correct position and that the cord is not jammed between the appliance and the water tank. |
| Ground coffee is in the drip tray. | Yes, to stay clean the appliance clears ground coffee which has fallen out of the percolation tank. |
Here are some recipes you can make using your Espresseria Automatic:
Cappuccino
For a cappuccino in the rules of the art, the ideal proportions are as follows: 1/3 hot milk, 1/3 coffee, 1/3 milk froth.
Caffe Latte
To make coffee with milk, also often called Latte Macchiato, the proportions are as follows: 3/5 hot milk, 1/5 coffee, 1/5 milk froth.
- For these milk-based preparations, it is best to use cold skimmed milk straight from the refrigerator (ideally between 6 and 8°C).
- To finish off, you can sprinkle with cocoa.
Café Crème
- Prepare a conventional espresso in a large cup.
- Add a little cream to get a café crème.
Café corretto*
Prepare a cup of espresso as usual. Then add 1/4 or 1/2 of a liqueur glass of Cognac to taste. - You can also use anisette, brandy, Sambuca, Kirsch or Cointreau. - There are many other ways to give some punch to your espresso. - Just use your imagination.
Coffee liqueur*
Mix 3 cups of espresso, 250 g of brown sugar candy and 1/2 litre of Cognac or Kirsch in an empty 0.75 litre bottle. Leave the mixture to macerate for at least 2 weeks. - You will obtain a delicious liqueur. A real treat for coffee lovers.
Italian style iced coffee
4 scoops of vanilla ice-cream, 2 cups of espresso with sugar to taste, 1/8 litre milk, fresh cream, grated chocolate. - Mix the cold espresso with the milk. - Serve the scoops of ice-cream into the glasses, pour the coffee onto them and decorate with fresh cream and grated chocolate.
Café à la frisonne*
Add a small glass of rum to a cup of sweetened espresso.
Decorate with a good layer of fresh cream and serve.
Flambéed espresso*
2 cups of espresso, 2 small glasses of Cognac, 2 teaspoons of brown sugar, fresh cream.
- Pour the Cognac into heat-resistant glasses, heat and light.
- Add the sugar, mix, pour in the coffee and decorate with fresh cream.
Espresso Parfait*
2 cups of espresso, 6 egg yolks, 200g sugar, 1/8 litre of sweetened fresh cream, 1 small glass of orange liqueur. - Beat the egg yolks with the sugar until it forms a thick, frothy mass. - Add the cold espresso and the orange liqueur. - Then mix in the whipped fresh cream. - Pour the mix into saucer champagne glasses or ordinary. - Put the champagne glasses in the freezer.
(Remember, over-indulgence in alcohol is bad for the health.)
MAKING ESPRESSO AND COFFEE

THE MACHINE IS EXCLUSIVELY SUITABLE FOR MAKING COFFEE WITH COFFEE BEANS.
Spare parts and accessories
Check the collection container and the drip tray regularly: the float switch may fail if the collection container is not emptied or if it is placed in the wrong position.
Water hardness
CLEAN Perform cleaning
CALC Perform descaling
CLEAN + CALC Proceed to the duration menu

DESCRIPTION OF THE DEVICE
CLEAN Press the button
CALC Press the button on the machine
The amount of water for one cup is 80-220 ml.
Start preparing espresso for coffee
Plug the appliance into the socket.
Press the button. The indicator lights up during the preheating time of the machine.
The indicator lights up intermittently.
Place the cup under the coffee dispensing spouts. You can lower or raise the coffee dispensing spouts according to the size of the cup - Fig.7.
Press the button to start brewing espresso, or press the button to start brewing standard espresso.
Fig. 8.
You can always adjust the amount of water - Fig. 9.
To stop filling the cup, you can press the button again, or turn the rotary switch to the minimum position.

The amount of coffee and the amount of hot water after the brewing process. After a few seconds, the filtration process begins. To determine the amount of coffee in the cup, we recommend dividing the preparation into two parts to get a strong coffee. For example, 2 times 70 ml to get a cup with 140 ml of coffee.
Function "2 cups"
The device allows you to prepare 2 cups of espresso coffee.
Press the indicator button during the preheating of the machine.
The indicator lights up continuously.
Place the two cups under the coffee outlets. You can adjust the height of the coffee outlets according to the size of the cup - Fig. 10.
Quickly press the button according to your choice. The indicator flashes to confirm that you have selected two cups.

The machine automatically performs 2 full cycles of coffee preparation.
Be careful, do not remove the cups after the first cycle.
If you press the P button and then the button (or vice versa), the last press is not taken into account.
PREPARATION WITH STEAM
The steam production requires high temperature, so the steam generator performs an additional cycle before the steam is ready.
Plug the appliance into the power outlet.
Press the button. The indicator lights up during the preheating of the machine.
The indicator lights up continuously.
Press the button - Fig. 11
The indicator lights up during the preheating.
When the preheating phase is complete, the indicator lights up continuously and you can start the steam production by pressing the button again.
Press the button again to stop the cycle.
The machine returns to its initial position if the steam regulator is not activated within 2 minutes.

The cycle stop is not immediate.
Milk frother
We recommend using fresh, pasteurized or ultra-pasteurized milk.
Raw milk does not ensure optimal results.
Place the steam nozzle into the milk - Fig. 12.
Start the steam production function as described in the section above.
Korda obpa3yetyra DOCTaTOUHoe KOJIueCTBO NeHbI - Pnc. 13 - CHOBa HAKMITE KHONky Dnla OCTaHOBKn UIKJa.
UTo6bOuOCTnTb CneBbMOJOKa C CONIIa IINa IAPA, NOCTABbTe NOI Hero EMKOCTb N CHOBa 3aNcYCTnTe nprirotobHeHne c nCOnb3oBaHmE m npa (okono 10 cekynd).
Дяболесгуьбокочоискго снлдяпа мохногсггь.Моте erо щетков В bode c Heбовшим количесьм ВсьрабИЗВОFOMuOуцero copdctBaTNЯпспспспспспспспспспспспспспспспспспспспспспспспспспспспспспспспспспспспспспспспспспспспспспспспспспСТК.TOTe OTBepcTЯдял STOBOPaBO3yxaHe 3akynoppebI OCTaTKAMM MOnOKA.EcInHoe6XoIMMo,ОчNTHte erO cNOMOuBIO HrONKII,KOtOPAR BXoDIT B COMPNEKT-PnC.15.
He moTe hacaKy dIpa napa B nocydomooeHoi MaunHe.
UTo6bIOCTaHOBnTbФyHKcIIOnapa,IpOCTO HaxMITEJIIO6bYIO KHOJKy.
Ecnn conno 3acopeho, ouhctte erc nomoubIO INOJKN, BXOJeuB KOMPJIeKT.
Makcmahna npoOJXnTeHboctb opa30aHa napa 3a OIN cck coctabnre He 60nee 2 Mnhy.

Iocne IcnoIb3ObaHnpyHKn npapa cnoIIO MOKet 6bITb rOpRyHM, Mbl COBetyem Bam nIOoXdaTb HeCKoJIbKO MNHyT, npexJe Ym IpOBODHT KaKe-JINBO MaHNUYJN C HIM.
AByokanyuHaTop XS 6000 (npoJaTcra OTeJbHo)
3T0T abtokanyuHATOp obJrcaet nprirotobIeHne kanyuHIO nnI natae - Puc. 16. Coedinnte ero deTAMm Mekdy coBoi. YbeintcB, yTO Tpyka He nepekpyeha pni coxpanehn yDObHorO noLoKeHH KHOPIK.
Pcne 3nTnKpIbIKnCocda 3aONJHnTe ERO NOKOM - Pnc.17 n NOMeCTIne YauKu IIN CTAKAN NOI CONNIO ABTOKnyHnatopa - Pnc.18. UcAHOBnTE cneuaJIbHOe CONNO BNOXKeHNe IIN pRIOTOBNeHnK aKunHNo IIN NaTte - Pnc.19. IpaOJI nap, KaT0 yka3aHO b Tnabe "PnroTOBHeNE CnapOM".
Kak TOnbKO NpOBBtCMA NOUHnA NeHa, NoCTaBBte YaSHKy NOI BbInyCKHoe OTBepCTme KoFe n 3aNcTnTe ZnKJ KoFe - Pnc.20.
IITTO TOTO6bI 3E6KAtBa 3acbIXAHINMAONOKA HA BTOKAYHNAHTOpe,HEOBXIMO TUaTeBHO ERO OUHuaTb. PEKOMEHETcR MblEero cpa3y C NOMOuBIO 3aNYCa KUNLA C INONBJ3OBAHmE Napa I NOHbIM BaKOM BoDJI DnI OUHHeHINCOnla BHTPN. IIN3TN XUEJI MOHX TOAKKE ICSNOLb3OBAW JIKIDKOE MOHOOe CpeCTBO KRUPS.
YXOD 3A PIPNEGOPOM
OnycToWnte KOHTeHep dIy OTPa6oTaHHoro KoPe I NpDoHa dIy c6opa Kaenb.
Remove, empty and rinse the ground coffee container - Fig. 21.
Put the drip coffee container back in place - Fig. 22.
Remove, empty and rinse the drip tray - Fig. 23.
The drip tray has floats that signal when it needs to be emptied.
Put all the parts back in place.
As soon as you remove the ground coffee container, you must empty it completely to avoid overflow later.

The indicator light stays on if the ground coffee container is not inserted or is inserted incorrectly, and also if it has been in place for less than 4 seconds.
When the indicator light is on or flashing, preparing espresso for coffee is impossible. The container is designed to collect ground coffee for 9 coffee doses.
Access to these functions is possible at any time, except when the machine requires 'CLEAN' or 'CALC' maintenance.
Rinsing the coffee brewing system:
Place a container under the coffee outlet nozzle. Quickly press the button to start the coffee system rinse cycle, which stops automatically after dispensing 40 ml of water.
Rinsing the steam system:
Place a container under the steam nozzle. Then press and hold the button to start the steam system rinse cycle, which stops automatically after dispensing 300 ml of water.
Descaling program, 3 times per year (approximately 13 minutes).
For hygiene reasons and to preserve the taste and aroma of coffee, it is recommended to rinse the coffee brewing system when the coffee maker prompts you (approximately 3 times per year).
Start the descaling program by pressing the button. The 'CALC' indicator flashes continuously, and the indicators O and M flash.
Remove and clean the drip tray.
Place a container with a capacity of 0.6 liters under the coffee spouts, as well as under the steam nozzle - Fig. 24.
Empty the reservoir and fill it with warm water up to the 'CALC' mark - Fig. 33.
Dissolve the sachet of descaling agent Krups (40 g) F054 in the reservoir - Fig. 33.
Fill the reservoir with water. The indicator goes out.
Press the button after performing all operations.
The first phase (about 8 minutes) starts.
The descaling cycle will be performed automatically.
At the end of this phase, a beep sounds every 10 seconds, and the indicator flashes.
Empty the used water from the container and put it back in place.
Empty and rinse the water reservoir - Fig. 34.
Fill the reservoir with water and put it back in place. The indicator L goes out.
Press the button again to start the second stage. The audible signal is interrupted.
The second stage (about 6 min.) starts.
The program continues. It allows you to rinse the appliance and install the descaling agent.
At the end of this stage, an audible signal sounds every 10 seconds.
Remove the container, discard the used water, and put the container back in place.
Press the button again to start the last stage. The audible signal is interrupted.
The last stage (about 6 min.) starts.
The program continues. It allows you to remove the last residues of the descaling agent.
The cleaning cycle is complete, the 'CALC' indicator goes out.
Fill the reservoir with water.
The appliance is ready for use.
If there is not enough water in the reservoir, the appliance will alert you with a sound and an indicator.
Add enough water to the reservoir, the descaling cycle will continue automatically.

If you unplug the appliance during descaling, press the button ① again in case of power failure, the descaling program will be performed from the beginning. In this case, adding descaling agent is not required. Perform a full descaling cycle to ensure proper machine care.
The descaling cycle is interrupted; during its execution, do not put your hands under the water outlets 'E' and 'W'.
Program duration of rinsing - activity: approximately 2 minutes
The device will prompt you when it is necessary to carry out additional cleaning of the light indicators «Rinse» 'CLEAN' and «Scale» 'CALC'.
Remove, fill, and put the reservoir back in place.
Install the steam nozzle on a container with a volume of at least 0.6 L.
Start the rinsing program by pressing the button. The 'CLEAN' and 'CALC' indicators light up continuously, and the indicator starts blinking.
When the rinsing is complete, the 'CLEAN' and 'CALC' indicators go out, and the indicator starts shining continuously.
The device is ready for operation.
The machine may suggest you empty the coffee grounds container.
Other functions
Turning off the device
You can interrupt the operation of the device at any time. When turning off, a sound signal is emitted, all red indicators go out one after another. The device performs a quick stop.
Installation of the filter element - total duration: approximately 2 minutes
To optimize the taste of the coffee you prepare and the durability of the appliance, we recommend you use the water filter Claris - Aqua Filter System, which is sold as an accessory.
Fig. 30: Mechanism that allows you to record the installation position of the filter and its recommended replacement position (maximum after 2 months).
Installing the filter in the device: Remove the filter from the reservoir. - Fig. 31.
Dispenser 0.6 liters under the hood for draining.
Press and hold the button for 3 seconds (except in cases where the machine requires maintenance
'CLEAN' n/nnn 'CALC'). The indicator flashes.
When the installation of the filter element is complete, the indicator starts to light intermittently.
The device is ready for operation.
The Claris cartridge must be replaced from above approximately every 50 liters of water, at least every two months. In case of using the Claris - Aqua Filter System cartridge, set the water level to 0.
Changing the coffee temperature.
Factory setting of the device - level 2.
Connect the device to the power supply, but do not turn it on.
Press the buttons and simultaneously - Fig. 27.
The indicator will flash during the entire adjustment process.
Turn the rotary knob to position 20 ml or to change the coffee temperature - Fig. 28.
Press the button to increase or the button to decrease - Fig. 32.
Selecting the temperature level. Part 1 indicator = temperature 1, part 2 indicator = temperature 2, part 3 indicator = temperature 3 (the highest temperature).
Changing the water hardness.
Device setup - water hardness level 4.
Before first use, if the water hardness changes, it is necessary to adjust the device operation according to the determined water hardness. To find out the water hardness level, contact your local water supply organization.
Connect the device to the power supply, but do not turn it on.
Press the buttons simultaneously - Fig. 27.
The indicator will flash during the entire setup process.
Turn the rotary knob to the 120 ml position to change the water hardness - Fig. 28.
Press the button to increase the value and the button to decrease it - Fig. 32.
Select the hardness level of the water used: no indicator lights = very soft, 1 indicator lights
= soft, 2 indicators light = medium hard, 3 indicators light = hard, 4 indicators light = very hard - Fig. 29.
Connect the device to the power supply, but do not turn it on.
Press the buttons simultaneously - Fig. 27.
The indicator will flash during the entire setup process.
To enter the norm about the number of cycles, press and hold the button for 3 seconds until all red indicators flash 3 times - Fig. 29.
Number of cycles:
- Less than 3000: 1 indicator lights. - More than 3000: 2 indicators light. - More than 6000: 3 indicators light.

If the parameter setting is complete, you can exit the setting mode by pressing the button.
All indicators will go out. The setting data is saved and remains active even in case of power failure. Following these instructions, you can change the necessary settings at any time.
FAULTS AND ACTIONS TO ELIMINATE THEM
If any of the faults listed in the table persists, contact the service center KRUP'S.
For 2 weeks, do not mix.
You will get an excellent coffee that will be appreciated above all.
Coffee à la Italienne
You will need: 4 balls of vanilla ice cream, 2 cups of cold espresso, 1/8 liter of milk, whipped cream, grated chocolate.
Mix the cold espresso with the milk.
Distribute the ice cream among the glasses, pour the coffee, decorate with whipped cream and grated chocolate.
Coffee à la Française*
Add a glass of rum to a cup of sweet espresso.
Decorate with a thick layer of whipped cream and serve.

CtAnapTha KaBa

Miuna KaBa
CALCBuKoHaTe BuJaIeHnHaKaIpy

Khonnka napi

CLEAN + CALC BИКОнайт eцкл Trпвалюгпрмьанhh

ПомИВАнHA/ОБСЛУROВВАнHA
ПИГOTУBAHня HANOIB
IPEEDEPLIMMBKOPNCAHH
PiIroTOBka npnlaNy
BnMItb pe3epByap dIy BOni HAnOBHITb Ioro - Man.1 i 2. IocTaBTe NOro Ha MicSe, 3akpiniTb i 3akpnTe KpiuKy - Man. 3 BiKpnTe KpnKy KOnteHepa IJn KaBn B 3ephax. HacnPte Kaby - Man.4. 3aKpIte KpUkky KOHTeHepa dIy KaBv B 3ephax.
3a6bopnoeTb8c3aJIbAtnBpe3epByaprapyBoDy,MOKOQHbSyb-kyiHsyPiHy.JaKIO niJac yBIMKHeHHNpIiIaPype3epByapIgBOnBIDcyTHII aBOI BIDCyTHII aBO 3aOBHeHH He Do KINzA,3aOpNTbC iHNkKaTop i npIroTyBaHHecnPecO aBO KaB CTaHE TImuCaOBO HEmoKJInBIM.

3A6BOPOHЯCTbC3ACINATM MEJIENHY KABY B JOTOK DJIY KABN.
He peKoMeHEnyEeTbcra BnKOpNcTObYBaTu y npUaDi I macIaHncti, kapaMeJI3ObaHi a6o apOMaTI3ObaHi 3epHa KaBn. LcE Bn 3epeH MoKe TPOUkODHTn npUaI.
IpekoHaiTece, Mo 1epeepBvap In KABN He nToPAnHIN CTOpOHHi nPeDMtHi, 30KpMa dPi Hi KAMiHui, 1o MoXHTb 3hAxODITNC B KABOINX 3epHax. IJr npaHTII pInnHHeTc8a, AkiIO NsIKoDKeHHa pe3epByapa In KaBn cpiuHHeNO TnpAINHMM Do HbOro CTOpOHHX nPeDMtIB.
3a6b0pOHaTeBc 3aJIbAtn Body B pe3epByap IJI KABOBx 3epeH.
To prevent contamination of the working surface and the risk of getting harmful substances into the product, which may occur from the spout, do not forget to install the drip tray.
Check the cleanliness of the water reservoir.
Initialization - total duration: approximately 3 minutes.
Turn on the appliance by pressing button ① - Man.5. Indicator ① will flash continuously.
The machine will automatically fill with 0.6 liters of water under the nozzle for steam and hot water.
Press button - Man. 6, the appliance will start the initialization cycle for the water system and the steam system. The indicator will light up.
The cycle ends when indicator 1 starts flashing continuously. The coffee machine is ready for preparing your recipes.
Rinse the water system several times if the appliance has not been used for a long time. Each time you turn on the appliance, the machine will perform an initialization cycle.
Preparing the milk frother
You have the ability to adjust the milk froth level by adjusting the steam knob. With a higher steam setting, the milk will be less frothy and have a finer texture. Adjust the desired steam level by turning the regulator. Turning the regulator clockwise will increase the steam level.

ADJUSTING THE STEAM LEVEL
Never attempt to change the steam level setting while the appliance is in use.
The milk frother is not dishwasher safe.
Milk frother
It is recommended to use fresh pasteurized or ultra-pasteurized milk. Using raw milk does not guarantee optimal results.
Pour the milk into the milk container - Fig. 12.
Start the milk preparation function as described above.
When the milk froth is ready - Fig. 13 - press the milk container again.
To clean the milk container from the steam nozzle, place it under it and start the preparation again with steam (about 10 seconds).
The steam nozzle is removed, so you can clean it thoroughly inside. Perform cleaning with a cloth and water with a small amount of mild dishwashing detergent. Rinse and dry.
When the milk container is ready, place the cup under the coffee spout and start preparing coffee - Fig. 20.
Wipe the milk container thoroughly from milk so it does not dry on it. Rinse the inside of the water tank after preparation. To start the steam function, use the accessory container filled with water. For cleaning, you can use a soft cloth or a brush with soft bristles, available as an accessory.
CARE AND MAINTENANCE
Empty and clean the water tank and the drip tray.
The indicator light flashes.
Remove, empty, and clean the water tank - Fig. 21.
Place the water tank back in place - Fig. 22.
Remove, empty, and clean the drip tray - Fig. 23.
The drip tray is equipped with floats that indicate when it needs to be emptied.
Collect all parts and put them back in place.
Fill the container with clean water to about 360 liters, then empty it completely to prevent any residue from contaminating the next batch of output.

The indicator lights up if the water supply hose is not inserted or is inserted incorrectly, and also if it is inserted in the wrong place. It will turn off after 4 seconds.
When the indicator is on or flashing, preparing espresso or coffee is impossible. The container is designed for 9 cups of water.
Rinsing system
Access to these two functions can be obtained at any time, except during cleaning, when the machine is performing the 'CLEAN' and/or 'CALC' maintenance cycles.
Rinsing the coffee preparation system:
Set the capacity under the coffee outlet. Press and hold the button - Fig. 6 - to start the rinsing cycle of the coffee preparation system, which will automatically stop after about 0.5 liters of water.
Rinsing the steam system:
Place a container under the steam outlet. Press and hold the steam button to start the rinsing of the steam system, which will automatically stop after about 300 ml of water.
Empty the container, then reuse the water or dispose of it properly.
Press the button again to start the final stage. The acoustic signal is repeated.
Start the final stage (duration approximately 6 minutes).
The program runs. Water will be dispensed to remove any limescale residue.
The descaling cycle is complete, and the 'CALC' indicator goes off.
Fill the water reservoir again.
Prepare the water tank for operation.
If there is not enough water in the tank, we will inform you about this with the indicator [0]. Add enough water to the tank, and the rinsing cycles will continue automatically.
To start the rinse program from the beginning, press the button again or hold it down; the rinse program will be executed from the very start. In this case, you will get a new tablet for the rinse. Perform a full rinse cycle to ensure reliable rinsing.
If the rinse cycle is interrupted, do not touch the controls or the water inlet/outlet during its execution.
Select the desired water hardness level: 1 indicator on = hardness 1, 2 indicators on = hardness 2, 3 indicators on = hardness 3 (label).
To exit the setting mode, press the button.
Setting water hardness
The principle of setting the hardness level and setting the water hardness level 4.
Before first use of the device or after changing the water hardness, it is necessary to set the hardness level of the water used. To find out the water hardness level, contact your water supplier.
The indicator flashes throughout the entire setting process.
Set the adjusting ring to the value 120 min, then set the water hardness level (Fig. 28).
Press button E to increase the value or button C to decrease the value (Fig. 32). The hardness indicators show: 1 indicator on = very soft, 2 indicators on = medium hardness, 3 indicators on = hard, 4 indicators on = very hard (Fig. 29).
1 indicator on = very soft, 2 indicators on = medium hardness, 3 indicators on = hard, 4 indicators on = very hard (Fig. 29).
To exit the setting mode, press the button.
Setting the automatic system for electric water heating.
Replace the pressure switch at the factory once a year.
You can set automatic shutdown after a certain number of hours of operation.
Turn off the device with the switch, but do not unplug it.
Press and hold the SET button (Fig. 27).
The indicator will flash throughout the entire setting process.
Set the required value to 220 ml, then wait until the device automatically turns off after the set time (Fig. 28).
Press the button to increase the value, or the button to decrease the value (Fig. 32).
Select the desired time interval: 1 flash = 1 hour, 2 flashes = 2 hours, 3 flashes = 3 hours, 4 flashes = 4 hours (Fig. 29).
To exit the setting mode, press the button.
Normal number of operating cycles
Turn off the device with the switch, but do not unplug it.
Press and hold the SET button (Fig. 27).
The indicator will flash throughout the entire setting process.
To enter the "Number of operating cycles" mode, press and hold the button for 3 seconds.
To exit the setting mode, press the button.
The displayed information of all indicators is shown (Fig. 29).
Number of operating cycles:
- Less than 3000 cycles: 1 indicator lit. - More than 3000 cycles: 2 indicators lit. - More than 6000 cycles: 3 indicators lit.
To exit the programming mode, press the button
At each of the steps you can exit the programming mode. Therefore, if you have finished programming, press the button. All indicators are lit. All settings are stored in the device memory even after a power failure. You can change the settings at any time by repeating the procedure.
TROUBLESHOOTING
If a malfunction indicated in the table below does not disappear, contact an authorized service center.
Add the coffee to the cup with cold espresso.
First, sprinkle with whipped cream and add
Espresso fiambe*
2 cups of espresso, 2 small cups of coffee, 2 tablespoons of brown sugar.
Pour the coffee into a heat-resistant glass, heat and ignite.
Add the sugar, stir, pour the coffee, sprinkle with whipped cream.
Ideal espresso*
2 cups of espresso, 6 egg yolks, 200 g of sugar, 1/8 liter of whipped cream, 1 shot of apple liqueur.
MAKING ESPRESSO AND COFFEE
THE APPLIANCE IS INTENDED FOR USE ONLY WITH WHOLE BEAN COFFEE.
To get the best taste from your coffee and extend your appliance's service life, we advise you to use only the Claris -
Aqua Filter System cartridge sold as an accessory.
PROBLEMS AND THEIR SOLUTIONS
If the problem described in the table persists, contact the KRUPS customer service point.


- SOUND SIGNALS
- DEAR CUSTOMER
- DESCRIPTION
- SYMBOL INFORMATION
- WARNING SIGNALS
- BEVERAGE PREPARATION
- BEFORE FIRST USE
- PREPARING THE APPLIANCE
- NEVER PUT GROUND COFFEE IN THE COFFEE CONTAINER
- INITIALISATION CYCLE - TOTAL DURATION: AROUND 3 MINUTES
- PREPARING THE GRINDER
- CHANGE THE SETTING DURING GRINDING
- PREPARING ESPRESSO AND LONG COFFEES
- YOUR APPLIANCE IS DESIGNED TO MAKE COFFEE FROM COFFEE BEANS ONLY
- NOTE
- PRODUCTION OF AN ESPRESSO OR COFFEE
- CUP FUNCTION
- THE APPLIANCE WILL AUTOMATICALLY SEQUENCE 2 COMPLETE COFFEE-MAKING CYCLES
- PREPARING STEAM
- BE CAREFUL, BECAUSE THE CYCLE DOES NOT STOP IMMEDIATELY
- FROTHING MILK
- AUTO-CAPPUCCINO XS 6000 SET (SOLD SEPARATELY)
- MAINTAINING YOUR APPLIANCE
- EMPTYING THE COFFEE GROUNDS COLLECTOR AND THE DRIP TRAY
- RINSING OF CIRCUITS
- RINSING OUT THE COFFEE CIRCUIT
- RINSING OUT THE STEAM CIRCUIT
- APPLIANCE CLEANING PROGRAM, 3 TIMES A YEAR (TOTAL DURATION: ABOUT 13 MINUTES)
- WHEN TO CARRY OUT THIS PROGRAM
- HOW TO START THE AUTOMATIC CLEANING PROGRAM
- YOUR DEVICE IS READY TO BE USED
- IMPORTANT
- SCALE REMOVAL PROGRAM - TOTAL DURATION: ABOUT 20 MINUTES
- MAKE CERTAIN TO PROTECT YOUR WORK SURFACE DURING CLEANING AND SCALE REMOVAL CYCLES, ESPECIALLY IF IT IS MADE OF MARBLE, STONE OR WOOD
- THE FIRST PHASE (APPROXIMATELY 8 MIN) BEGINS
- THE SECOND PHASE (ABOUT 6 MIN) BEGINS
- THE FINAL PHASE (APPROXIMATELY 6 MIN) BEGINS
- LONG RINSING PROGRAM - TOTAL DURATION: ABOUT 2 MINUTES
- OTHER FUNCTIONS
- TO SWITCH THE APPLIANCE OFF
- INSTALLATION OF THE FILTER CARTRIDGE - TOTAL DURATION: AROUND 2 MIN
- COFFEE TEMPERATURE DISPLAY
- WATER HARDNESS SETTING
- SETTING THE ELECTRICAL SUPPLY CUT-OFF MECHANISM
- INFORMATION ON CYCLE NUMBER
- HERE ARE SOME RECIPES YOU CAN MAKE USING YOUR ESPRESSERIA AUTOMATIC
- CAPPUCCINO
- CAFFE LATTE
- CAFÉ CRÈME
- CAFÉ CORRETTO
- COFFEE LIQUEUR
- ITALIAN STYLE ICED COFFEE
- CAFÉ À LA FRISONNE
- FLAMBÉED ESPRESSO
- ESPRESSO PARFAIT
- MAKING ESPRESSO AND COFFEE
- THE MACHINE IS EXCLUSIVELY SUITABLE FOR MAKING COFFEE WITH COFFEE BEANS
- SPARE PARTS AND ACCESSORIES
- DESCRIPTION OF THE DEVICE
- START PREPARING ESPRESSO FOR COFFEE
- FIG
- FUNCTION "2 CUPS
- THE MACHINE AUTOMATICALLY PERFORMS 2 FULL CYCLES OF COFFEE PREPARATION
- PREPARATION WITH STEAM
- THE CYCLE STOP IS NOT IMMEDIATE
- MILK FROTHER
- ABYOKANYUHATOP XS 6000 (NPOJATCRA OTEJBHO)
- YXOD 3A PIPNEGOPOM
- ONYCTOWNTE KOHTEHEP DIY OTPA6OTAHHORO KOPE I NPDOHA DIY C6OPA KAENB
- RINSING THE COFFEE BREWING SYSTEM
- RINSING THE STEAM SYSTEM
- DESCALING PROGRAM, 3 TIMES PER YEAR (APPROXIMATELY 13 MINUTES)
- THE FIRST PHASE (ABOUT 8 MINUTES) STARTS
- THE SECOND STAGE (ABOUT 6 MIN.) STARTS
- THE LAST STAGE (ABOUT 6 MIN.) STARTS
- THE APPLIANCE IS READY FOR USE
- PROGRAM DURATION OF RINSING - ACTIVITY: APPROXIMATELY 2 MINUTES
- THE DEVICE IS READY FOR OPERATION
- TURNING OFF THE DEVICE
- INSTALLATION OF THE FILTER ELEMENT - TOTAL DURATION: APPROXIMATELY 2 MINUTES
- CHANGING THE COFFEE TEMPERATURE
- CHANGING THE WATER HARDNESS
- FAULTS AND ACTIONS TO ELIMINATE THEM
- COFFEE À LA ITALIENNE
- COFFEE À LA FRANÇAISE
- ПИГOTУBAHНЯ HANOIB
- IPEEDEPLIMMBKOPNCAHH
- PIIROTOBKA NPNLANY
- A6BOPOHЯCTBC3ACINATM MEJIENHY KABY B JOTOK DJIY KABN
- INITIALIZATION - TOTAL DURATION: APPROXIMATELY 3 MINUTES
- PREPARING THE MILK FROTHER
- ADJUSTING THE STEAM LEVEL
- CARE AND MAINTENANCE
- EMPTY AND CLEAN THE WATER TANK AND THE DRIP TRAY
- RINSING SYSTEM
- RINSING THE COFFEE PREPARATION SYSTEM
- SETTING WATER HARDNESS
- SETTING THE AUTOMATIC SYSTEM FOR ELECTRIC WATER HEATING
- TURN OFF THE DEVICE WITH THE SWITCH, BUT DO NOT UNPLUG IT
- TROUBLESHOOTING
- ESPRESSO FIAMBE
- IDEAL ESPRESSO
- THE APPLIANCE IS INTENDED FOR USE ONLY WITH WHOLE BEAN COFFEE
- PROBLEMS AND THEIR SOLUTIONS
Brand : KRUPS
Model : ESSENTIAL GRAINS YY4540FD
Category : Kitchen appliance